Objective
This week we are designing our own version of the hello-world board. We are also adding a button and a LED.
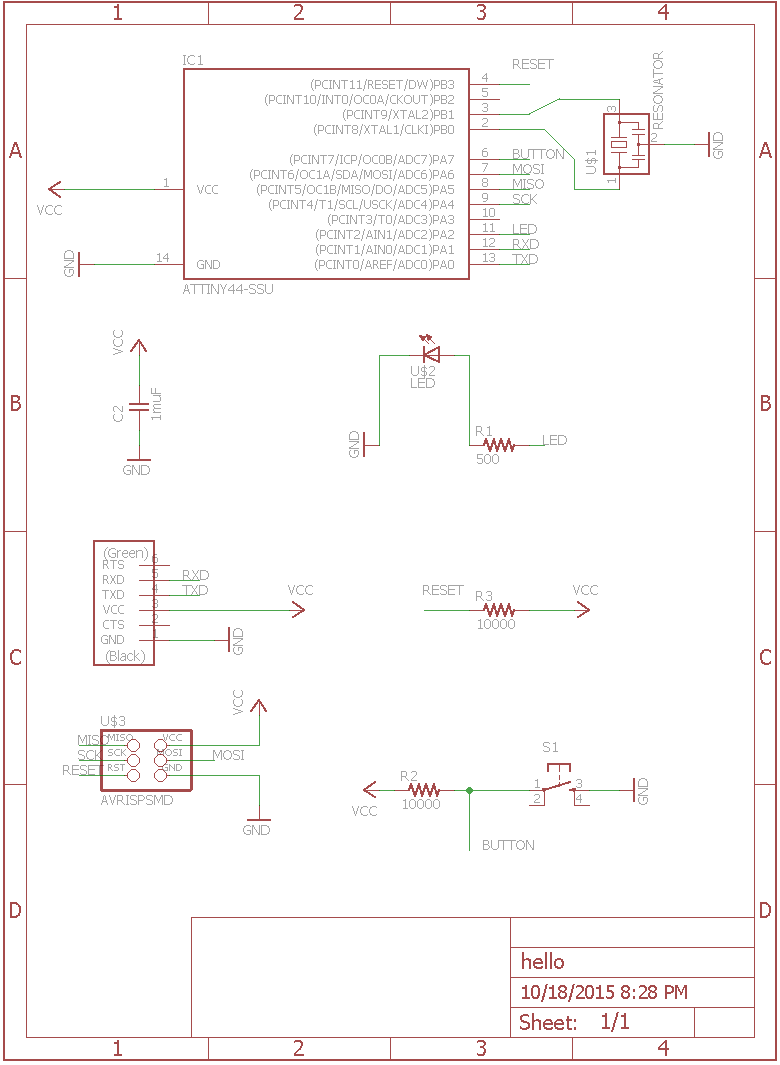
Design
After goint to this week's (very helpful!) recitation I went ahead and downloaded the free version of EAGLE. I followed the sparkfun tutorials very closely to design my board.
- It looks more complicated than it is!
- Add components with the 'add' tool and then look them up in the library. Double chekc with the datasheets whether you have the correct part.
- Every part has a small, grey cross that you have to click to move it.
- Make electrical connections with the 'Net' tool.
- Every part can have two descriptions, a name and a value. If you name a 'wire', you can use that name for a different wire and the two will be connected (withou actually being connected on the schematic). This way you can create all the loops of the circuit seperately which keeps the schematic clean looking and you can connect the microprocessor to the headers very easily.
- If you want the name for the wires to show up, you neeed to label them (under the Label tab).
Random thoughts on EAGLE schematics:
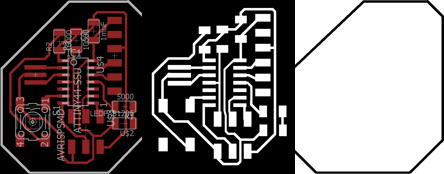
Making the board
After making the schematic you have to lay out the board. Click the 'Generate/Switch to board' button (and always have both windows open, if you close one and change the other, they won't sink up anymore.
This happened to me, because making the board is realtively quick, I just deleted the 'board' file and started over.)
- Yellow lines are the connections you have to make.
- Connect parts with 'route manuallly' and take them apart with 'ripup route paths to airwires'. You can also ripup everything by selecting the ripup tool and then pressing go.
- You can route under the switch, the microprocessor, the resistors, the diodes, the capacitors and the 2x3 header.
- Use the retsnest tool to find airwires.
- Use the DRC to find out whether your board can be milled. If wires are to close make them thinner or move them further apart.
- After you are done, safe the 'top' and 'dimensions' layer (monochromatic, 600dpi) for milling the traces and the outline.
Random thoughts on EAGLE boards:
Milling and Stuffing
(Very similar to week 2) I used the Roland mill to cut out the traces (1/64in endmill, 0.11 cut depth) and the outline (1/32in endmill, 3 passes).
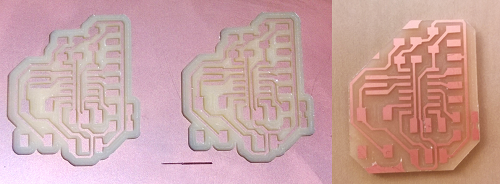
For stuffing, I started in the middle of the board and made sure that all joints are smooth and shiny.
