Technologies Used
Large-scale machining was used to make the robot's parts.
Good ol' fashioned woodworking was used to put it all together.
Personal Project Goals
This week we tackled the problem of large-scale milling. I had never made something this large before, so it was pretty exciting. In our lab, we are looking at scaling up some of our robot design technologies to larger sizes, to show that printable robotics techniques can be used at all scales and useful for real, large robot problems. My goal this week was essentially to teach myself how I could make the chassis of a large robot.
Read More / Hide
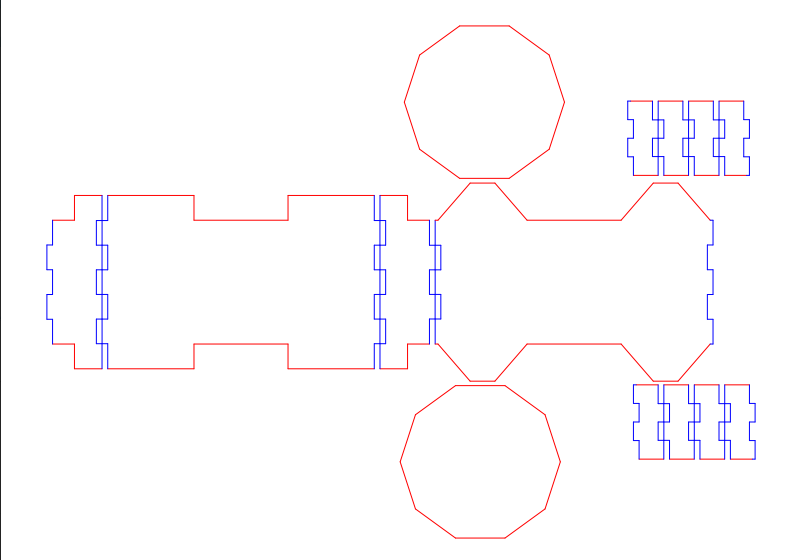
Our robot design tool has been modified recently to allow for tab-based, fitted construction planar-based construction of robots (thanks, Cindy!). Below is a picture of our robot's .dxf for its mechanical design, sans the connections needed for mounting motors.
Methodology
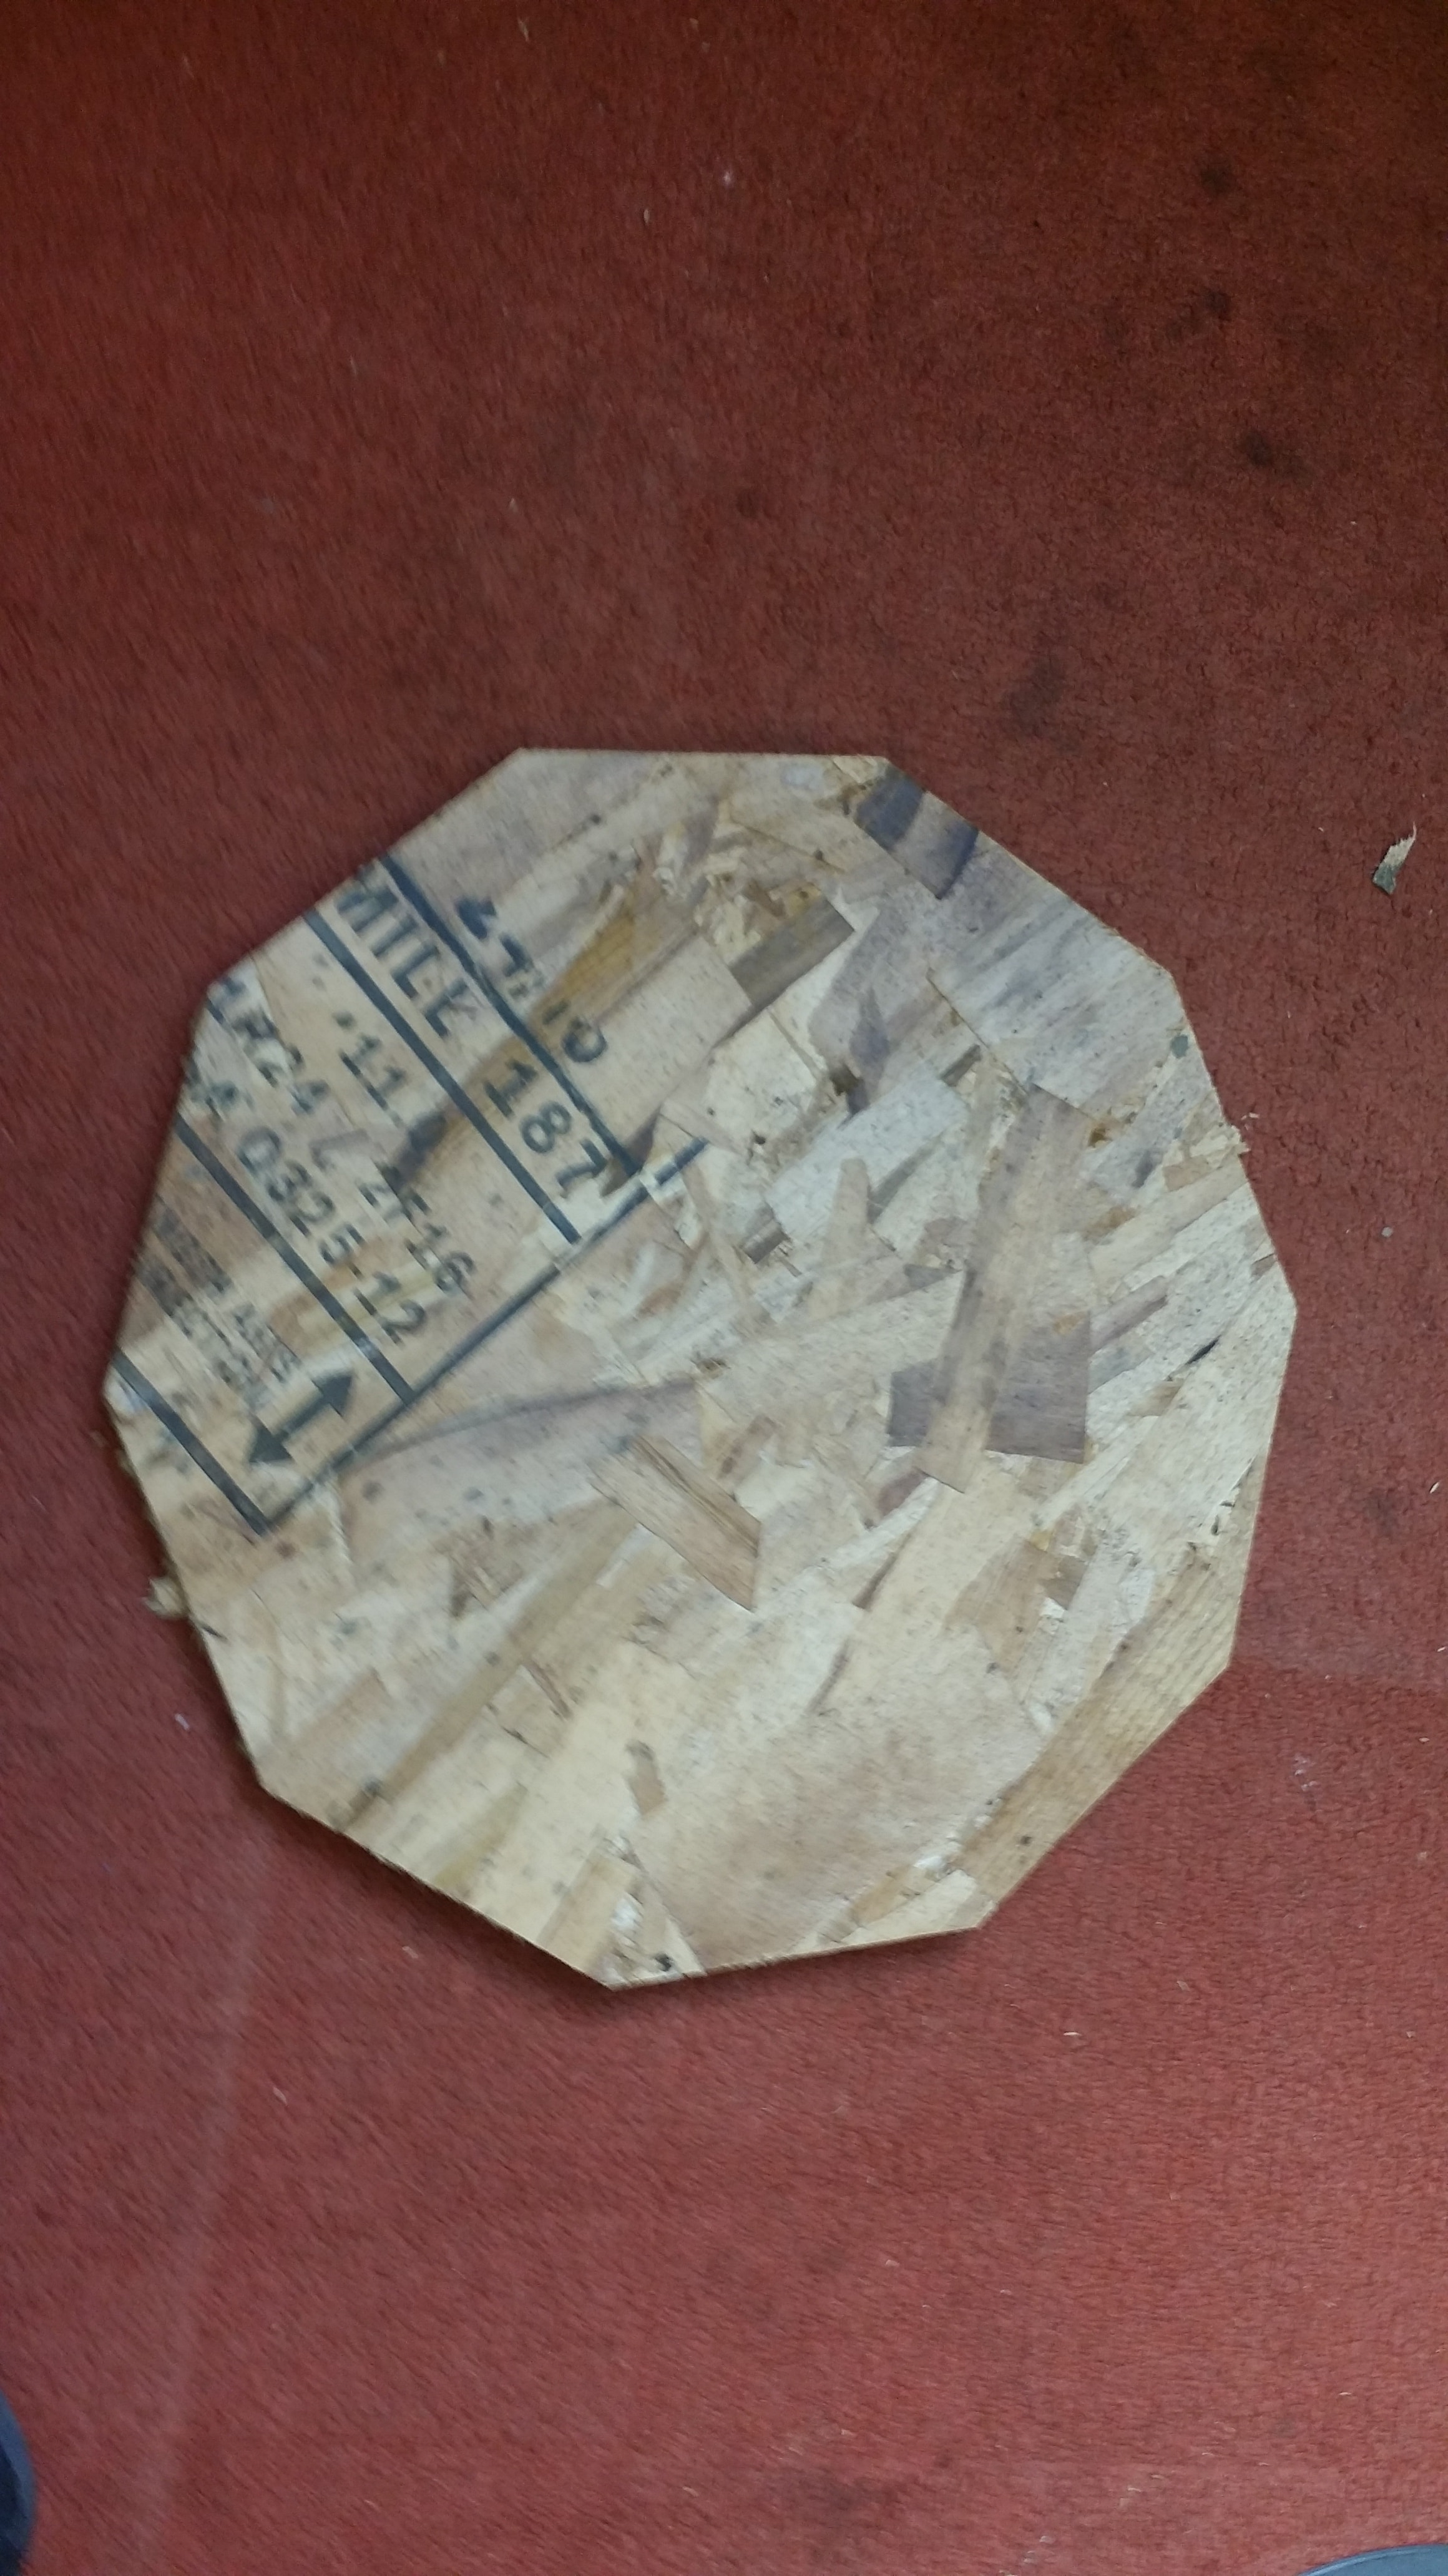
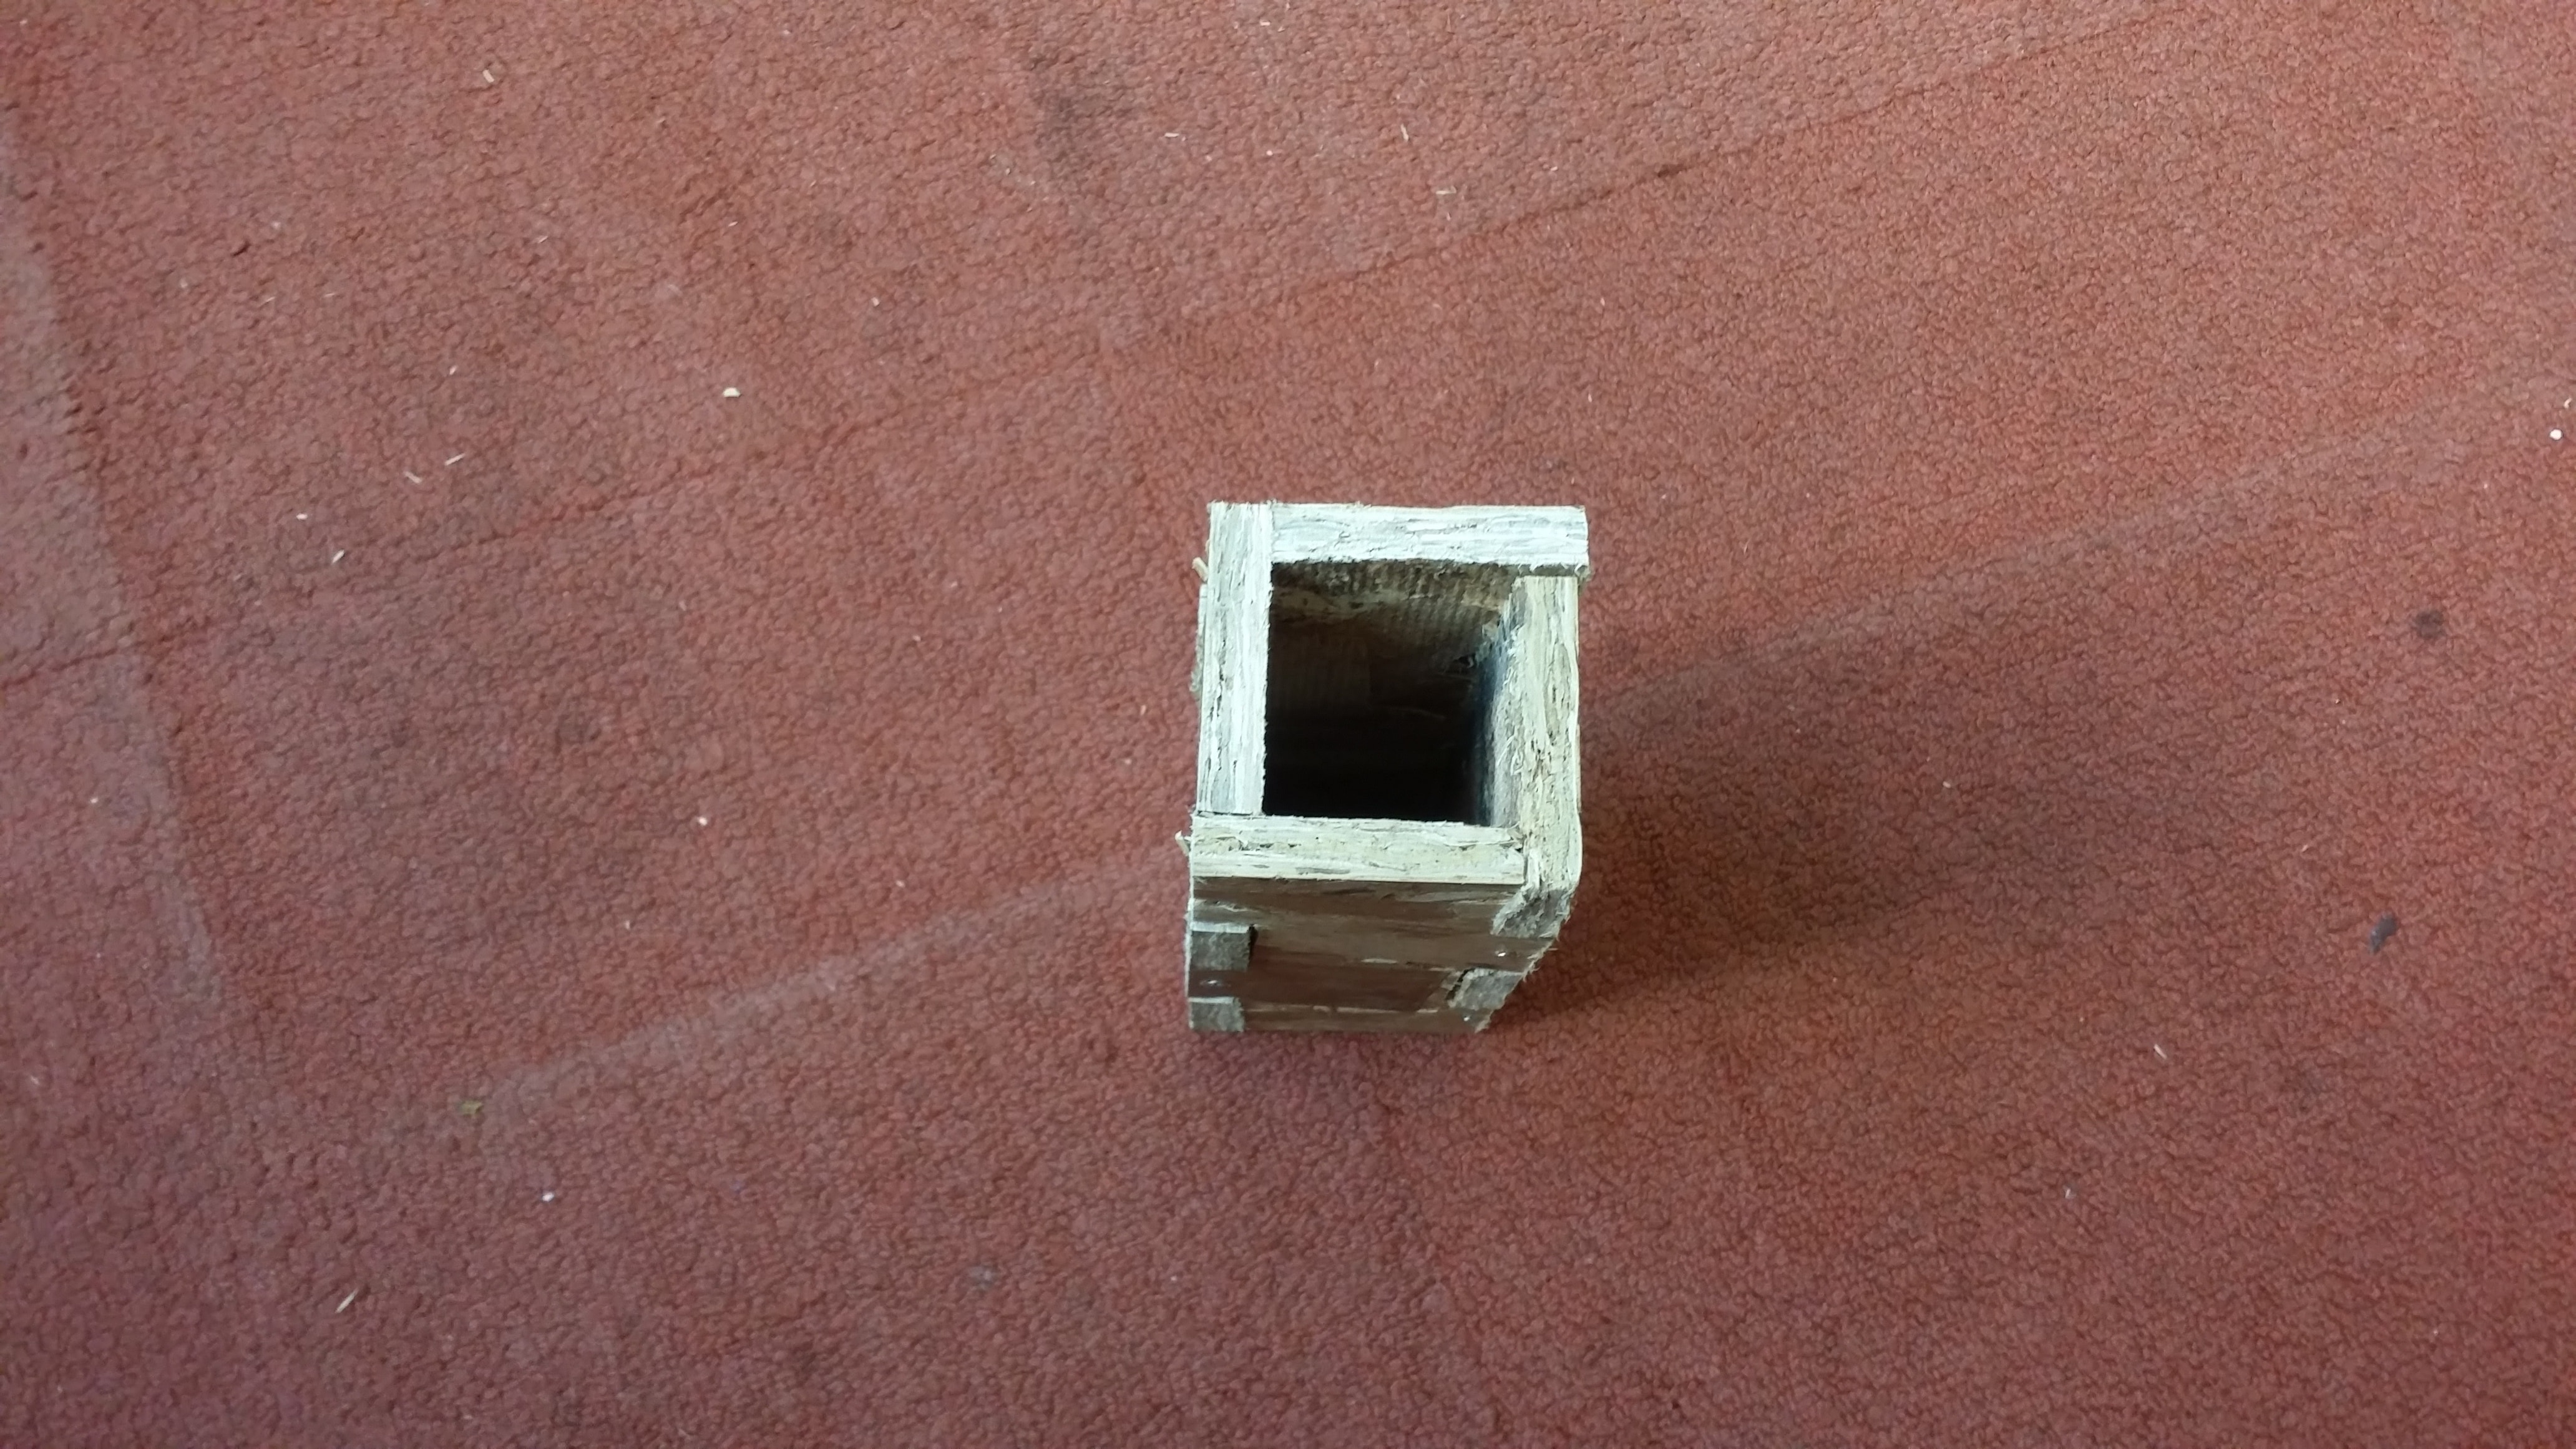
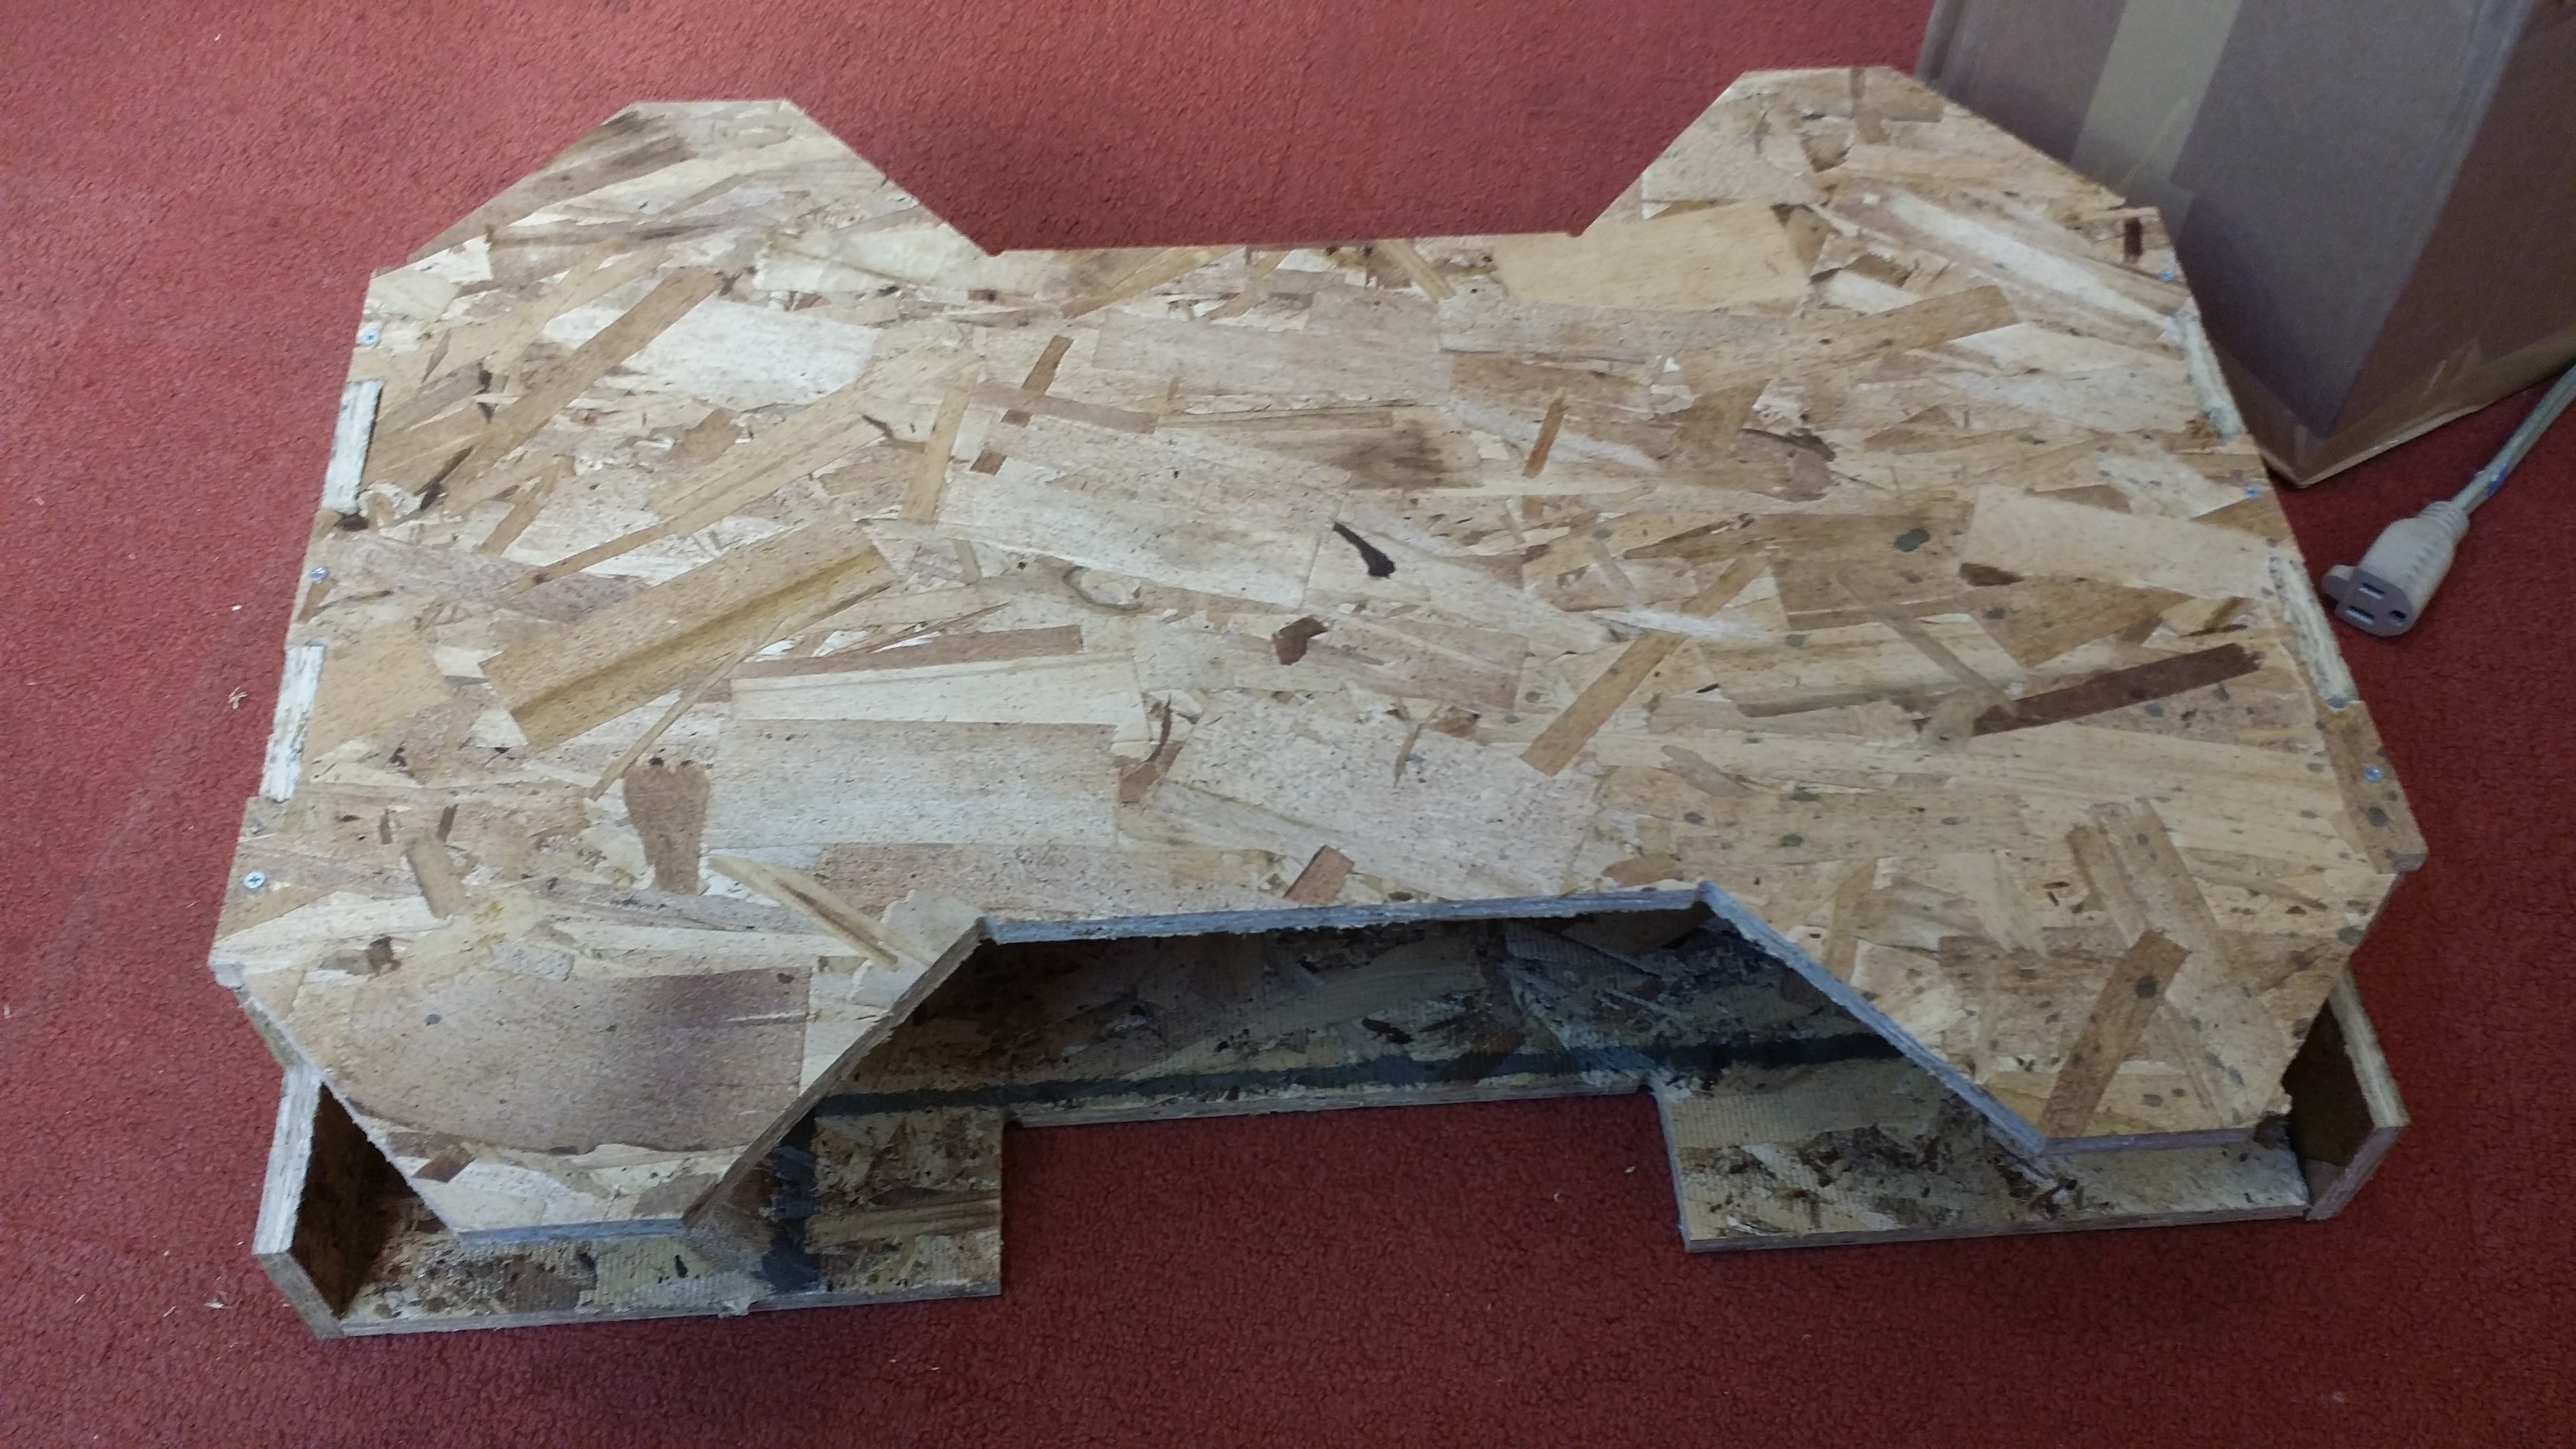
Given the .dxf, using computer-controlled milling on the ShopBot was surprisingly easy! From the auto-generated .dxf, only a few changes needed to be made to the .dxf file itself. First, the pieces needed to be separated: this is important because if the pieces are too close together, the kerf of the end-mill could cause it to cut into adjacent pieces. Second, the pieces needed to be placed separated away from the side of the board, so that the endmill didn't cut into the nails. Third, the tabs needed to be filleted, so that the corners weren't curved and the tabs were able to fit snugly. Finally, connector tabs for keeping the pieces to the OSB stock before it was cut out.
Read More / Hide
Beyond that, we installed the 1/4" end-mill, set the settings to cut the OSB board in two passes, nailed down the board, and away we went!
The final cut pieces needed to be punched (literally) out of their connector tabs to separate them from the stock.
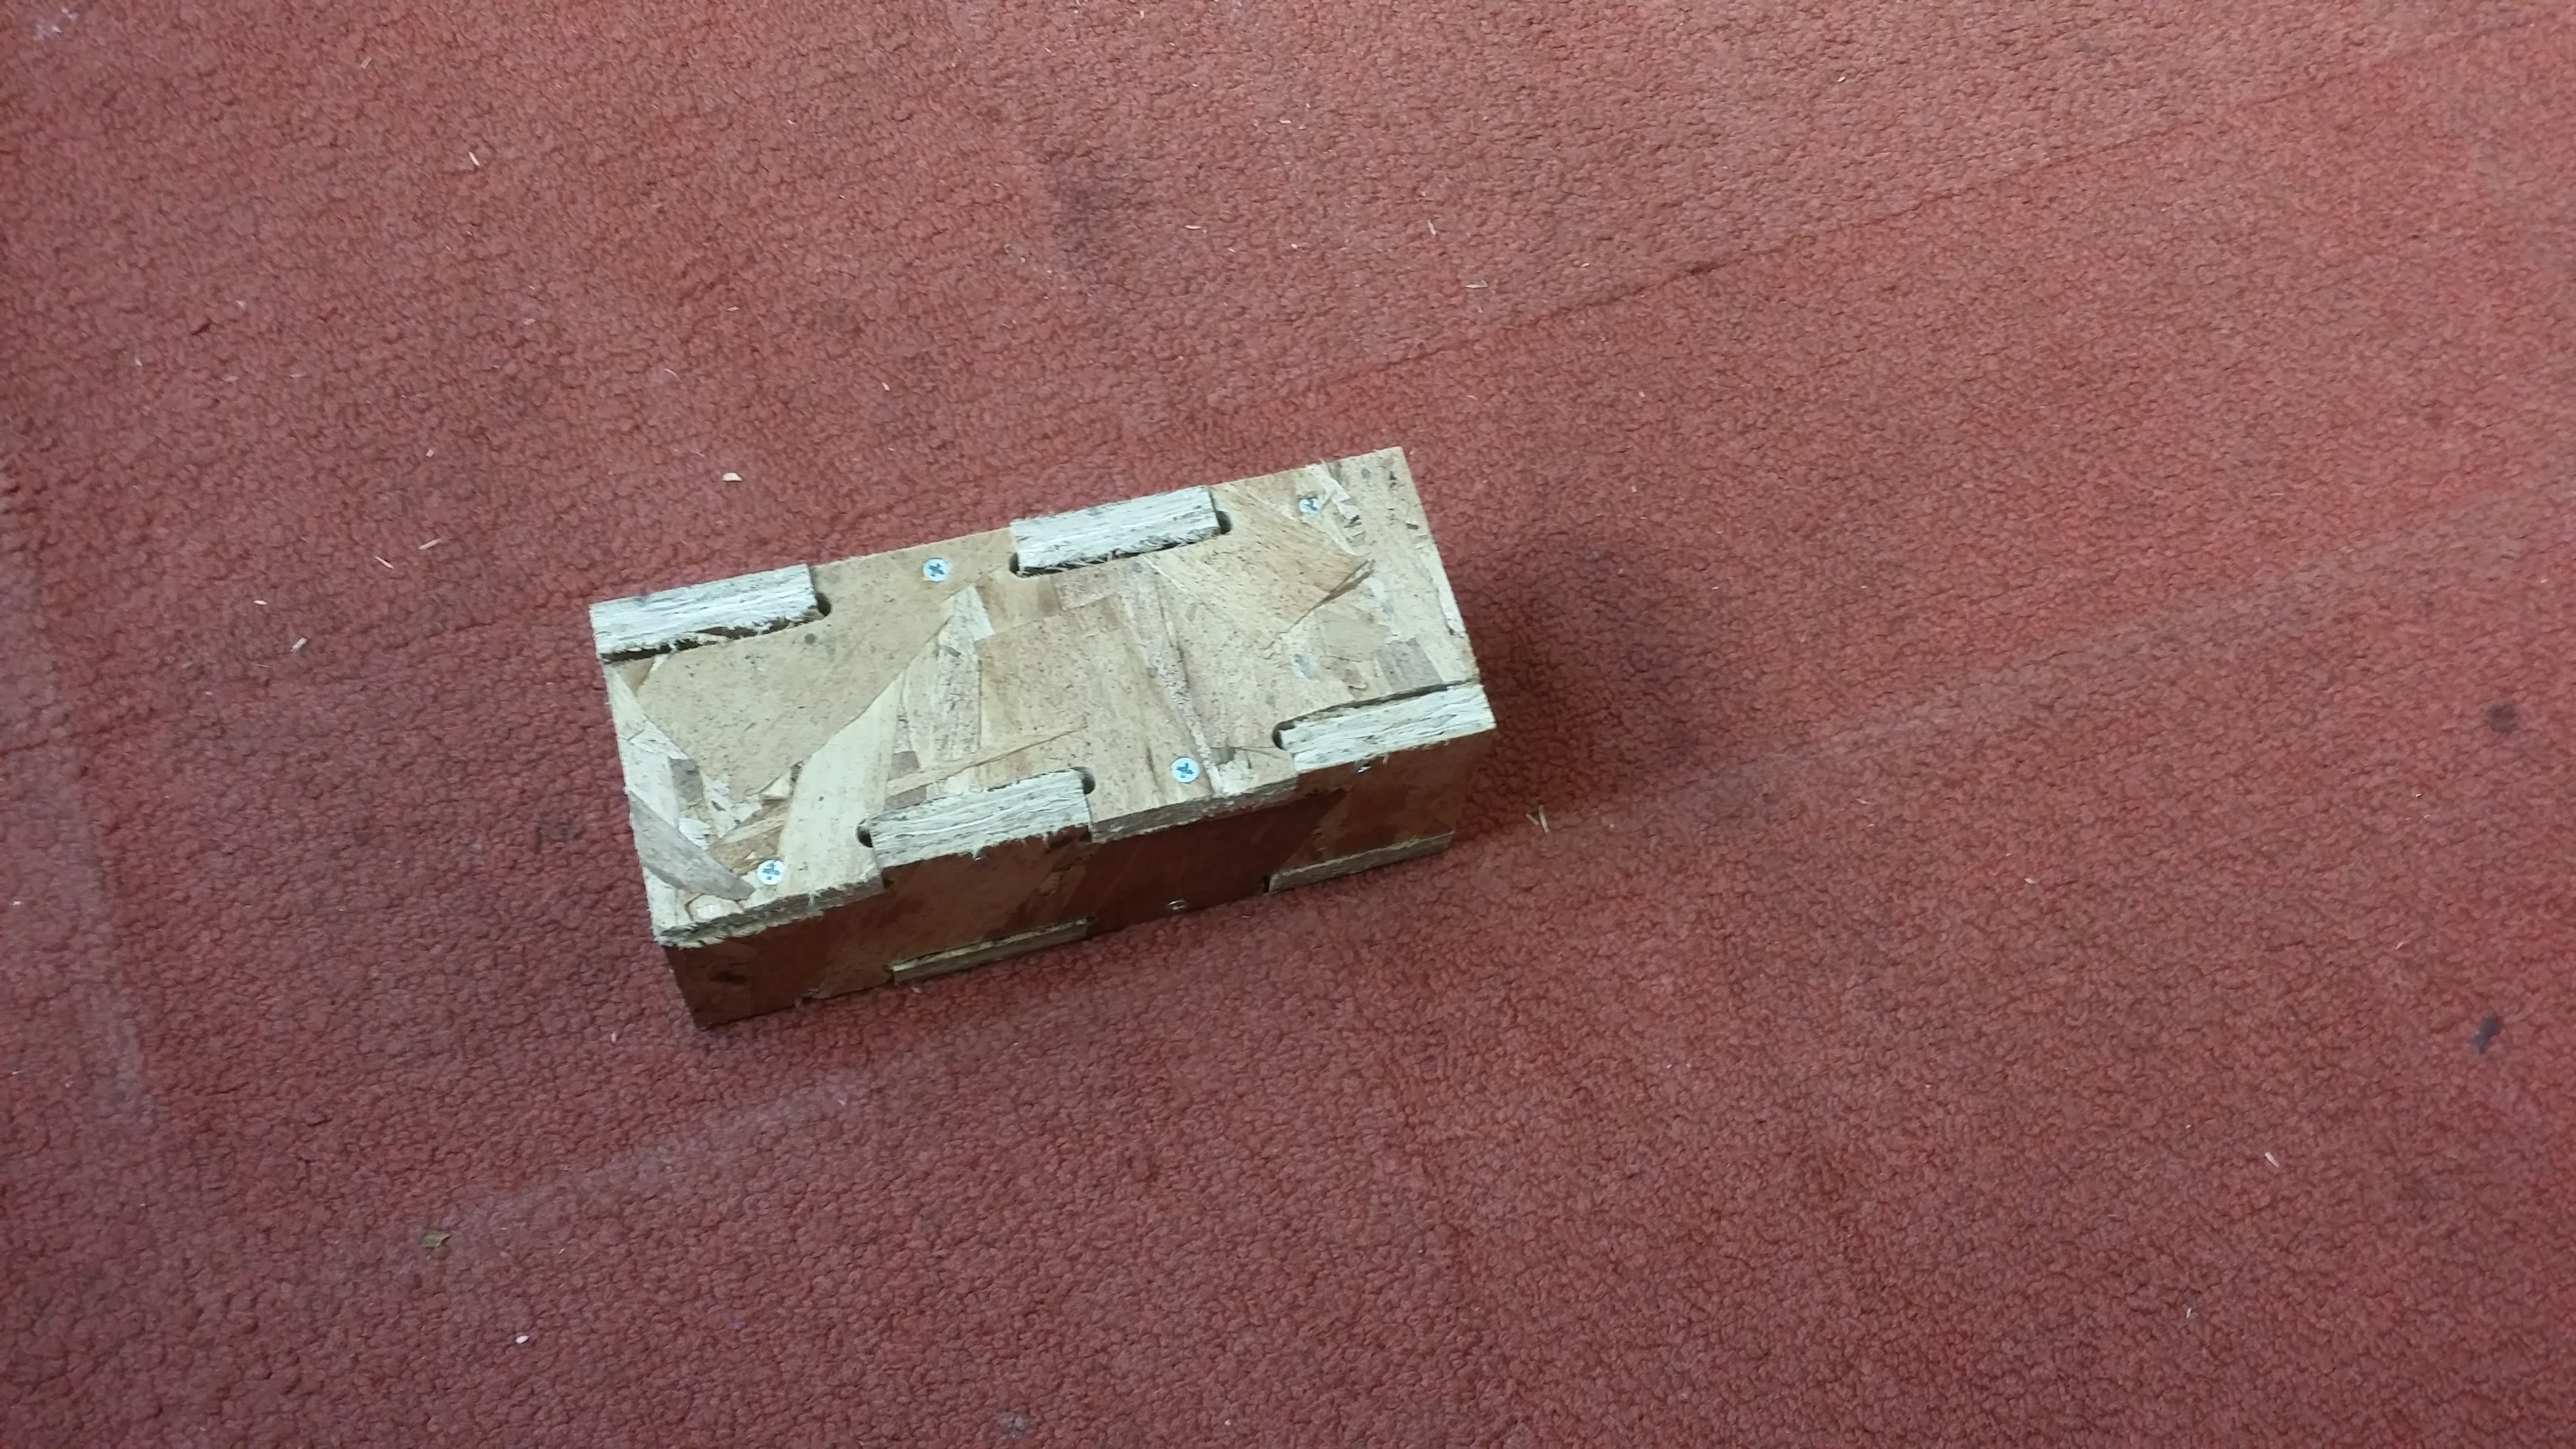
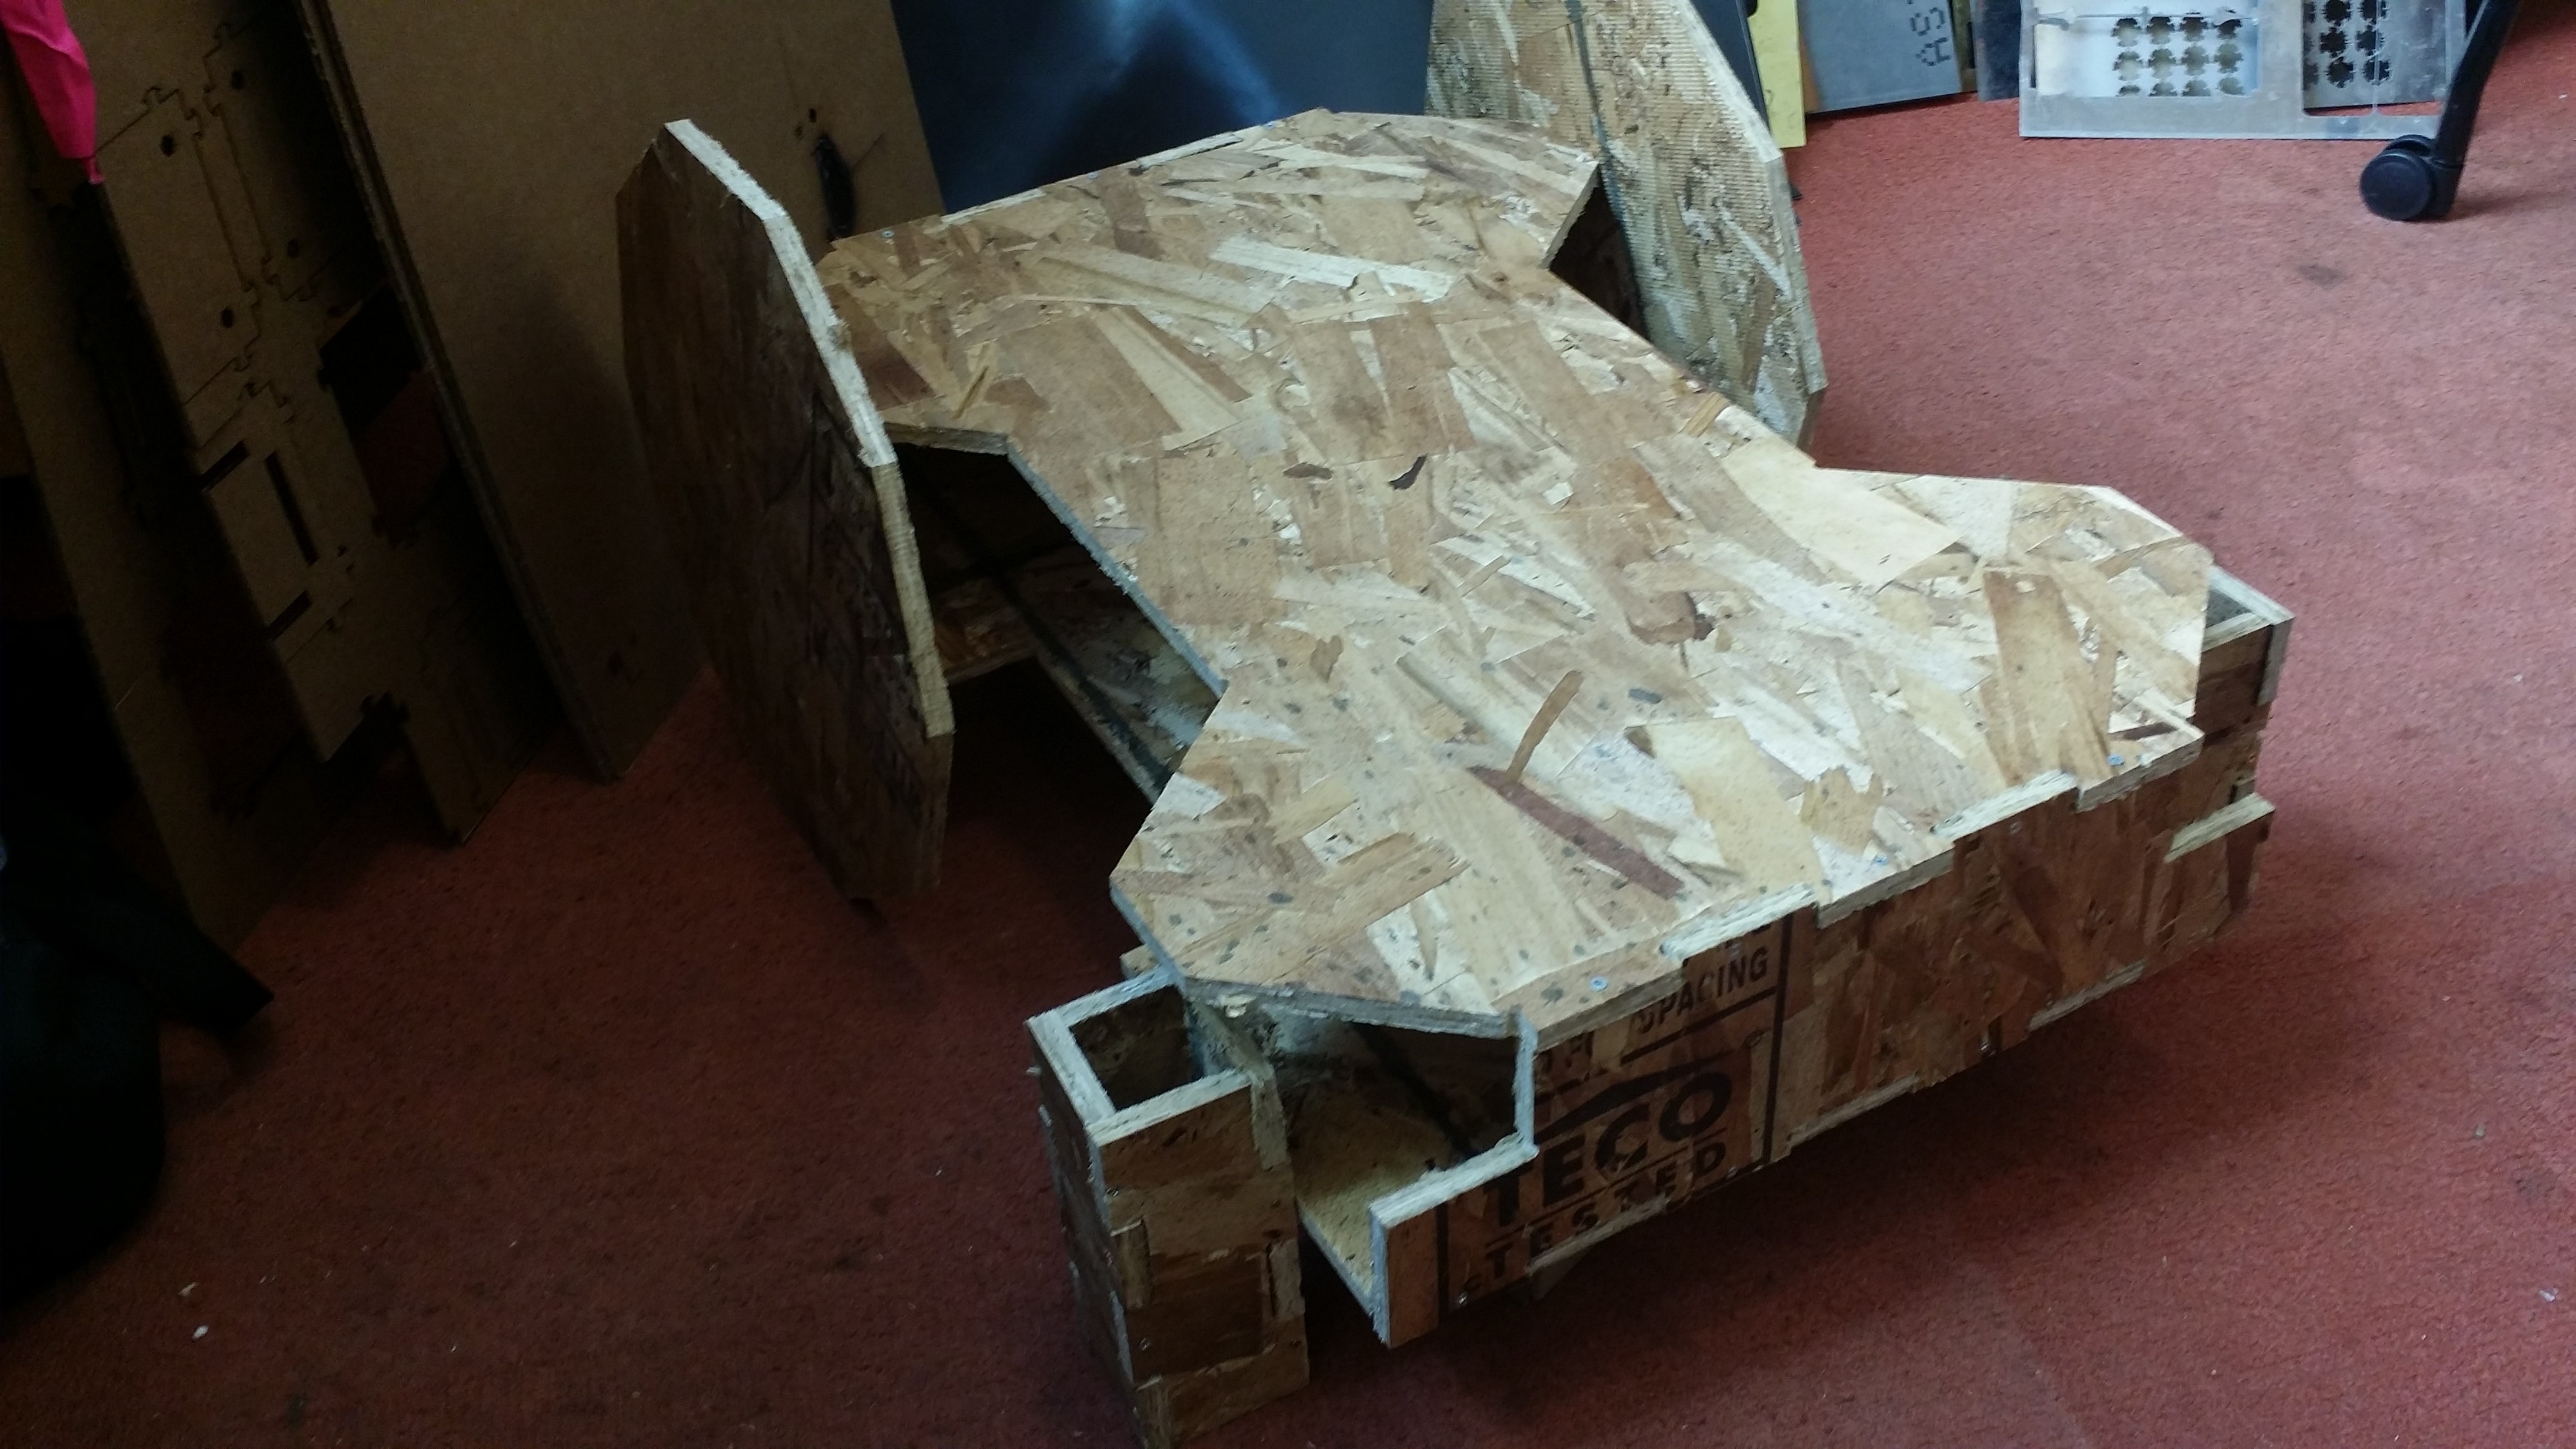
Assembly was a bit tricky. OSB is bad - like, really bad - and splinters easily. At first I tried large wood screws along the tabs, first drilling a pilot hole and then drilling in the large wood screws. But they were too large, and splintered the OSB everywhere. Next, I tried nailing the OSB, bu nails tend to take the path of least resistance. In the case of OSB, where the path of least resistance changes erratically within the piece, this makes aligning the nail in a straight line hard. I gave up for a while and crowdsourced suggestions. Some people suggested nail guns, but I didn't have that, and some people suggested wood glue, but that would be a very long and geometrically challenging process. In the end, I found that thin, but long screws, are able to hold together the pieces relatively strongly. The final chassis came out very nicely, in my opinion.
Current Issues
Everything is good to go right now for the objectives of this week. The only remaining task is to make this robot start walking - but, that's just bonus, and will come in research time :-).