3D printing and scanning

Clamp and Sense scanner: I began my work for the week by scanning Rob's clamp, an interesting shape which absolutely couldn't be produced easily in a single piece by subtractive manufacturing.
This week's work, which is on 3D scanning and printing, is interesting in large part because this technology is so often mentioned in the news. We're working with extruded filament 3D printers, which heat up a plastic thread and push it out in a controlled fashion so that it sticks to itself, forming a 3D object. The easiest way to think of it might be as a glue gun with particularly hard glue in really thin sticks and a robotic system to precisely place the glue.
The 3D printer I used this week was the Ultimaker II, a $2500 desktop 3D printer that's designed to be able to print extremely quickly, with a fast-print option that's even better than the normal speed at printing overhangs. Although it could've printed any number of useful parts given enough time, I tried to limit both the amount of plastic I used and the amount of printer time I took away from my colleagues. Thus, I ended up producing four parts, each of which had a longest dimension of about 25mm.
For scanning, I used the Sense scanner, a handheld device based on the same technology as the Microsoft Kinect. I tried a couple different things: first putting the clamp on the desk and attempting to move the scanner around it, then putting the scanner on the desk and rotating the clamp. I finally settled on putting the clamp on a stepladder so that it was easier to move the scanner around it: this allowed me to complete a full scan of the clamp without the scanner losing track completely. I had intended to put the resultant .obj file here for viewing, but unfortunately trying to put it on my flash drive corrupted the flash drive--perhaps I can try again this week.
I had a cool idea that I turned into a part late in the week: I have a PC fan (apparently these are also called 'muffin fans') that I want to turn into a miniature desk fan. In order to do that, I'd want to be able to rotate the fan on its stand and also tilt it.
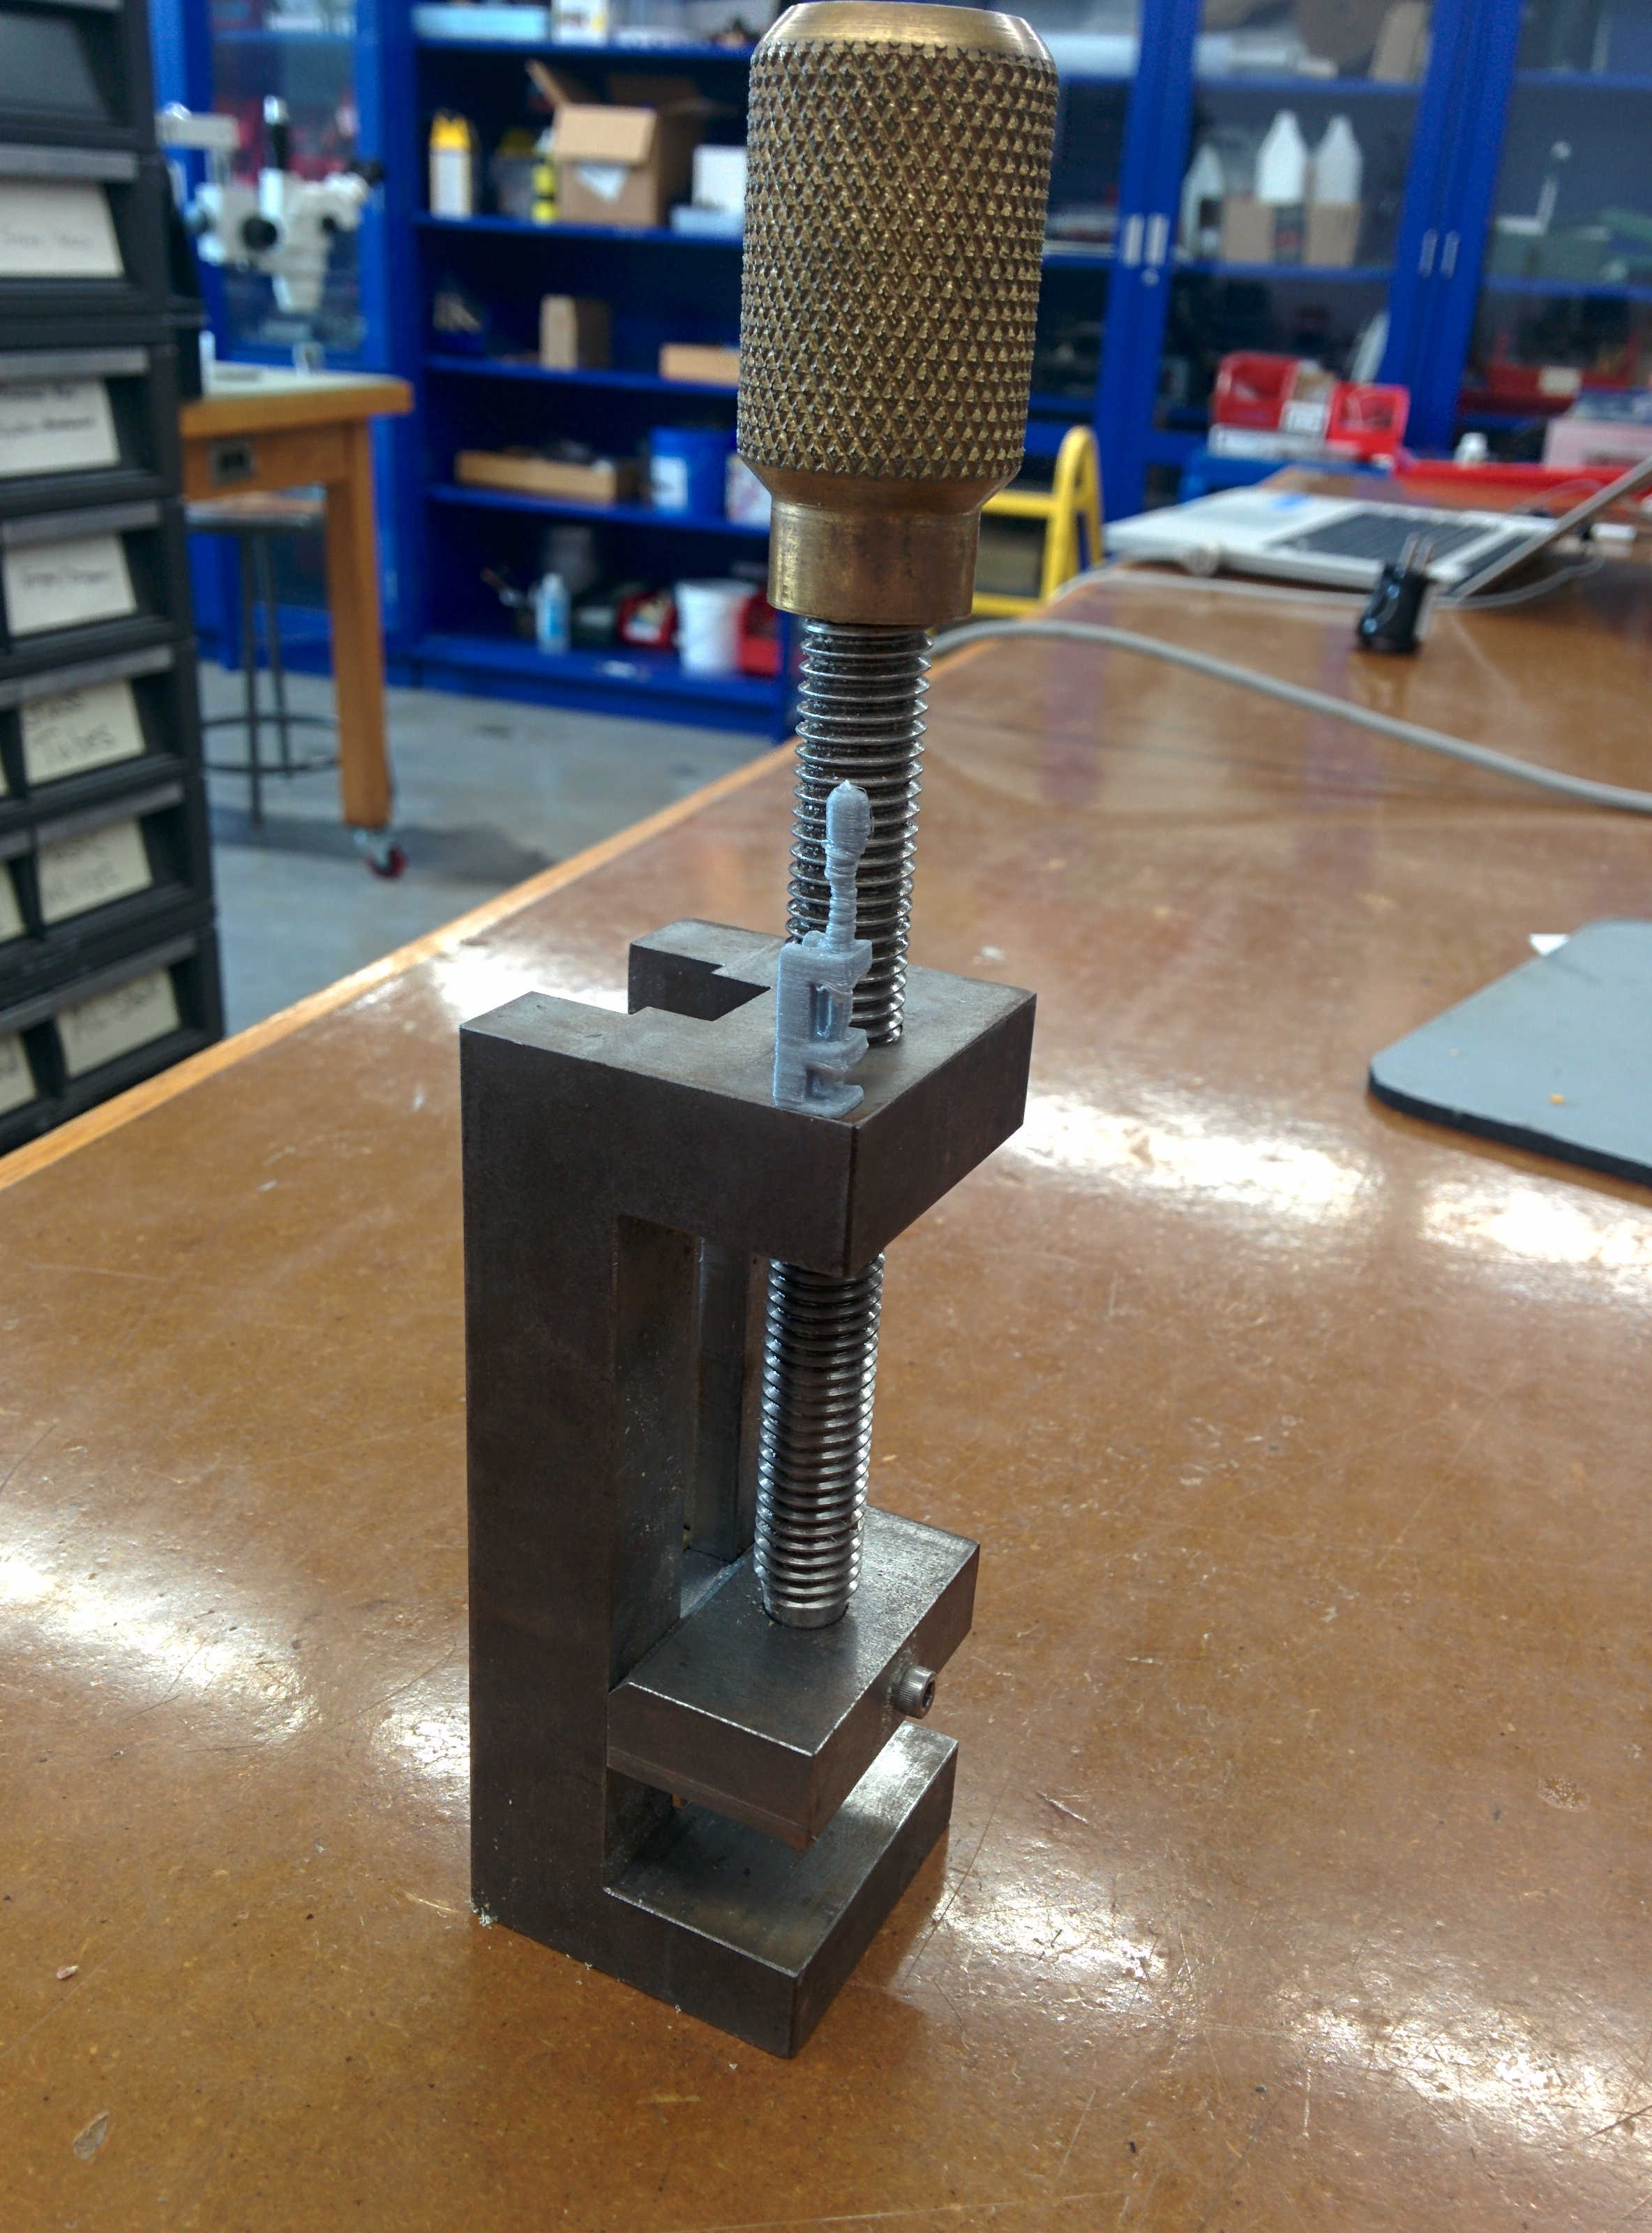
Big and little clamps: The replica clamp, printed on Harvard fab lab's Ultimaker II on the fast print setting, is a little rough in the details because the vertically-printed shaft was extruded in tight spirals. The 8-minute print is much smaller than the original, measuring in at around 25mm height.
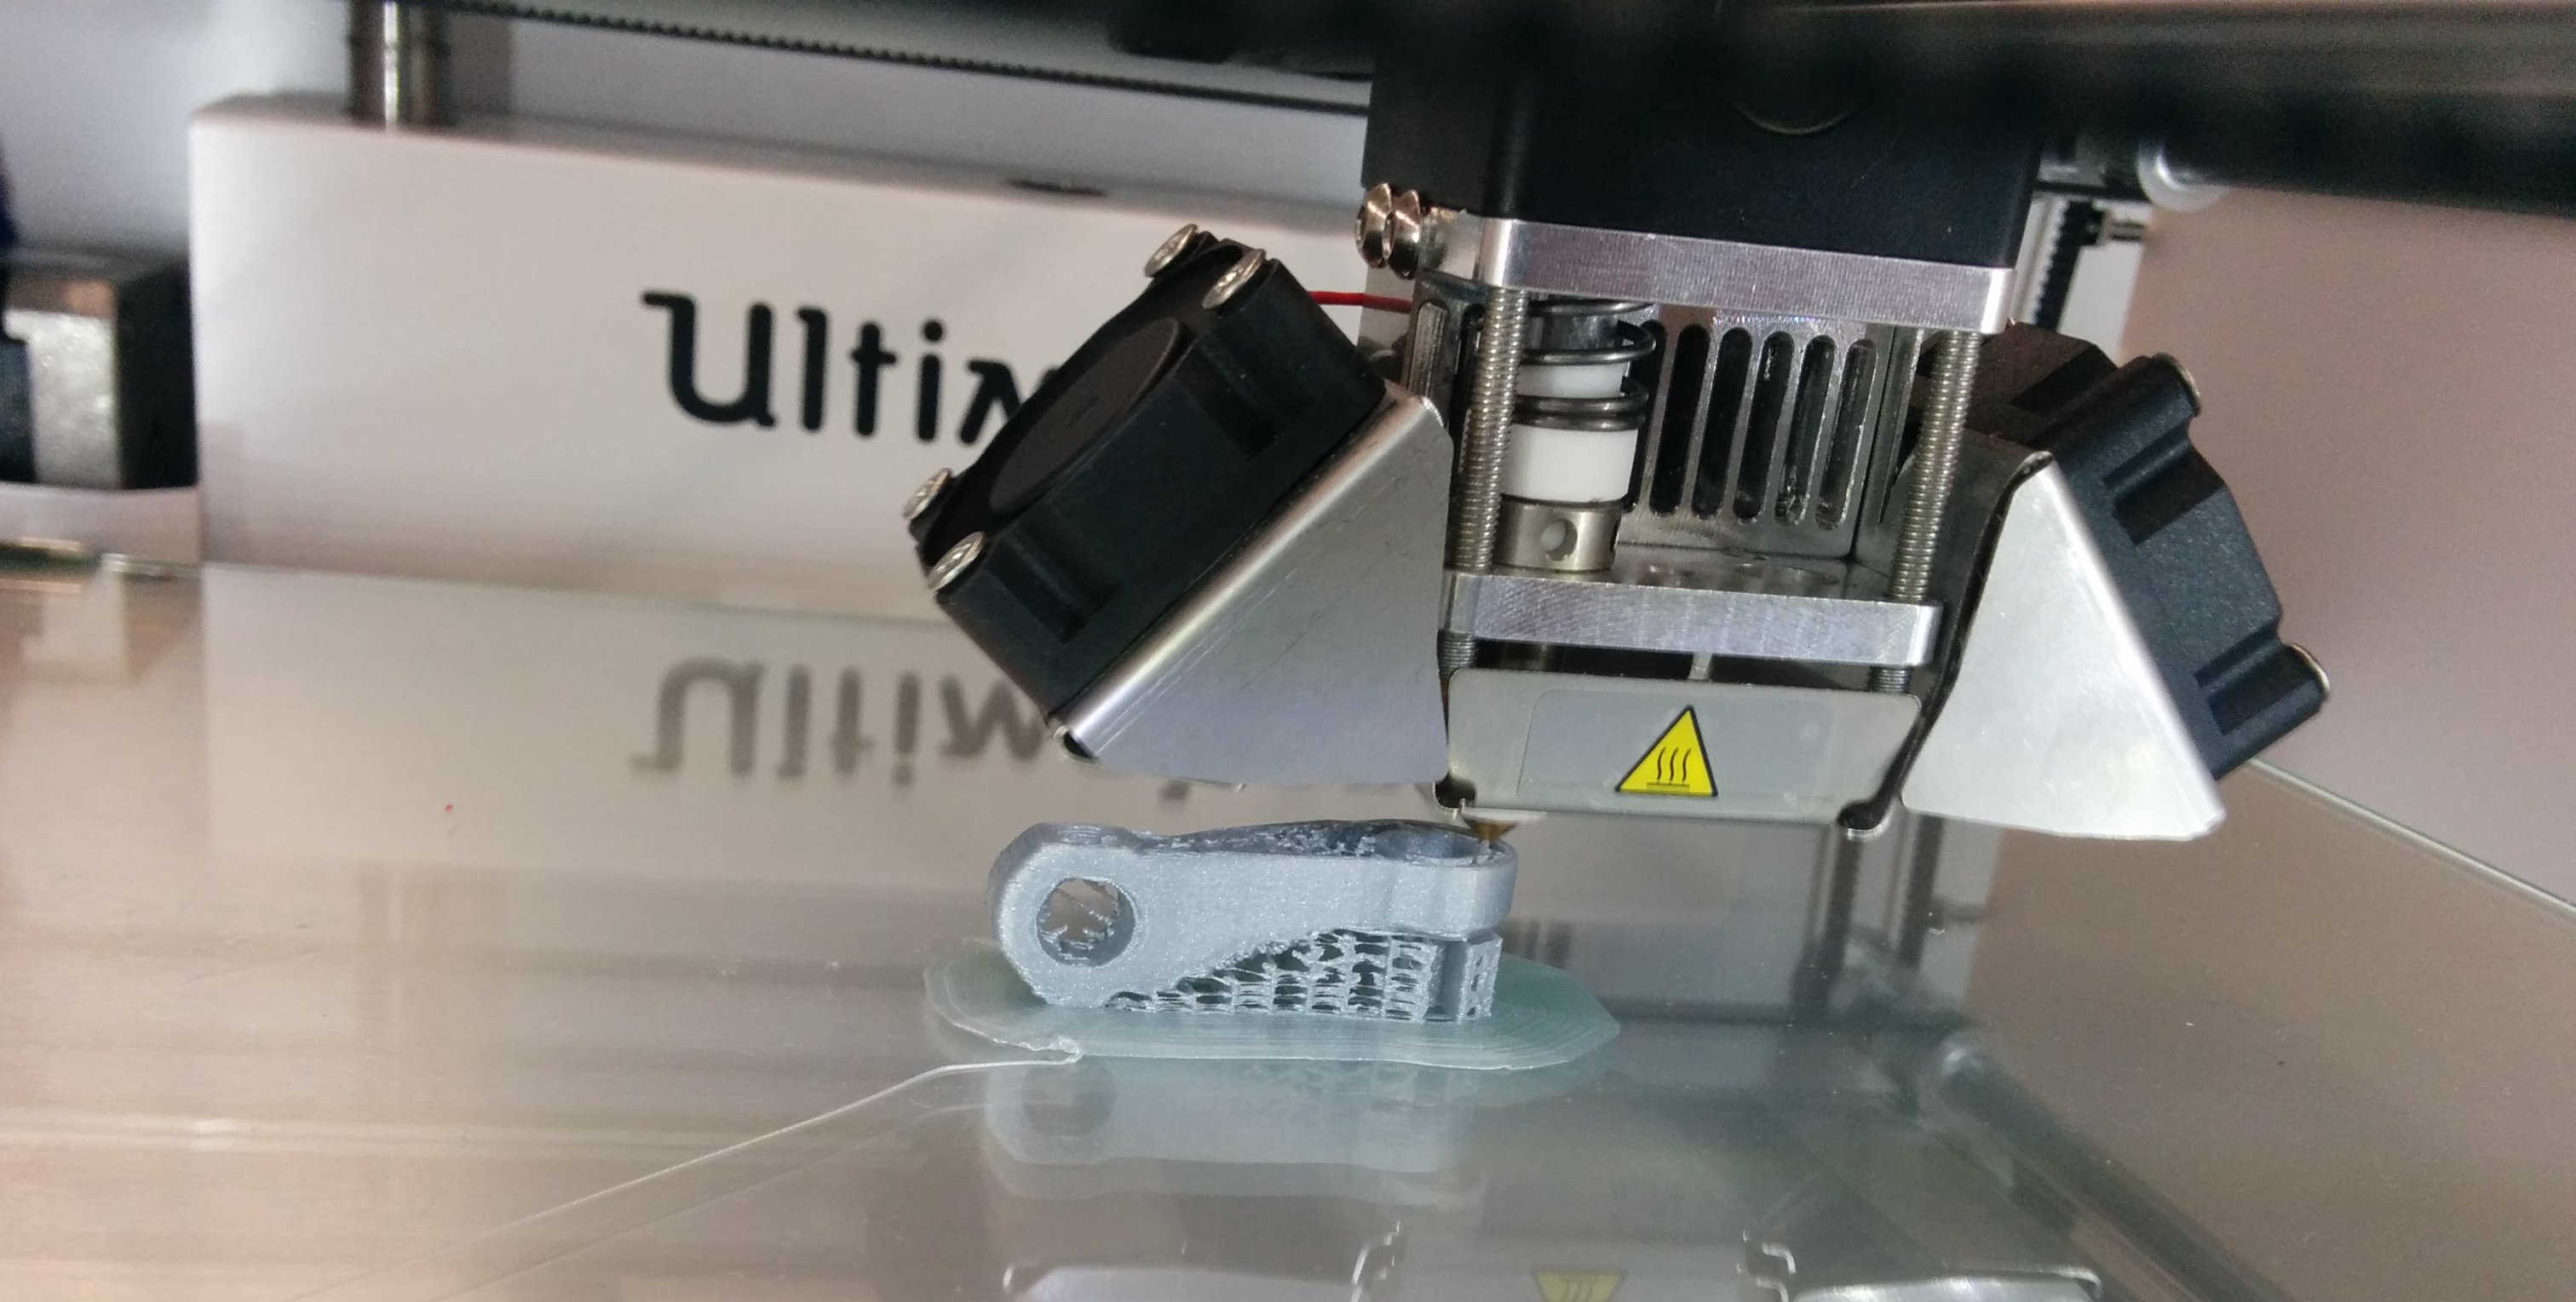
Ultimaker printing: the joint I printed has a cool support structure beneath it.
I immediately thought to try to print the parts for this joint, and so I designed them in Solidworks and got to work printing them. Unfortunately, Cura completely messed up the dimensions, so I wasn't sure if I was printing it the right size. Fortunately, the linear dimensions were ok. Unfortunately, the holes were too small for the 1/4-20 screws I'd intended to use for the moving part of the joint.
I ended up using a soldering iron at ~400 degrees F to enlarge the holes. Unfortunately, with a wall thickness of ~.8mm (2 filament widths), the wall got pretty deformed on the side next to the hollow inside. Nevertheless, I have a working joint!
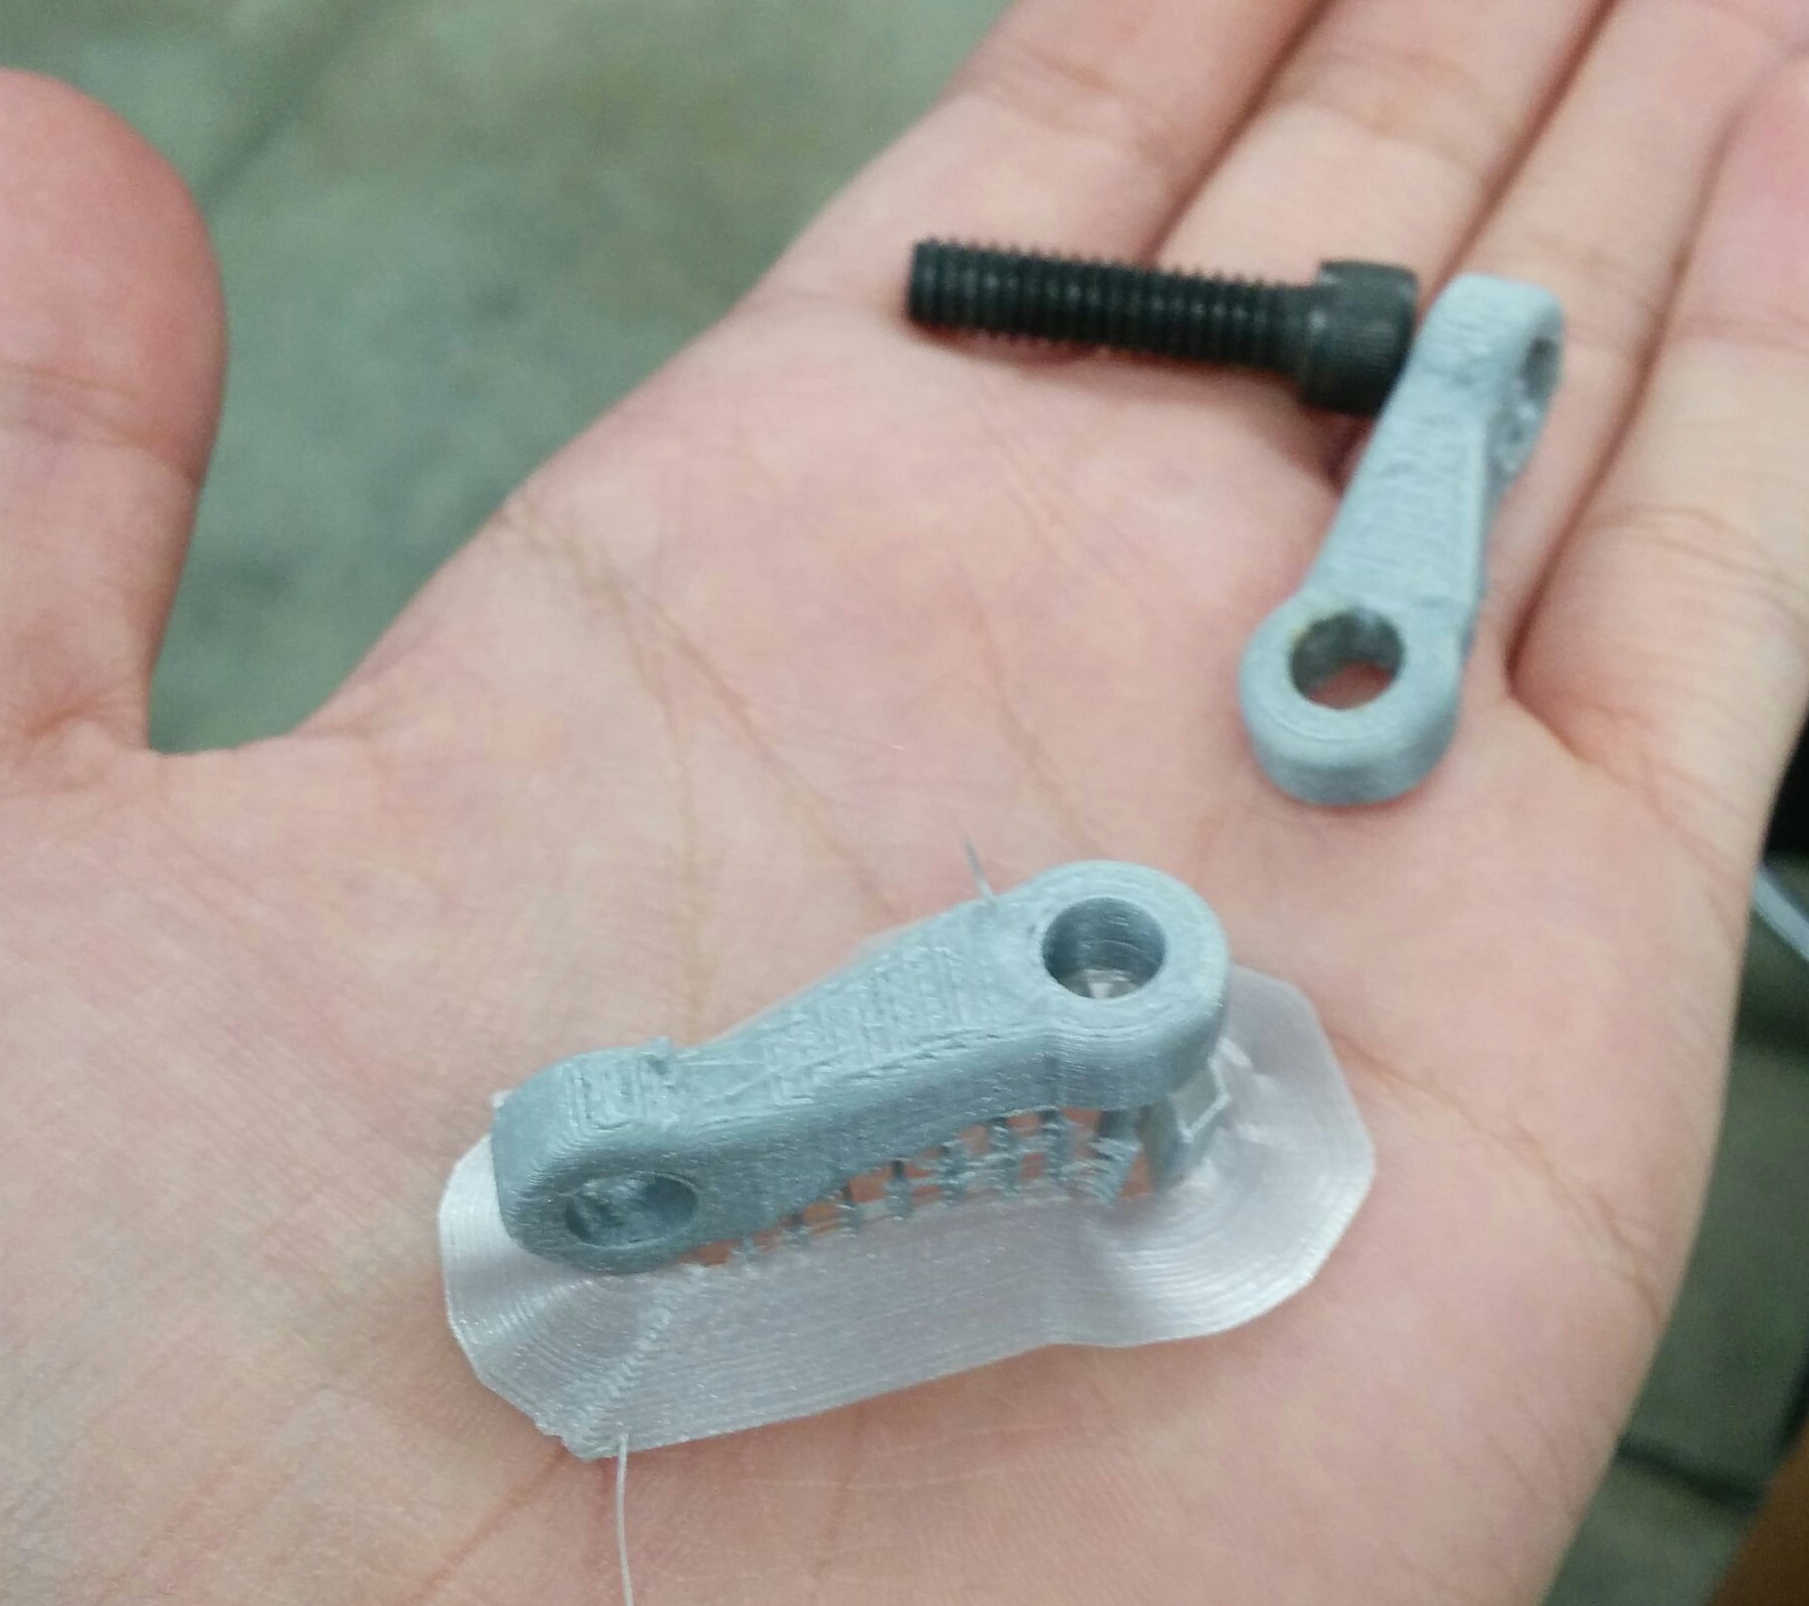
Joint parts: In this photo, you can also see the 1/4"-20 bolt (1" length, I think) and the support structure on the nearer part.