Large-scale machining
This week, we learned to use the Shopbot, a $16k CNC mill with a 48"x48" work area, which we used to cut sheets of Oriented Strand Board (OSB, a cheap type of plywood) into parts for furniture, arbitrary shapes, or even kinematic sculptures. Starting with a sim ple shoe rack, I decided to focus on furniture, and found the time to also make a leaning bookcase.
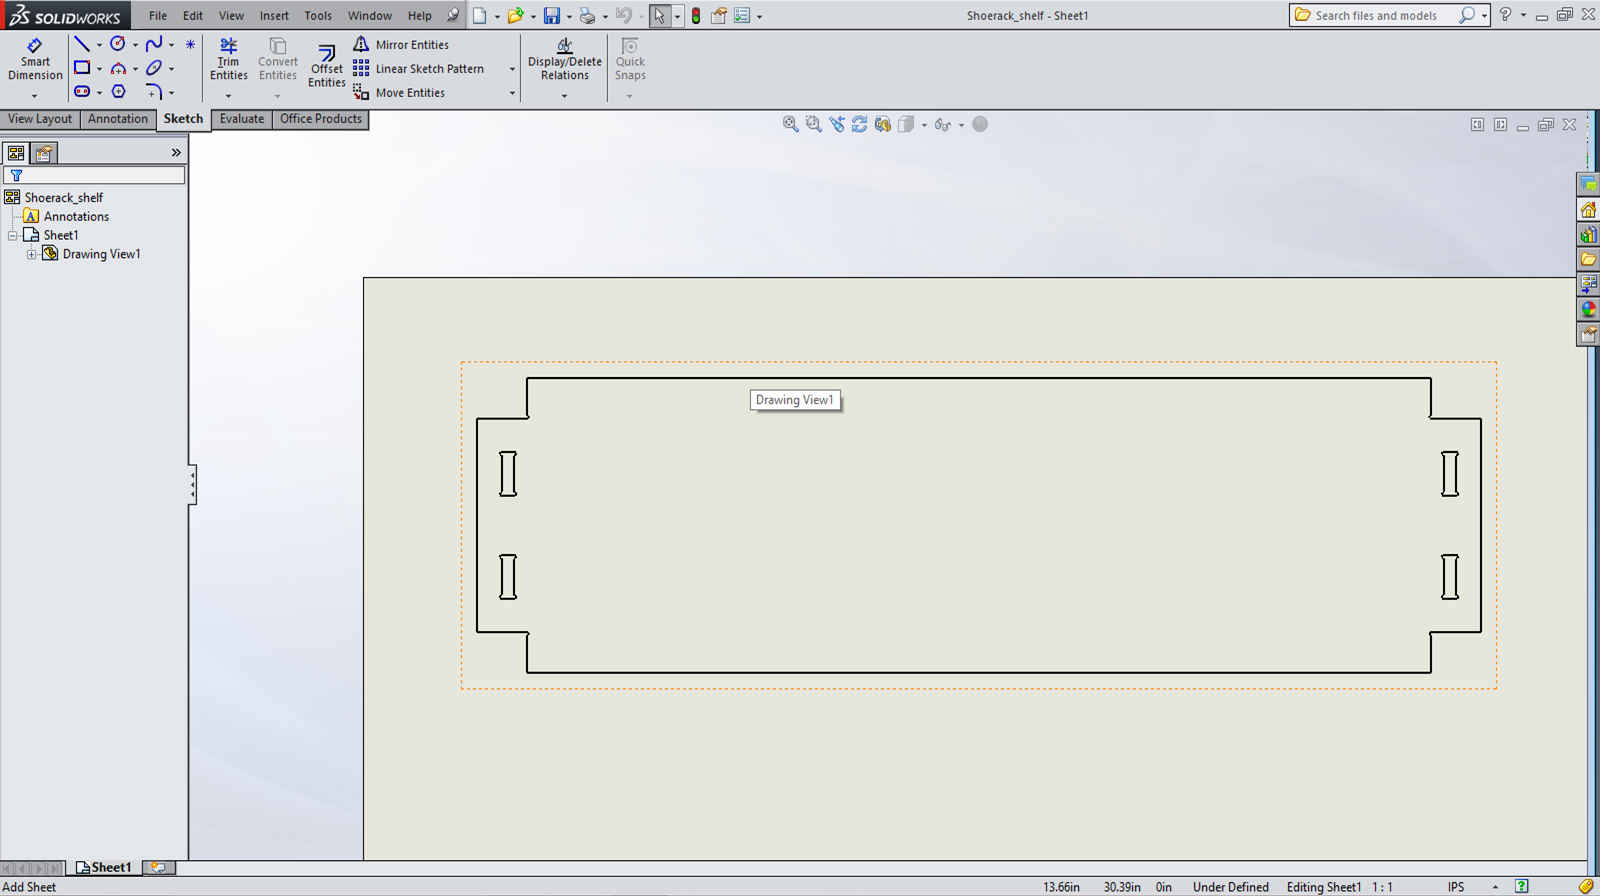
Designing parts: I used Solidworks, a mechanical design program, to make parts. In order to put in T-bone cuts for press fits, I manually added arcs in the internal corners of my parts.
One of the major design points this week was press-fit joints in plywood. Because the mill has a significant diameter (1/8"-1/4" for the end mills we used), we had to add cuts to give sharp enough internal corners for press fits. I designed all my parts after the first two (the walls of the shoe rack) in Solidworks because it allowed me to do higher-level design and dimension everything very nicely. Also, I could export drawings as .dwg files, which I could import directly into VCarve Pro.
In VCarve Pro, I had one problem--the toolpaths would always generate on the wrong side of my T-bones. It turned out that VCarve has a concept of open and closed vectors, where closed vectors are series of end-to-end vectors forming a closed path. It also doesn't seem to have a tool to join vectors except to select and join them pairwise. I had to do this for every part that I made (actually, it was only 7 different parts, since most of my parts were duplicates). After this, I could duplicate and nest the parts and generate toolpaths to cut them.
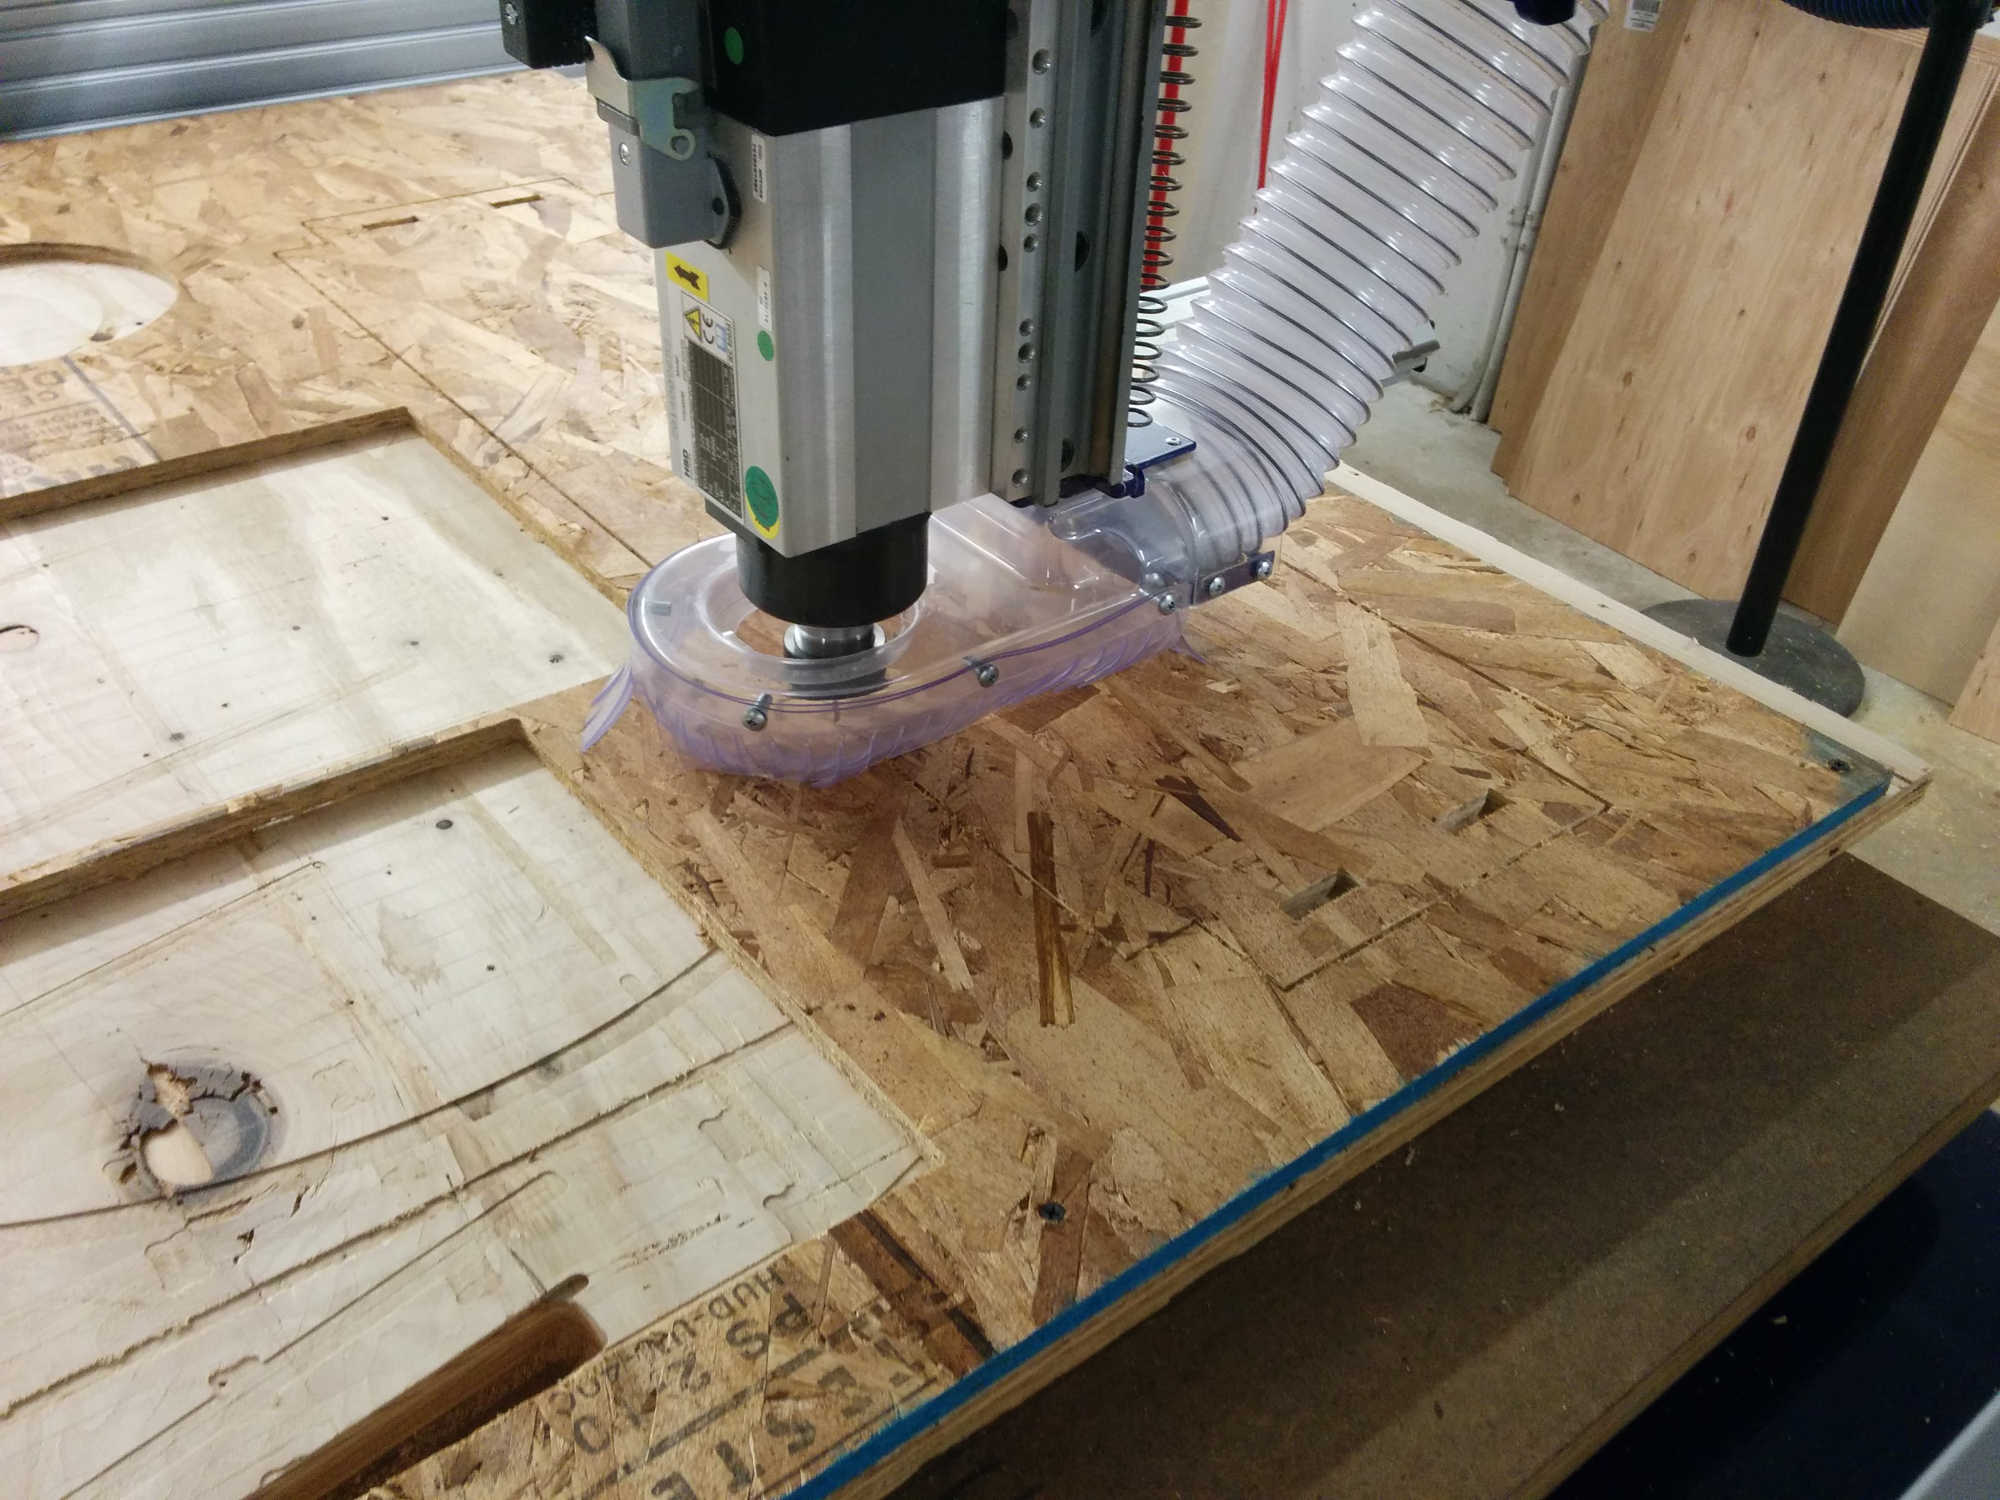
The ShopBot in action: I cut most of my parts using a 1/8" downcut end mill, which allowed me to make really small dog bones and cut my parts pretty quickly. On the downside, it took four passes to cut out a part. Here, the ShopBot is cutting out a shoerack shelf.
Well, I hope I can get a photo of the shims for my shoerack so that I can put that here. Essentially, they're T-shaped pieces of wood that fit into rectangular slots in the shelves in order to hold the walls onto the shelves. The T shape prevents them from slipping out, as gravity can't assist them.
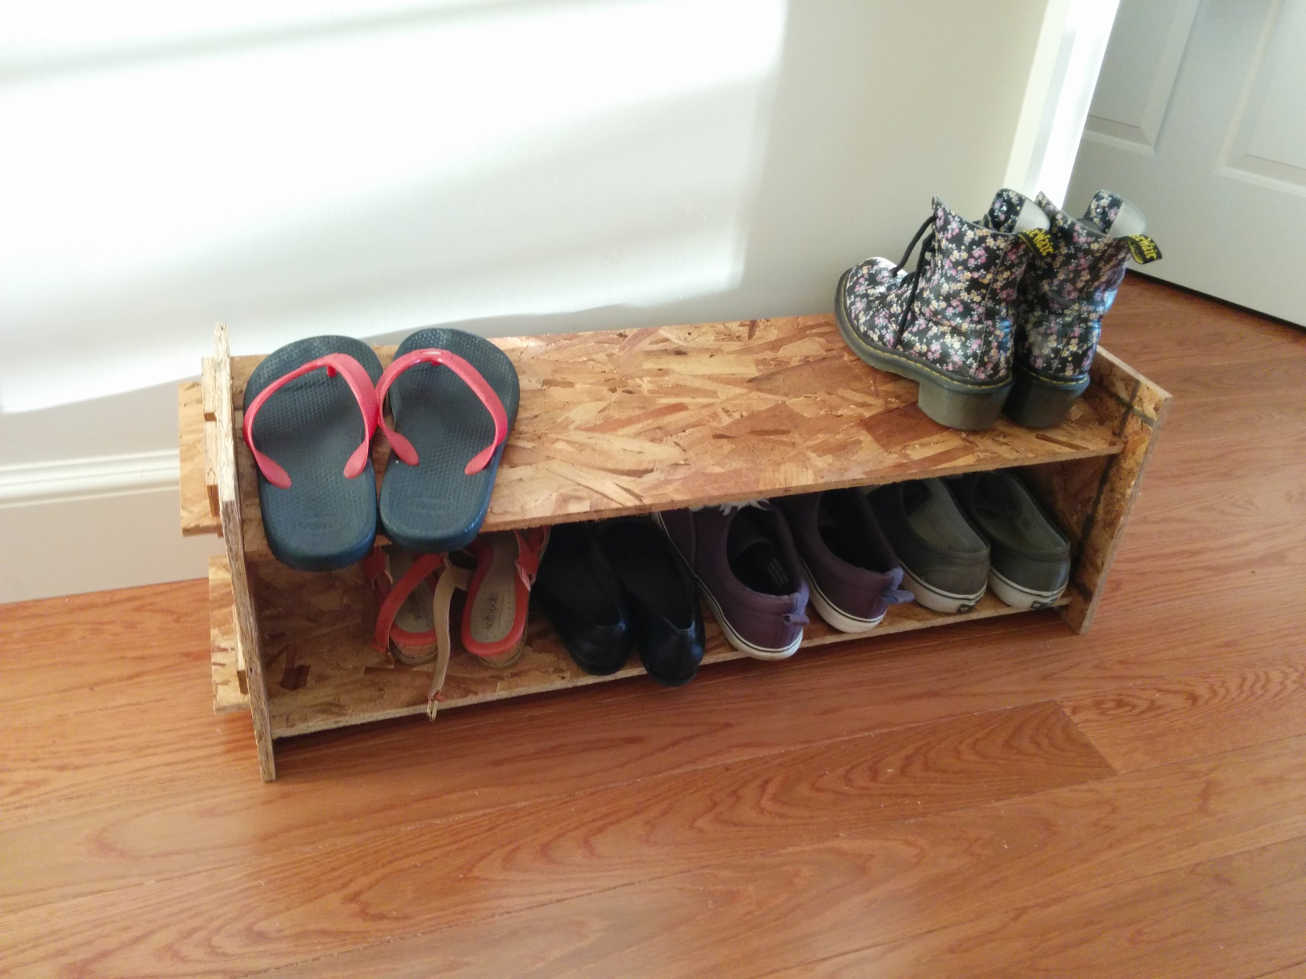
My shoerack: The shims in the shoerack do their duty just fine, here's a photo of the shoerack in action.
I decided on a shoe rack and bookshelf because both are things I need. The bookcase is the fab-able version of leaning bookshelves, which I think are a really nice-looking design. I've been really enjoying press-fit construction thus far in HTM, and thought that a nice final version would have 2x8's as the sides with nicer plywood shelves, but that I could start out by trying to make one out of OSB. As I should've expected, the OSB version took enough ShopBot time that I haven't been able to head out to Home Depot to get any nicer plywood and 2x8's.
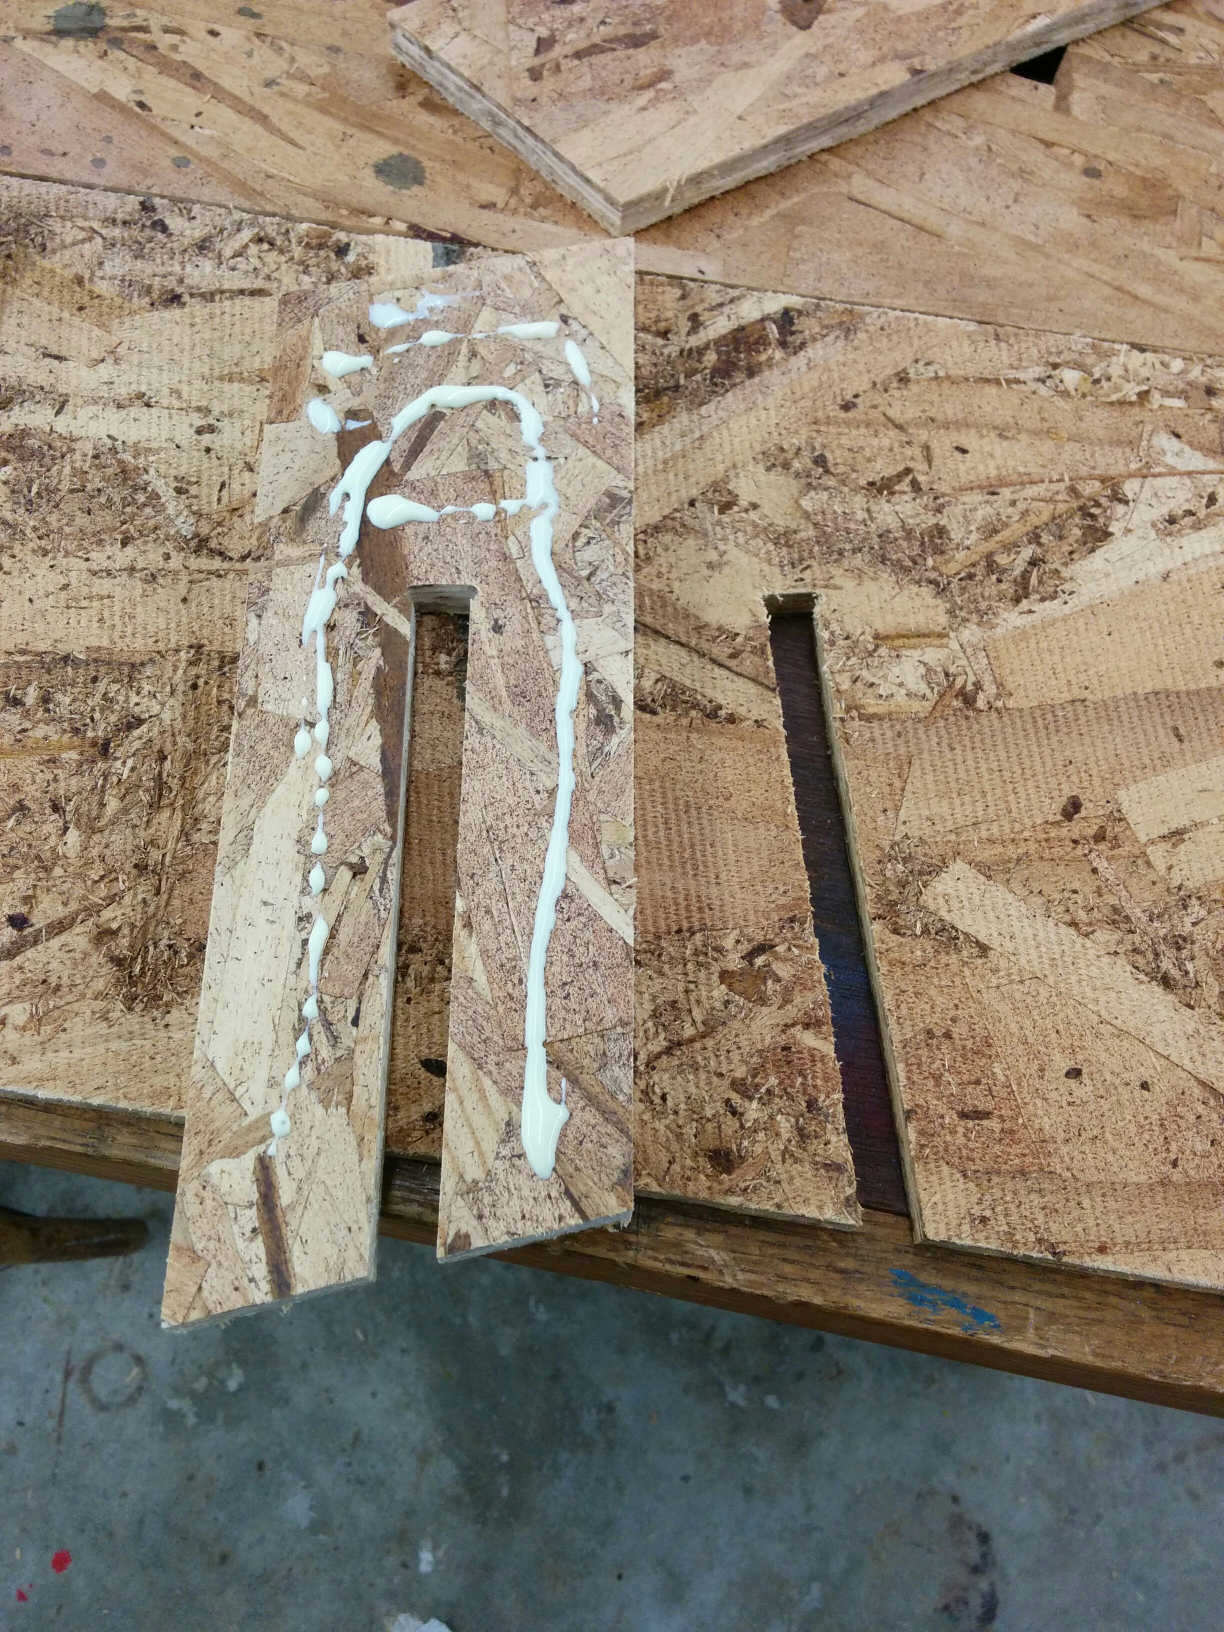
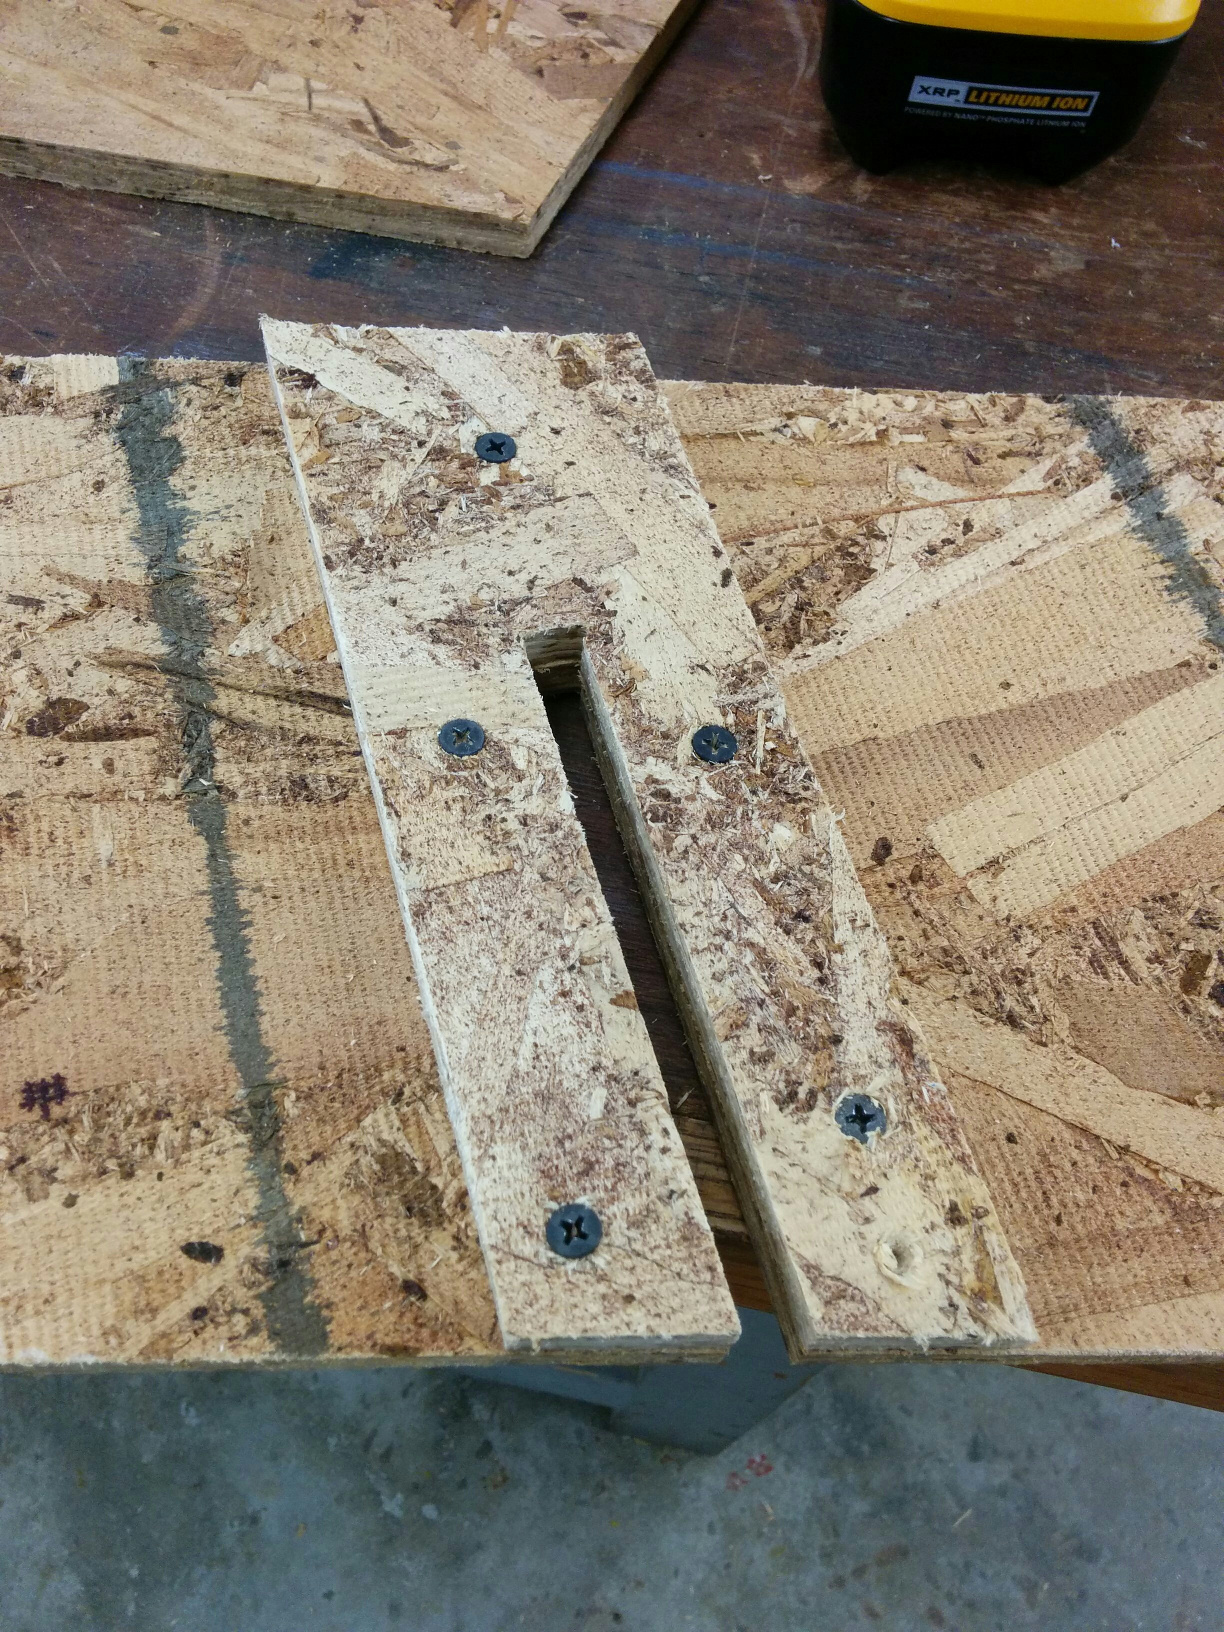
In terms of making the OSB bookcase, I decided that adding reinforcements to the walls along each shelf slot would give more surface area to hold the weight, as well as making the entire structure more rigid. Thus, I cut 3"-wide parallelograms of wood with matching slots, and used those to rigidify the structure.
To attach these supports, I used a technique Dan Rosenberg calls "glue and screw"--first, apply wood glue between the two surfaces. Then, use drywall screws to pull the two pieces together. After waiting ten minutes, remove screws and wait another couple hours to glue. Unfortunately, we couldn't find 3/4" screws in the lab, so I ended up needing to attempt to drill in the screws while off the table to prevent the screws from going into the table.
The glue part: Glueing
Glue and Screw: Here I'm finishing the glue and screw with drywall screws.
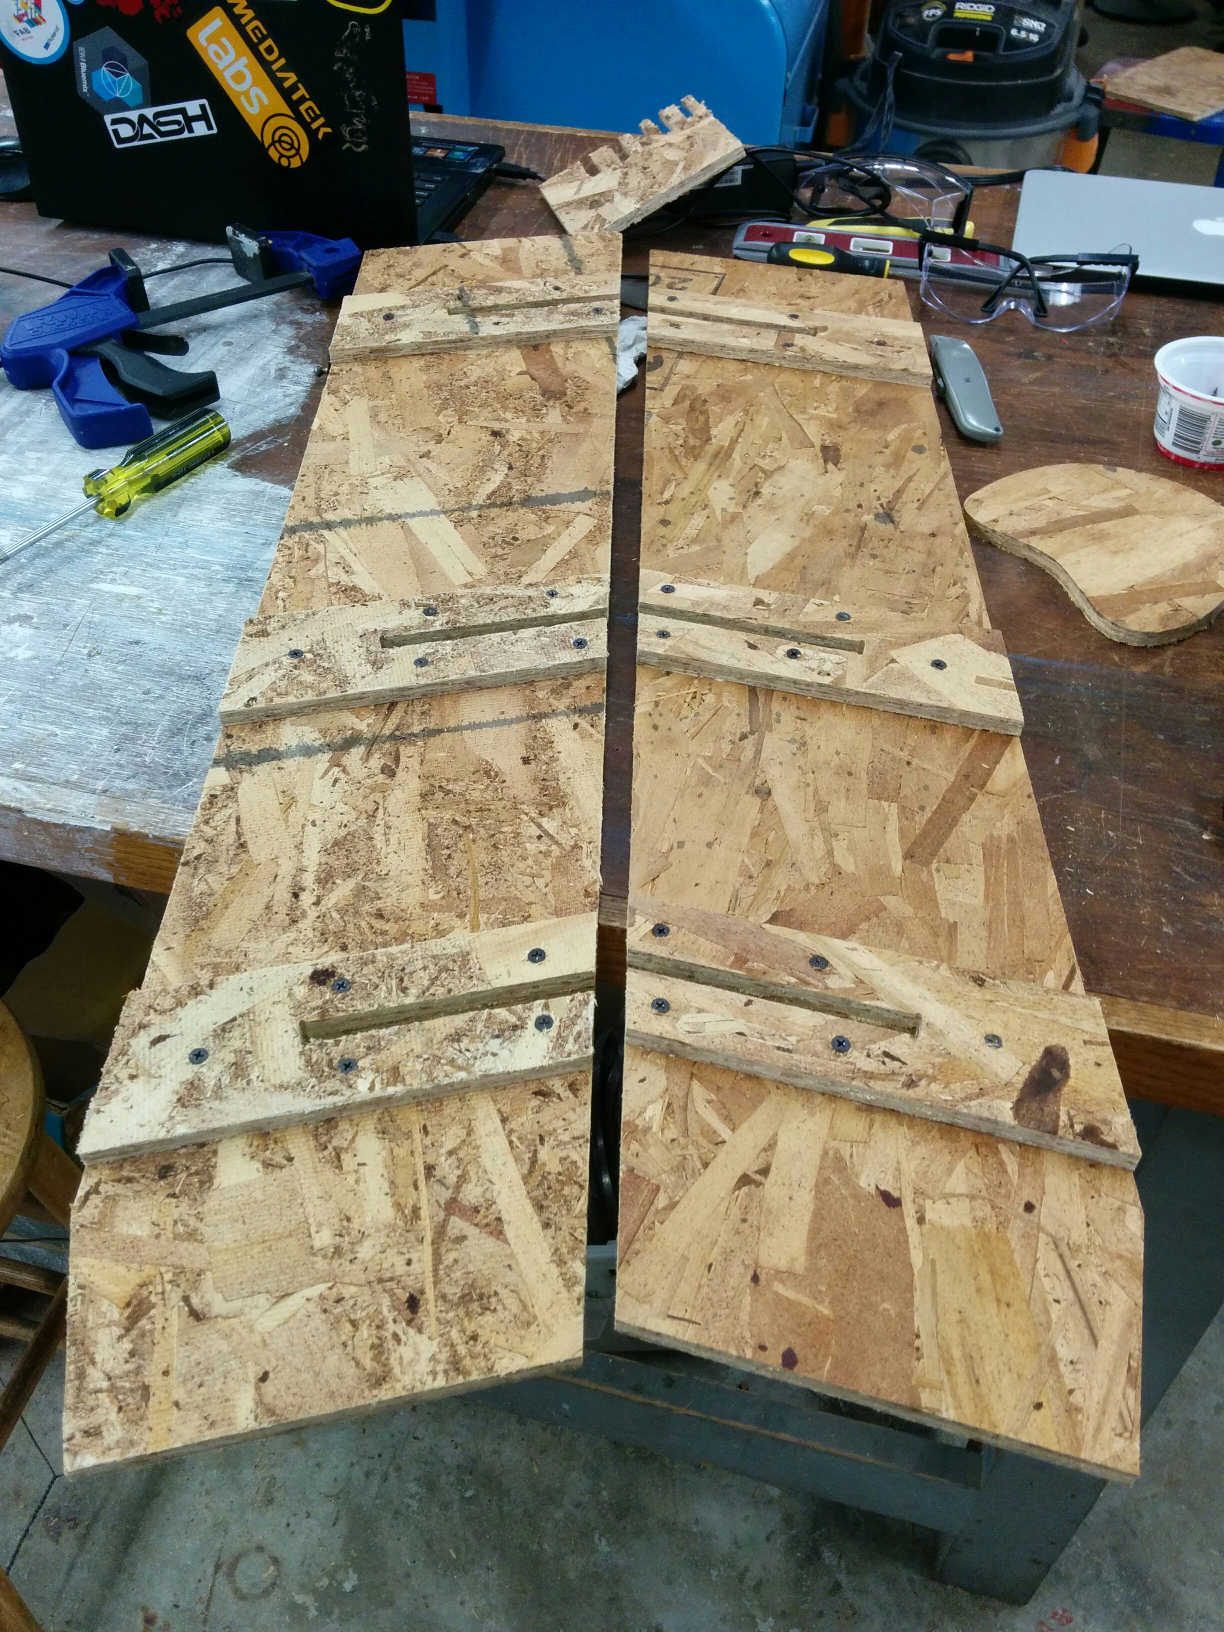
All the supports: Here, the supports are waiting for the glue to set before I remove the screws.

Final bookshelf: I finally put together the entire bookcase after removing the screws and letting the glue finish hardening.