How to Make (almost) Anything
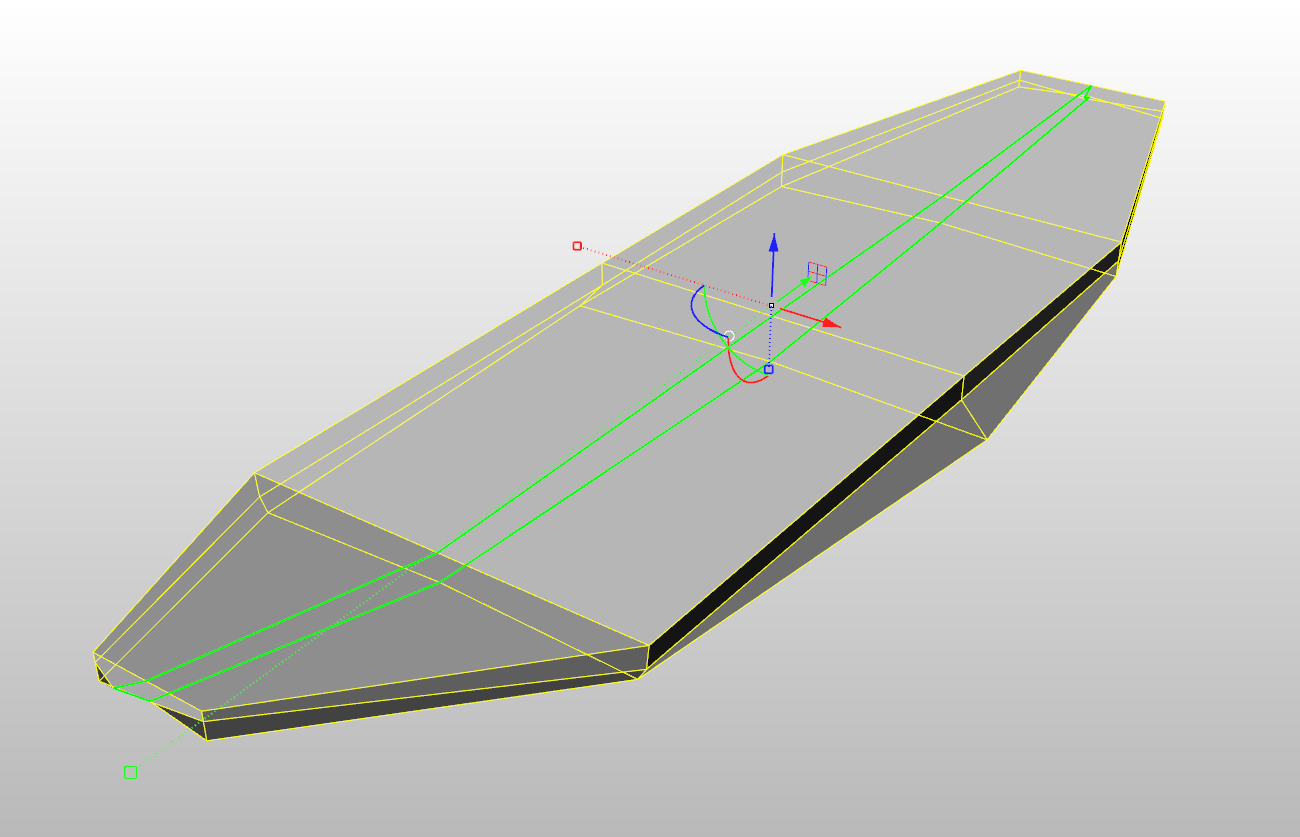
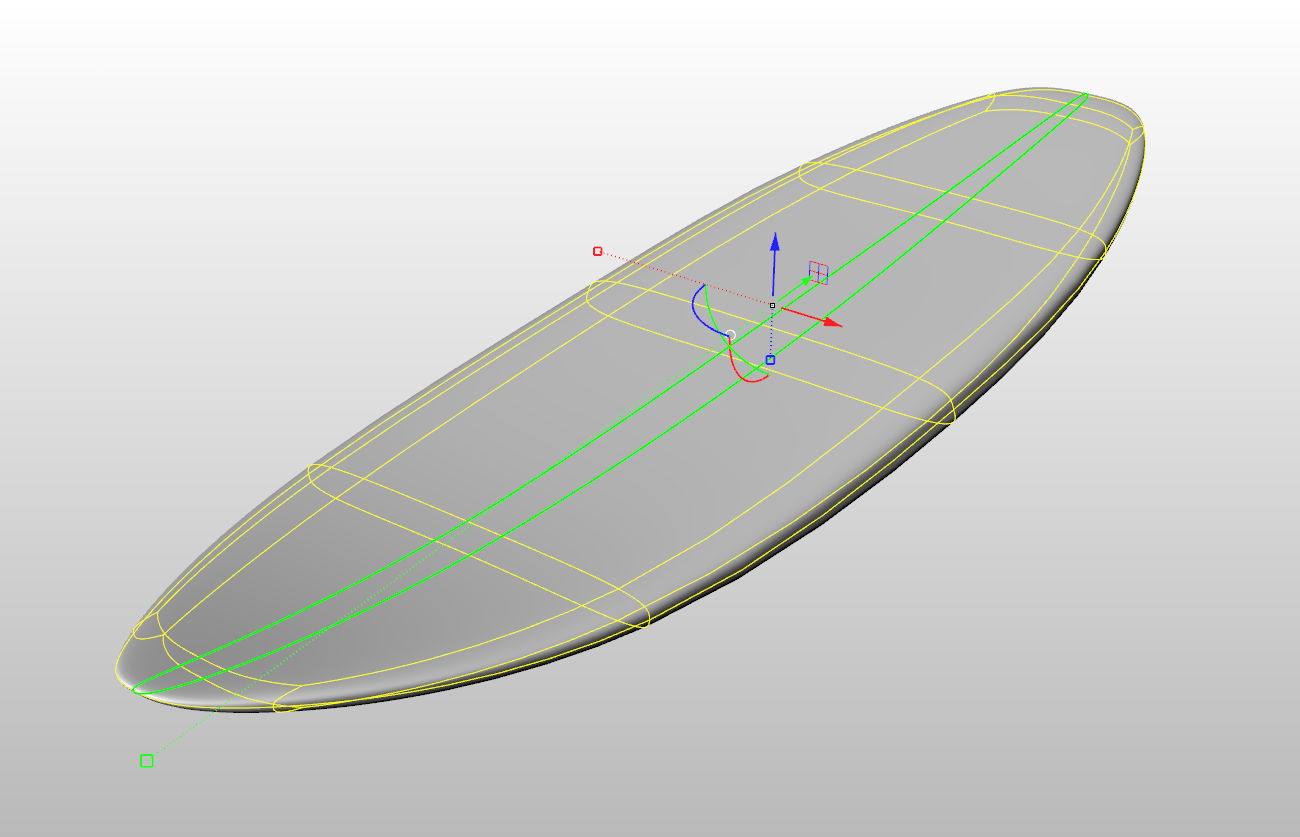
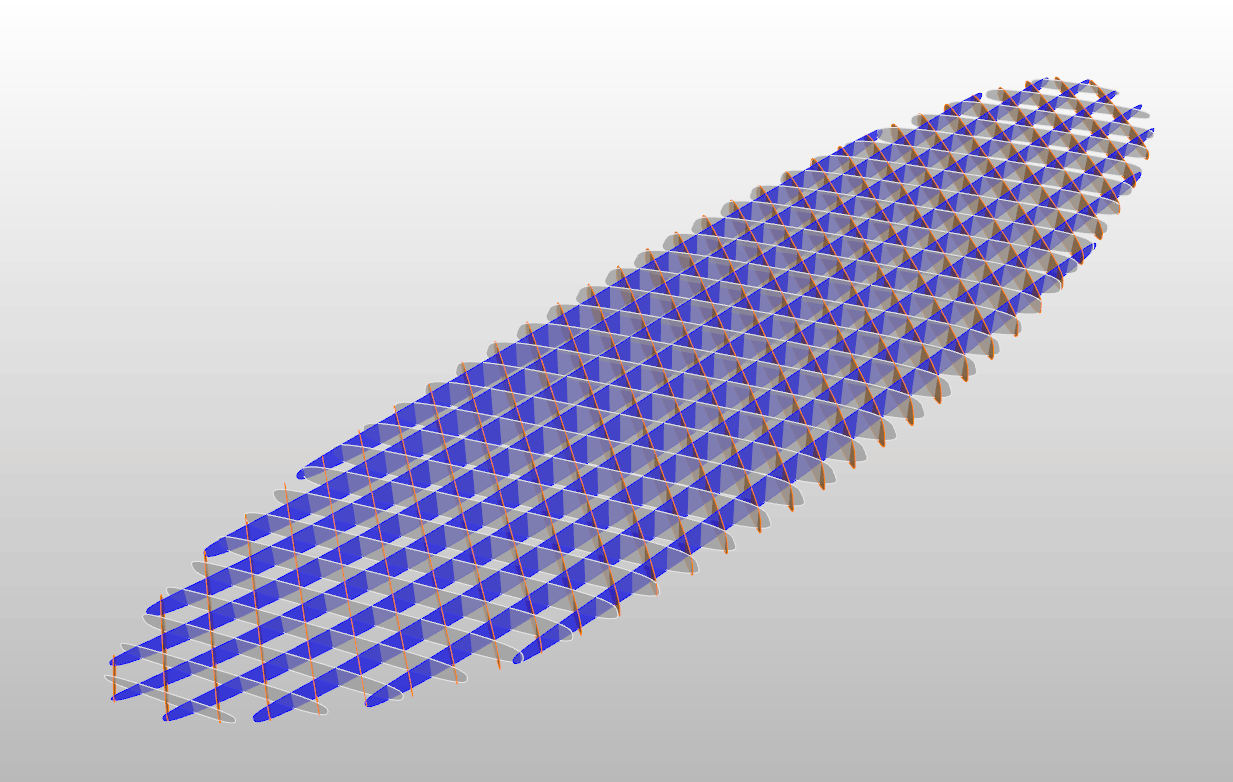
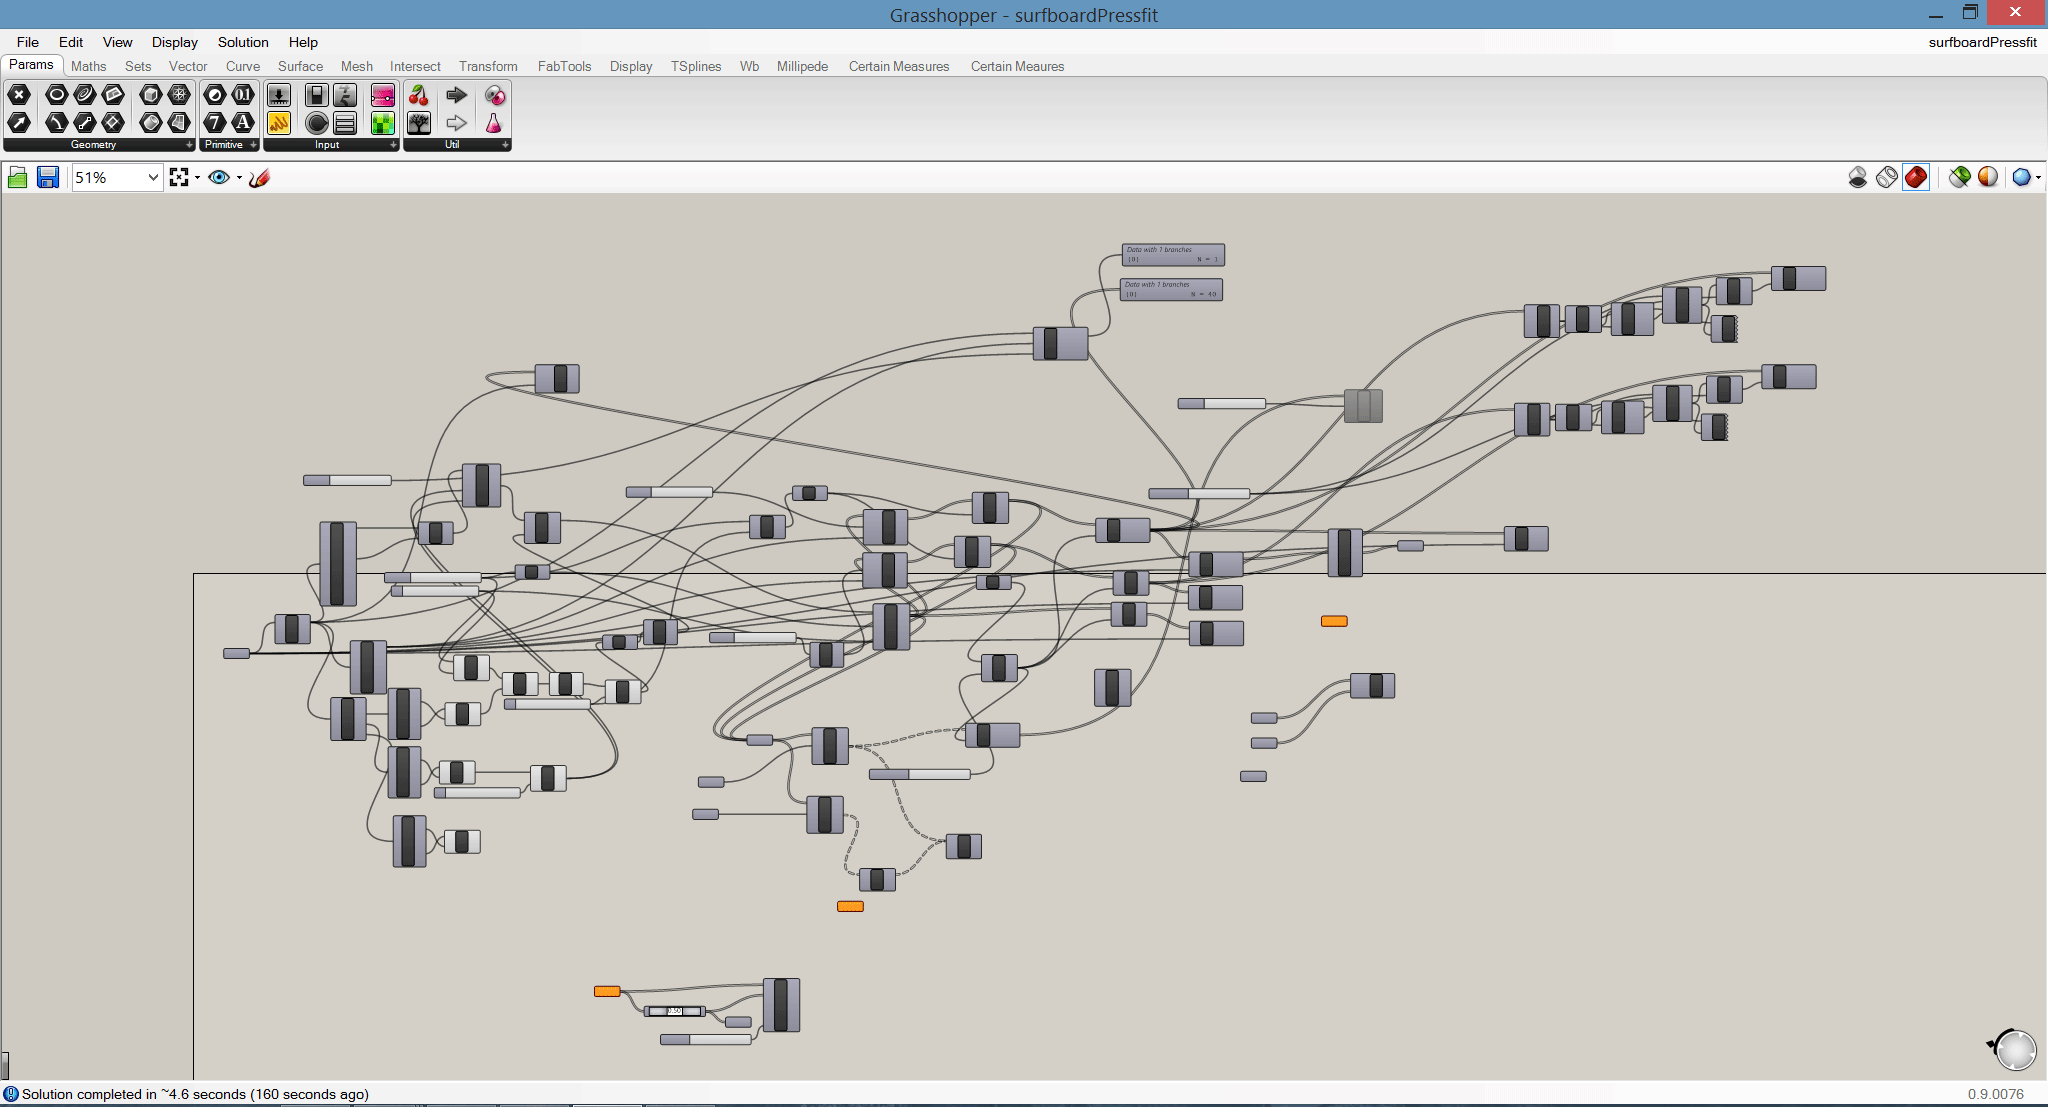
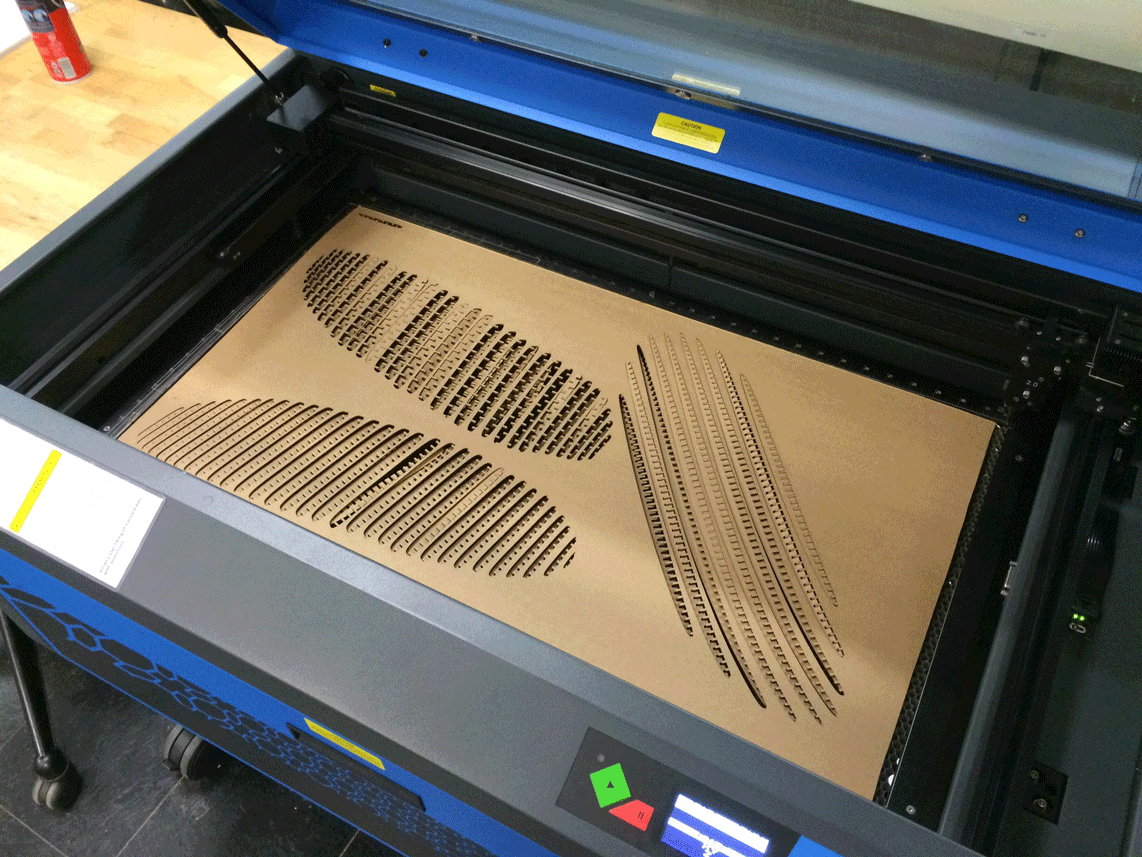
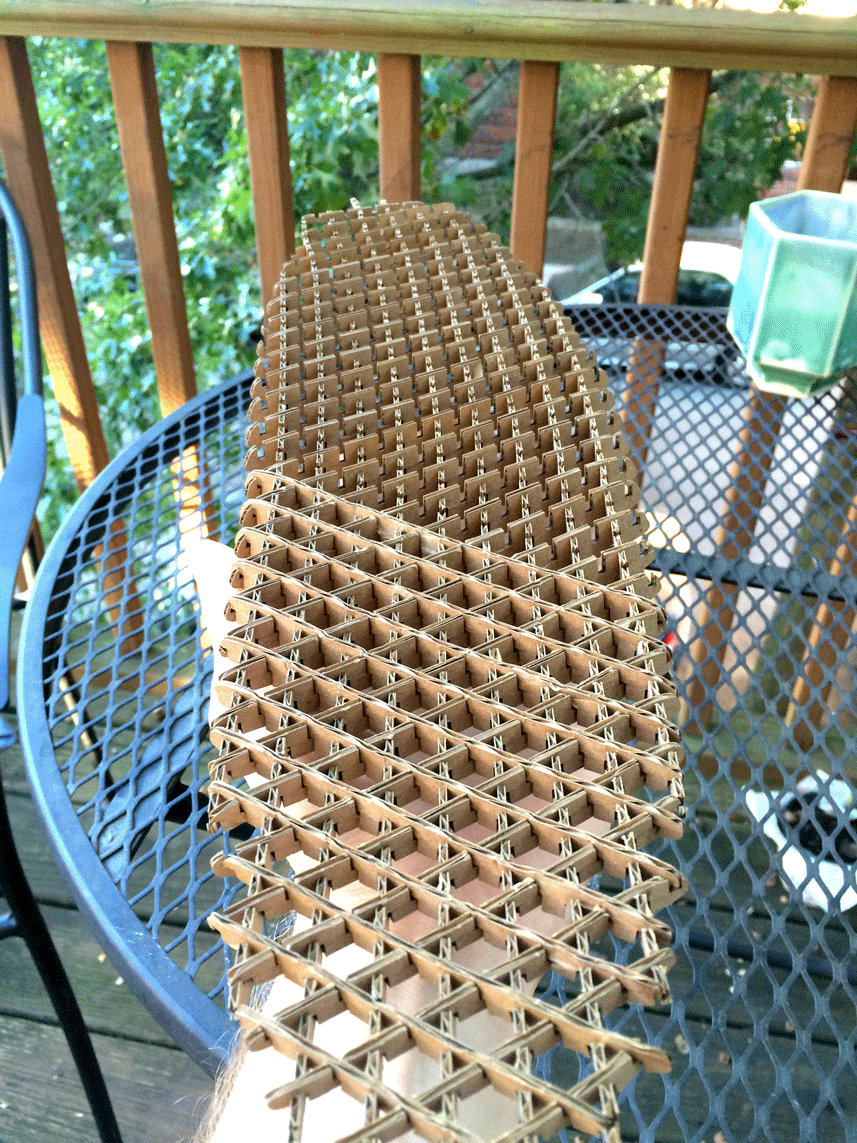
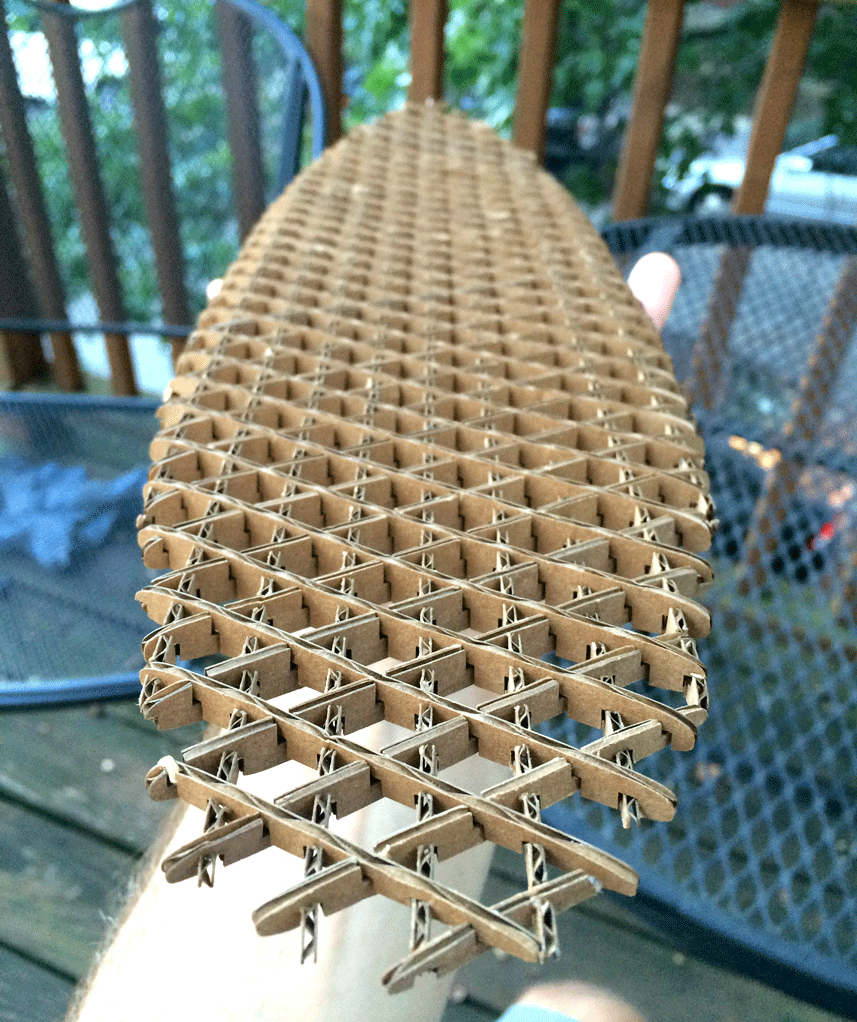
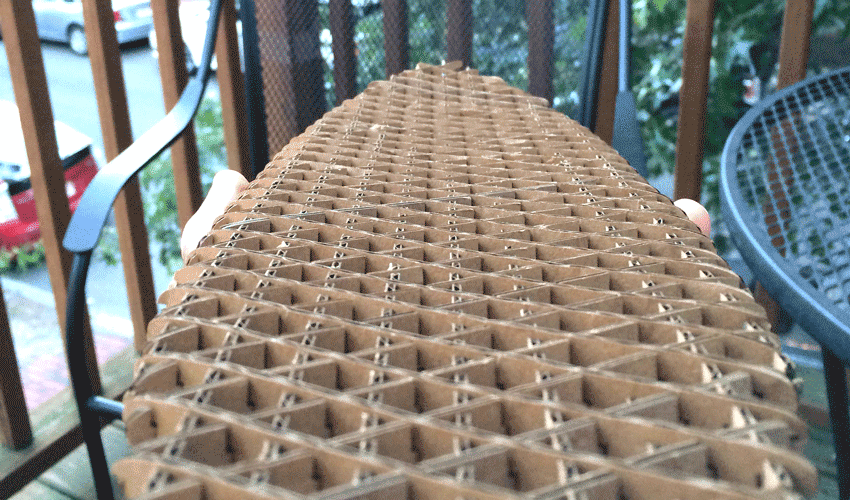
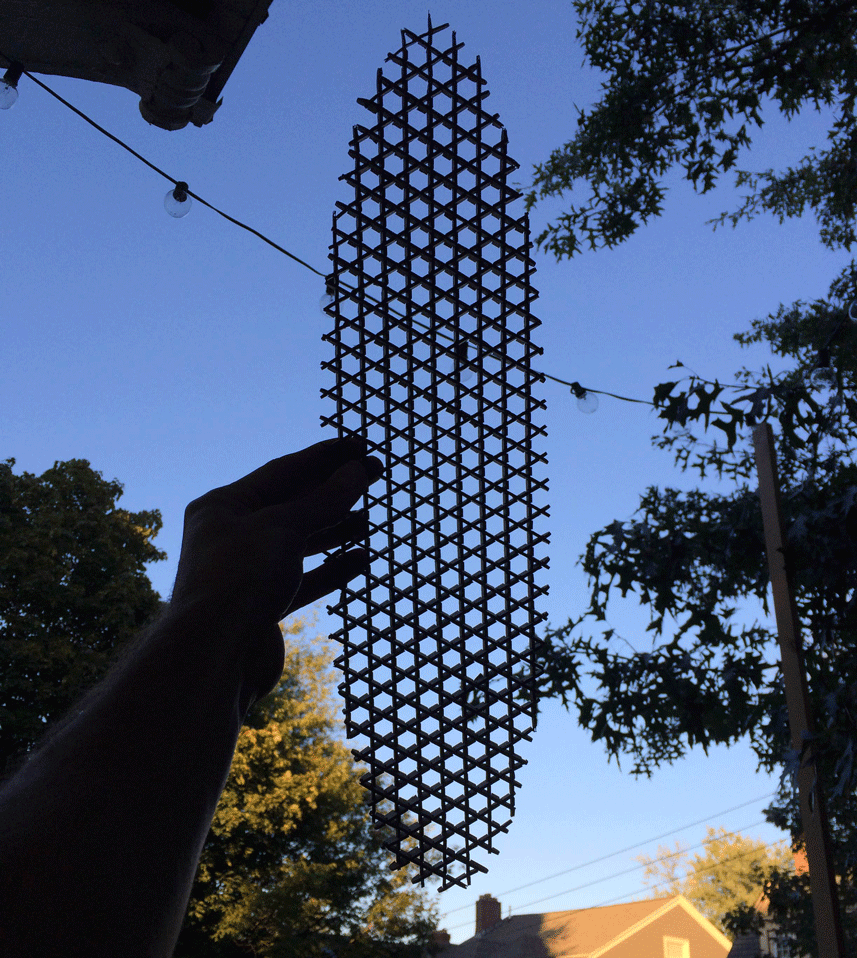
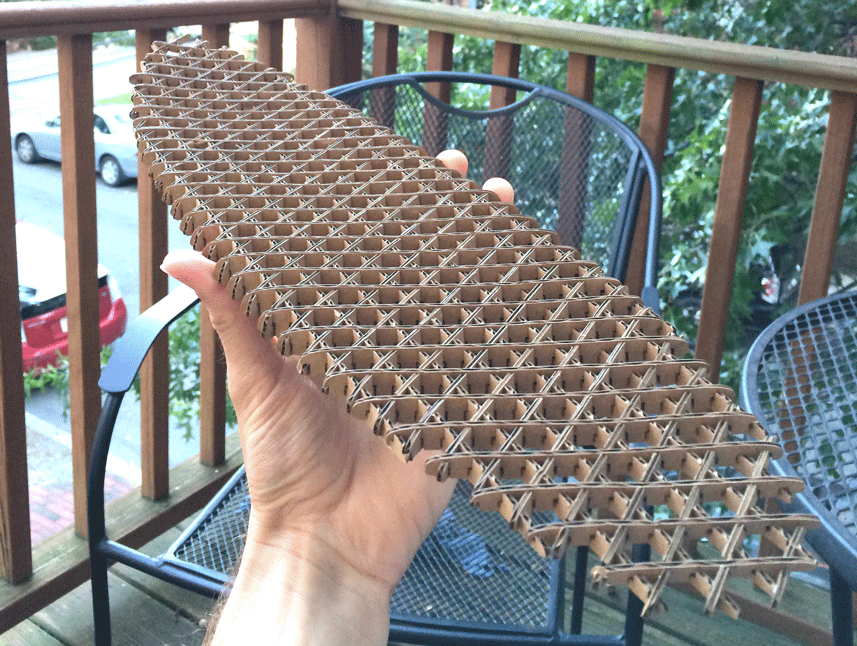
For this assignment, I wanted to continue along the lines of my idea from last week to design and fabricate a surfboard. I opted to use 1/16th inch cardboard so that I could produce a 1/4" scale model of a full size board. The eggcrate pattern that was produced is considered a quarter-iso grid, which has been used before to make cardboard surfboards, furniture, and baskets. My process involved taking scan of my surfboard using 123d Catch and then reverse engineering the shape using T-Splines within Rhino. After generating a closed polysurface I was able to use Grasshopper to generate sections in the correct pattern. After creating notches, the pieces were lasercut and assembled into place. I had tried a few tolerance tests and while the differences were very slight, I chose to err on the side of a tight fit. The assembly was very difficult at first while trying to slot in the ribs with one hand while holding sever others in place with the other hand. After the long stringer ribs where all connected with about 5 diagonal ribs in both directions, the assembly picked up pace, but required a fair amount of massaging. It was necessary to lead with one set of diagonal ribs which needed to be set before the alternate direction would slot in and lock the pattern into shape. This caused the form of the model to warp to one side, but it was very satisfying to slowly watch the shape come back into proper form as the alternate set of ribs were placed. This quarter iso-grid pattern is very useful to prevent the racking that would occur with using a traditional 2-dimensional eggrate. The scale surfboard is surprisingly rigid and this excercise has given me confidence that this could be repeated at full scale with success.


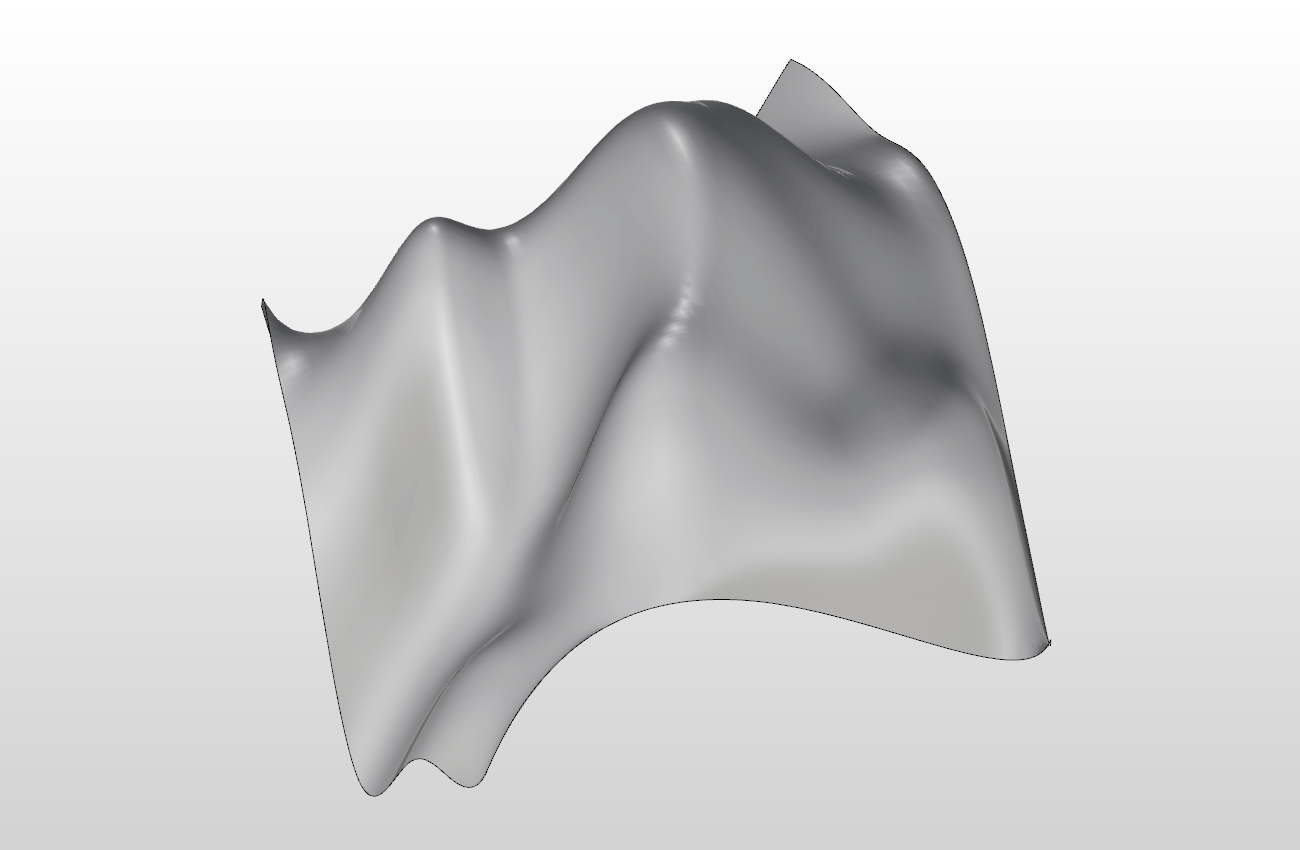
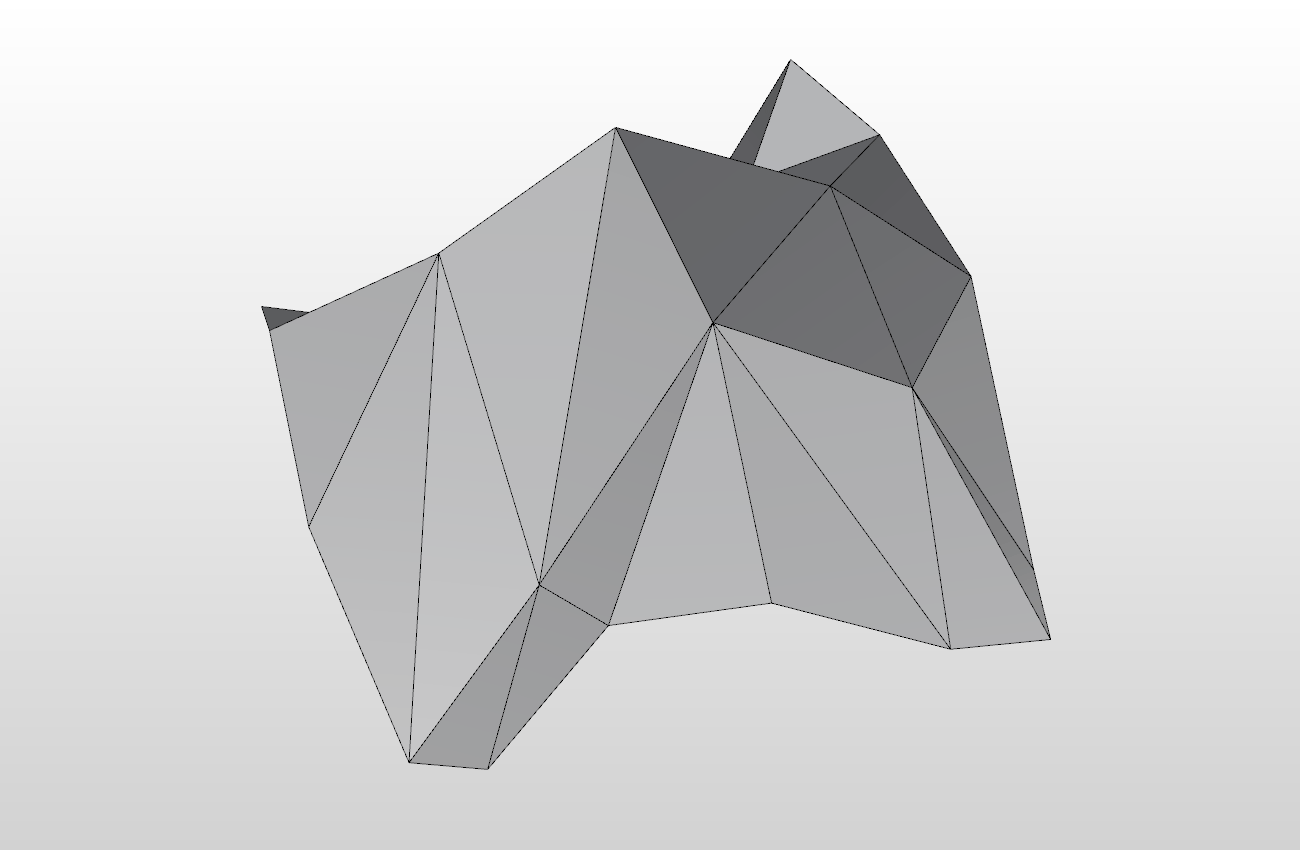
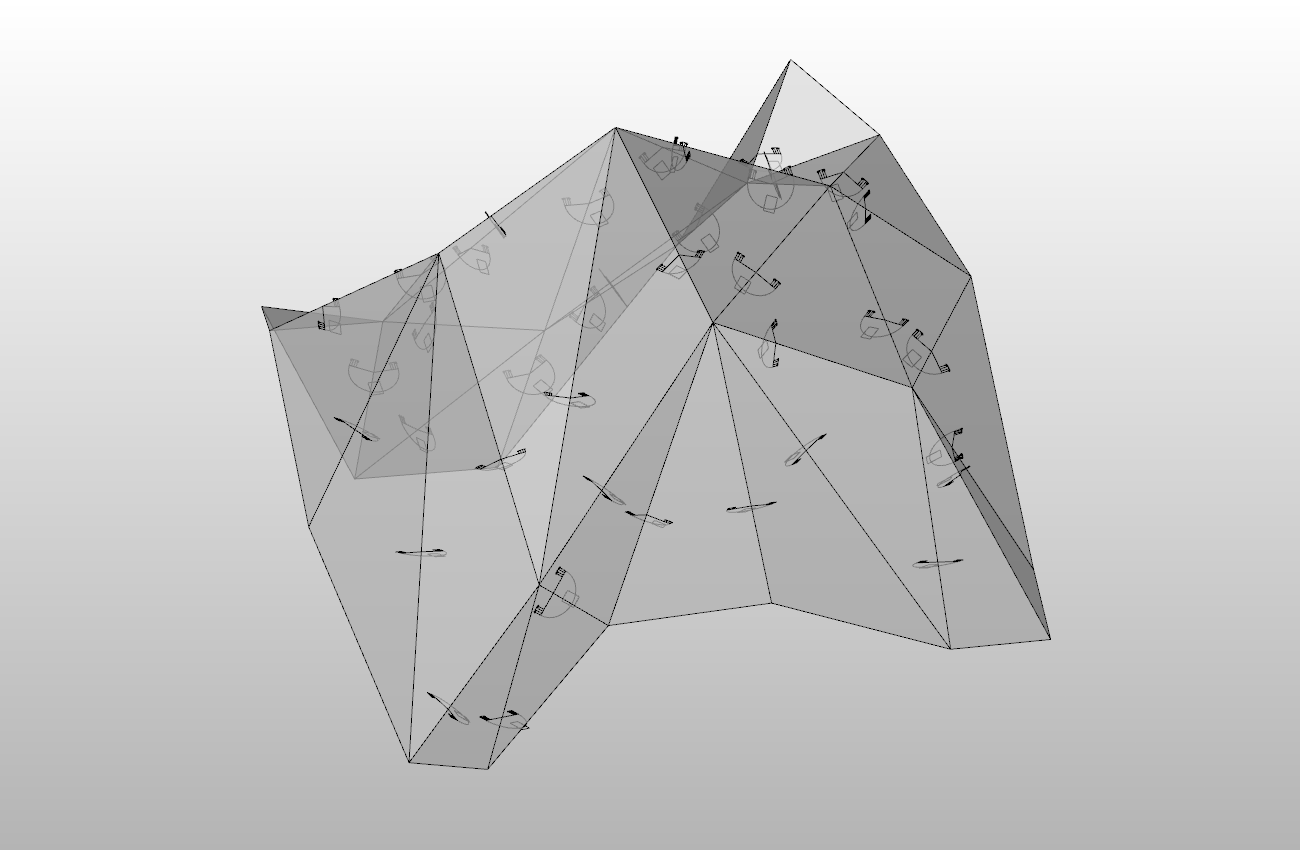
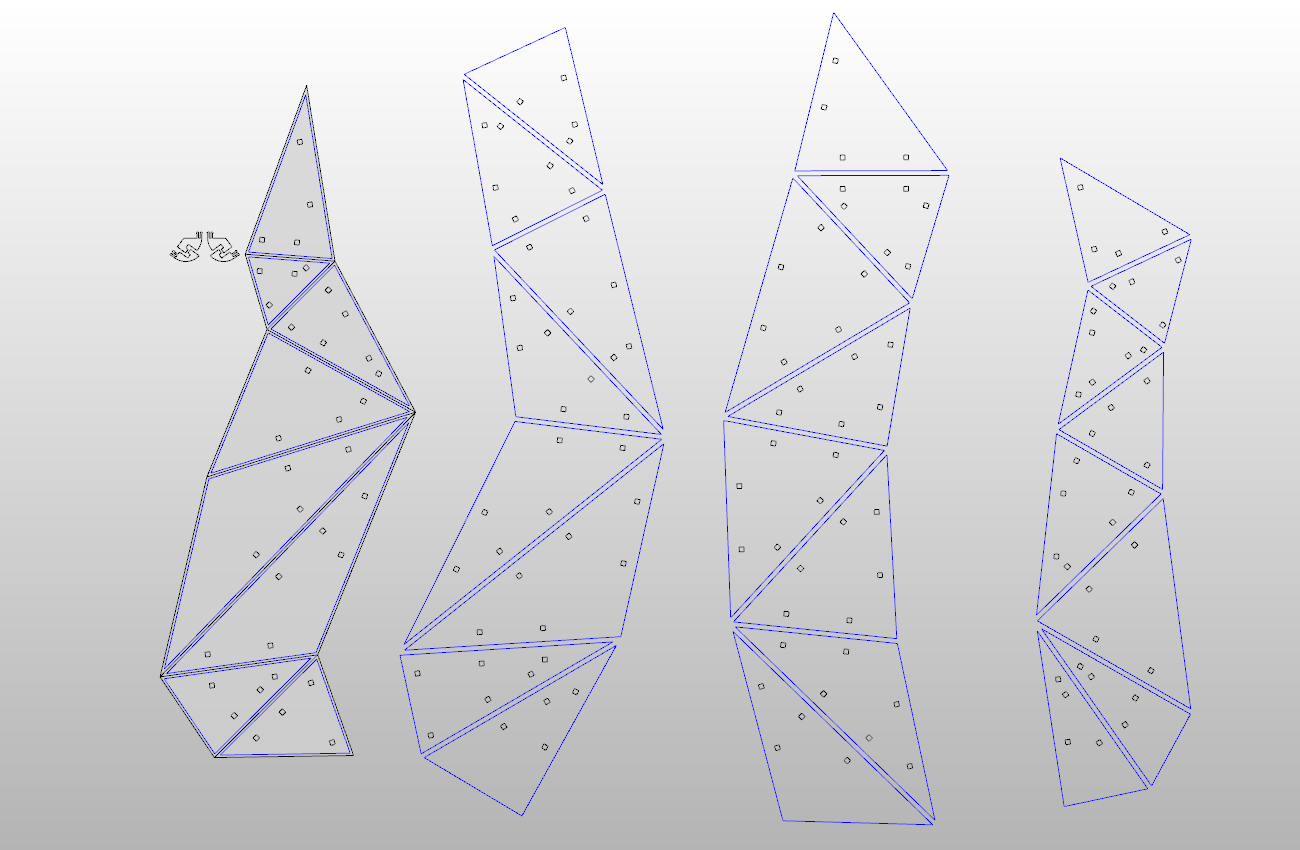
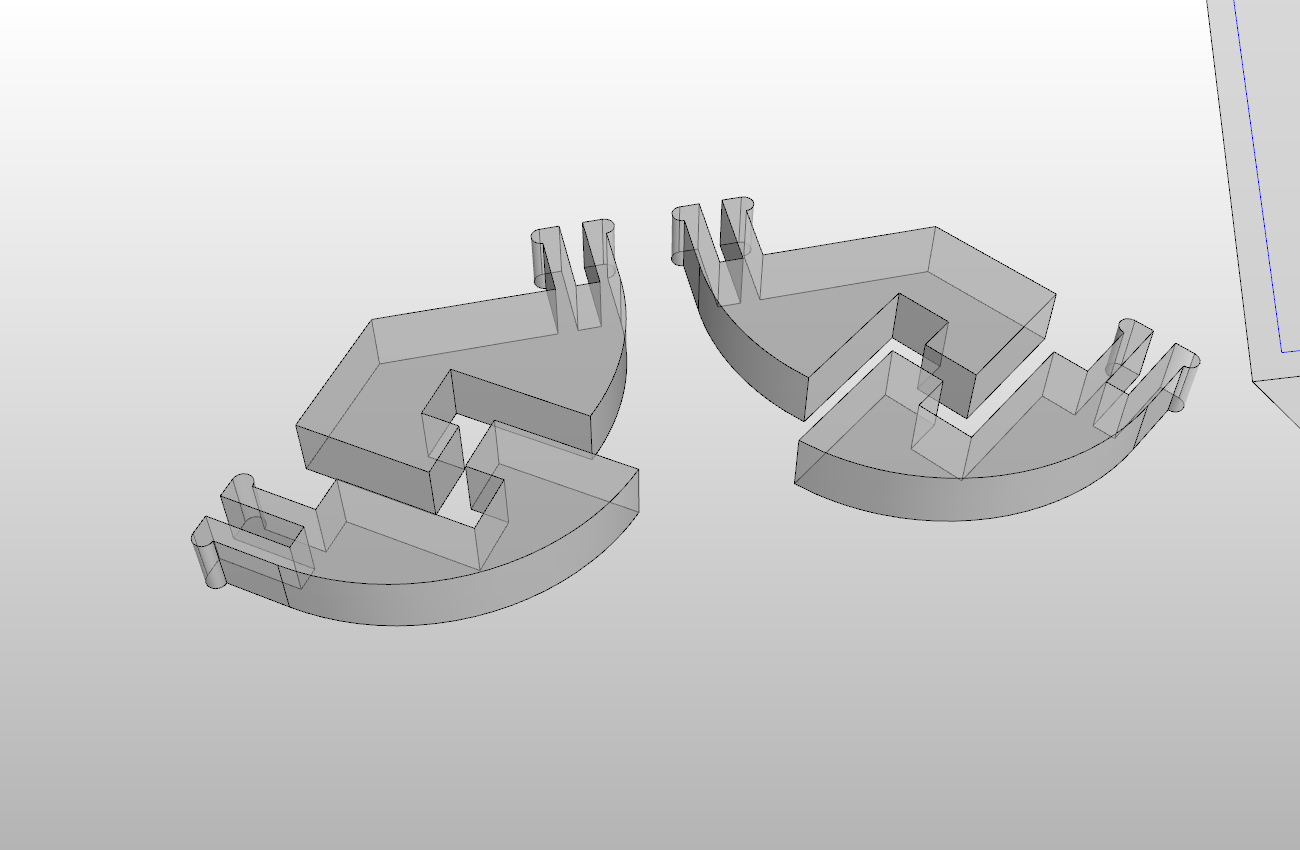
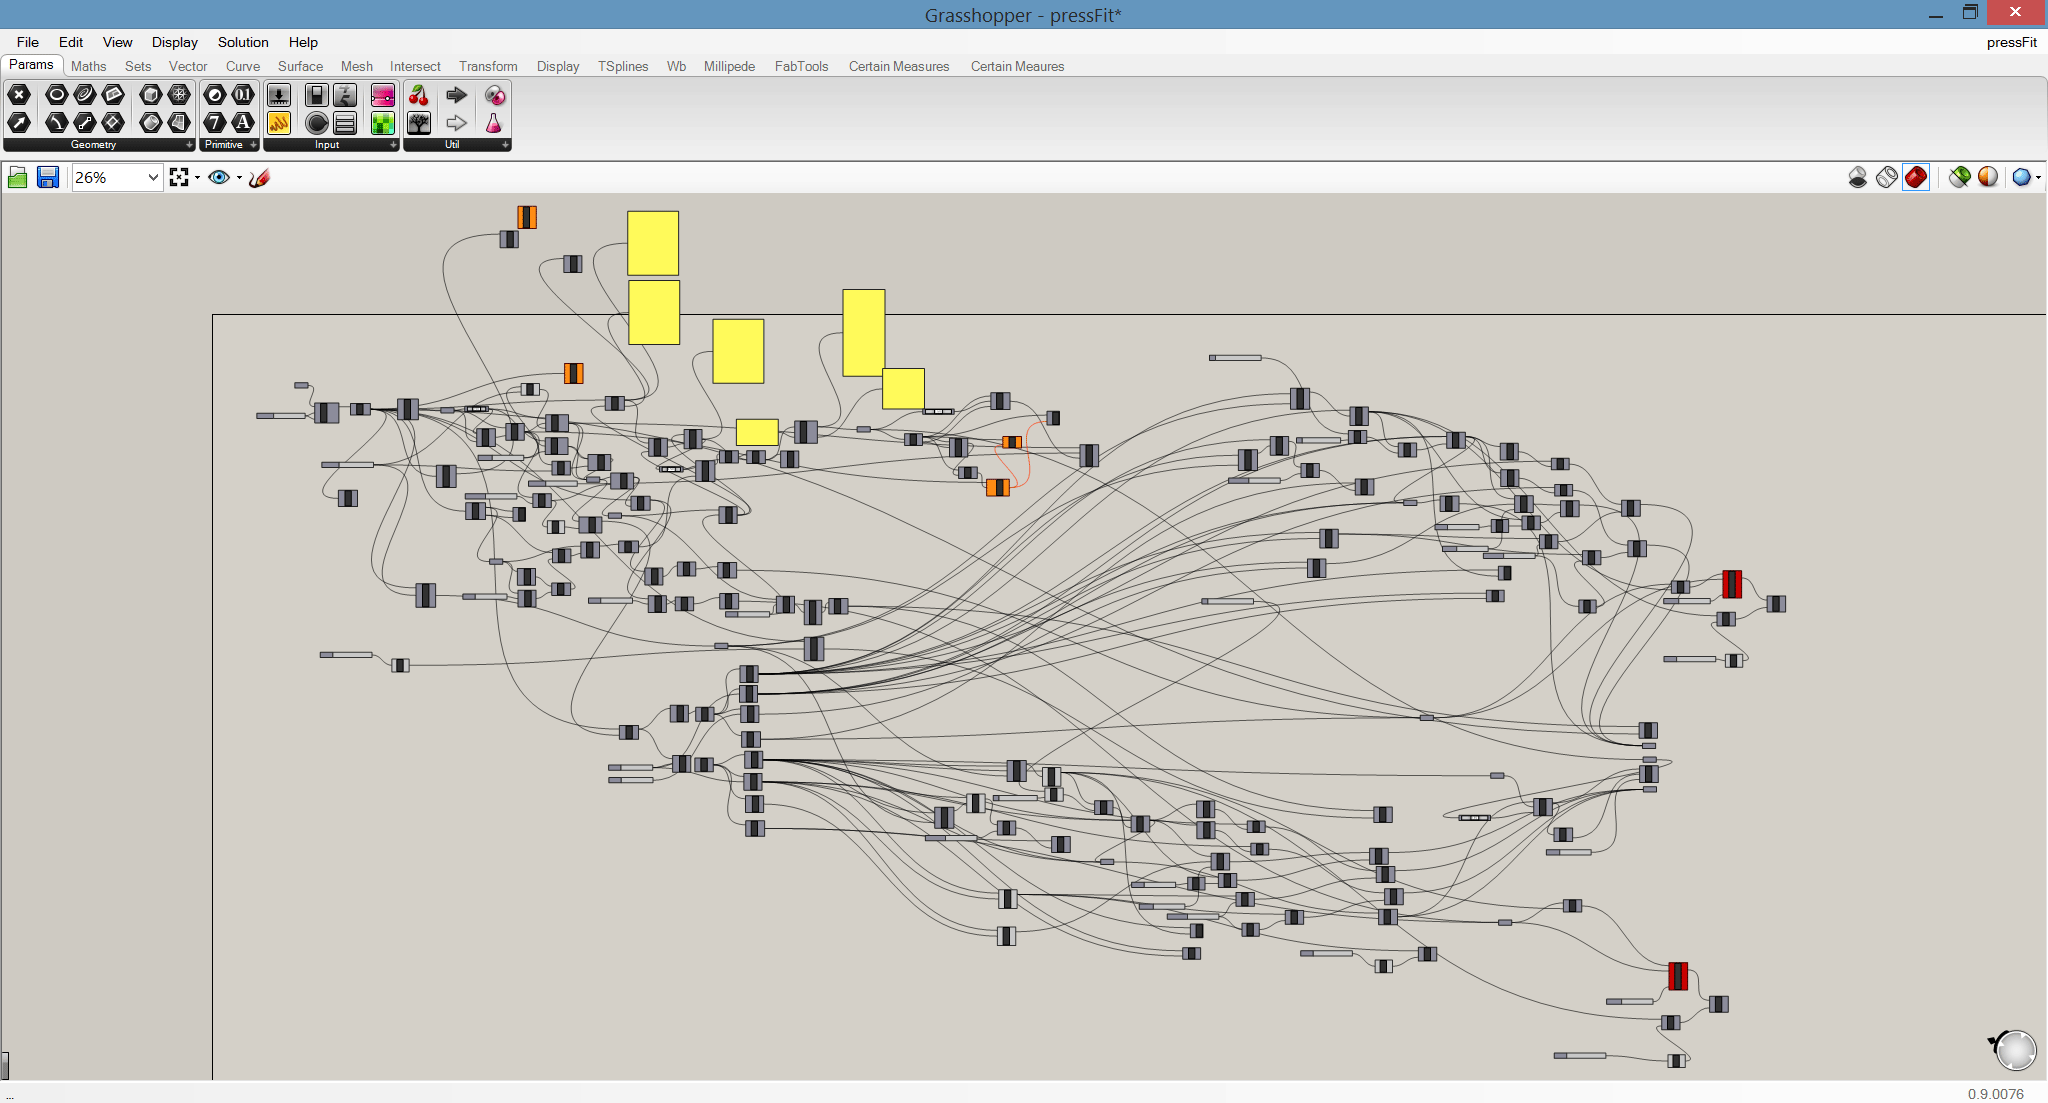
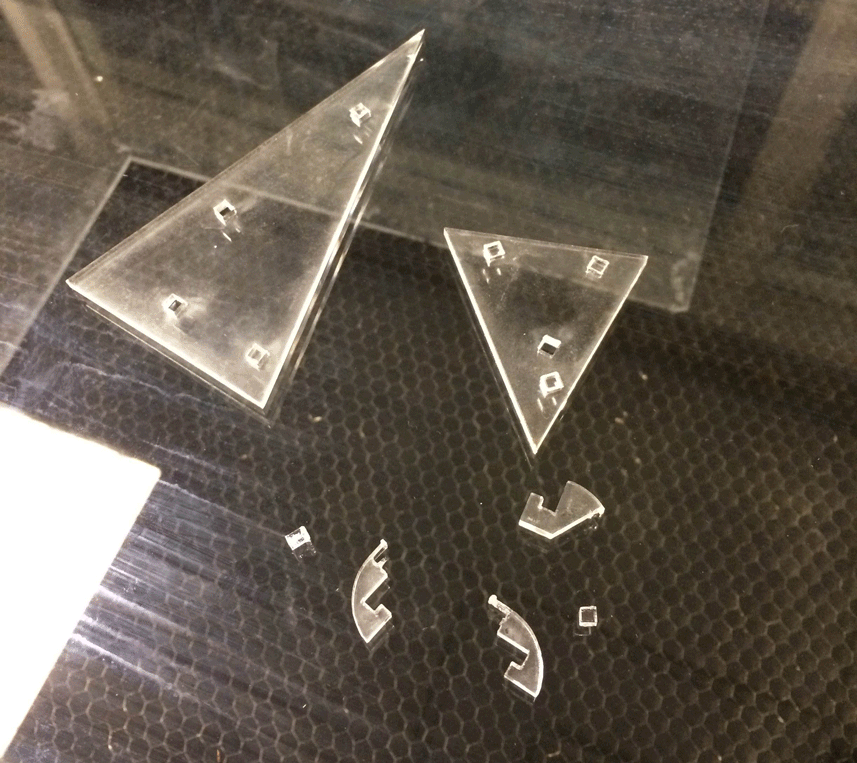
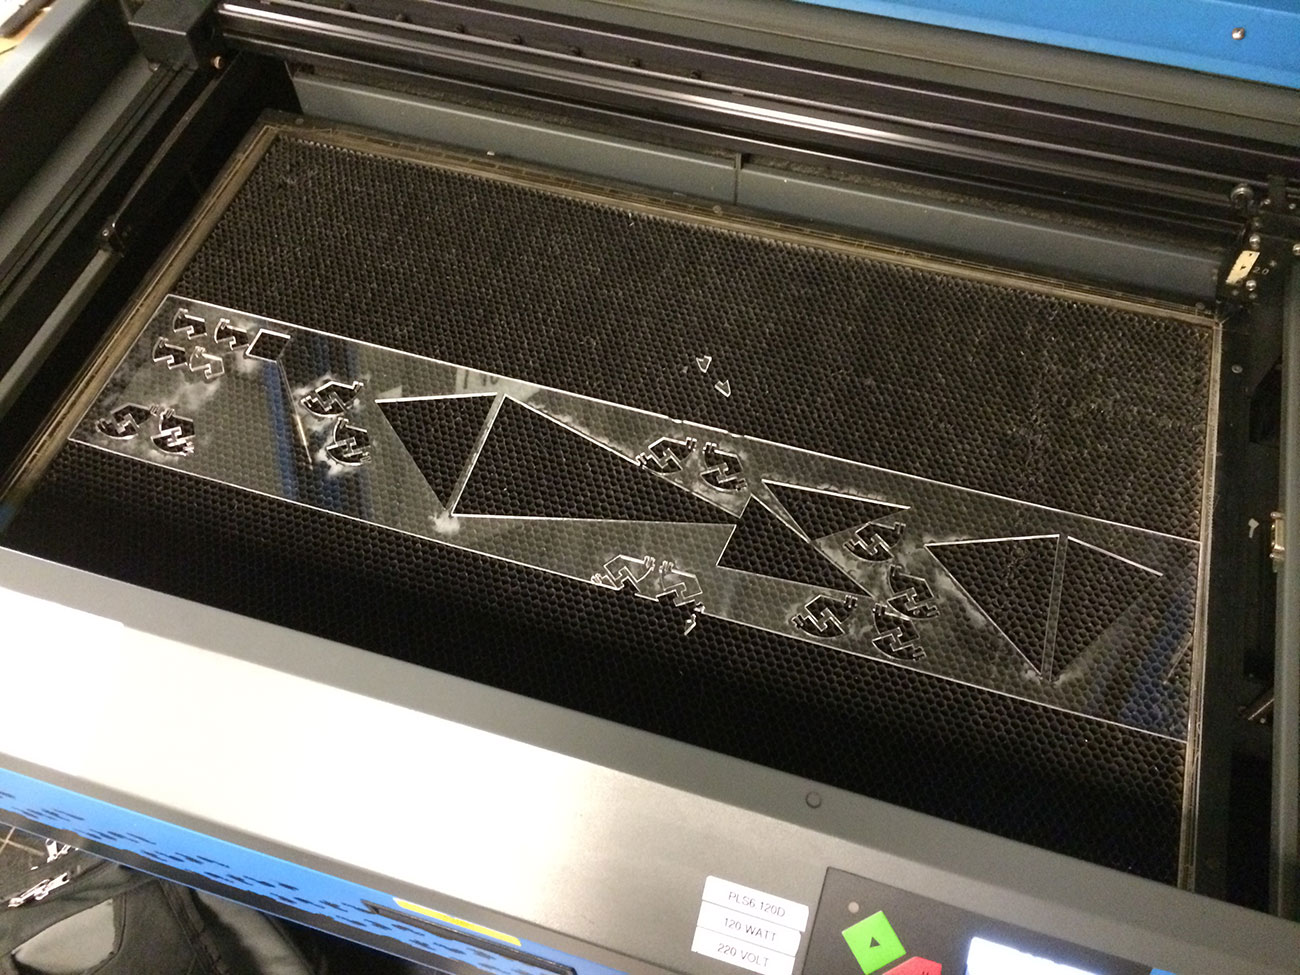
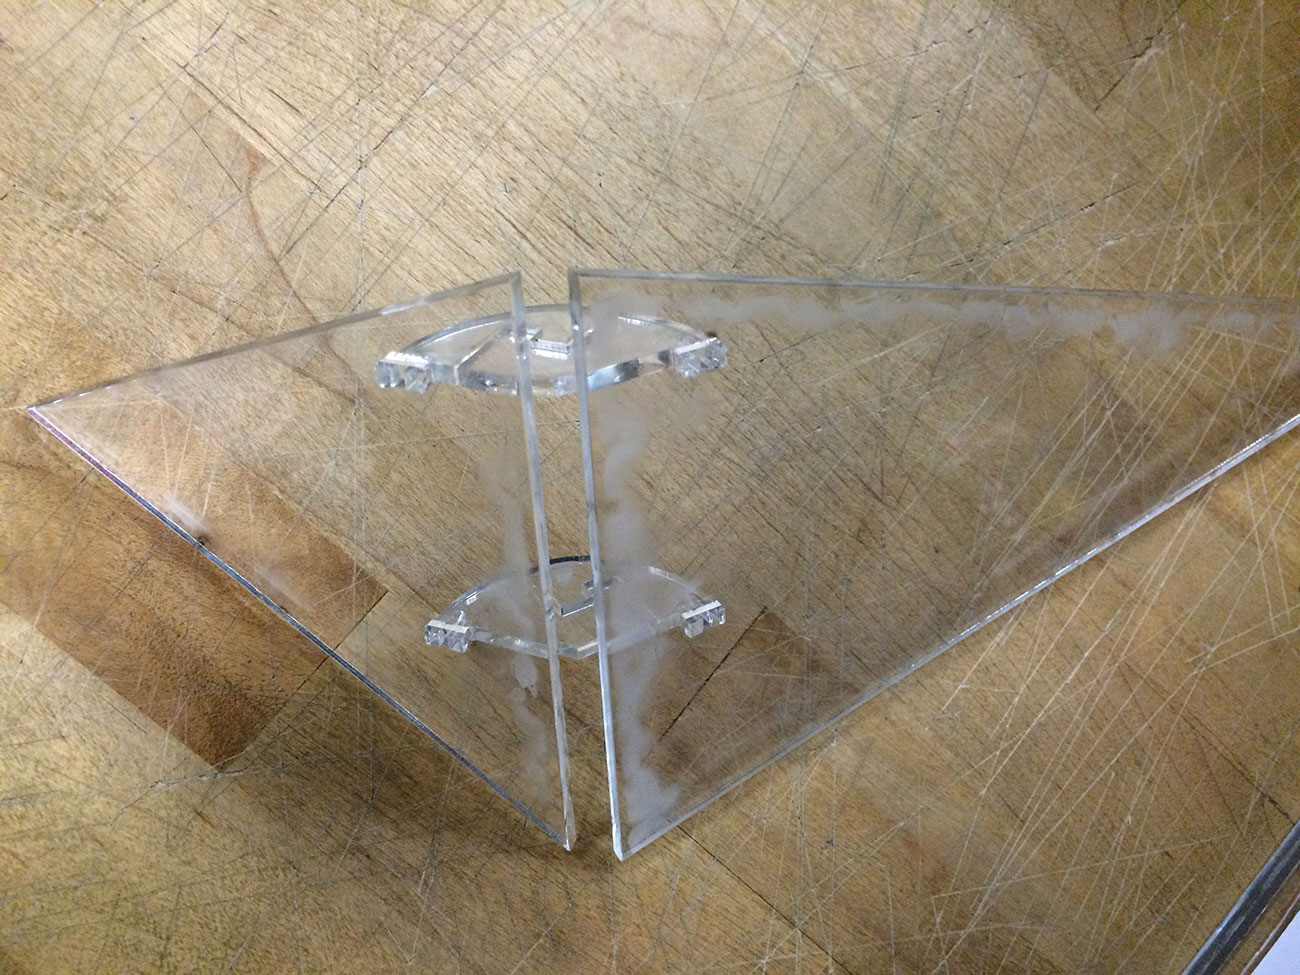
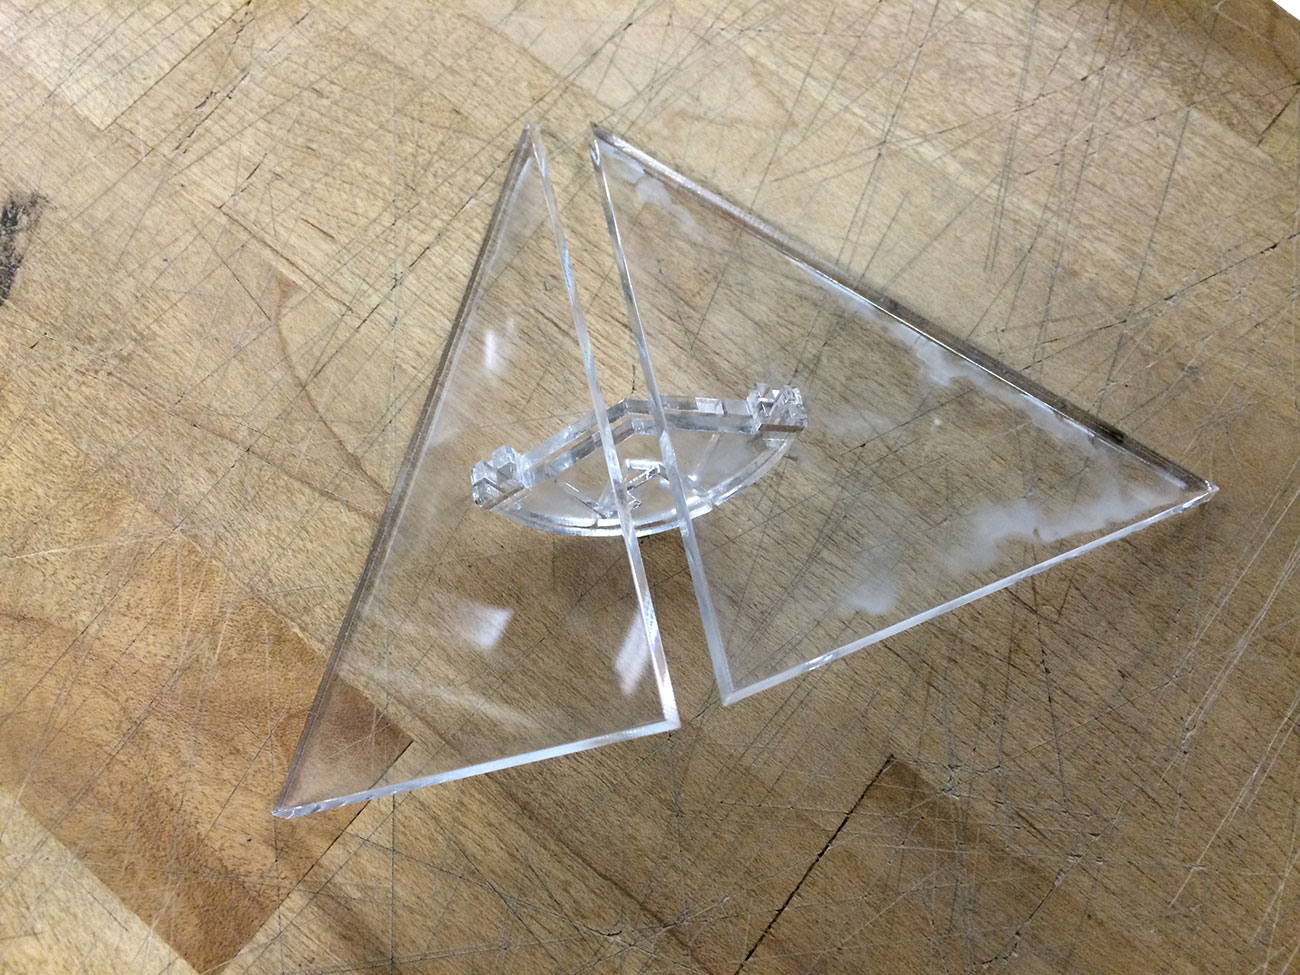
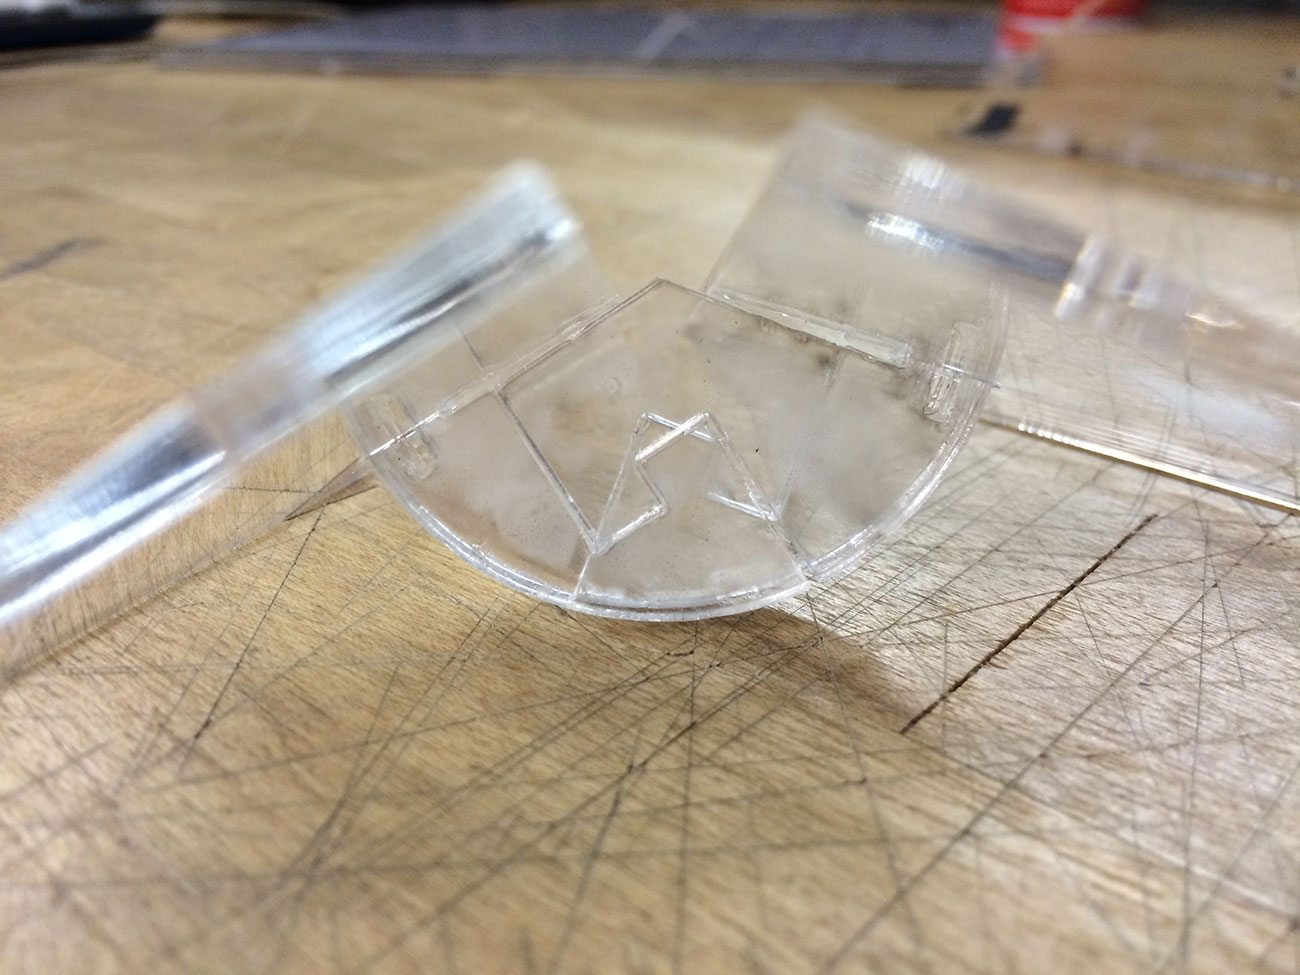
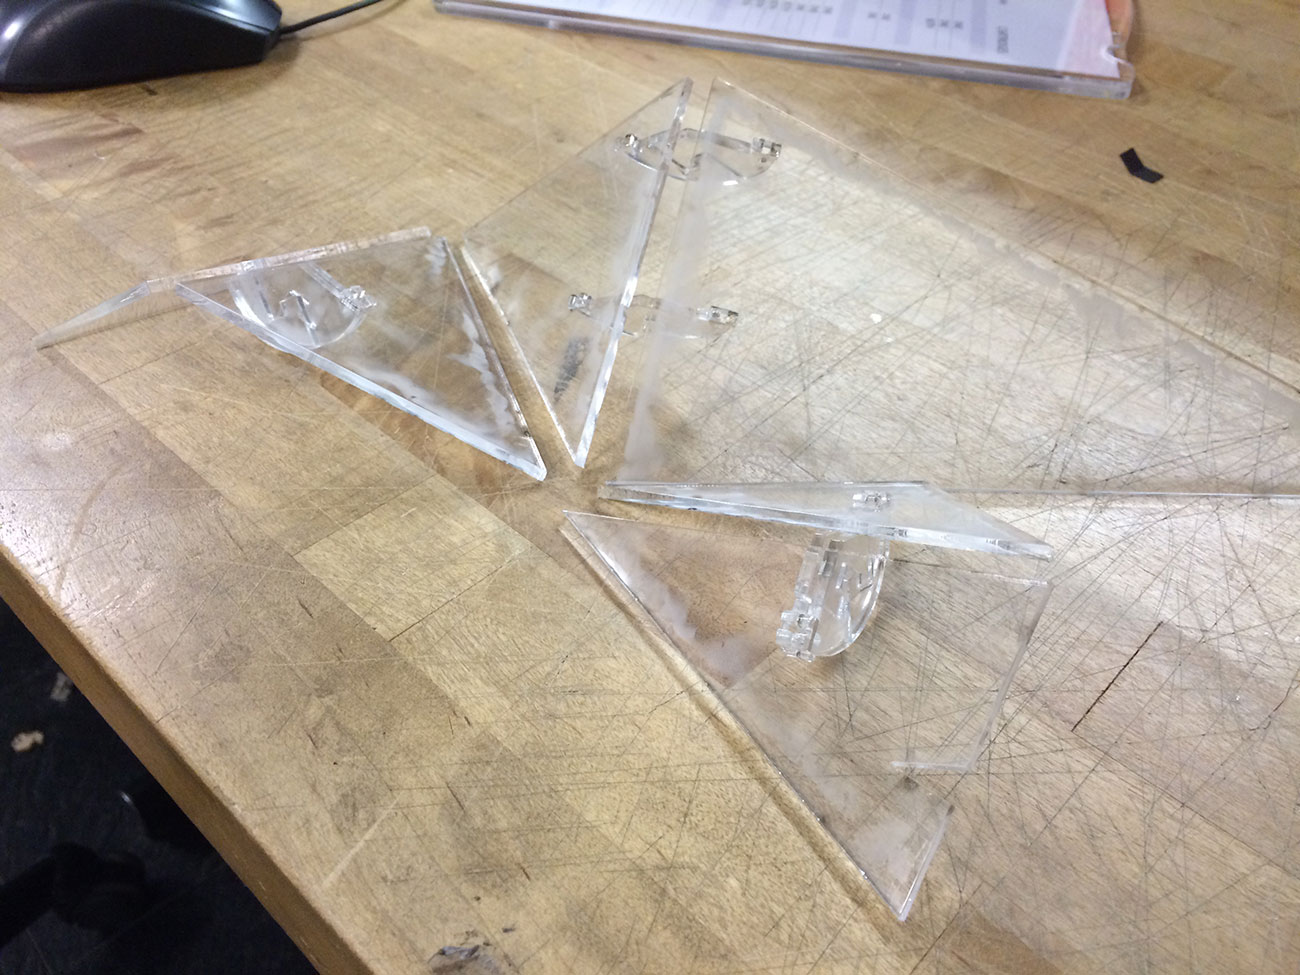
I was also interested in creating a faceted acrylic lamp. I started my design in Rhino with an amorphous nurbs shape which was then subdivided and converted into a triangulated mesh in Grasshopper. I then built a parametric connection detail which would have two halves, allowing for slotted assembly as the shape became more complex. The material choice was 1/8th inch acrylic, which unfortunately did not work out for my notch detail at first. The acrylic was too brittle at that dimension and snapped upon trying to press into the notch. After testing several minor variations and adding some fillets at the corner stress points, the connector detail is now able to slot into the notch. The current design is using a 4-part connection detail which allows for assembling from two different angles and prevents the respective pieces from slipping out laterally.