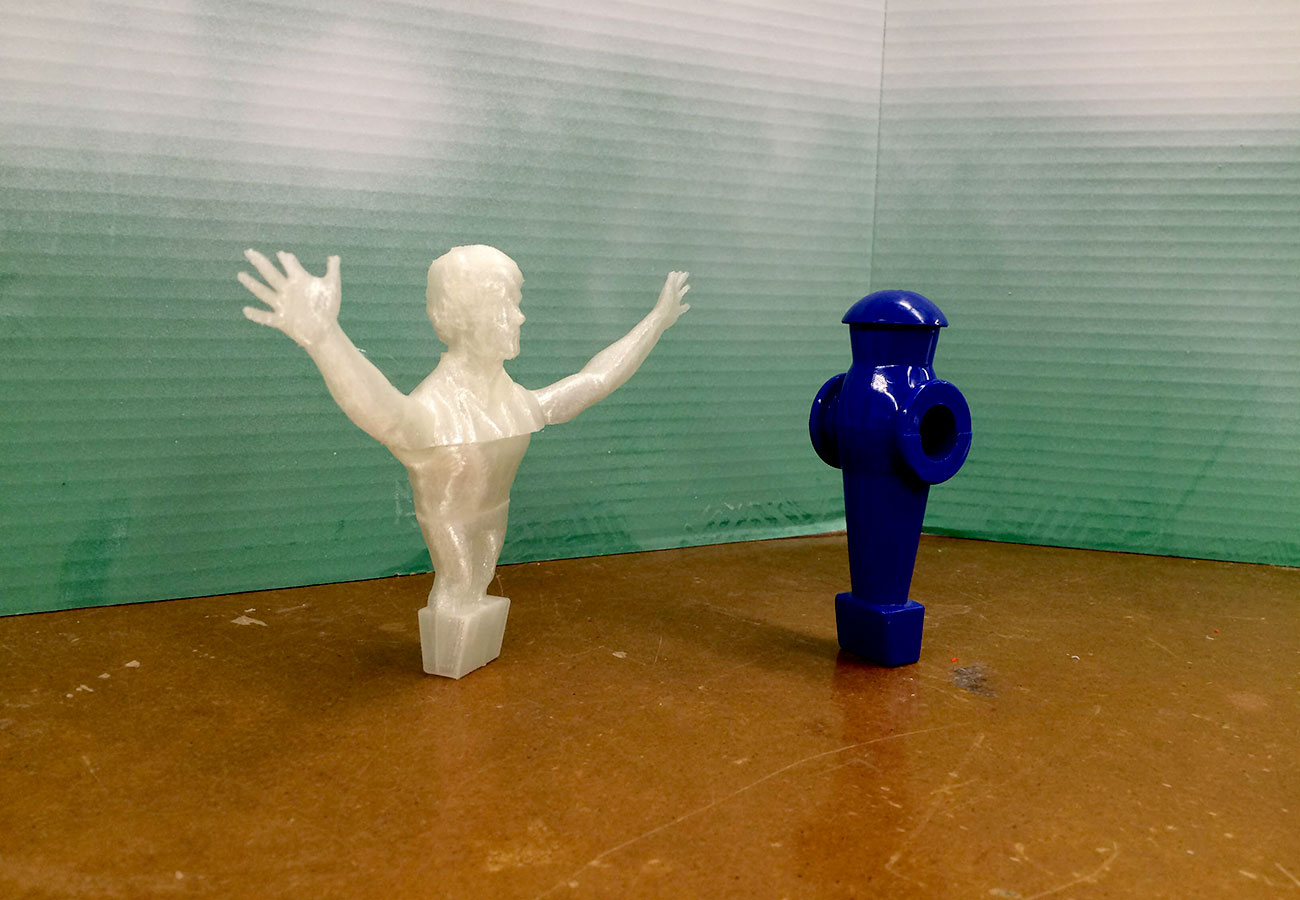
How to Make (almost) Anything
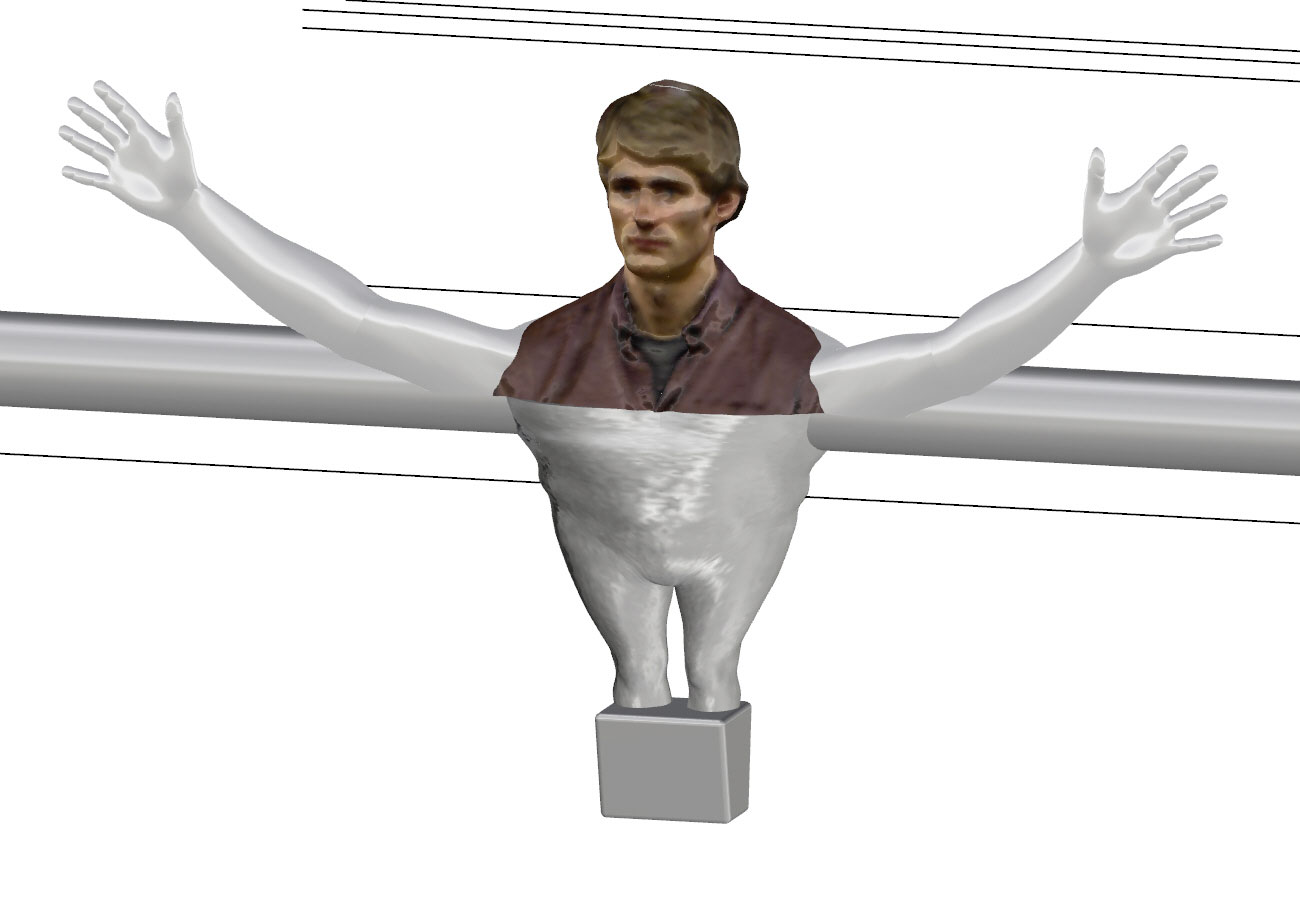
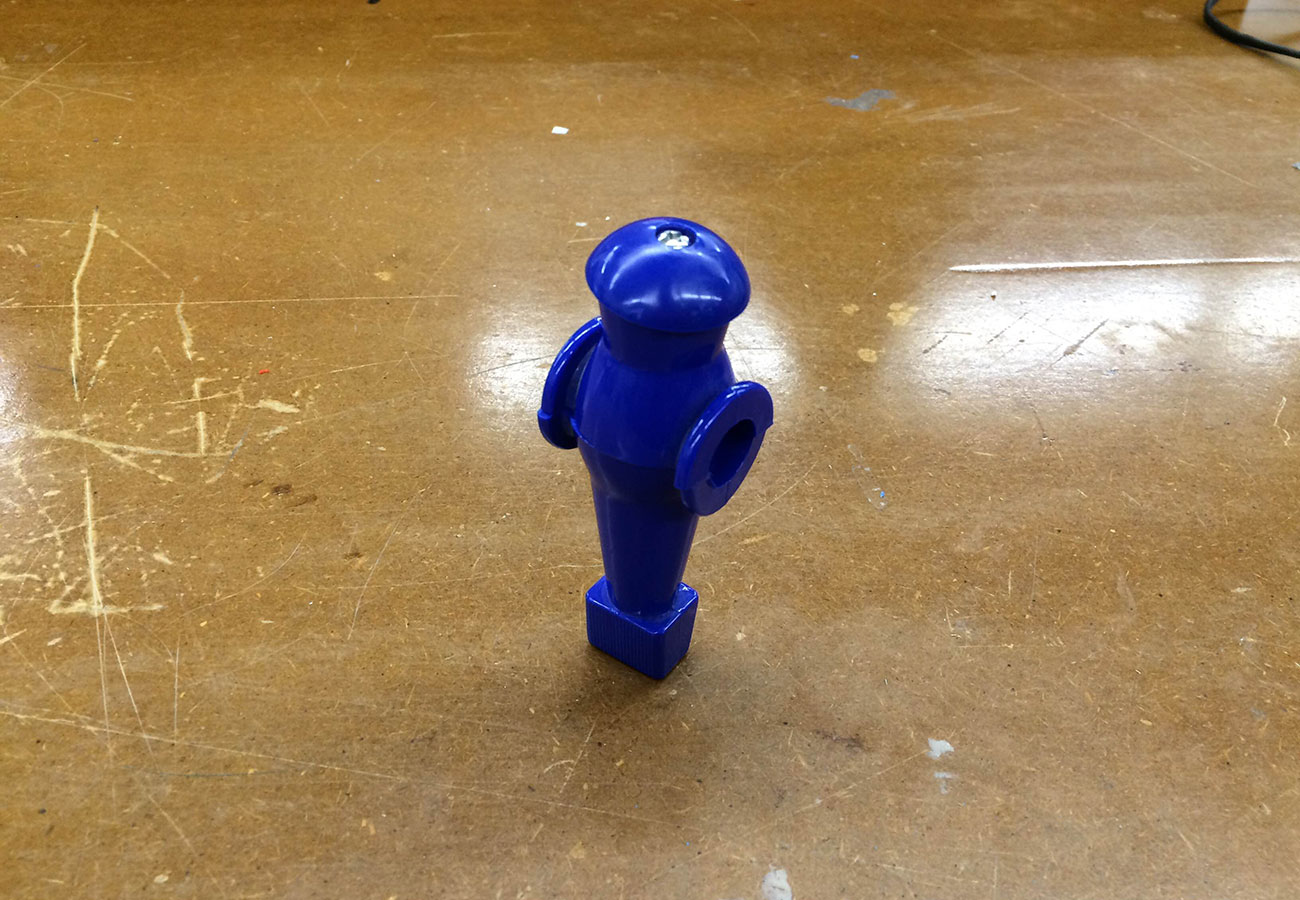
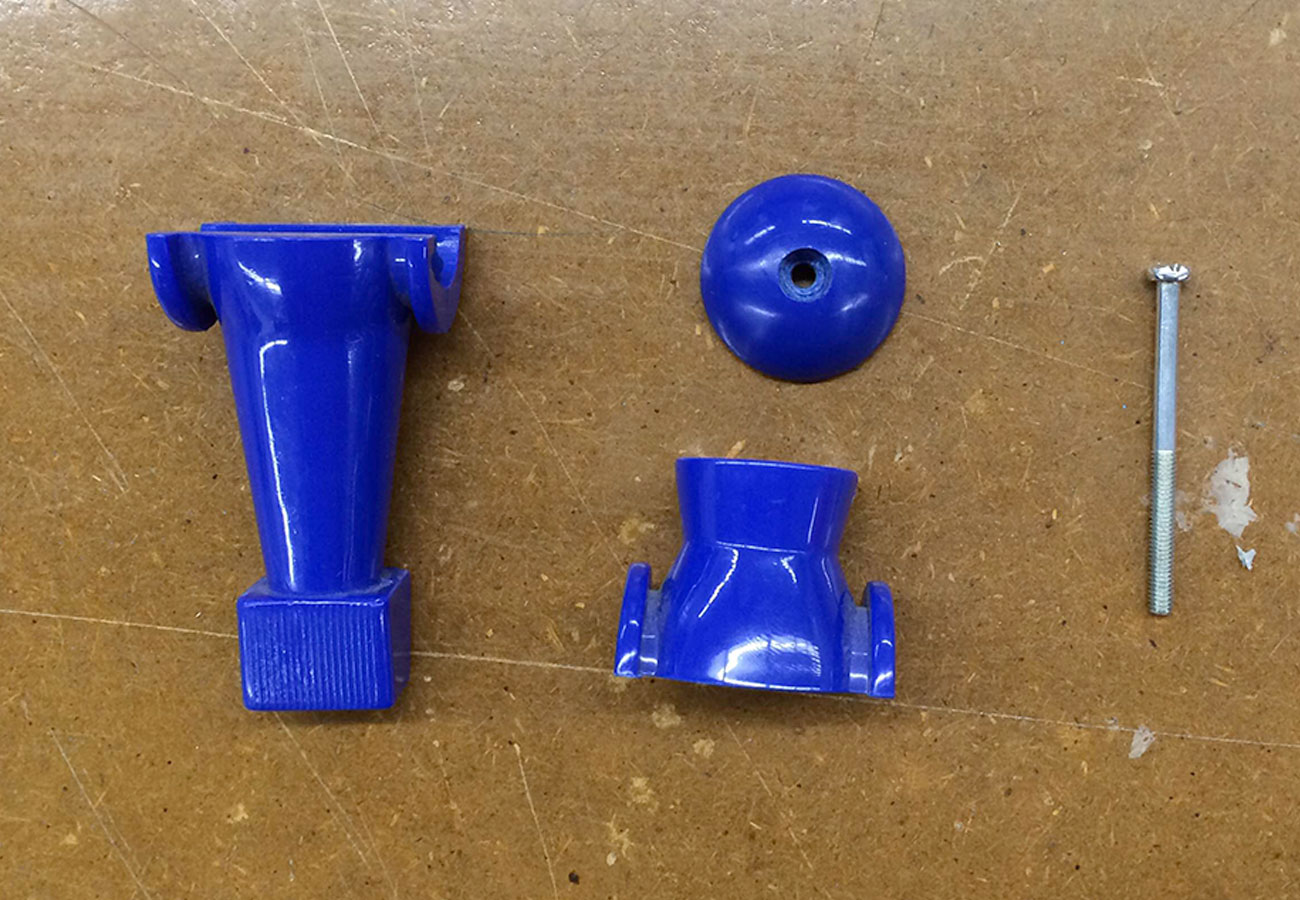
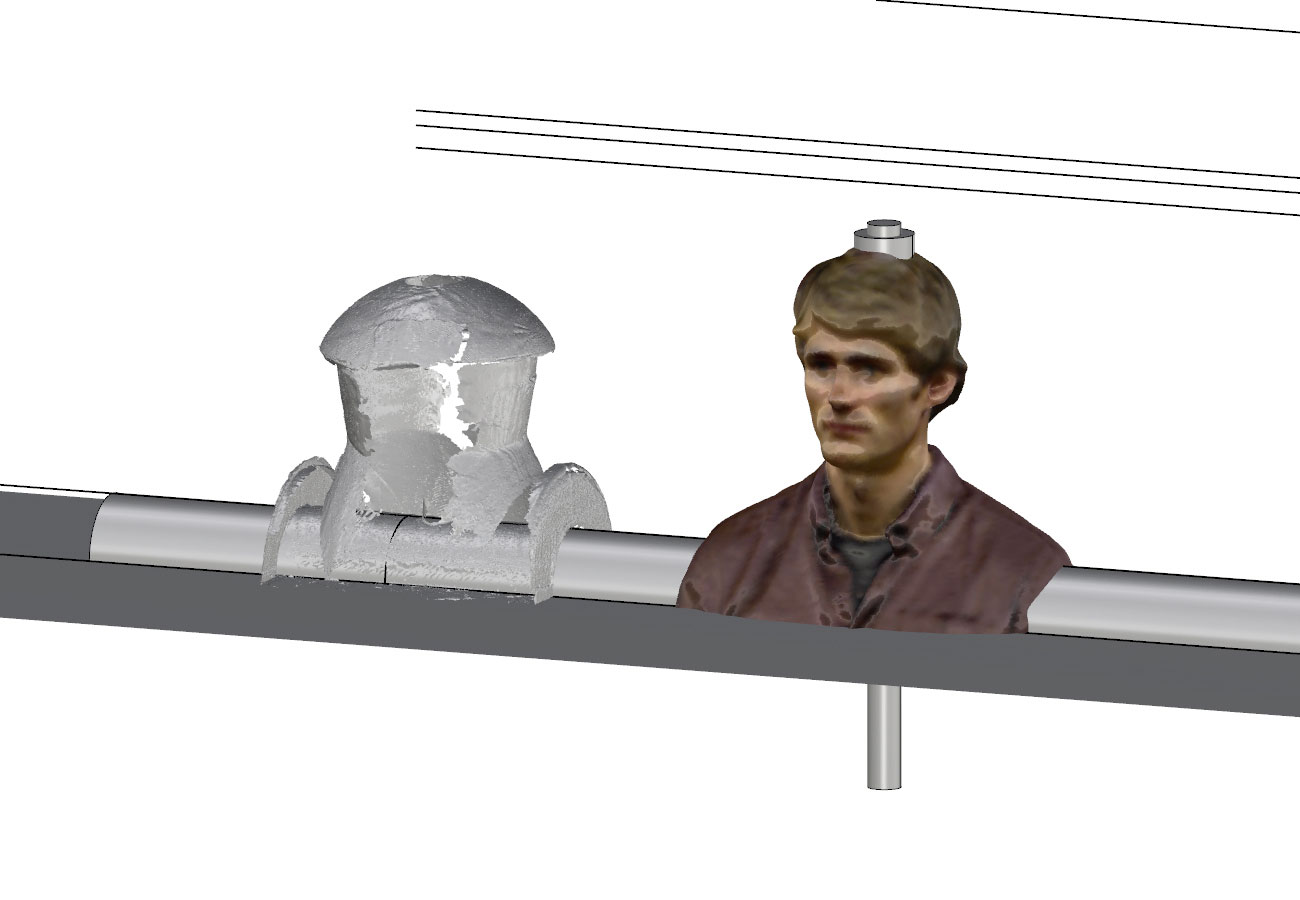
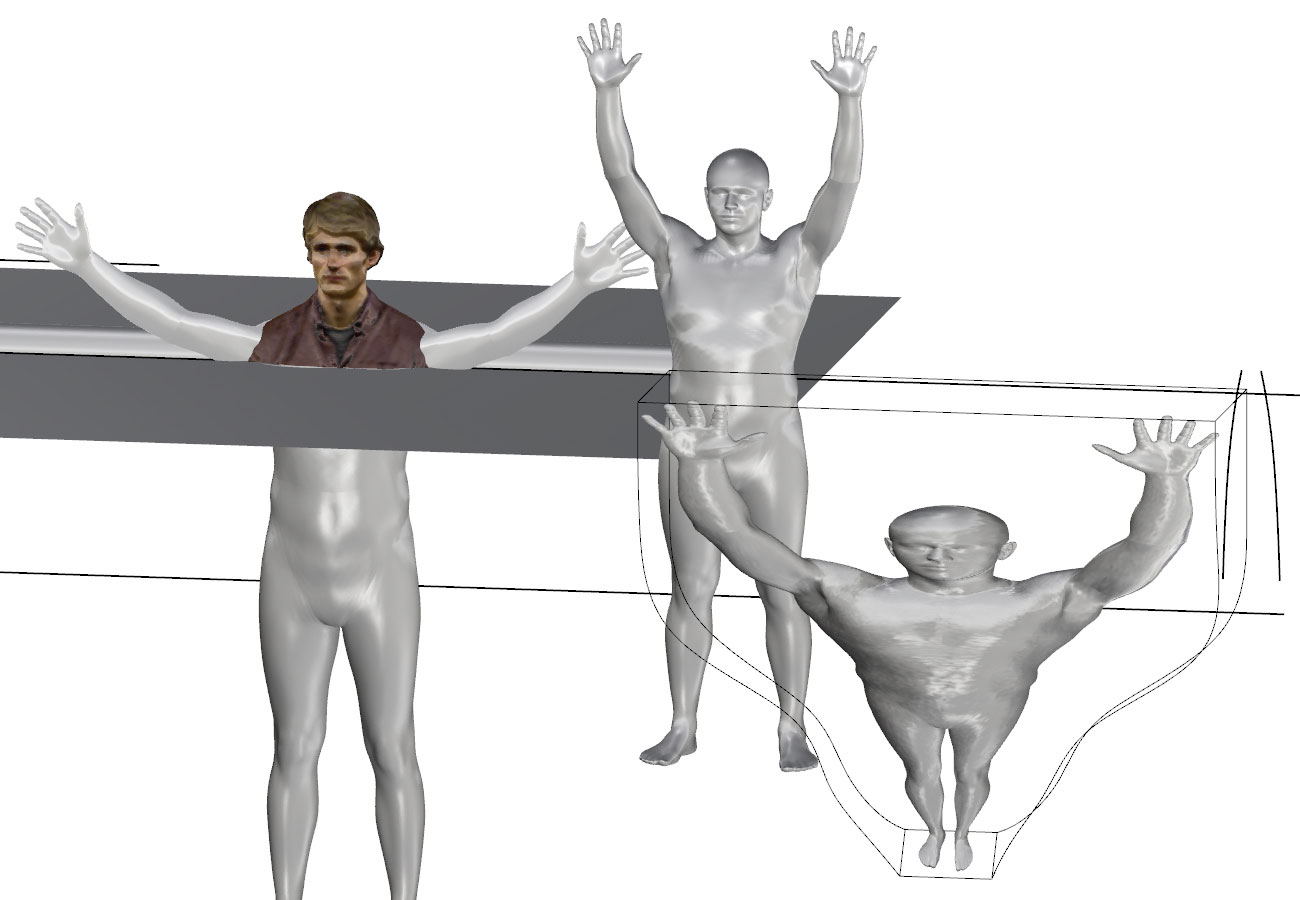
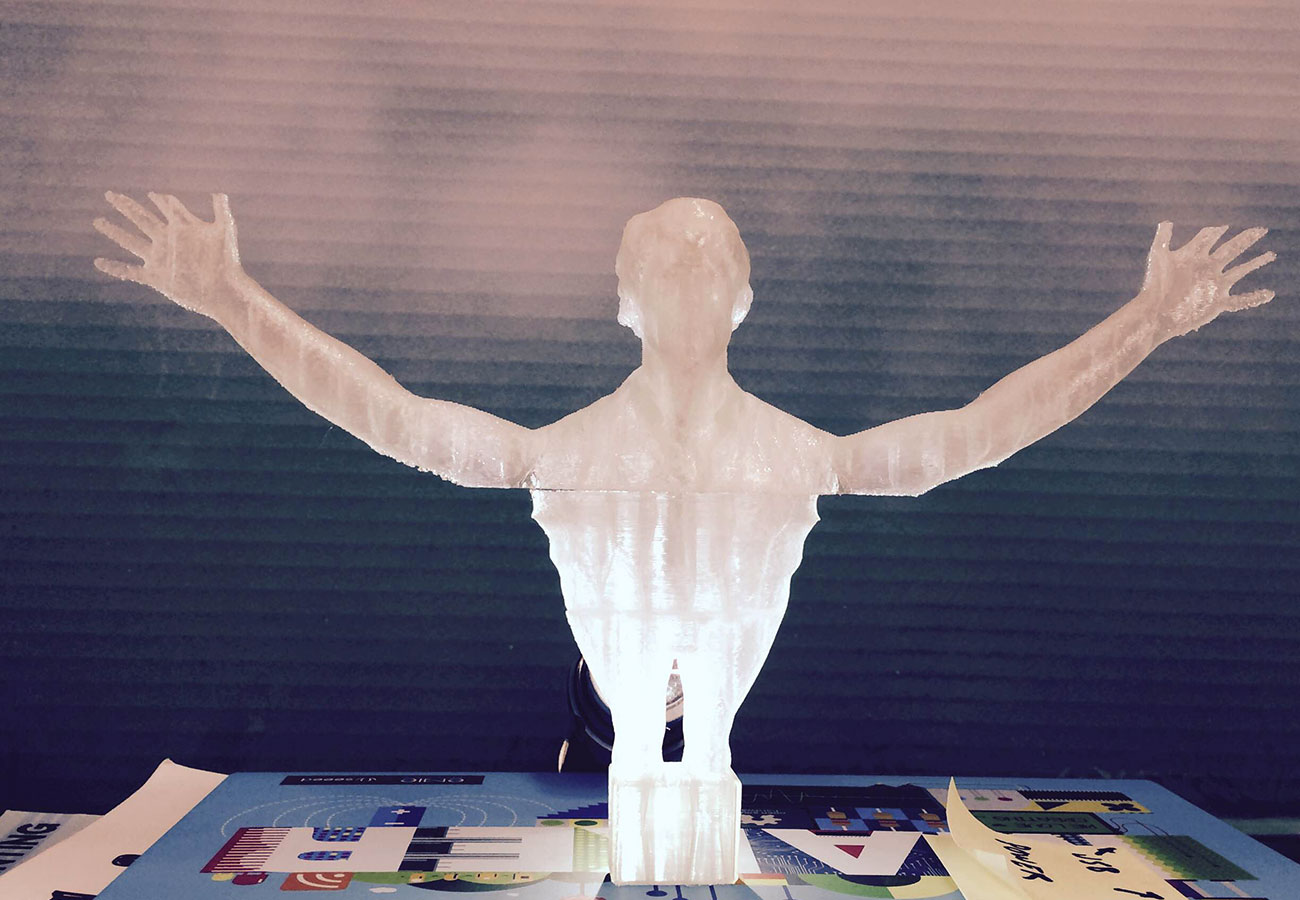
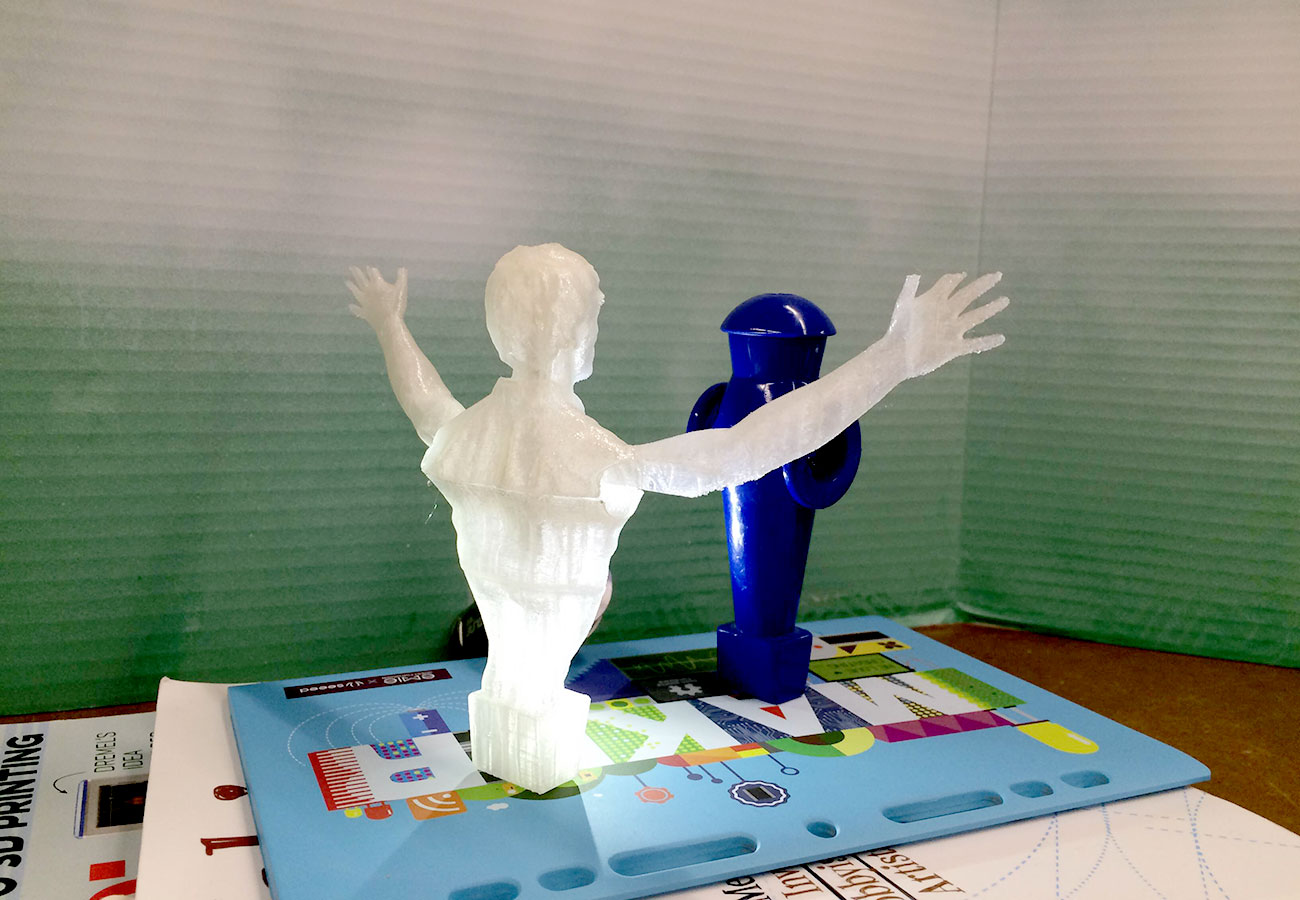
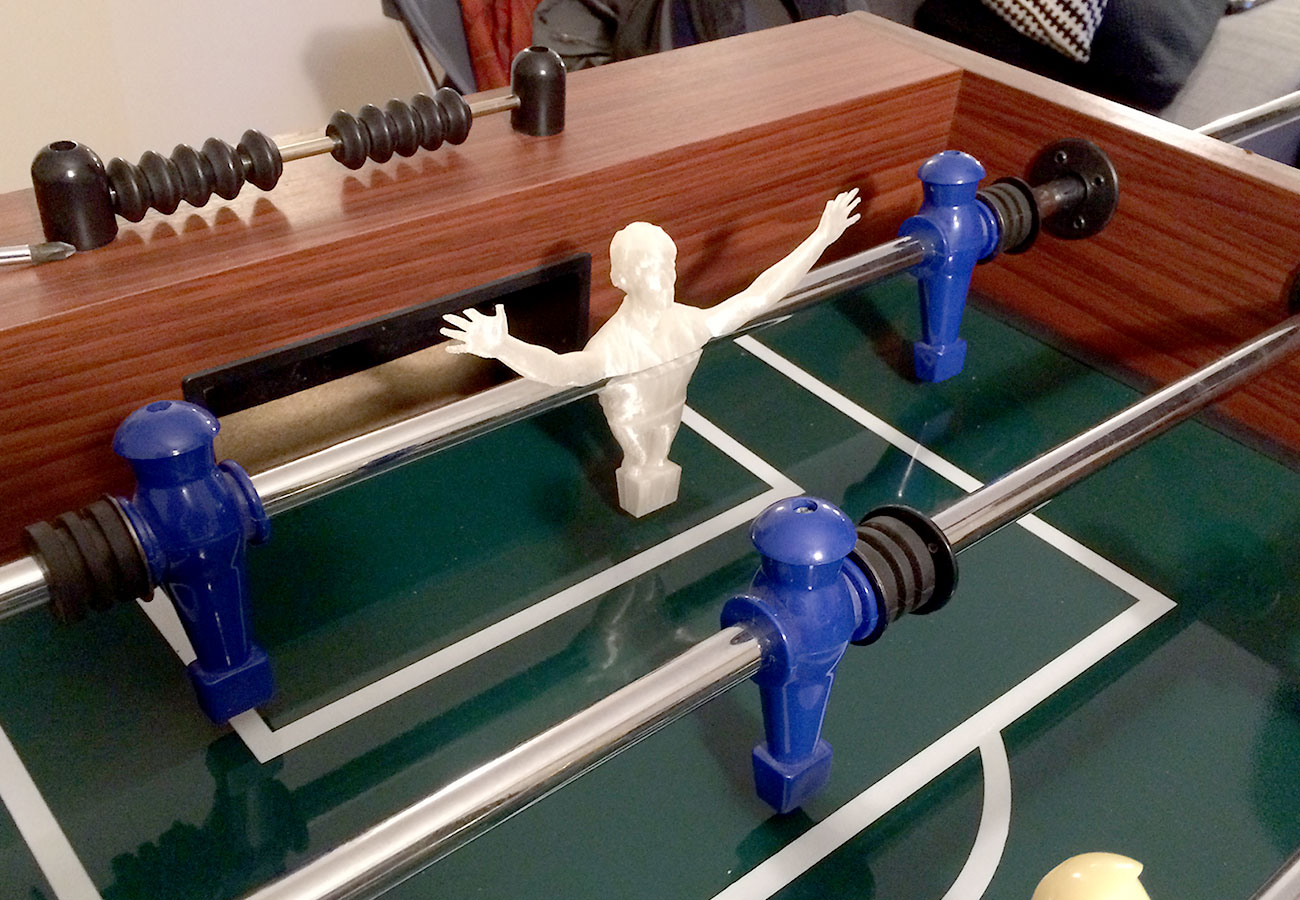
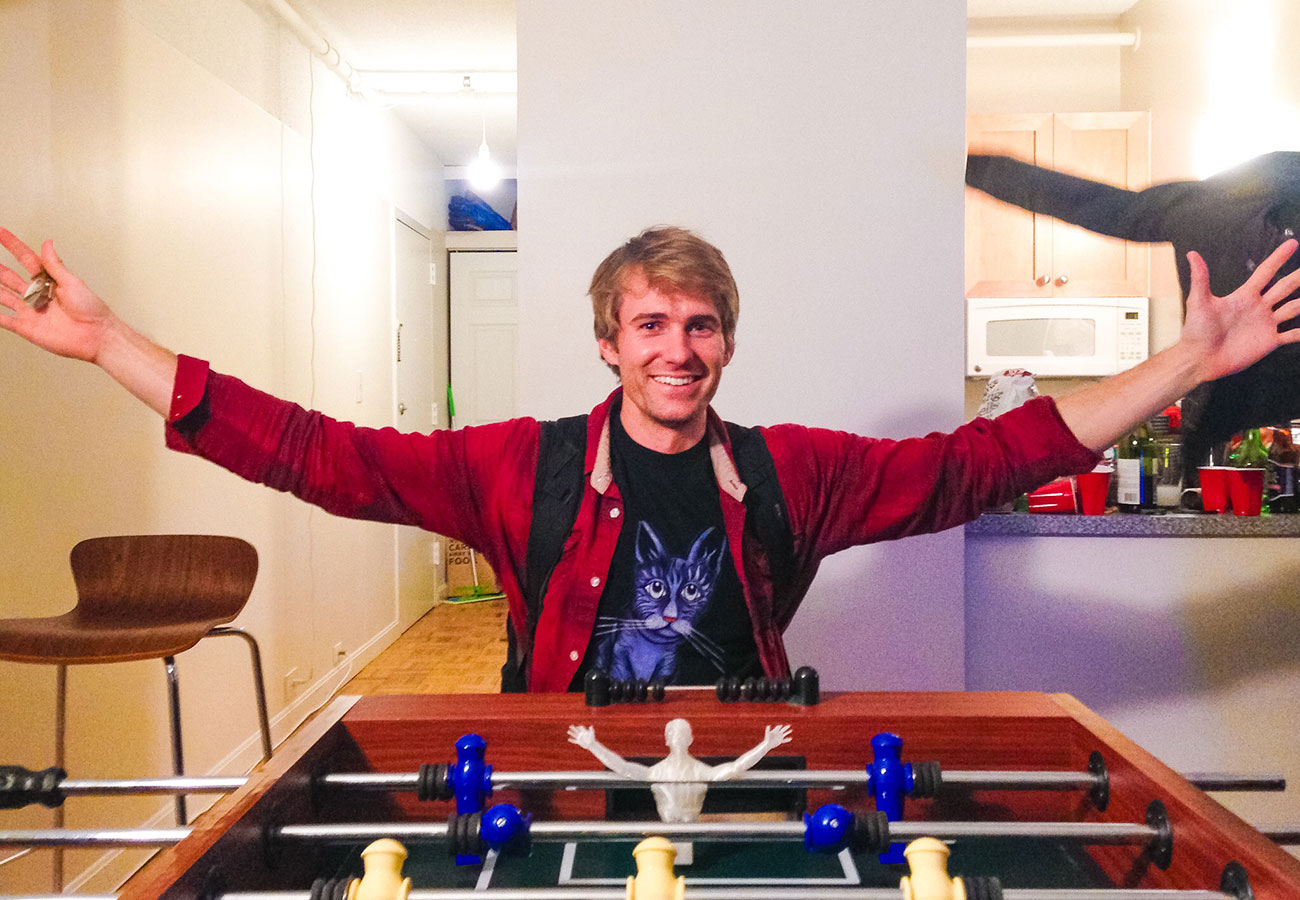
This week we were asked to design a 3d model and then print it. We were also given the opportunity to utilize the 3d scanner to generate a print file. A friend has recently acquired a foosball table and I decided that I'd like to have a custom player. My first step was to remove the plastic character from the table rod and replicate it's shape to scale in 3d. I first tried to scan this object with the Sense handheld scanner, but the size was a bit too small to get any promising results. The GSD has a structured light scanner available for use, so I used that to capture the information from the foosball player. It is made out of a reflective plastic, which does not work well for the structured light scanner (DavidScan3d), so I dusted it with a bit of zcorp 3d printer powder, which helped. I was only using this scan for reference, so it was not necessary to build out a watertight mesh. My plan was to replace the upper half of the assembly with a 3d printed replica of myself.
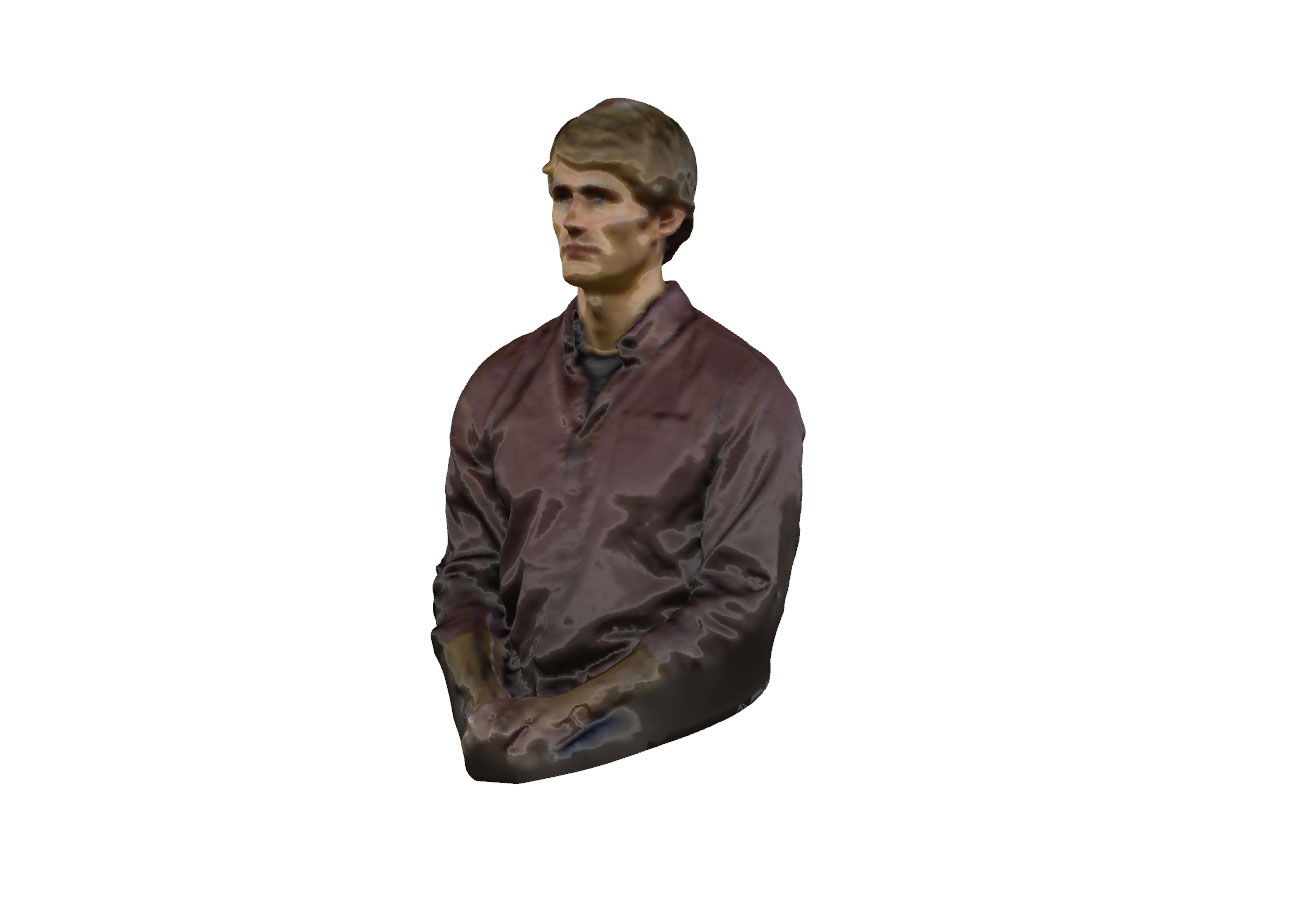
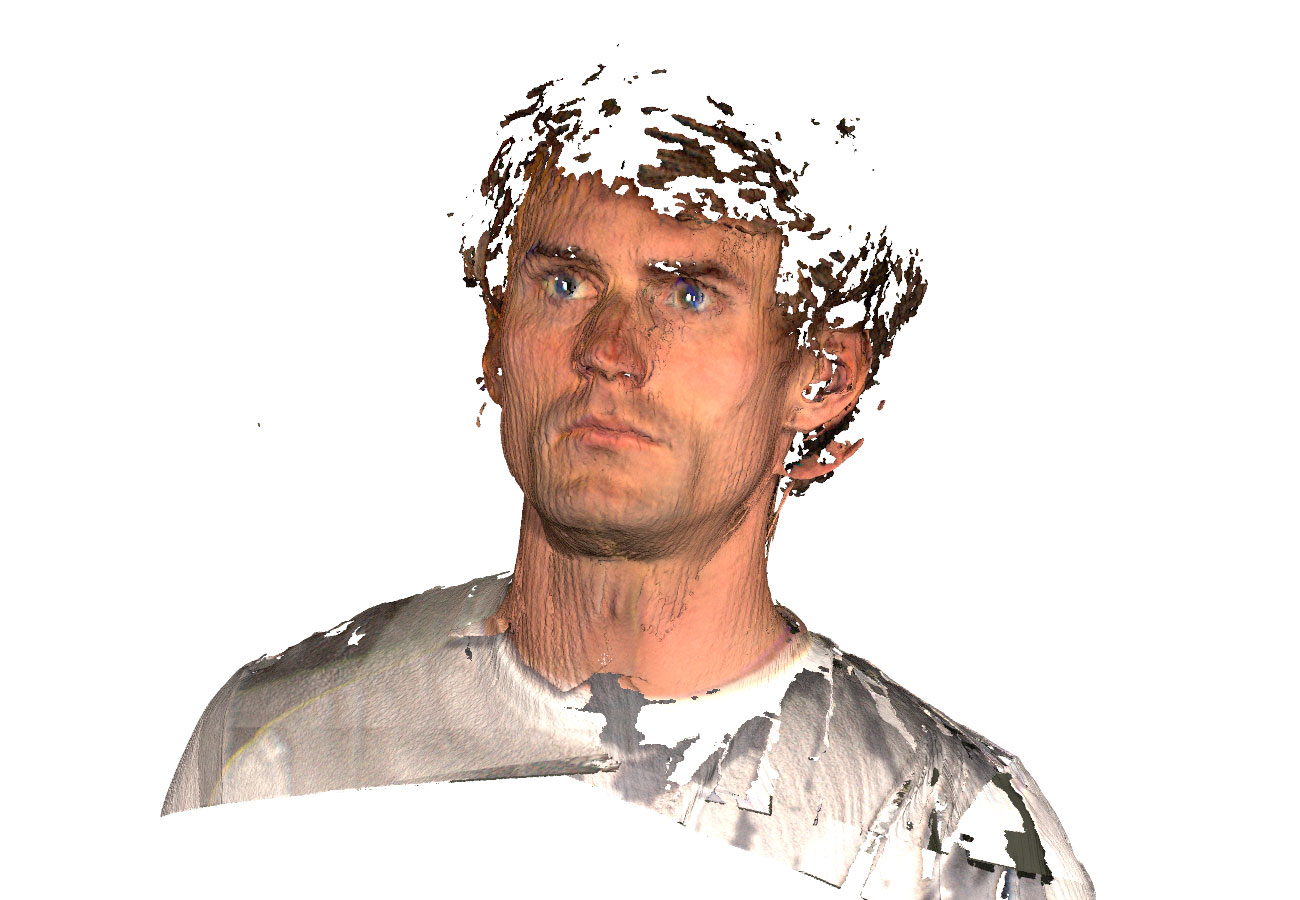
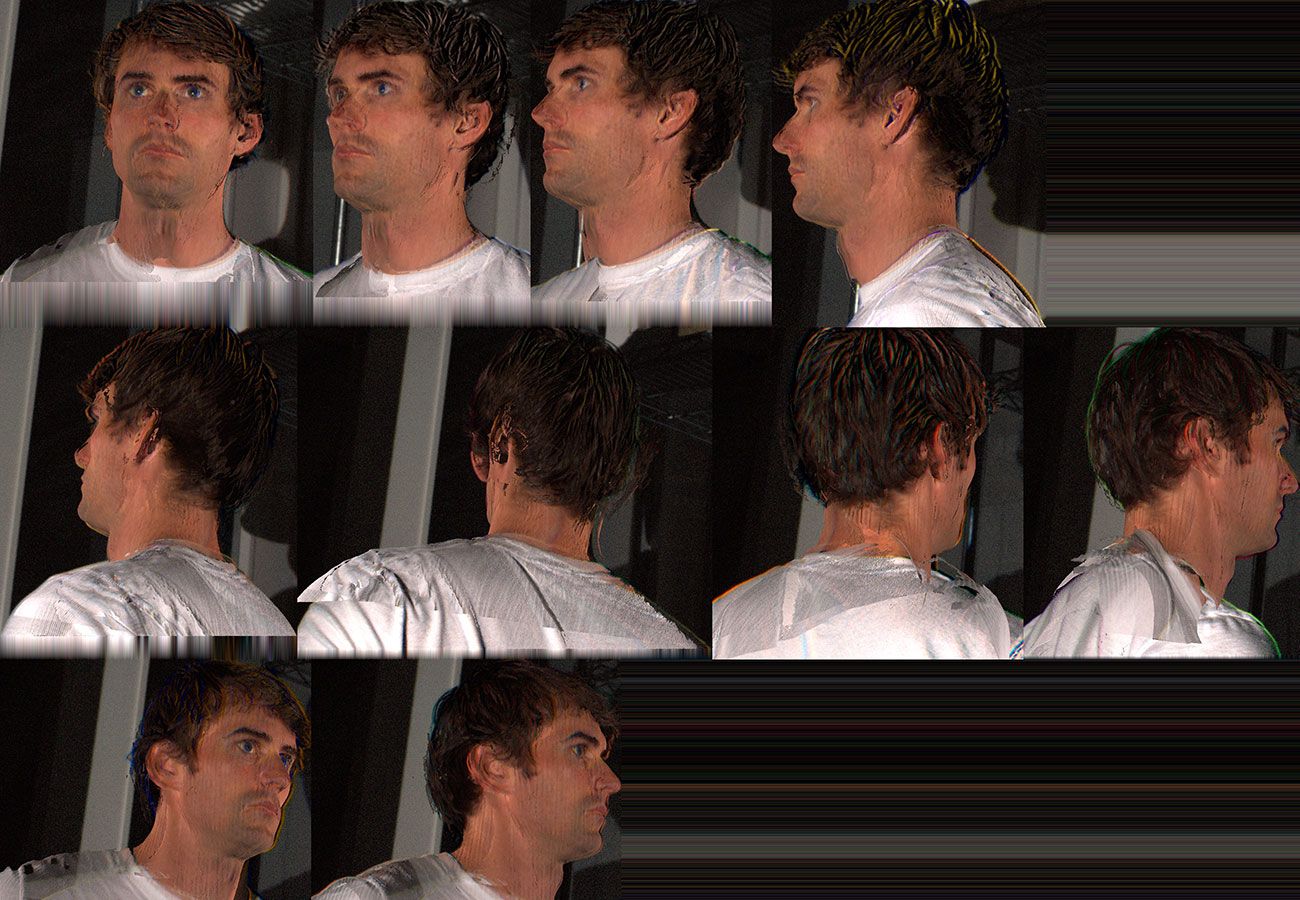
At first, I tried using the DavidScan3d for myself, but this proved to be extremely challenging. The structured light scanner works by projecting a sequence of image patterns and colors on the object that is being scanned, which takes about 5 seconds per angle. You then need to take incremental scans around the object so that there is enough overlapping information to be able to align the scans together. I was trying to achieve this by rotating myself in a swivel chair and clicking the scan button each time. It is necessary to stay completely still and not move (too much) between each different scan. I was able to get pretty high resolution information, but the scanning procedure and subsequent aligment steps made this a very time consuming approach. I decided to use the Sense handheld scanner instead. I set the scanner onto a tripod and used the same rotating in a chair technique, which worked surprisingly well. This method was very fast, but the trade-off is a low resolution scan.

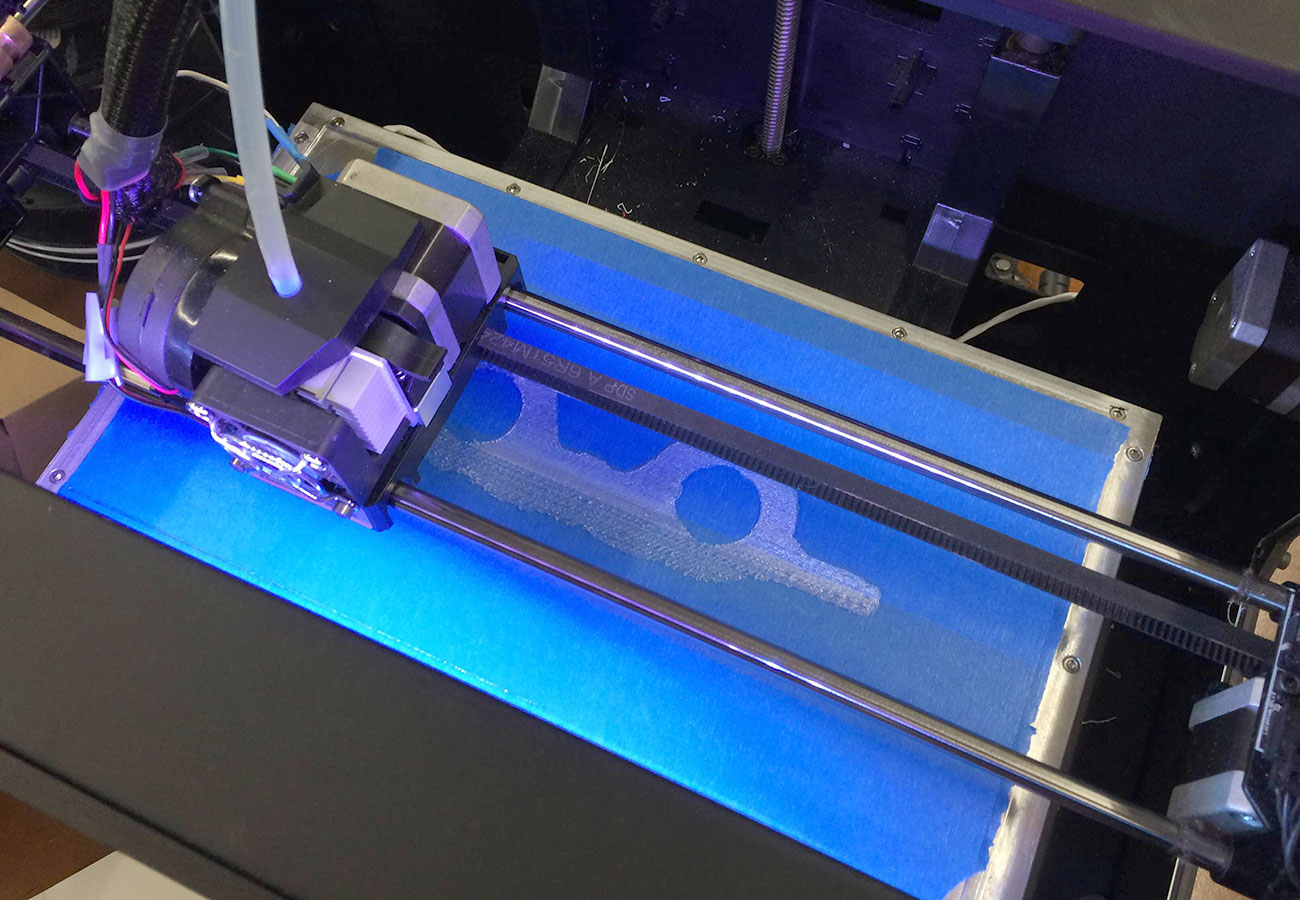
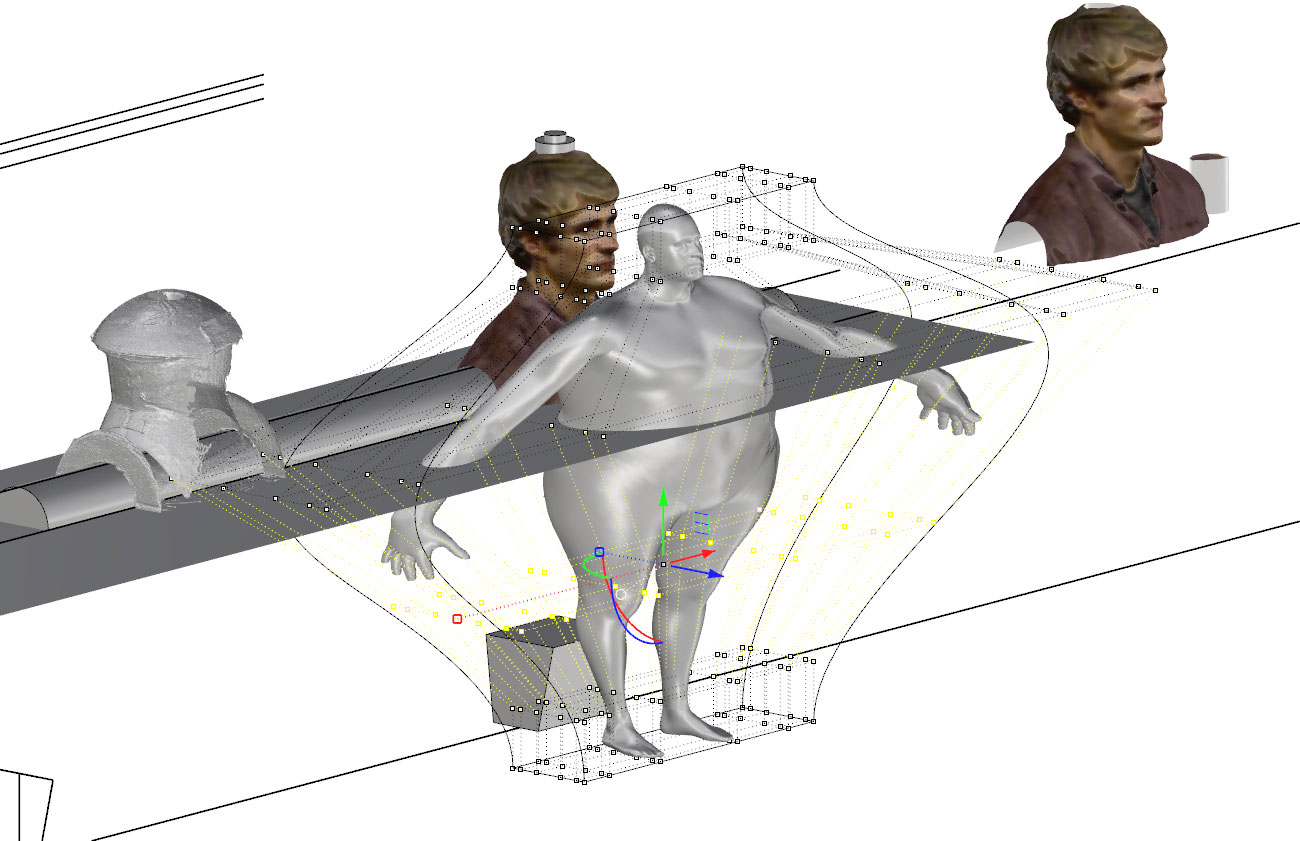
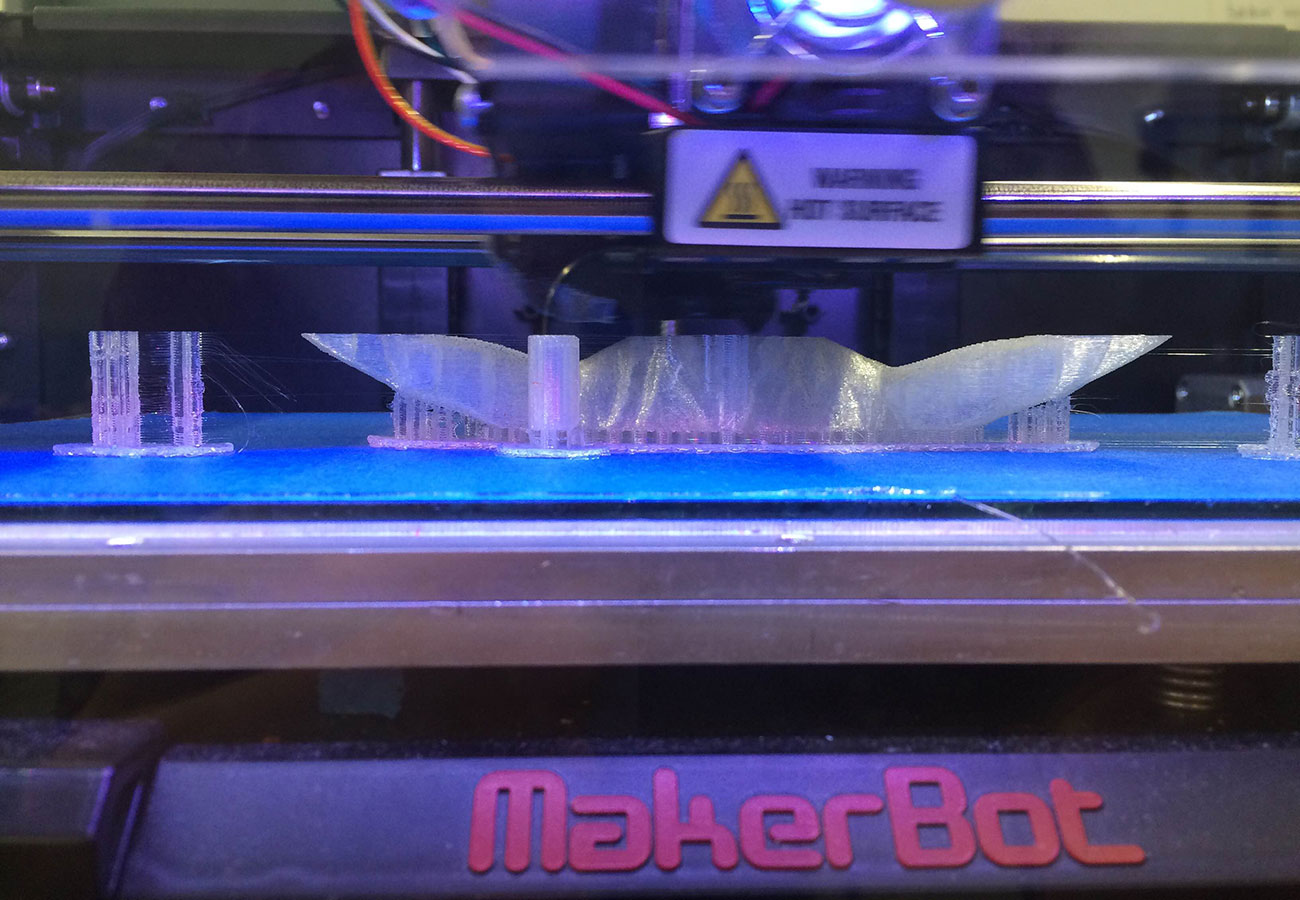
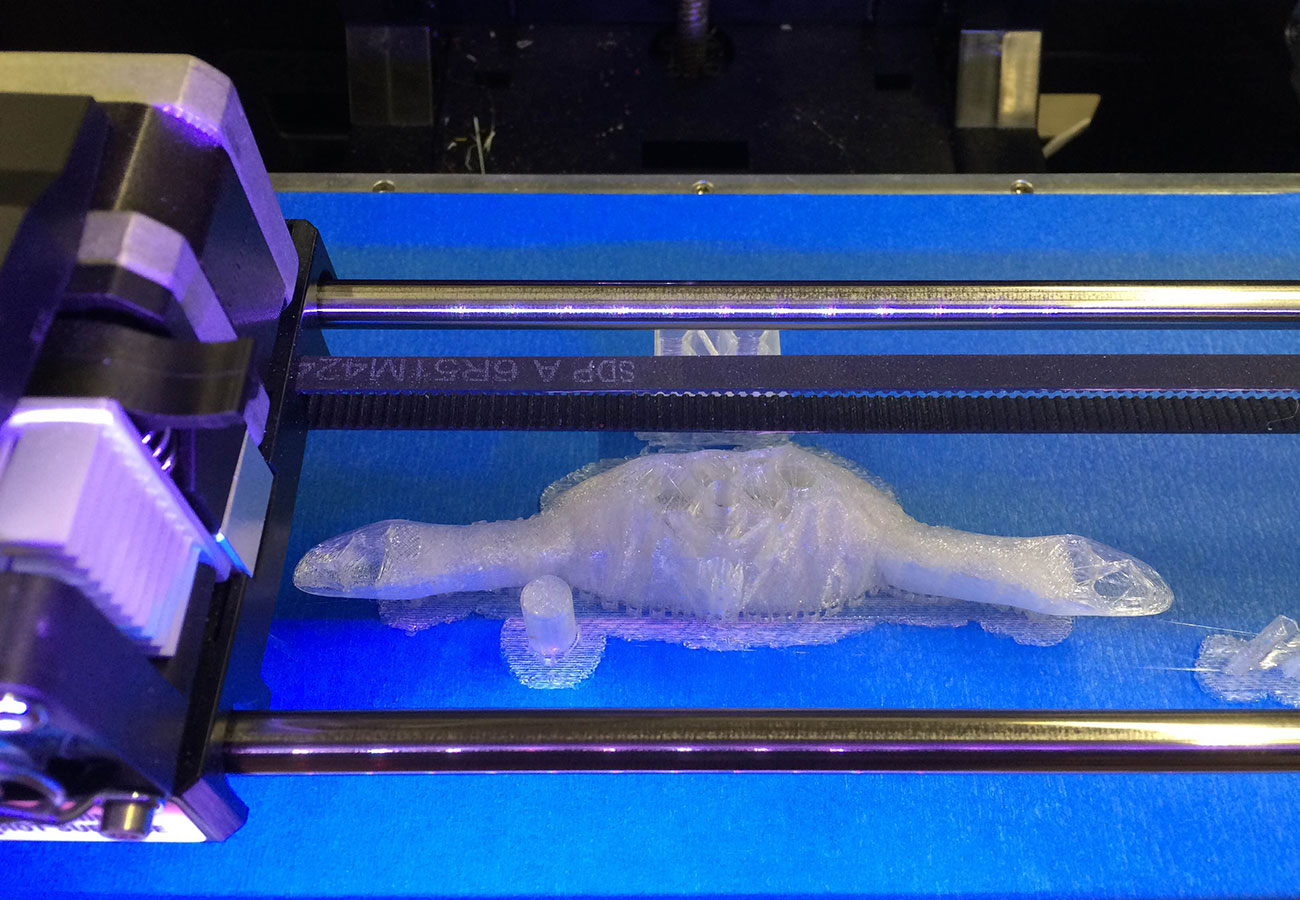
Once I had a decent scan of my upper body and the measurements for through holes in the foosball character, I was able to modify my minature self to fit onto the foosball table rod. All of the modeling was done in Rhino and consisted mostly of mesh boolean difference and union. I also decided to change the leg portion of the character to a custom design, but I didn't have a scan of my lower half. I found a generic body 3d model and morphed it using cage-edit in Rhino to fit within the parameters of the original foosball character. I used the original foot-kick shape to ensure that my character would be up to standards. After the two halves were complete, I set up the print file in Maker-Ware and sent the print to the Makerbot Replicator2.
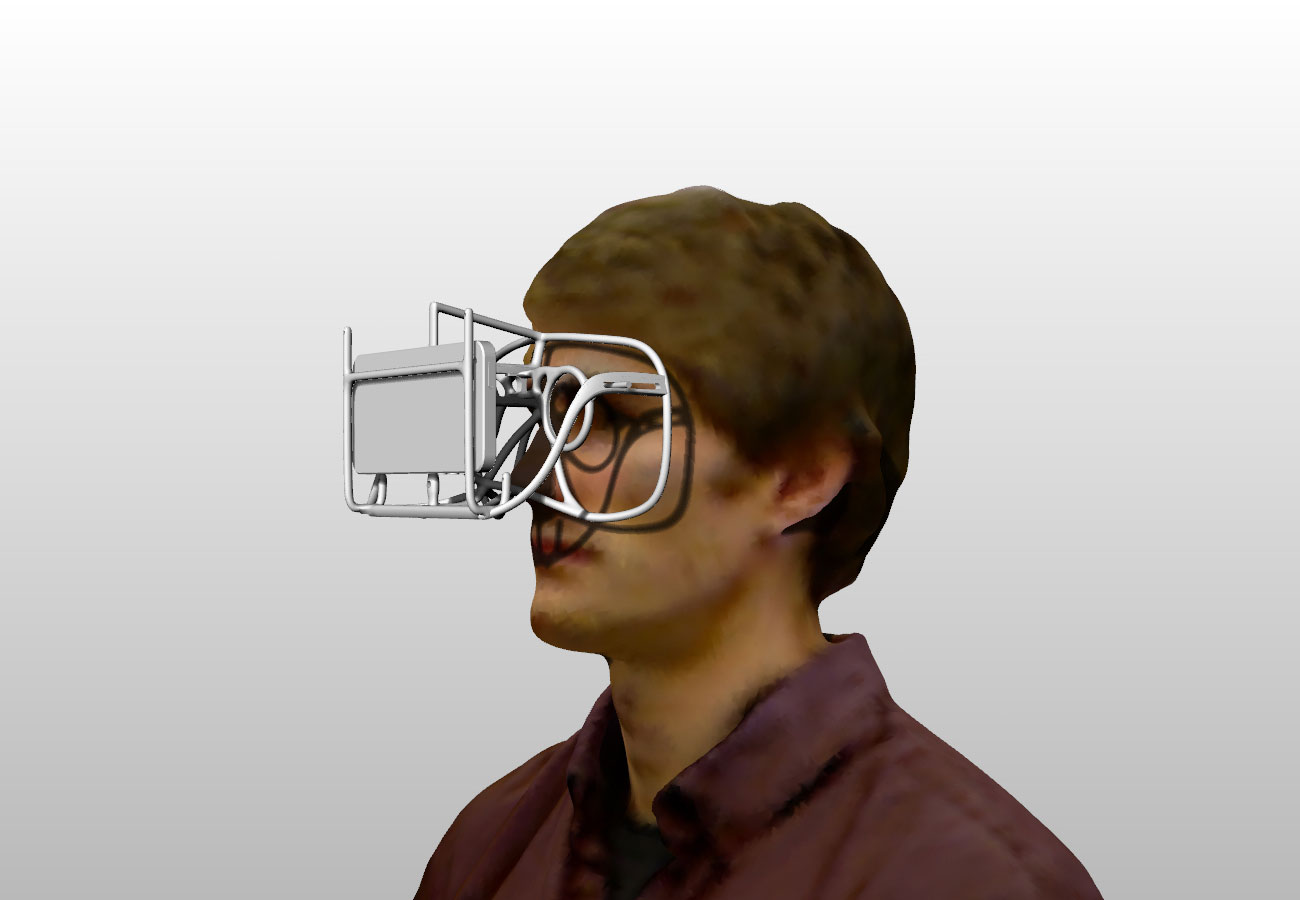
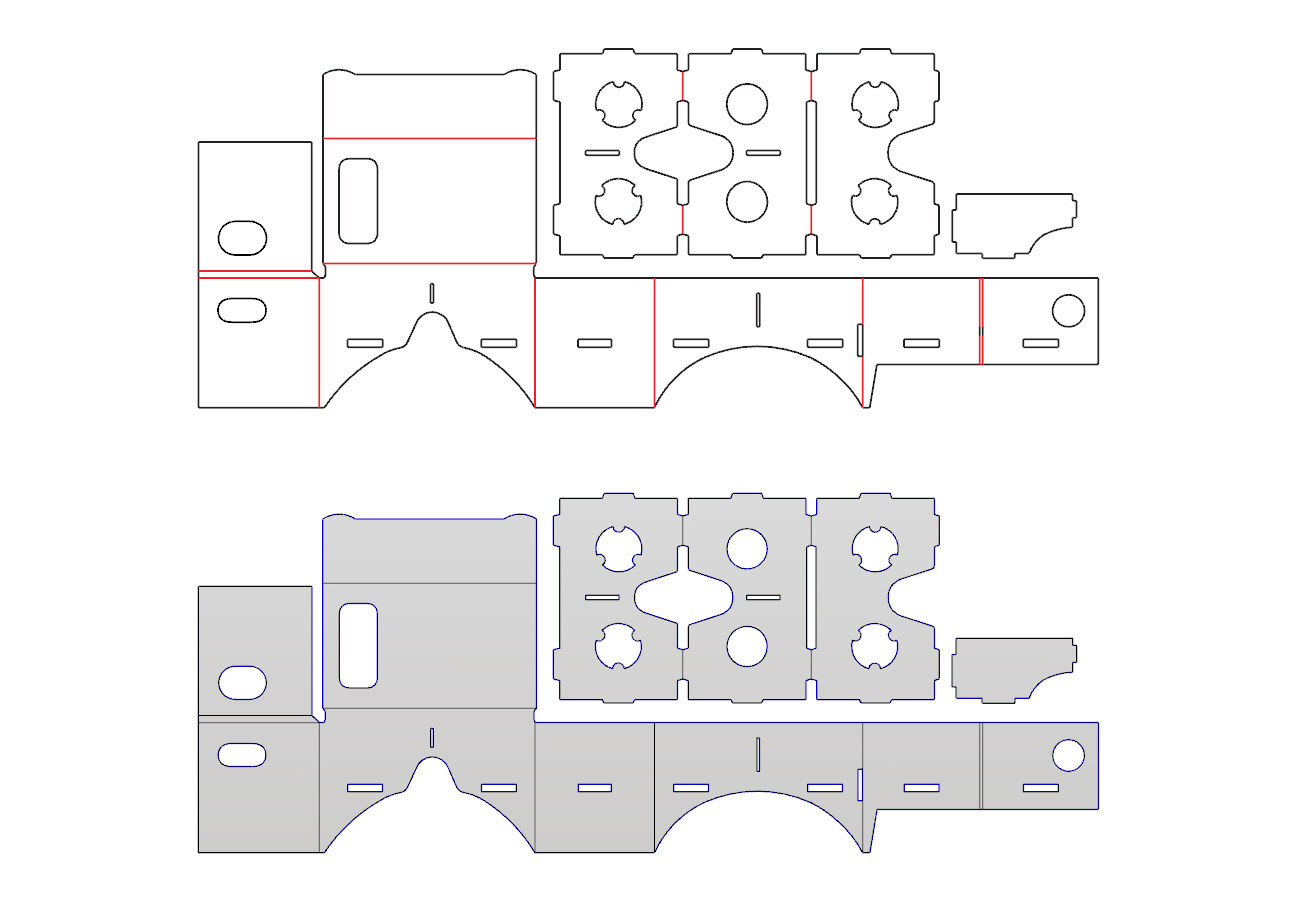
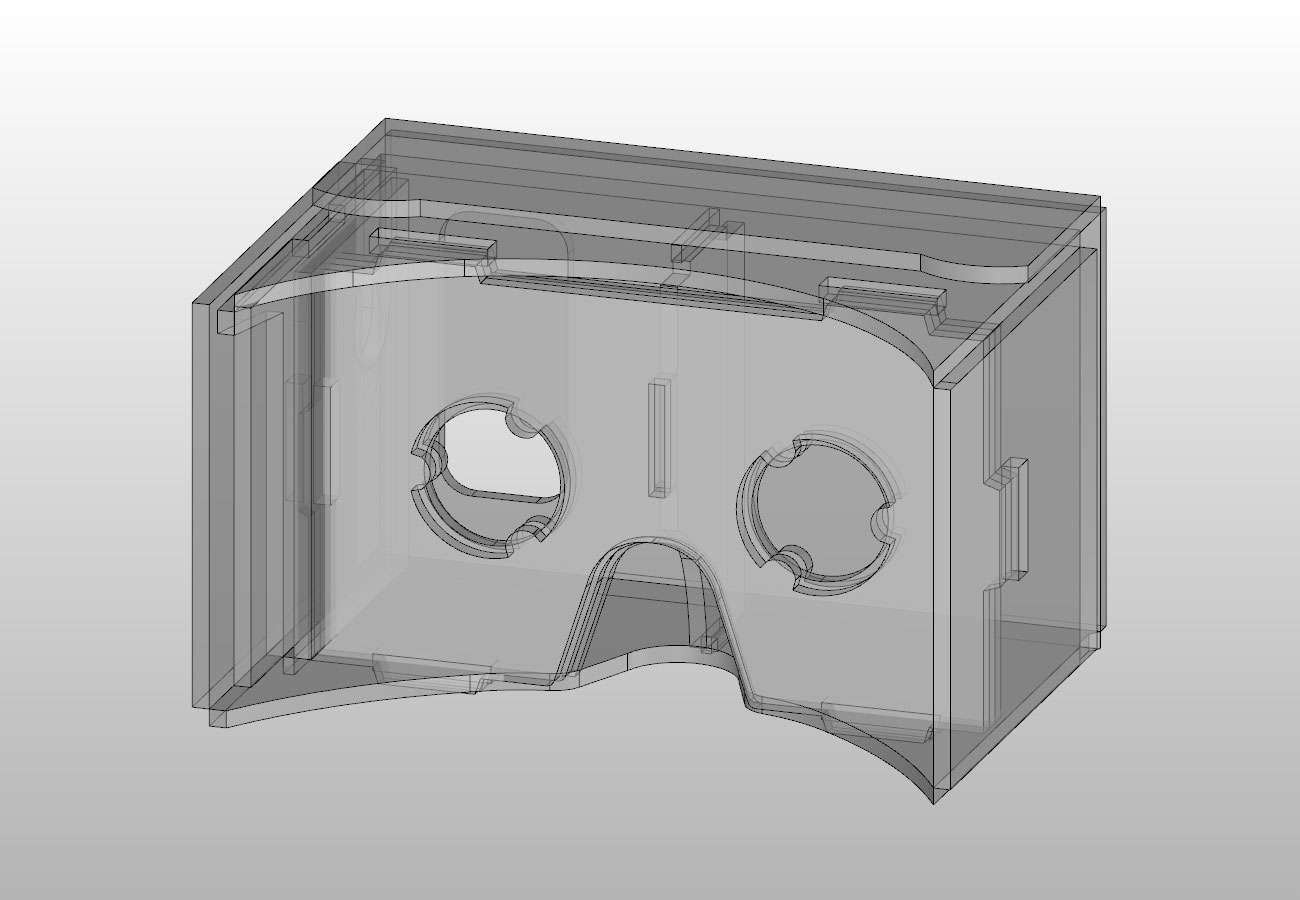
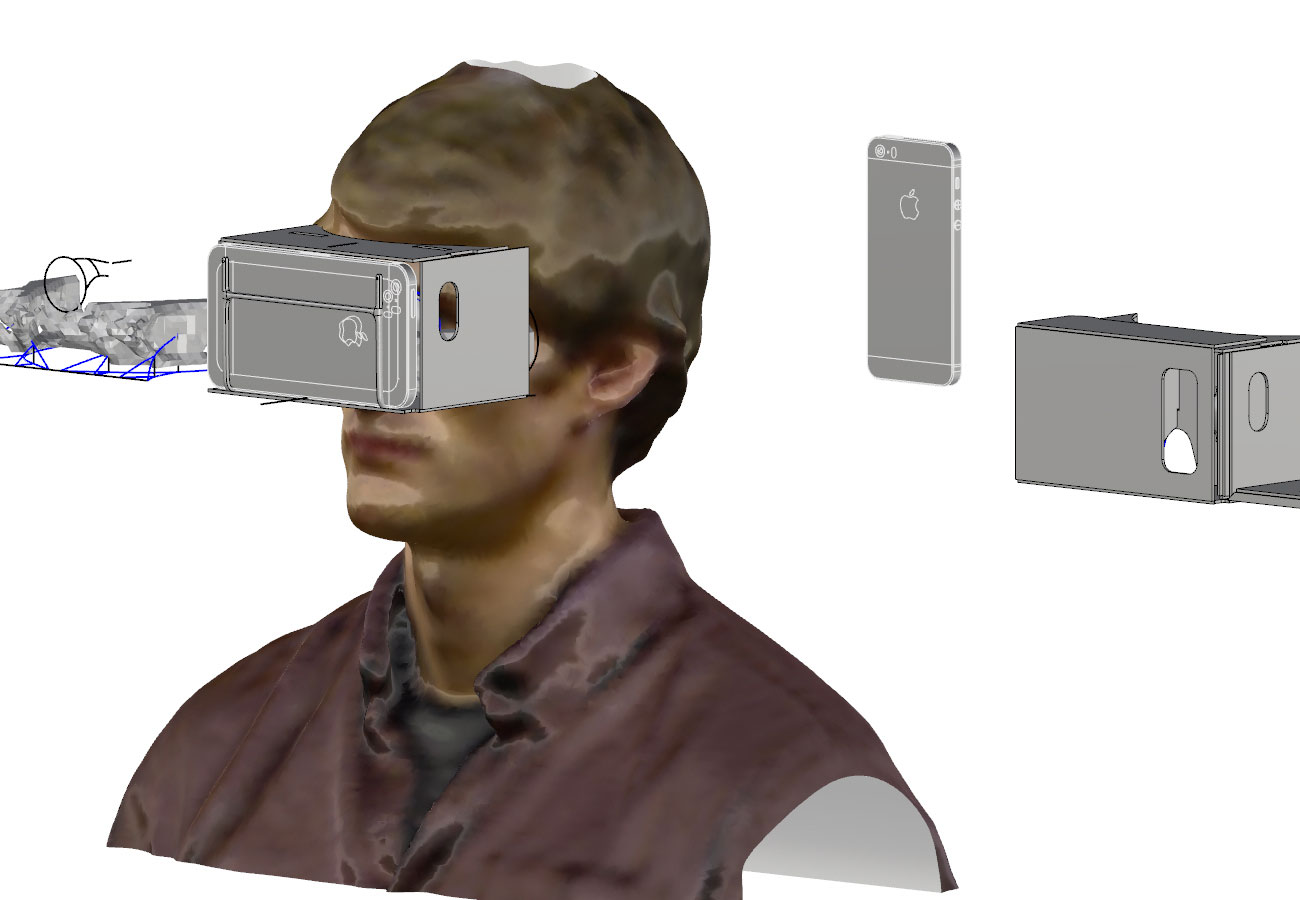
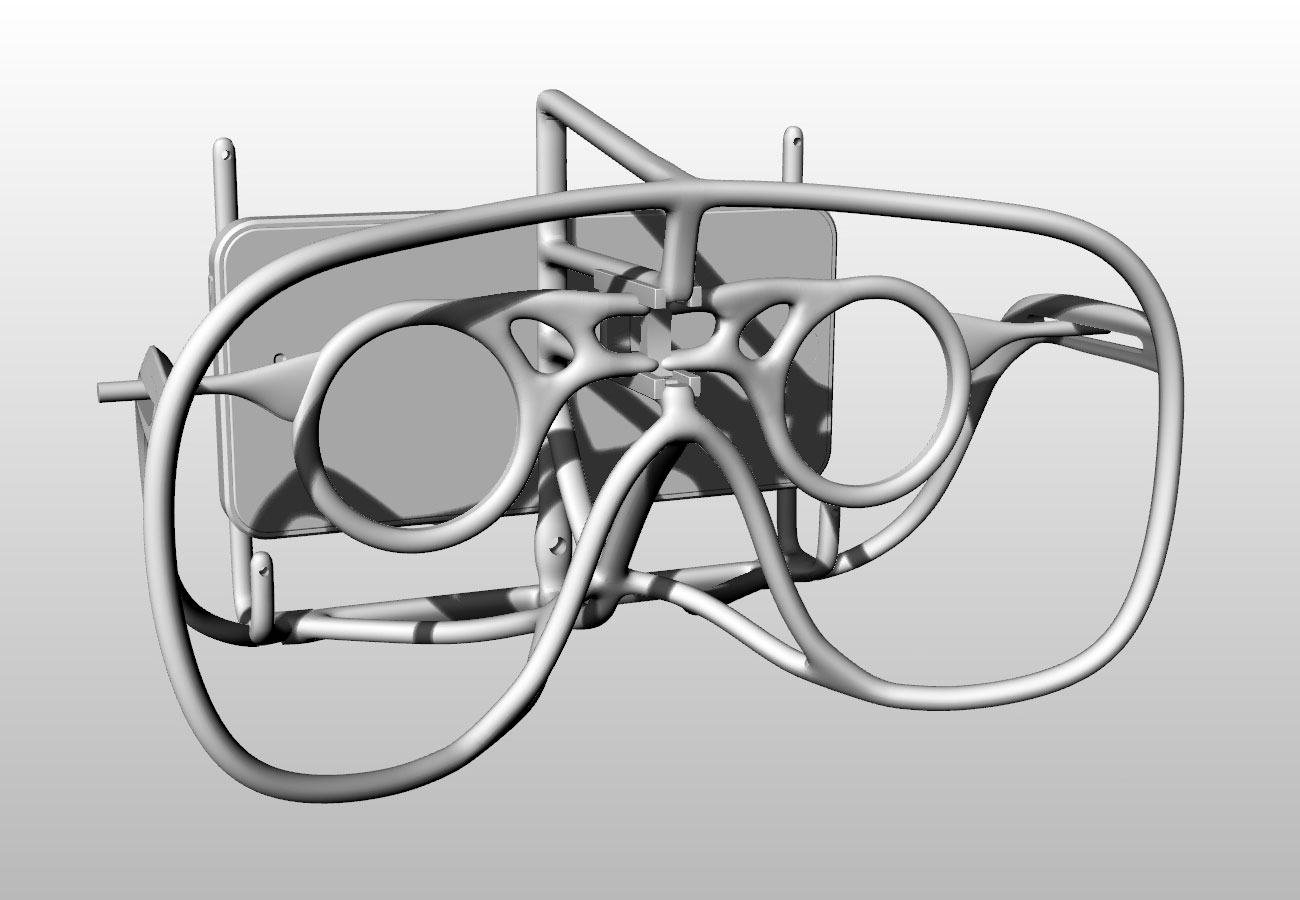
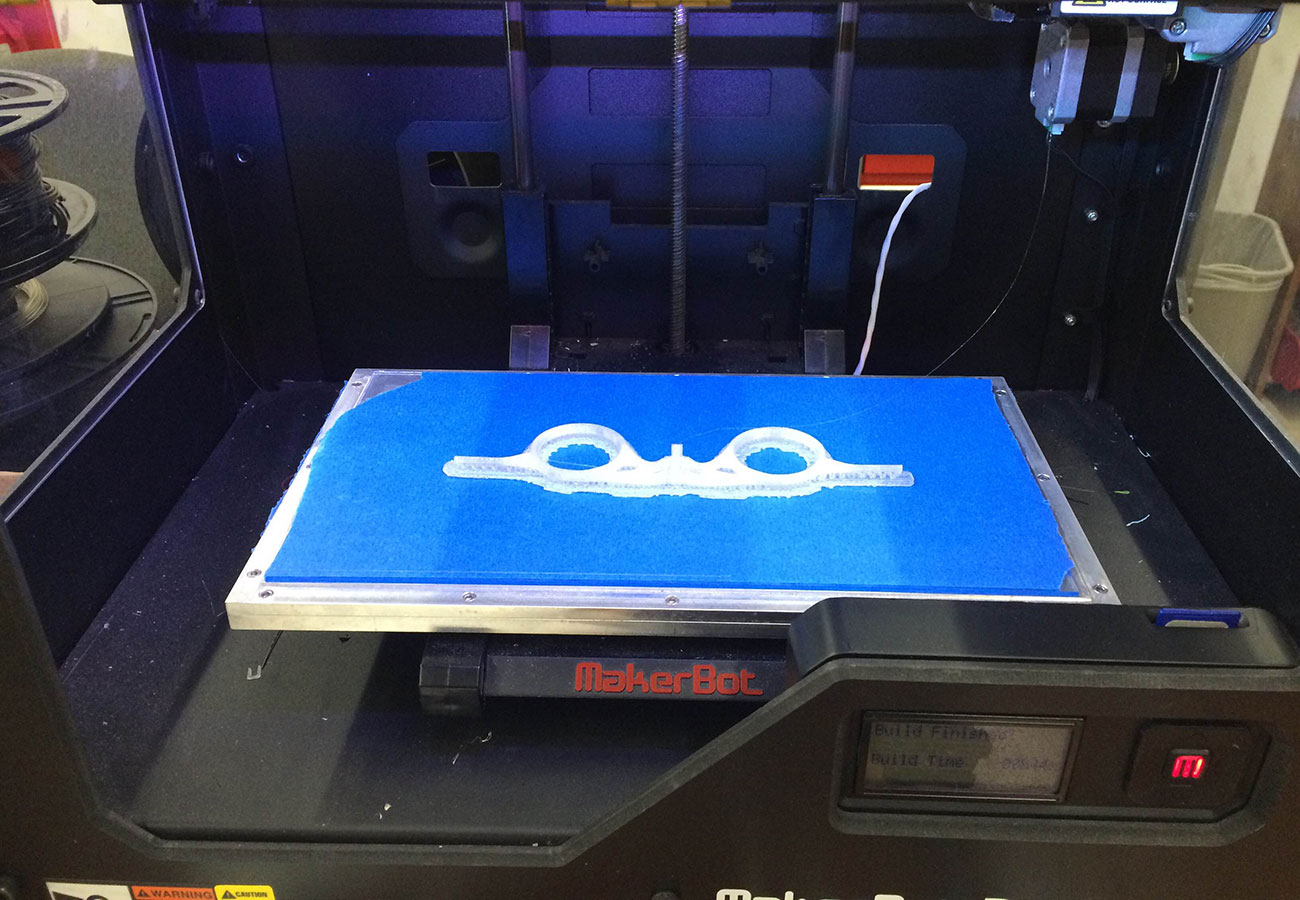
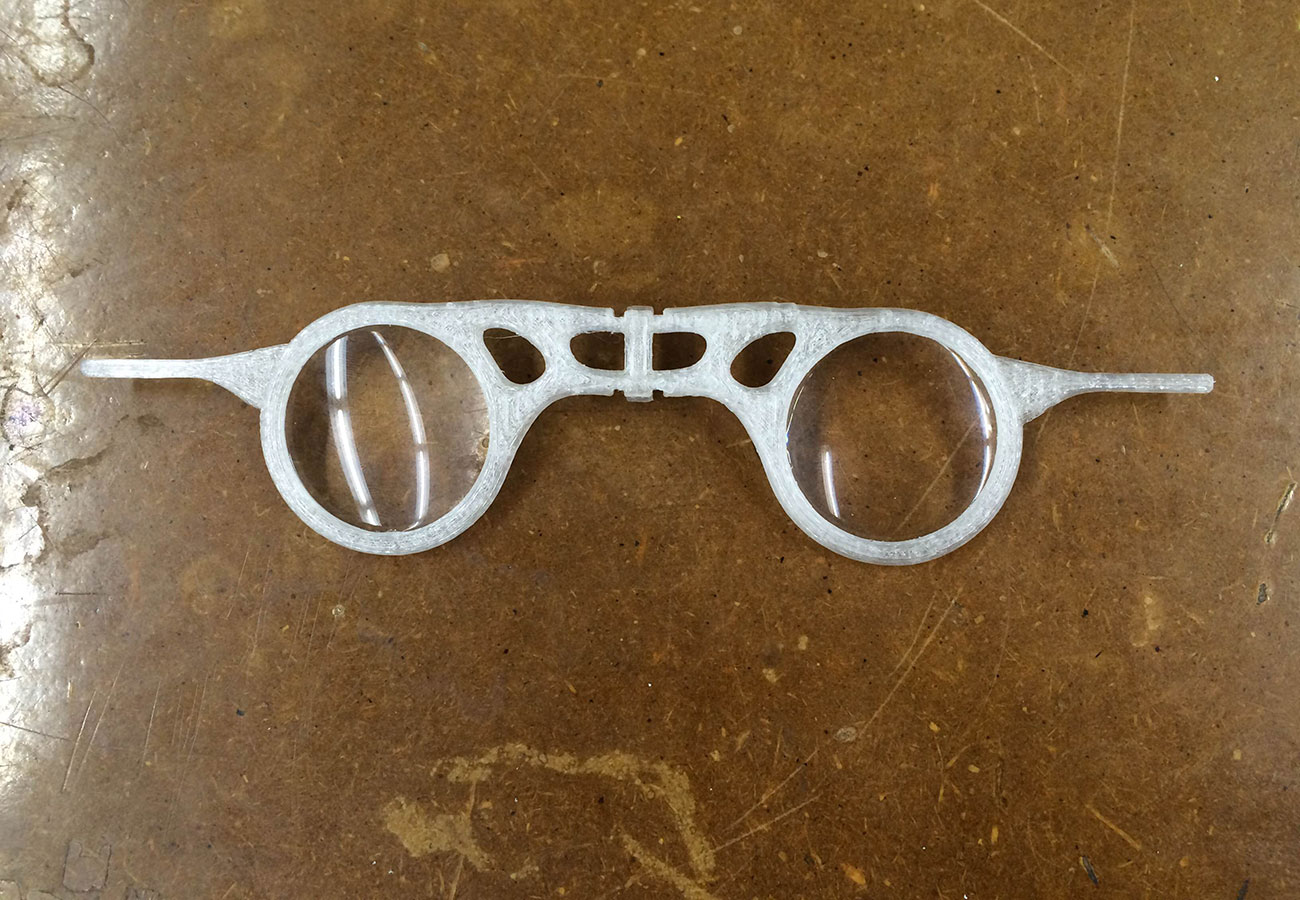
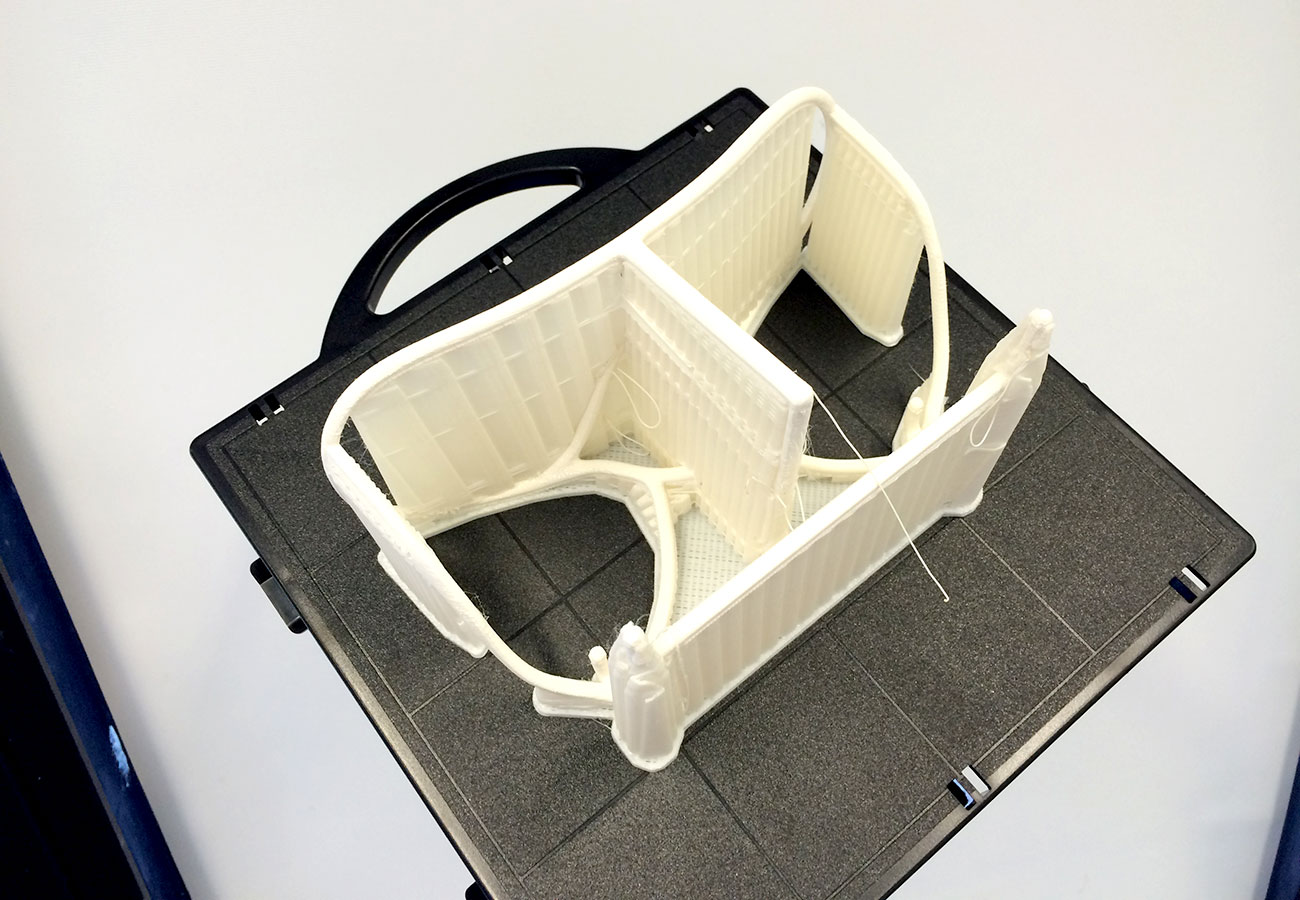
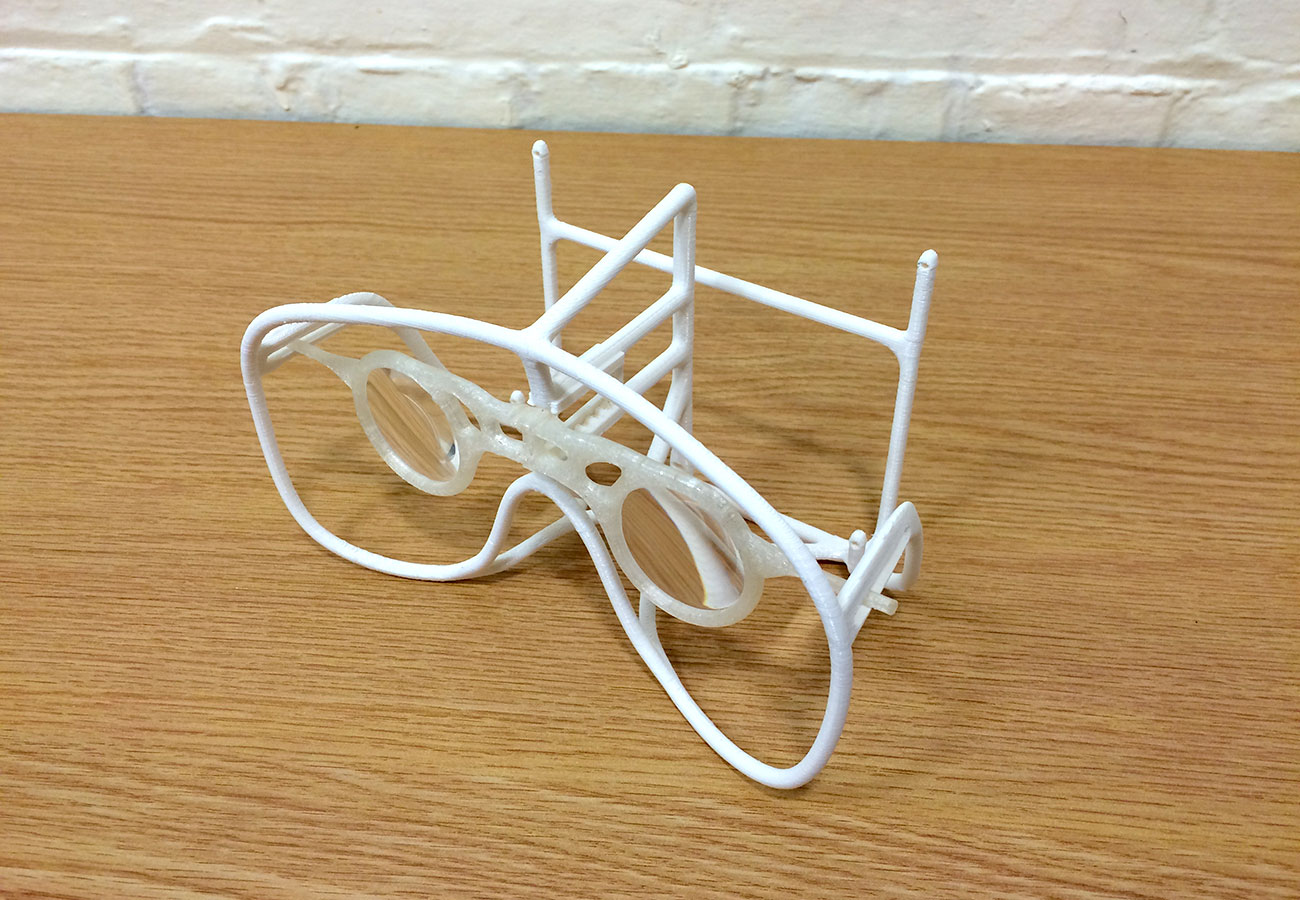
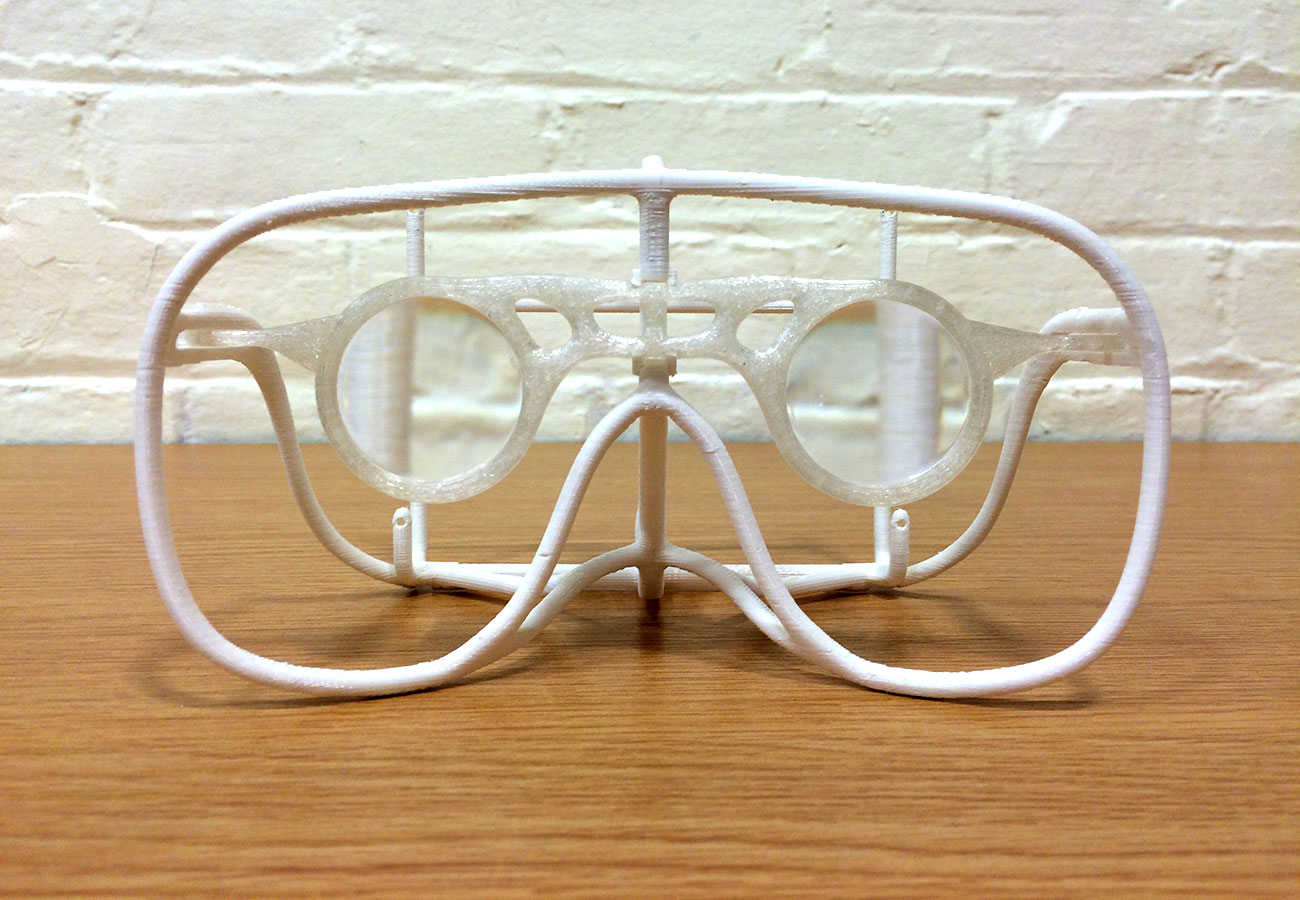
Aside from the foosball character, I've also been interested in making my own VR viewer. I took inspiration and design cues from Google Cardboard along with using the scan of my face to help direct the proportions. Google offers the production cut-sheet for their previous version of Cardboard, so I took this and re-created it in 3d to use as a base geometry. I wanted to explore the form to see if I could create a VR viewer enclosure that was a bit less clunky than current options. This led me to a generally organic wireframe shape which I modified to allow for adjustment of the lens to screen distance. I was able to produce the lens holder portion for this week, but the rest of the frame is taking longer to print. I think that this design will involve an iterative cycle between physical production and digital modification. I would also like to build this out as a parametric model that would take a scan of someone's head as input and then generate a viewer that is correctly proportioned to that person's facial characteristics.