week 3: 3D pritning (the death star) and 3D scanning (a cat)
This week, we explore the capabilities and limiitations of additive manufacturing ('3D printing') using a desktop system (Ultimaker 2, retail $2499, in conjuction with the free software Cura). We also foray (to mixed success) into 3D scanning using 1) computational processing of serial photography images (via the Autodesk 123D Catch client) and using a dedicated peripheral (the Sense scanner by Cubify, retail $399).
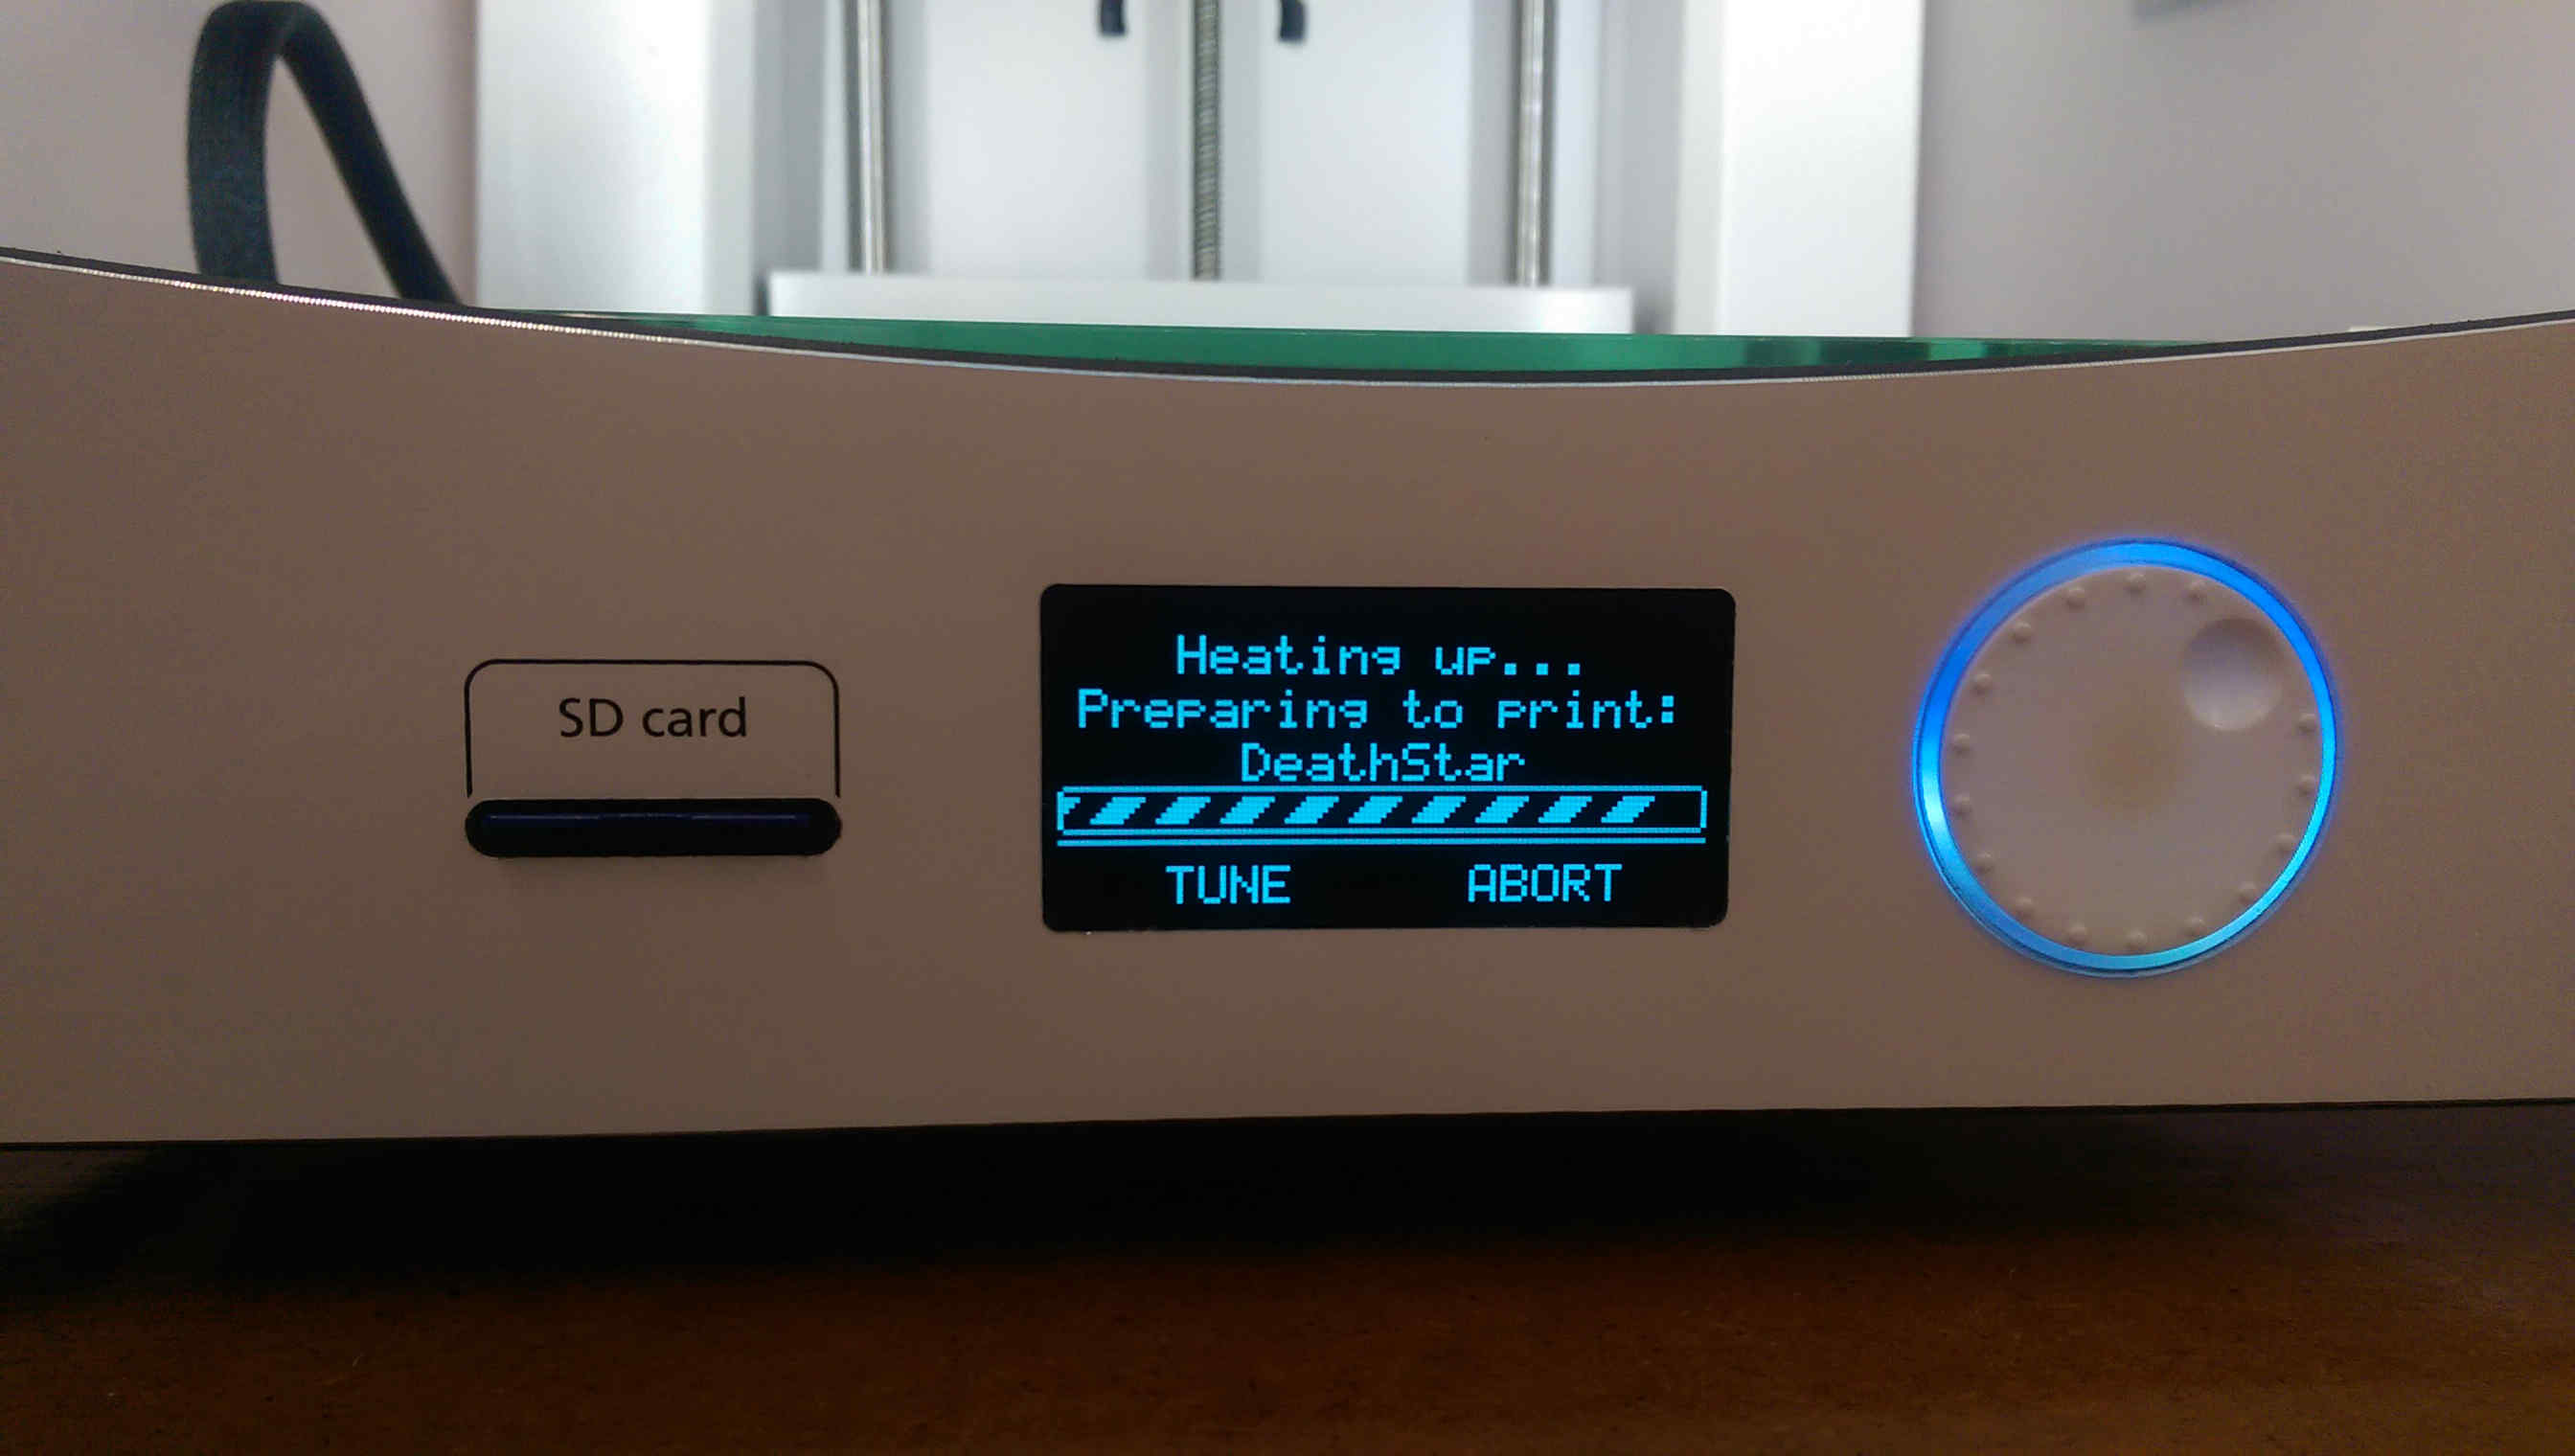
printing the death star
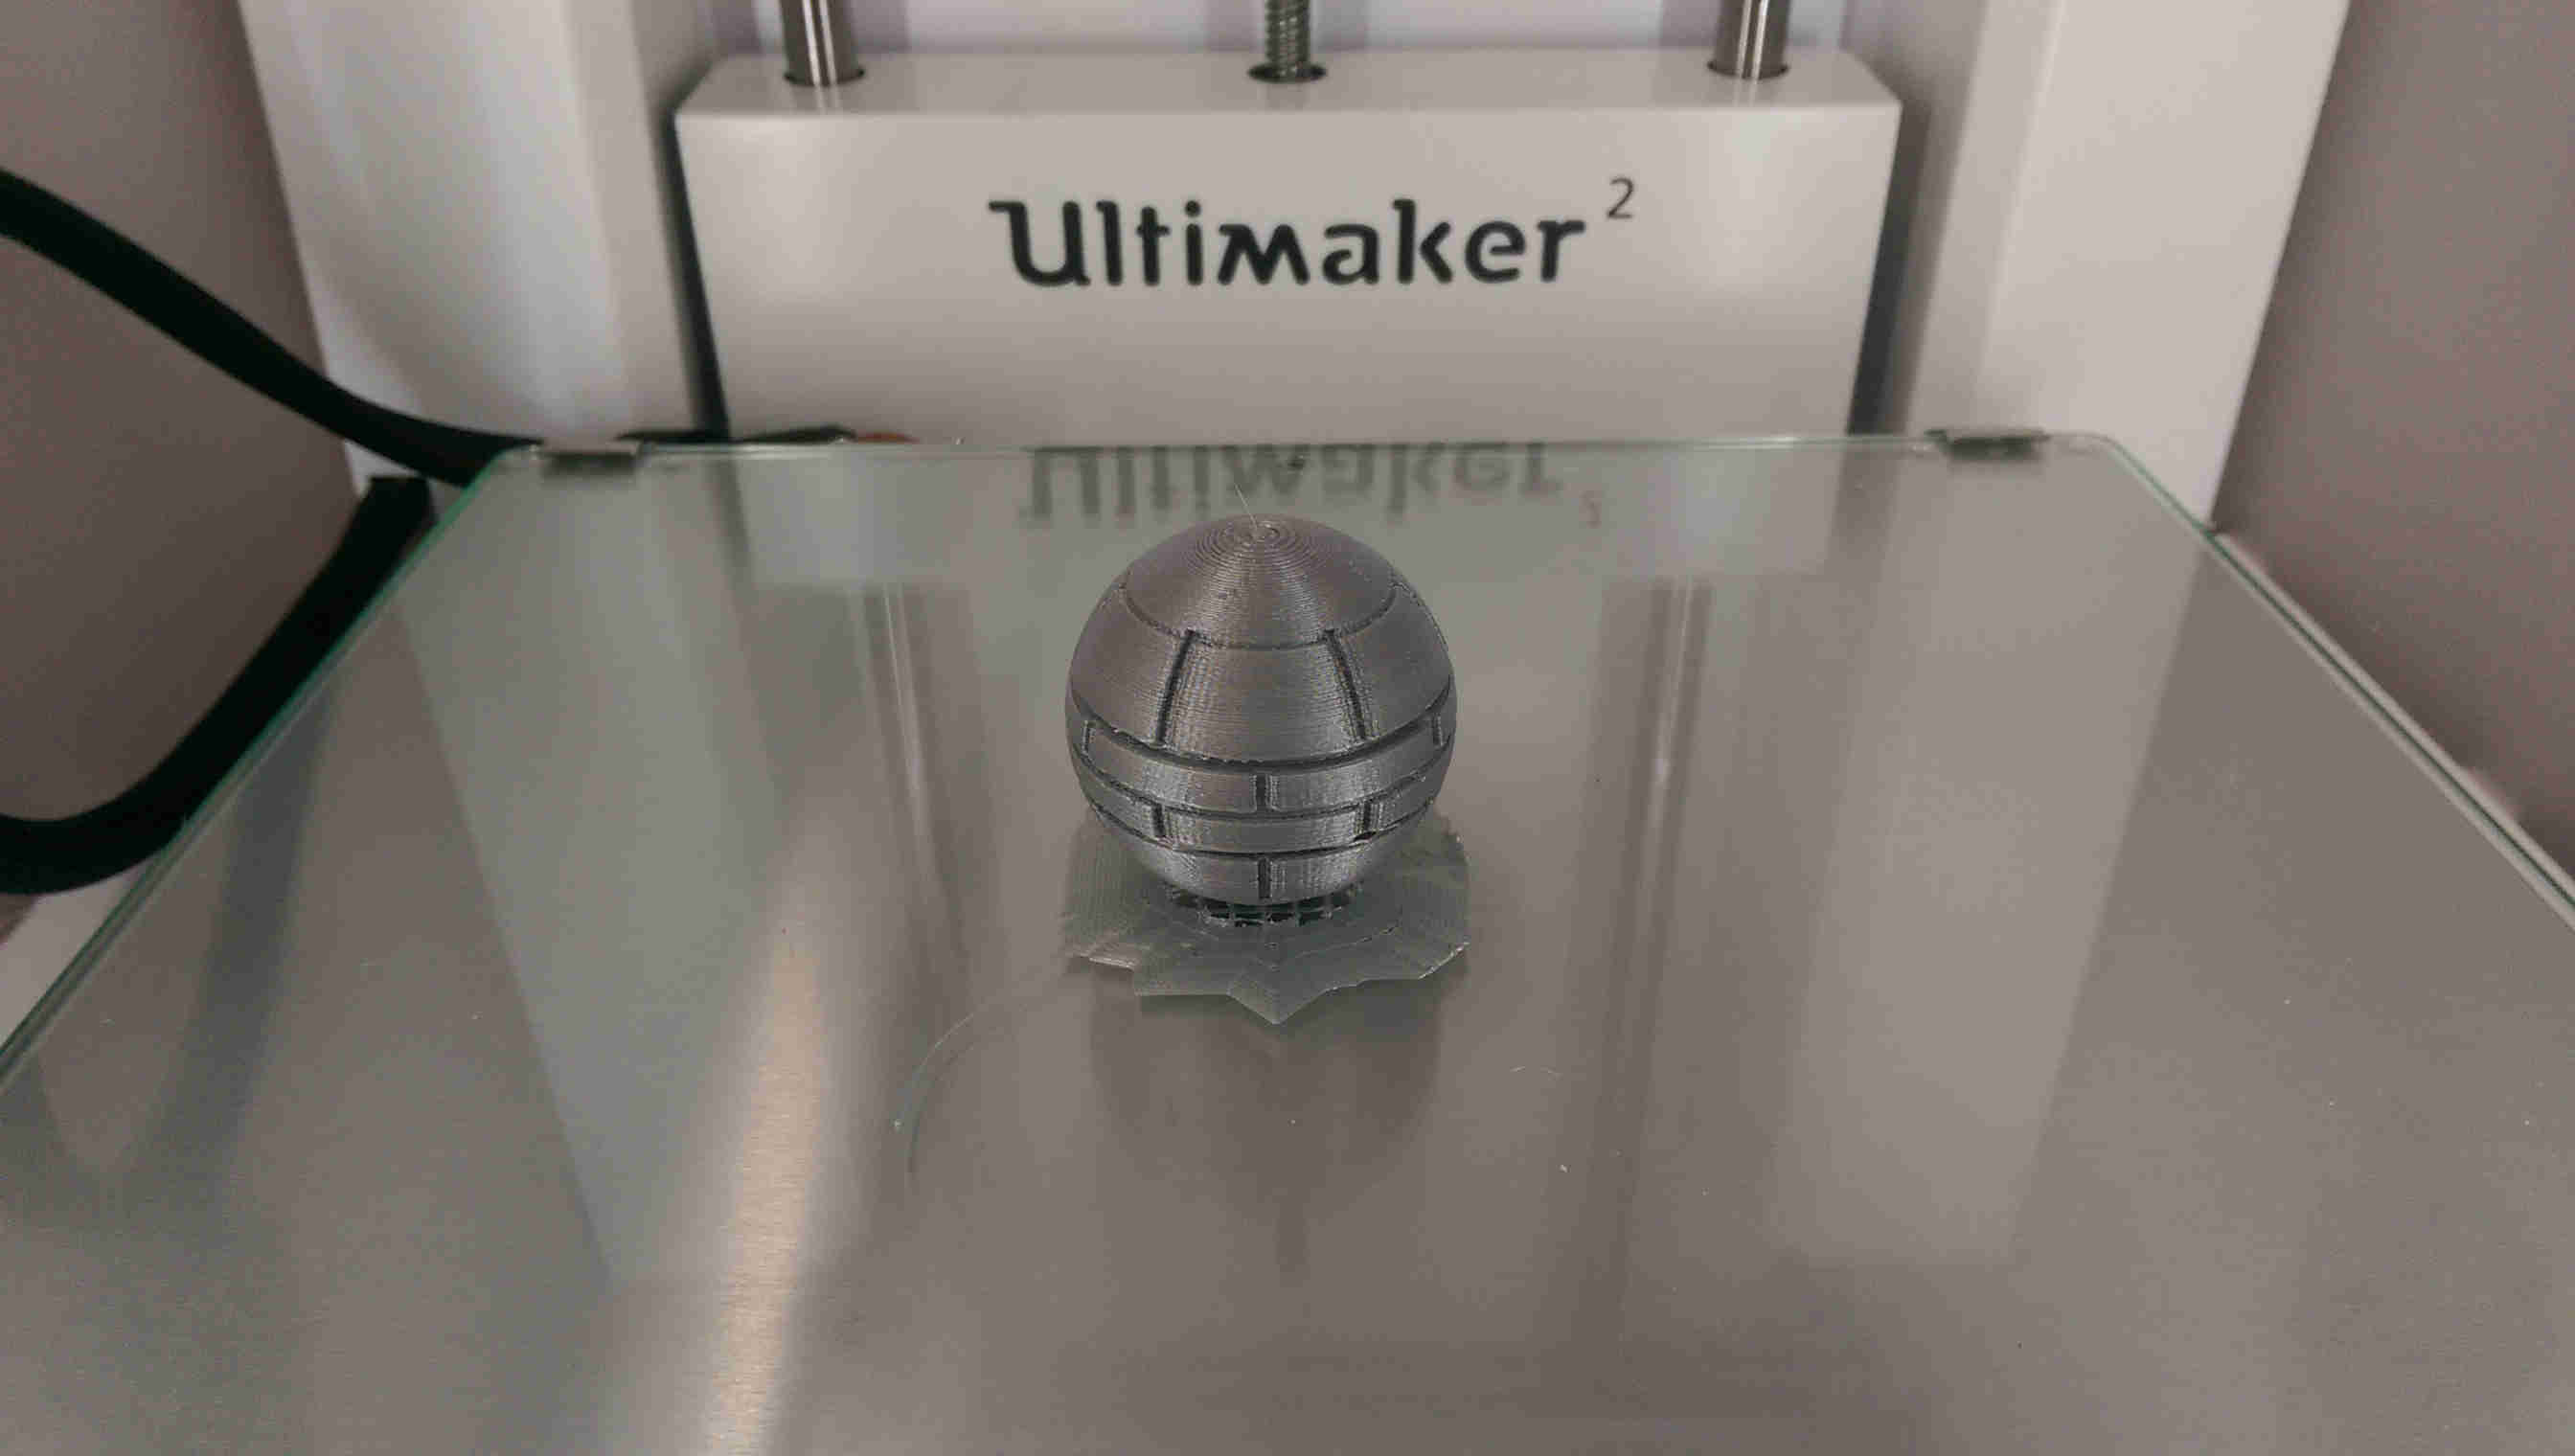
For my ab inito model, I chose the Death Star (TM The Galactic Empire) as design that was well-suited to computational solid geometry and whose fabrication would not be readily achievable using subtractive manufacturing (the spherical indent and various cylindrical cross sections in particular were well-suited to 3D printing). Designing the model in antimony was relatively straightfoward - I created the death star by subtracting a small sphere from a larger one (to create the planet destroyer), subracting a cylindrical ring about the sphere's equator, and then doing various transformations to that initial ring to create the rest of the surfact topology (the staggered longitudonal cuts were created using intersection operations with rotated cylinders).
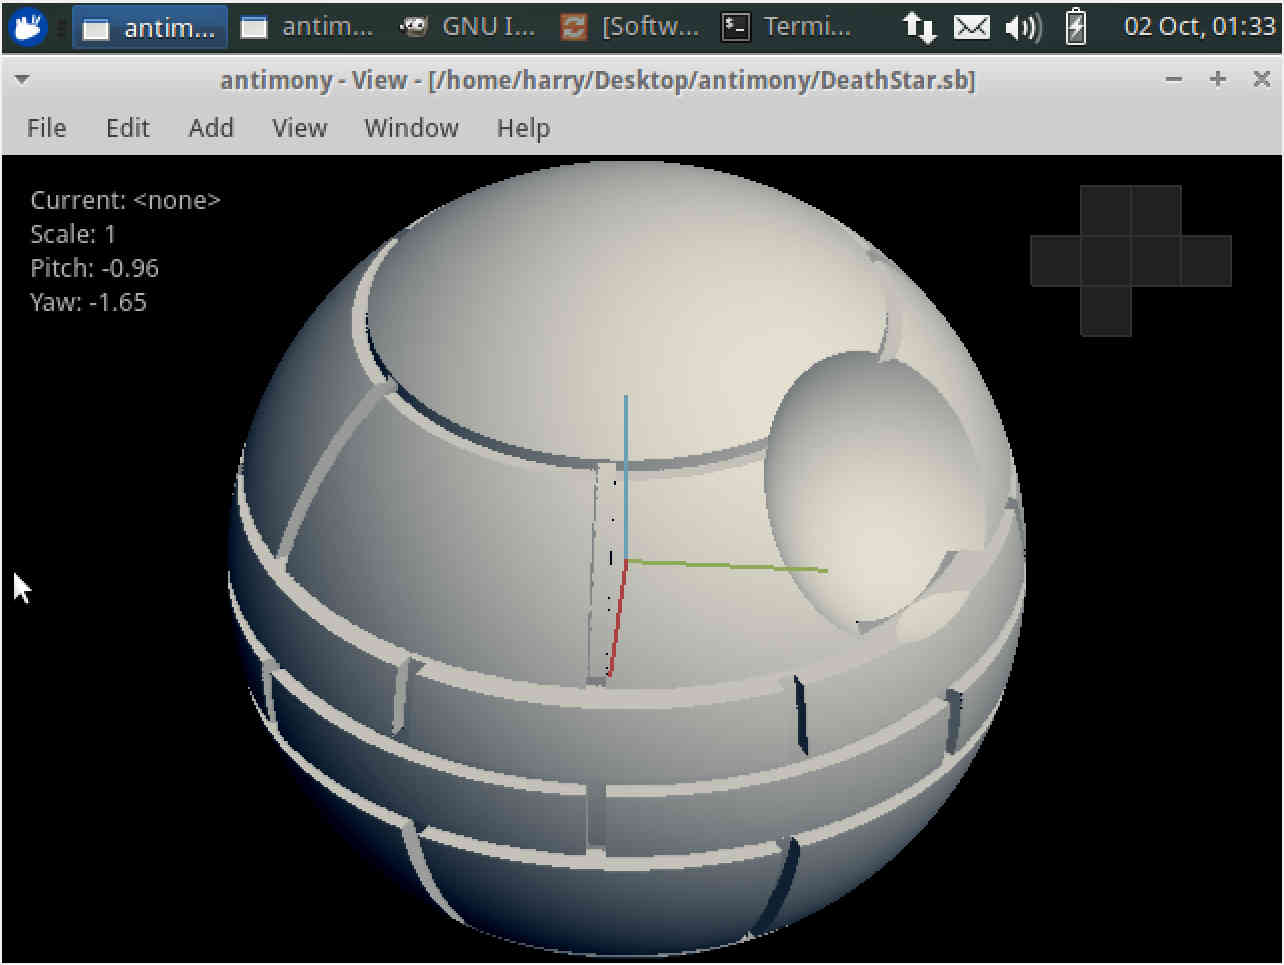
death star rendering in antimony
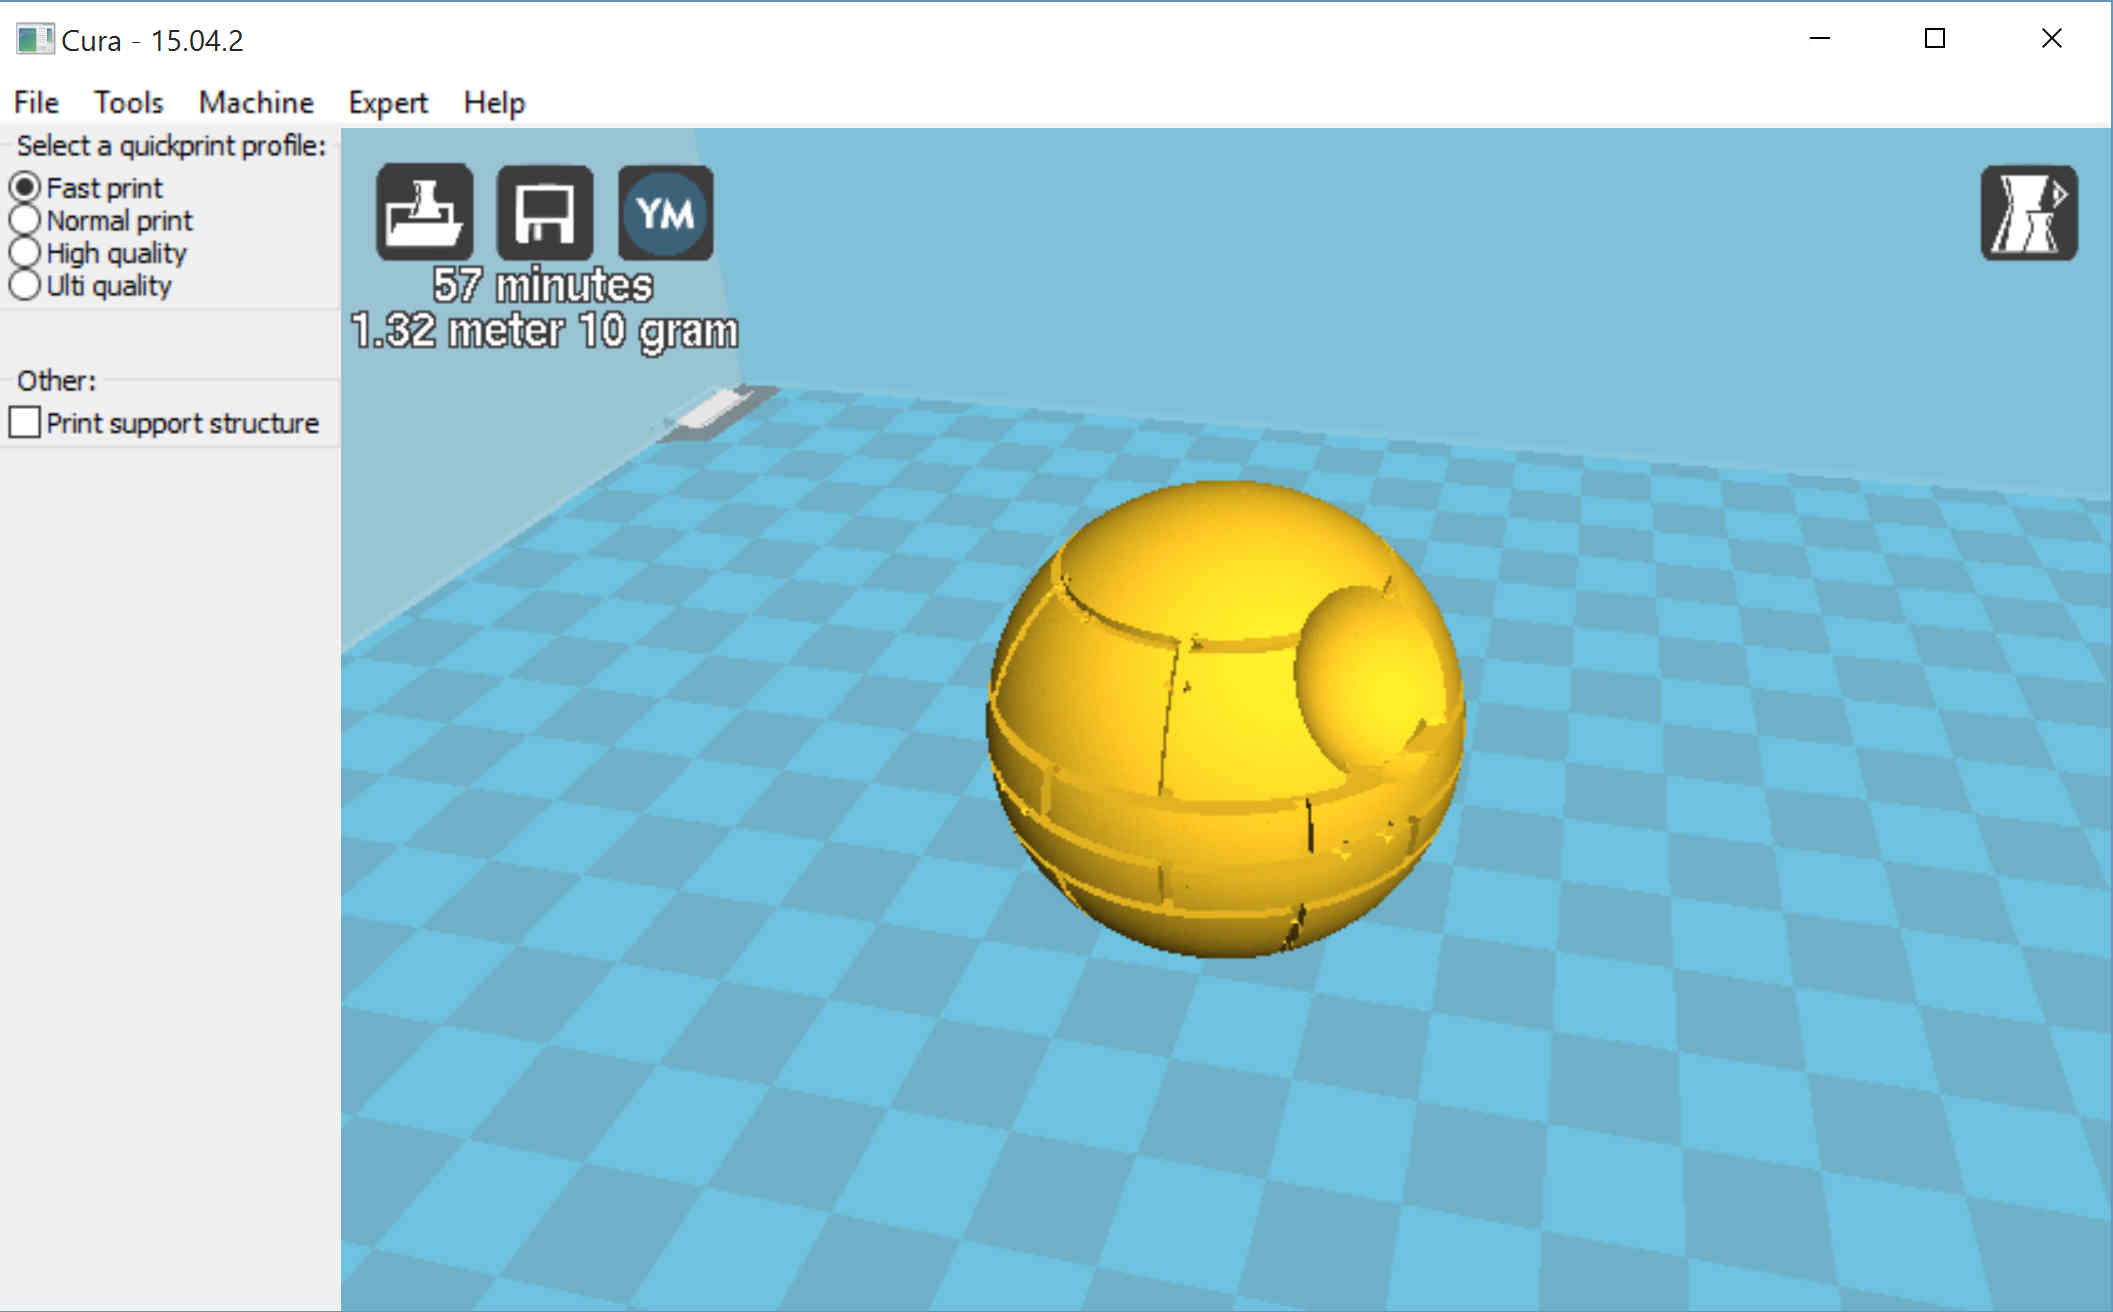
...and in cura
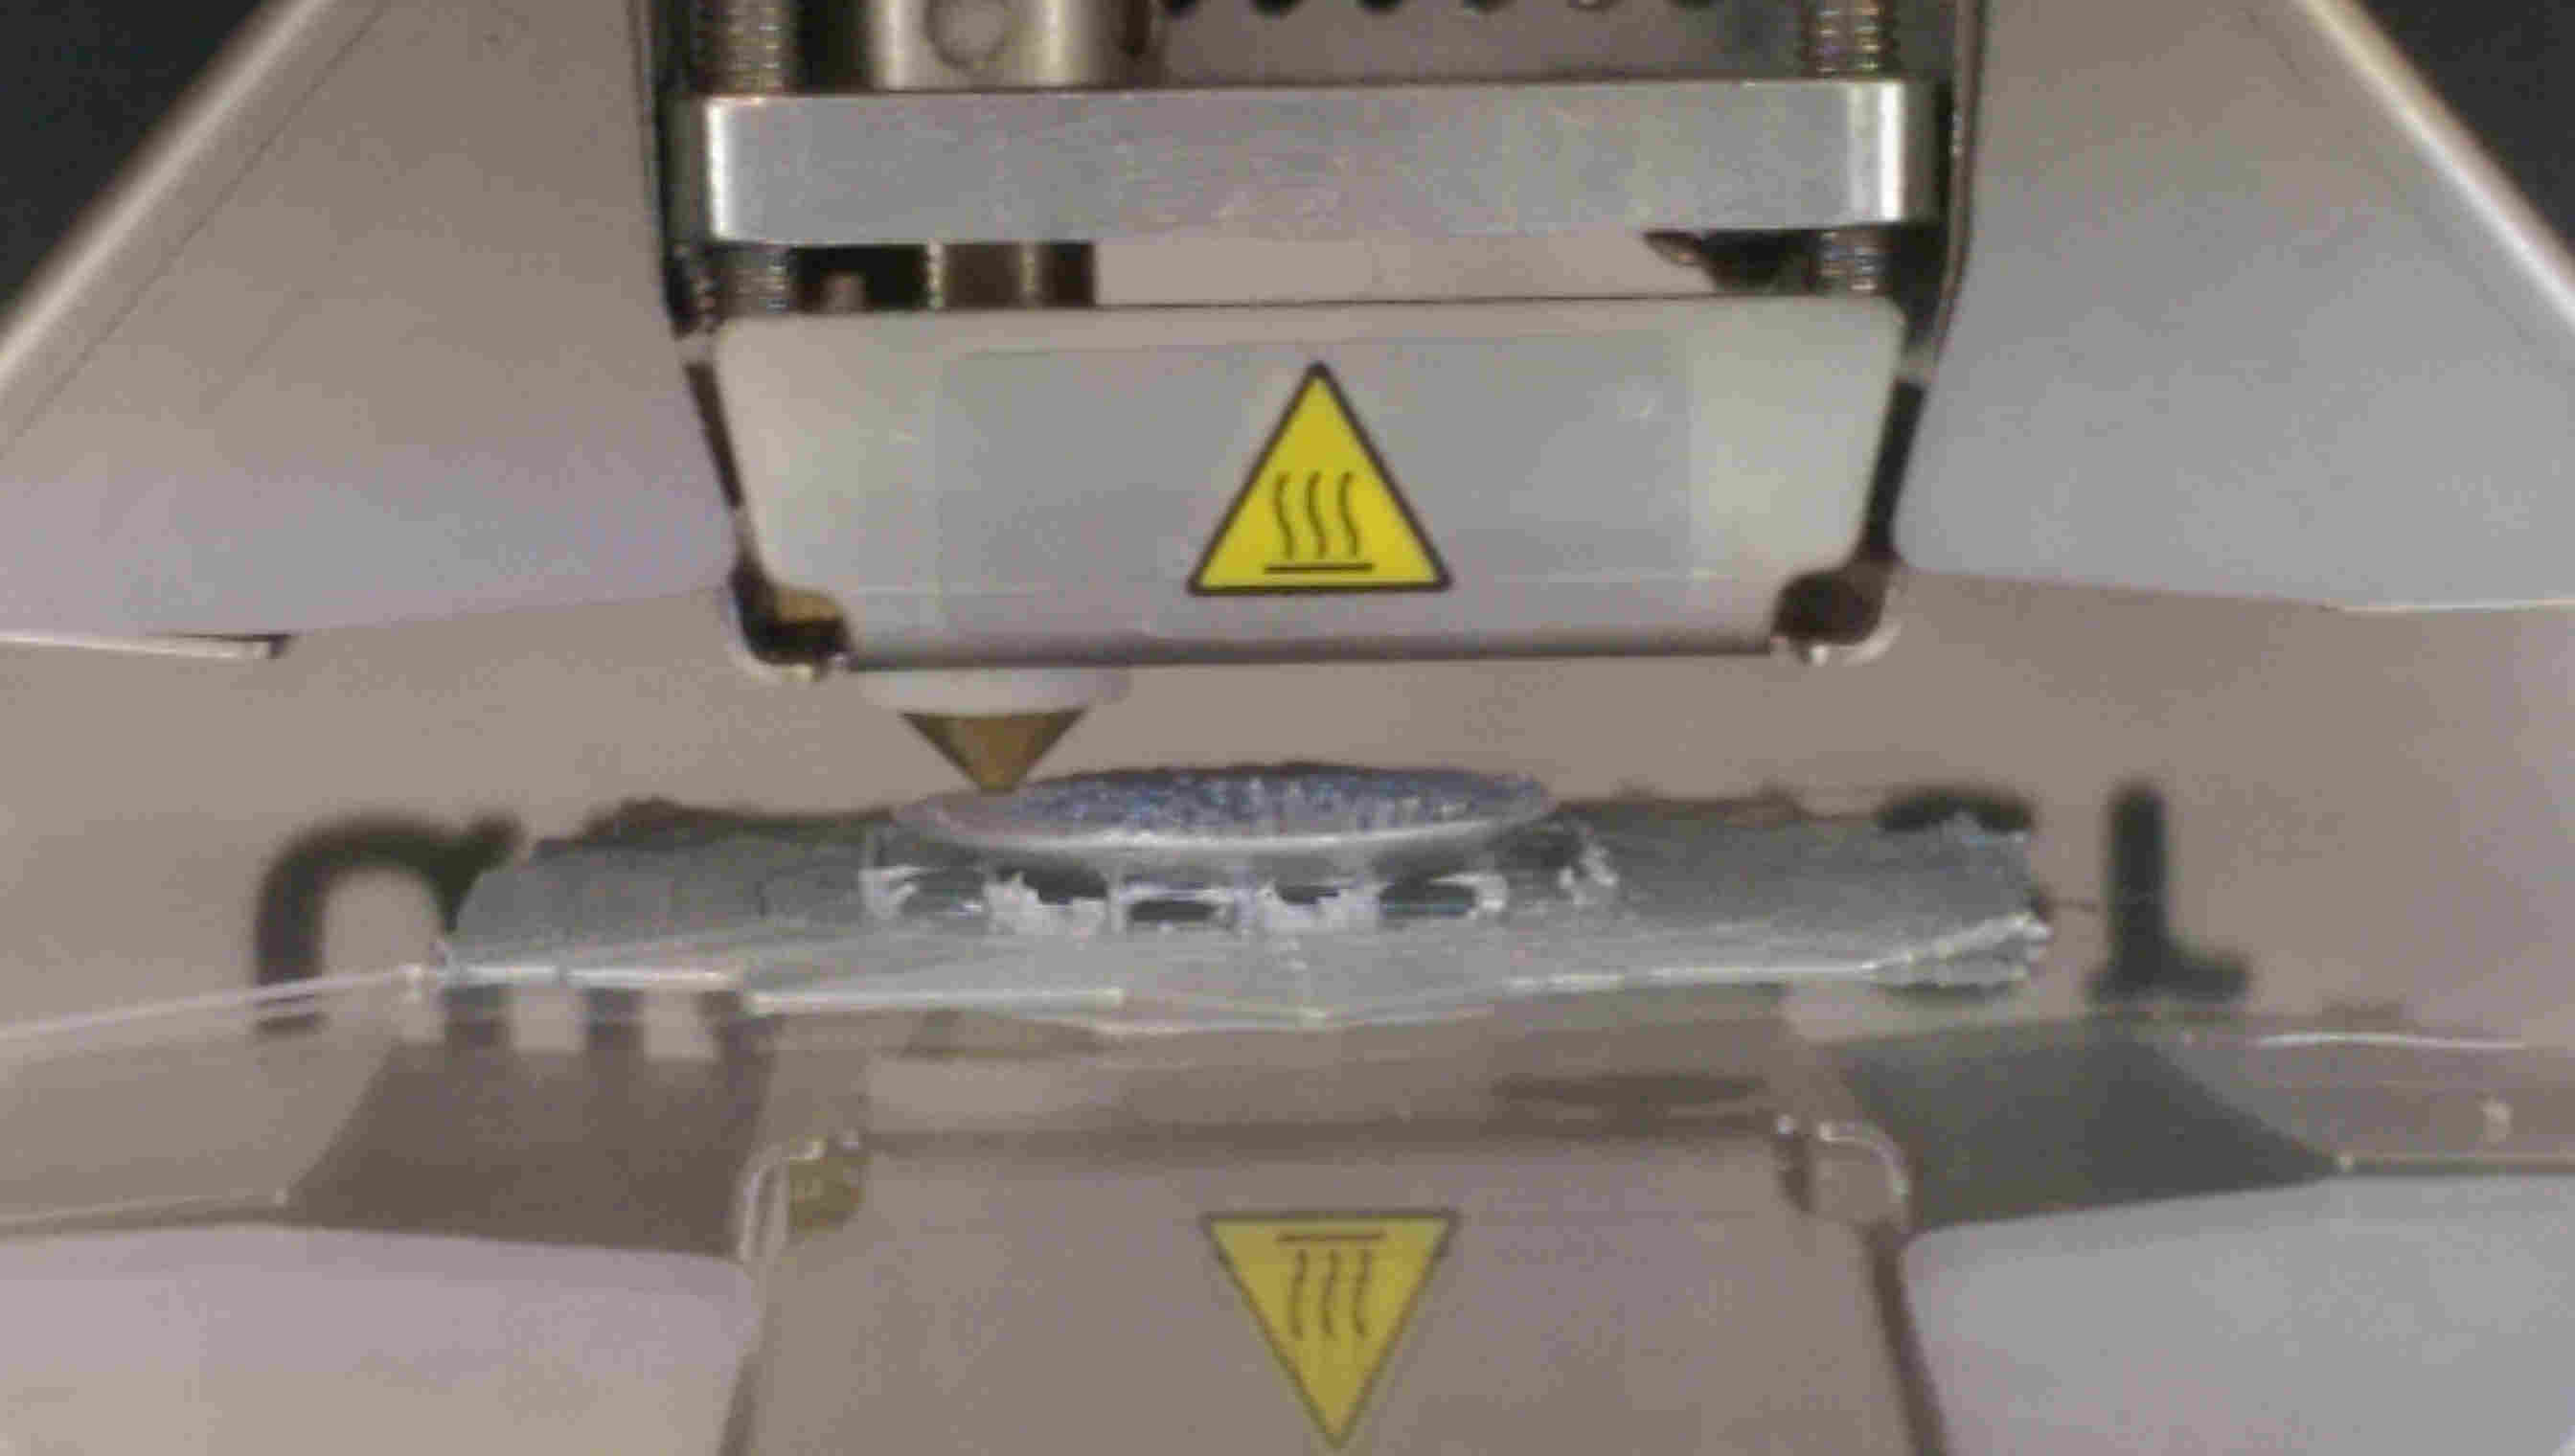
My first attempt at printing on the Ultimaker 2 encountered some issues - principally the nozzle had been clogged from a prior job. My first (naive) attempt to clear the nozzle involed using the system controls to heat the nozzle (to 260) and then force the filament through. However this had the pathalogical effect of, after forcing a bit of filament through initially, eventually clogging the nozzle and gausing the mechanical gear at the back of the machine to grind the filament, creating a large deformation that made a separate and independent obstacle to filament extrusion.
To fix it, I had to manually remove the filament from the machinal gear (to clip the ground 'stub' off) and then clear out the extruder head with 'The Atomic Method' (!). The atomic method was less aggressive than it sounds - it essentially just involved heating the extruder tip to its maximum temperature (260), then manually pushing a short (~20 cm) filament piece through until a decent material stream came through the tip. I then cooled the system temperature down to 90 (for PLA; different materials should be cooled to different values), yanked out the filament from extruder, and then repeated the entire processes until the resulting tip was conical and smooth (see below).
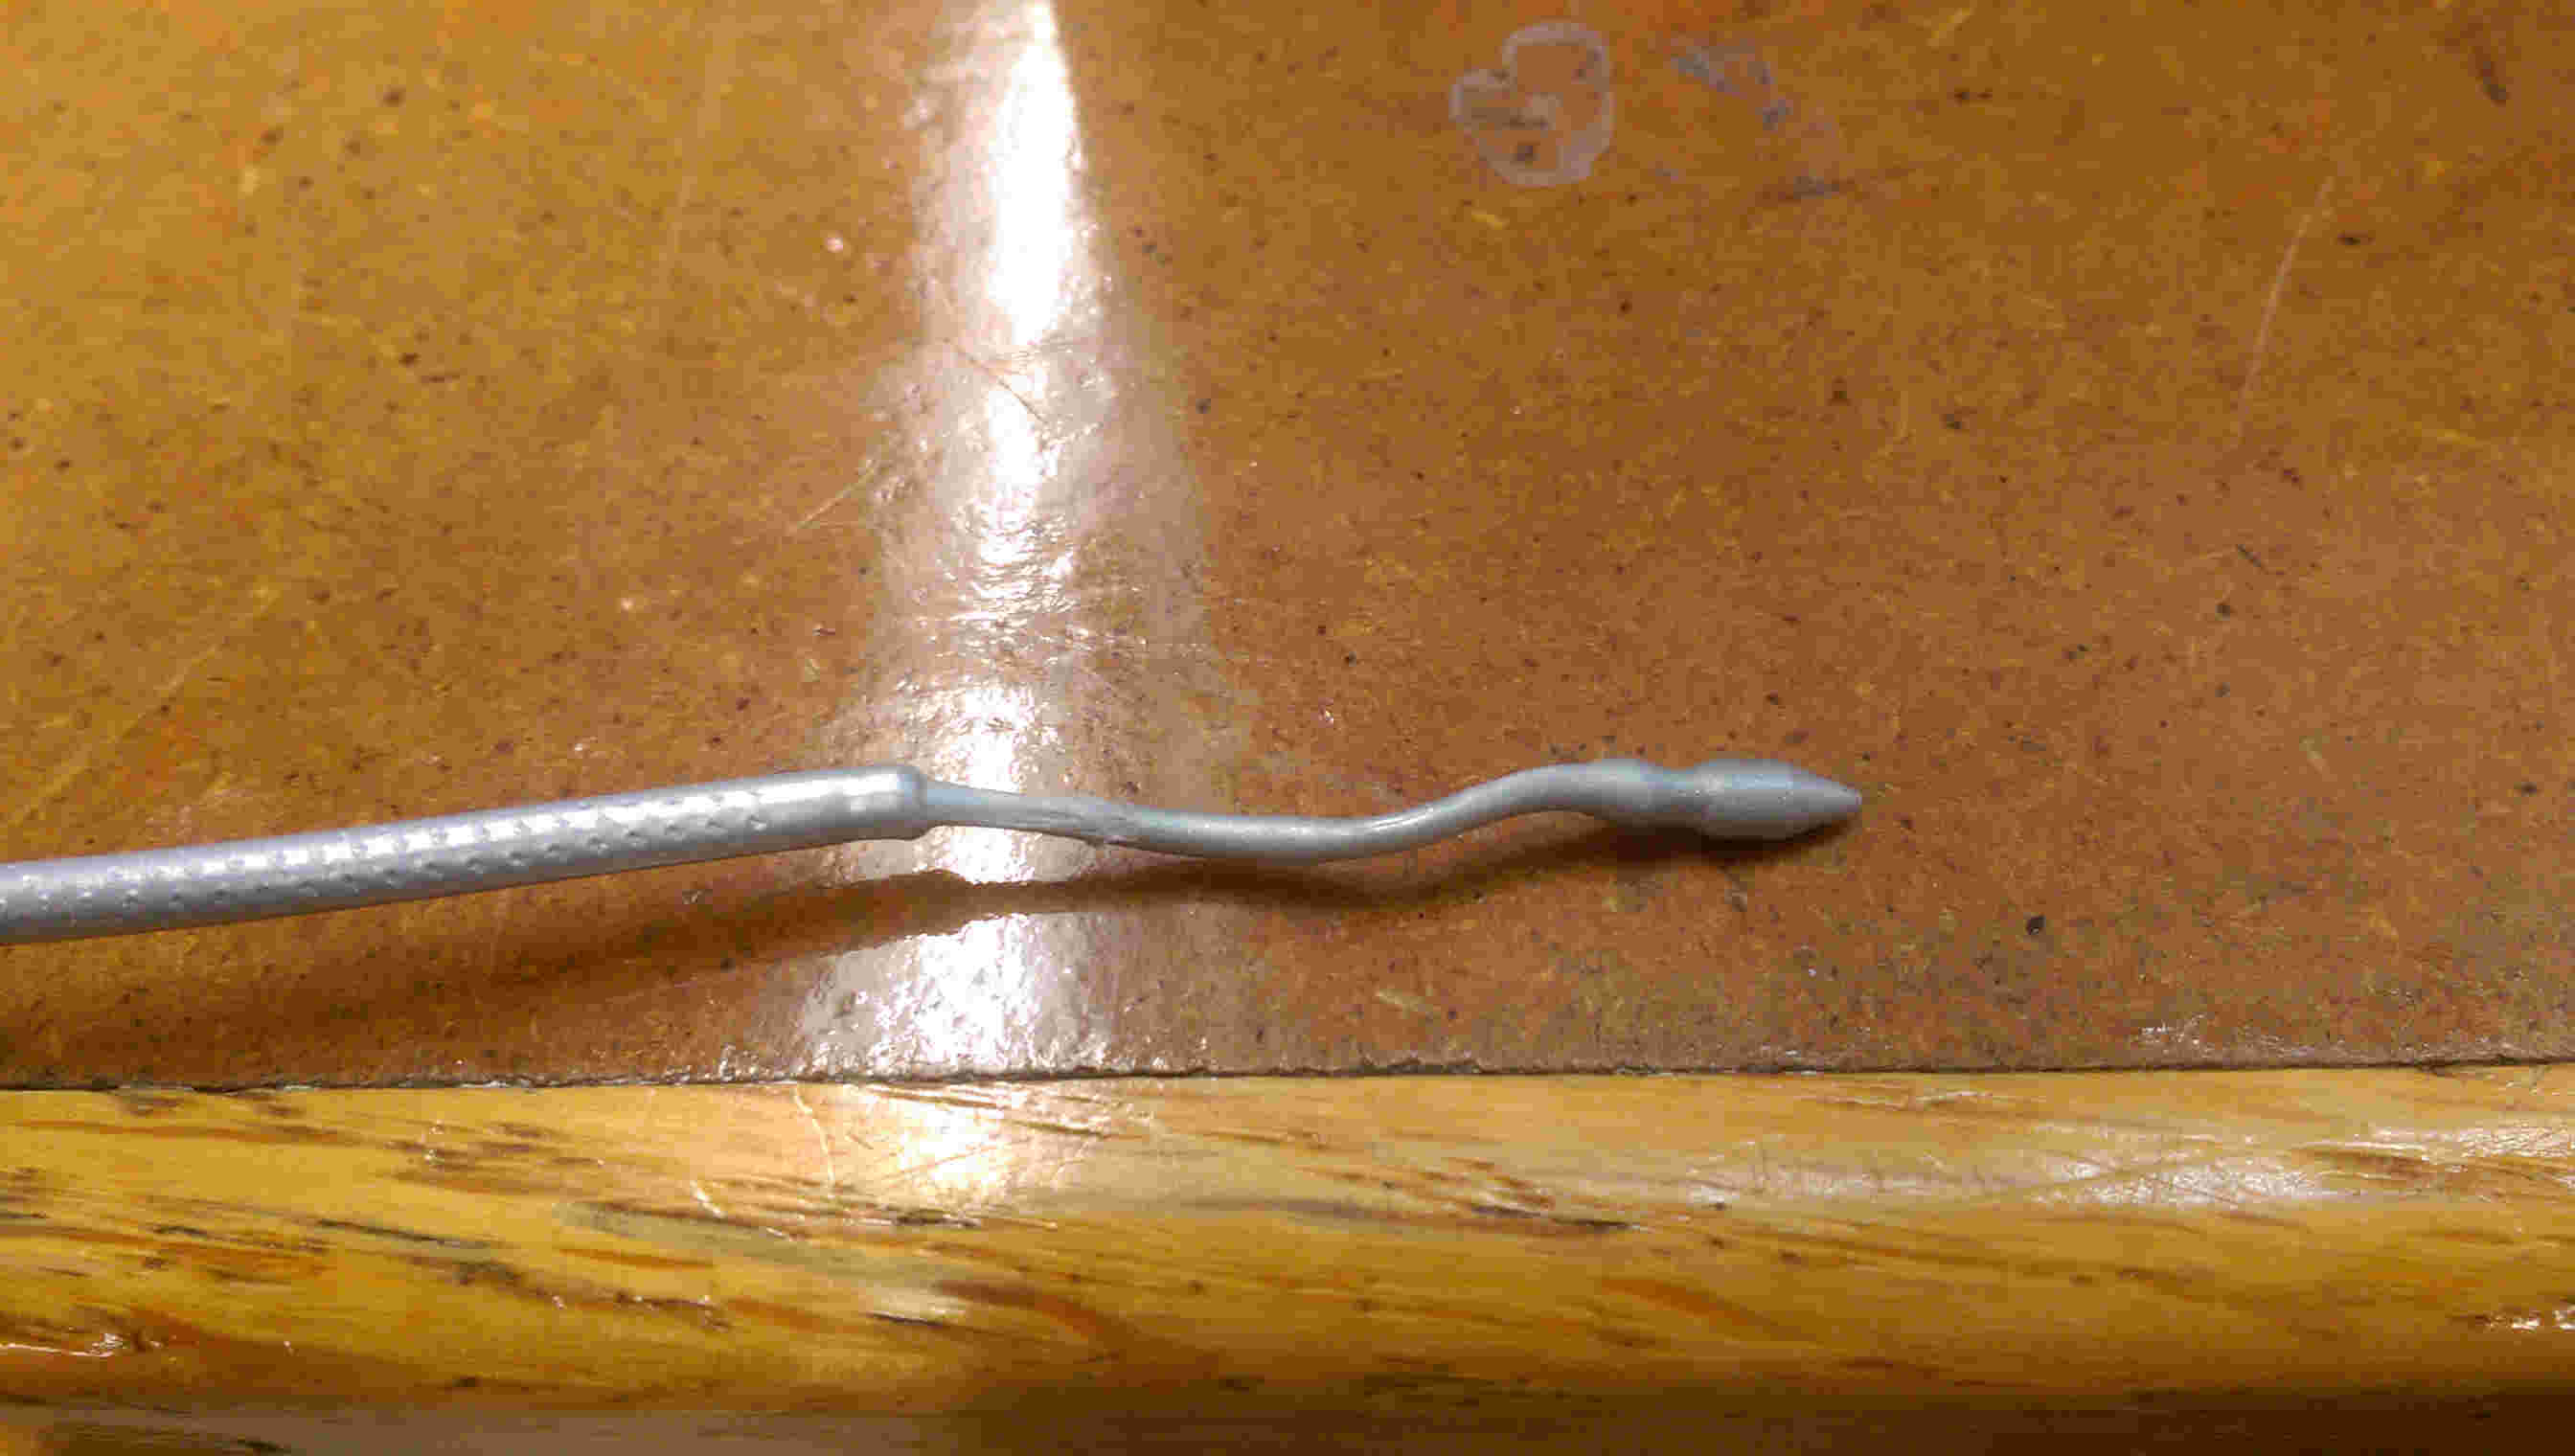
atomic method validation - conical and smooth
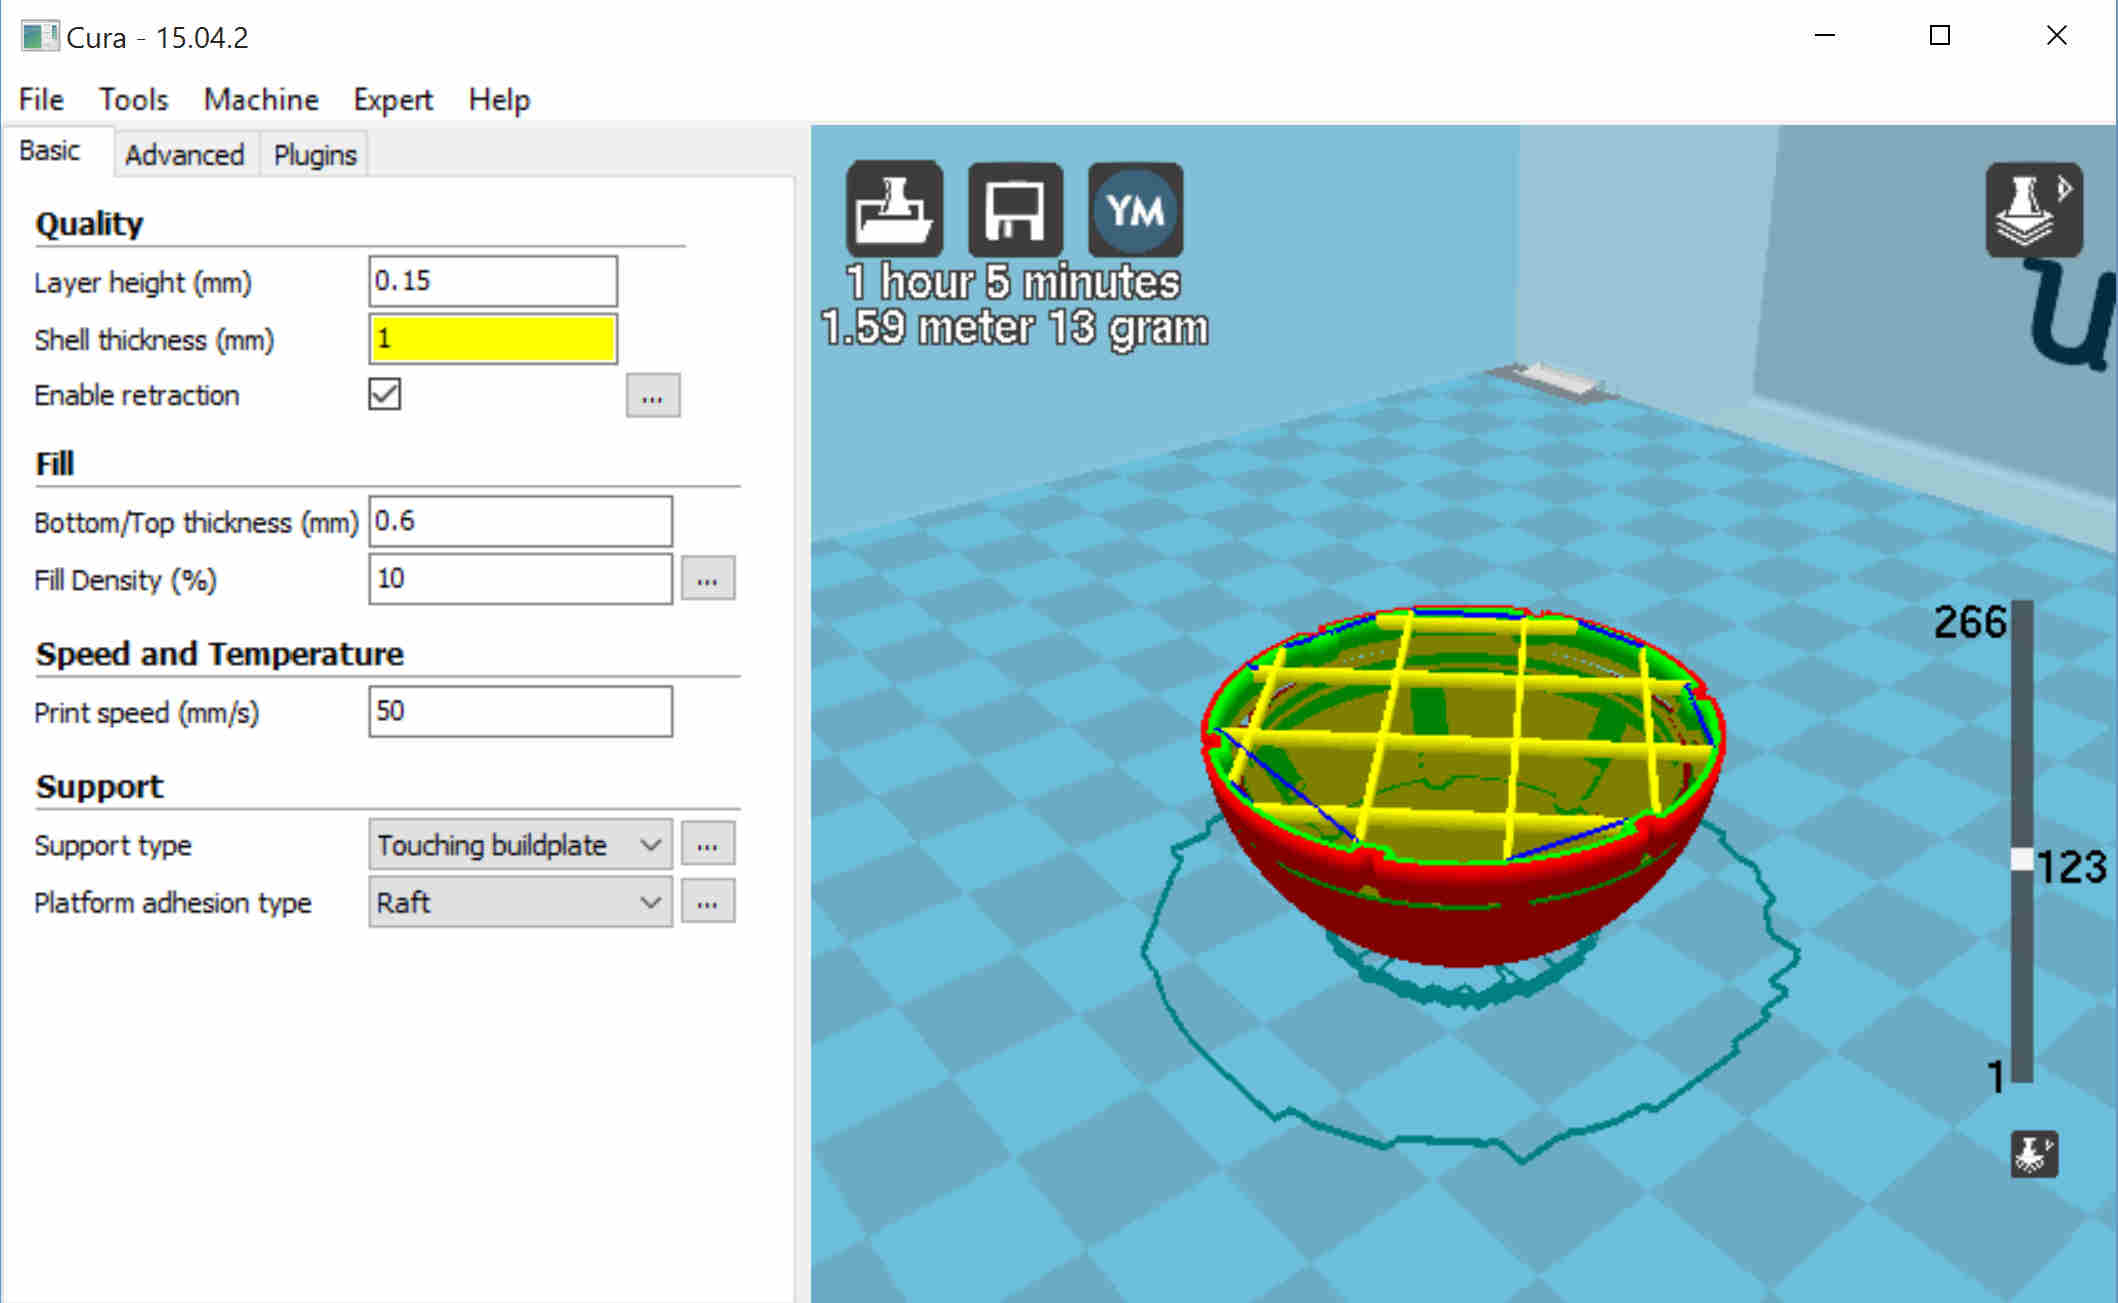
A separate challenge came when, during my first print, the small contact area of the sphere with the printer bed was not sufficient, and the piece detached and slipped during the early stages of the print. I added a raft contact to anchor my piece and re-printed.
death star rendering in antimony
printing the death star
laying a foundation for attachment to the buildplate
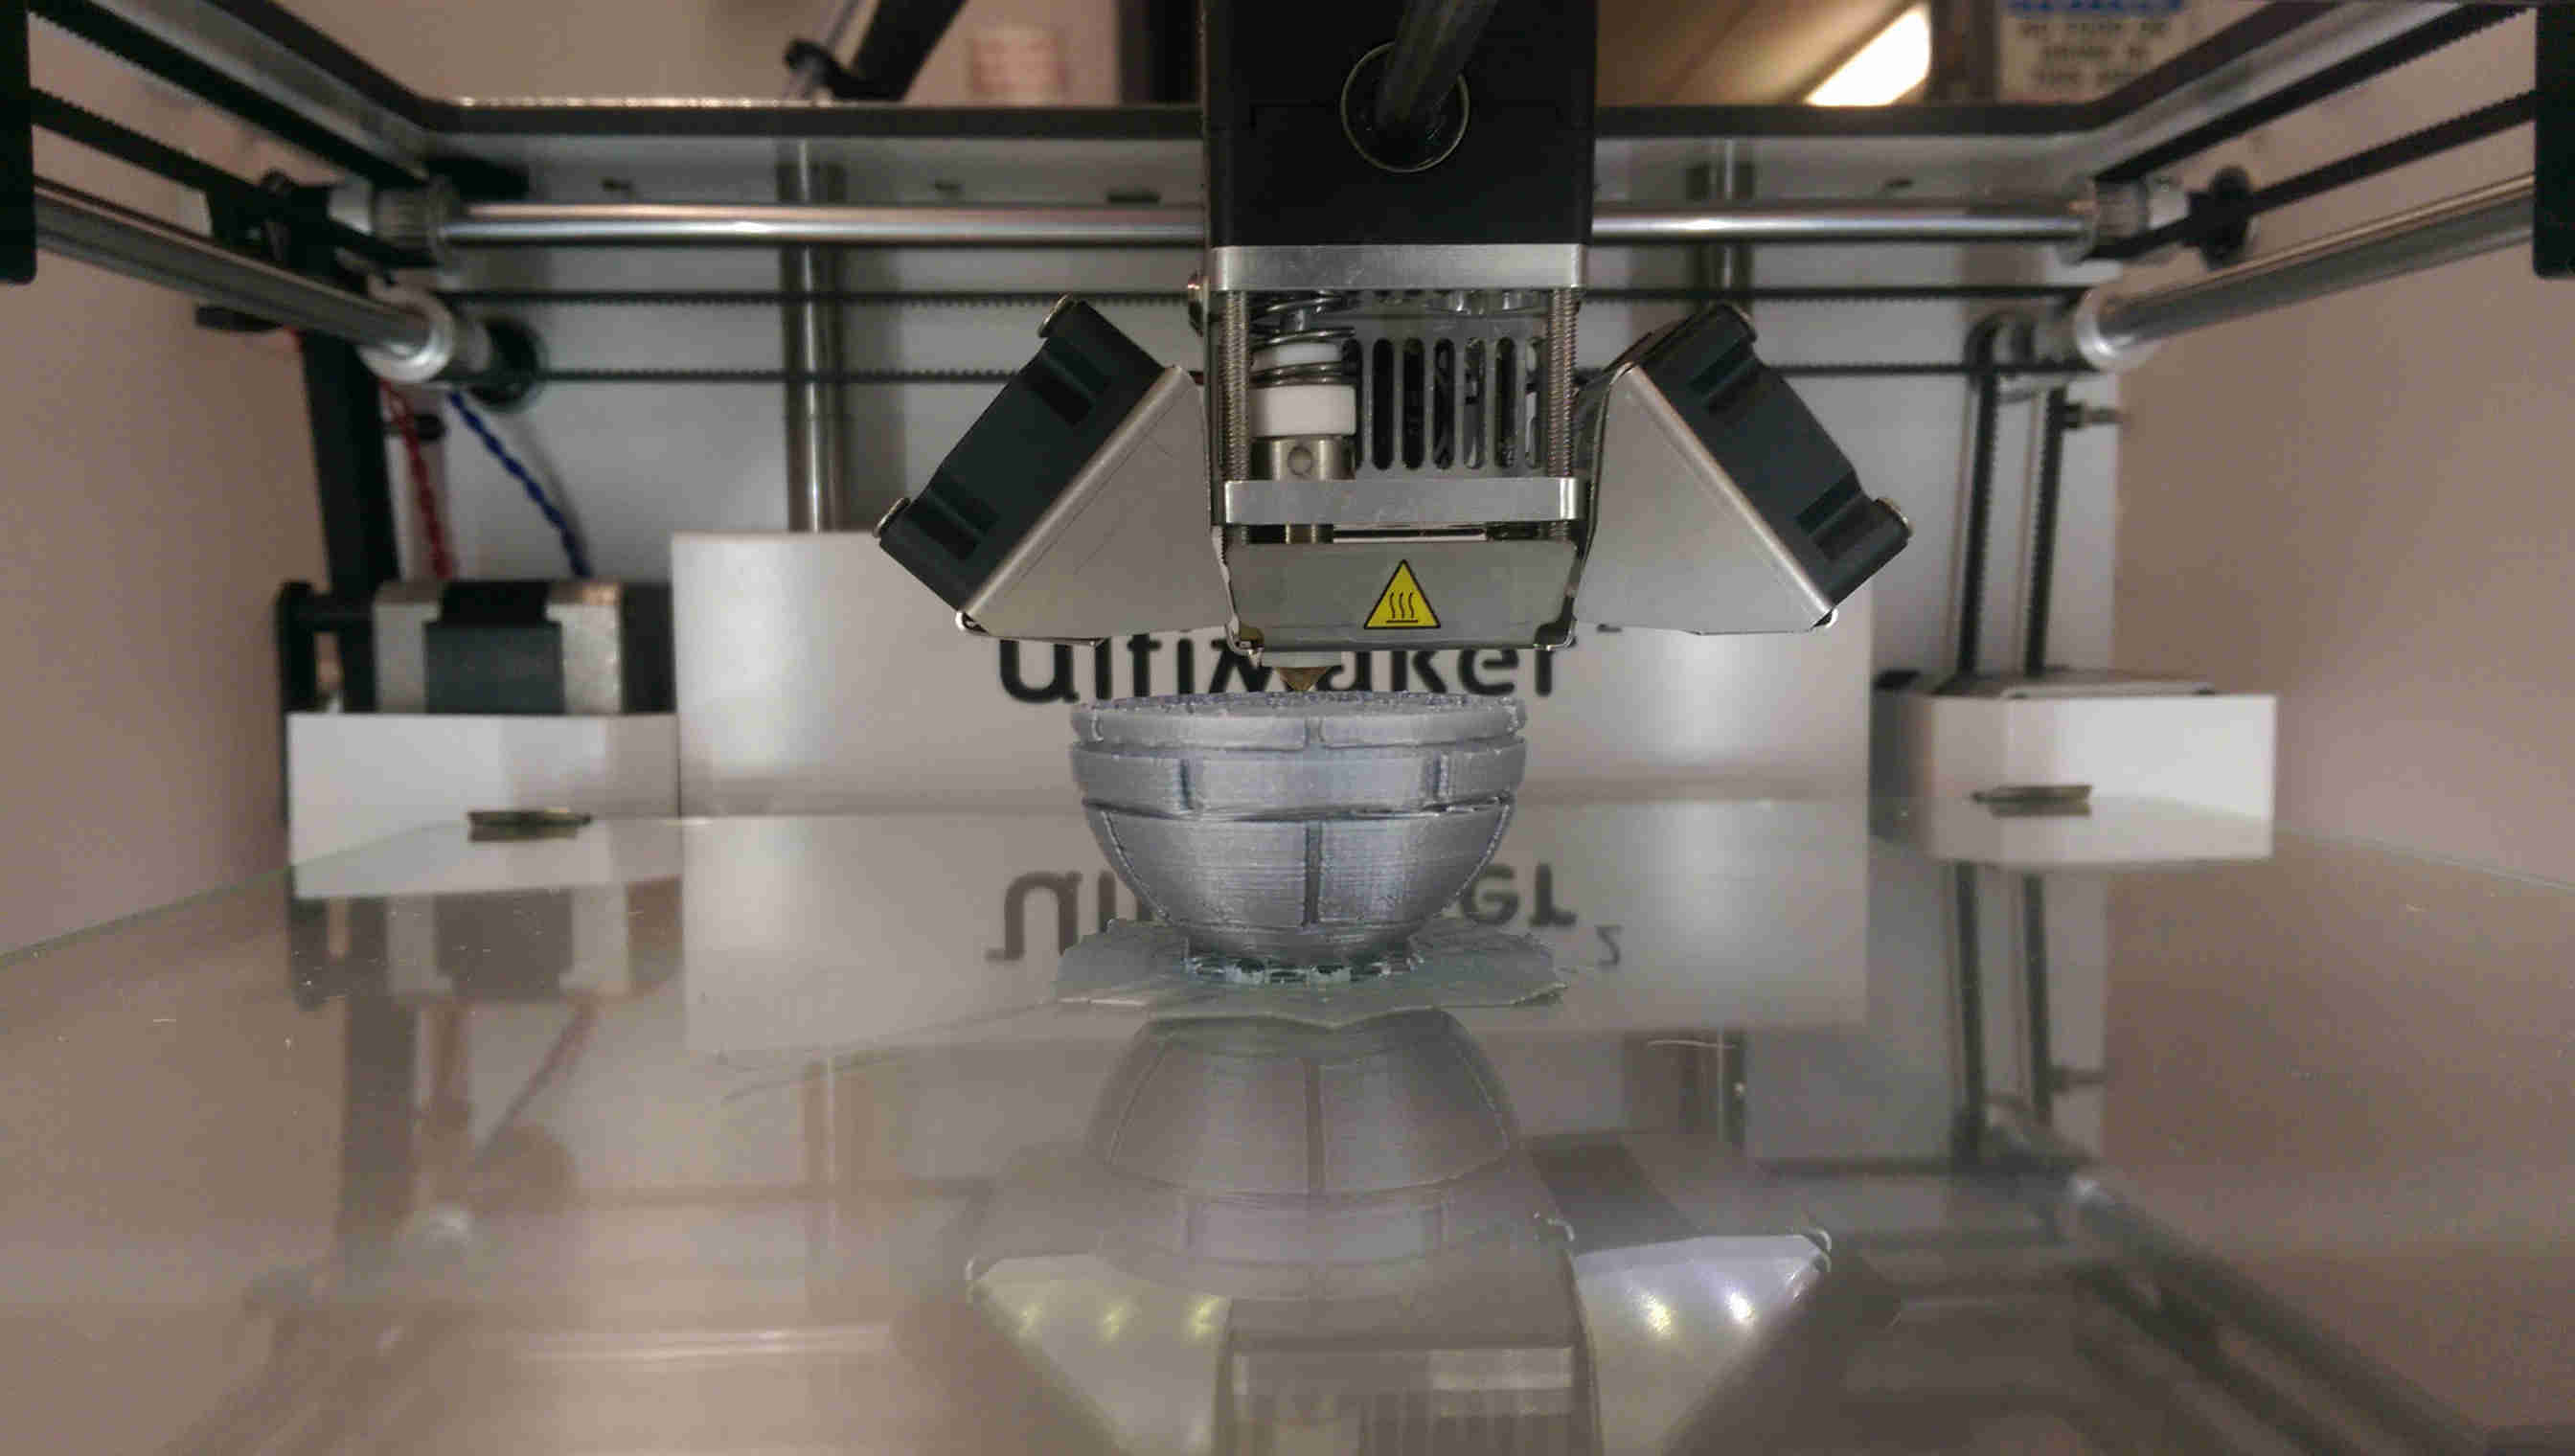
in progress
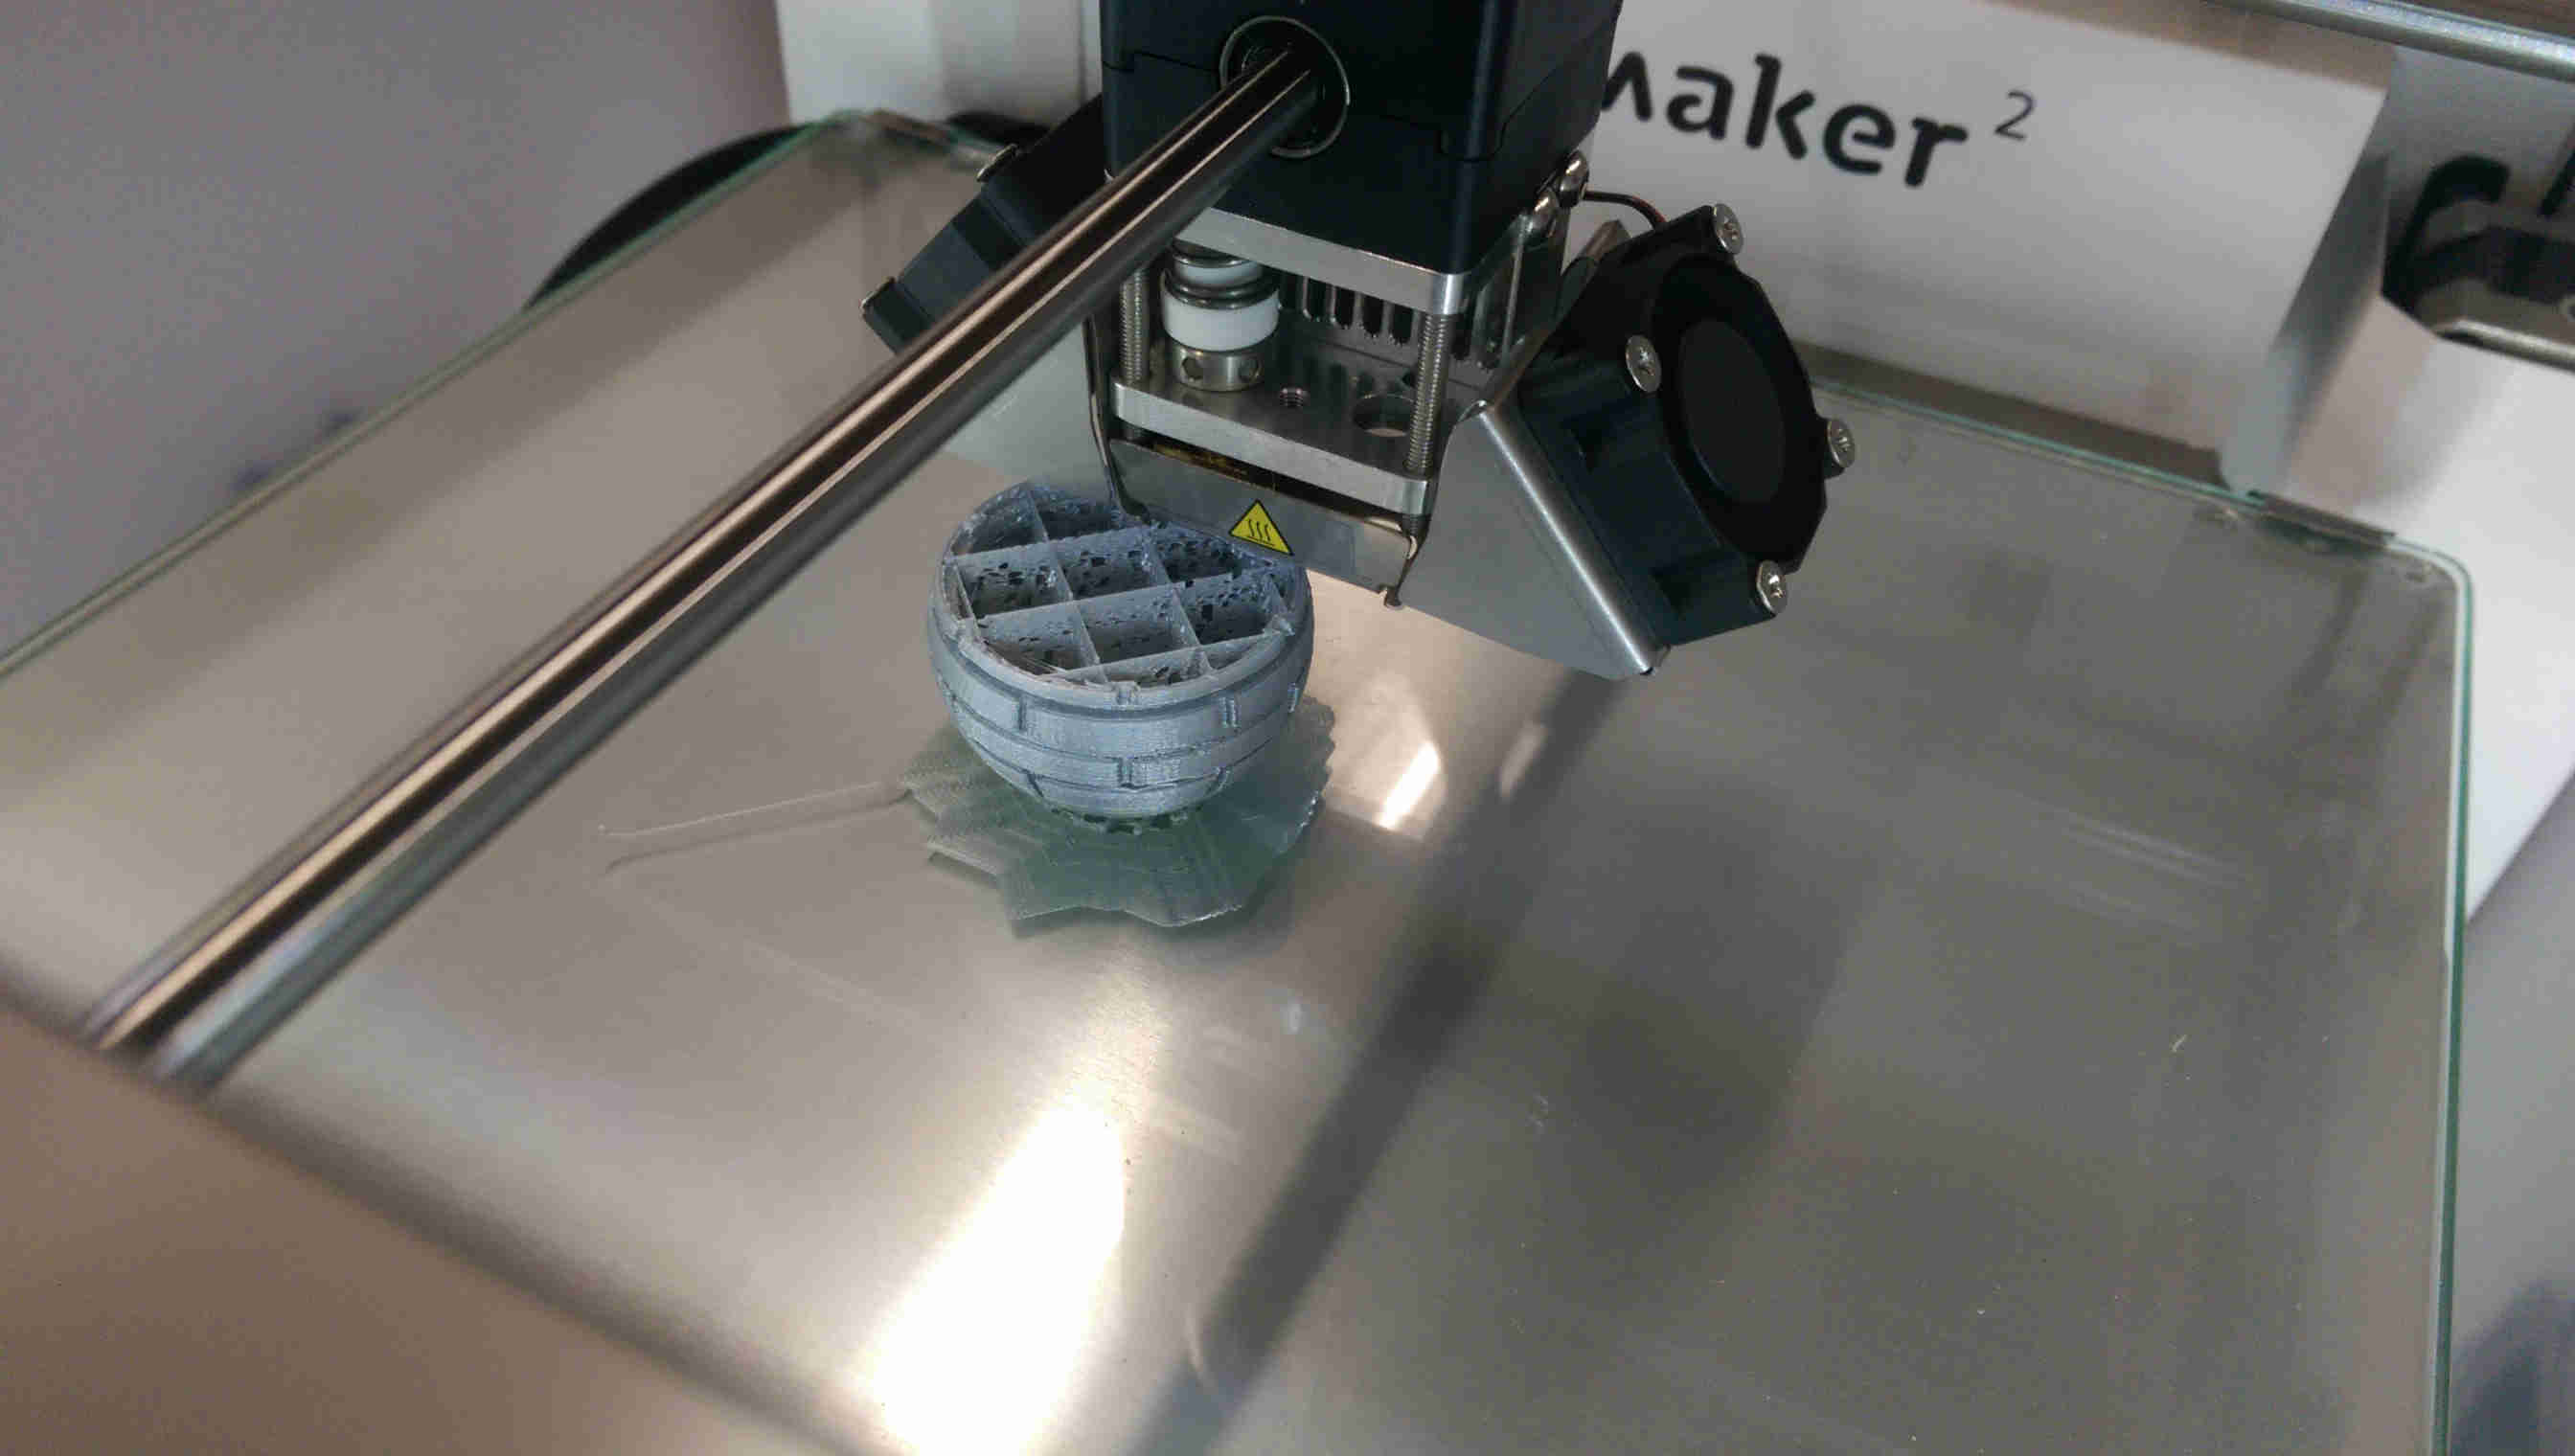
internal mesh for a 10% fill
fin
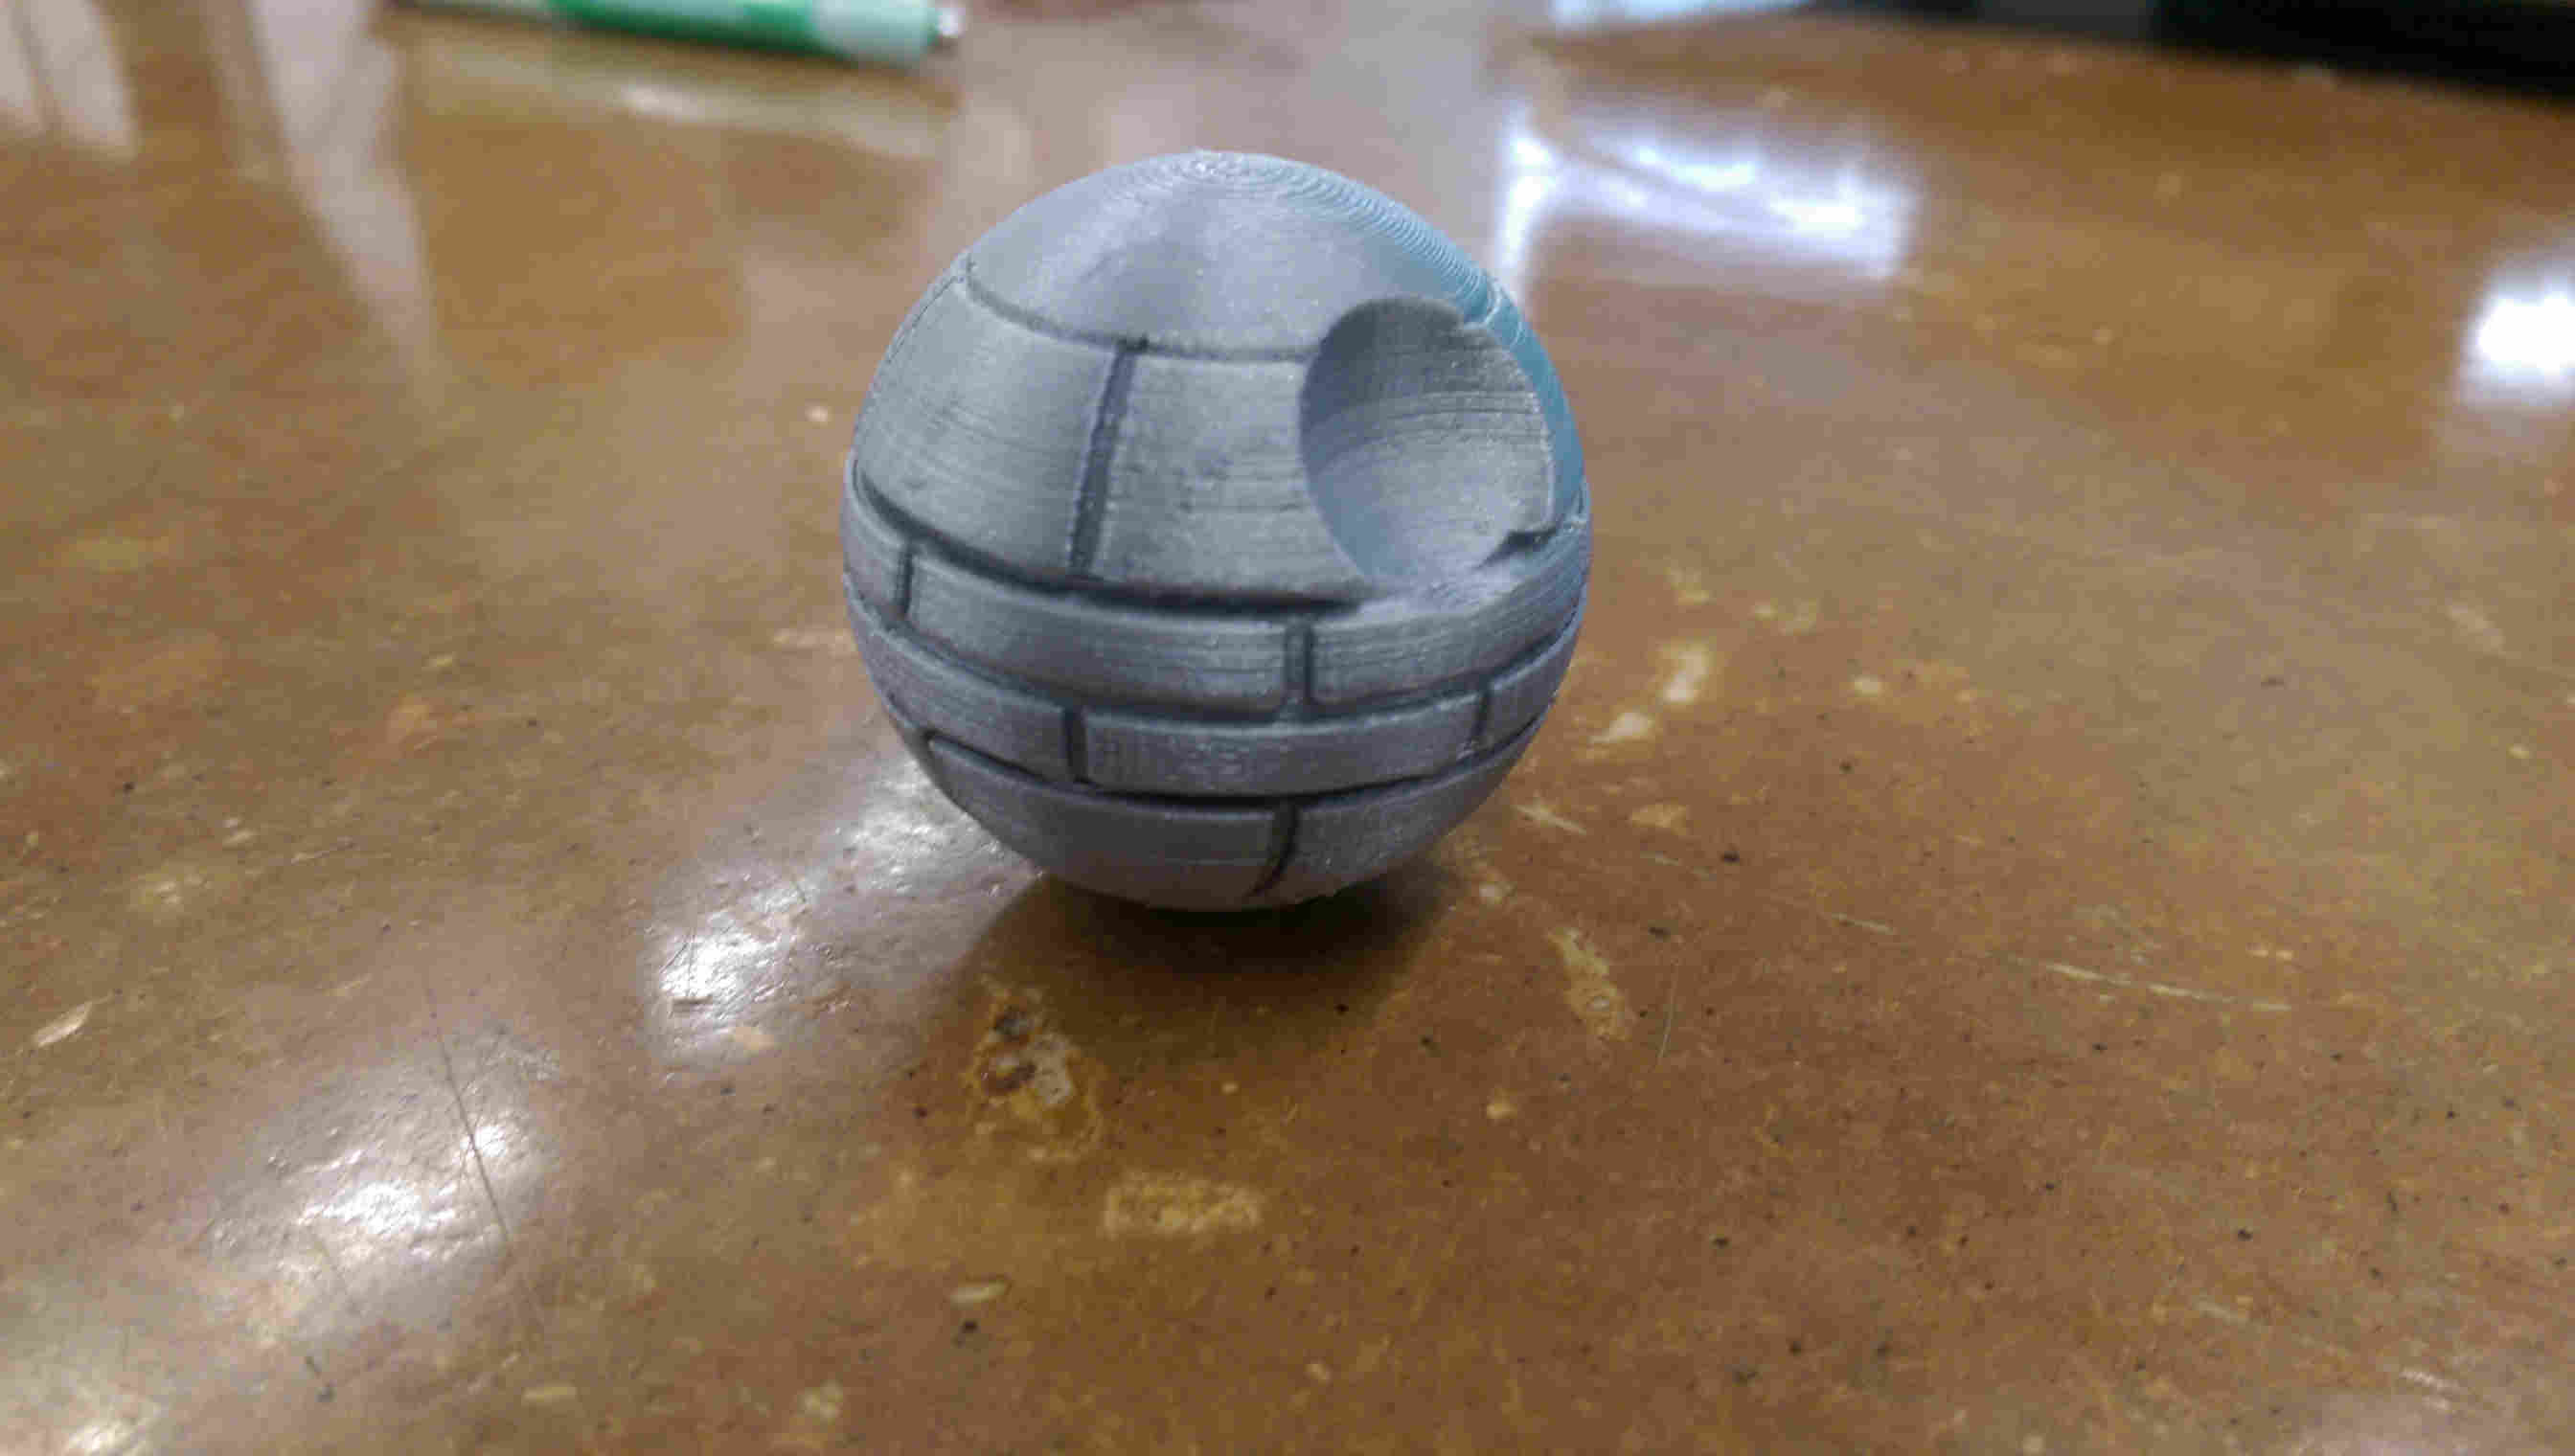
that's no moon... that's (a paperweight?)!
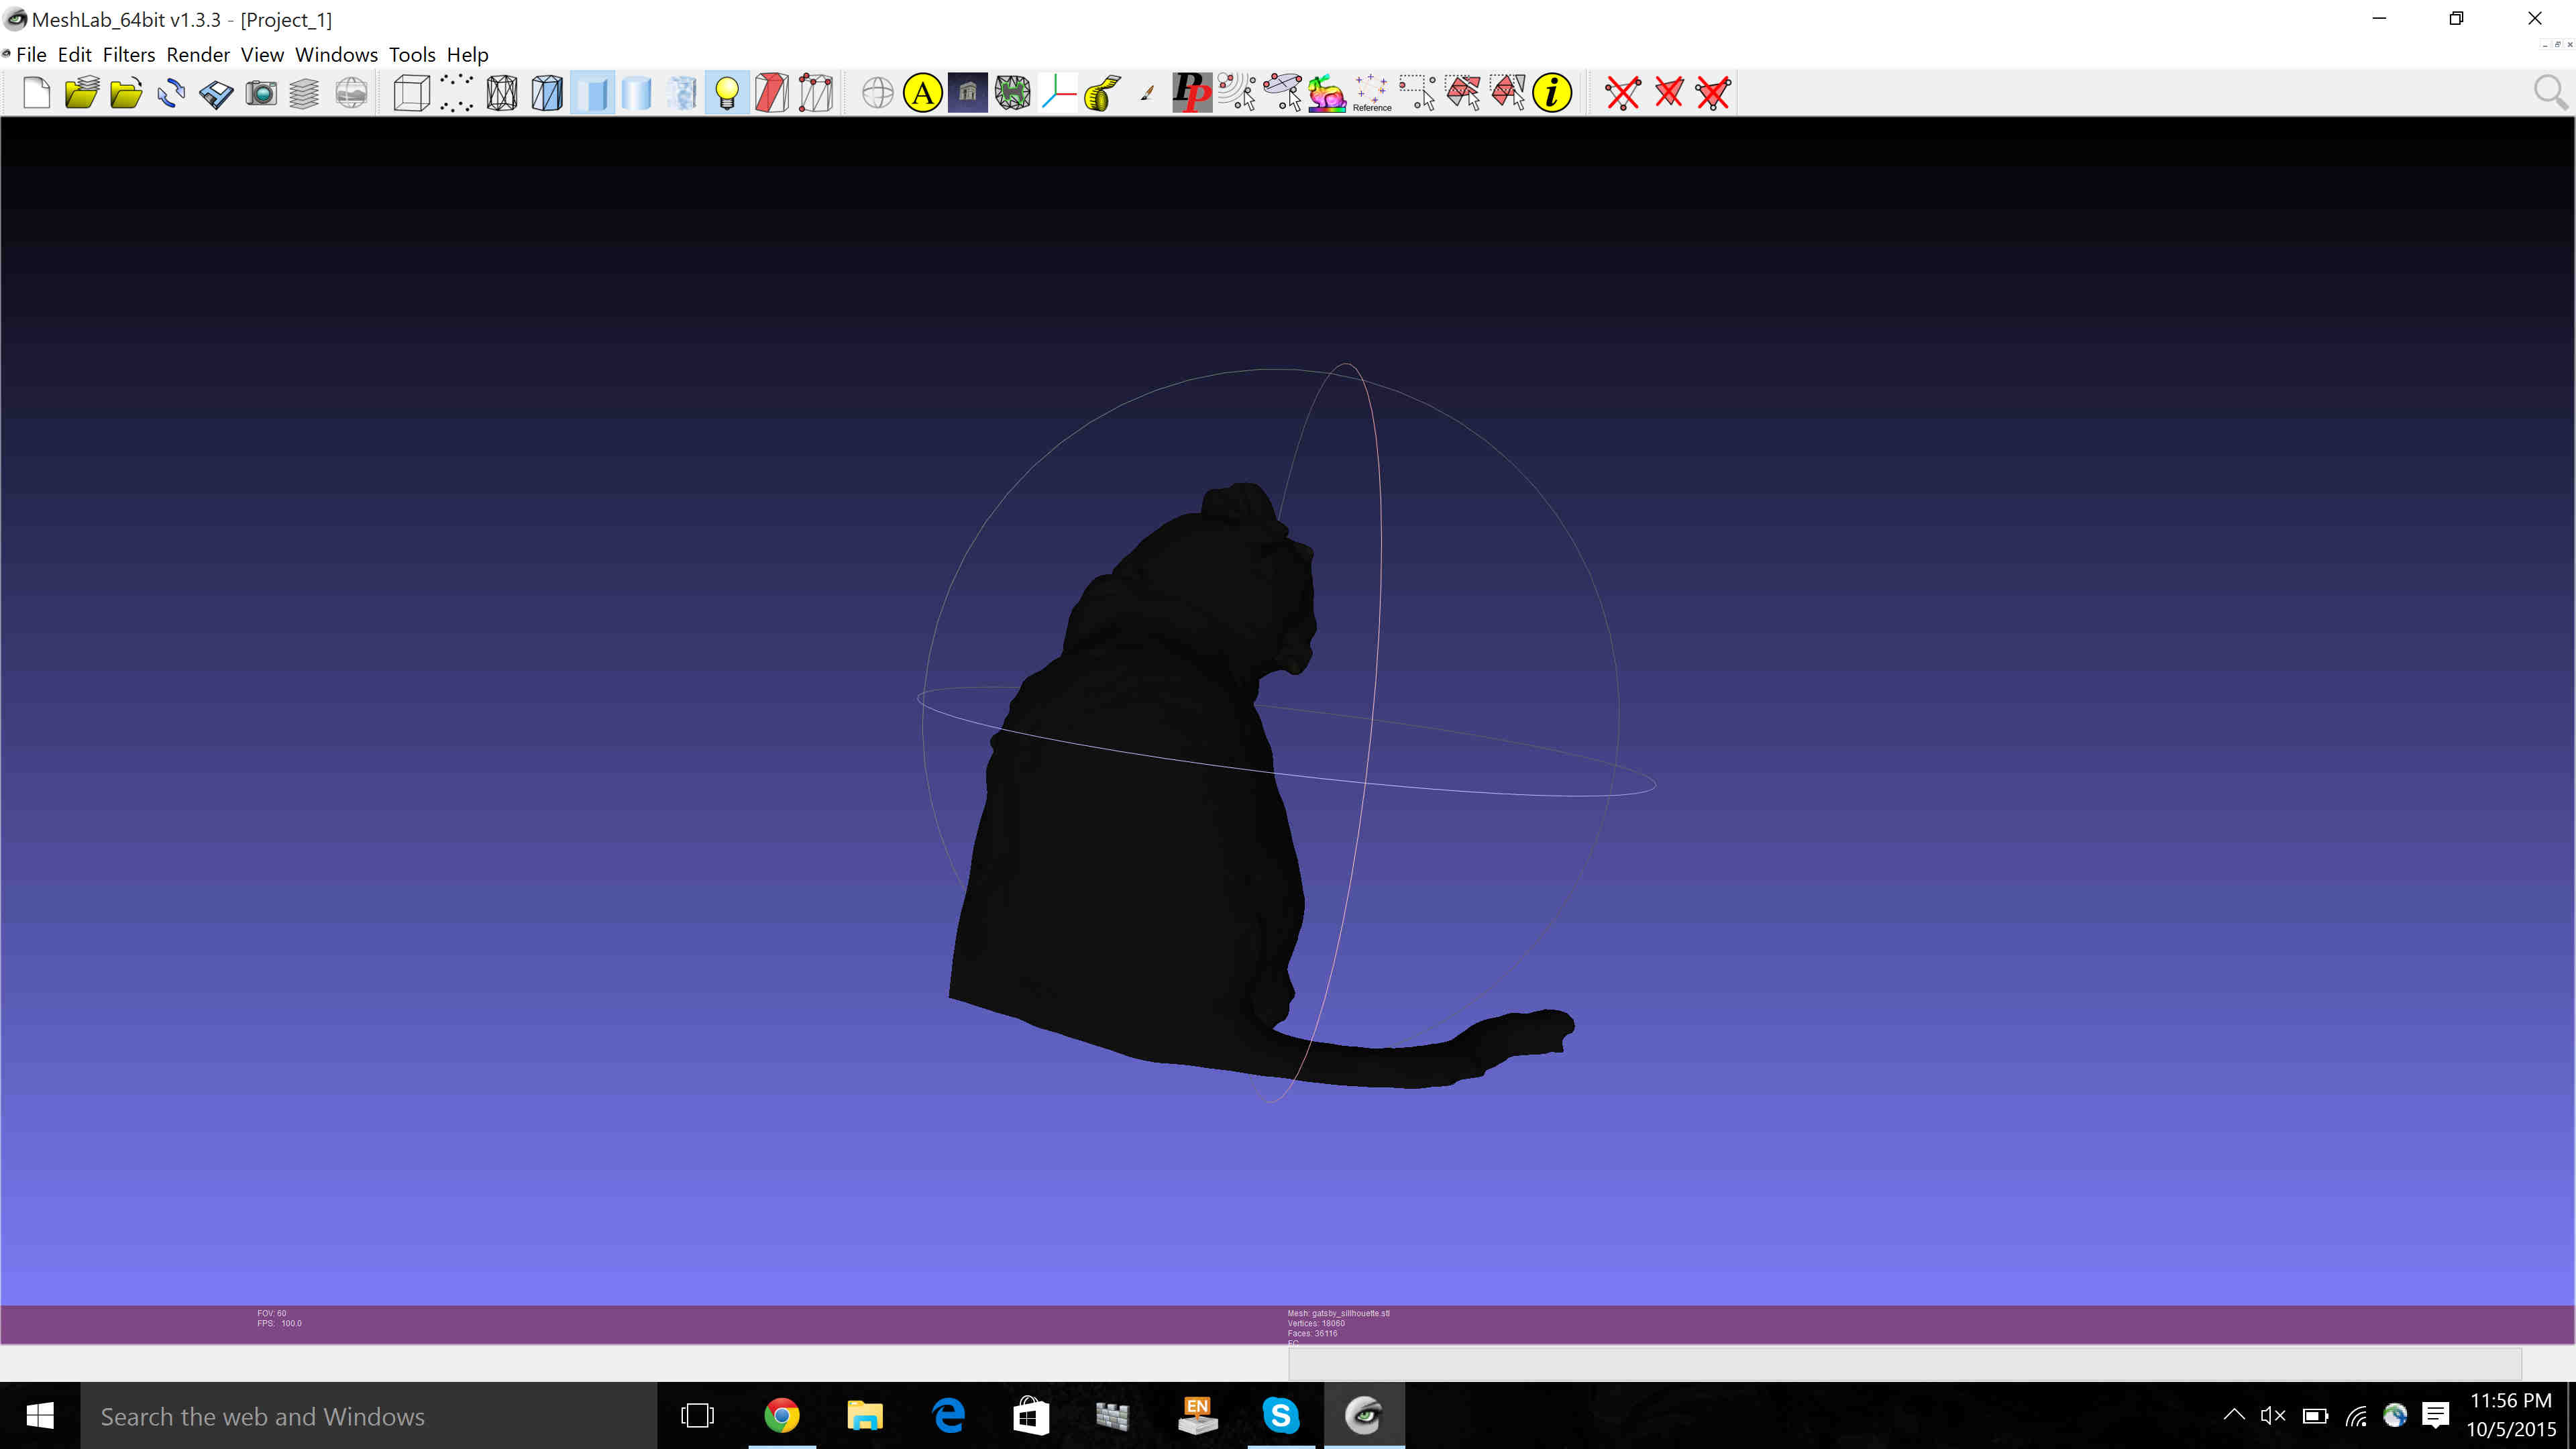
many ways to scan a cat
My other challenge for this week was scanning my girlfriend's cat, Gatsby. Gatsby is a, well, substantial cat who I have long thought worthy of internet fame.
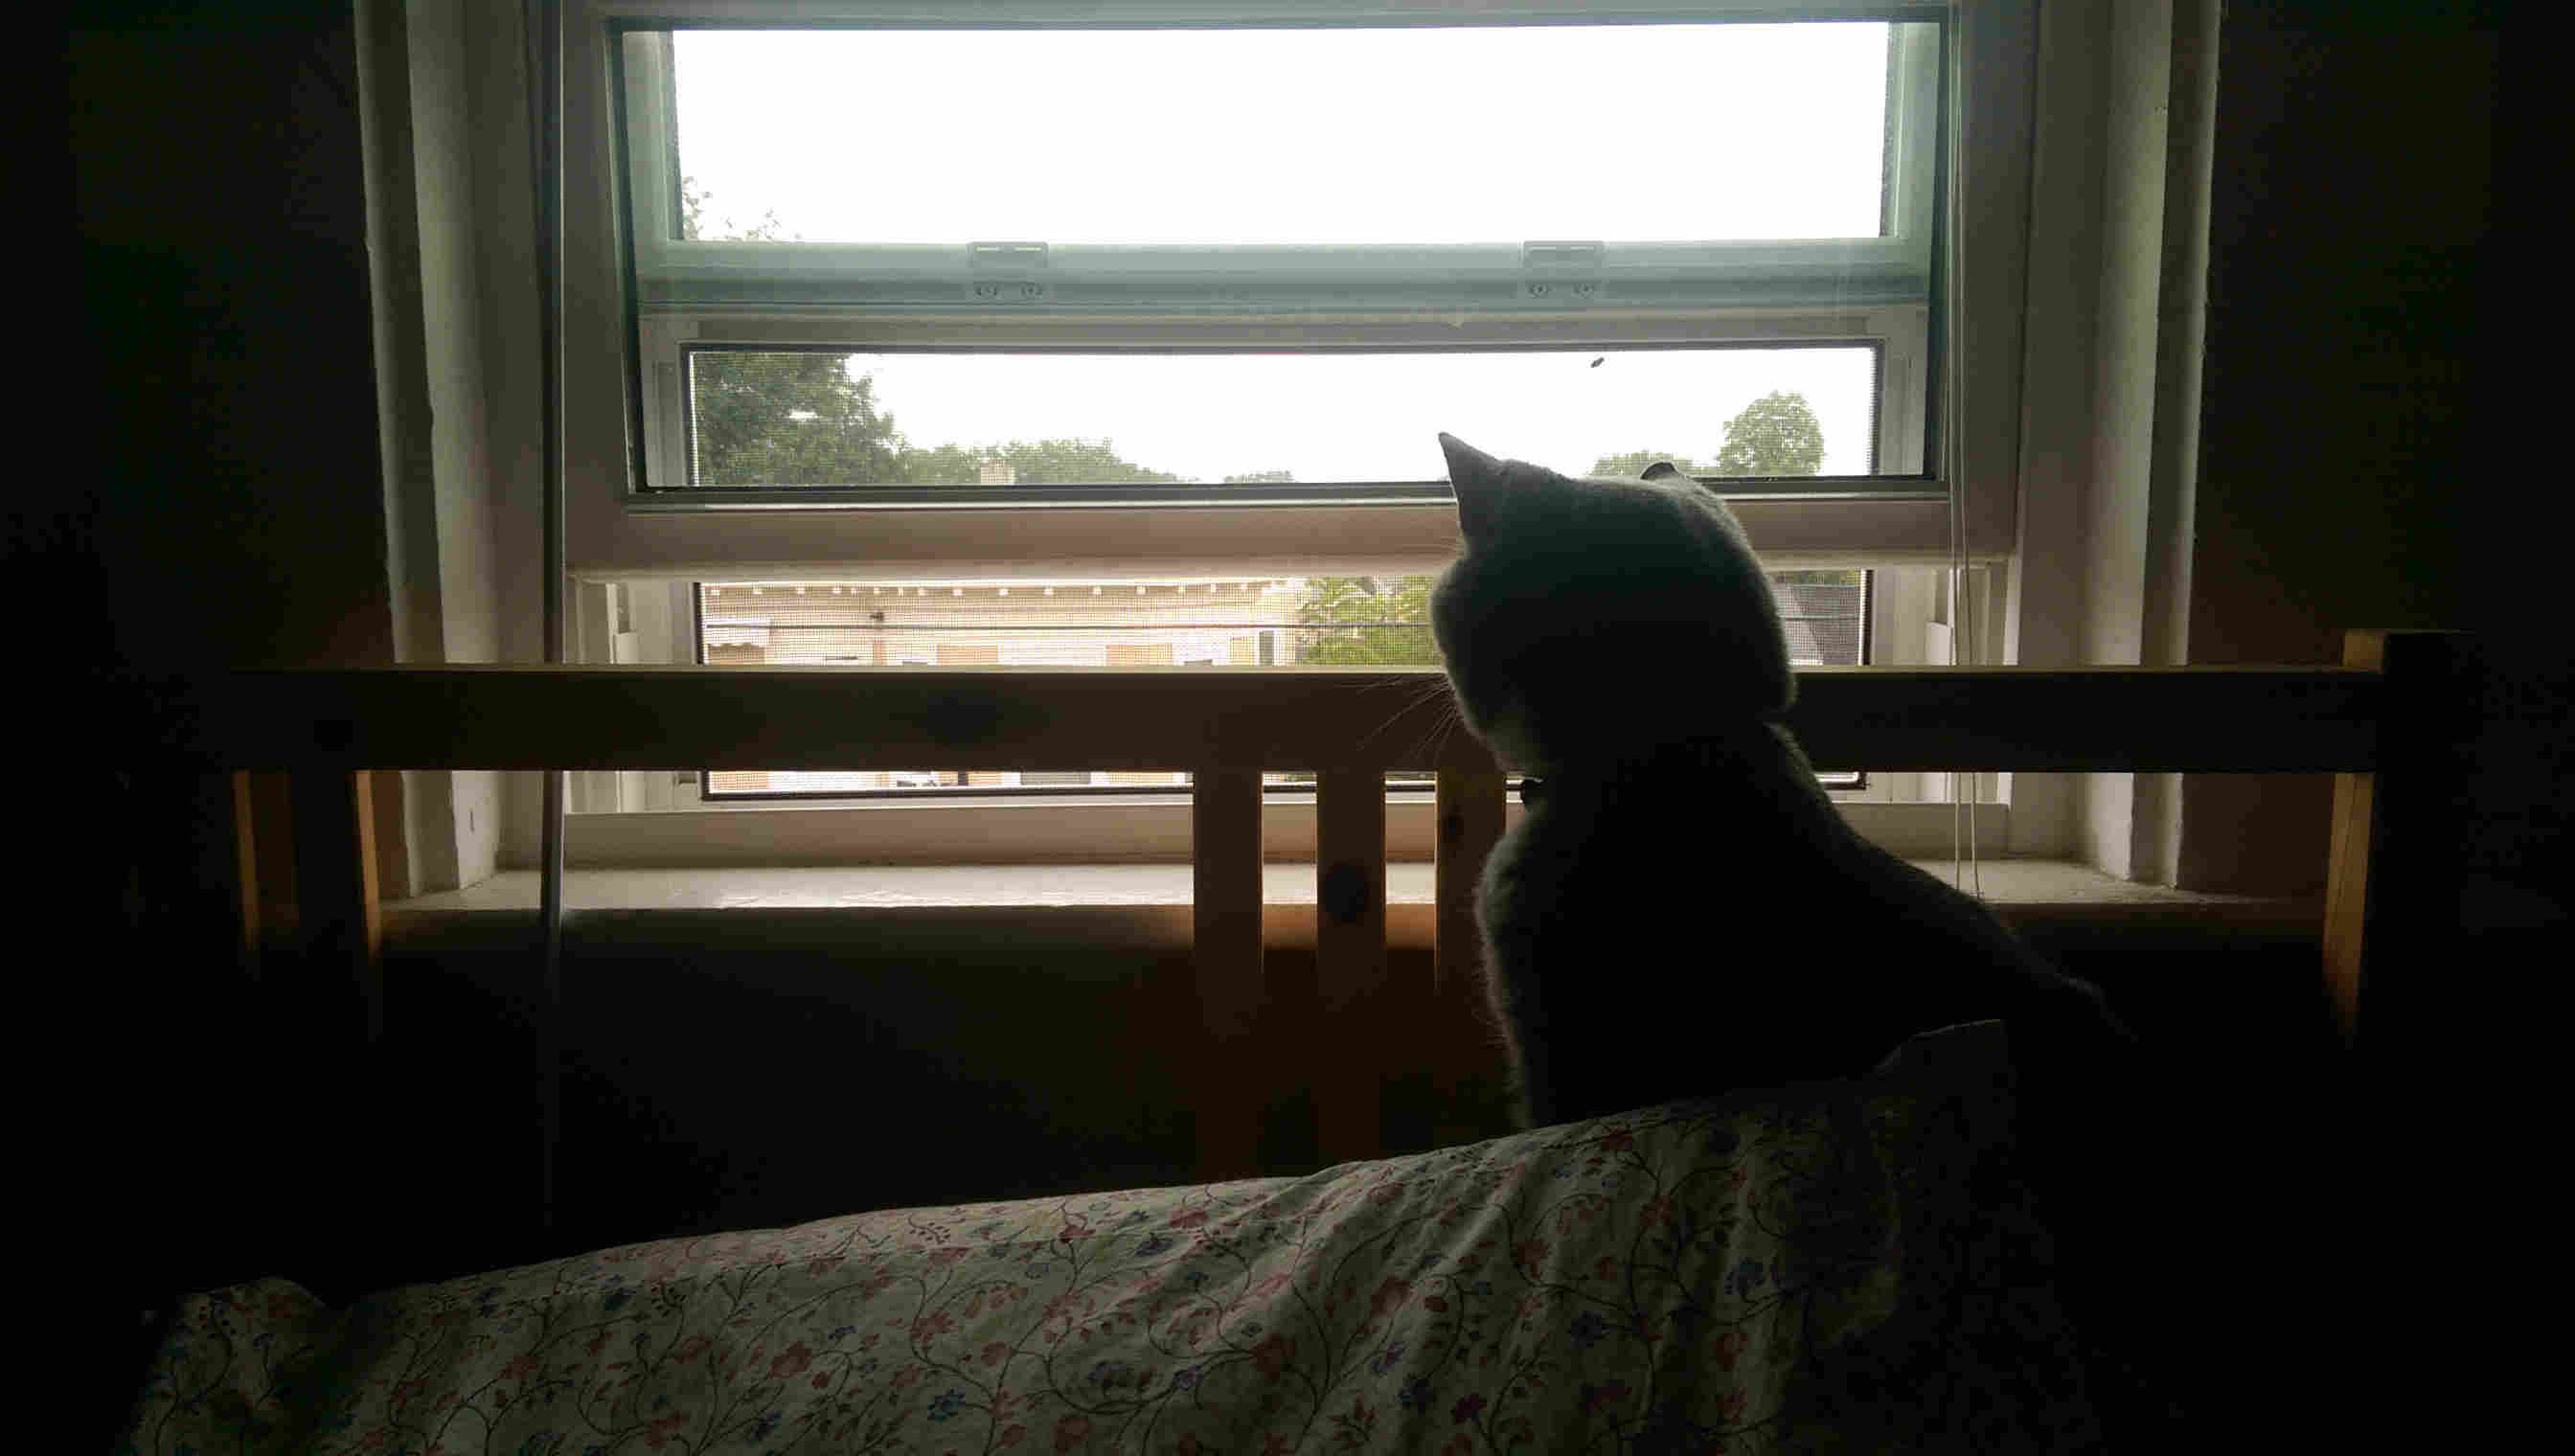
existentialist gatsby is existential
I first attempted to scan him via 123D Catch from Autodesk: a mobile app that stiches together 3D renders of scenes from a series of surrounding photographs. Unsurprisingly, it was challenging to get him to stay put. If he moved his head even a little between frames, the software interpretted a series of overlapping, Picasso-esque faces.
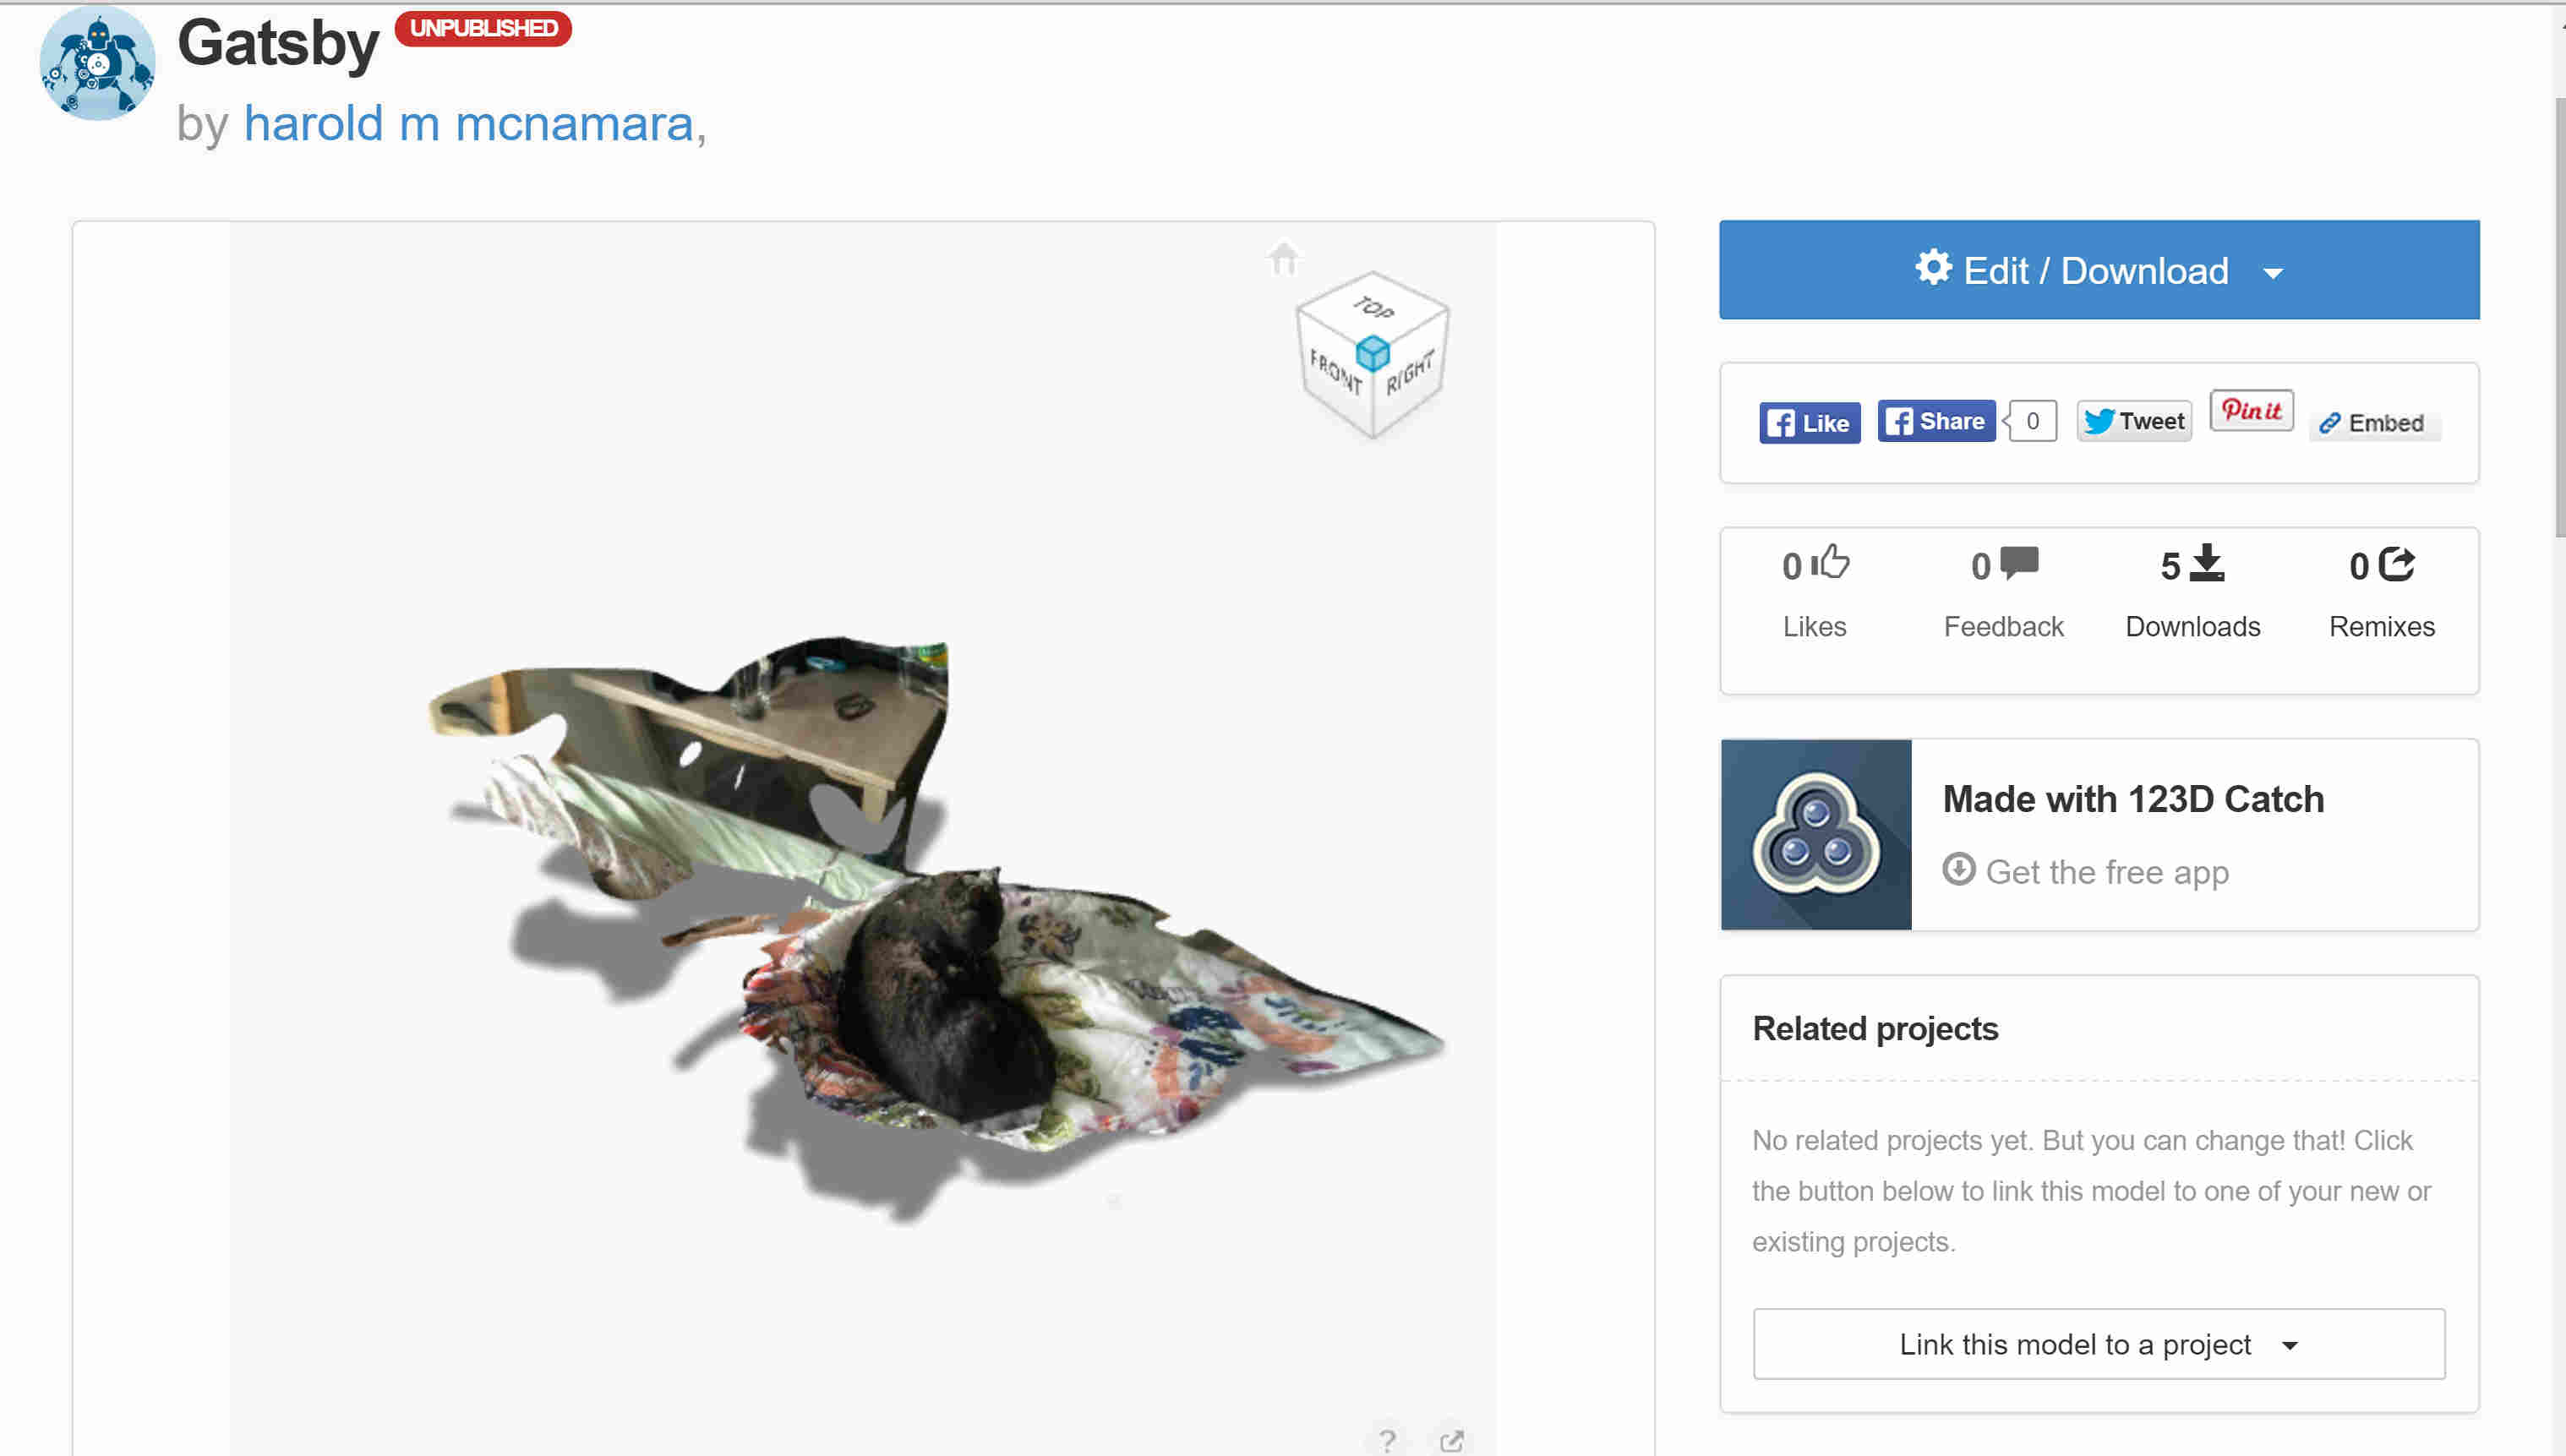
123D Gats
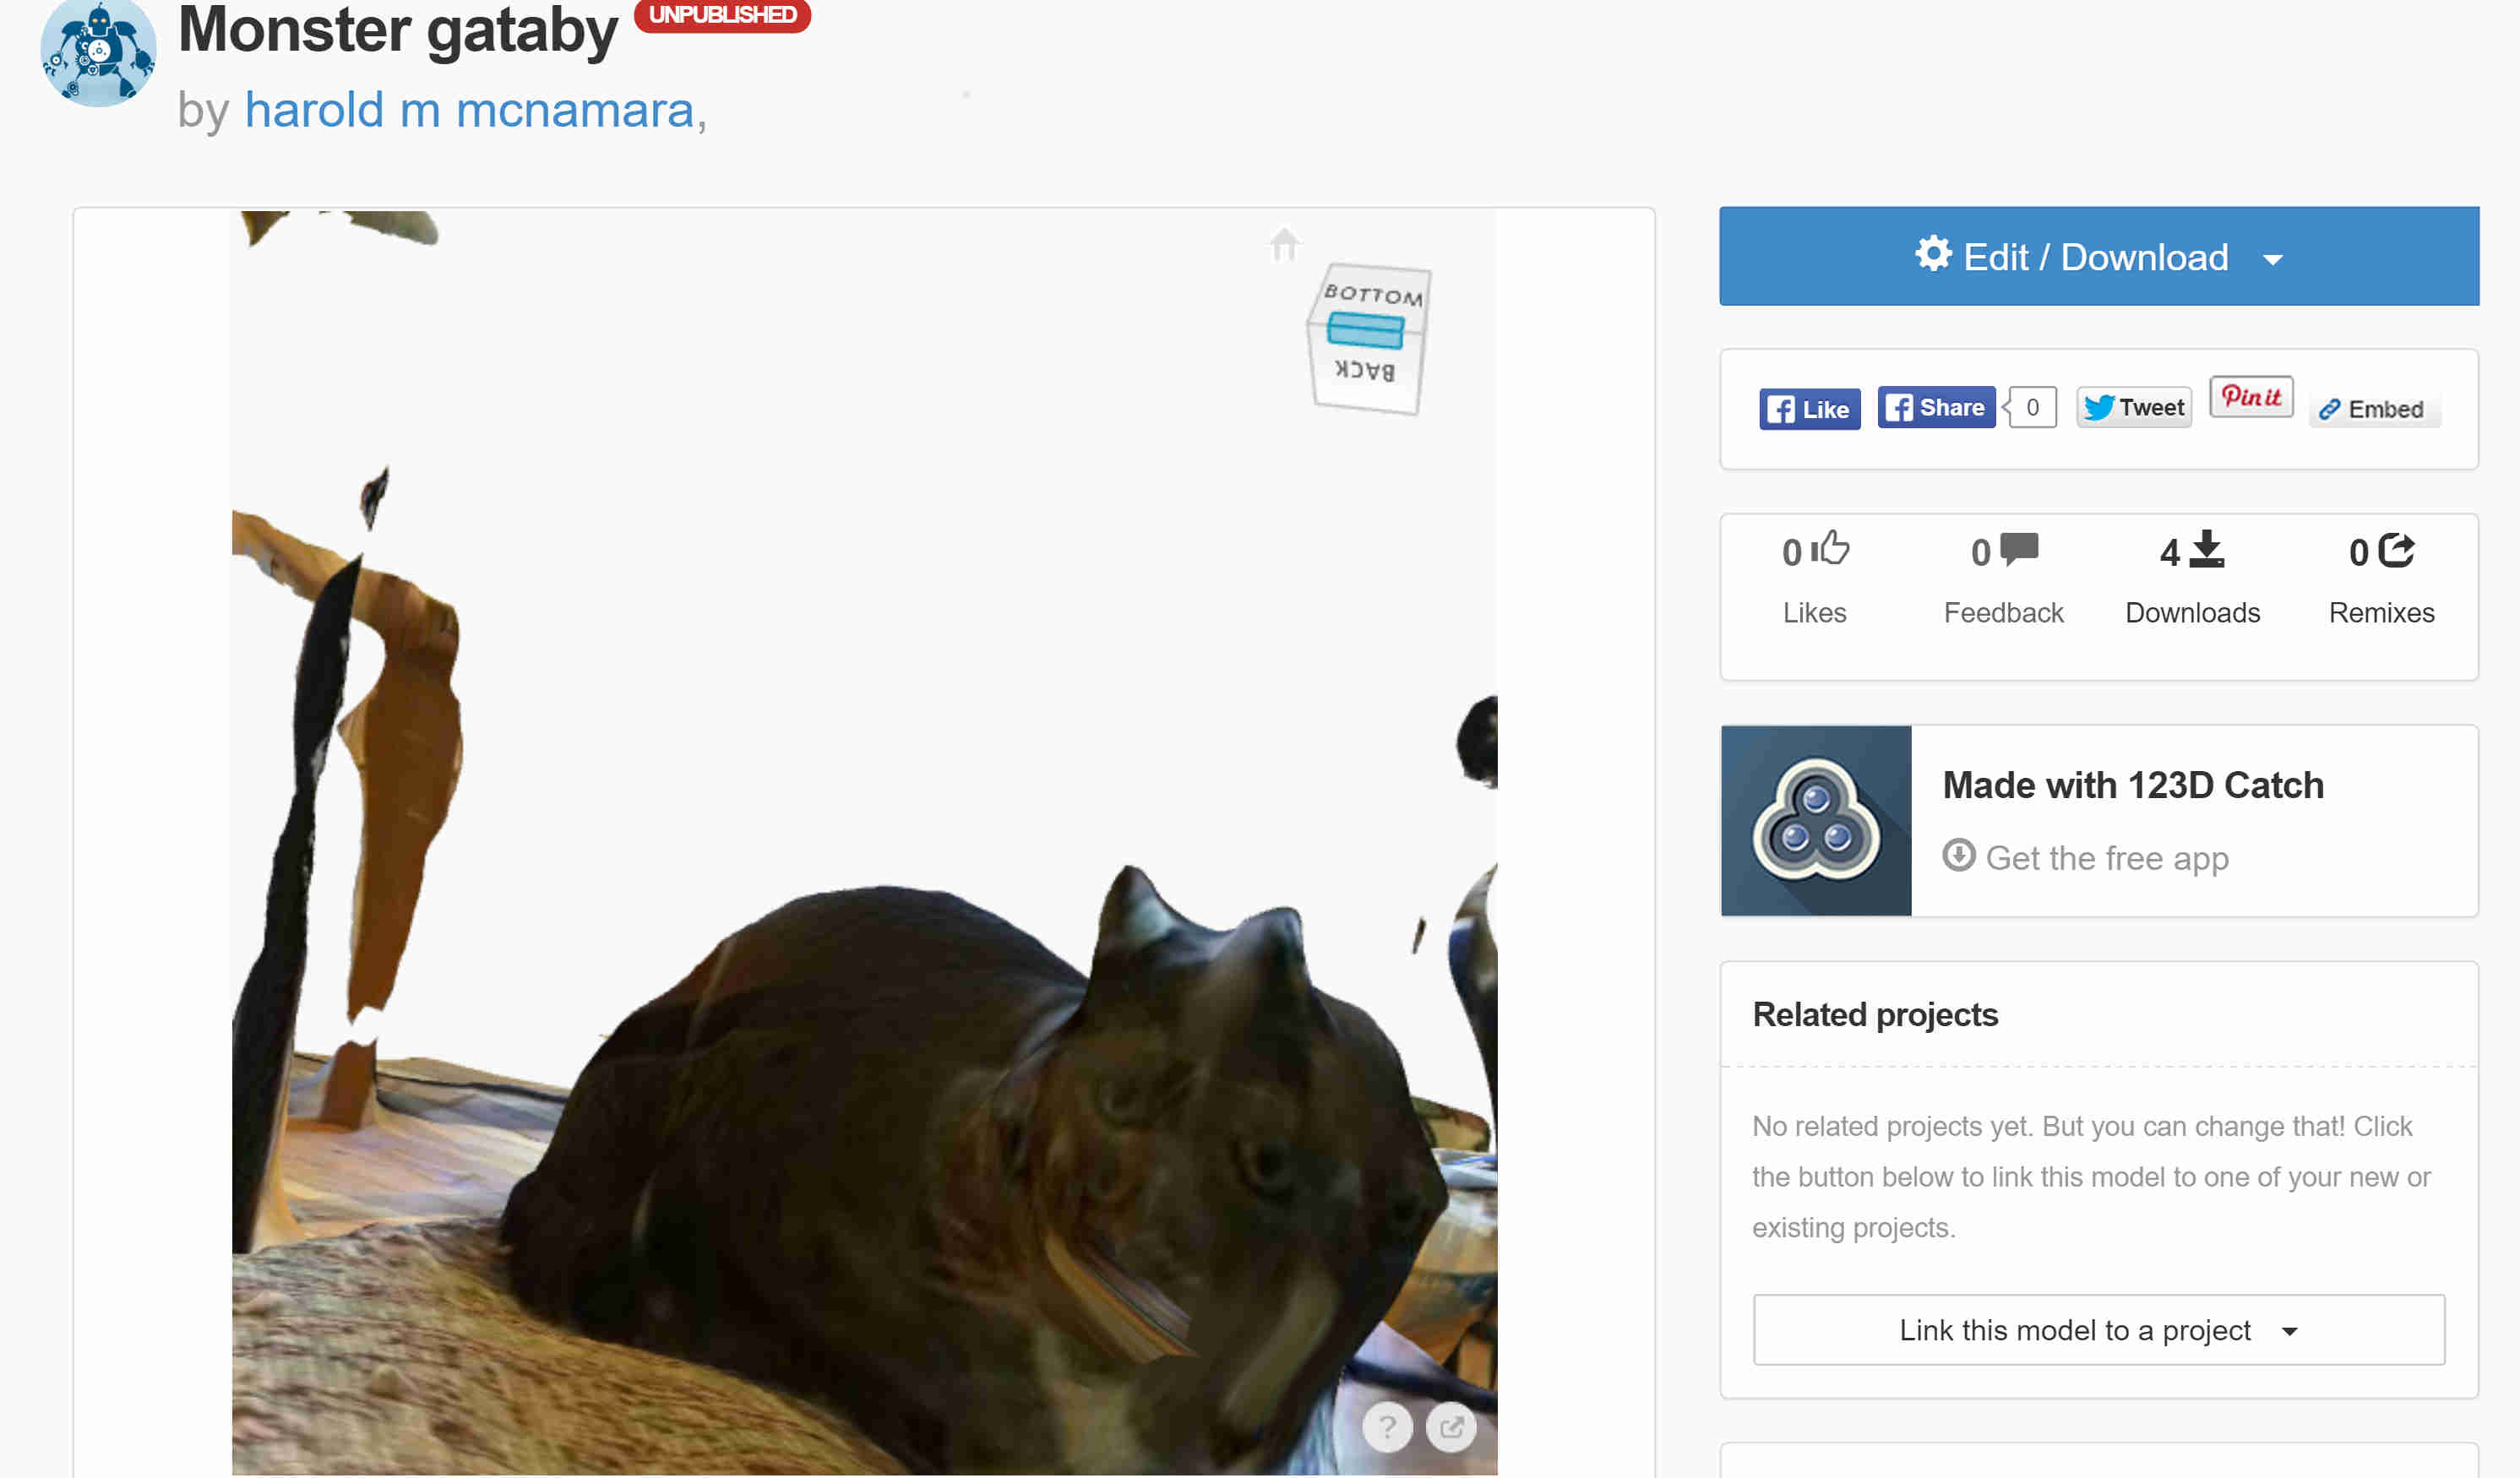
gatsmonster
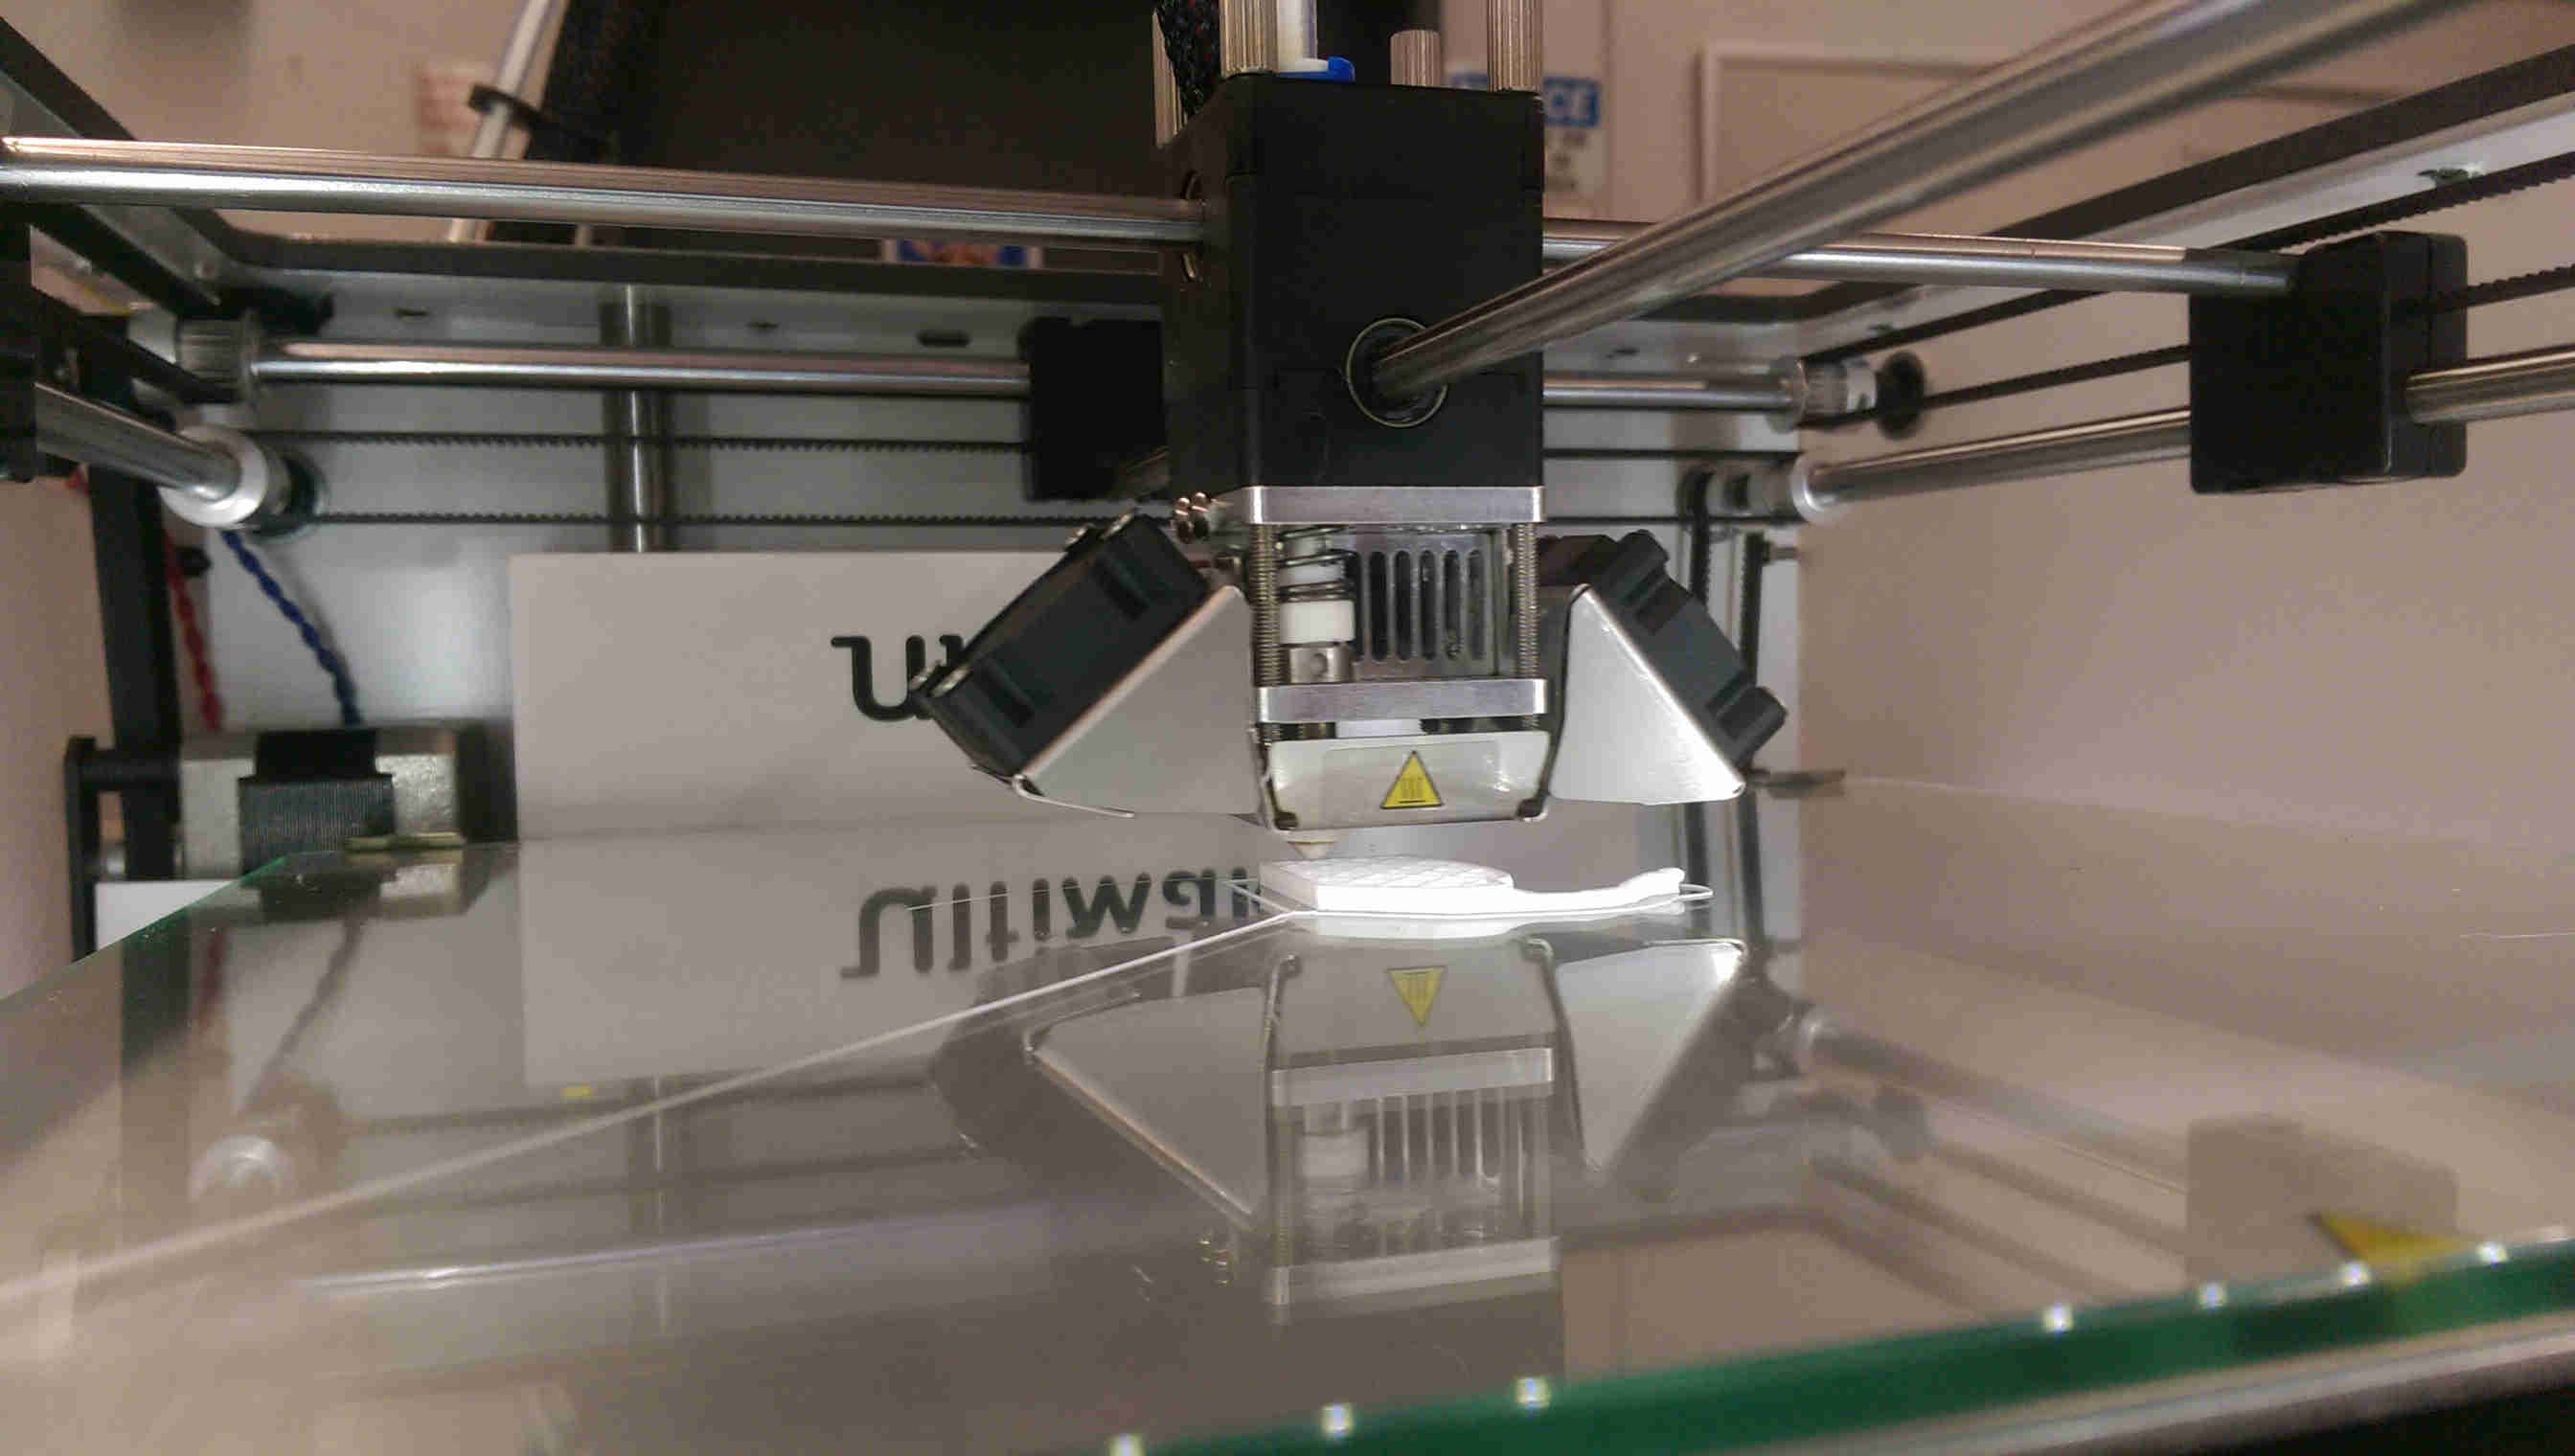
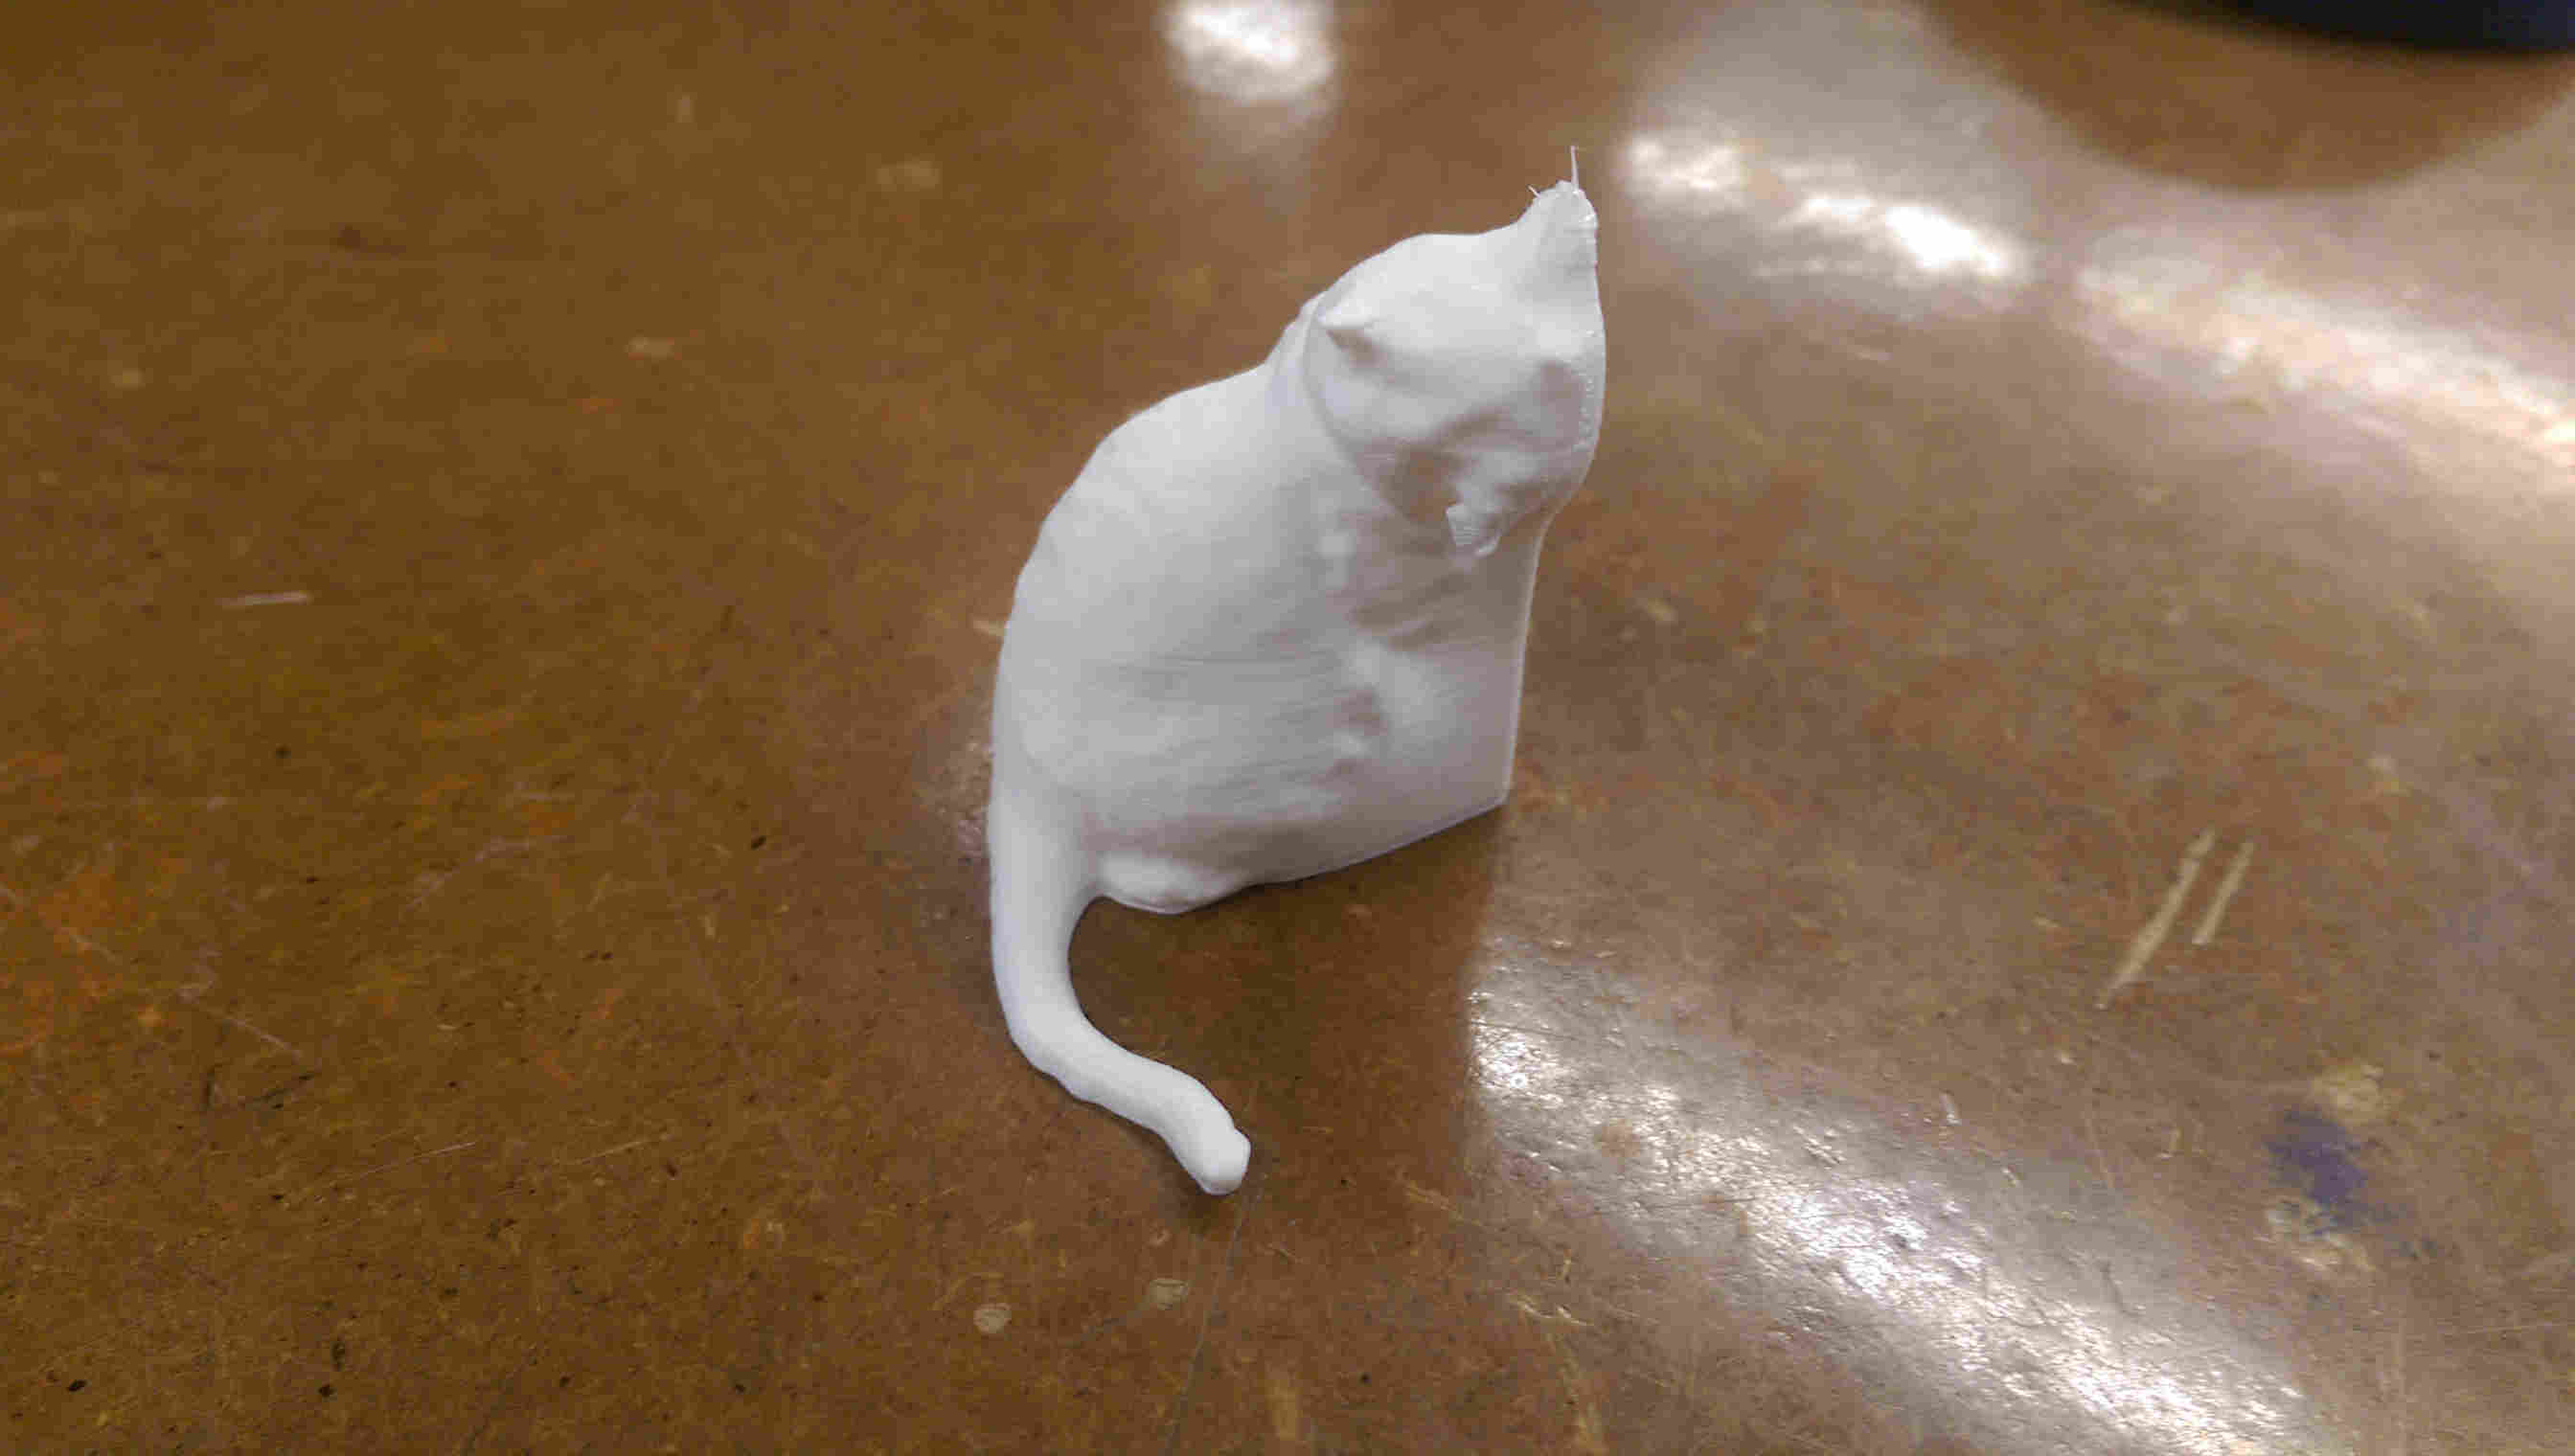
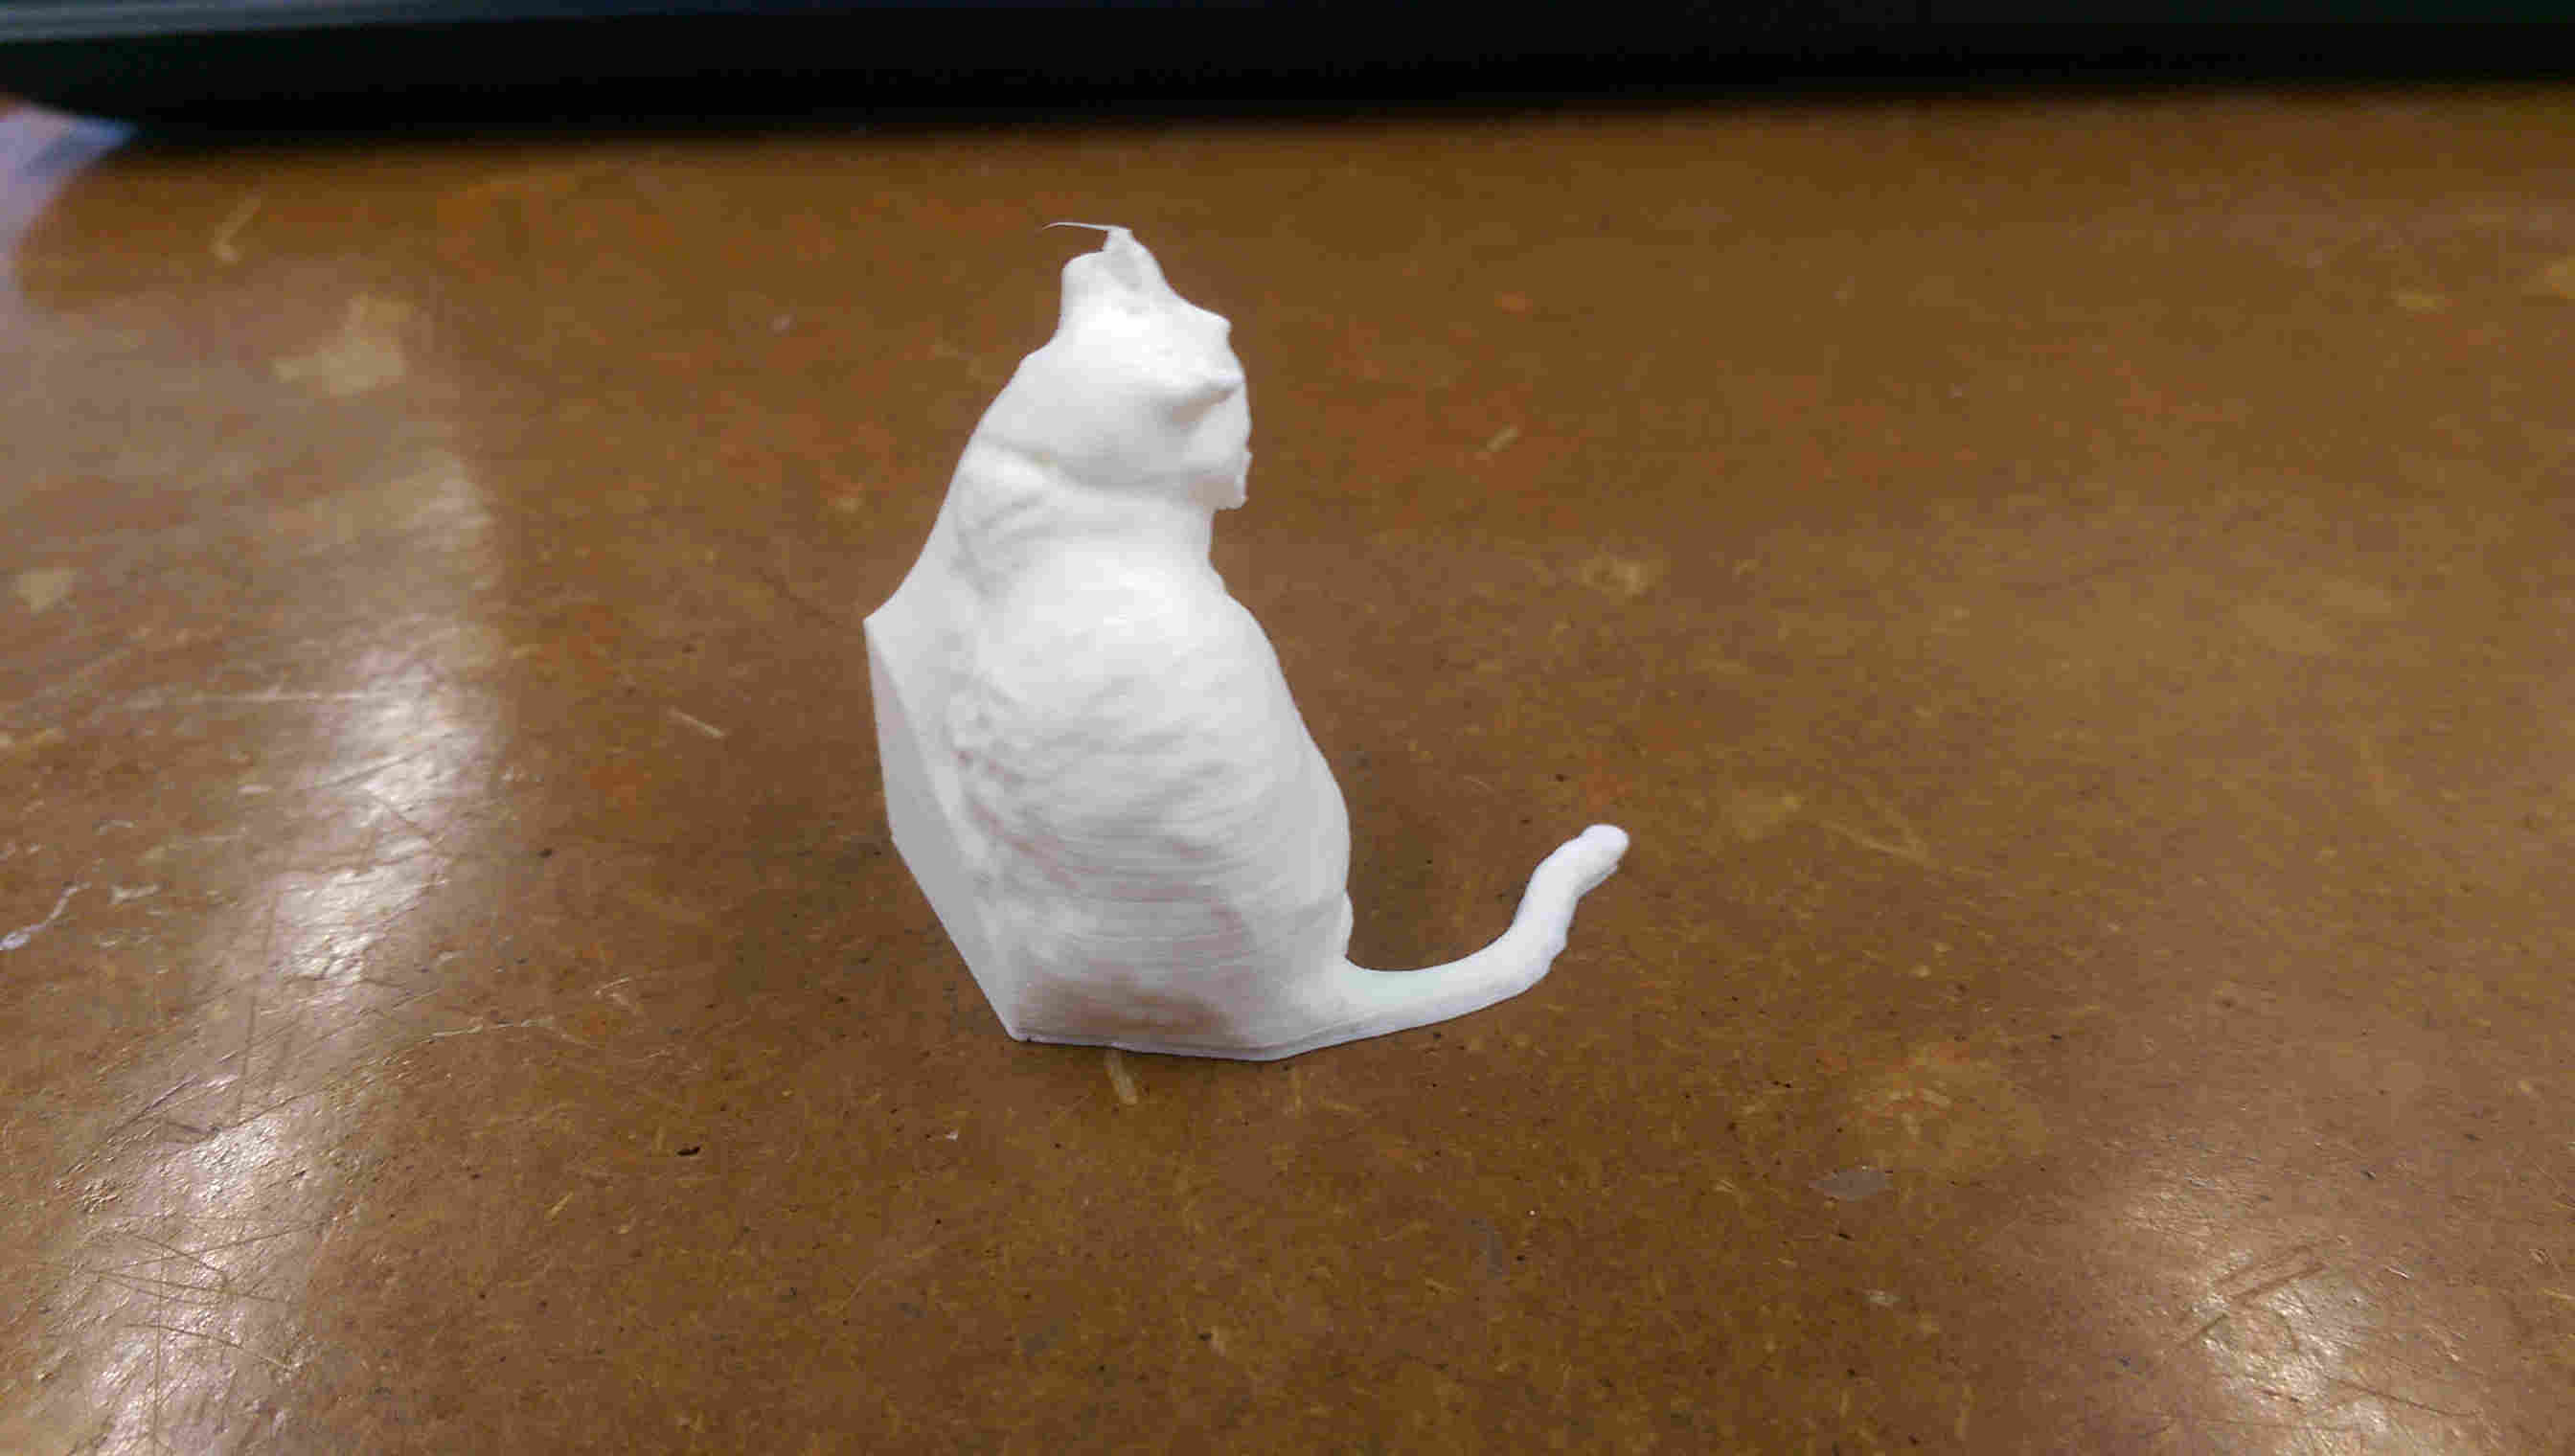
These renders turned out decently, but I also gave a go at using the Sense peripheral+software to scan a render that was more amenable to 3D printing. Because of the tracking sensitivity of the software, this was actually almost harder to capture - it turns out that if you wave a stapler looking thing in a cat's face, it will turn its head to follow the object around. My most effective strategy was enlisting help in the form of distracting pets to keep his head fixed, and to edit out the hand in post-processing. The result actually looked (unintentionally) artistic - a silhouette of a cat carved out of mstone, almost a la a statue-in-progress.