SUNFISH TRASH CAN
A plea for ocean conservation: A trash can that reminds me of how the trash I'm producing affects the wondrous creatures who live beneath the surface
Water and Air, the two fluids which all air depends on, have become global garbage cans.
-Jacques Cousteau
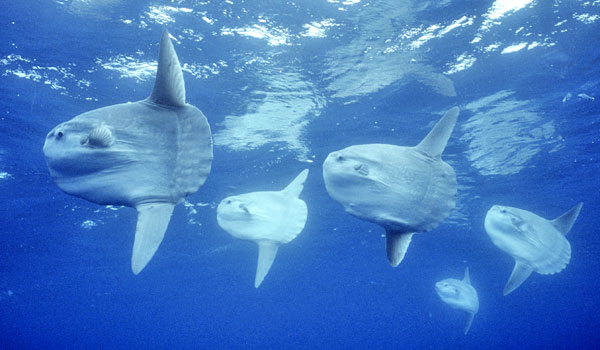
Last summer, I blew my ear drums from ascending out up into the ocean too quickly from the excitement of seeing a sunfish come by and consequently ascending too quickly to the surface. But it was 100% worth it, because it was beautiful and sprung a latent latent passion for these highly complex creatures in the wild, where we may see them and be like, "Oh they're hella weird," but underwater I'm the most awkward with my BCDs and ugly contraptions"
As a way of making myself connected to my actions as a waste-producer to this underwater world, I am making a translucent sunfish trash bin out of ocean waste plastic to promote awareness of the holocene extinction. The holocene destruction where we are seeing a quiet destruction of coral reefs and. The act of putting trash into my favorite animal would make me reconnect with how much trash I am producing, and take personal responsibility for limiting the creation of trash. As the trash amount increases, the fish slowly dies, as with its lights dwindle.
I'm happy the sunfish would live at the Woods Hole Oceanagraphic Institute, and to also support the Parley for the Oceans, a movement that seeks to "Avoid plastic wherever possible, intercept plastic waste, and redesign the plastic economy
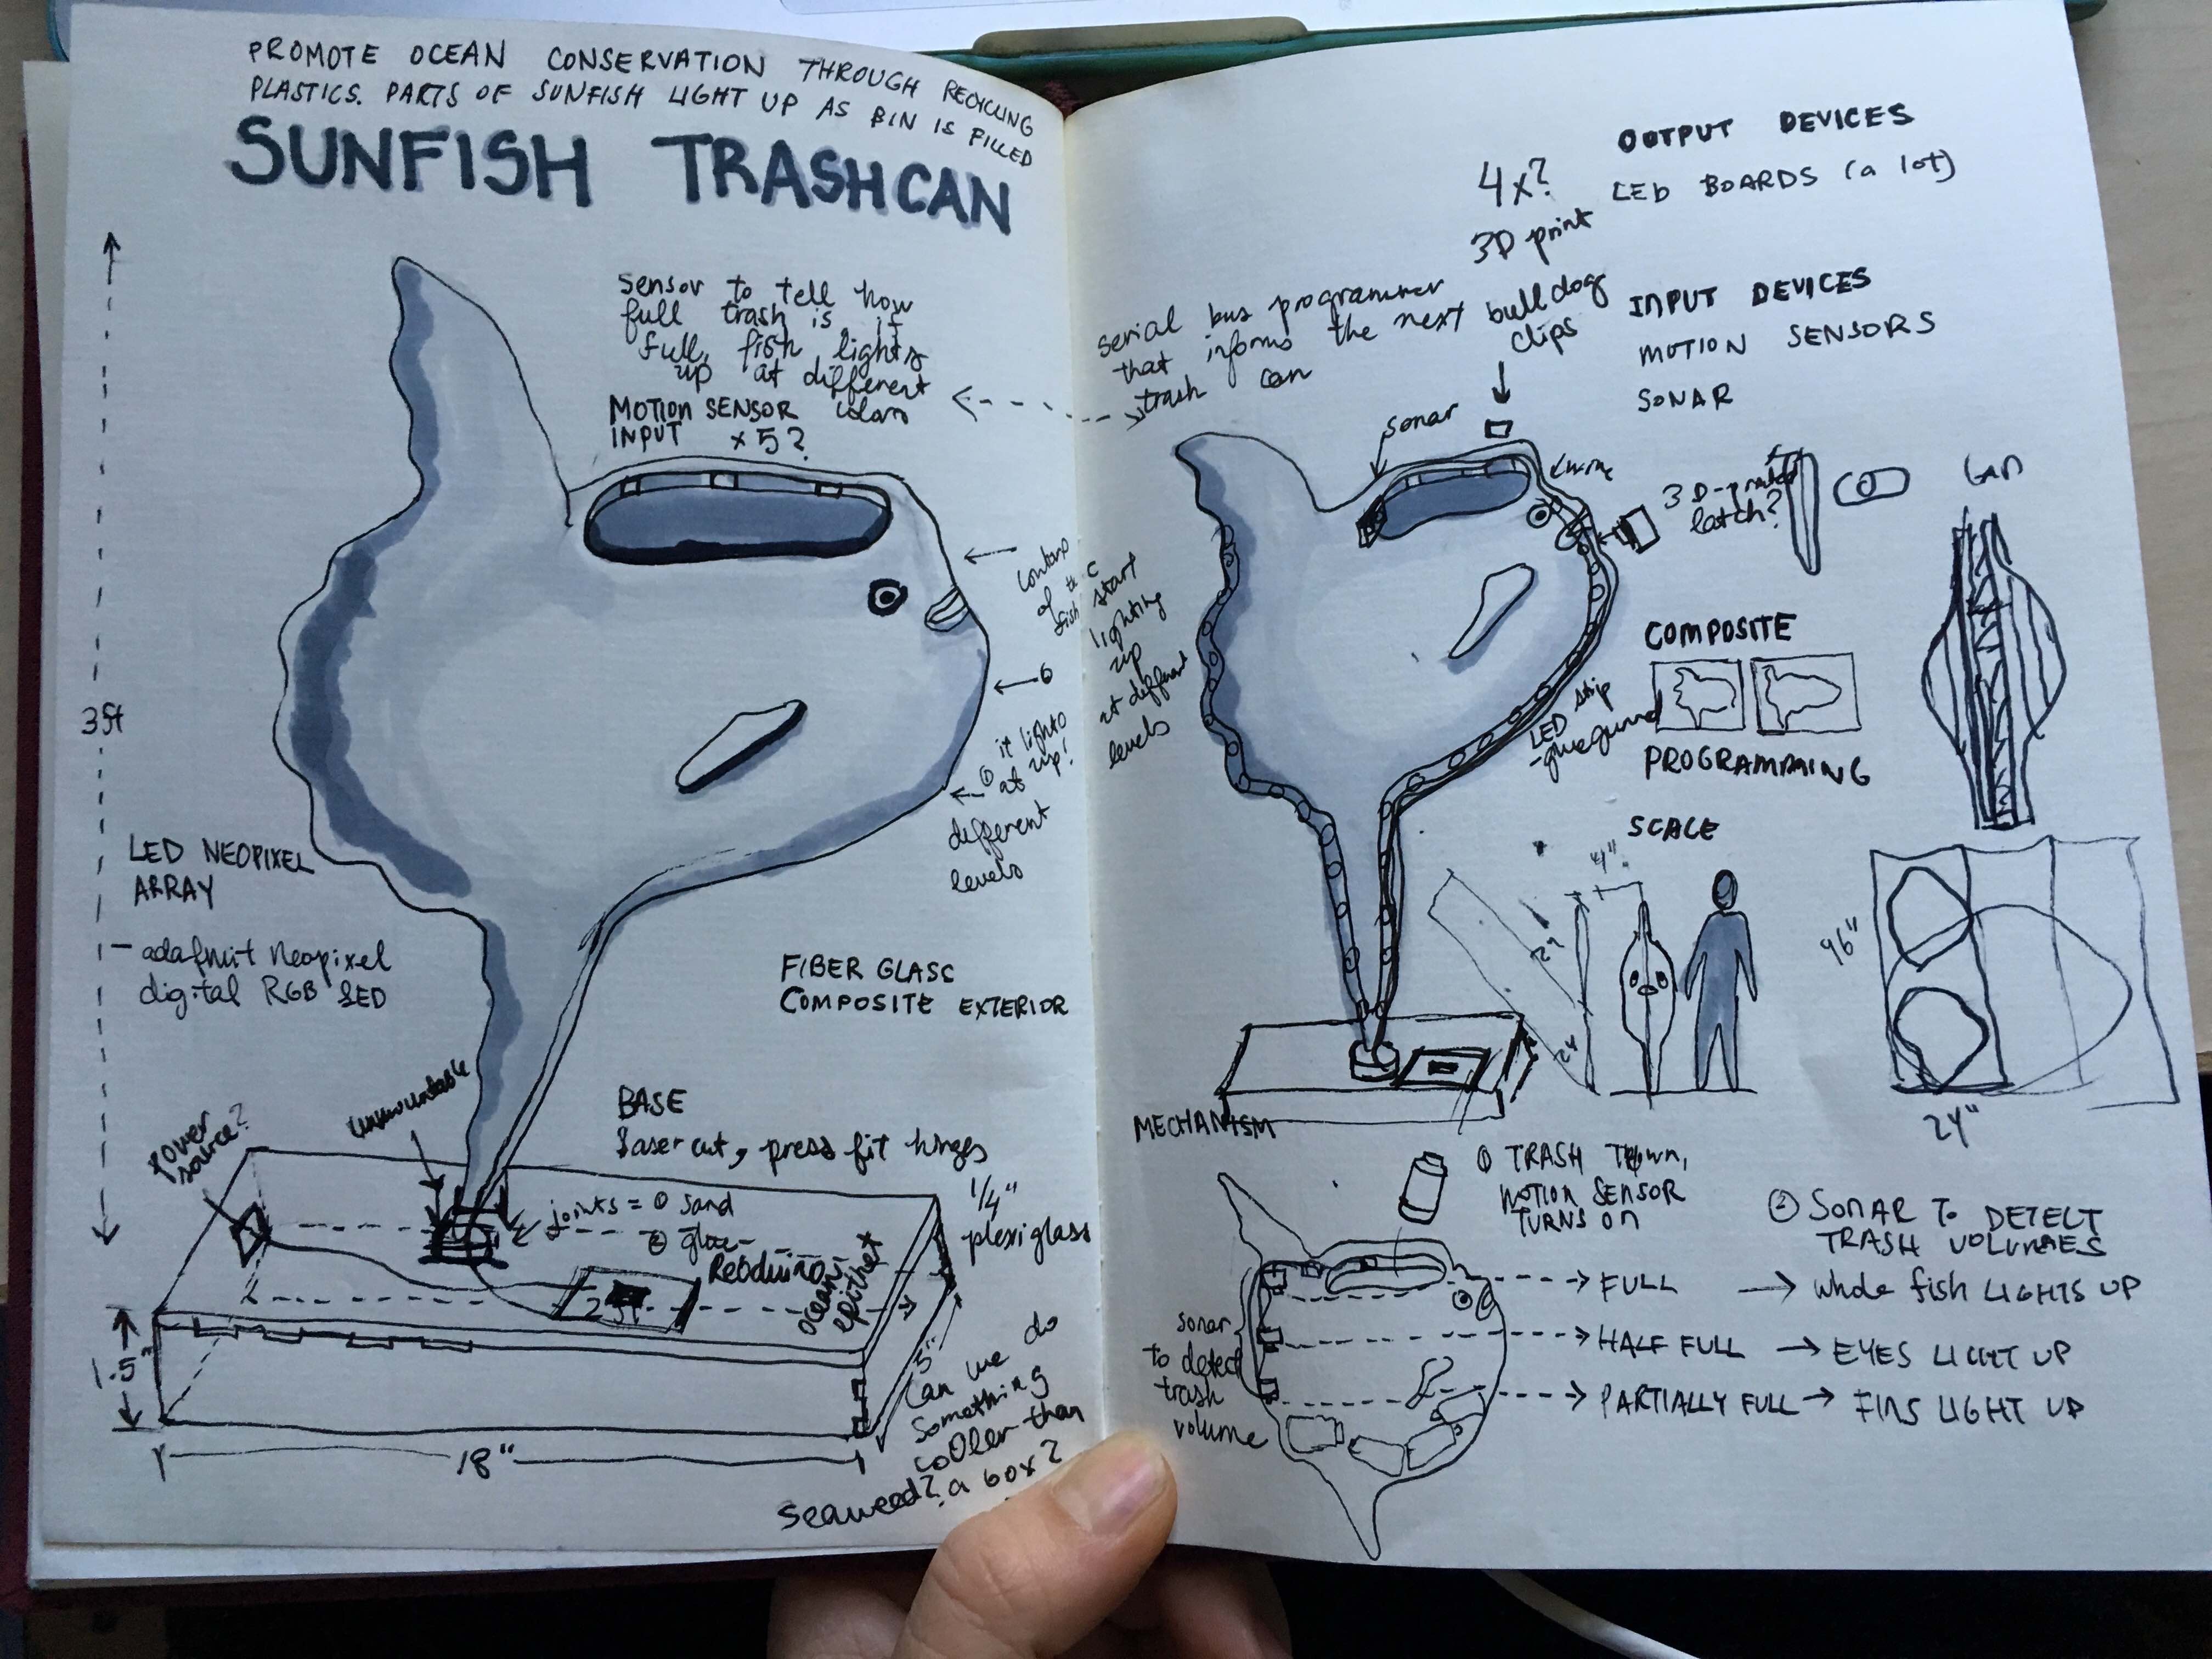
Skills Integrated for Final Project
1. Composites/ Milling: Thermoform the fish
2. Laser Cutting: Design and build a base for the
2. Input Devices: Sonar Sensor to detect when trash is thrown
3. Electronics Design: Design a programmer in Eagle to program all the other boards
4. Electronics Design 2: Design and build a microcontroller board, a fabduino
5. Embedded Programming: Load a code that talks betweeen my microcontroller board and the computer
6. Output Devices: LED RGB Array that lights up at different levels of trash throwing
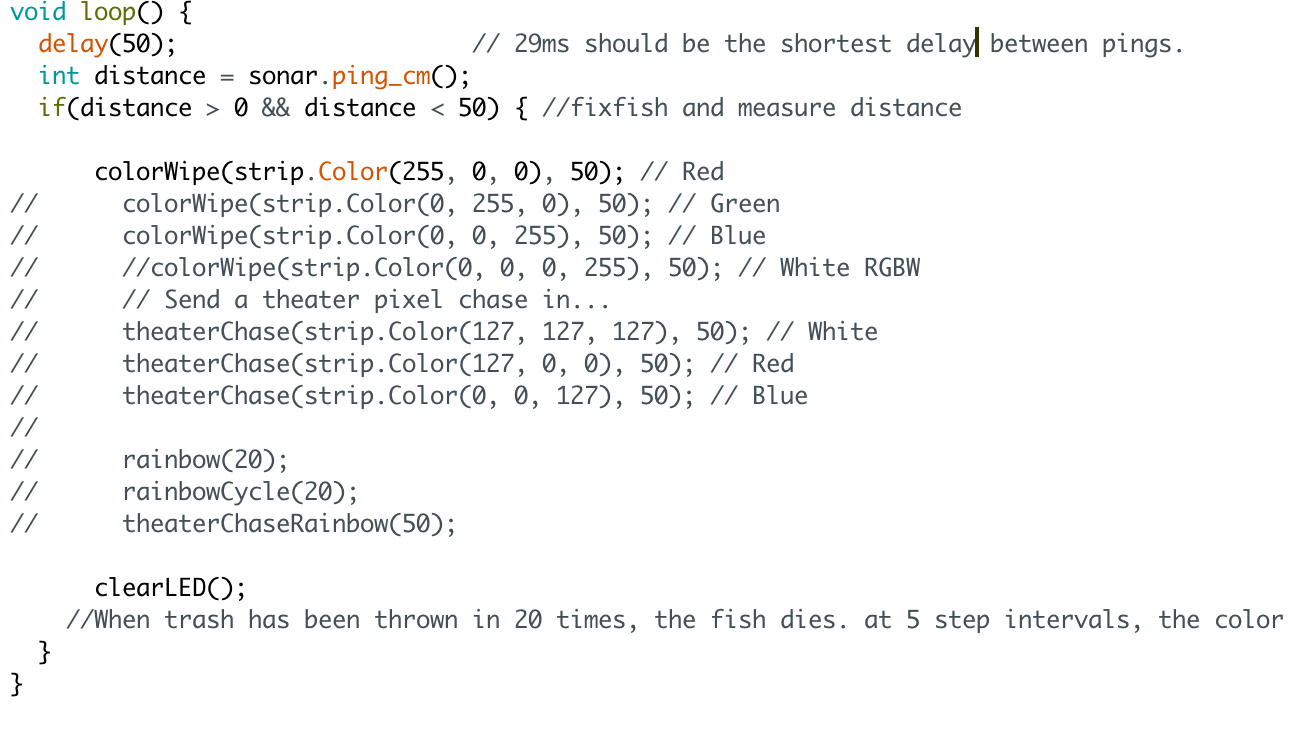
7. Interface Programming: A loop script that knows the amount of trash that has been thrown in and programs different light reactions
8. Network Programming: Time permitting, Has a motion sensitive component b. Triggers the sunfish to "light up" when trash is thrown c. Time alotting, can create a network with other trash bins in the vicinity to create other lit animal bins d. Other bins light up when enough trash has been reached (so there needs to be some type of counter in the system)
9. Design user components that make sense with the electronics (rim of the bin filled with sensors, material of choice looks good when lit up with LEDs, etc.
Forming the Geometry:
Materials used:
3/4" MDF, 5 layers per block, 2 blocks at 24"x24"
Gorilla Glue
Tools Used:
Rhino (Design)
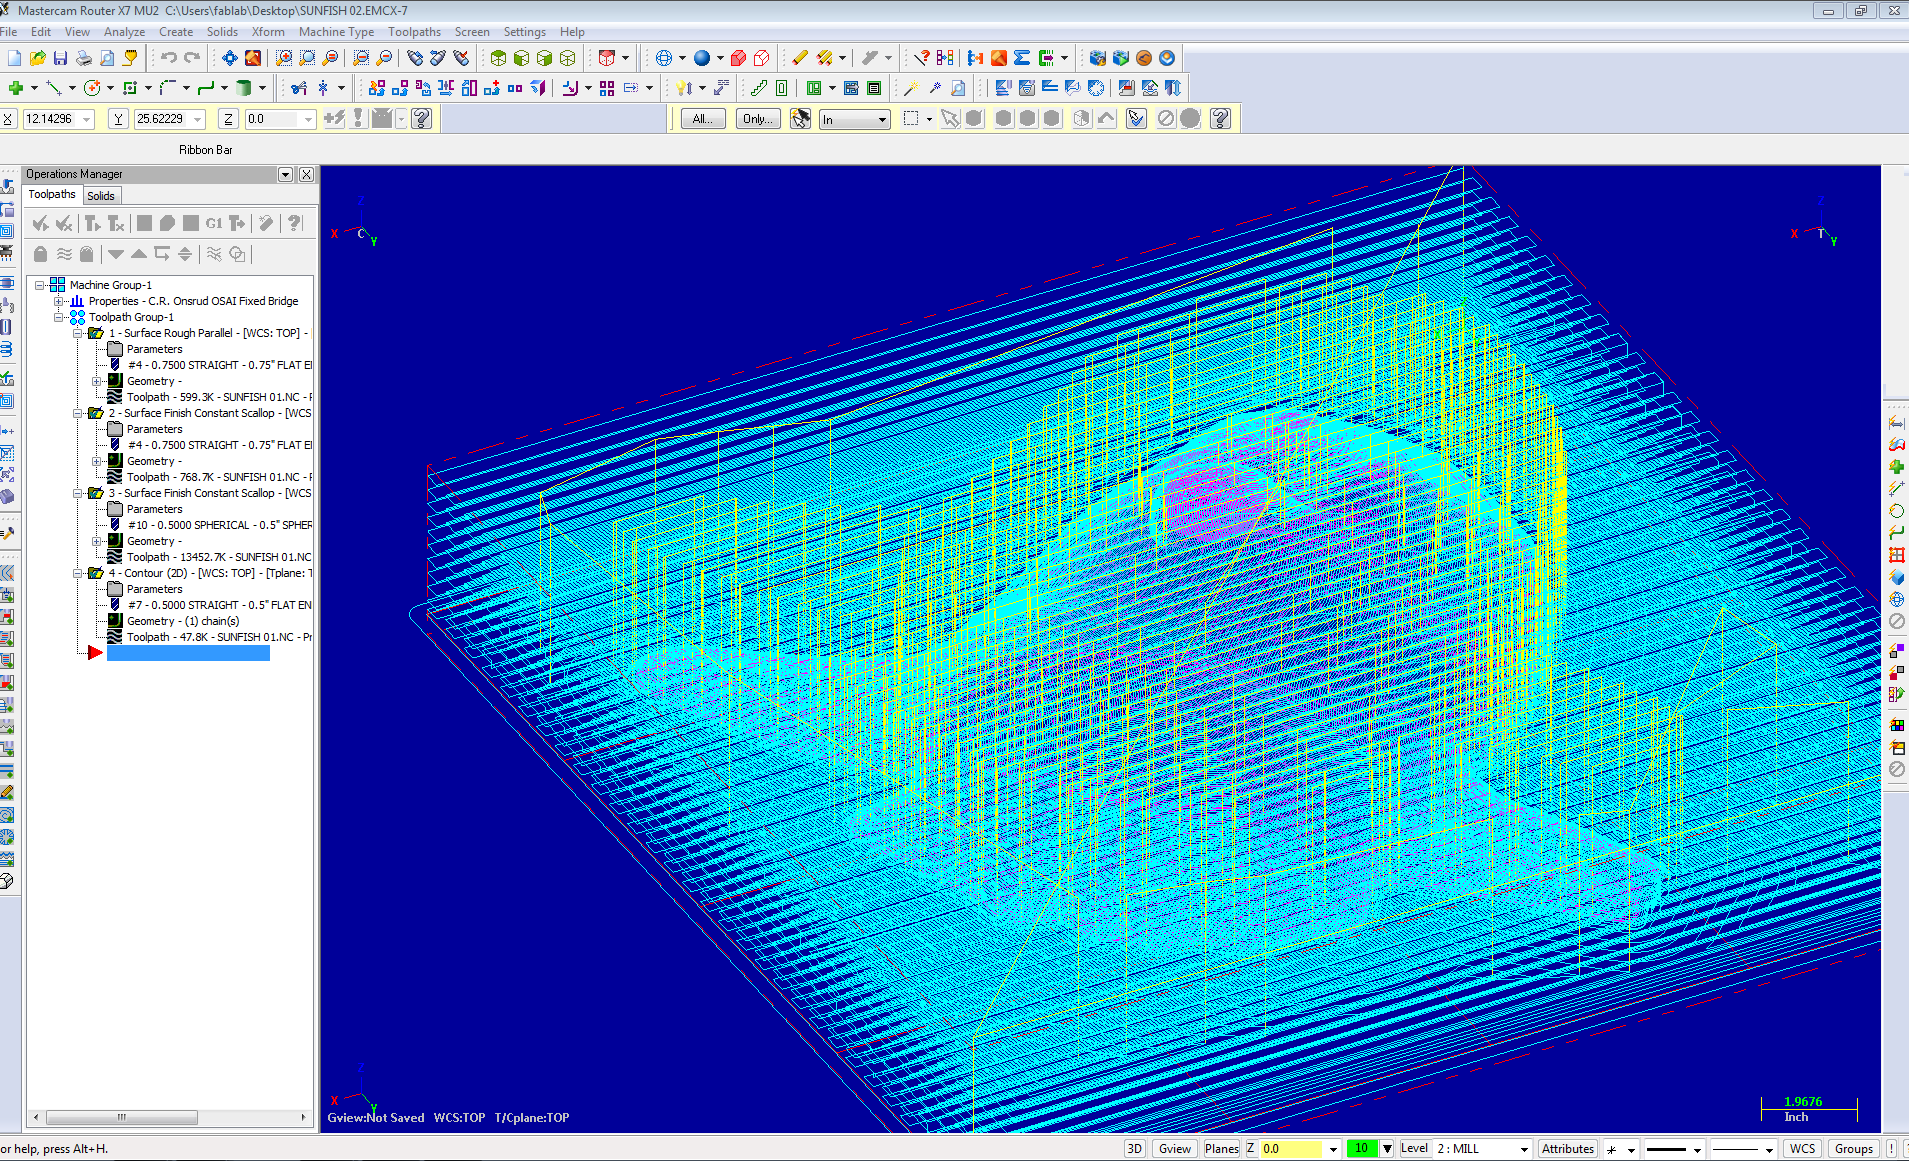
Mastercam, PartsWork3D (Generate Tool Paths)
ONSRUD CNC Machine (Milling)
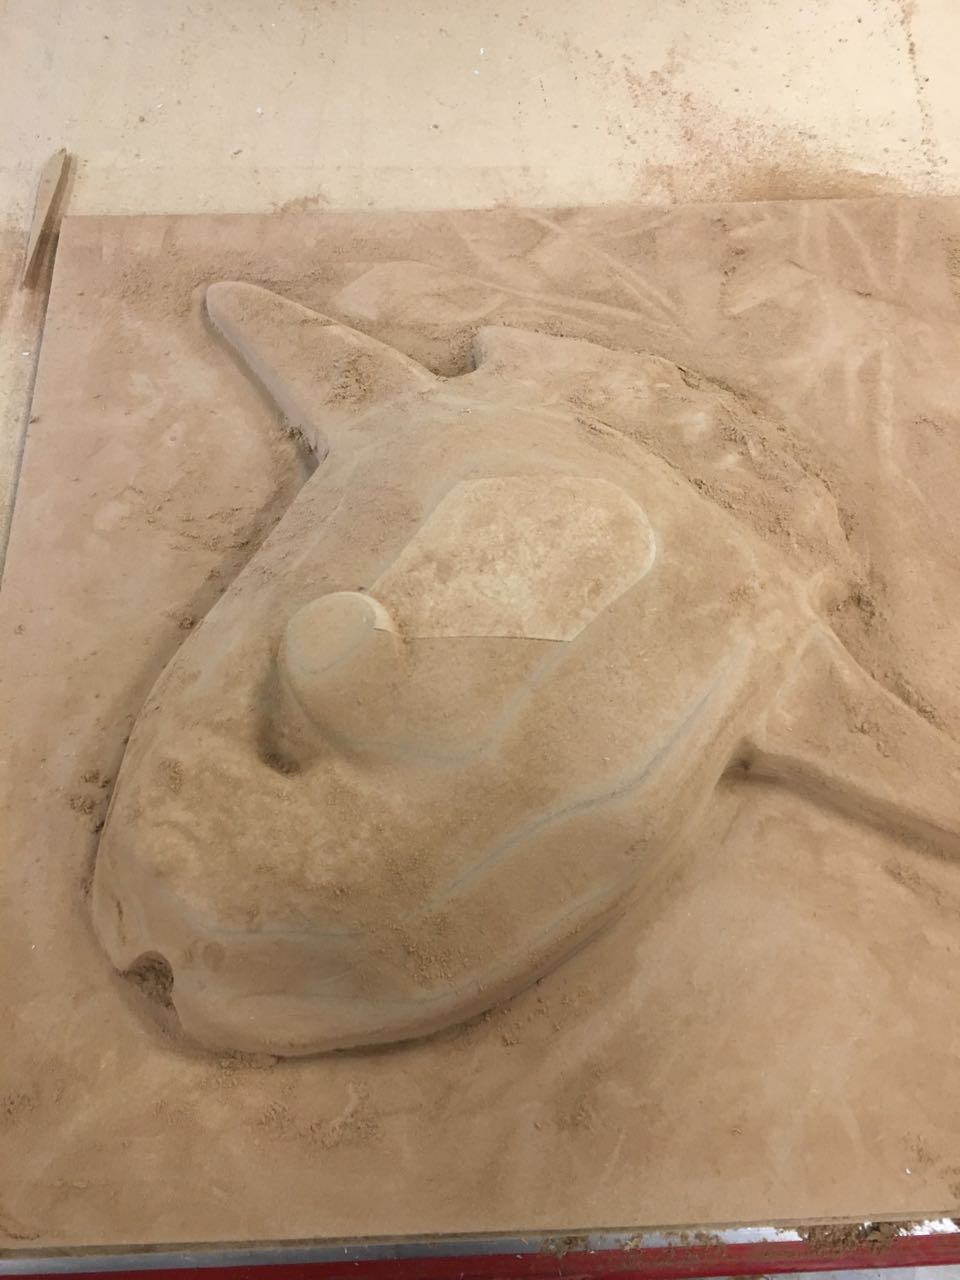
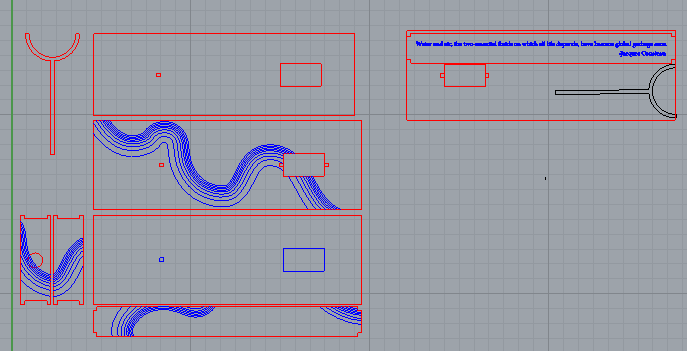
At first I wanted to create a 2'x3' recycle bin using composites. But exploring the fabrication process it would have been messy, difficult to execute, and at such a scale pose severe toxic and safety hazards. It would have also been counter intuitive to promote ocean conservation and simultaneously be using toxic and unsustainable materials. After exploring several routes for fabrication to ensure I would not lose the form factor of the fish over re-layering (especially because the fish is already awkward-looking and it would not be desirable to lose anymore granularity or it would become completely unrecognizable) In rhino, it was straightforward since I took the same geometry I used from molding and casting week and scaled it to 24" x 96", the size of the bed on the ONSRUD CNC bot. The dimensions of the formech were 24"x24", which created a nice limitation for the dimensions of the project. I cut out a plane for the trash lid along with a flat base for the bottom fin. In hindsight, both cuts were unecessary.

The tool paths I first created in Partwork. But realizing that the ONSRUD does not take .SBP files, I went back to th archaic and nefarious mastercam. The tool paths were pretty straight forward: 1. Surface Rough using a 0.75" flat end mill 2. Surface finish scallop using a 0.5" end mill
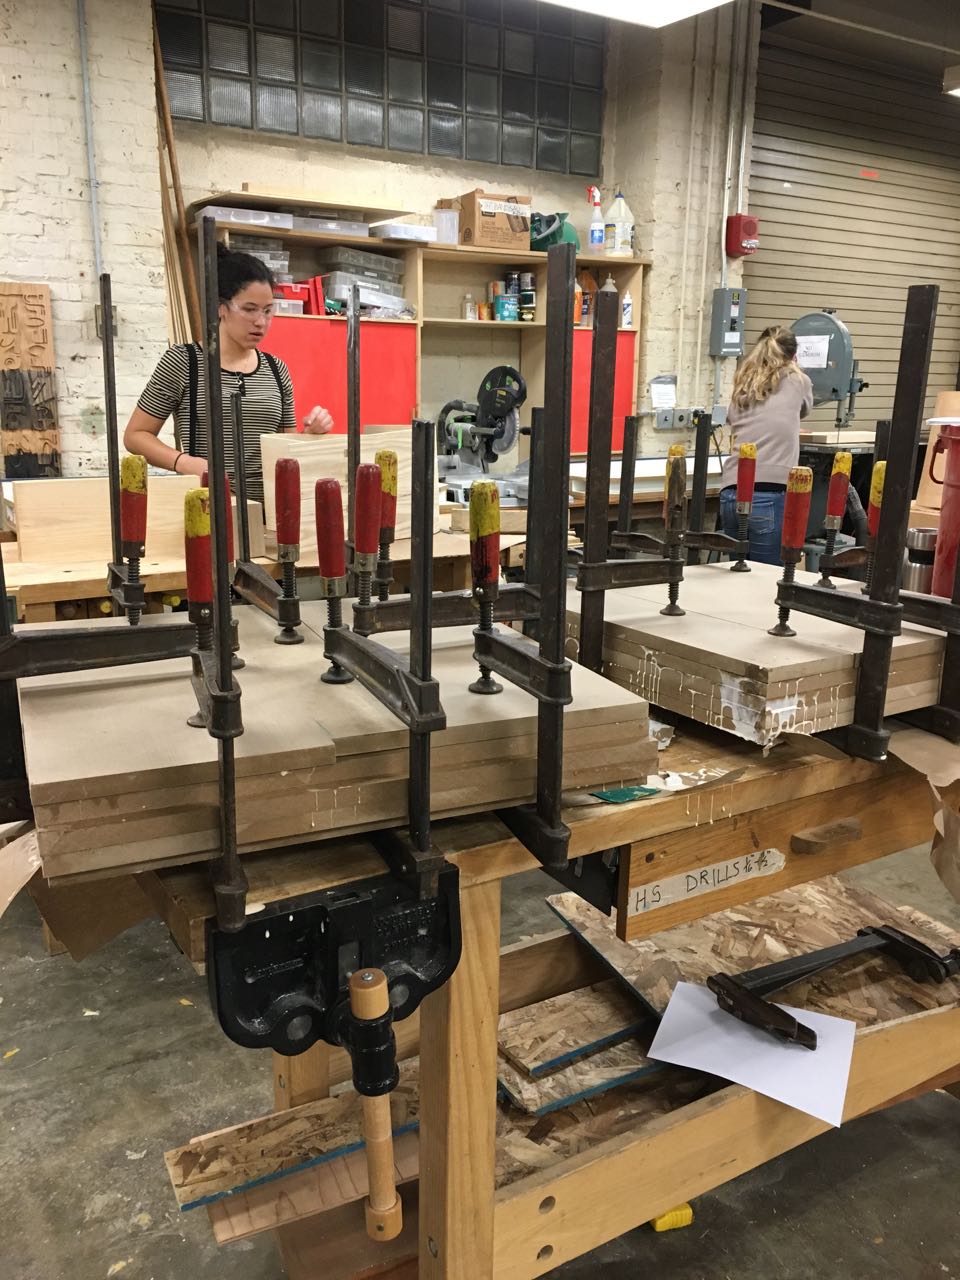
I got a 4'x8' 3/4" MDF board, cut it into 8 tiles, and stacked it into two blocks necessary for the opposites of the fish. Using gorilla glue and clamps I stacked it together over night for drying. Rapidly evening the glue and ensuring a tight clamp is key to getting a seamless cut the day after.
Then it was ready to be cut. Each side took aproximately 2 hours to cut. The residue from the MDF was insane. It took me 30 minutes after each cut to vaccuum off all the saw dust
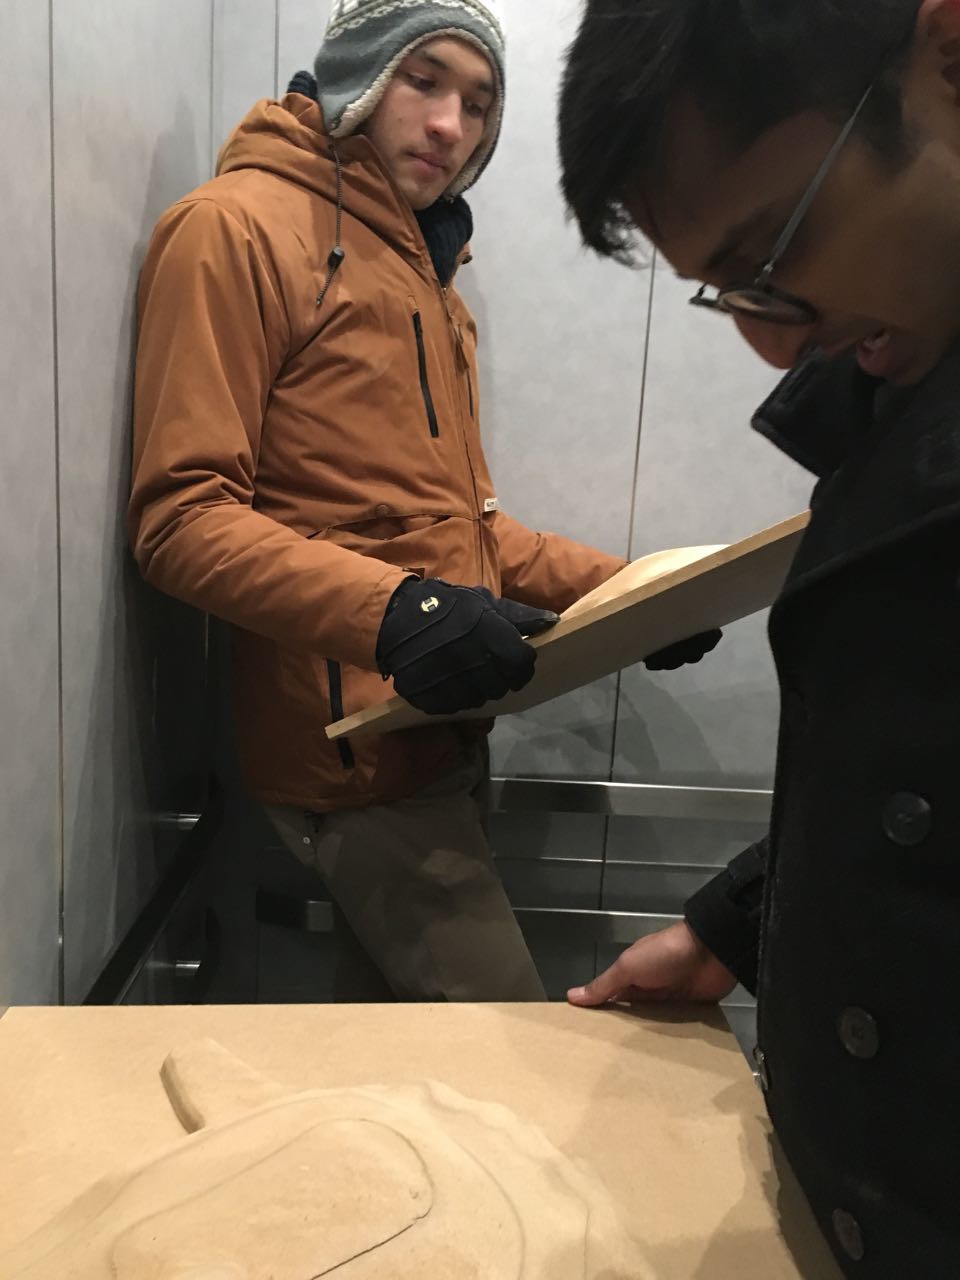
Being overly arrogant about my strength and trying to get my boards from N51 to building 7 without a trolley...humbled by the polar vortex, defeated, and waiting for a miracle to happen on Mass ave.
Thank God for friends
Thermoforming & Thermoplastics
Thermoforming is a common method of processing plastic materials. My materials and machineries used include:
2 sheets of 24x24" 1/8" PETG purchased from McMaster-Carr, each at $16.30
FORMECH: Here is the datasheet on thermoforming plastic
In order to create a vaccuum form, we had to drill holes in the MDF so the plastic would then stick to the MDF
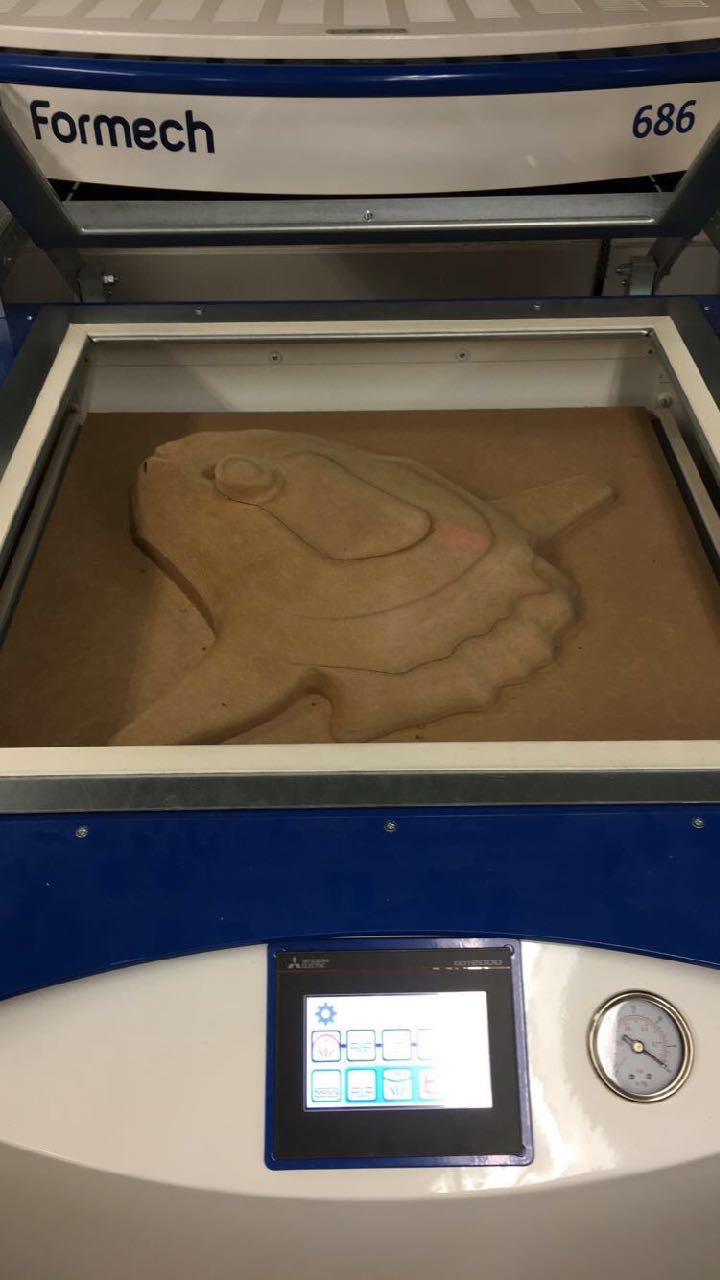
According to McMaster-CARR, the maximum and minimum temperatures for PETG are between 140 to 100. We first tried setting it at 80, which did not melt the plastic enough. We then bumped it up to 100, and got a nice finish.
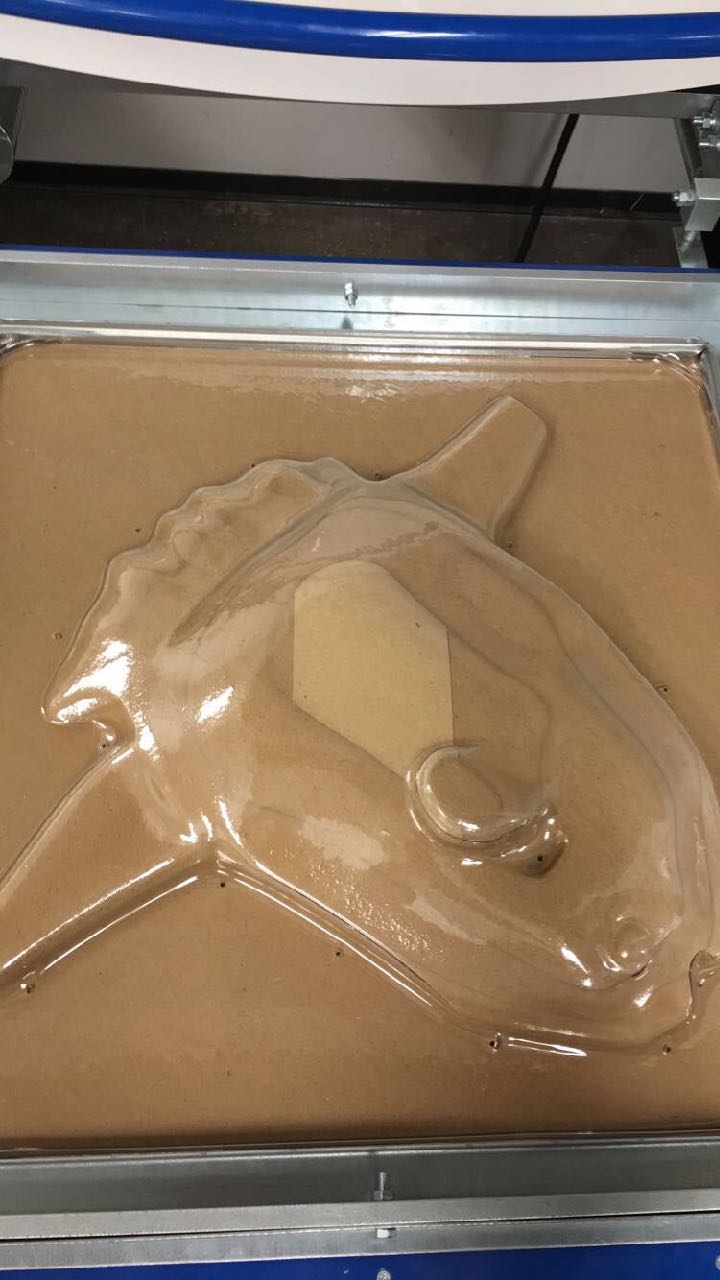
But it may have been a bit too hot, and the plastic ended up sticking to the rim. We ended up jigsawing the plastic off from the rim
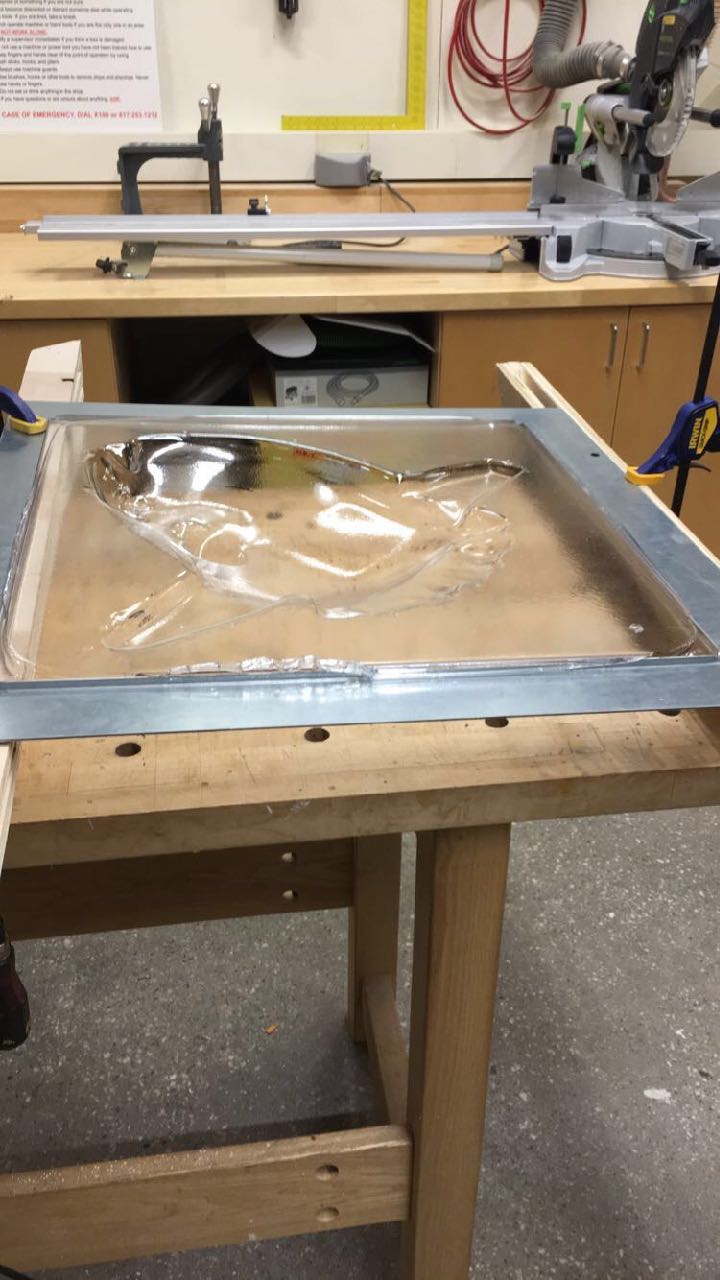
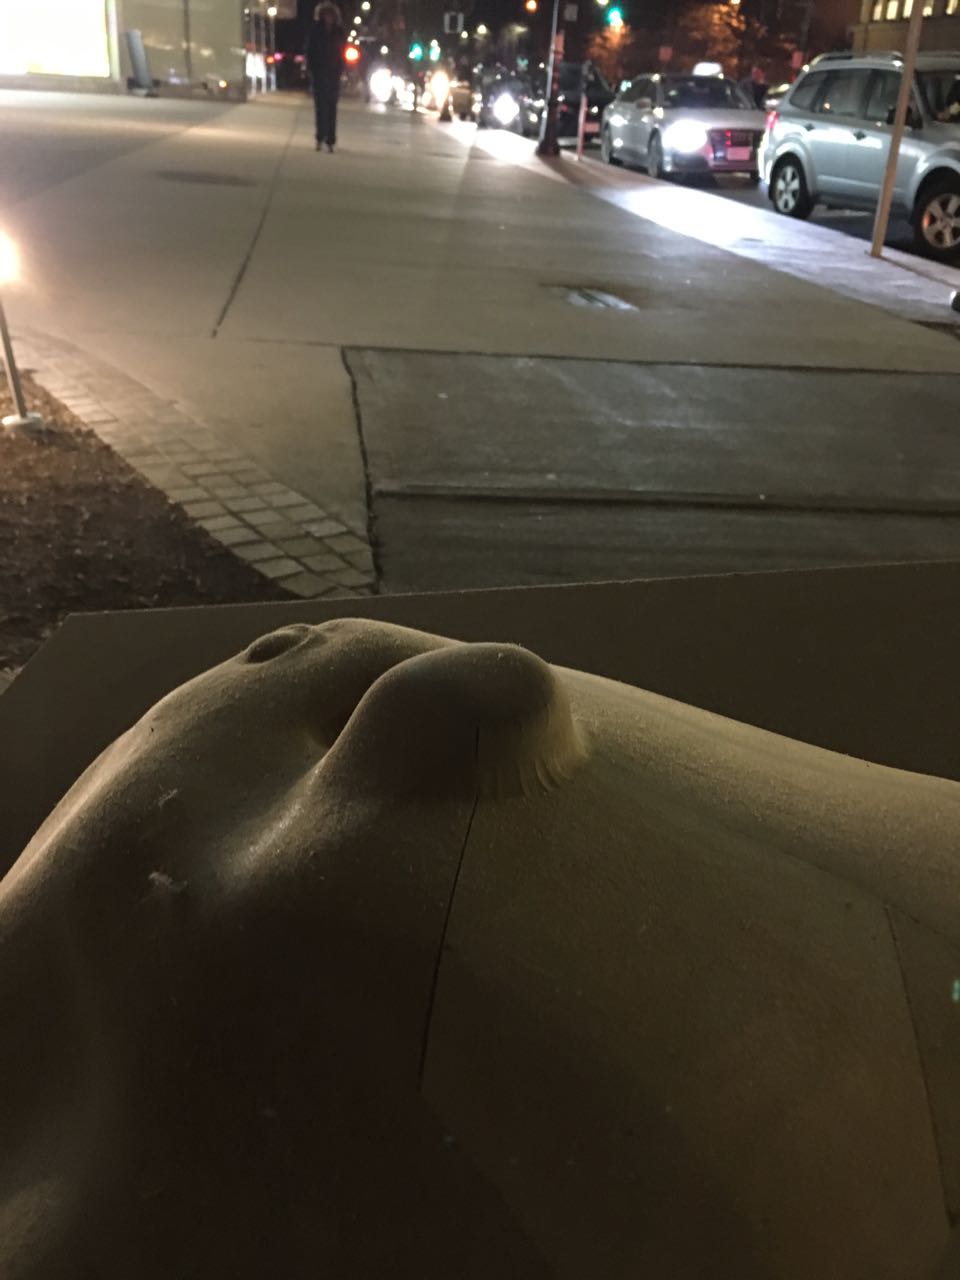
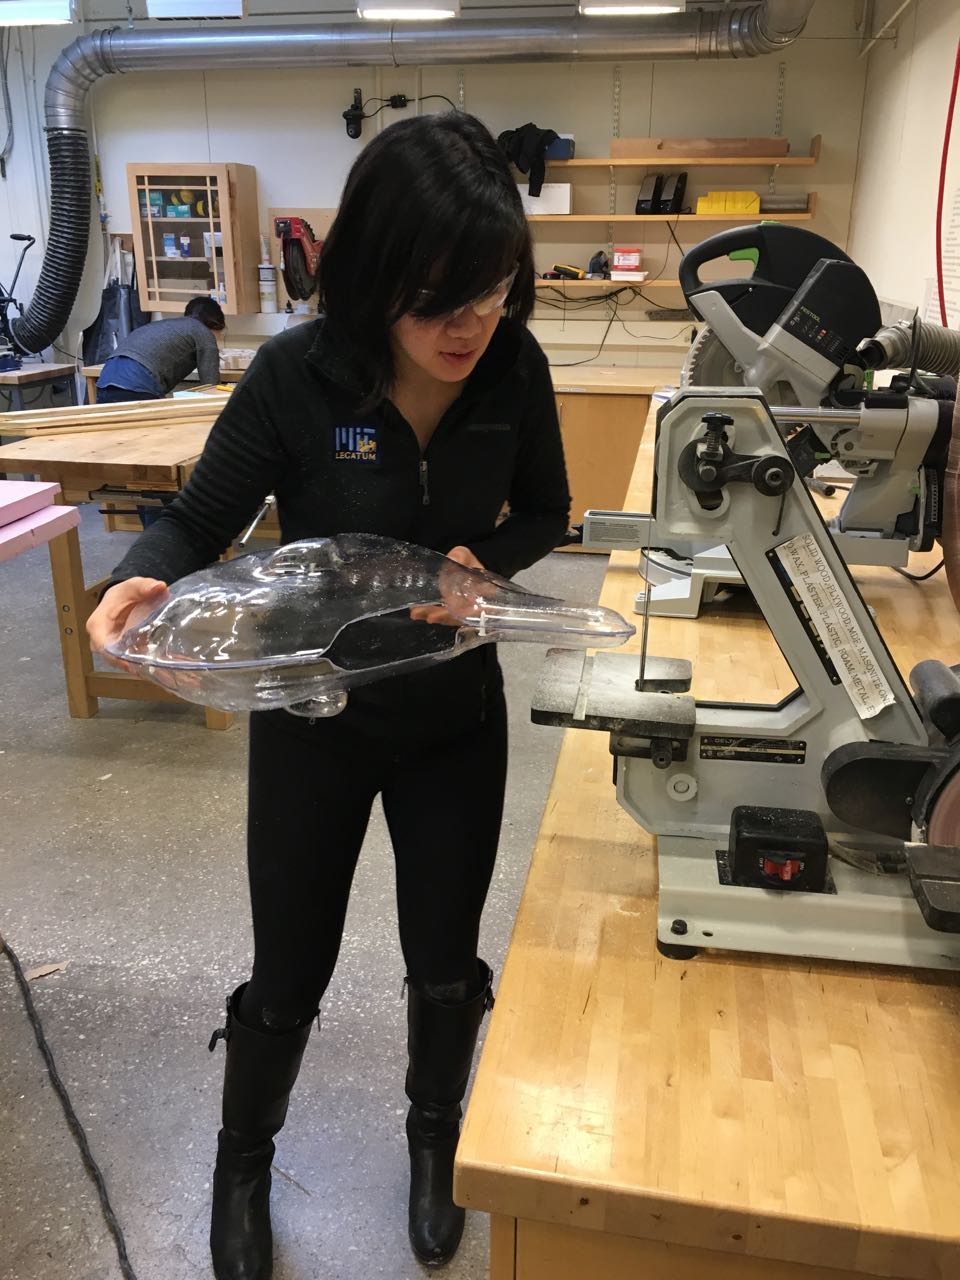
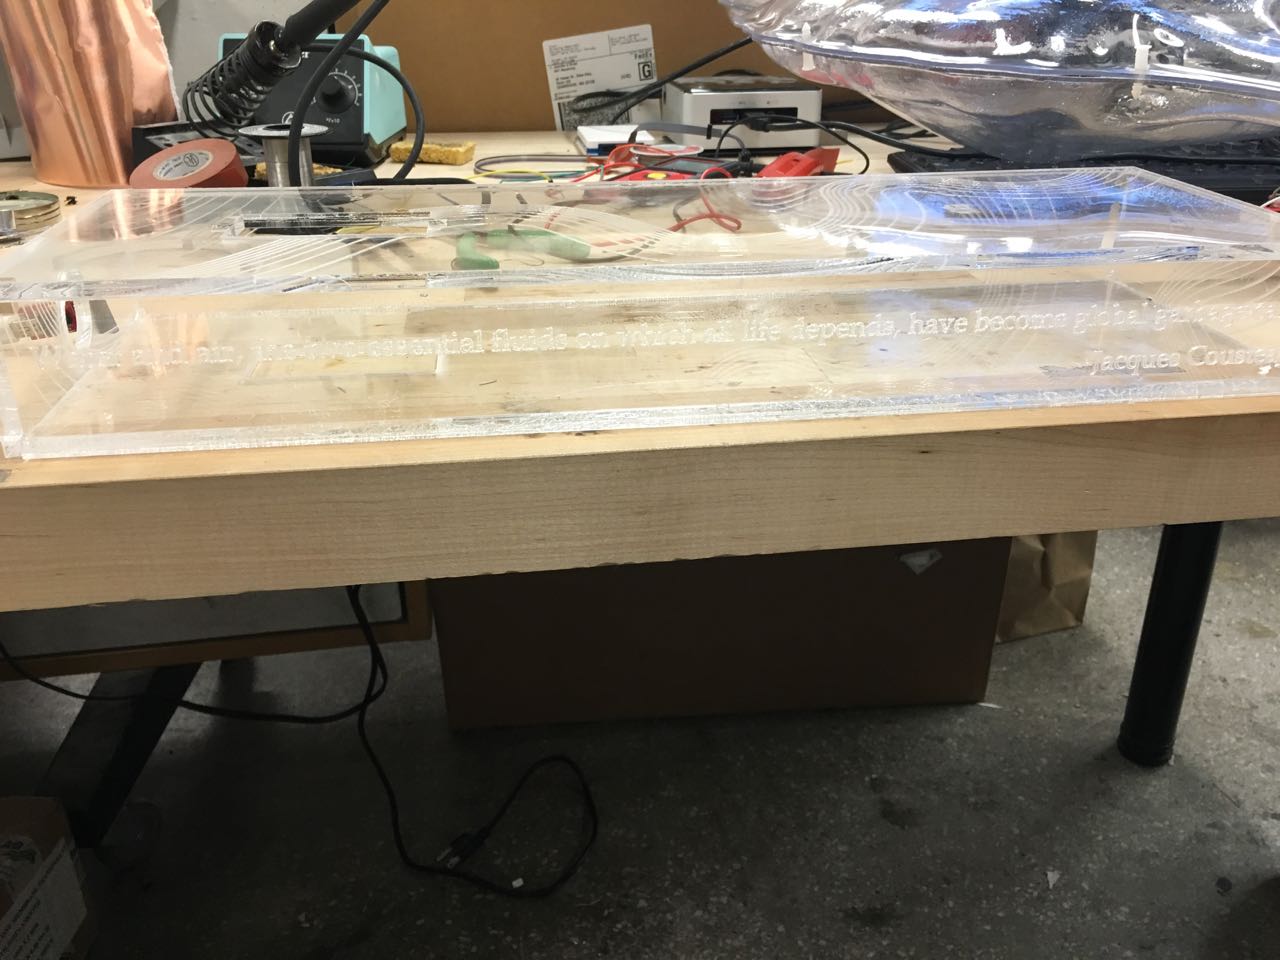
Very happy with the results. I used a bansaw to trim off the edges, finished with a sander to create alignment on the flange, drilled holes and nailed the fish together using transparent 3/16" nails. In hind sight I could have used a CNC router to trim off the edges to get a cleaner finish.

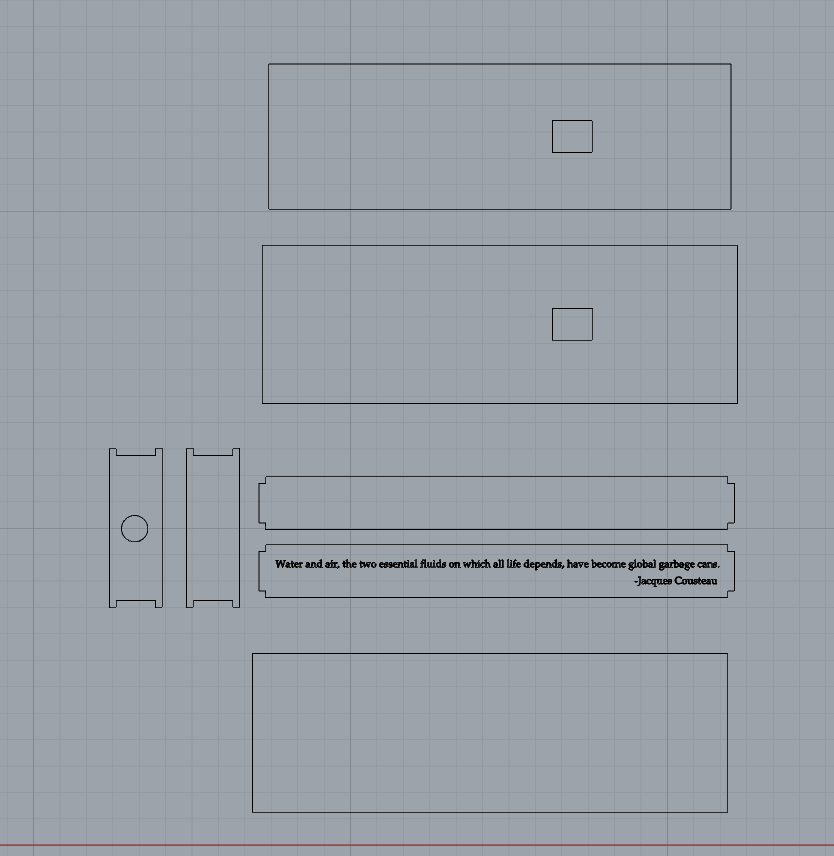
Designing + Laser Cutting the base
Probably the easiest part. I created a base accounting for some press fit corners using one 24"x 24" sheet of 1/4" plexiglass. Made some waves on it, made a cool design
Materials Used:
1/4" plexiglass
Acrylic Glue
Settings to cut on 120 epilog:
CUT: Power: 95% Speed: 5% Frequency: 5000
Score: Power: 70% Speed: 30% Frequency: 5000
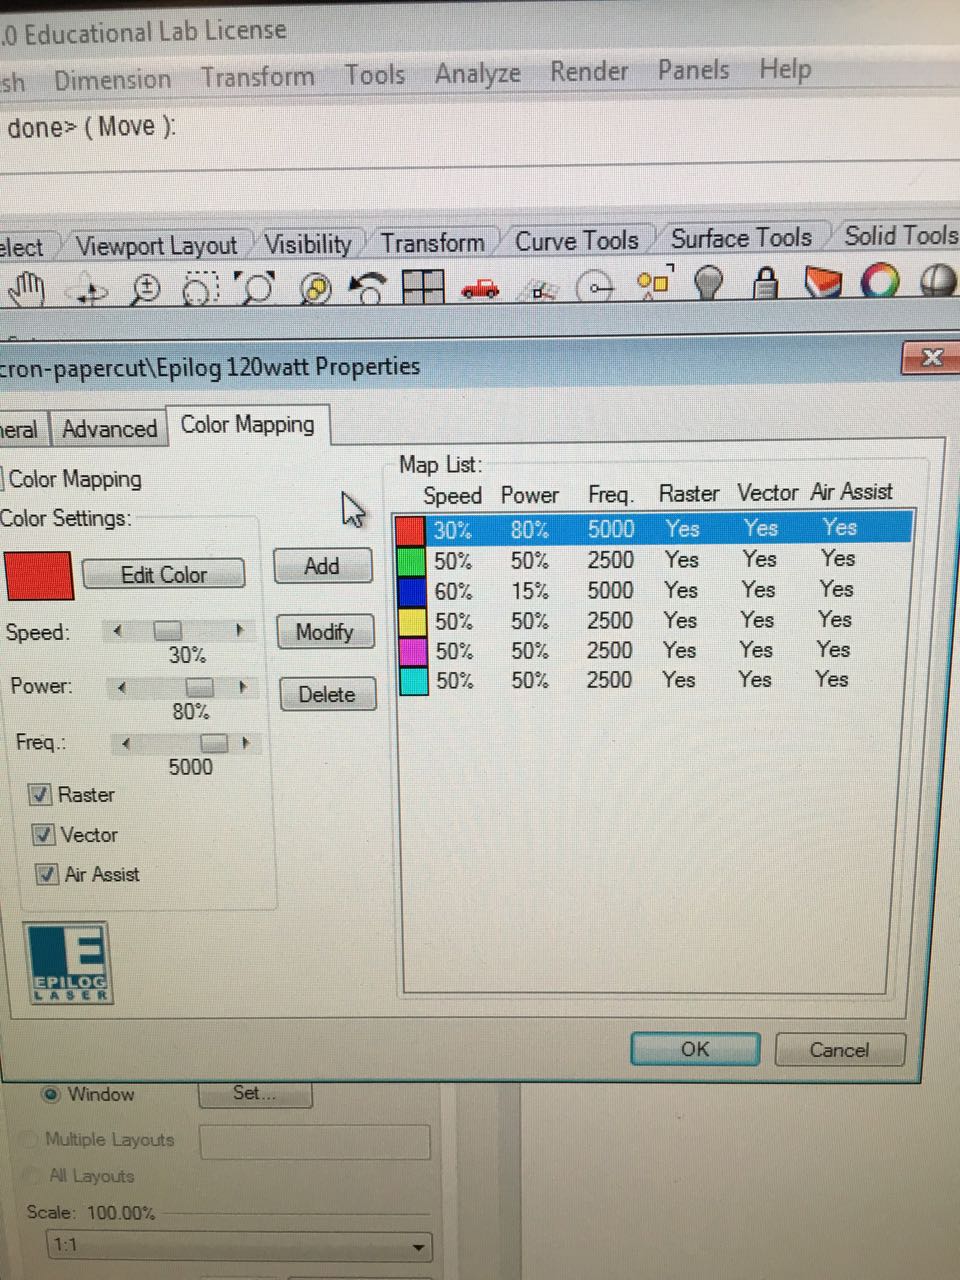
Be very very careful. While it required a bit of power to cut through the plexi, there was definitely a potential fire hazard that required me to keep guard.
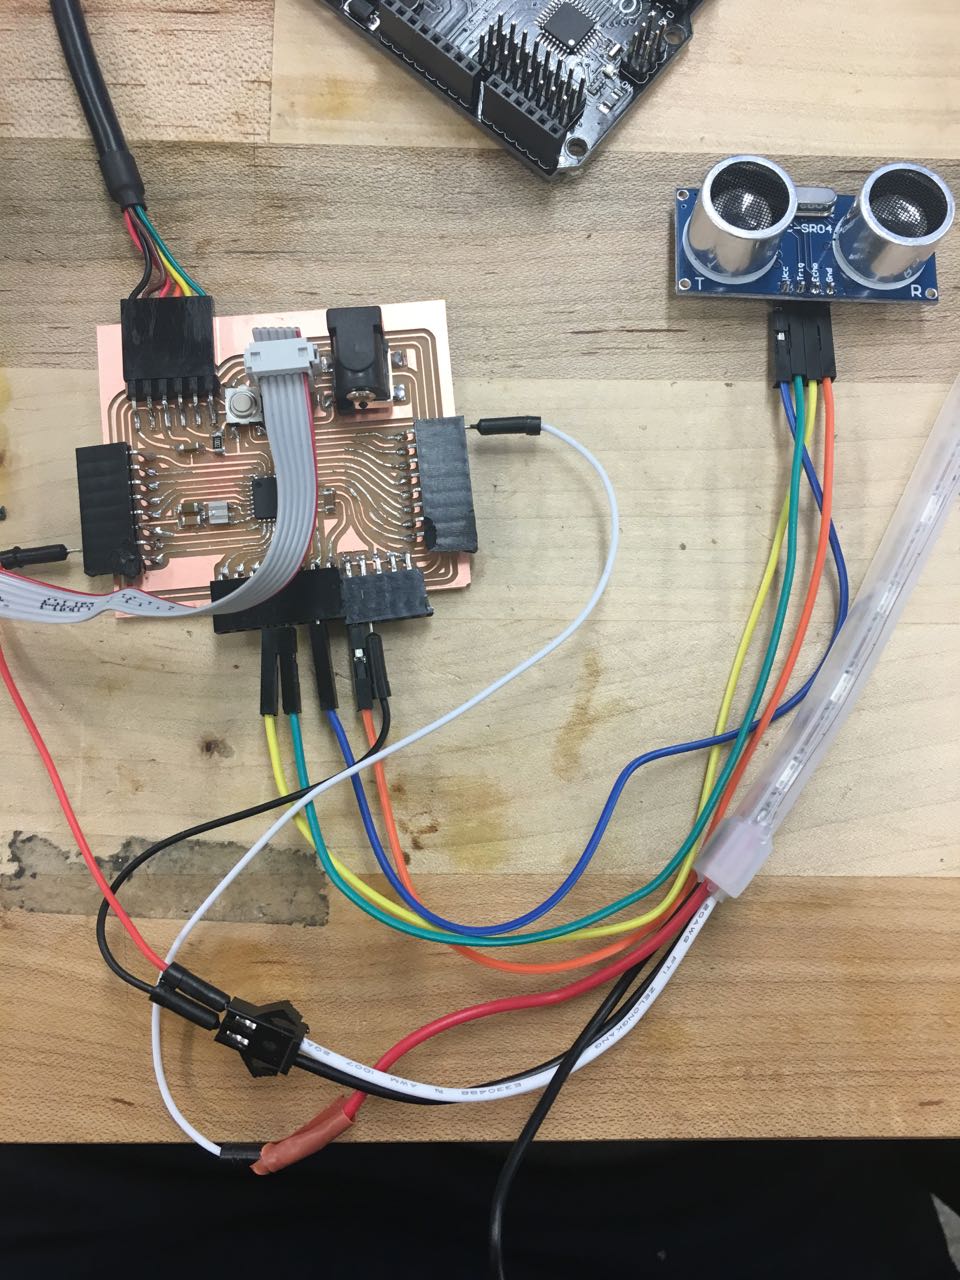
Electronics Design
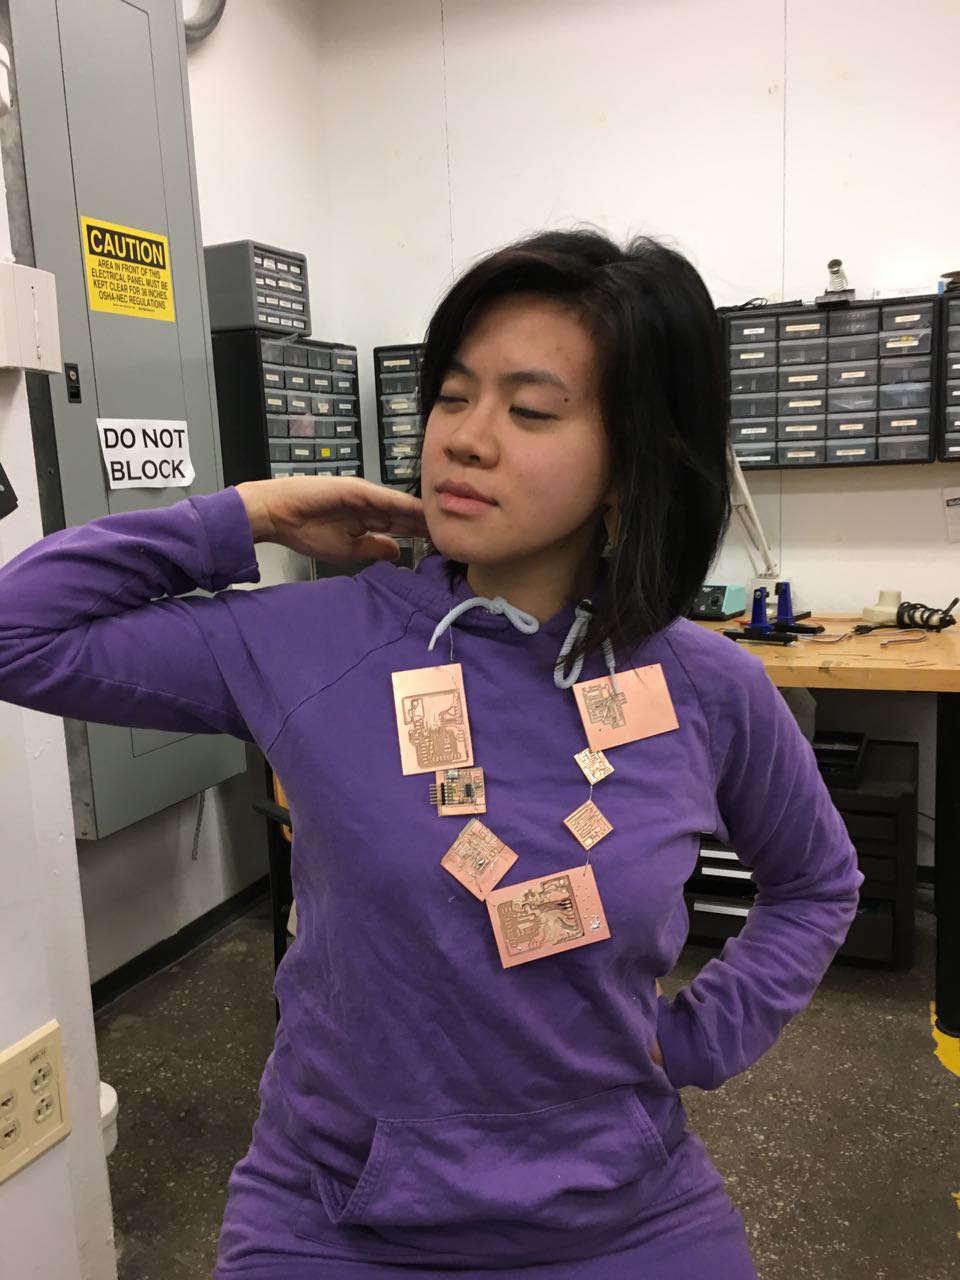
I've found some good use for all the copper I've killed this semester. Jewelry business come at me
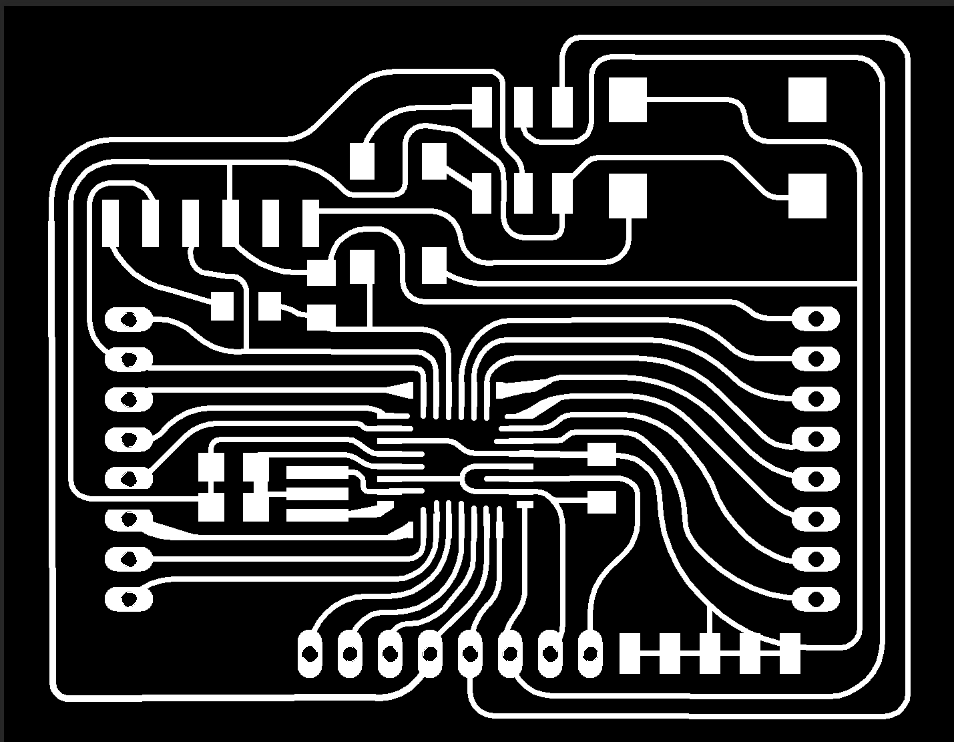
Interior Traces at 1/64" end mill
Outline and drill bits at 1/32" end mill. NOTE: BE very careful about using double sided copper which can cause shorts!
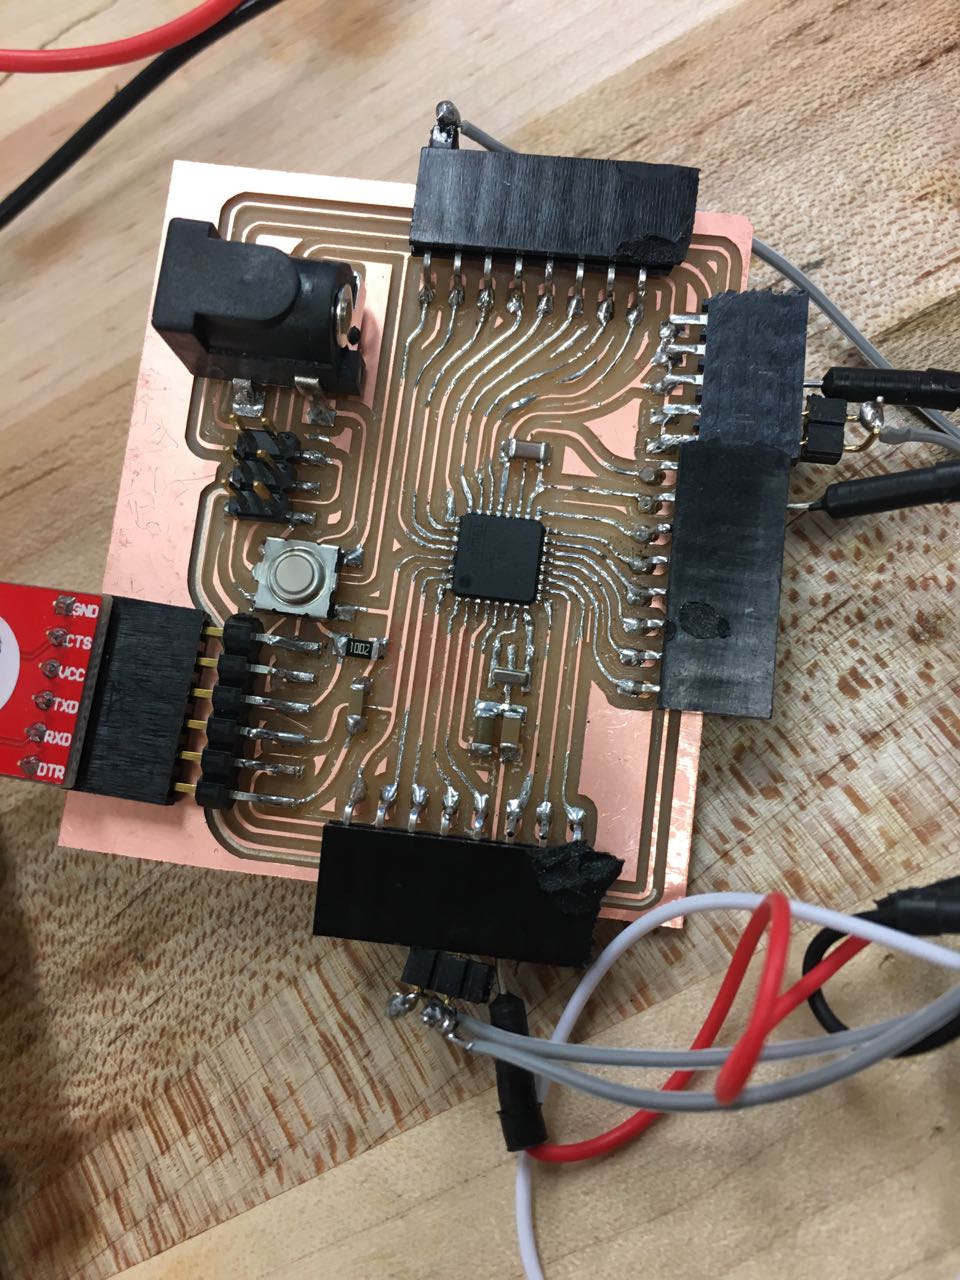
In the spirit of spiral development, I first tested my program and sensors on an arduino UNO. I first took code taken from ada fruit.Once I got the pins to start working, I used Raphael Schaad's beautiful shaaduino as a basis for my microcontroller board.
Milling the board really took forever, especially soldering down the ATMega328P. It was a really painful process getting the rebduino to work due to my lacking electronics skills. I made at least 3 boards, at some point each of them did work, and the current board is able to load programs successfully (after switching out the 20 mHz crystal for a 16 mhz crystal)
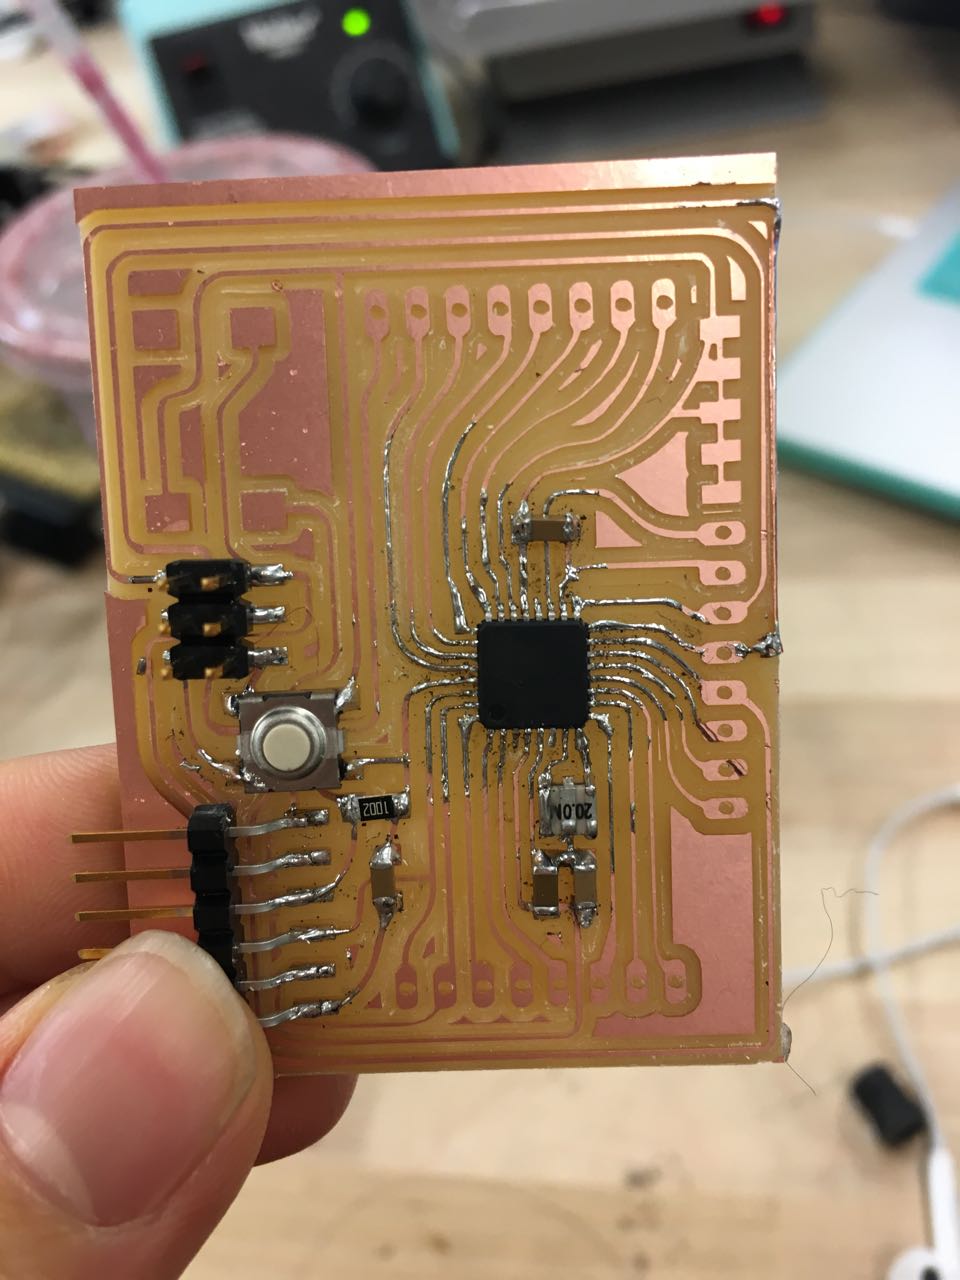
At last, I was able to get the program to load. But still the rebduino doesn't work. Must be because the PIN mapping was wrong. Referencing Dan chen's ATMega328P pin layout, I was able to remap the code and got the rebduino to work.
When the lights got lit, it may have been the best moment of my semester
Output Devices
Materials:
ADA Fruit White 30 LED Neopixels<
HC-SR04 Sonar Sensors.
At first I started with using the PIR infrared sonar. While it worked, it was not a fitting input device for my purposes because trash does not emit heat and one had to stand at a further distance in order for the sensor to pick up any movement
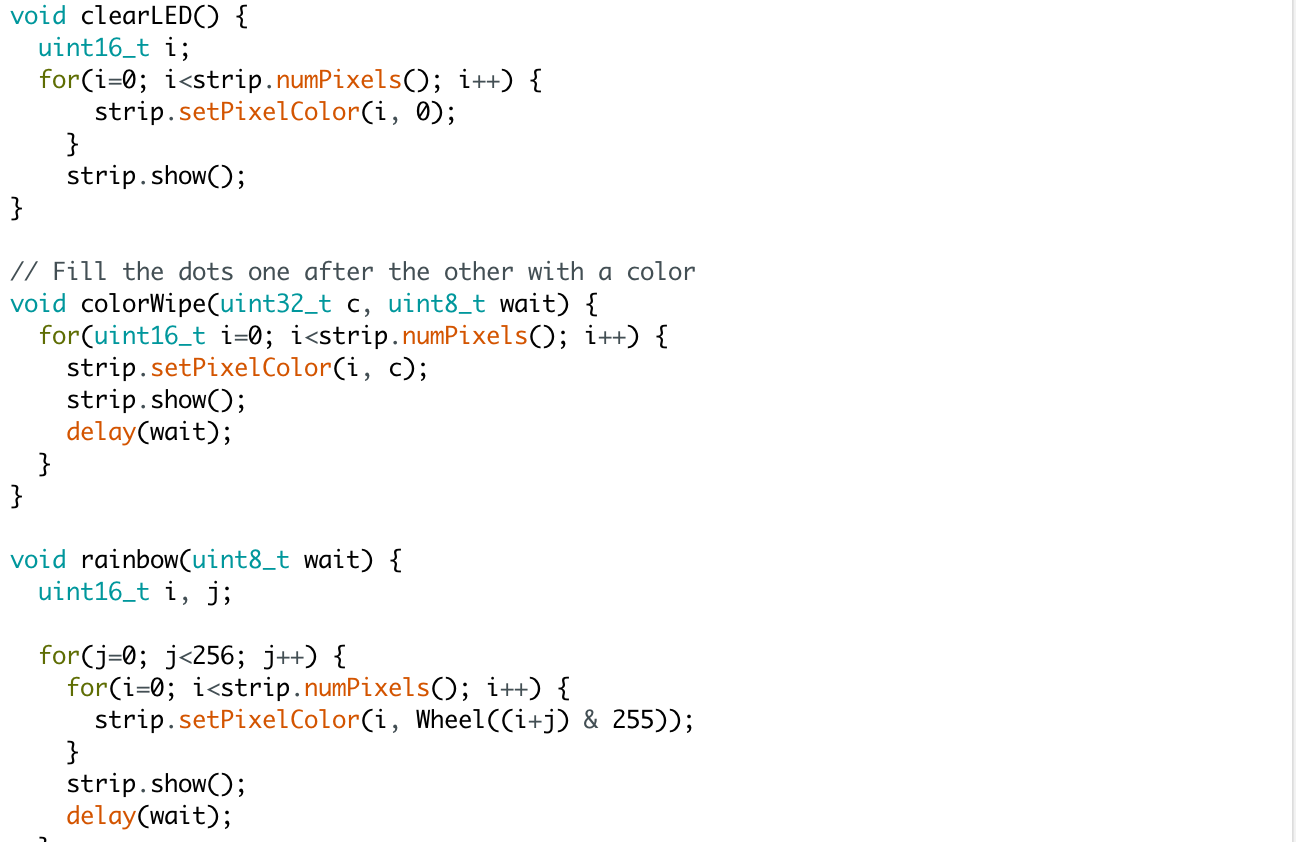
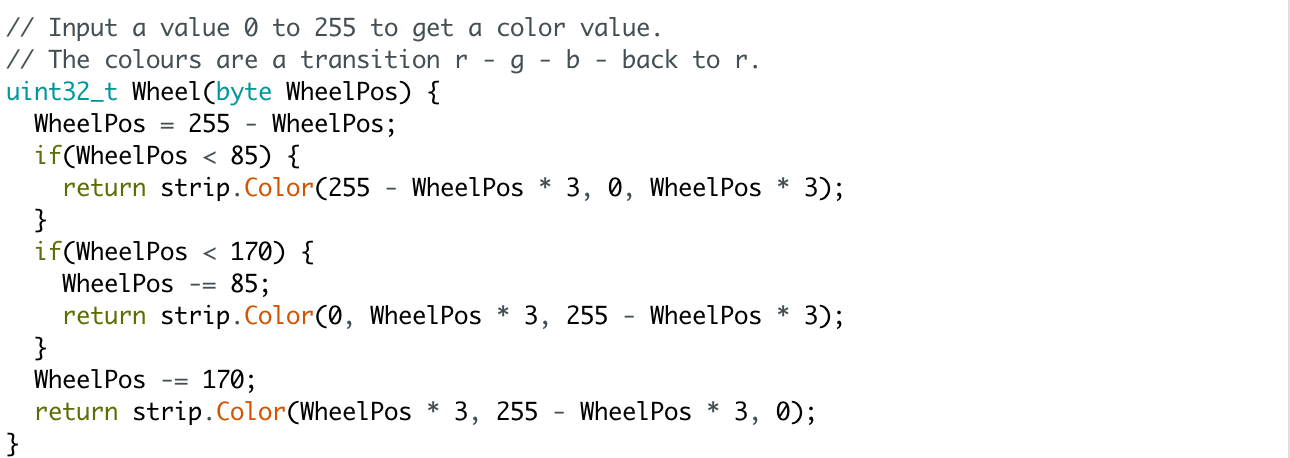
Working with adafruit neopixels was wonderful. The LEDs are beautiful and the abundance of coding examples online to treat the lights were bountiful. It gave me great dexterity with capturing the behavior of the fish using light. The only things to remember: One cannot plug it in from both sides; there is distinctive an input and outputs side. 3 pins to plug in: 1 for the LED pin, 1 for ground, 1, for VCC, and lo and behold, Magic!
2 Libraries to load in: 1. Adafruit Neopixels 2. Newping.h
I intended the code to do the following: After 20 pieces of trash have been thrown in, at intervals of 5, the colors become less vibrant. So we go from a fully RGB schematic to a chromatic scale

Huge thanks to the following people who gave me an incredible amount of technical support...: Mrinal Mohit, Sahil Shah, Victor Prost, Raphael Schaad, Nico Guida, Calvin Zhong, Max Jarosz