Week 8: Molding and Casting
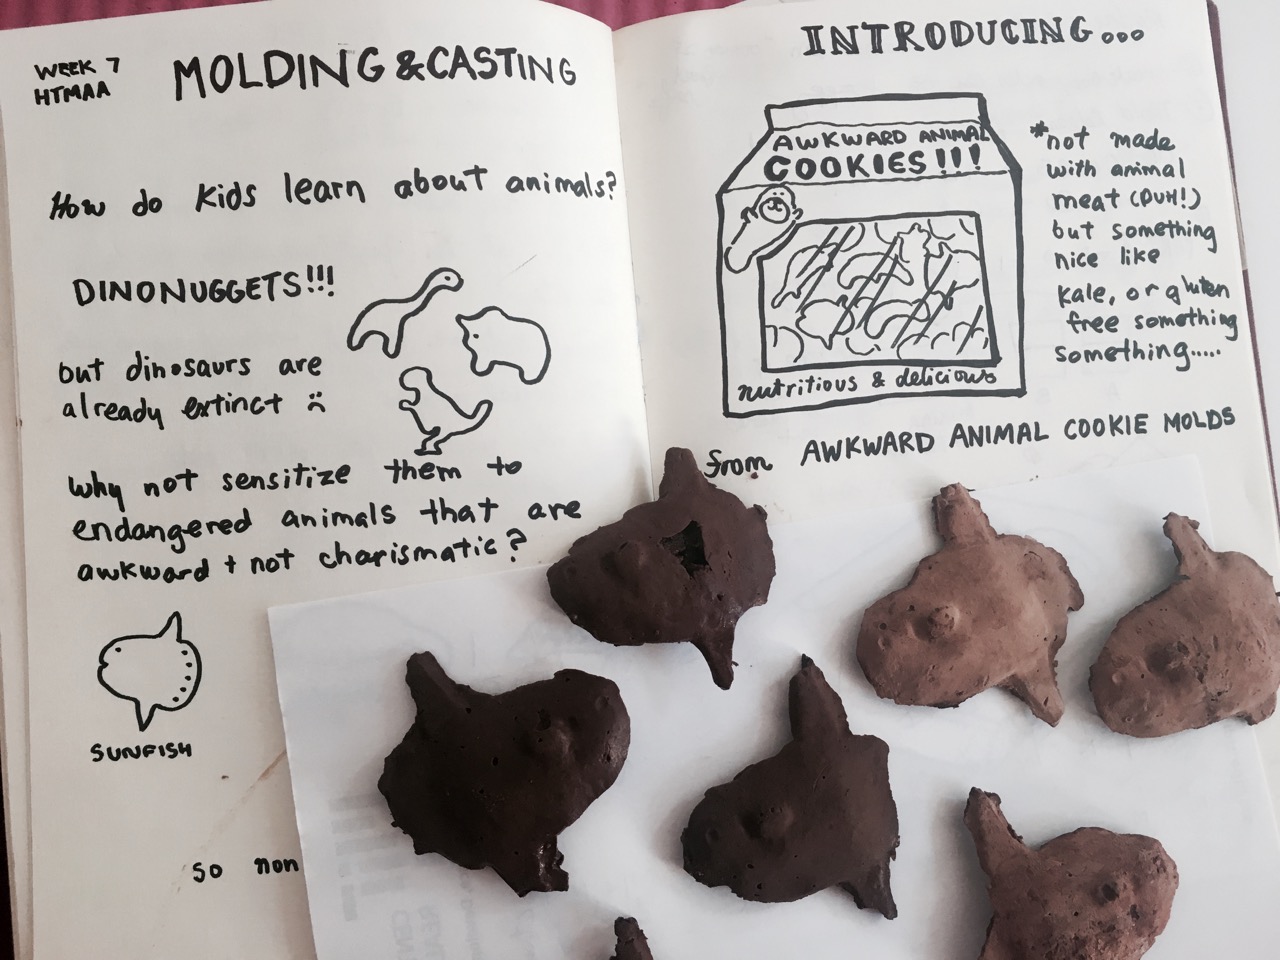
It has been in my heart of hearts to create awkward animal cookies. There are many awkward animals that are endangered, but are not charismatic enough to get the PR they need (tigers and rhinos). I have never been able to meaningfully connect my skillsets to ocean conservation.
Molding and casting week changed that. I could finally do something for the ocean. Awkward Animal Cookies is a project I've always wanted to pursue as a side income stream to my current social enterprise Roots Studio. Perhaps you will see this on kickstarter one day
This week was one of my favorite weeks (Minus MasterCam). We conceived a design which would be turned into a mold and then casted. Some of the main takeaways were:
-Inverse thinking: thinking positive, negative, positive
-Realizing how the shape changes with every subsequent remolded material
-Cutting toolpaths in Mastercam
-Working with the Modela; printing in space and into wax
-2 layer versus 1 layer molds in execution
-Types of materials for casting
Originally I wanted to create cookies, but after I realized the work flow and it was my first time casting, I decided to stick to chocolates. Casting aluminum, along with creating the type of cookie mold I wanted to create would introduce too many uncertainties and what seemed to be a longer workflow
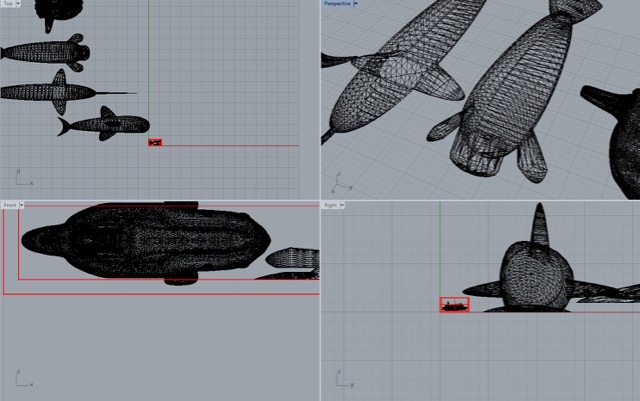
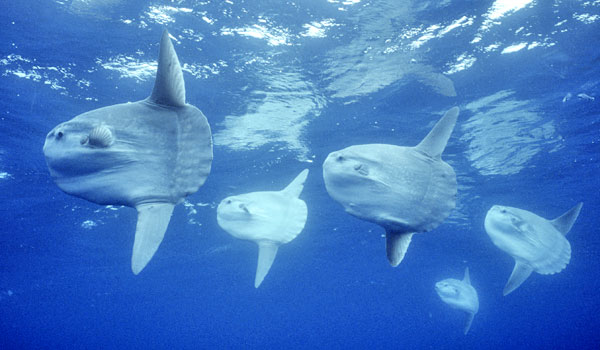
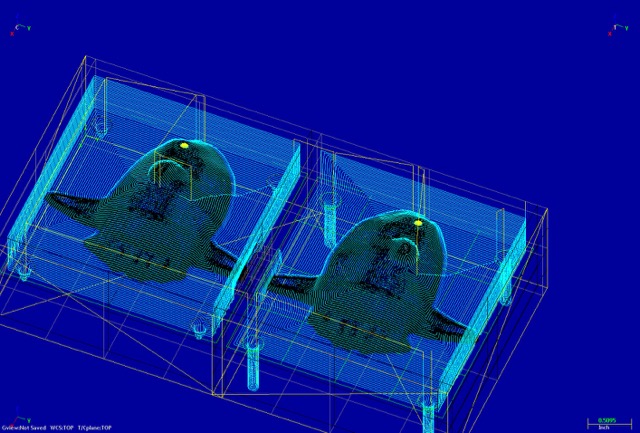
I first began by designing my own animals in rhino, but after finding some beautifully detailed meshes of awkward animals, I decided to go with these. Then when I thought through more about how the tool path would not be able to cut through the bottom shapes of my animals, I decided to go for just one animal - the sunfish - and create a two sided mold so we could get all the details
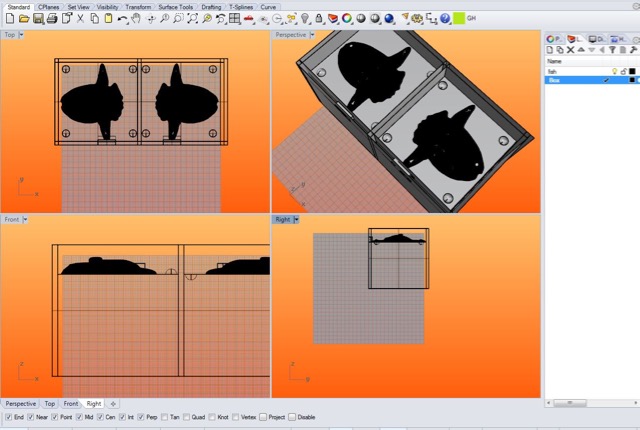
I redesigned the box in rhino according to the size of the 6"x3"x1.5" wax block. During this process I had to be very sober about the positive-negative-positive process, and how the two molds would fit together. I first gave the box spherical "nubs" that would fit together, which proved to be very cumbersome in Mastercam. I also created a small pouring spout through the sunfish's fin, which would prove to be cumbersome in material later on
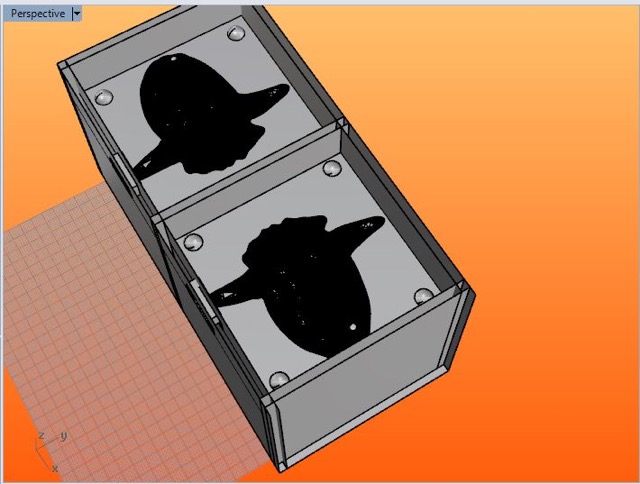
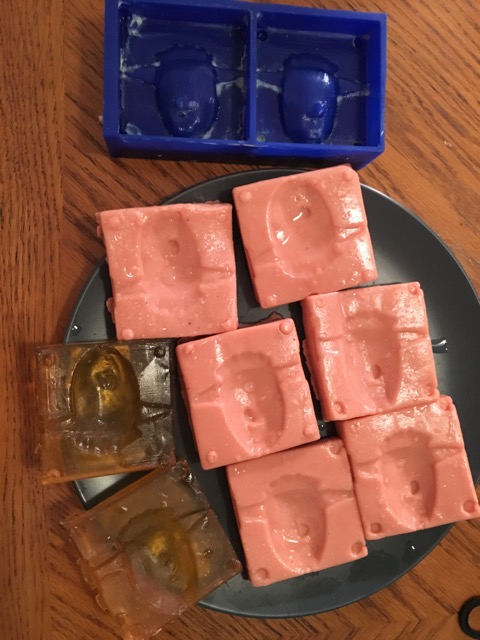
It became a 2 sided mold that would be put together and formed into a sunfish chocolate
One of the biggest frustrations working in mastercam was the complexity of the mesh I was working with. As a result of "exploding from nurbs," there were over 400000 lines. Every time I would redraw the path or resimulate, it would take at least 3 minutes to load...causing me to spend at least 9 hours in front of master cam
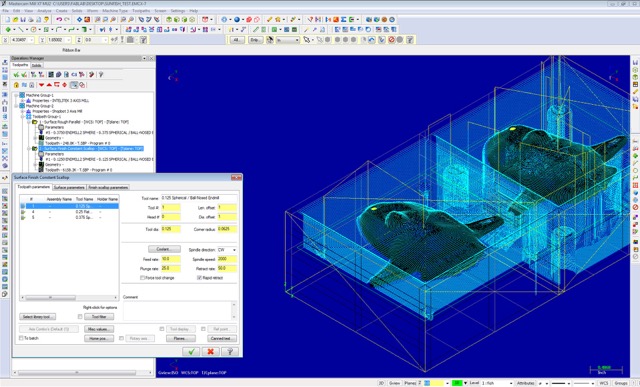
There were also many back and forths between rhino and mastercam. The tool paths would not like certain shapes and draw incorrectly or through the box. A few lessons I took away from designing in rhino:
1. Surface direction matters when you extrude
2. Mastercam did not like spherical notches. Changing them into circular cones helped a lot
3. Again, having over 300,000 meshes is not fun
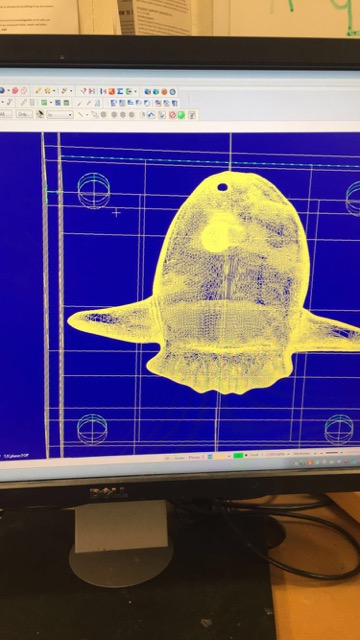
The Modela
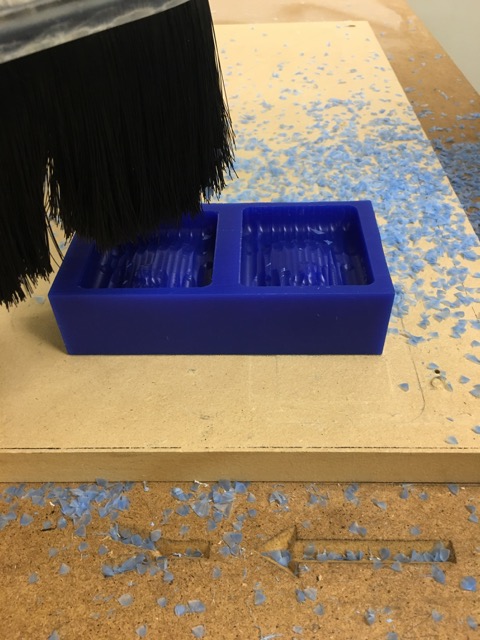
So happy to be out of the mordor gates of Mastercam and onto the Modela. First we had to custom set the jogger to make sure it would drill where our block was. We had to account that it wouldn't crash into the bed. But since we were working with a modela that didn't have side walls, we didn't have to worry as much about it hitting the limit. We first simulated the tool path by "drawing in air," and once it was clear that the tool path wasn't going to hit any undesirable places, we started cutting into the block. The rough cut was out of a 1/8" drill. In between we changed out the tools using a wrench, and scalloped the surface finish with a 0.375" drill
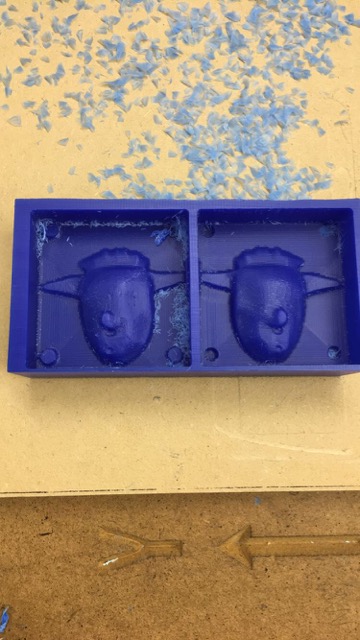
After the second cut came through, came two beautiful little sunfishes. A few insights that the cutout informed of:
1. Don't put the design too close to the edge of the box
2. The hole-fits were cut off. Perhaps they were too delicate
3. Very important to clean up the box so there are no rough edges...otherwise we will get a lumpy fill
Casting and Molding
Next, I tried several different materials into my mold. Since I wanted to create chocolates it would have to be food safe. I went to artisan and craftsman to buy the Organic Composimold which was certified food safe. I microwaved the mold for 1 minute and poured it into my mold
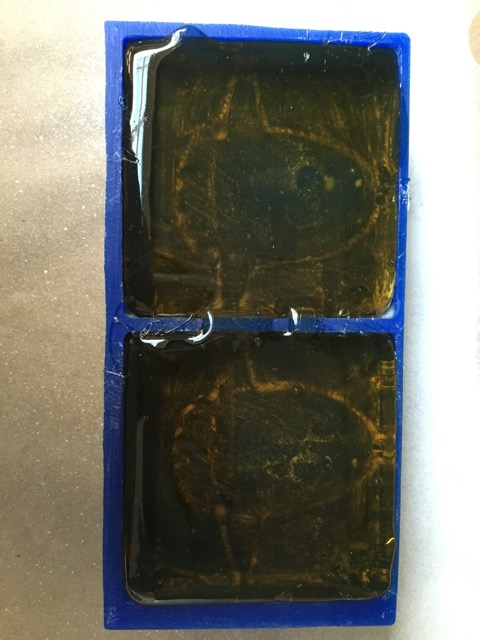
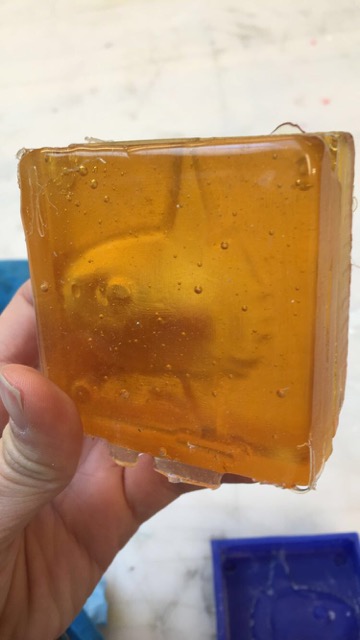
Out came this jurassic park amber sap looking mold with a lot of bubbles. It was quite rubbery in feel
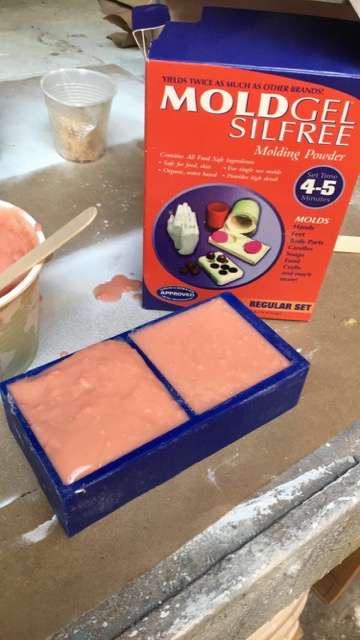
Kristen came in with some food-safe silicone so I tried creating a few molds using her MoldgelSilfree. It required a 3:1 water to silicone ratio and would dry in 4-5 minutes. This made mixing challenging, especially because lumps would show up if hard water was used. Measuring the proportions correctly also determined the resolutness of the mold. We would tip the cup a few times to release air bubbles, and proceed to pour the silicone into the mold in a ribbon-like fashion
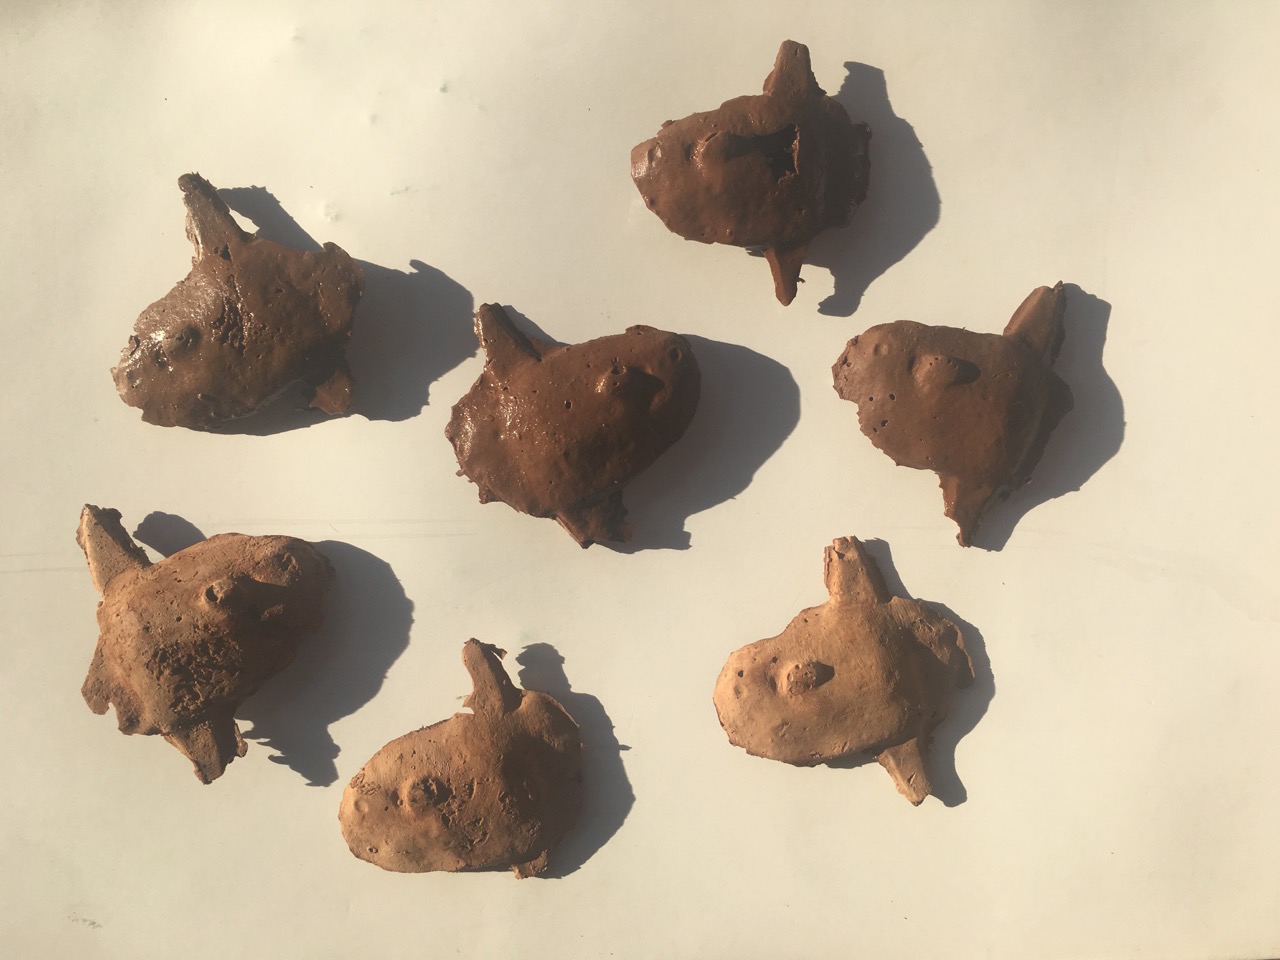
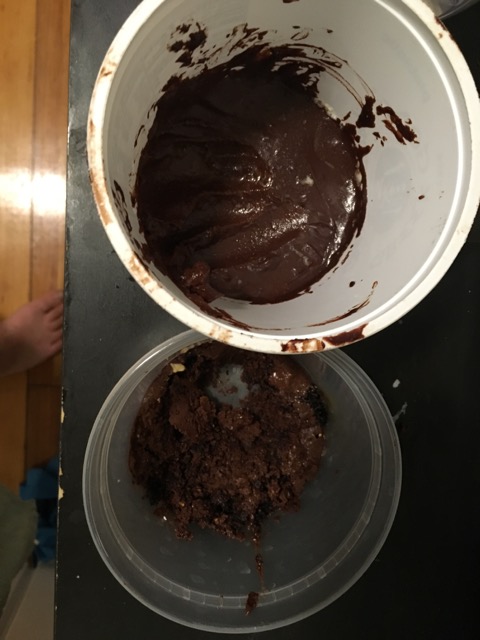
Next, I bought chocolate morsels from the grocery store. Making chocolate is another mess in itself because getting the temperature and composition of the chocolate is an esoteric art in itself. I tried diluting the chocolate with some water, which proved to create a mesh that would not dry. Then if I left the chocolate on the stove too long, it would turn into a brownie.
Organic Composimold versus Mold Gel Silifree: Here are the learnings:
1. The organic composimold was a mess for making chocolate, because it becomes denatured by heat and that is how the chocolate comes in.
2. Pretty much impossible to make a 2 sided mold considering how slimy the molds were and they would not clasp with each other. Moreover, I should have cleaned out the wax more so there would nto be so many gaping holes
3. The spout to get the chocolate in was way too small and could not account for the viscosity of the chocolate
4. I resorted to just pouring chocolate into the top side of the mold
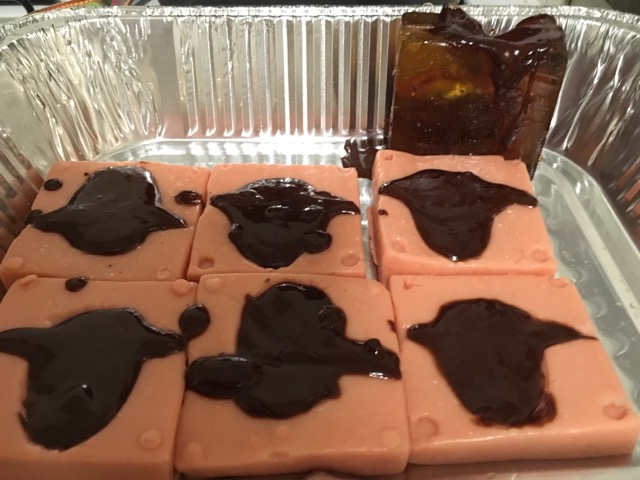
At last, my beautiful sunfish babies. They do come in different shapes and sizes but after all no sunfish was made equal and their quirks and eccentricities are what makes them beautiful