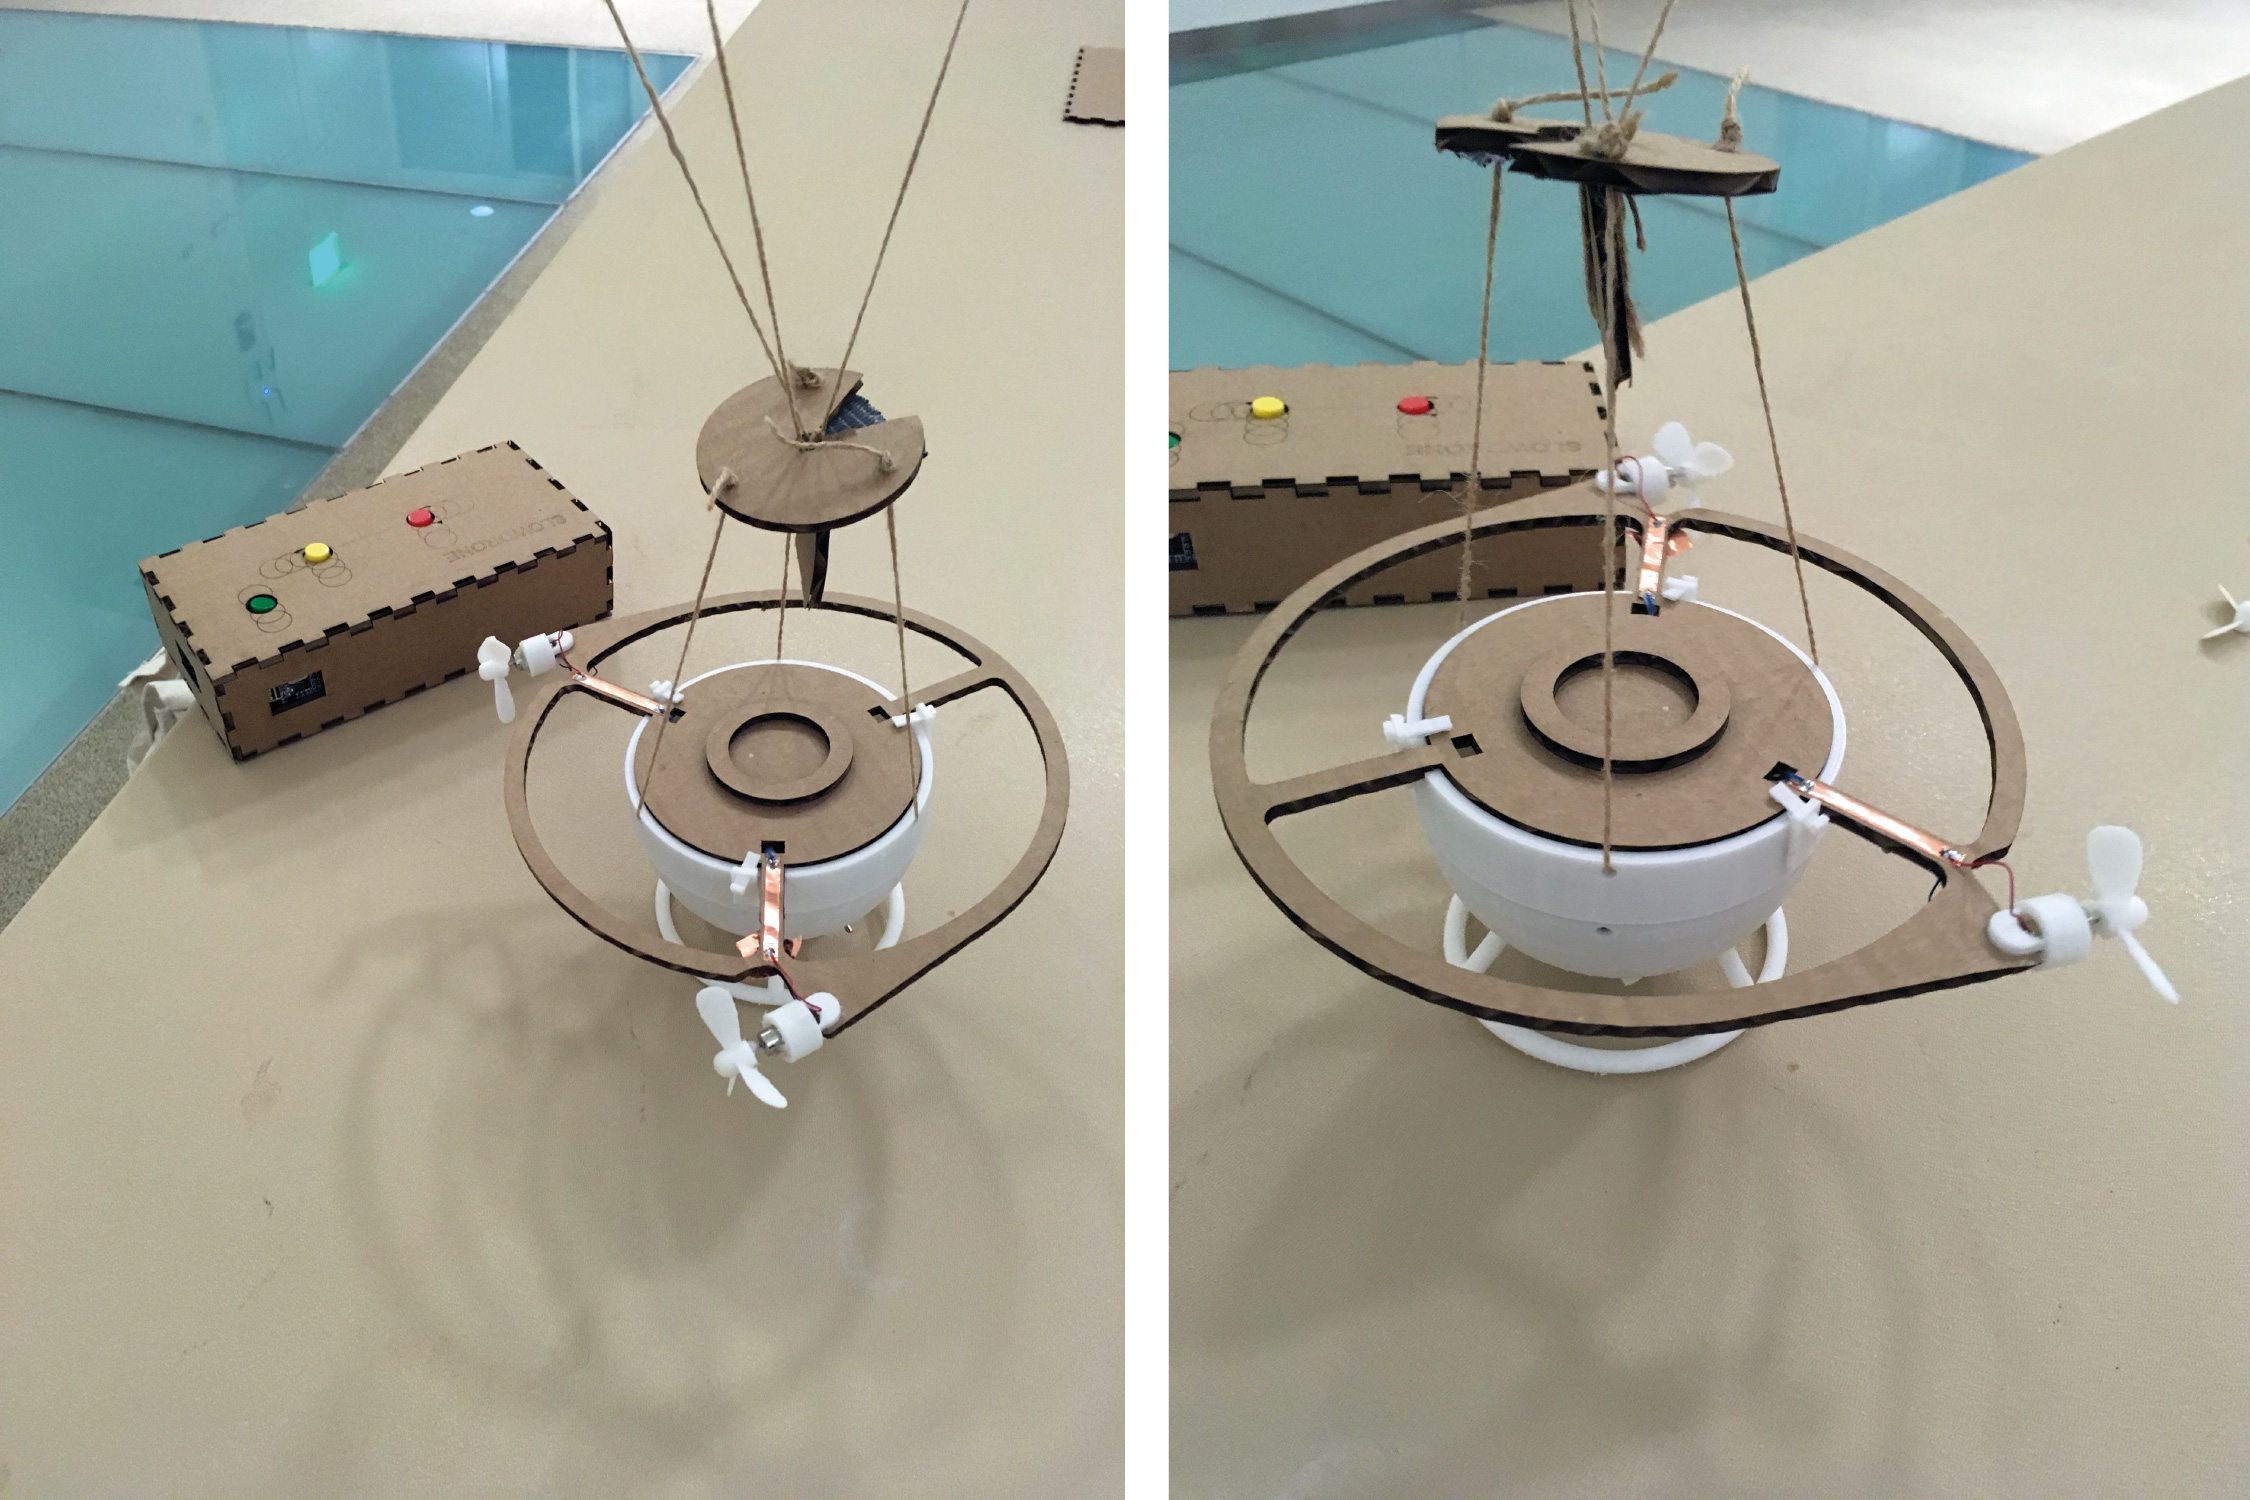
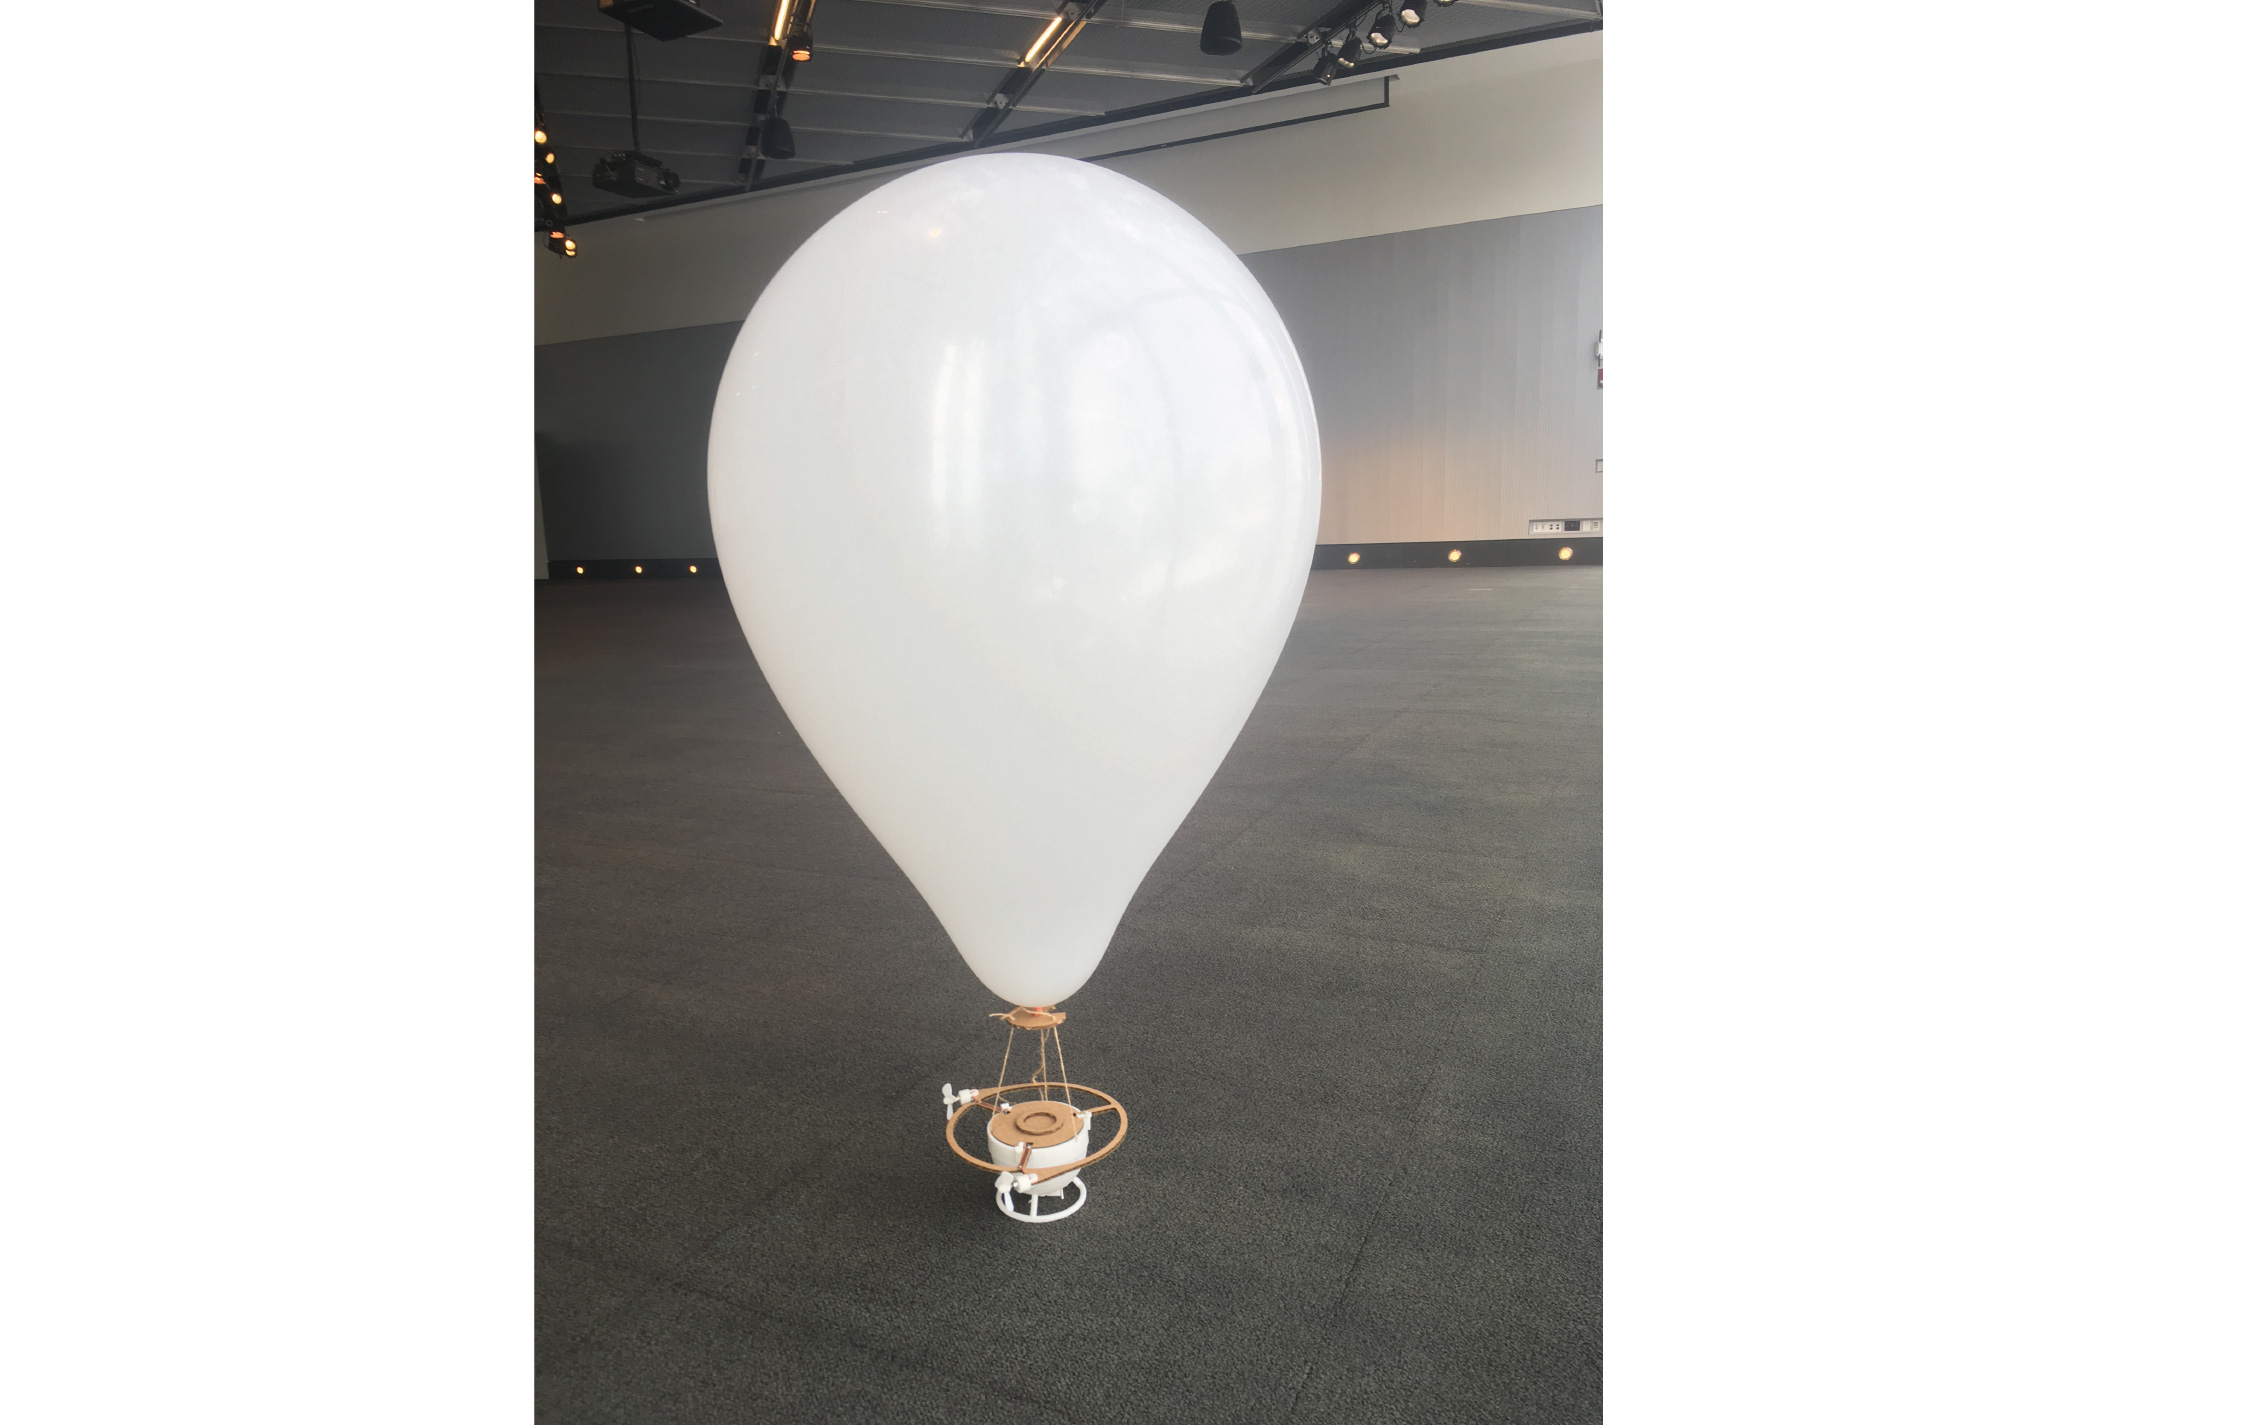
What does it do?
The BalloonDrone can float in indoor environments, and be controlled by a remote control.
When connected to sensors it can collect data or interact with an application. A slow and gentle indoor drone can be used for documentation of events, 3d-scanning of indoor environments, and interaction with spaces.
My next step would be to connect my BalloonDrone to Unity gaming environment, for interaction between actual and virtual spaces.
Test done with Sonar distance sensor and Unity application.
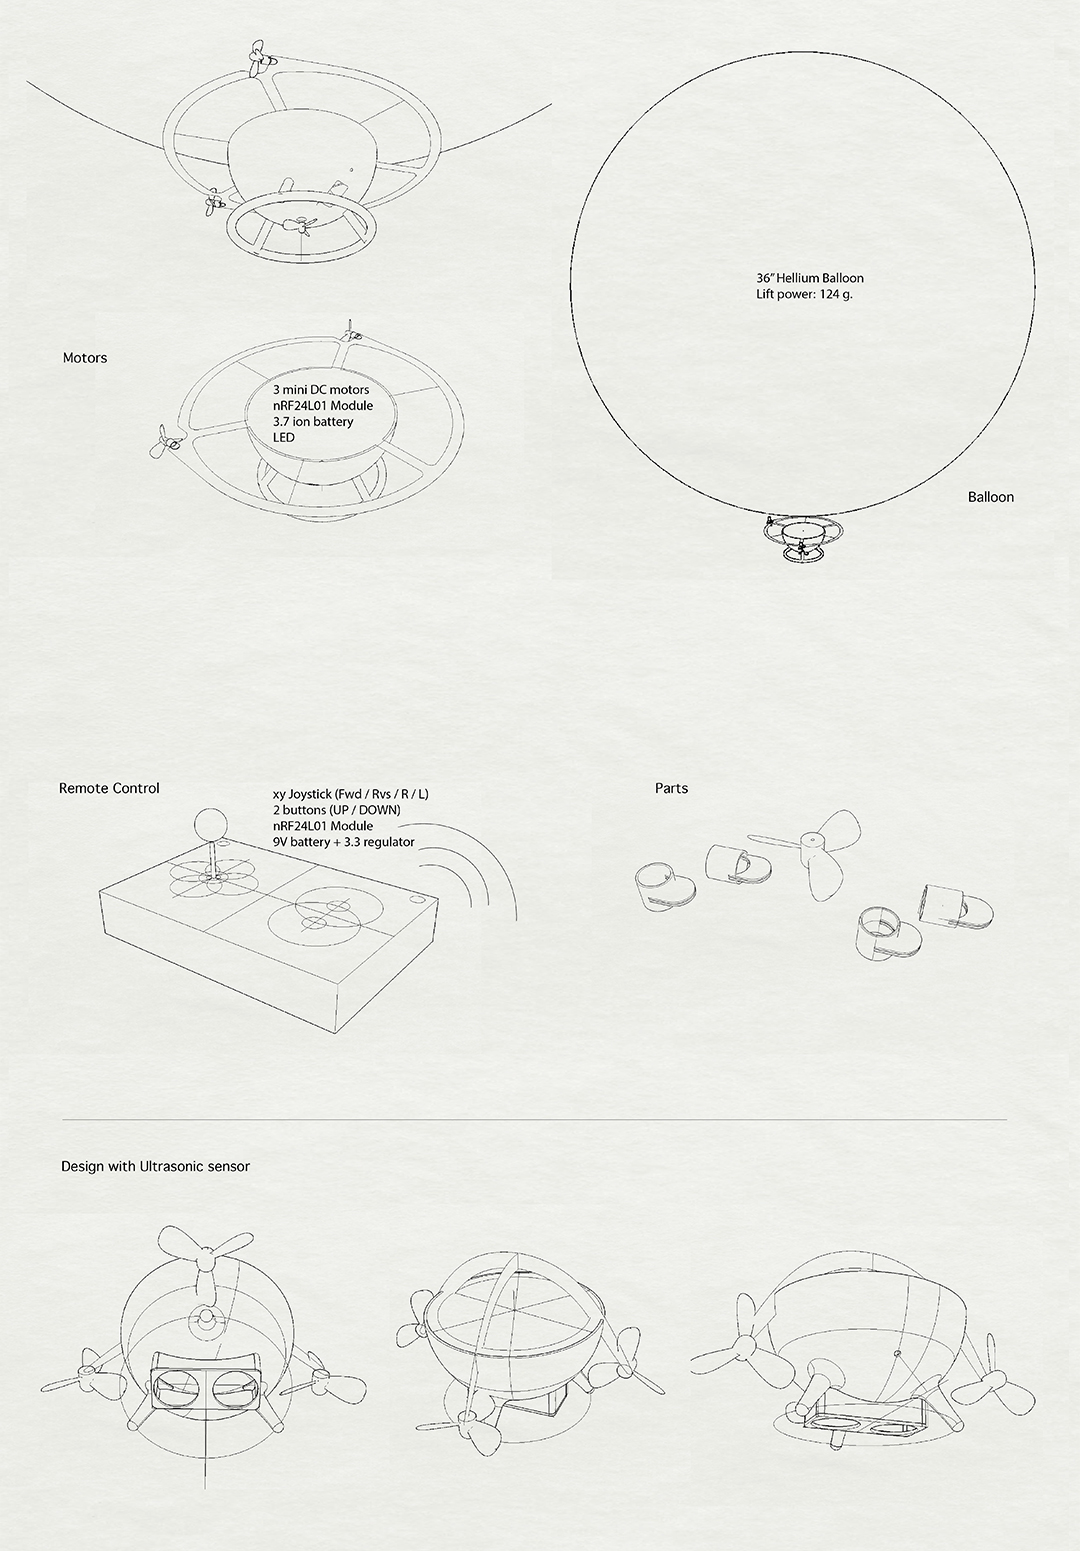
The project consists of:
• A balloon-drone (system and motors connected to a helium balloon).
• RF remote-control with several buttons to control the balloon movement.
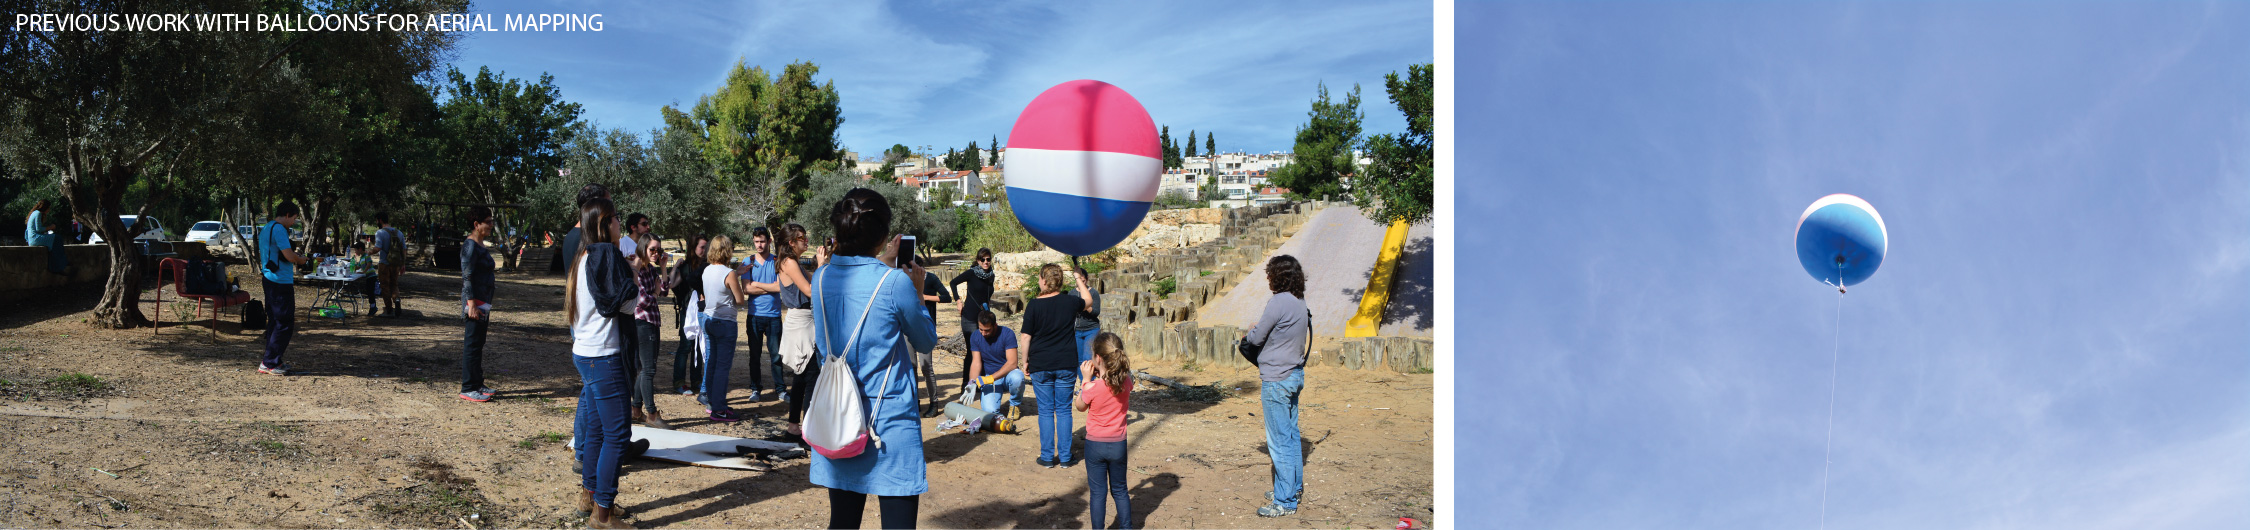
The motivation to make a balloon-drone came to me from previous work with hydrogen balloons for data collection. Specifically areal photography for open-source mapping and generation of civic data.
What did I design?
Everything except the latex balloon - and components.
Who's done what beforehand?
I’m and architect with vast experience with 3D-modelling (Rhino), and some experience laser-cutting and 3D printing (only with the Objet printer).
First time for me in PCBing, embedded programming, and also with CNC and casting.
What parts and systems were made?
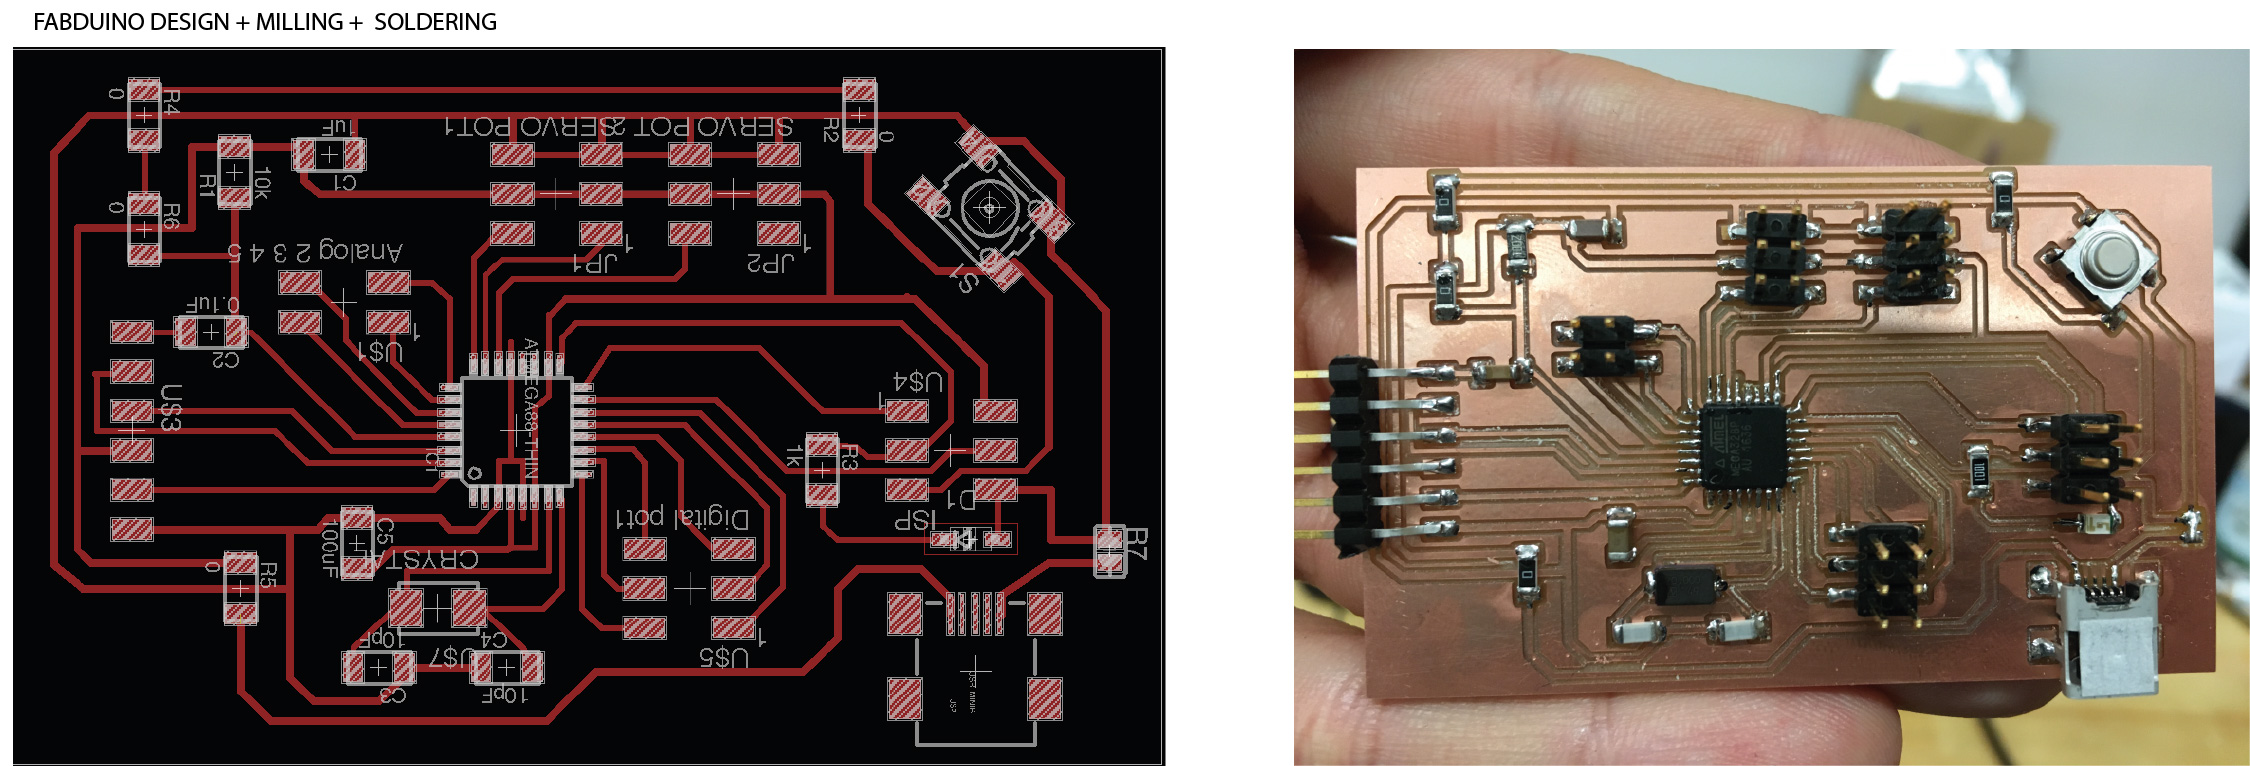
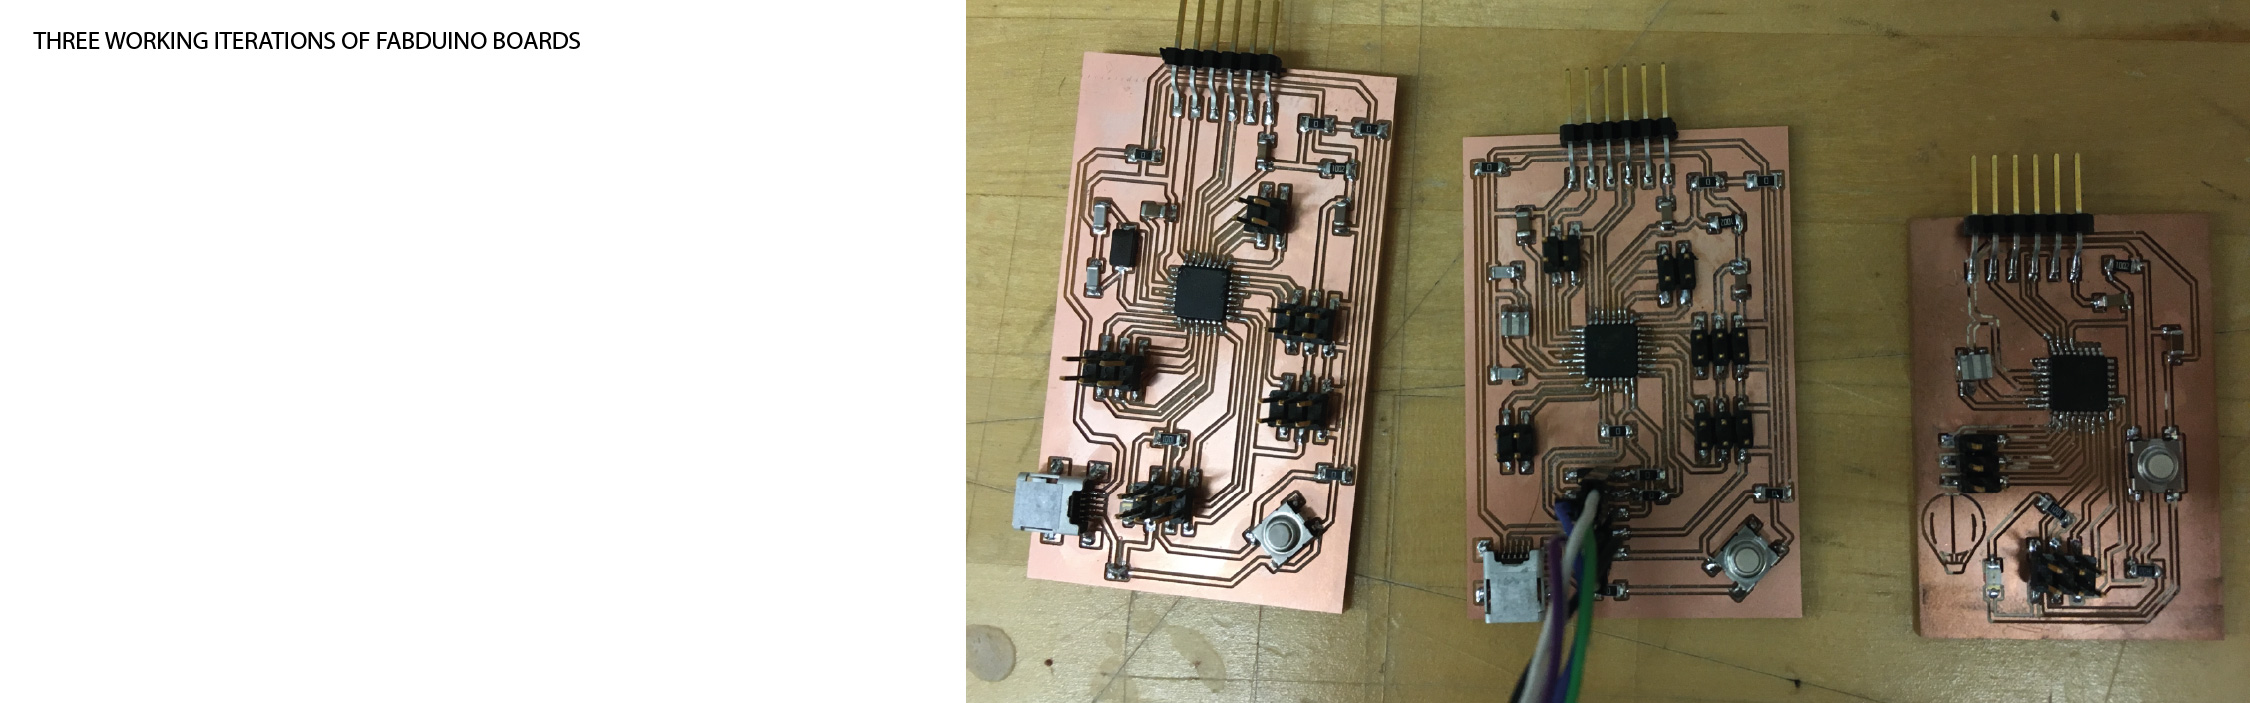
• The circuits (based on the Fabduino design)
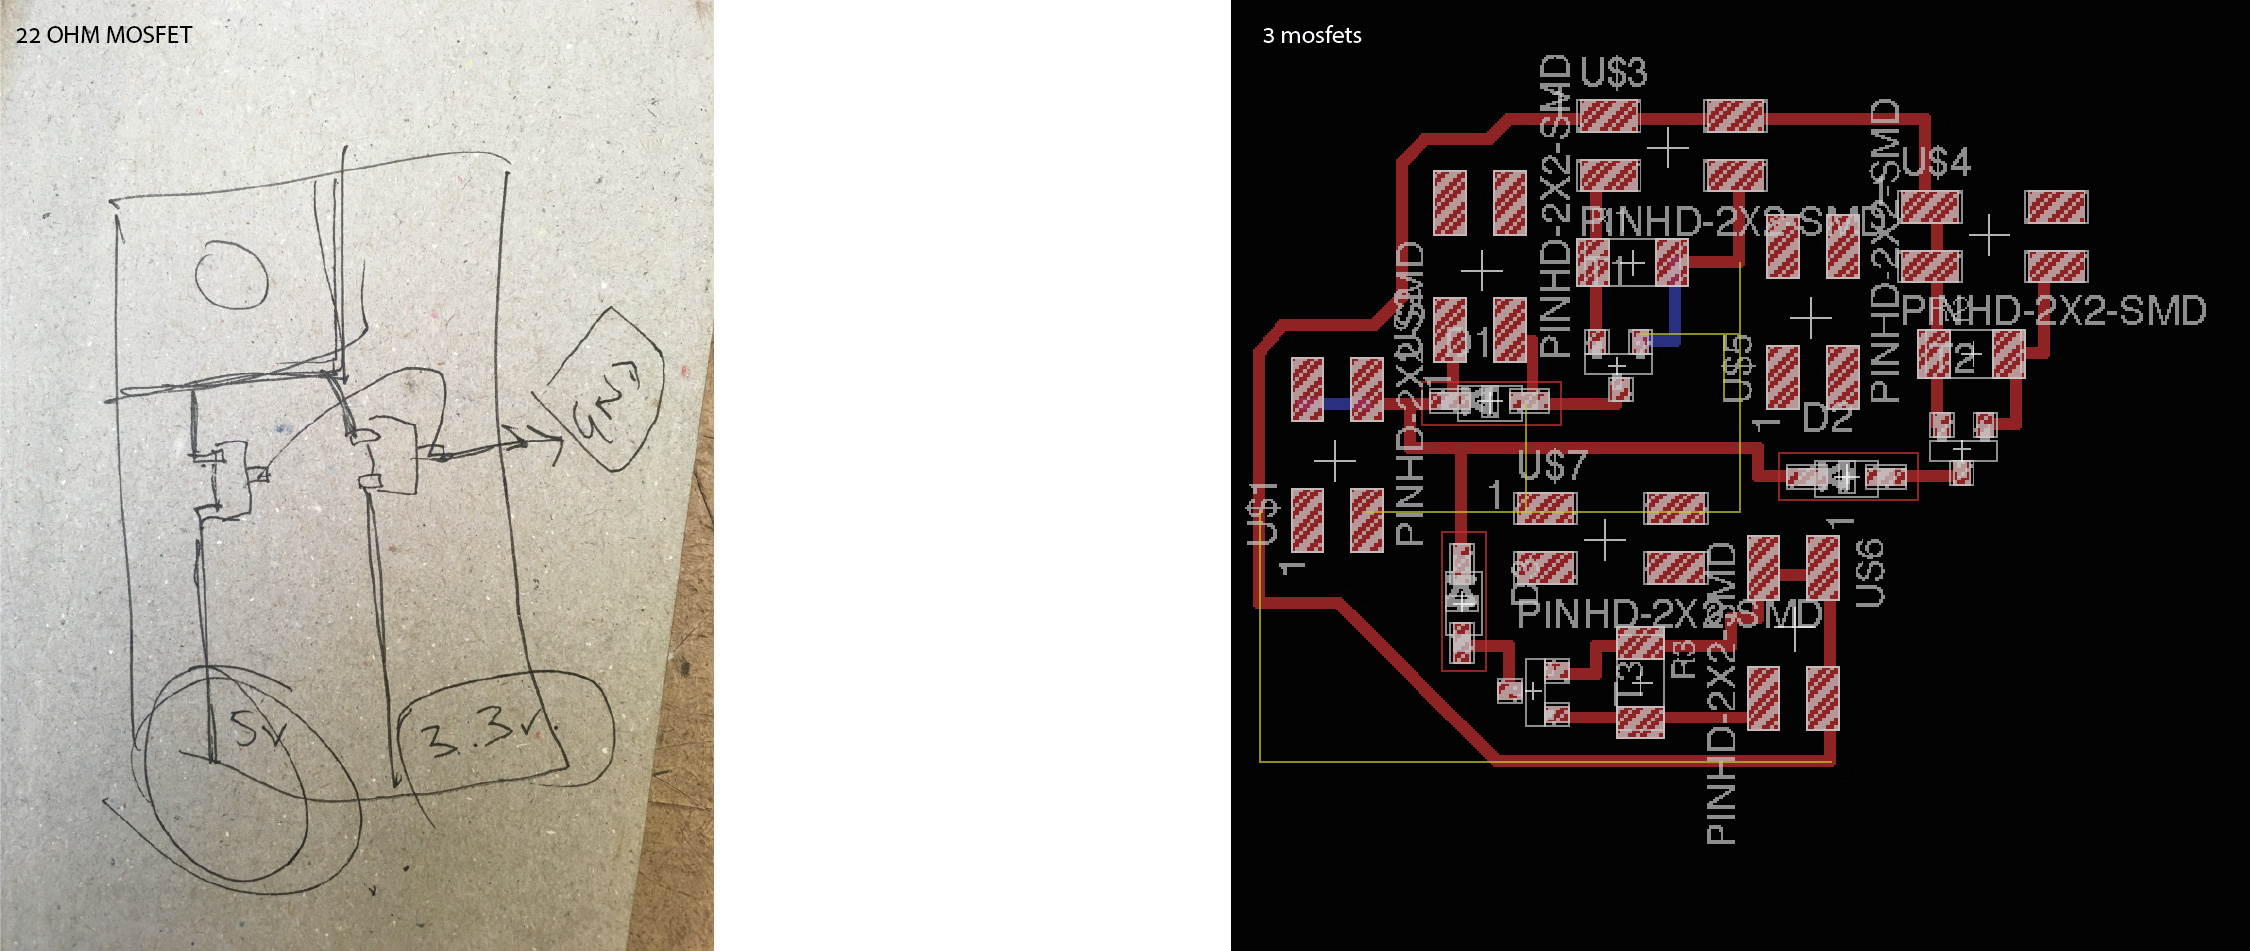
• Motor circuit. H-Bridge at first, dropped for MOSFET (troubles with battery weight)
• 3D design and print of body-cup
• Design and laser-cutting of rotors - including the rim and motor connectors
• Design and print of Propellors
• Design and laser-cutting of remote control remote-control
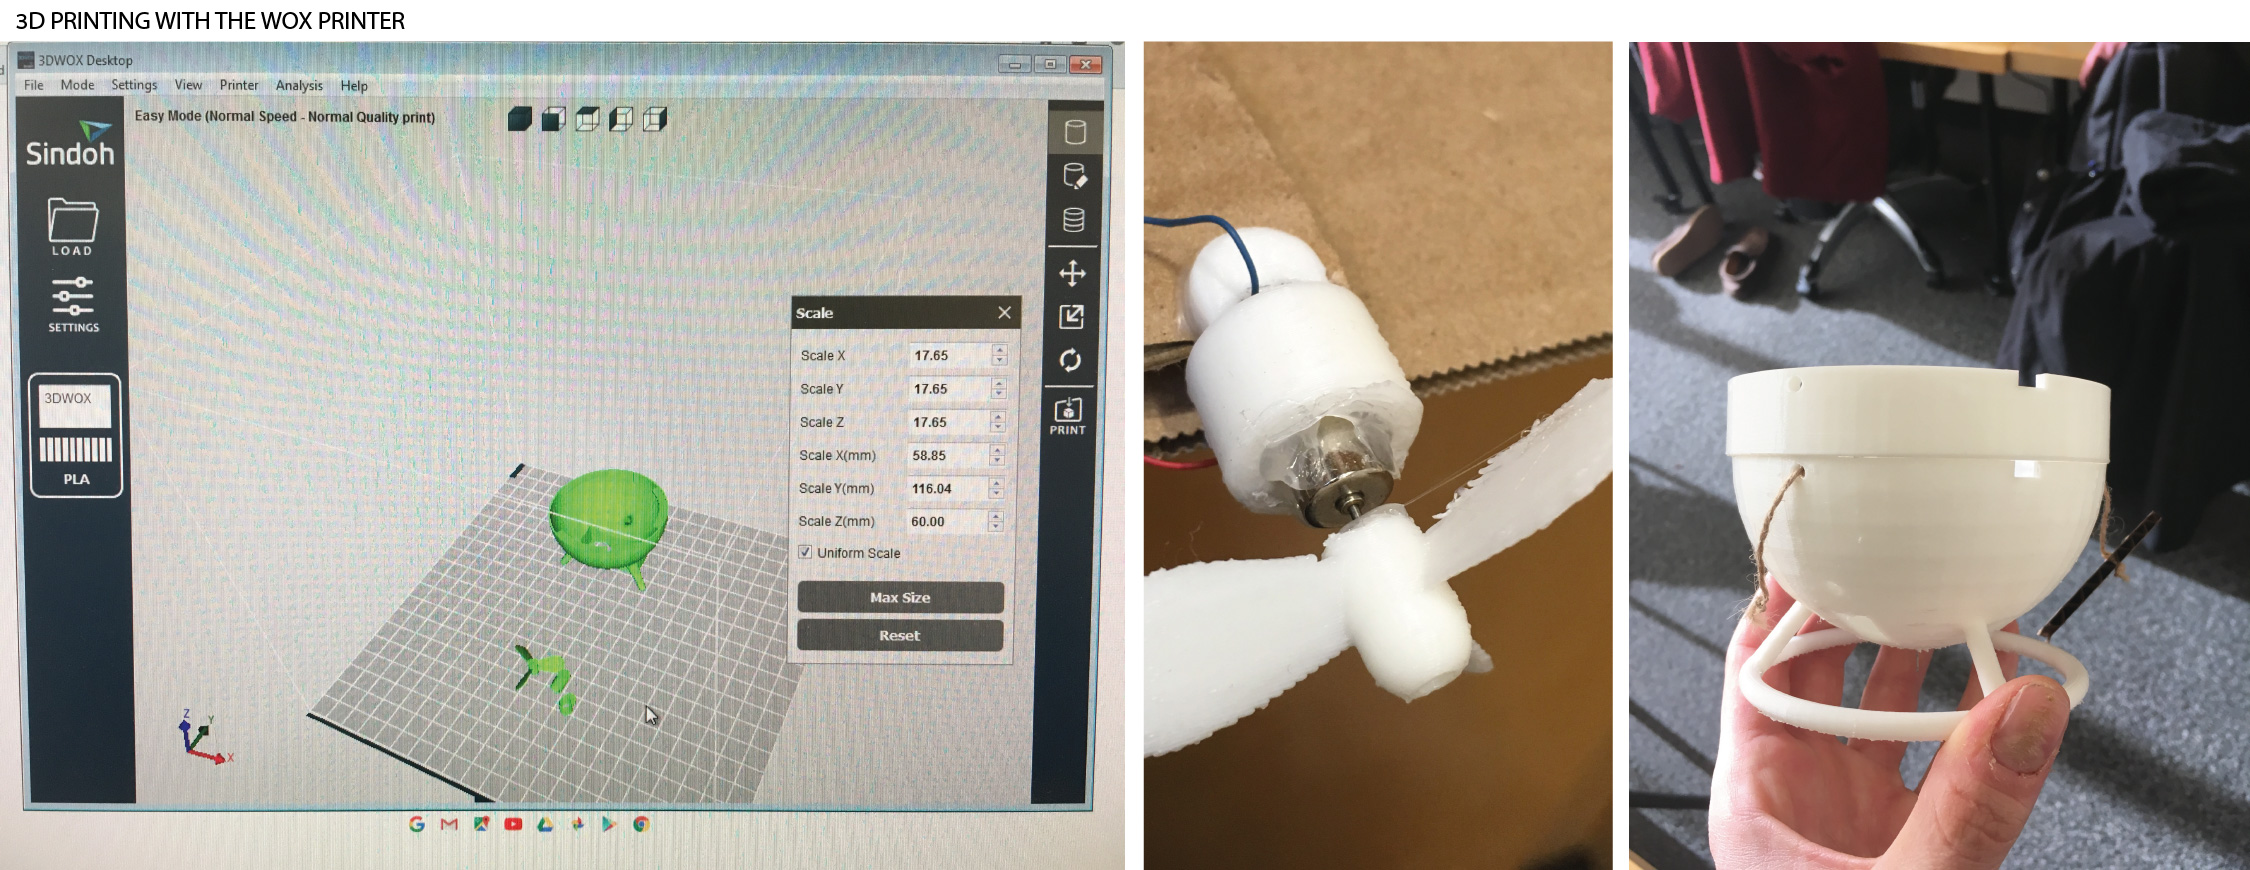
3D modeling and Printing
I used the WOX Printer to make the body of the motor controllor, to be connected to the balloon. The body had specific demands needed: light-weight, landing legs that will protect the lower motor, and some openenings needed for the RF module to be exposed.
Printing with the WOX was pretty straight-forward. One thing I strugled with a bit was the units of the model. I modeled in Rhino in inches, and when imported to WOX, it was out of scale. Realized the WOX app reads only in milimeters.
Another challenge for me in printing was getting a thinest surface possible, to minimize the weight of the cup. The WOX does tend to lose control of its nosle under 1.5 mm. Had to go with 2mm surface to be safe.
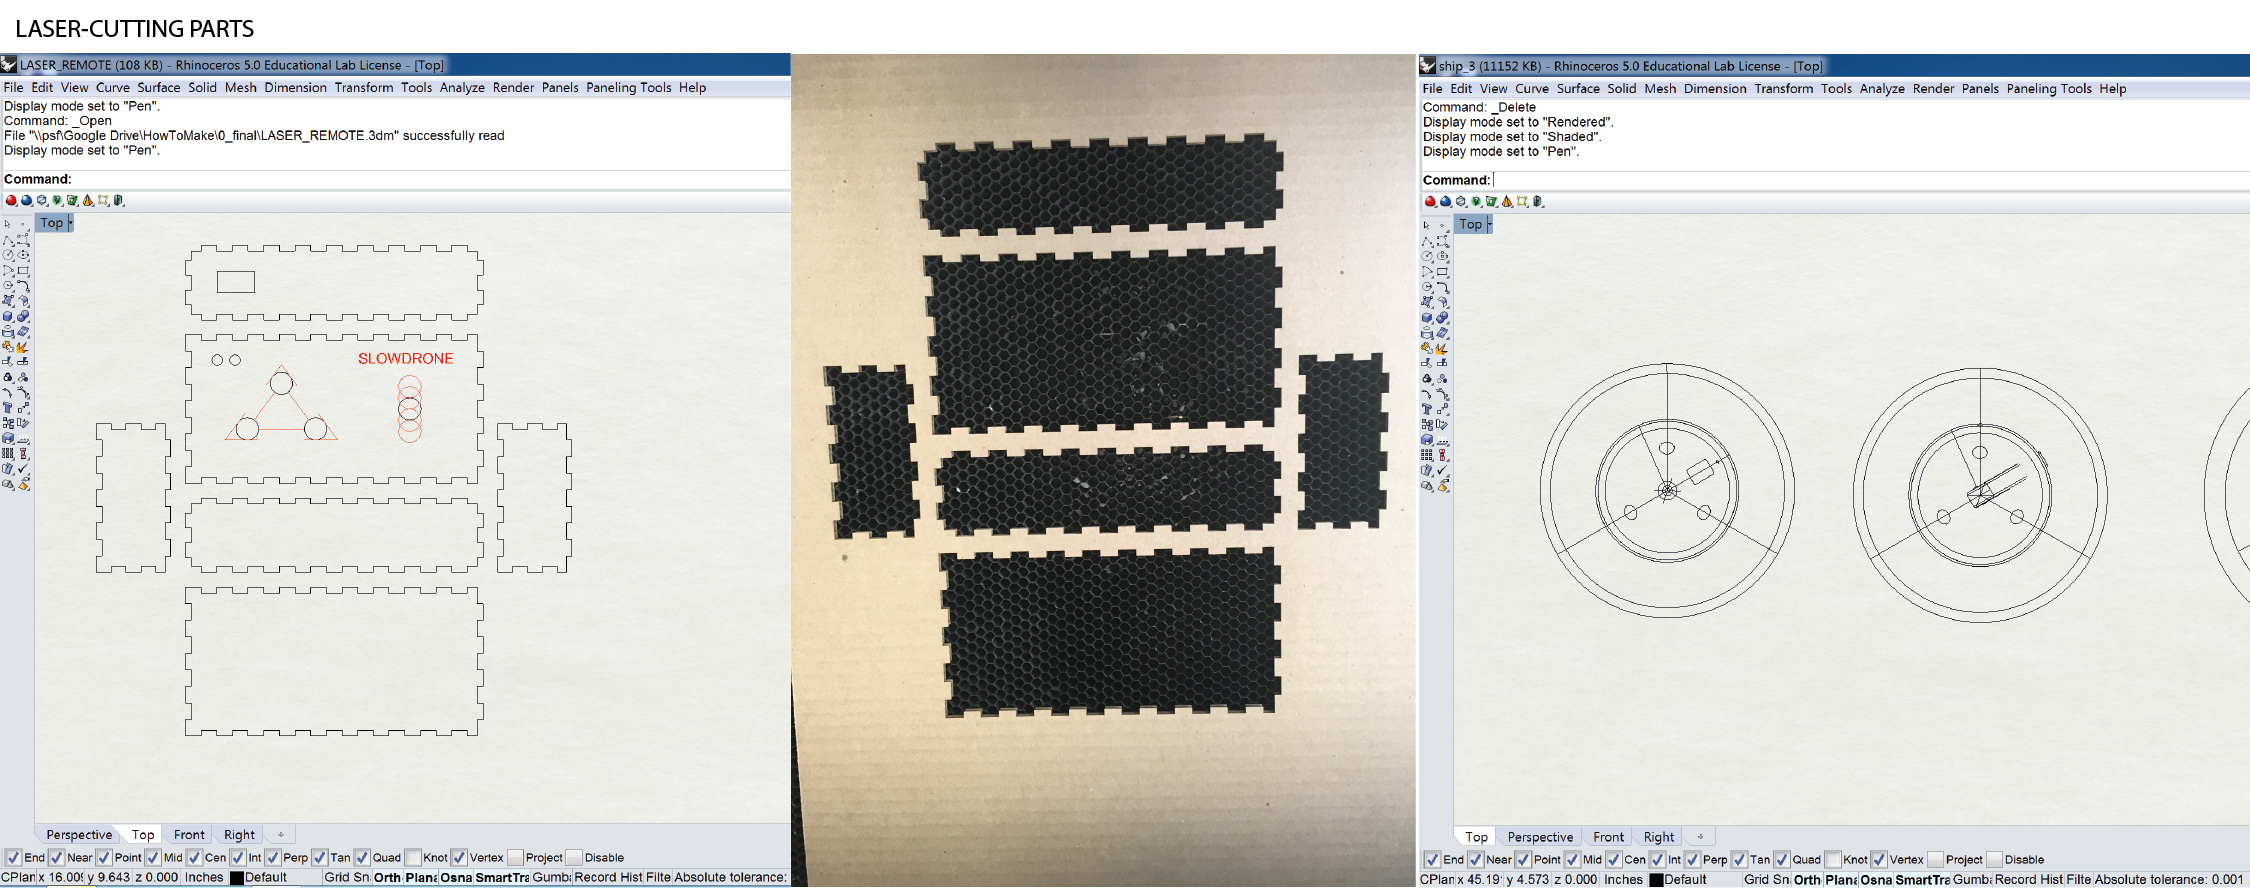
Laser-cutting
Laser cutting was used to produce the remote-control body and the rotters of the motors. I also scored an interface on the face of the remote.
For cutting I used Speed:60, Power:15. For scoring: Speed:100, Power: 5.
Weight Testing
Weight was obviously a big issue for me. After first tests with various sizes of ballons and amount of helium, I gathered I needed a 36 inch balloon, which can weight up to 130 g. Used pennies and quarters in a plastic bag to weigh the lift of the balloon.
130 G enabled me to add a sonar sensor on to the cup. This was assuming the Lipo battery that I ordered will weight 30g.
You calculate how much helium you need to launch your payload with the knowledge that 1 cu.ft. of helium will lift 28 grams. You divide the weight of your balloon and payload (2400 g) by 28 g/cu.ft. to get the total number of cubic feet of helium required for your launch (2400 g ÷ 28 g/cu.ft = 86 cu.ft.).
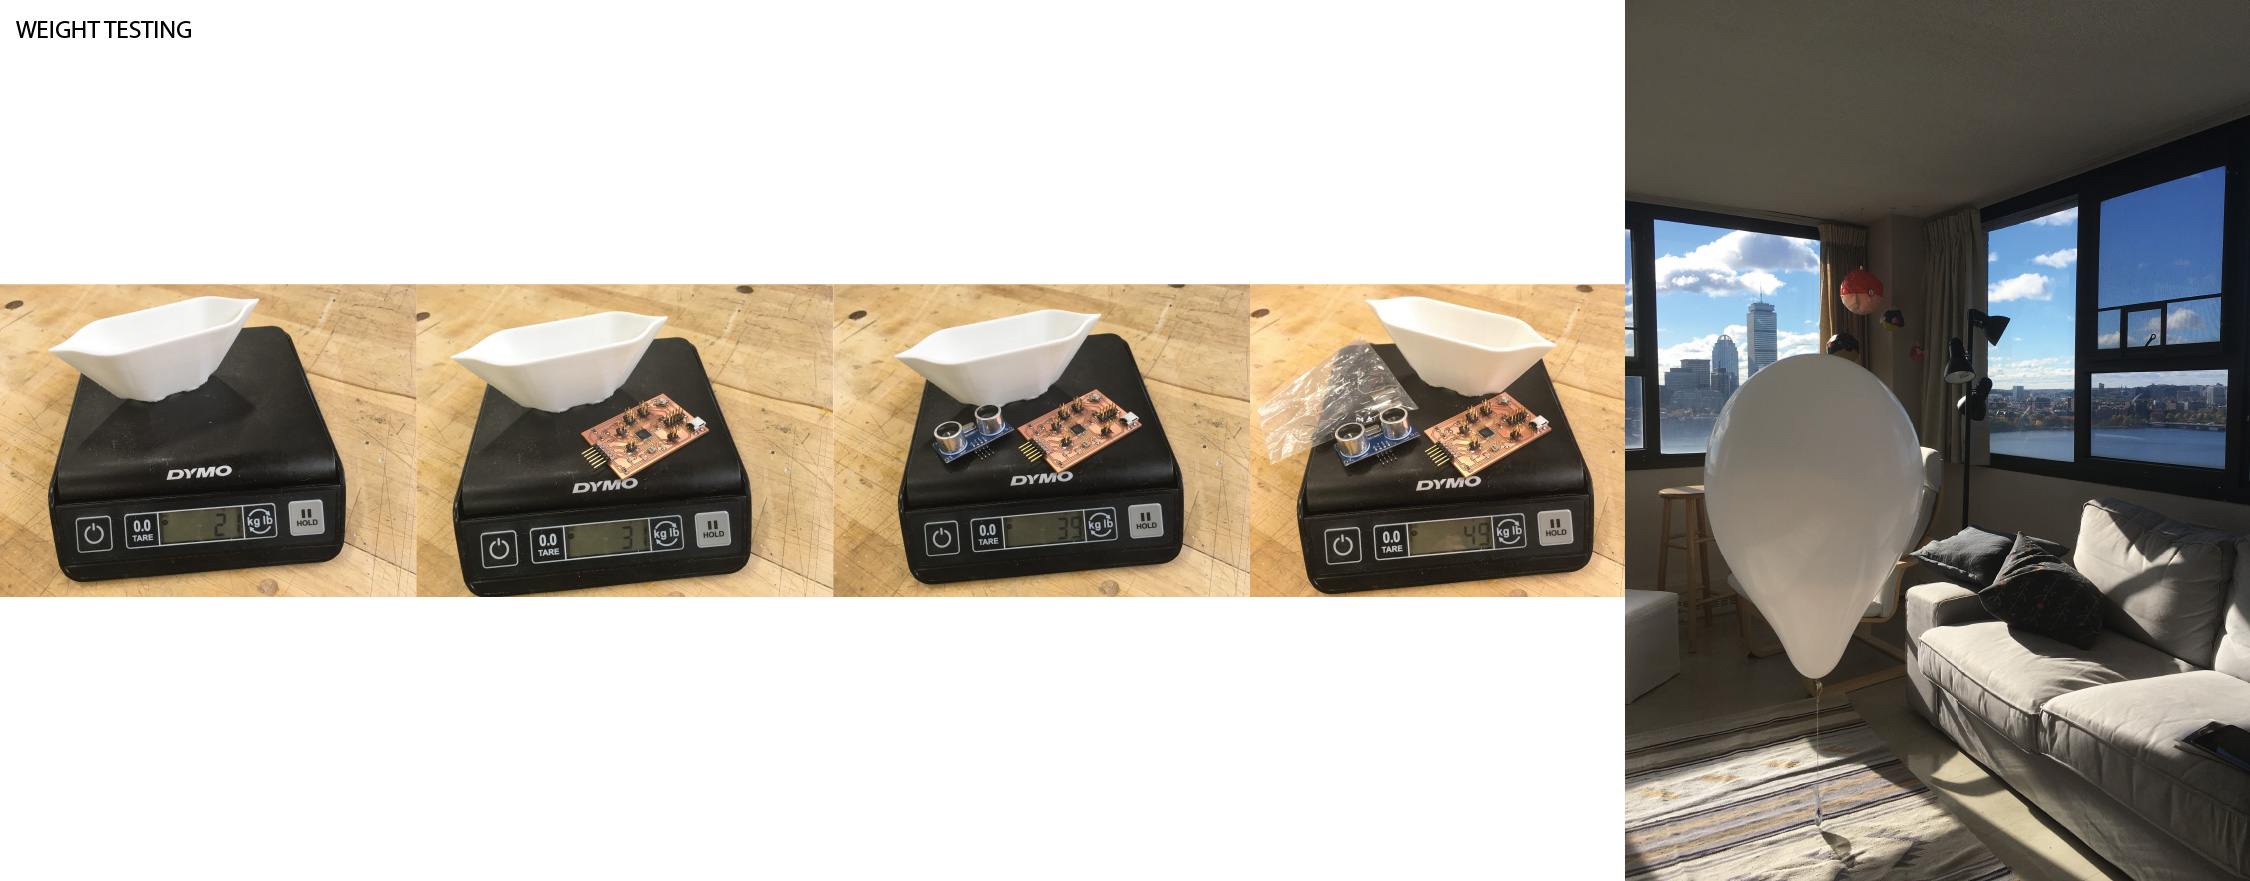
Filled a latex balloon to 30 inch size, and attached a string and nylon bag to carry the payload. 130 g.lift
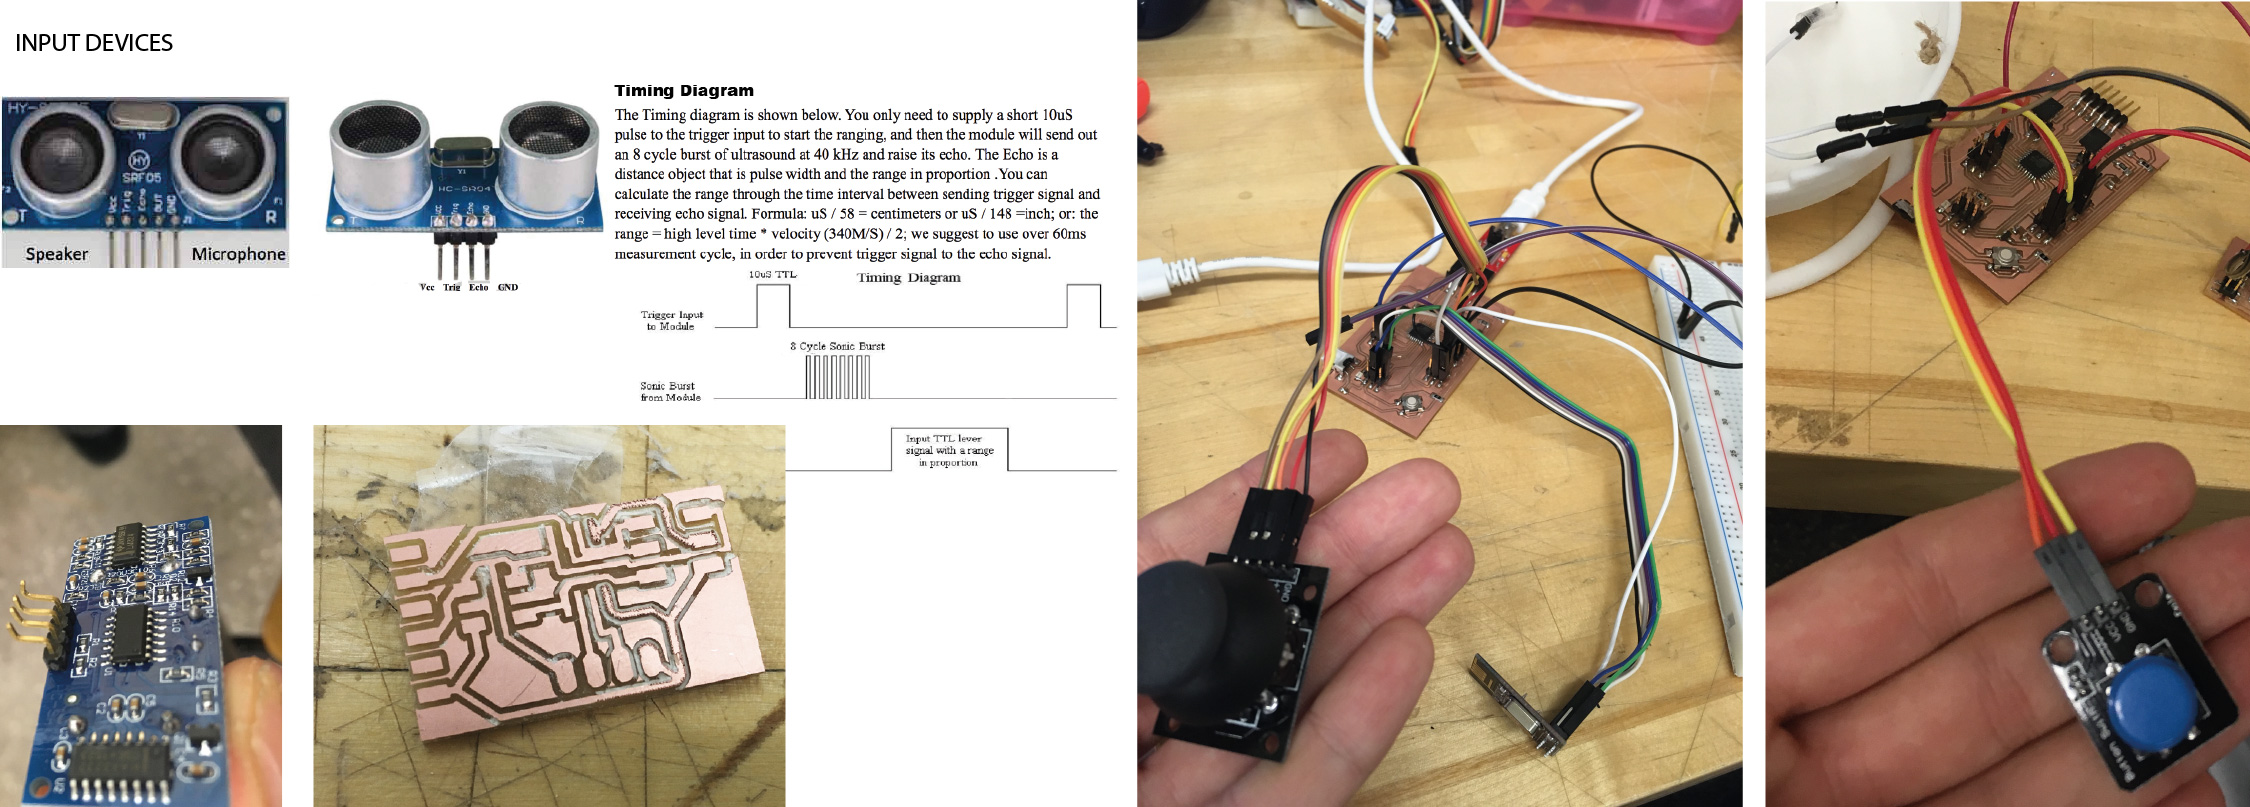
Input Devices
For the control of the movement I needed input devices. Explored a few: then initial objective was to use 2 joysticks for movement control, and a sonar sensor to add automation possibilities.
Due to time constraints I had to stop the reserach into joystick mapping. The sonar sensor was also giving me problems, since its readings were unstable, jumping from distance readings with extreme inconsistancies. Worked on adding a filter to the sonar sensor, but ran out of time.
HC-SR04 Sonar Sensor to Unity:
Balloon transmitting to remote control, connected to serial UNITY.
Had to leave this to next time.
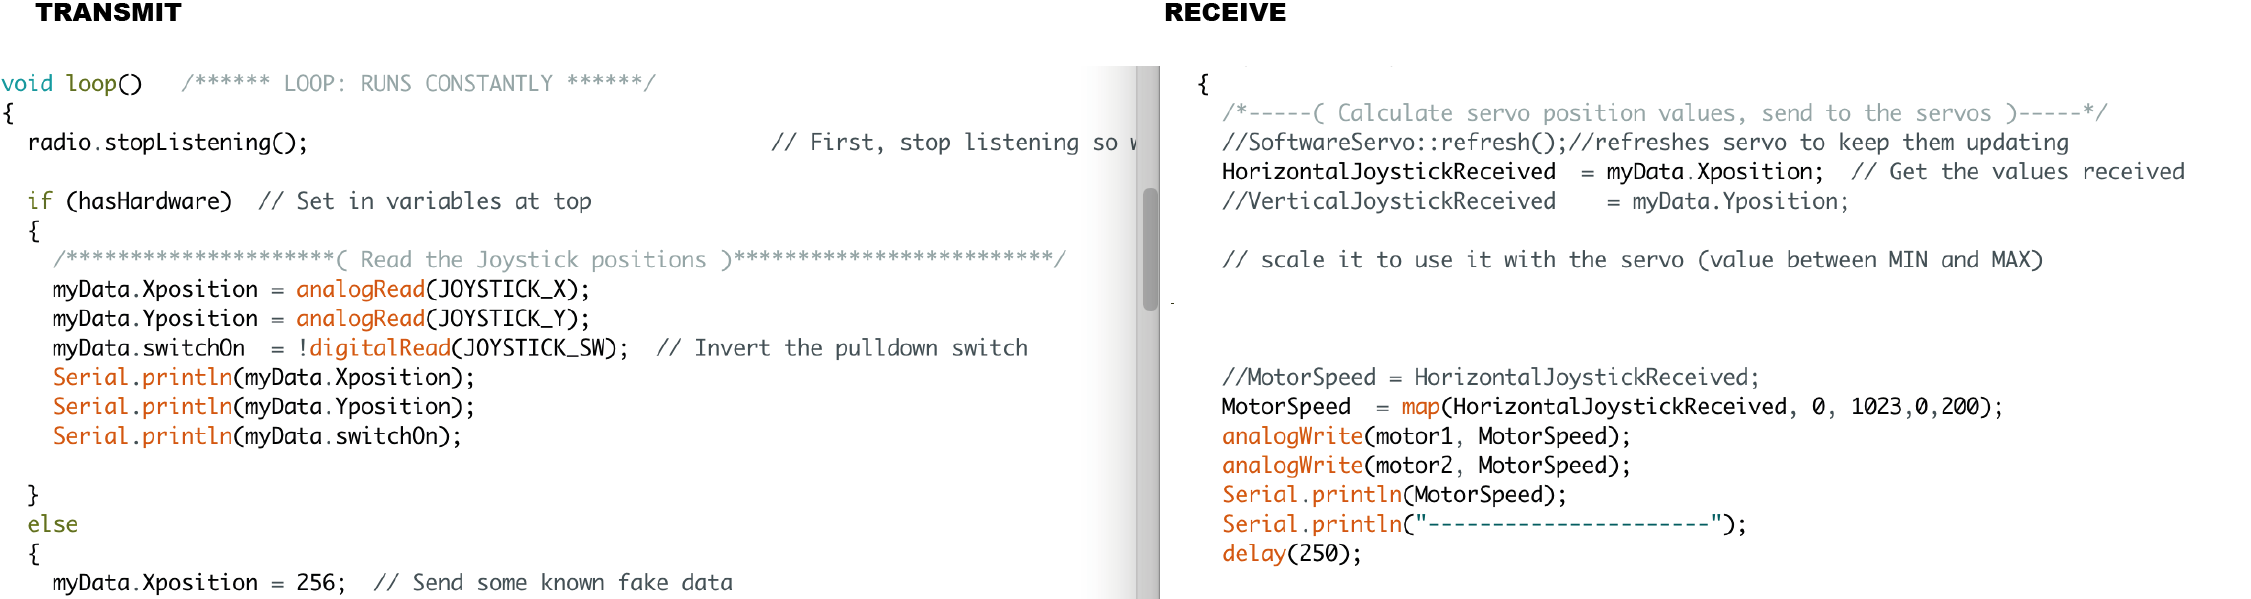
Transmitting joystick potentiometer
Mapping the joystick
Output Devices - mini dc-motors
Started with studying the motor circuit, the controlors and voltages. Got mini dc-motors which run on 3.6V. Didn't realize at first they also have a specific MiliAmp demand.
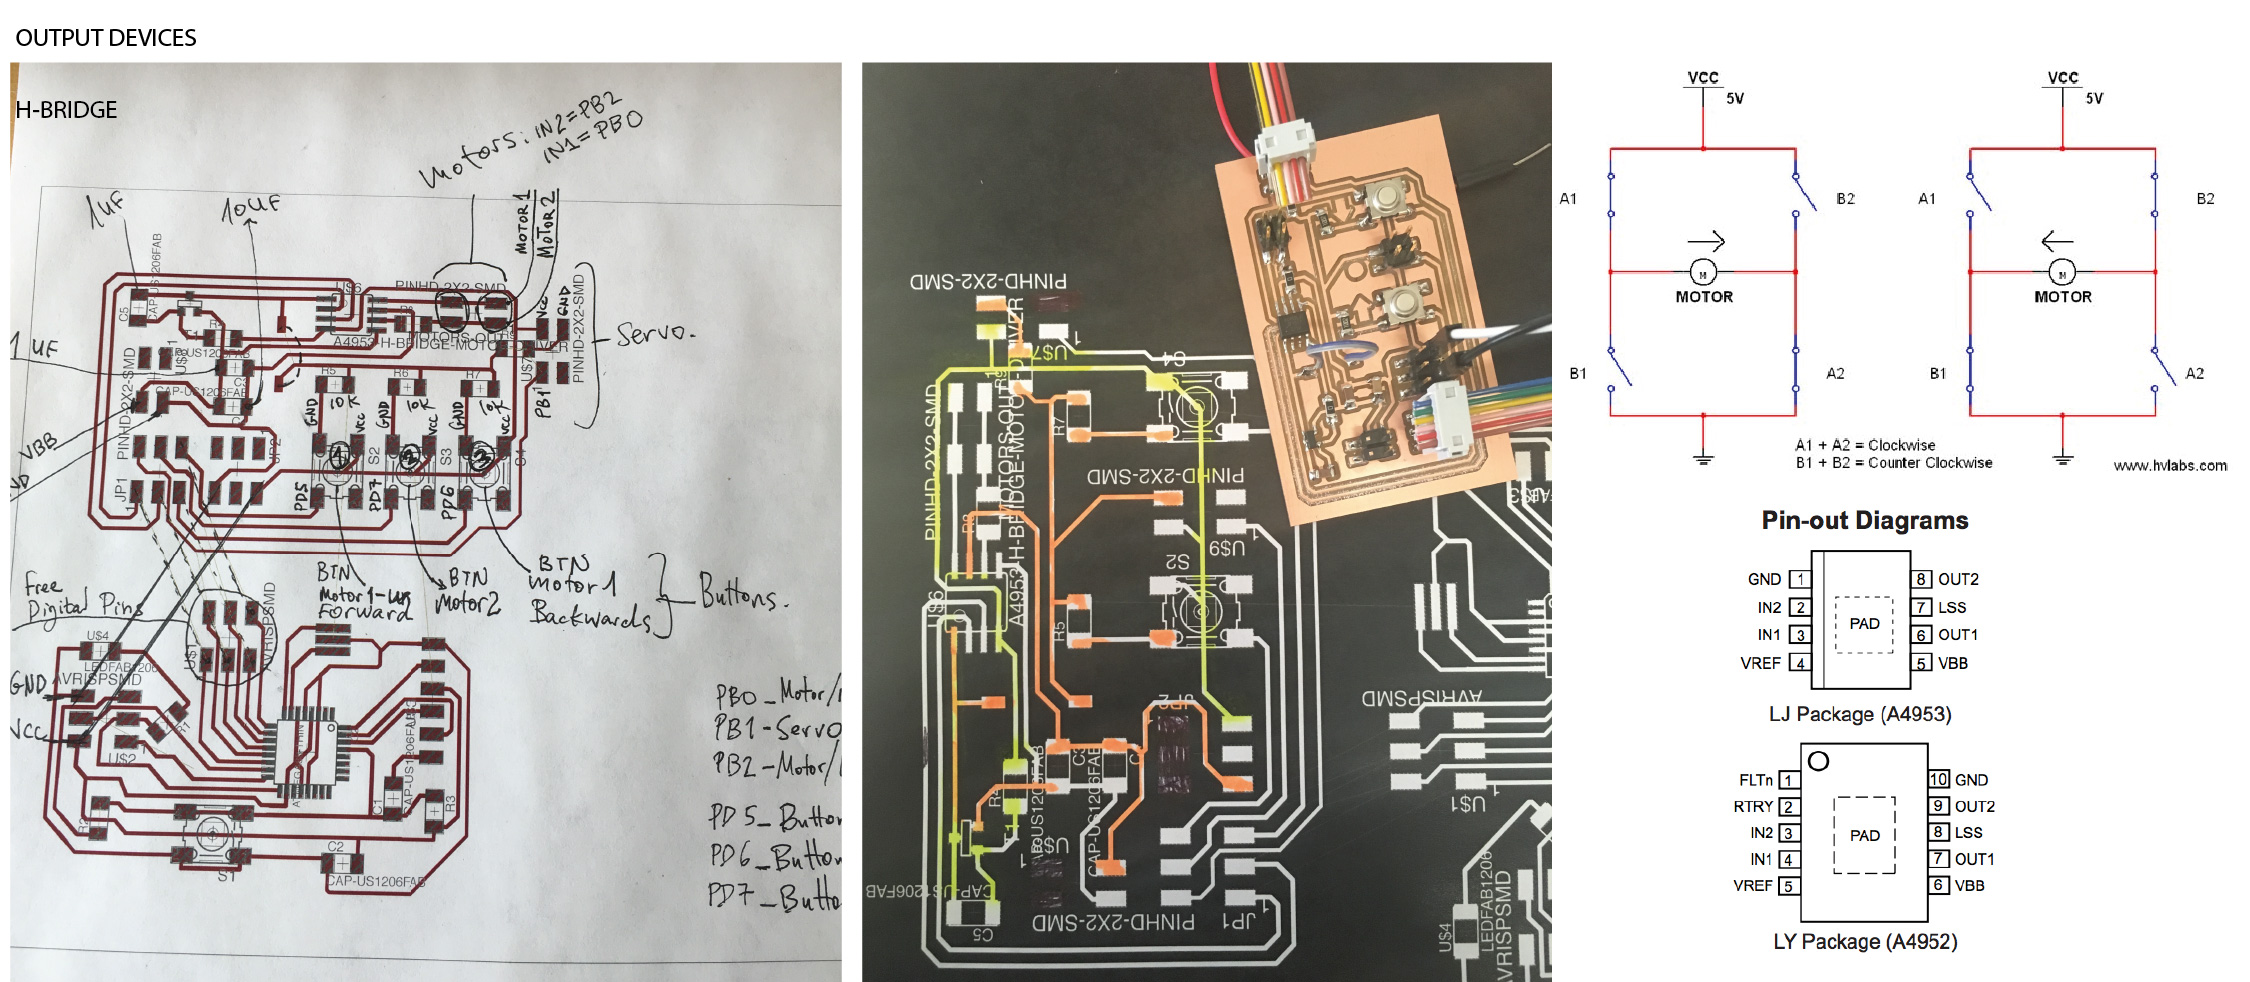
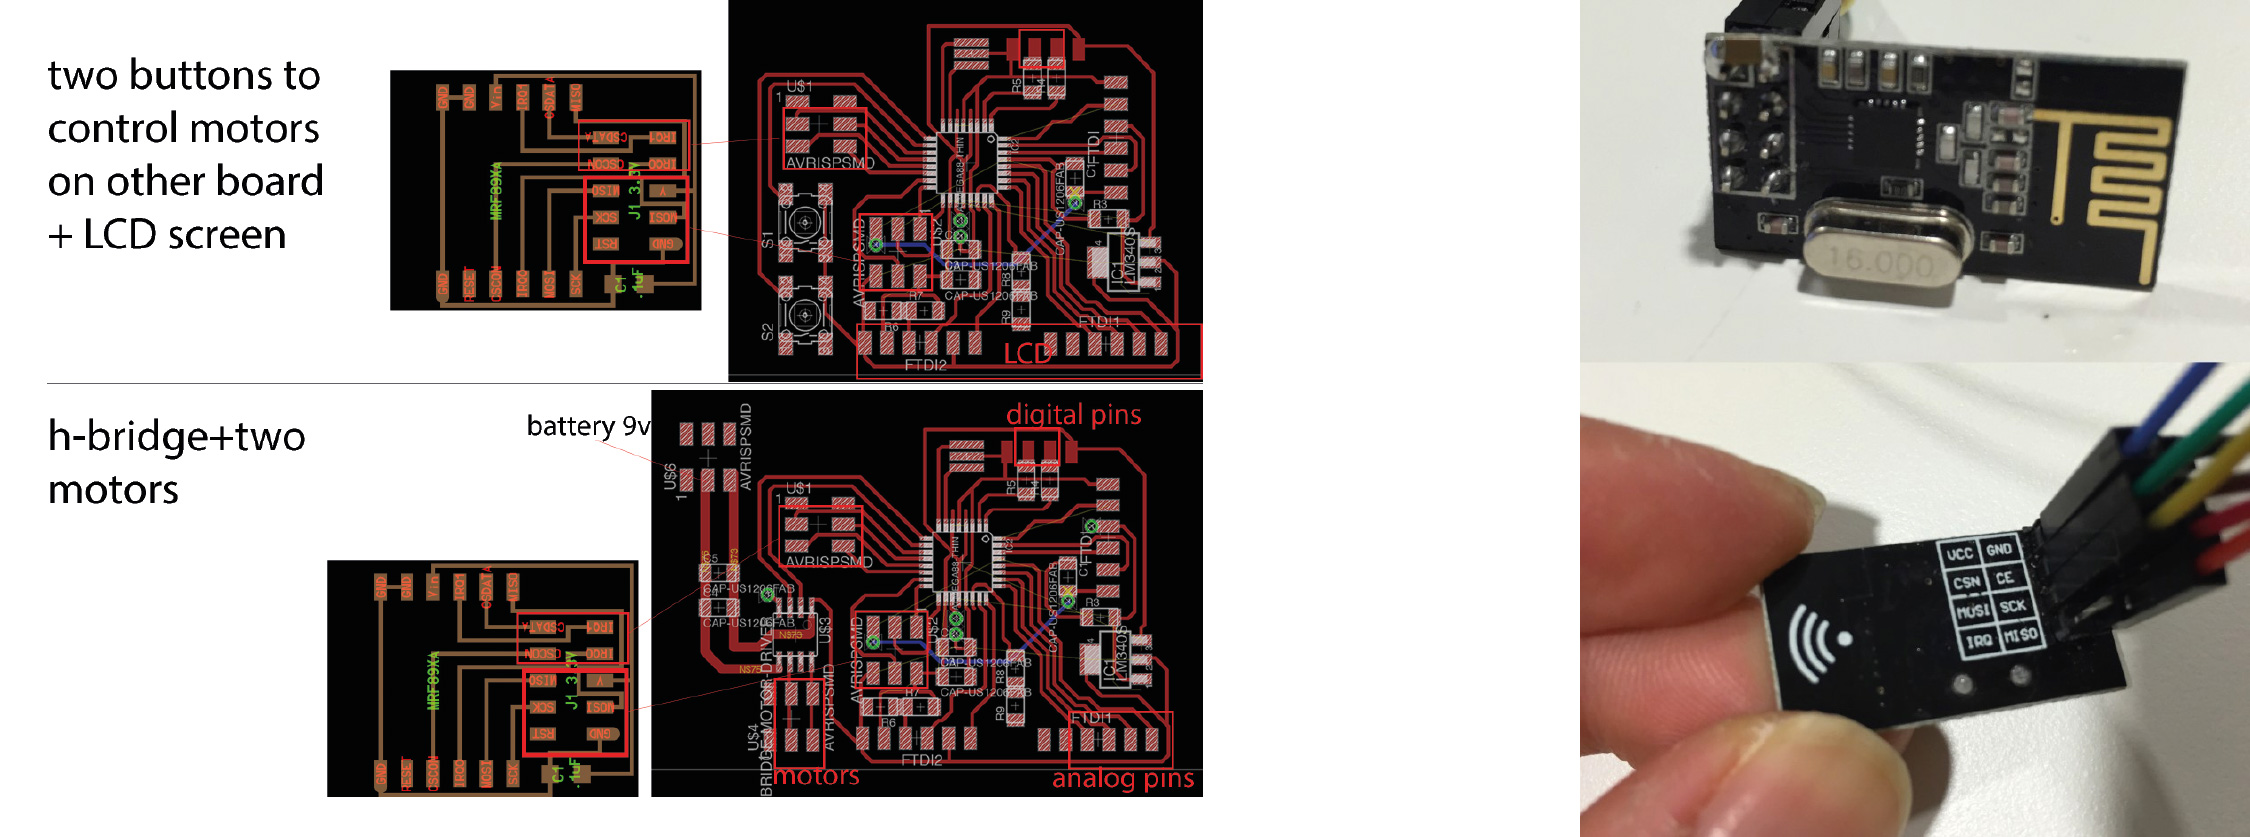
H-Bridge
Sometimes called a "full bridge" the H-bridge is so named because it has four switching elements at the "corners" of the H and the motor forms the cross bar. The basic bridge is shown in the figure to the right.
The key fact to note is that there are, in theory, four switching elements within the bridge. These four elements are often called, high side left, high side right, low side right, and low side left (when traversing in clockwise order).
The switches are turned on in pairs, either high left and lower right, or lower left and high right, but never both switches on the same "side" of the bridge. If both switches on one side of a bridge are turned on it creates a short circuit between the battery plus and battery minus terminals. This phenomena is called shoot through in the Switch-Mode Power Supply (SMPS) literature. If the bridge is sufficiently powerful it will absorb that load and your batteries will simply drain quickly. Usually however the switches in question melt.
To power the motor, you turn on two switches that are diagonally opposed. In the picture to the right, imagine that the high side left and low side right switches are turned on. The current flow is shown in green.
MOSFET
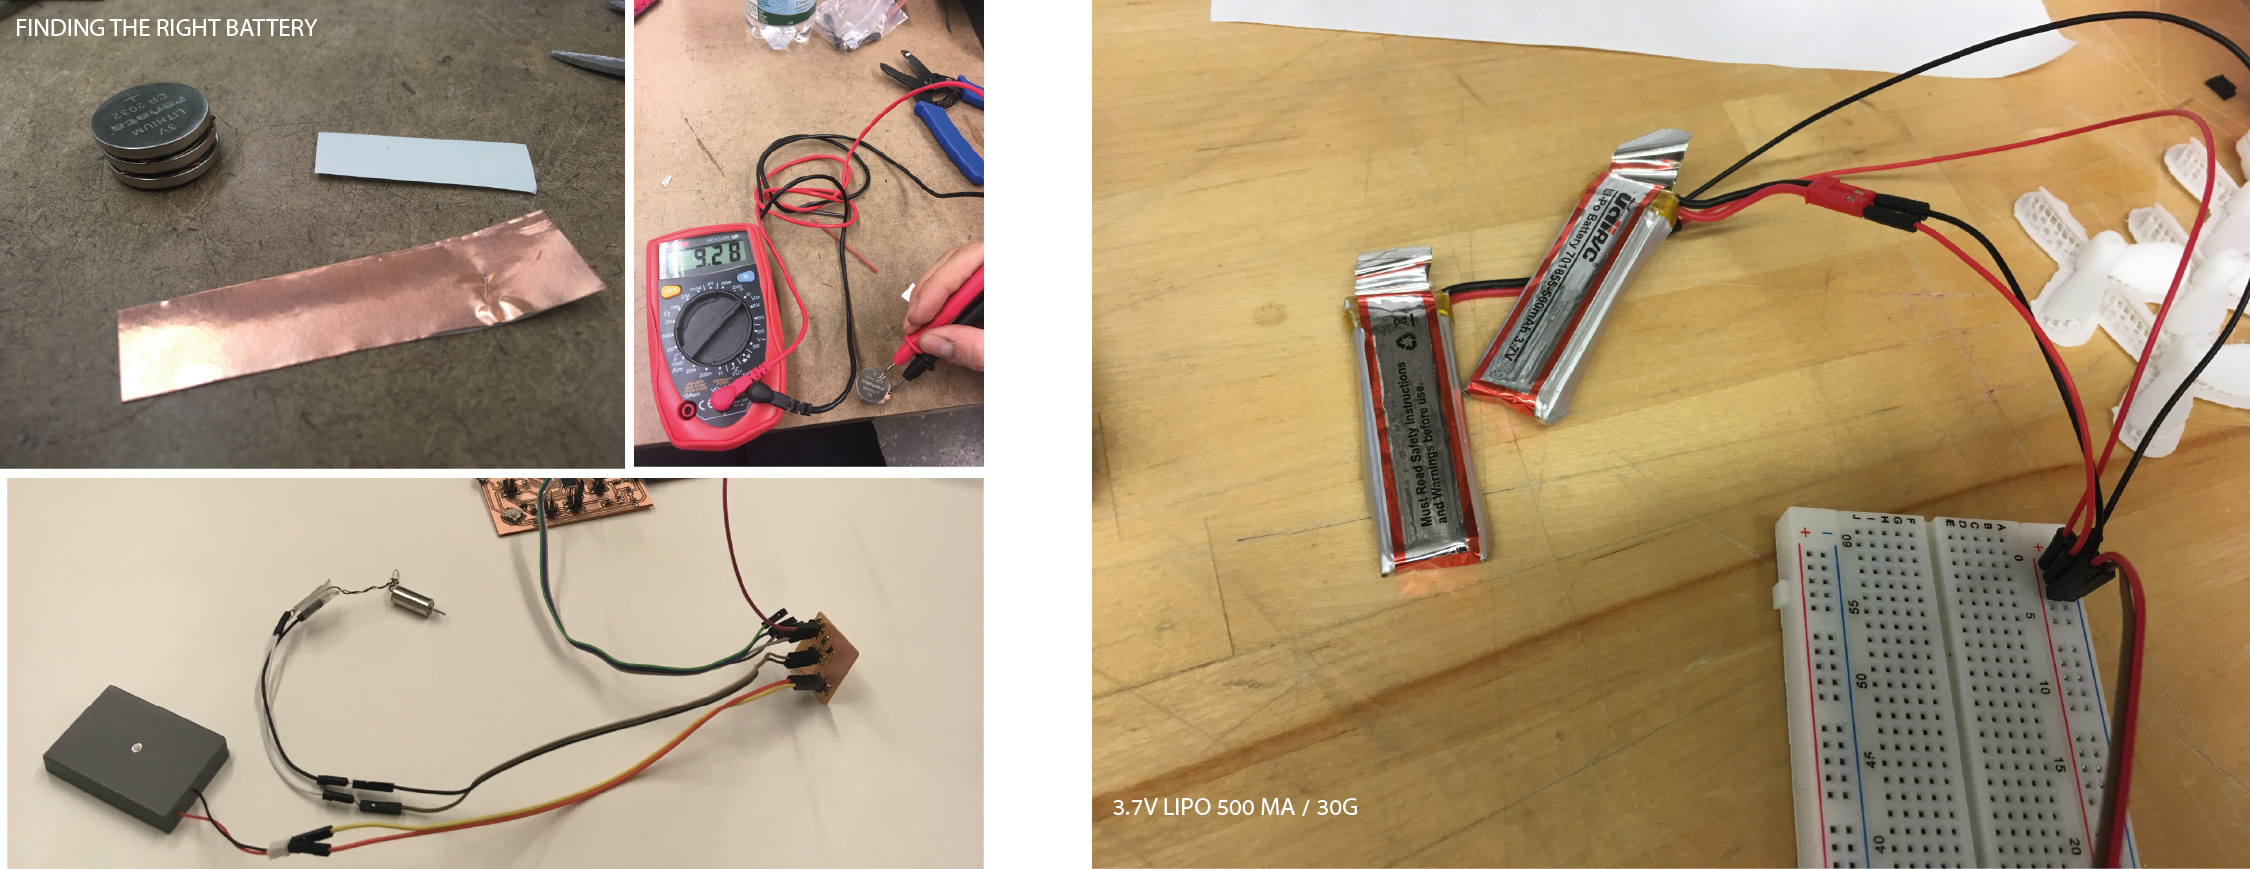
Battery Challenge
Battery used: 2 3.7 Lipo 500 ma batteries (Holy Stone Storefront via Amazon. $7.99)
Figuring out which battery to use was a big challenge for me. The battery has Voltage and AMPs.
Voltage: needs to work with the motors - 3.6V in my case, but also with the microcontroller
(Atmega328P), and with the RF module that runs on 3.6 max. Light-weight batteries come in 3.7 volts. So the first chanllenge was to mediate between all players on my board.
Amps: then the battery dosnt rotate the motor if they're not supplying same current.
Finaly managed to attach two of the batteries I've got in parrallel to amount ot 1 AMp and 3.7V. A resistor dropped it to 3.5, so everyone was happy.
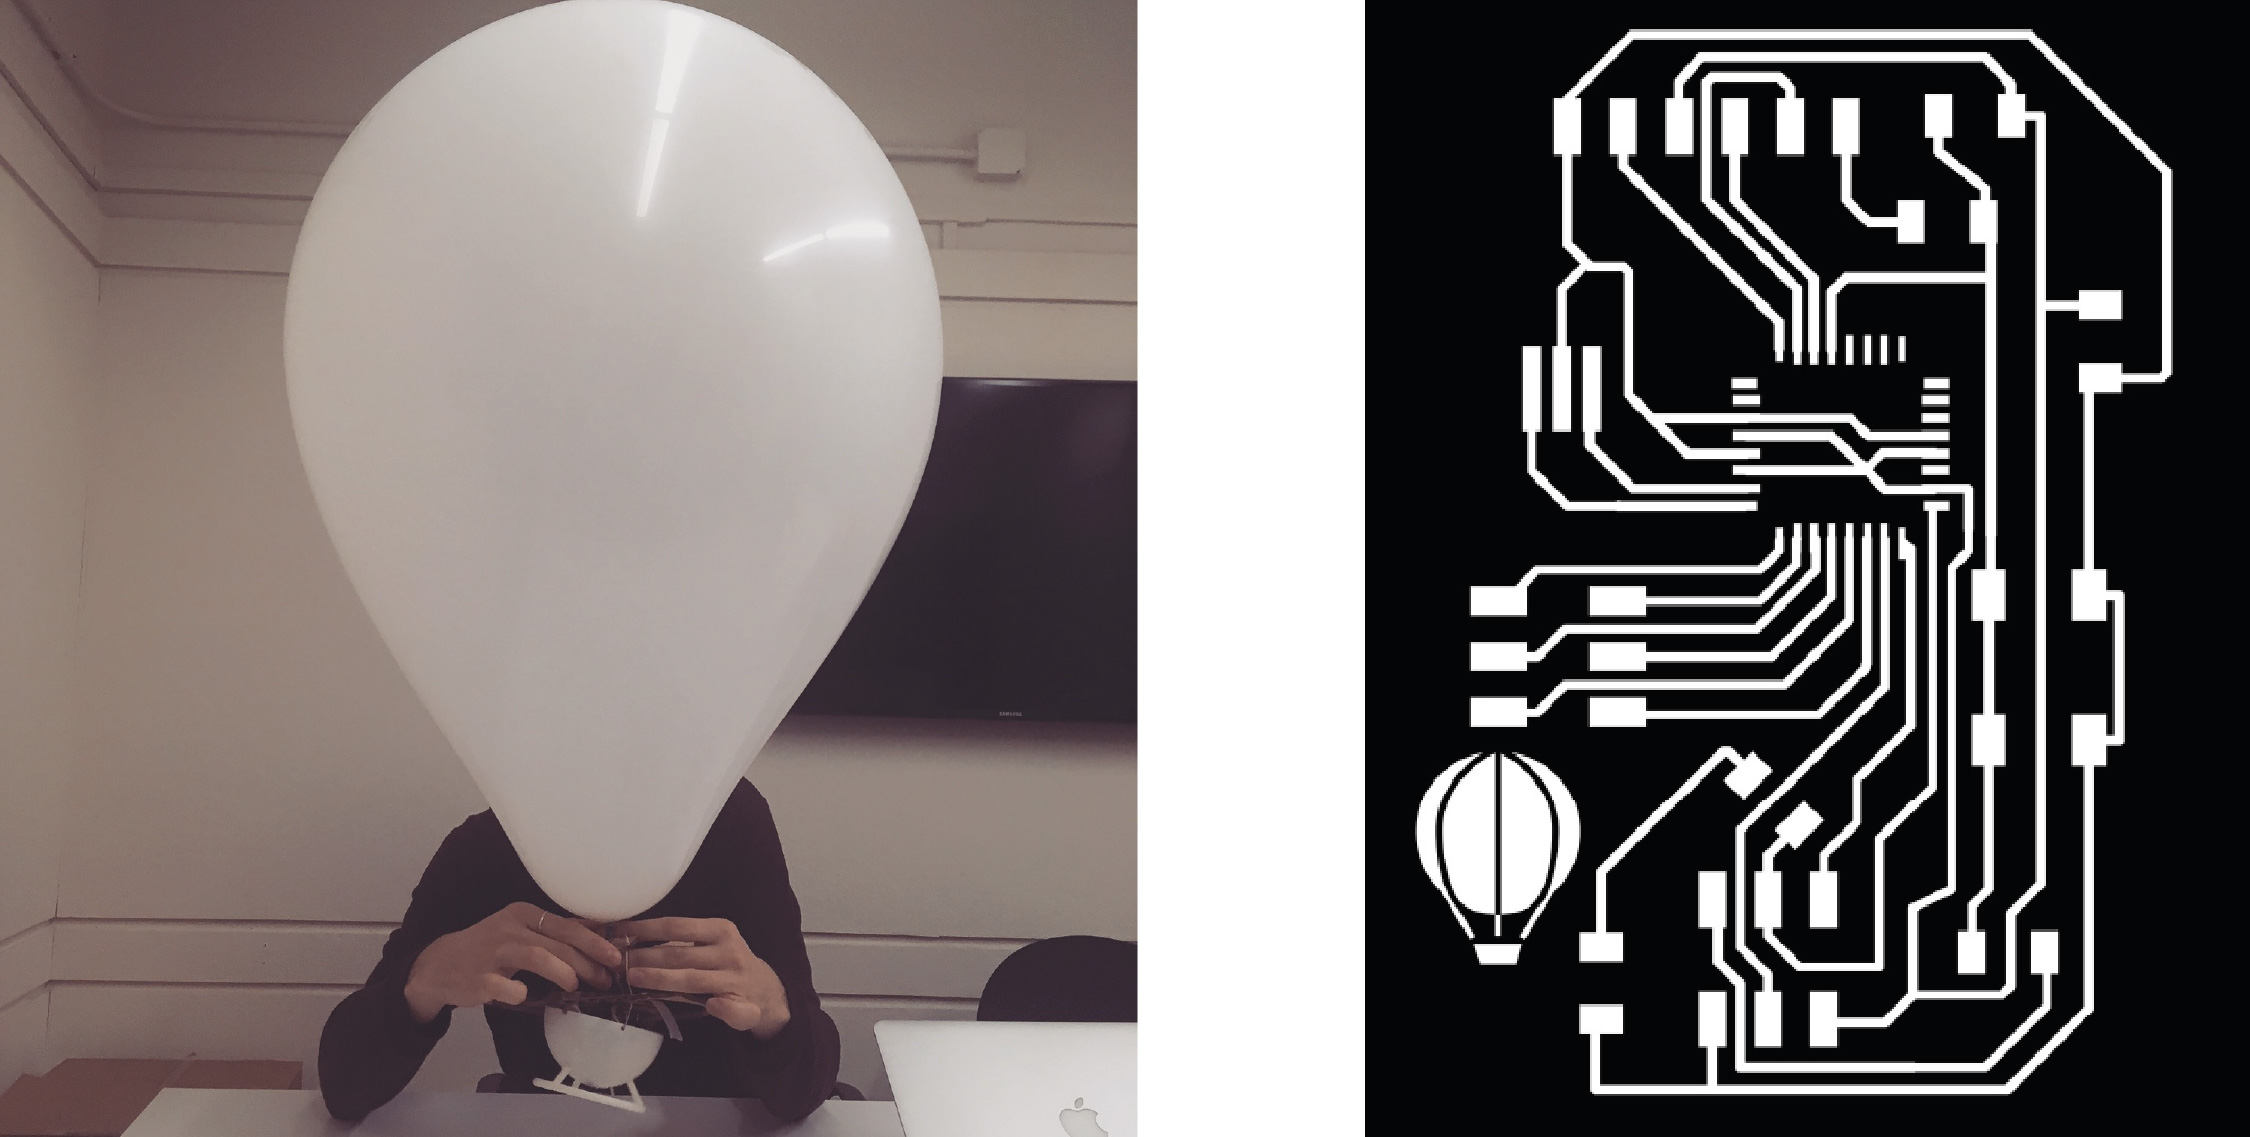
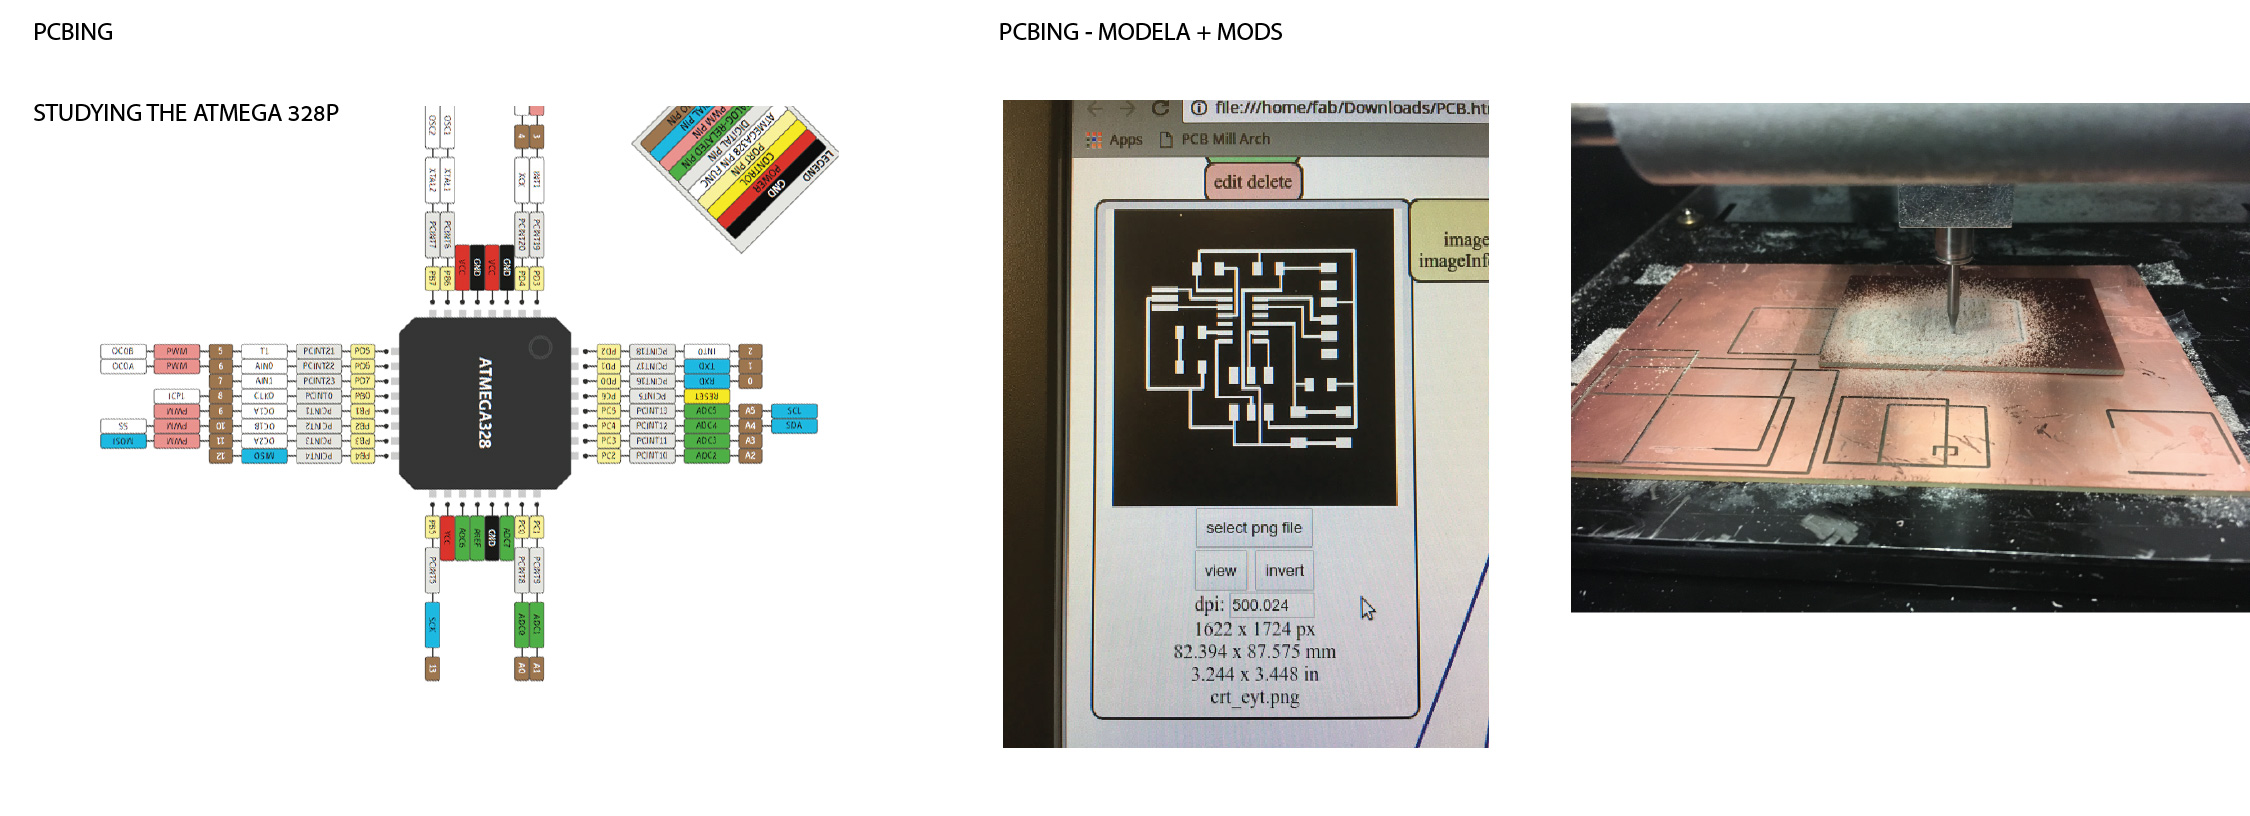
PCBing and soldering
2 3.7 Lipo 500 ma batteries (Holy Stone Storefront via Amazon. $7.99)
Networking: nrf24l01 Module
https://github.com/maniacbug/RF24
This library is designed to be maximally compliant with the intended operation of the chip. Easy for beginners to us. Consumed with a public interface that's similiar to other Arduino standard libraries
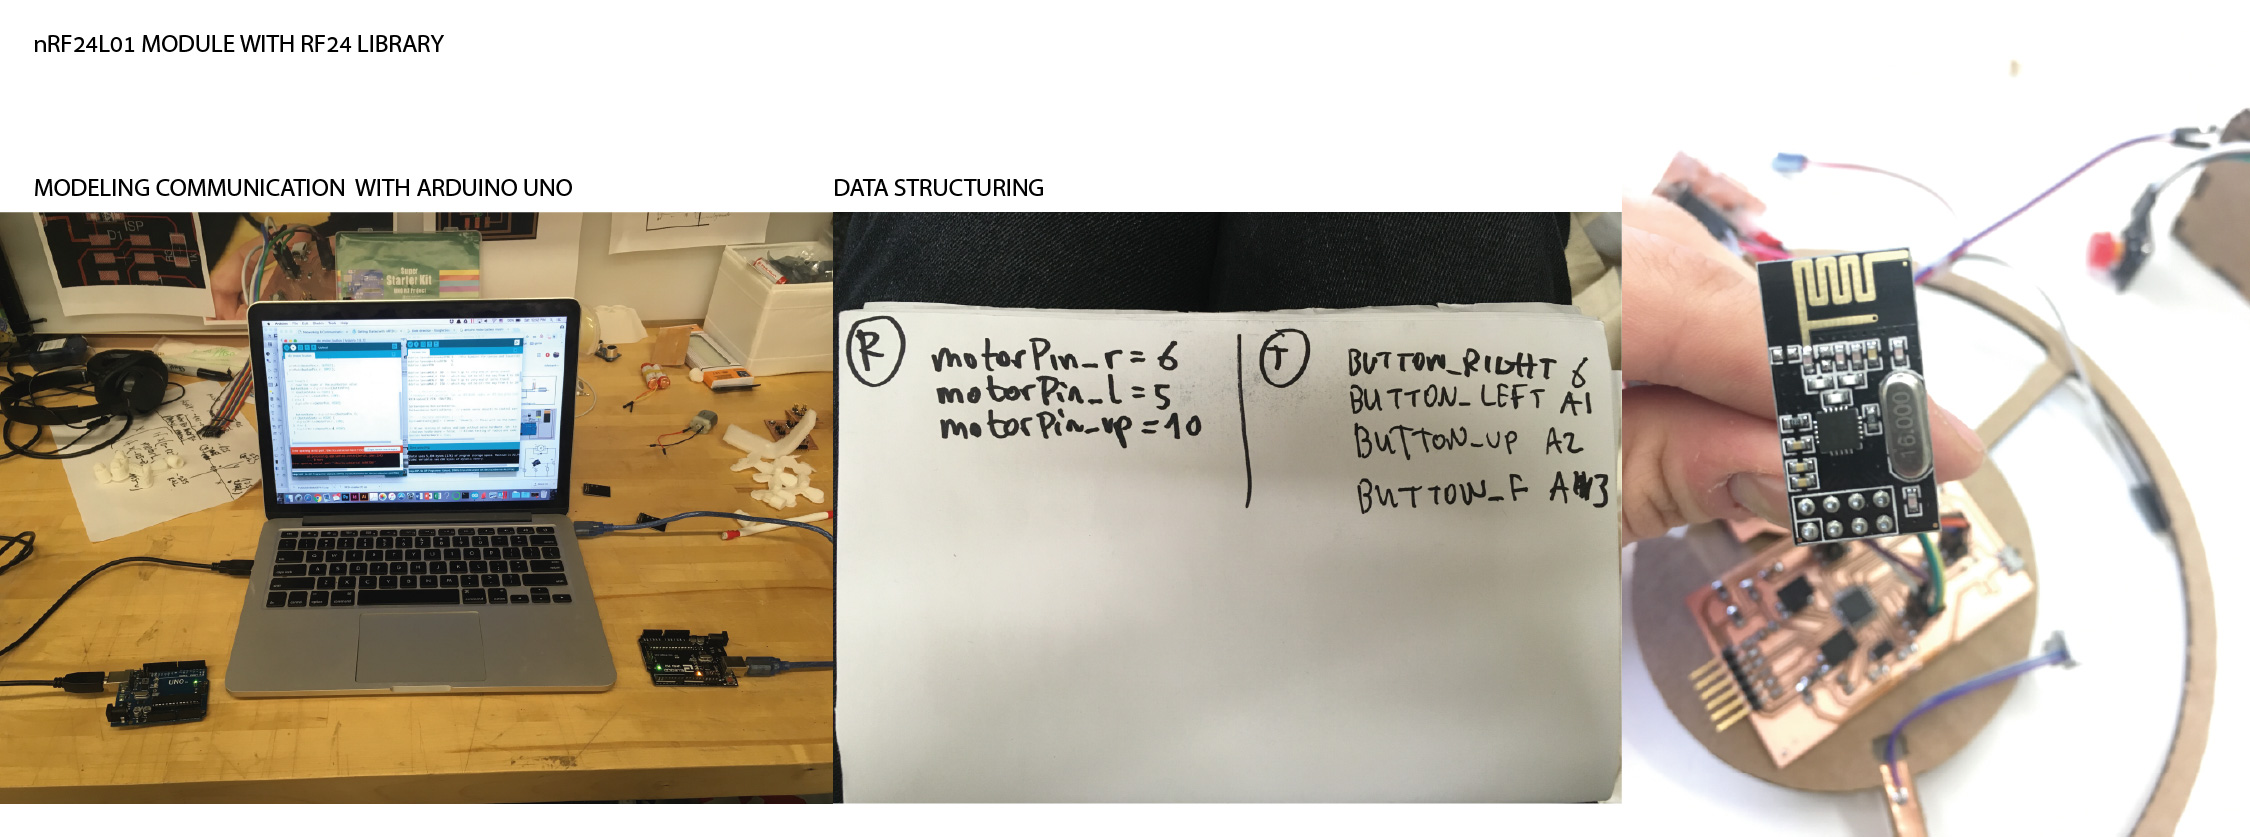
The nrf24l01 uses also a library that is based on MISO pin. With out the MISO pin of the ISP programer it wont work!
This is a big problem when PCBing your own board, because it means you can't get serial monitor without yout ISP pluged-in! and you can't plugin your module's miso without unpluging the ISP.
That meant that I had to model the whole thing exactrly with Arduino Uno, make sure it worked, and then program the atmega328P with the code.
Integrating
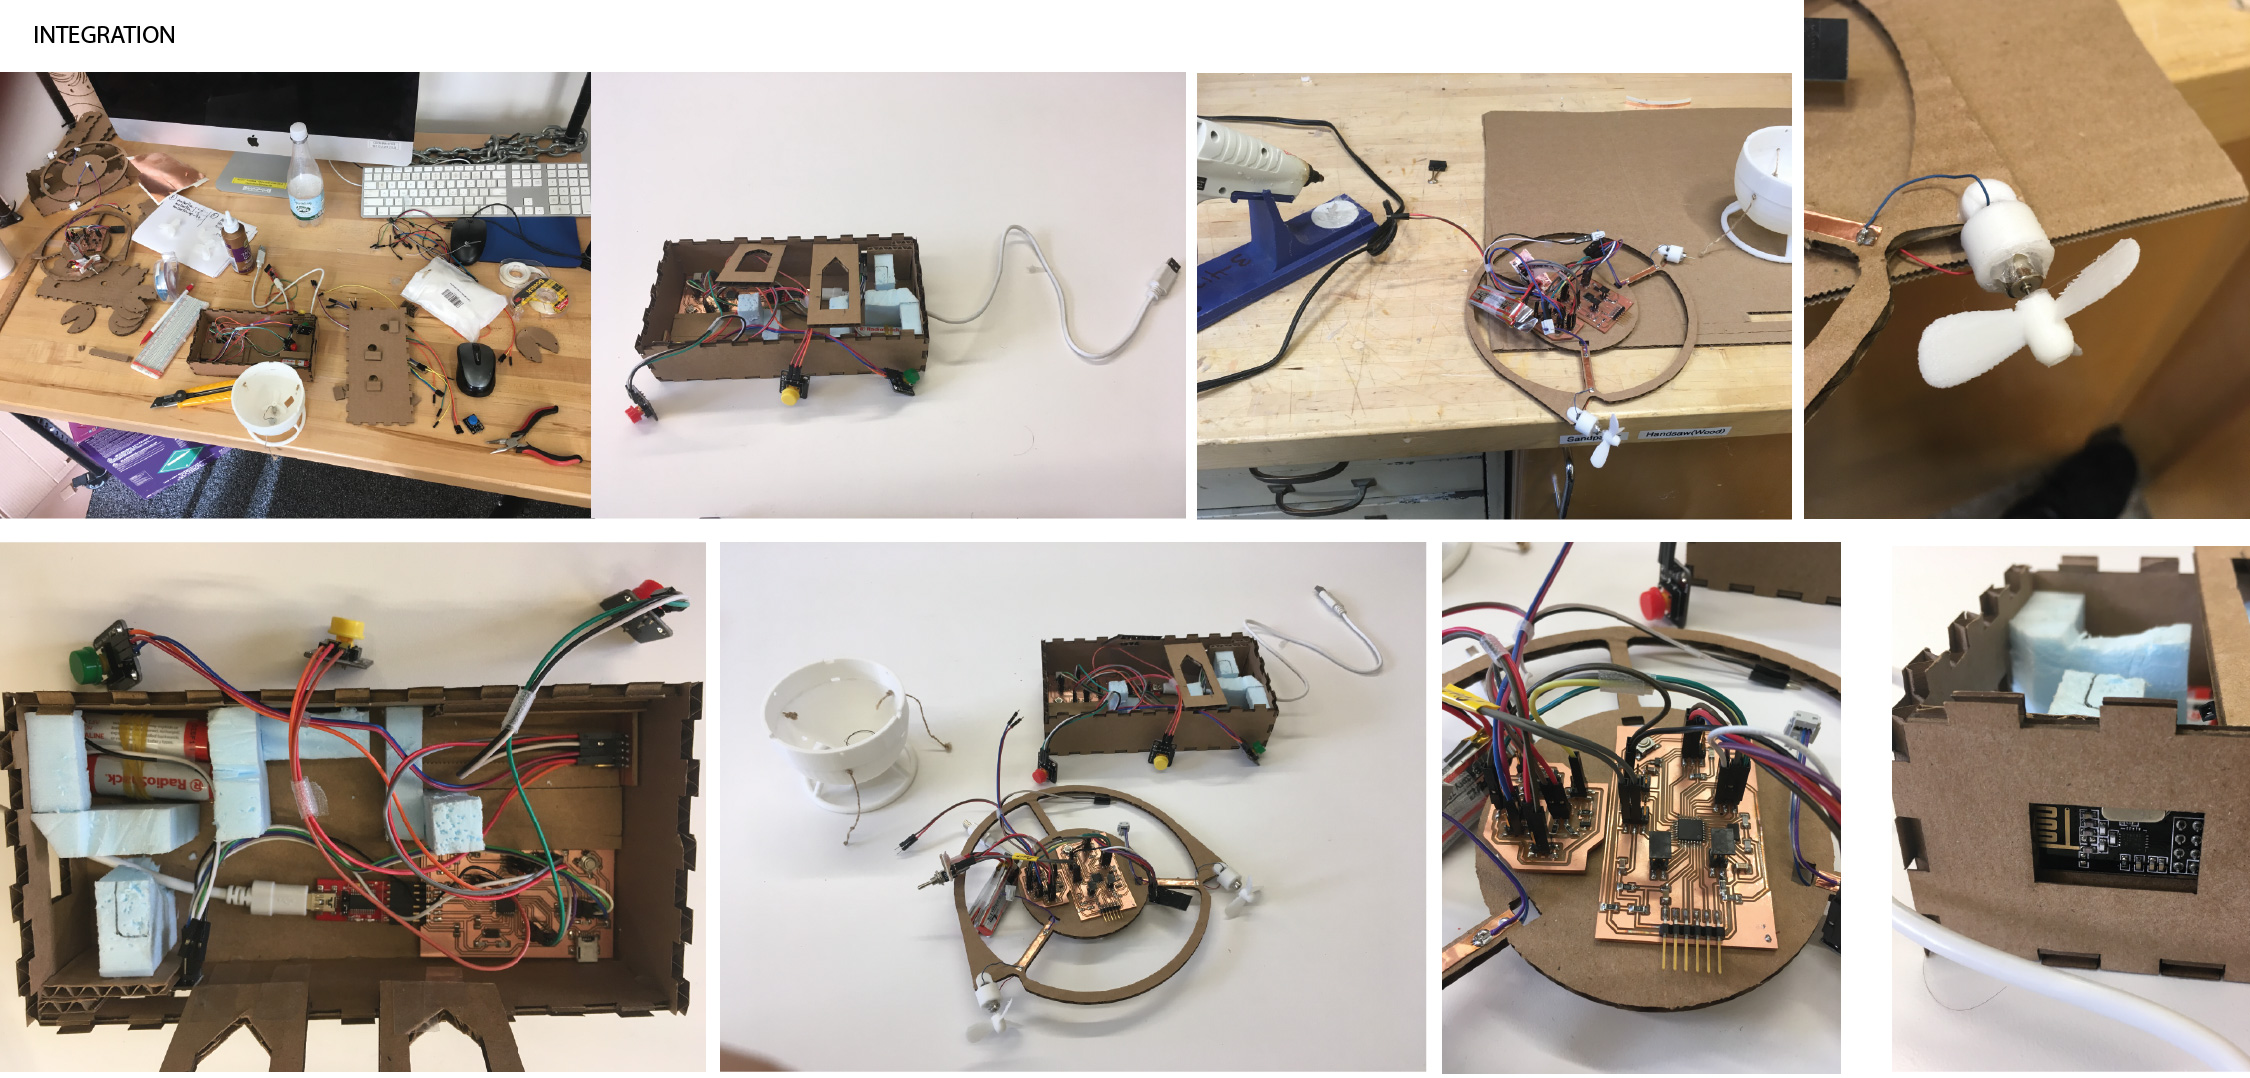
Testing

What materials and components were used? where did they come from?
• 2 Atmega 328p microcontrollers (class inventory)
• 3 3.6V mini dc-motors (Uxcell via Amazon. $6.89)
• 3 buttons (SMAKN via Amazon. $12.10)
• 2 nRF24L01 Module (SunFounderUS via Amazon. $8.99)
• 3 22ohm mosfets (class inventory)
• 2 3.7 Lipo 500 ma batteries (Holy Stone Storefront via Amazon. $7.99)
• 2 AA 1.5V batteries (RadioShack. $6.99)
• Jumper Wires (DealPe via Amazon. $6.39)
• FTDI Cable ($11)
• Cardboard (class inventory)
• 36 inch latex balloon (Bigbigdeal via Amazon. $7.57)
• Helium (Worthigton Cylinder Corp, via Amazon. $41.99)
• Wax 3D printing filament (class inventory)
How much did they cost?
$104.63
What questions were answered?
How to control movement with motor control in actual 3D space?
how was it evaluated?
• Looking for a technique for floating in space
• Seeking for the right design and testing multiple options
• Testing various types of motors and motor control
What are the implications?
A slow and gentle indoor drone can be used for documentation of events, 3d-scanning of indoor environments, and interaction with spaces.
My next step would be to connect my BalloonDrone to Unity gaming environment, for interaction between actual and virtual spaces.