For this week we used burlap and EPOXY (ENTROPY resin) to design, mould and cast
The work process is in the following steps:
1. Design Tool (model on which the burlap and resin is then applied)
2. Mill the model from foam (preparing the model in MasterCam and milling it with the Onsrud CNC
3. Studying the ENTROPY data sheet
4. Preparing ourselves and the room environment for casting
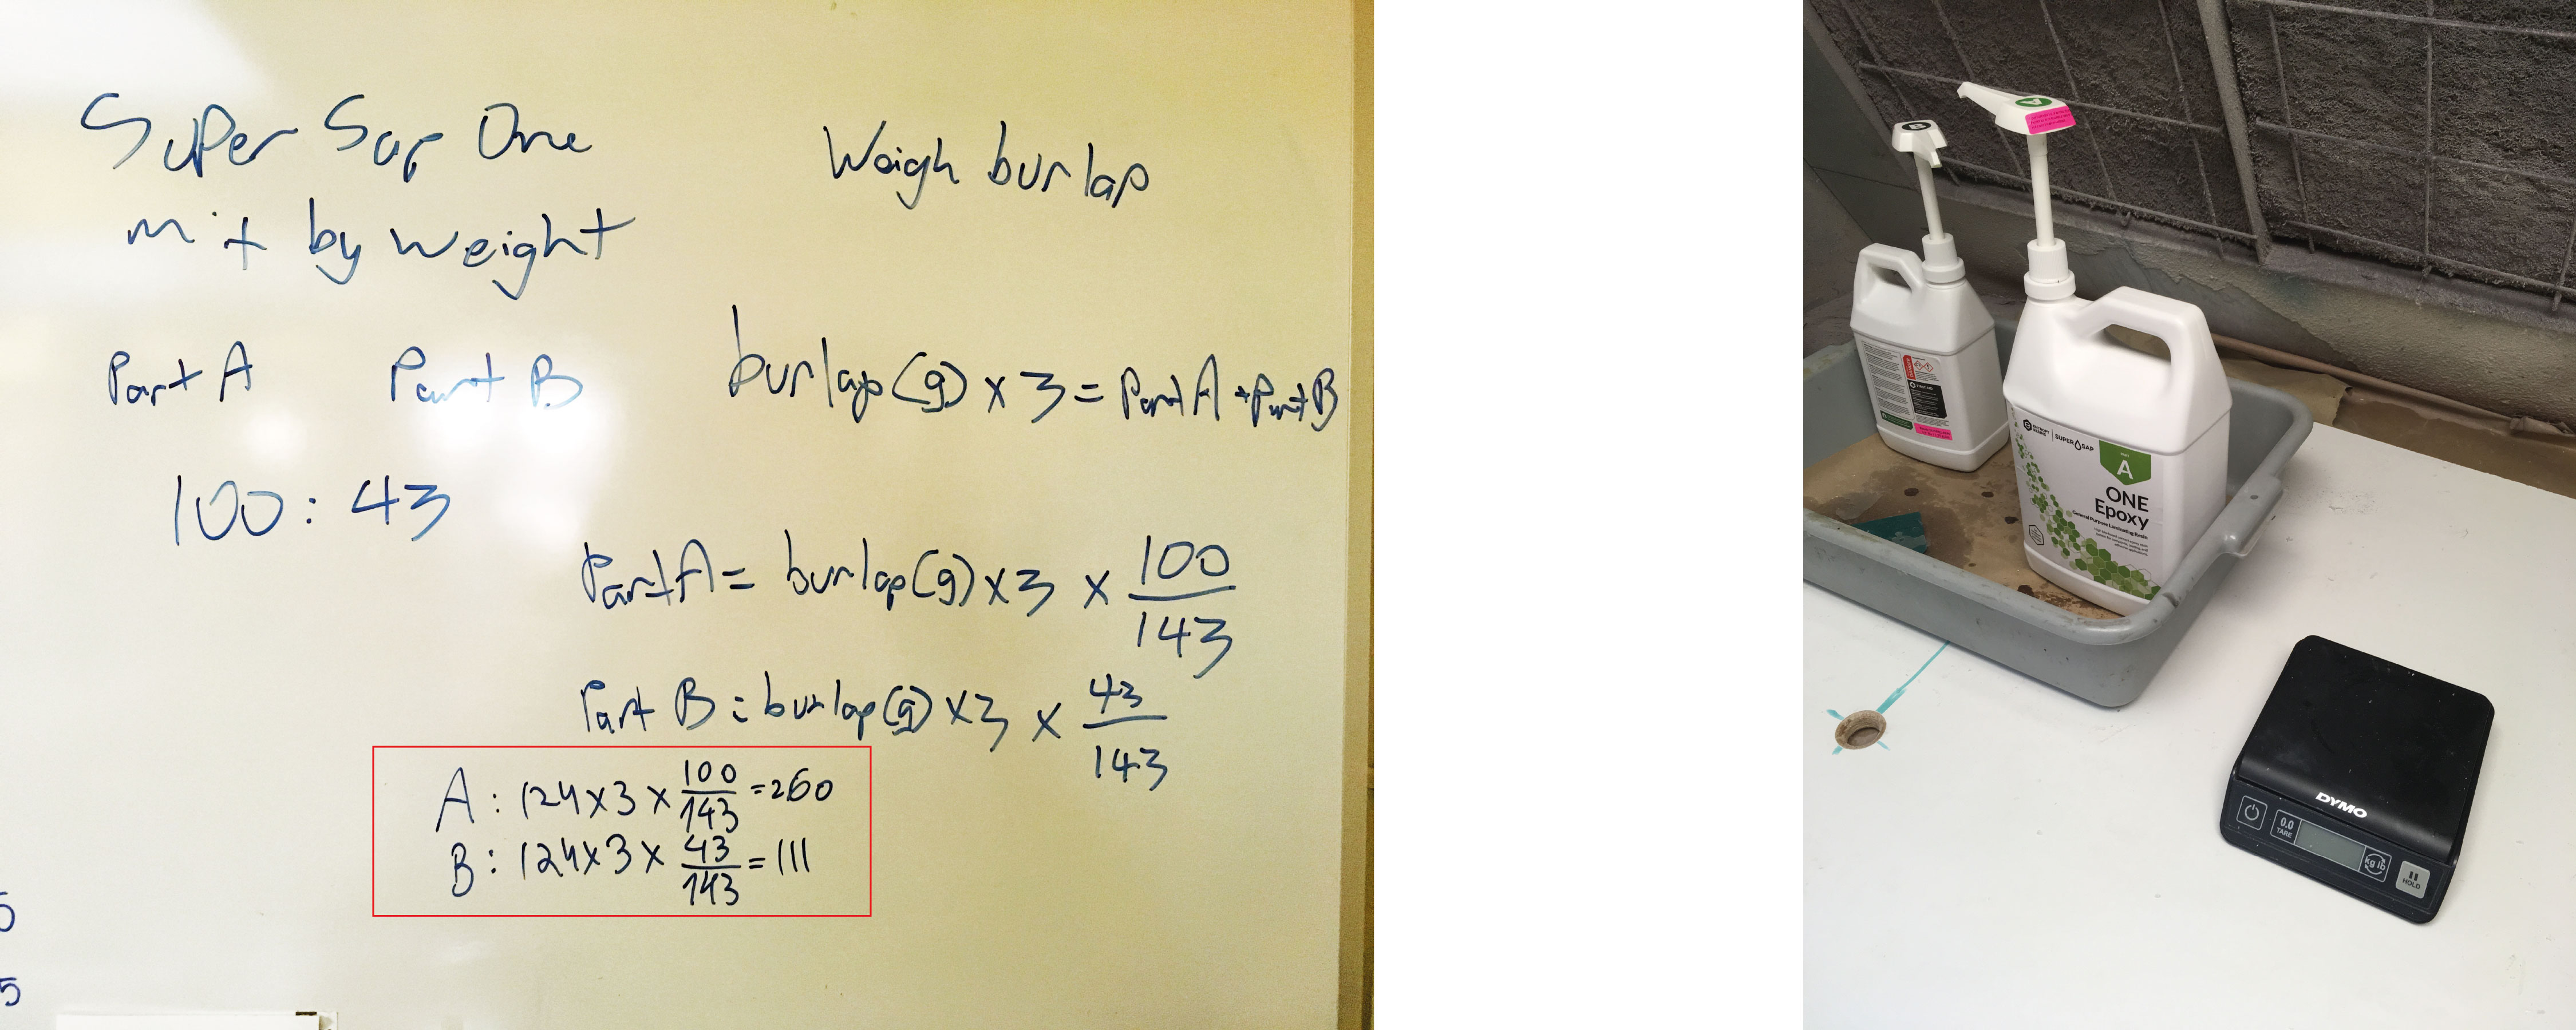
5. Calculating portions of resign (Part A / Part B), and casting the Tool
6. Post-production
The Model:
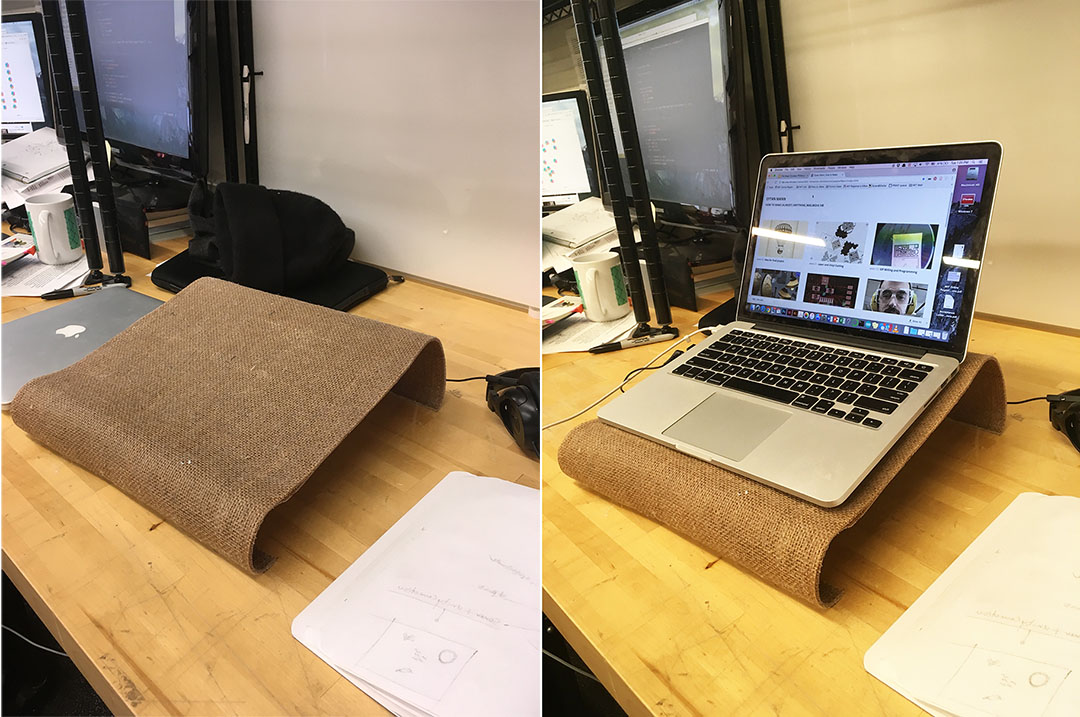
I’m having some back aches after sitting for long hours on my laptop
because the computer is too low for me on the table. For that reason,
I decided designed a simple platform on which I would place my laptop.

Milling the model:
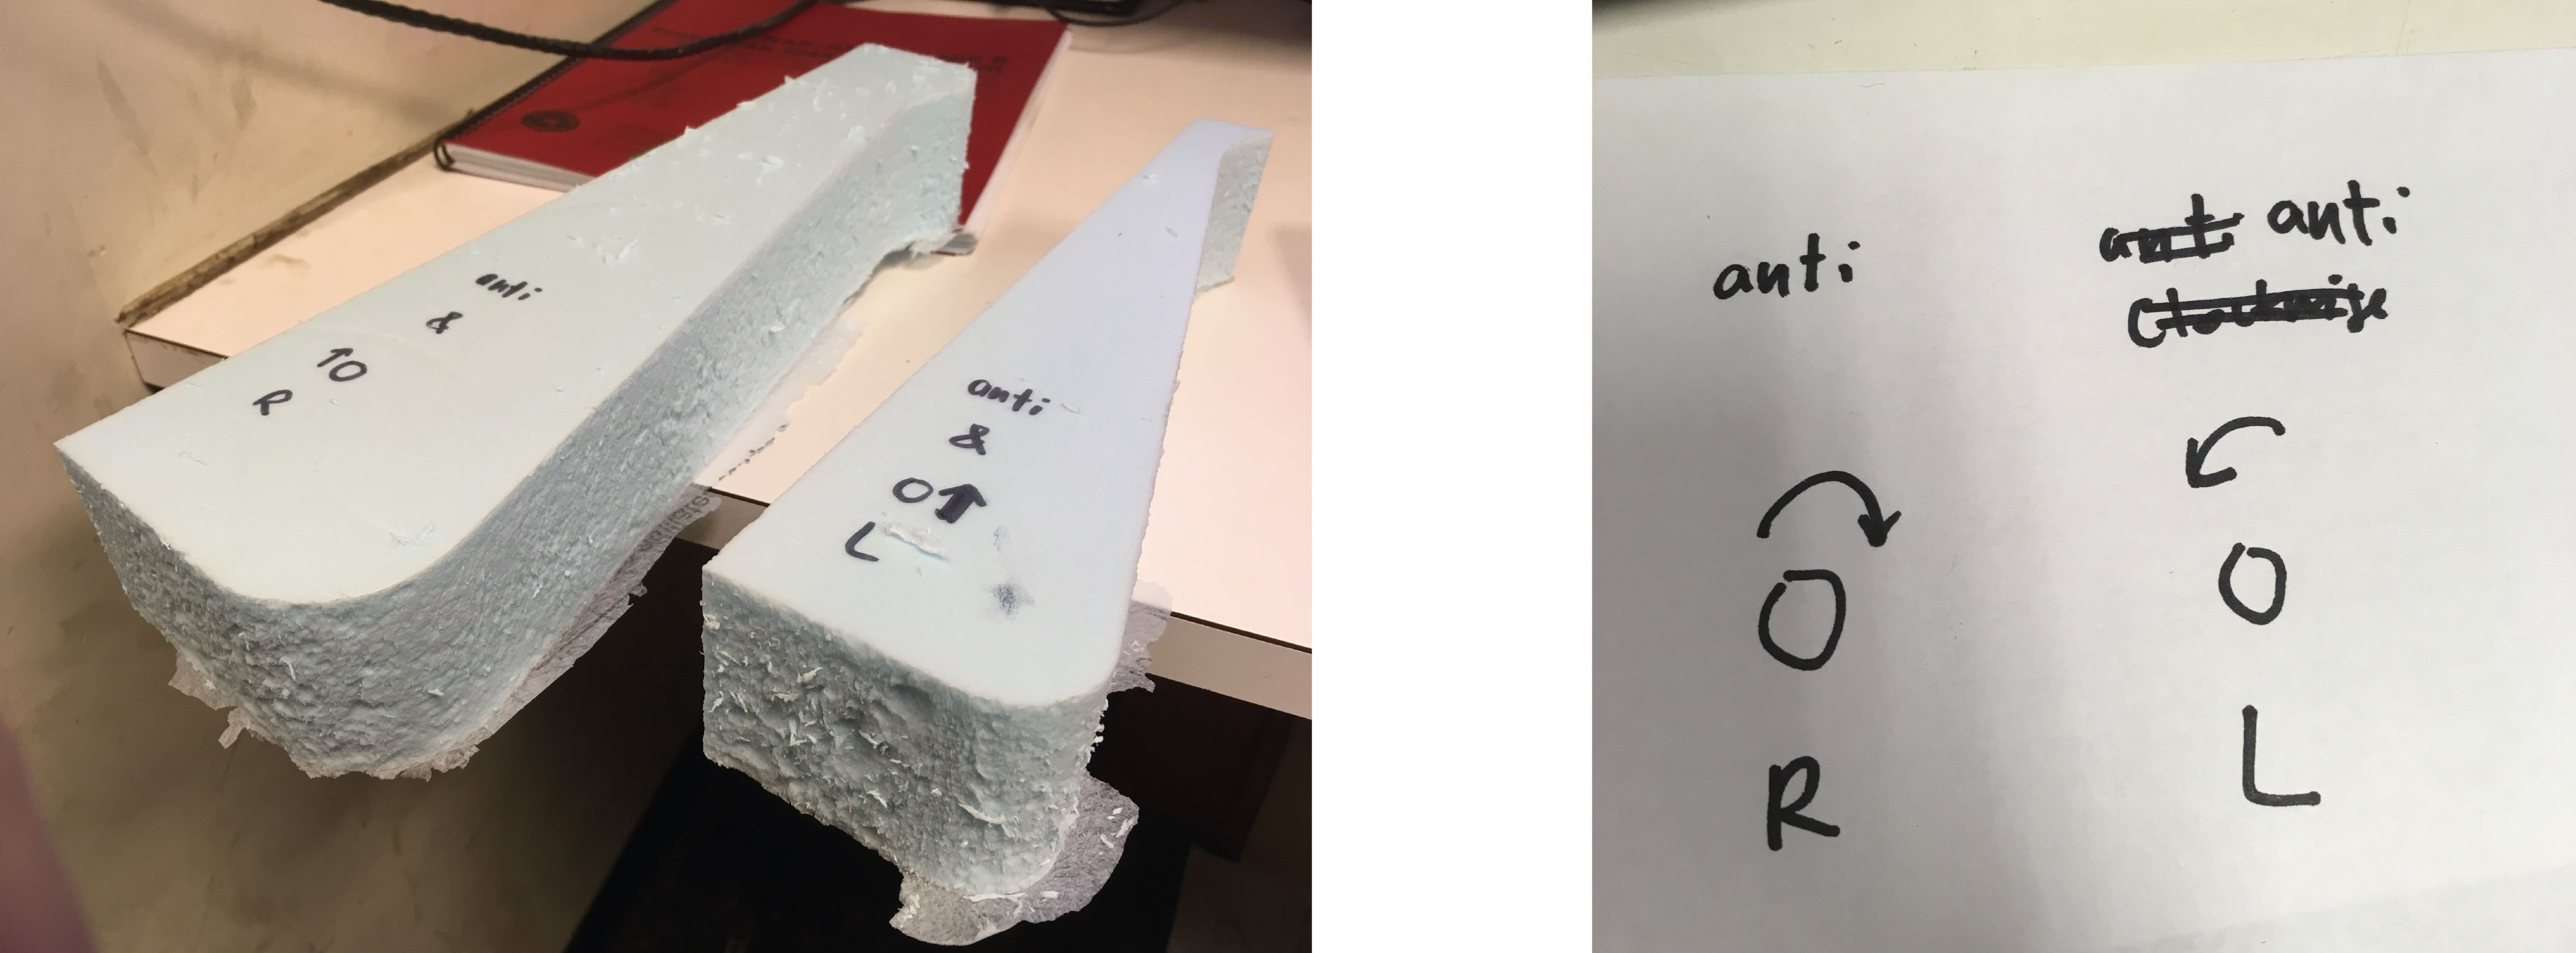
The model was made using 2D sections, so the MasterCad file was fairly easy to prepare.
The thing that need testing was the type of cutting: CLIMB Cutting / Conventional Cuttin.
Foam seems to have differently from other materials. I tested the two types of cutting before
send the whole job.
There is the direction of the Tool Path, and then there is the direction of the mill head.
Looking at the smoothness of the cut, Counter-Clockwise tool path + Clockwise spin is the best
way to go about it.
The milled parts were then glued and sand-papered.

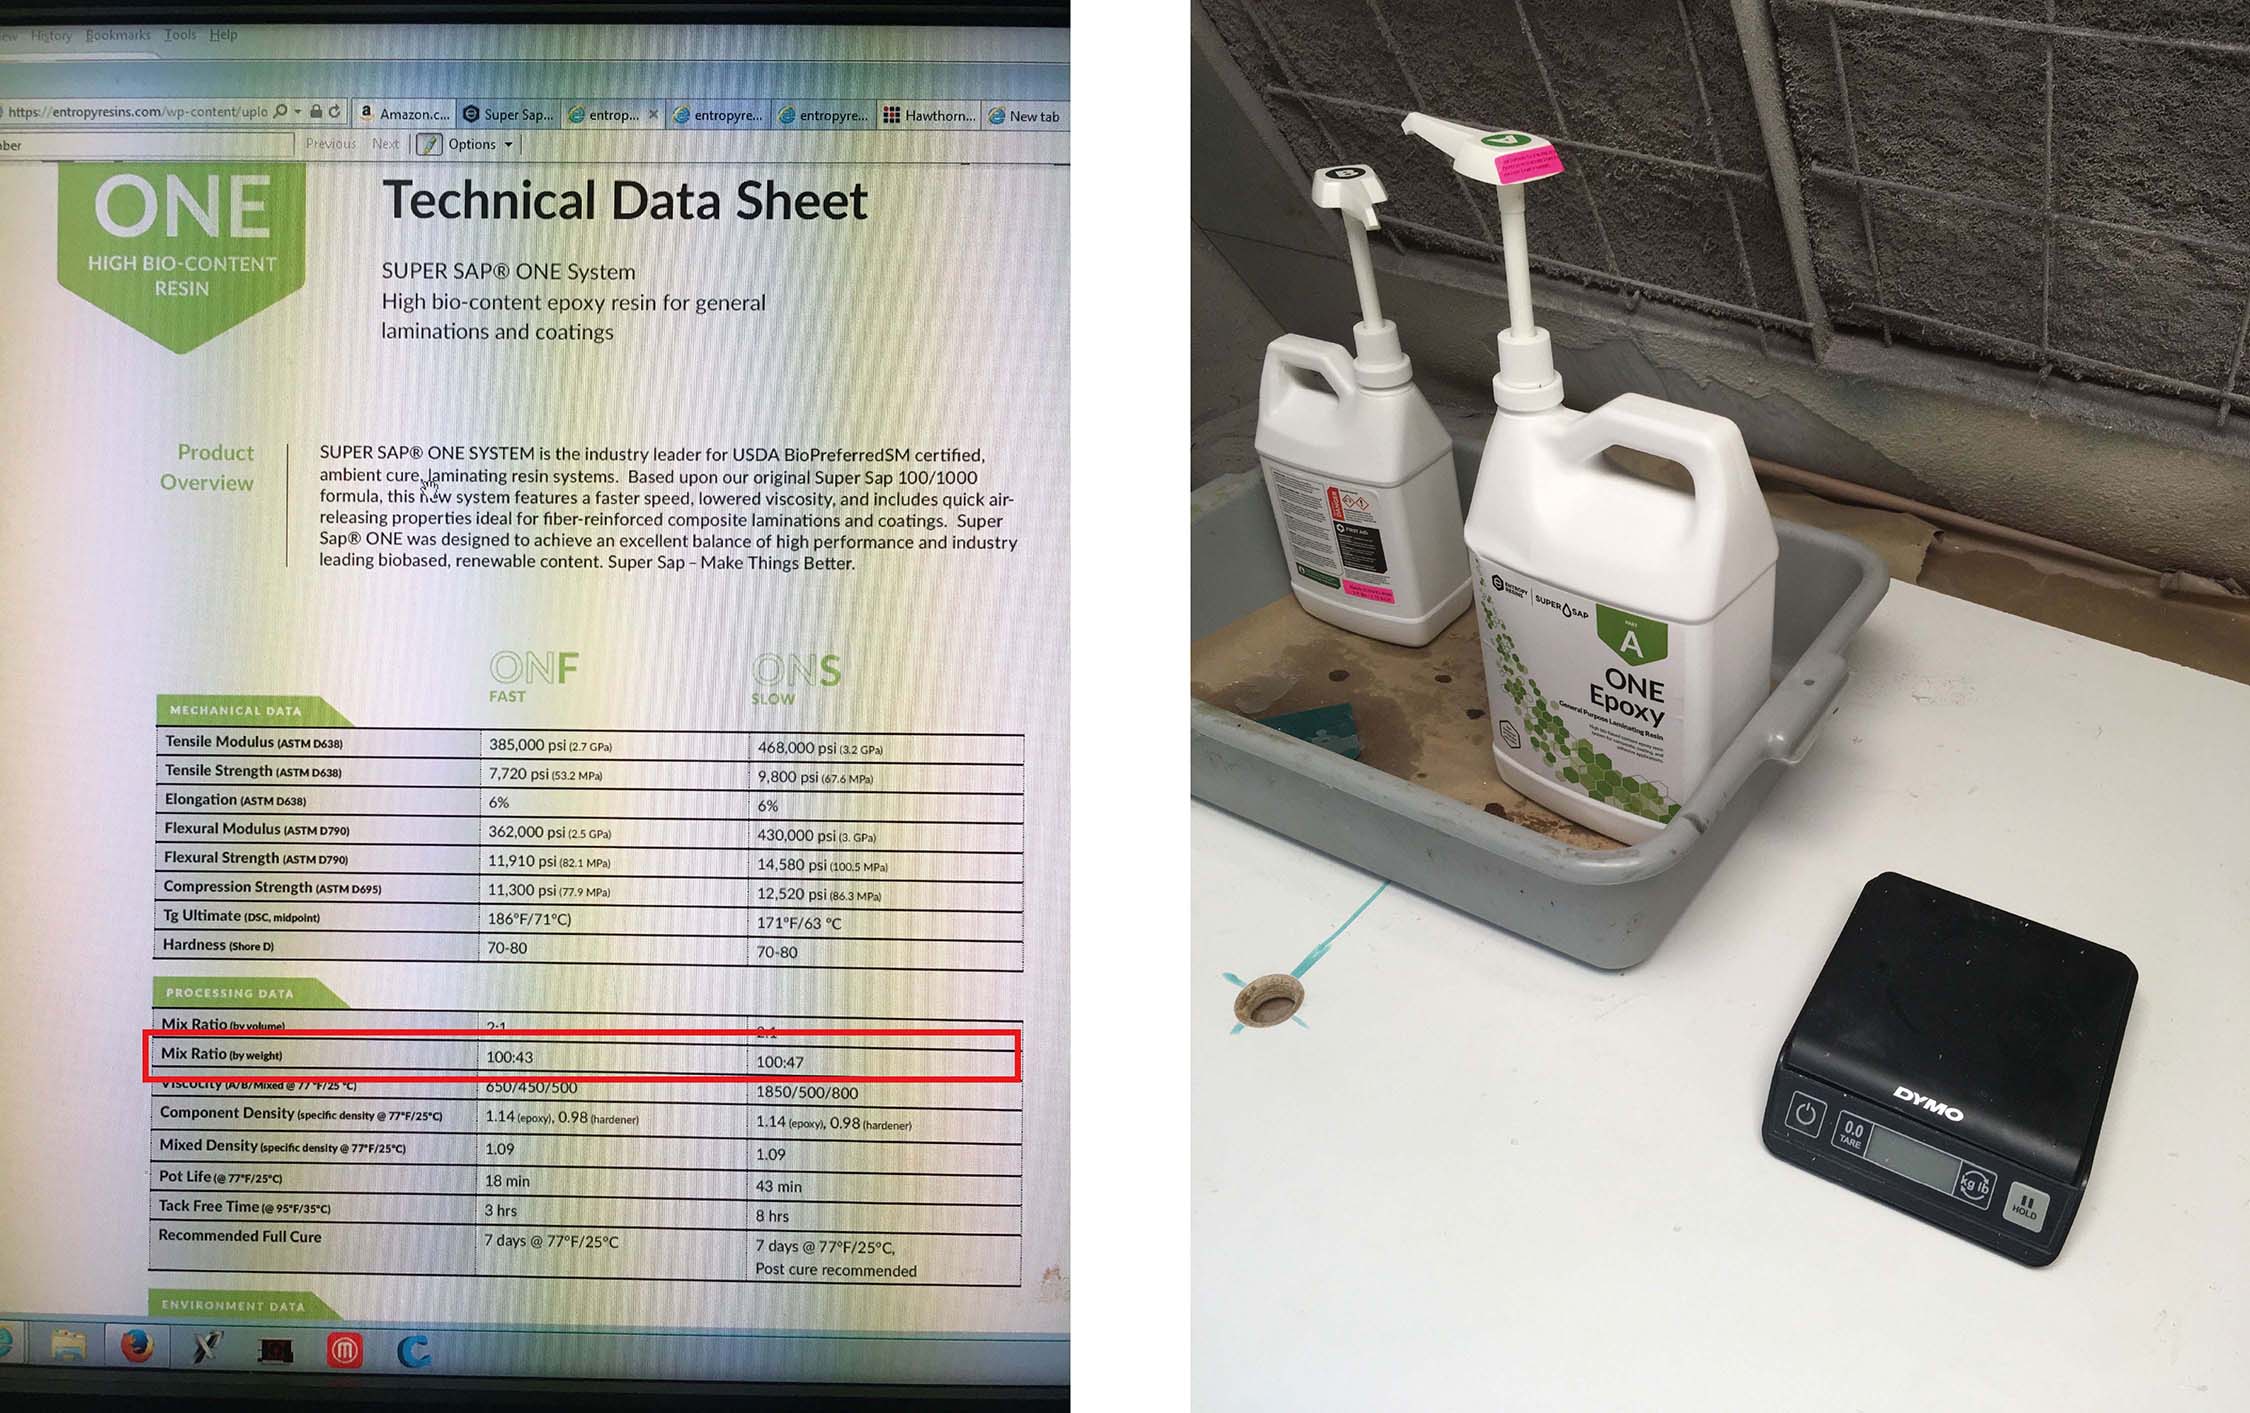
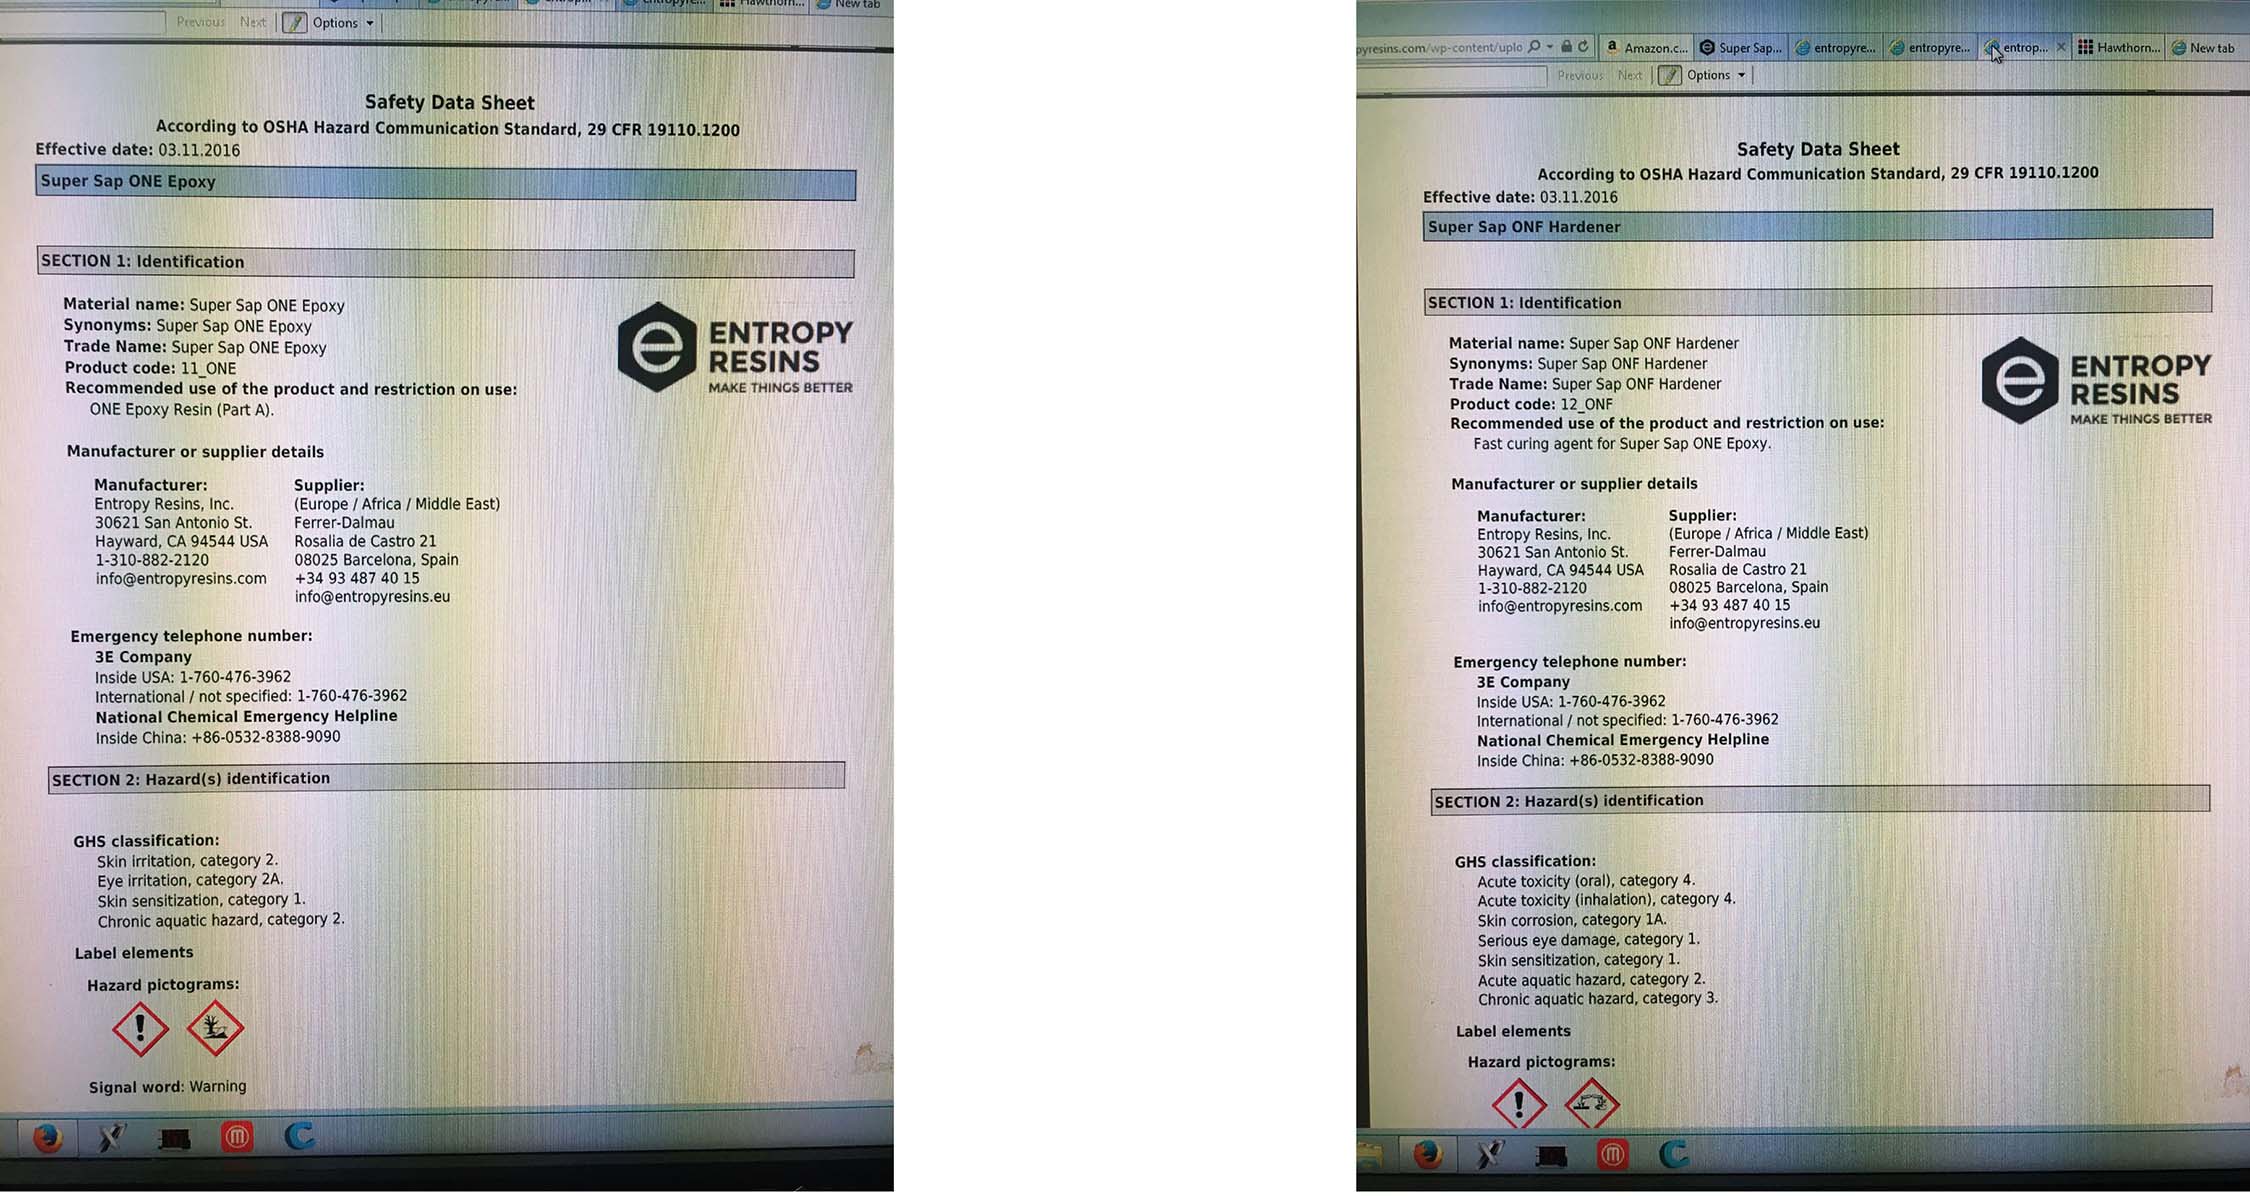
Studying the ENTROPY Data Sheet
The epoxy product we used is : Super SAP One System
The sheet provides safety directions, mixing ratios, Pot Life heating, time of curing and other safety information.
HIGH BIOBASED CONTENT EPOXY RESINS FOR LAMINATING AND COATING.
High biobased content resin system designed for composite, coating and adhesive epoxy applications.
Two-part epoxy resin kits are comprised of Super Sap ONE Epoxy and ONF Hardener.
Safety and Hazards:
- Wash skin thoroughly after handling.
- Contaminated work clothing should not be allowed out of the workplace.
- Avoid release to the environment.
- Wear protective gloves/protective clothing/eye protection/face protection.
- If on skin: Wash with soap and water.
- If in eyes: Rinse cautiously with water for several minutes. Remove contact lenses if
present and easy to do. Continue rinsing.
- Specific treatment (see supplemental first aid instructions on this label).
- If skin irritation or a rash occurs: Get medical advice/attention.
- Take off contaminated clothing and wash before reuse.
- Collect spillage.
- Dispose of contents and contain
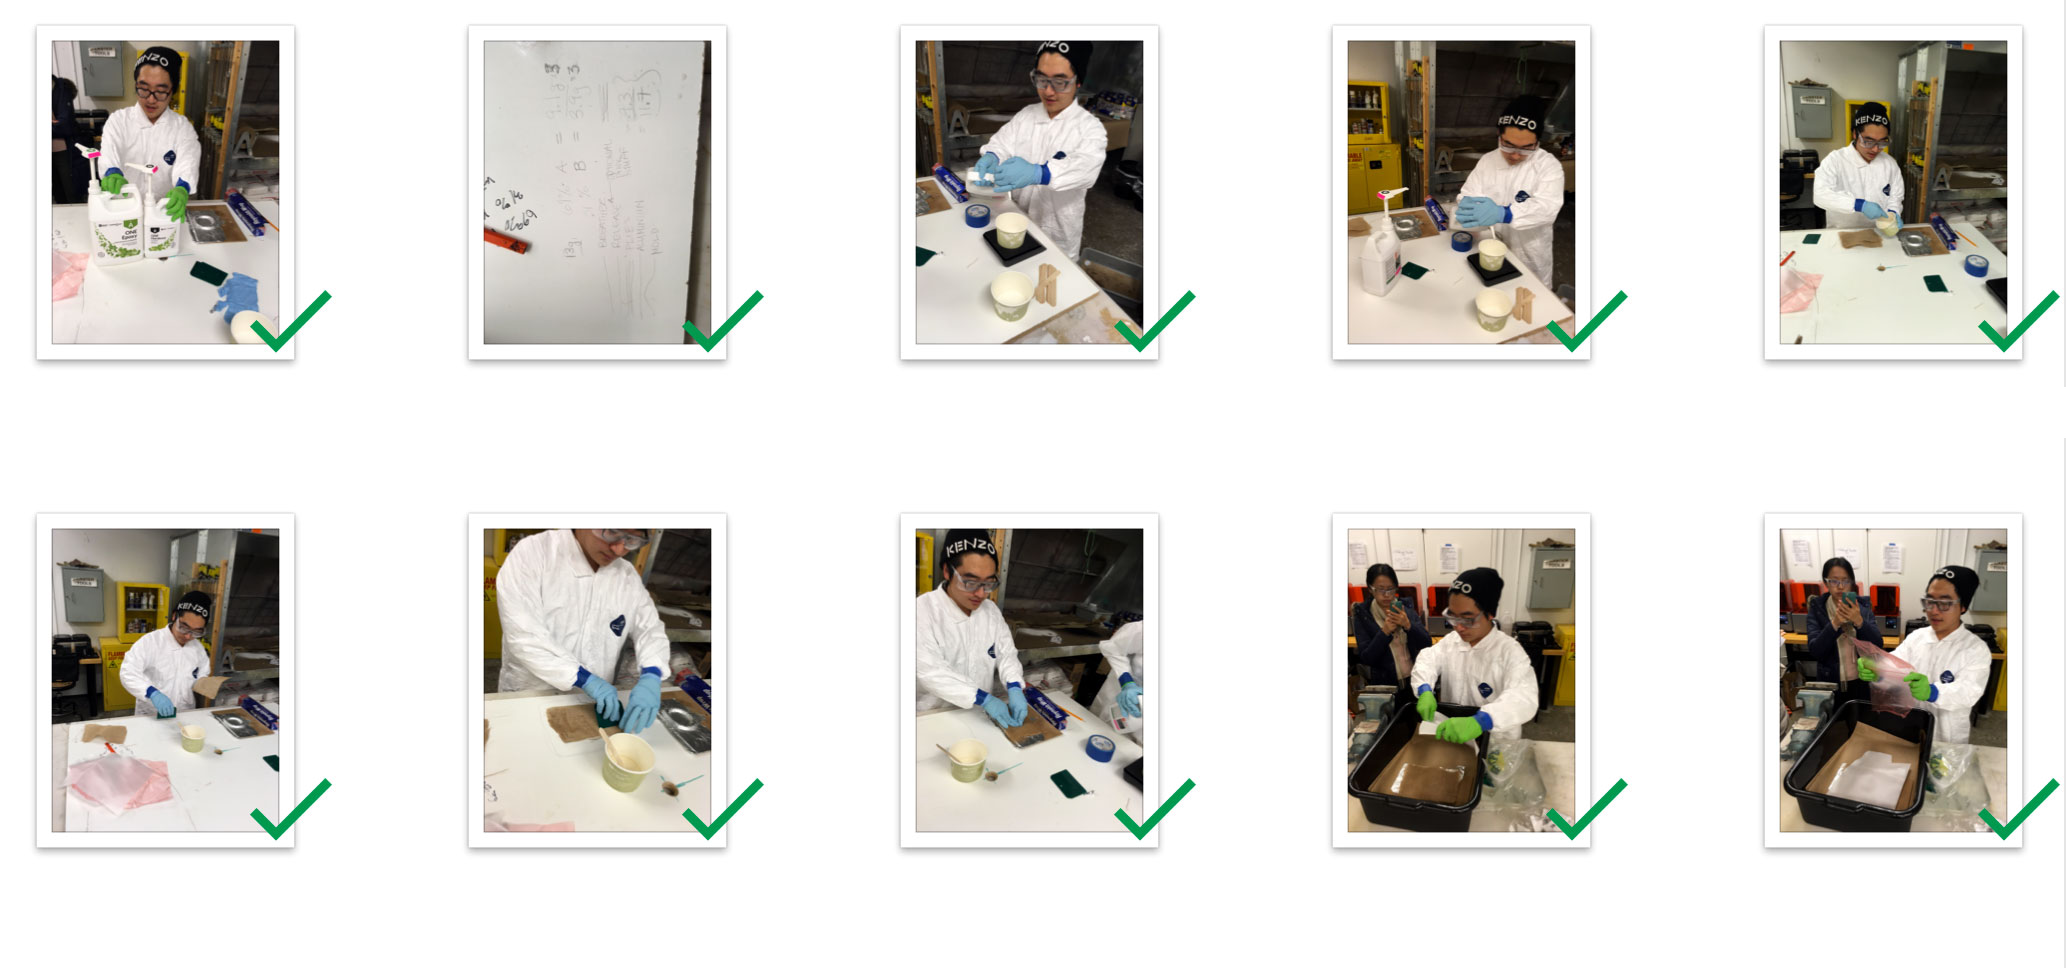
Calculating portions of resign (Part A / Part B), and casting the Tool:
The ratios and portions need to be super percise. For that I did a few steps:
1. Read the Data Sheet, understood how to calculate the ratios relative to the weight of my Burlap material.
2. Weight my Burlap separetly.
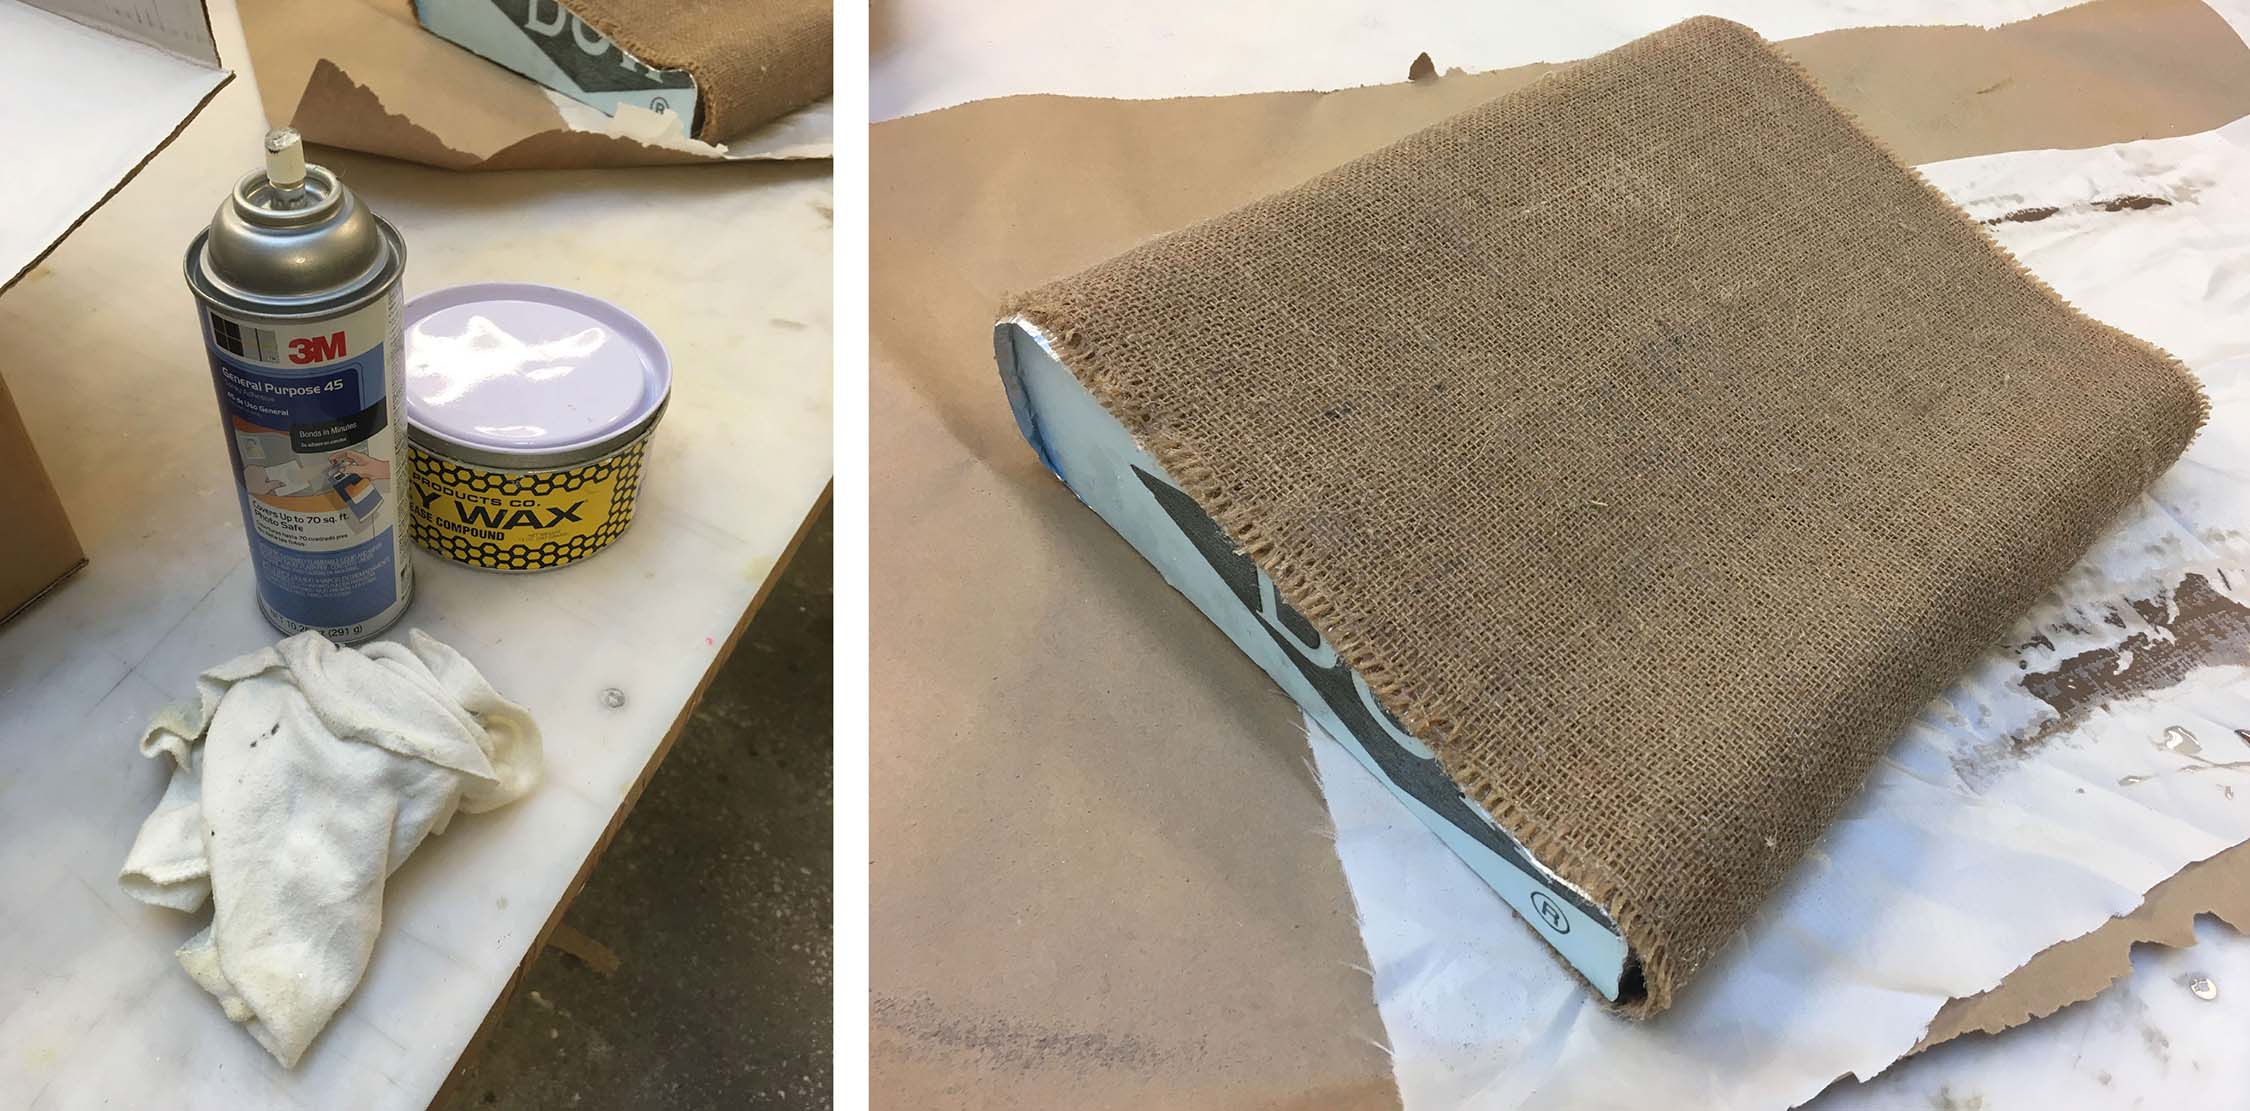
3. Only after I'm sure I'm ready to start the process, I pump Part A in a bowl, reset the scale and pump Part B material. Mix thoroughly and extremely carefully.
4. Spread the mixed resin on a clean and waxed table and smear the burlap sheet in it, while adding more.
5. When burlap seams soaked, place on the Tool (milled model).
6. All this, under air removal hood!!!
Data Sheet:
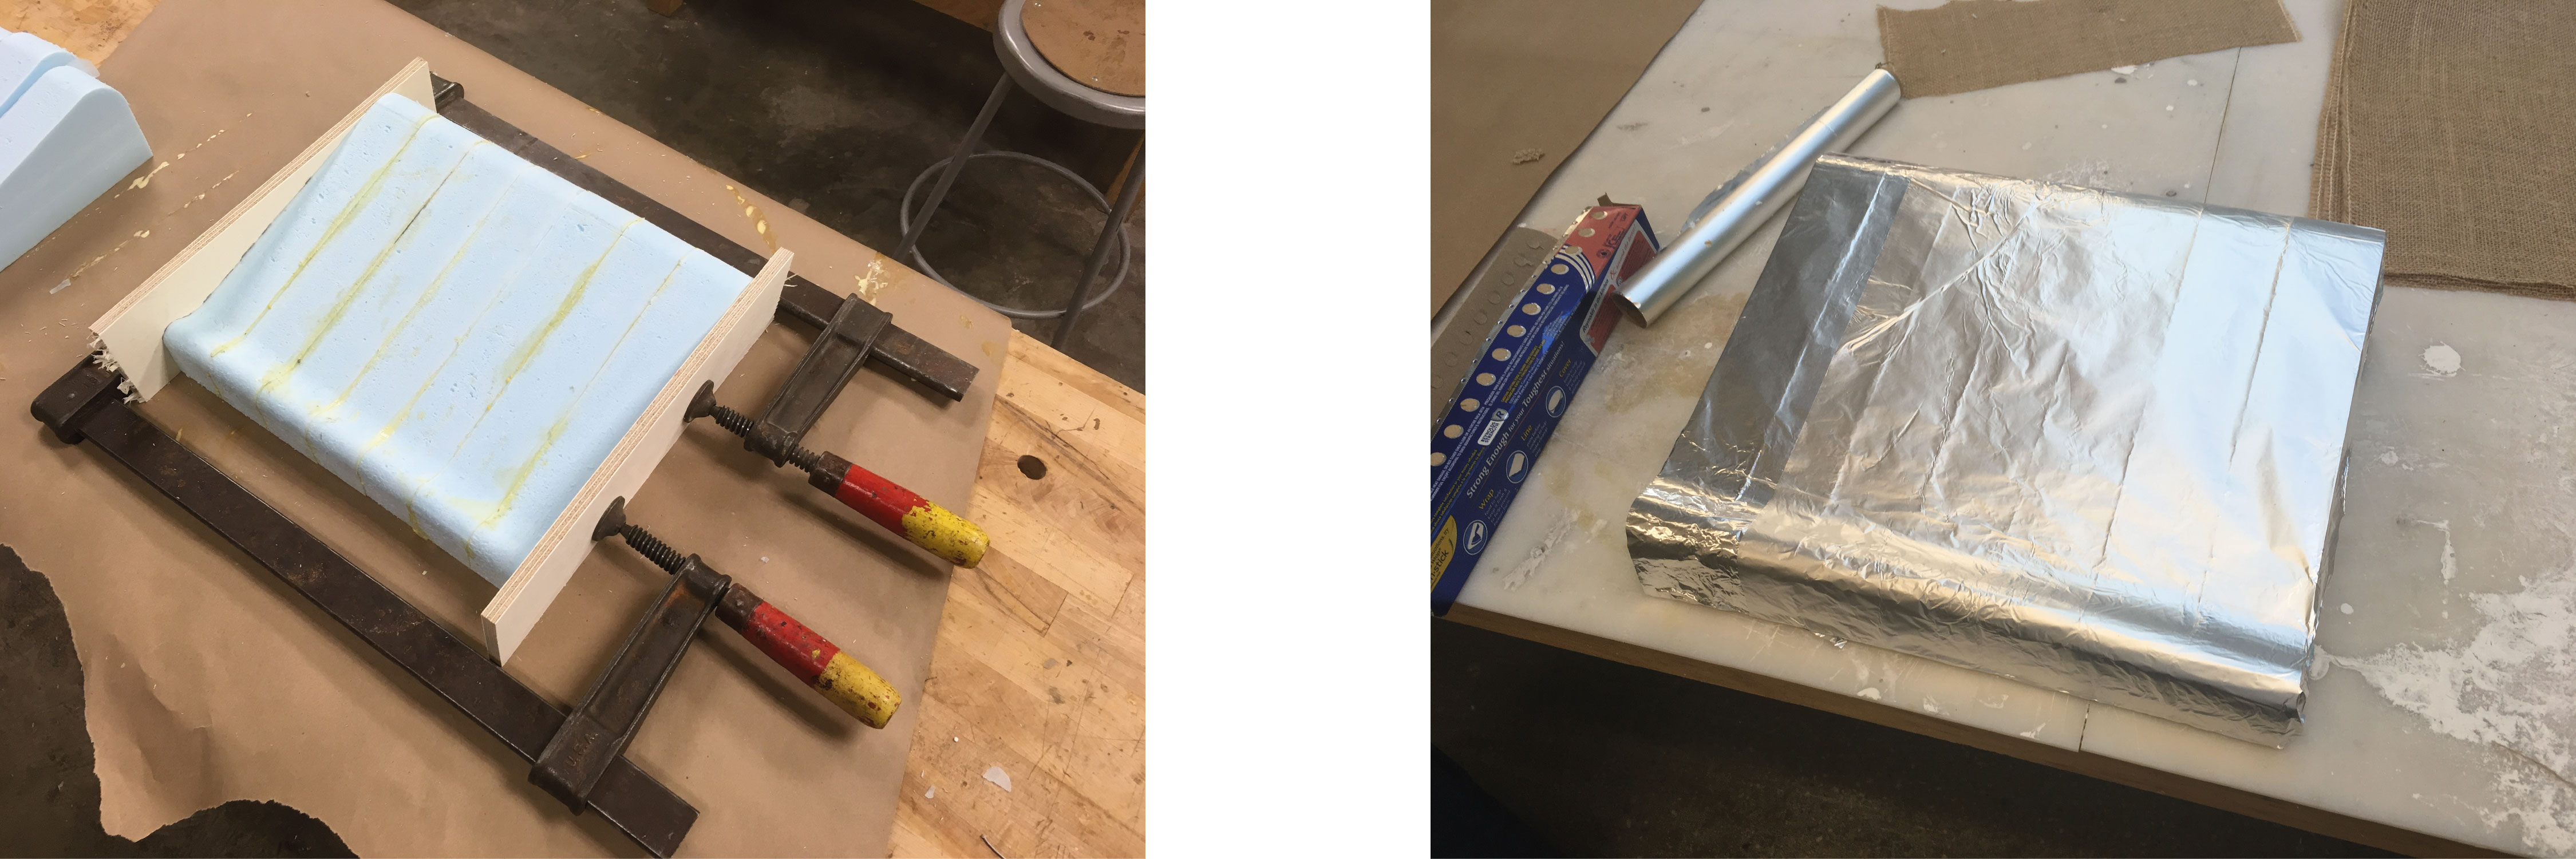
Preparation for casting:
Before soaking burlap in epoxy resin, there is preperation to do:
1. Wrap the foam model with alluminum foil, and use adhesive spay to make sure the alluminum is steaking to the foam.
2. Organize and clean work environment.
3. Wax the table to make sure the epoxy does not stay there for ever... Wax, then wipe, three times!
4. Prepare vacuum bag if needed.
Post-production:
Sawing the edges.
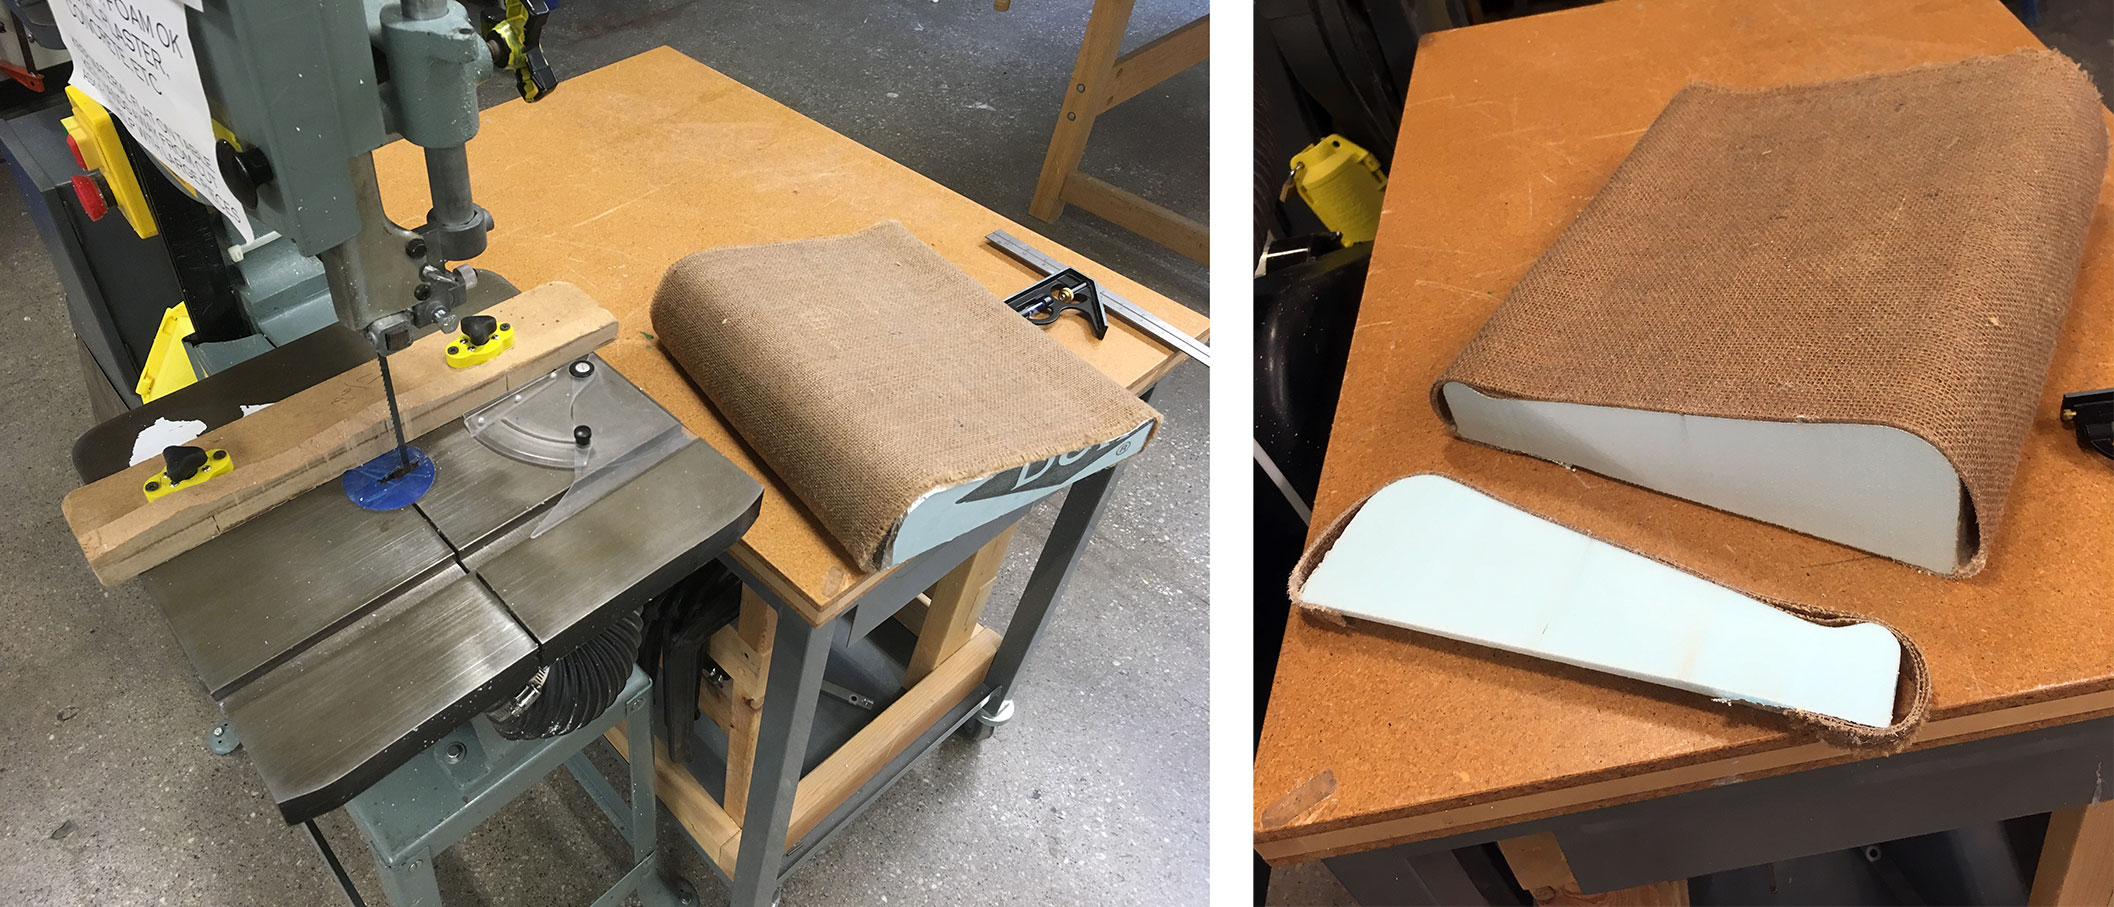
Final Product - Enjoy the crop of the work for better quality of life.