Back to Home
Assignment 3: 3D Scanning and Printing
This week's assignment is to design and 3D print, also including doing 3D scan. Before I started designing, I reviewed the design rules of 3D printing:
- Sharp corners should be avoided, as well as thin and narrow shapes.
- Pay attention to the orientation of the object designed.
- Save material.
After the group review of the 3D printer, I thought that the resolution of the printer we were going to use could support the angle nearly 30 degree. Also another important issue which should be paid attention was that most shapes needs support. For instance, the cantilever structures and hollows need support to prevent collapsing.
Design
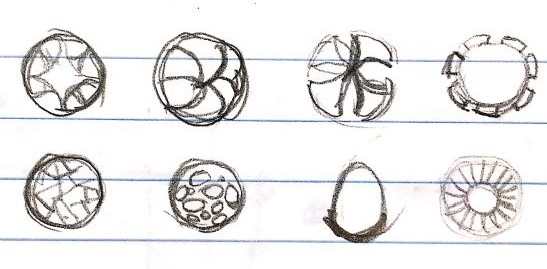
Because in my final project I want to make a ball robot, in this assignment I want to print a sphere with a particular skin. I made several draft on paper, finally I decided to make a Voronoi skin on a sphere. I have made Voronoi on planes and cubes before, but I never made them on curves. I reviewed several tutorials on Youtube and started from grasshopper. I combined several skills from different tutorials. When doing, I took a note of my process.
 |
- Create a sphere and find its boundary box, also set a serious of popular points on the sphere's surface.
- Use Voronoi 3D to create the lines and cut them by the sphere. Then get the lines on the sphere's surface.
- Find the points of intersections. Then make polylines based on these points.
- Scale and loft, and then get the frame. Then turn it into mesh.
- At this step, I found that only using grasshopper to deal with mesh is difficult. But in order to avoid sharp acute angles, I wanted to make the boundary smoother. Then I tried the plug-in for grasshopper, which is weaverbird.
- By using the “subdivision” and “mesh thicken” function in weaverbird, I smooth the edges and add the thickness to my basic mesh frame.
Join mesh is an important step. The subdivision will calculate the edges of an integrated mesh. If the meshes are not joined before subdivision, we will get a discontinuous form. Also inadequate level of subdivision will lead to unsmooth.
3D printing
There is one thing to pay attention when doing 3D printing. In 3DWOX the units are millimeters. If in “stl” files the units are inches, it would be changed into millimeters with scaling.
The other thing is about the support. Since there was a lot of holes in my sphere, I chose to add support everywhere. After printing I found that support cost a lot of time, even more than the solid I wanted. Also the support inside was hard to remove, I tried screwdriver.
3D printing in process.
After removing the support.
3D Scan
I used 123D catch to do my 3D scan. Based on more than 8 photos, it will generate a 3d model which is in "obj" format. I am curious about different materials' influence to the result of scanning.
a. Screen
I scanned my laptop at the first time. I left my screen on when scanning. The 3D model I got could record the letters on my screen. And the shape of my computer was recorded in the model.
b. Glass
The second time I scanned a glass cup. According to the record I got, 123D could not catch transparent objects. I only got the surface of the desk which holding the glass cup.
c. Opaque object
The third time I scanned a potted plant. This time the result was the best among all my scanning. Except for some sharp angles, the 3D model recorded the details well.