Assignment 5: Computer-controlled Machining
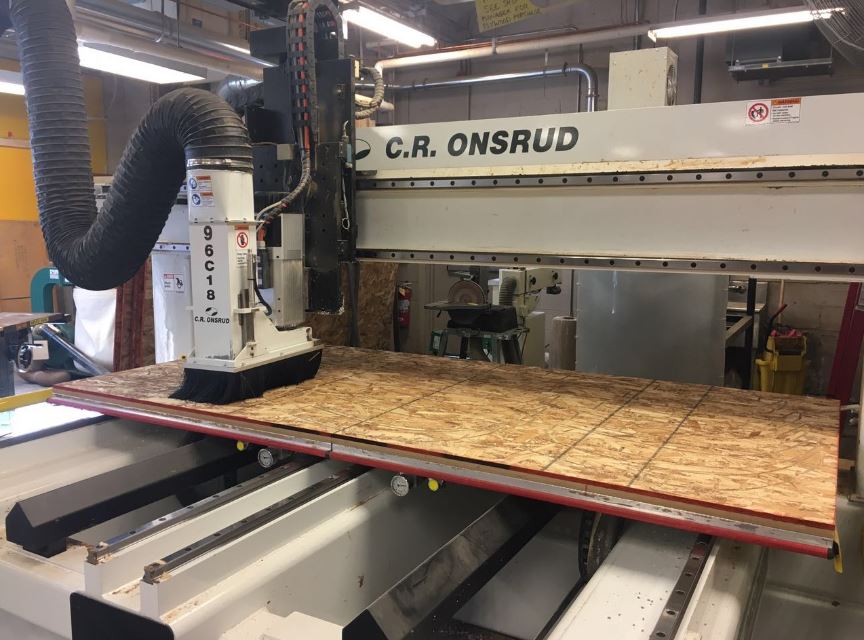
As our TA said, this week is “pretty crazy” because we are going to make something big. Our session uses MasterCam to machine OSB boards. For MasterCam, the most difficult part is to set up the toolpaths. And also for big things, the assembling is more difficult than small things. For me, these are this week‘s two main challenges.
Design
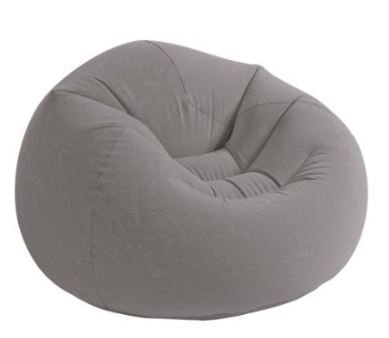
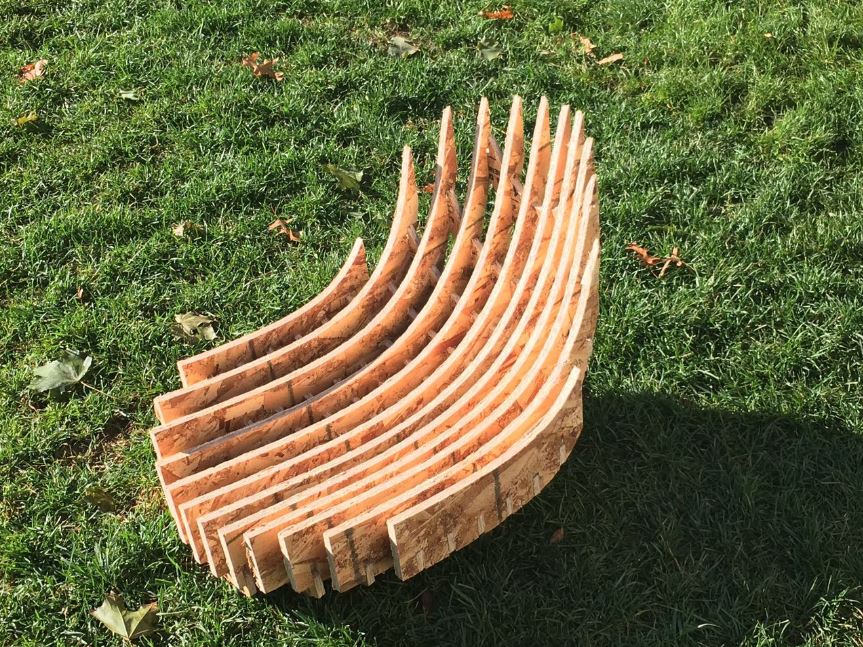
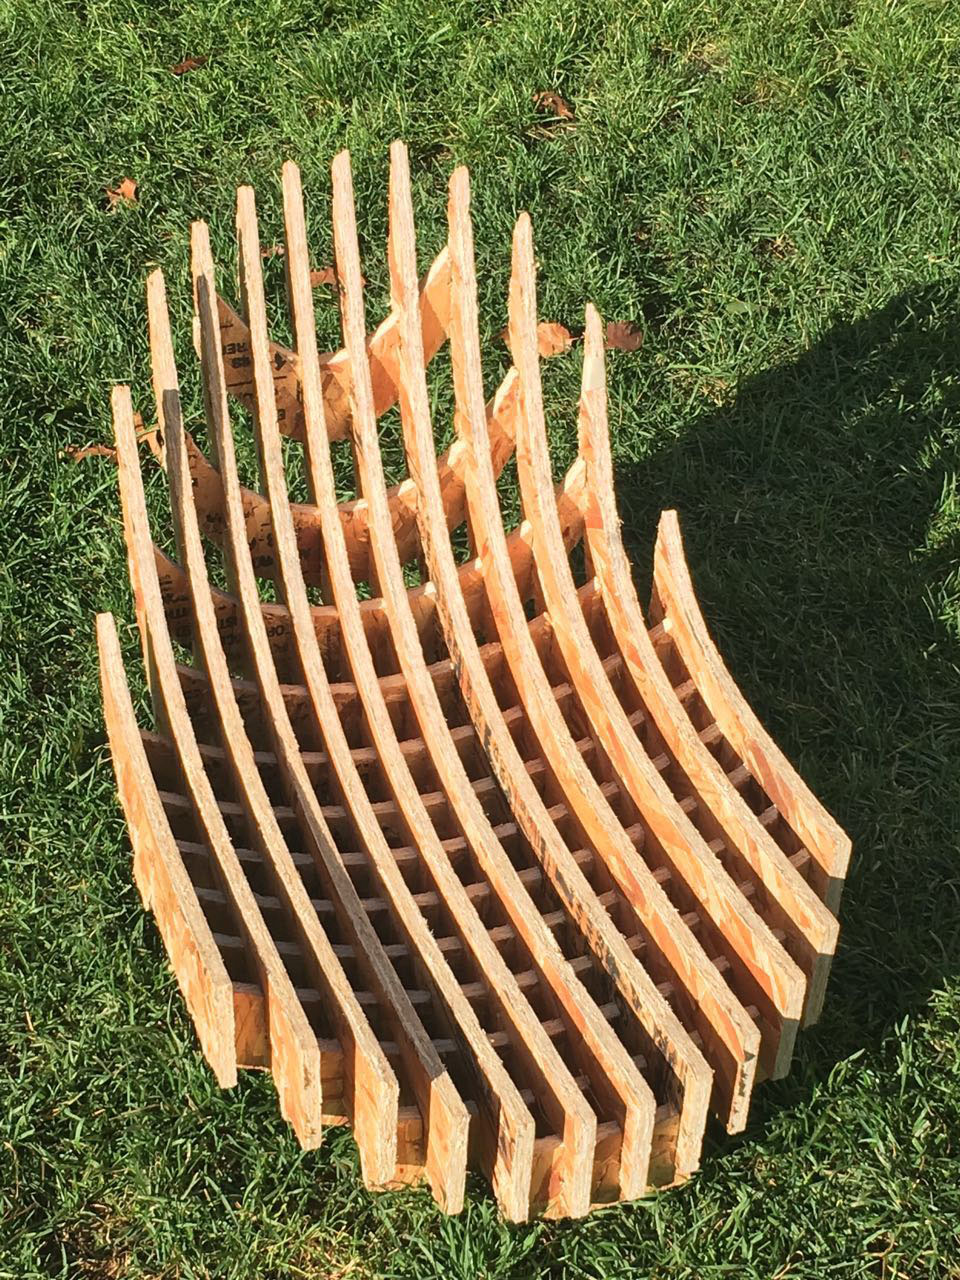
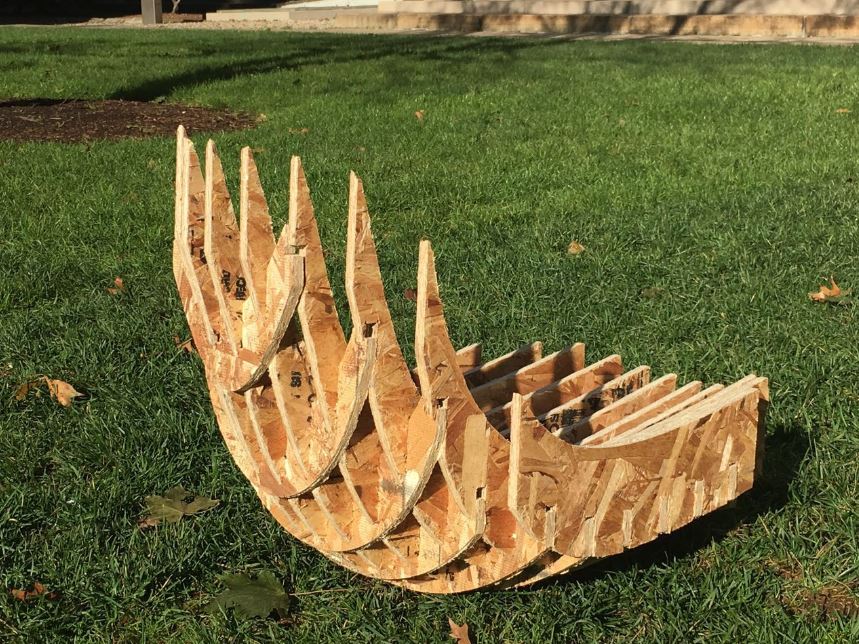
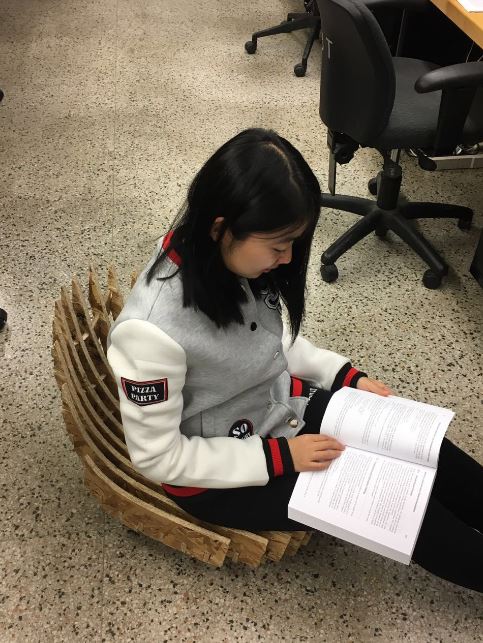
Since I want to make a ball in my final project, I explored different ways to make curves. In laser cutting and 3D printing, I tried small things with curves. In this assignment, I was thinking about different assembling method, and also, I wanted to make something which is stable and functional. I decided to make a lazy chair. (reference: google)
 |
I started in rhino and thought about the mode of assembling. My steps and attempts are listed as below:
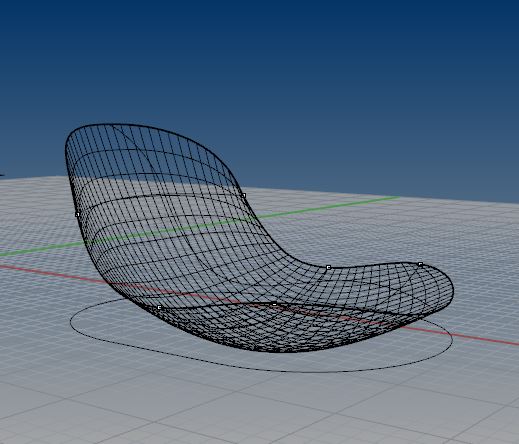
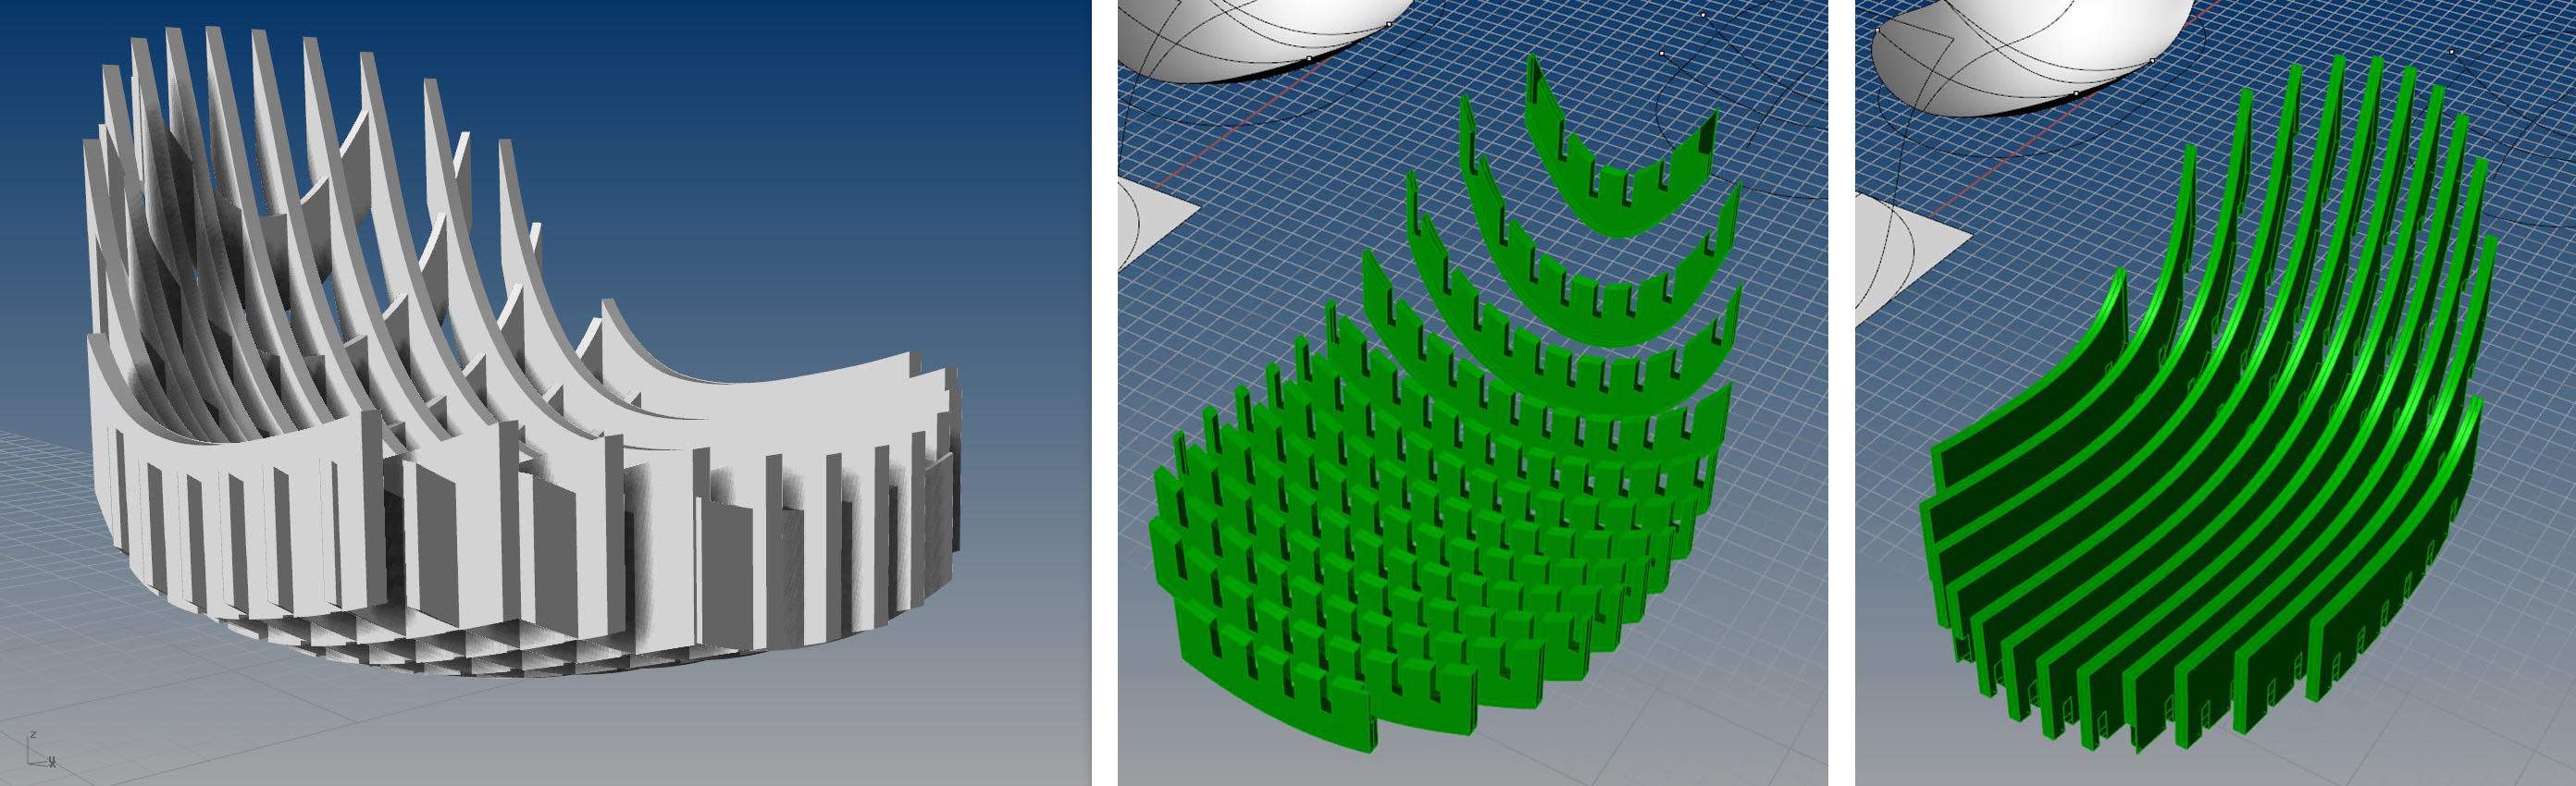
1). I designed a hemisphere-liked shape. I adjusted it by its projections in front and top views.R
 |
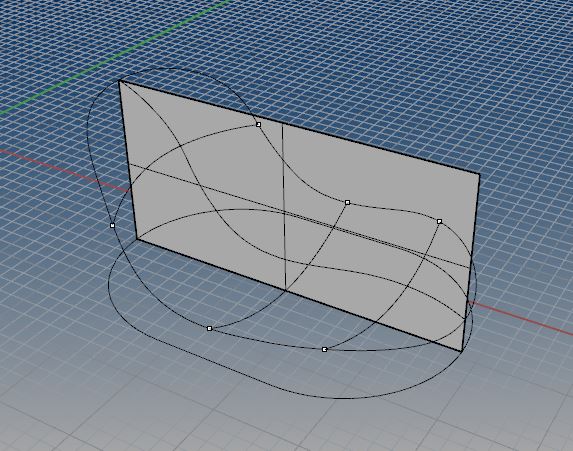 |
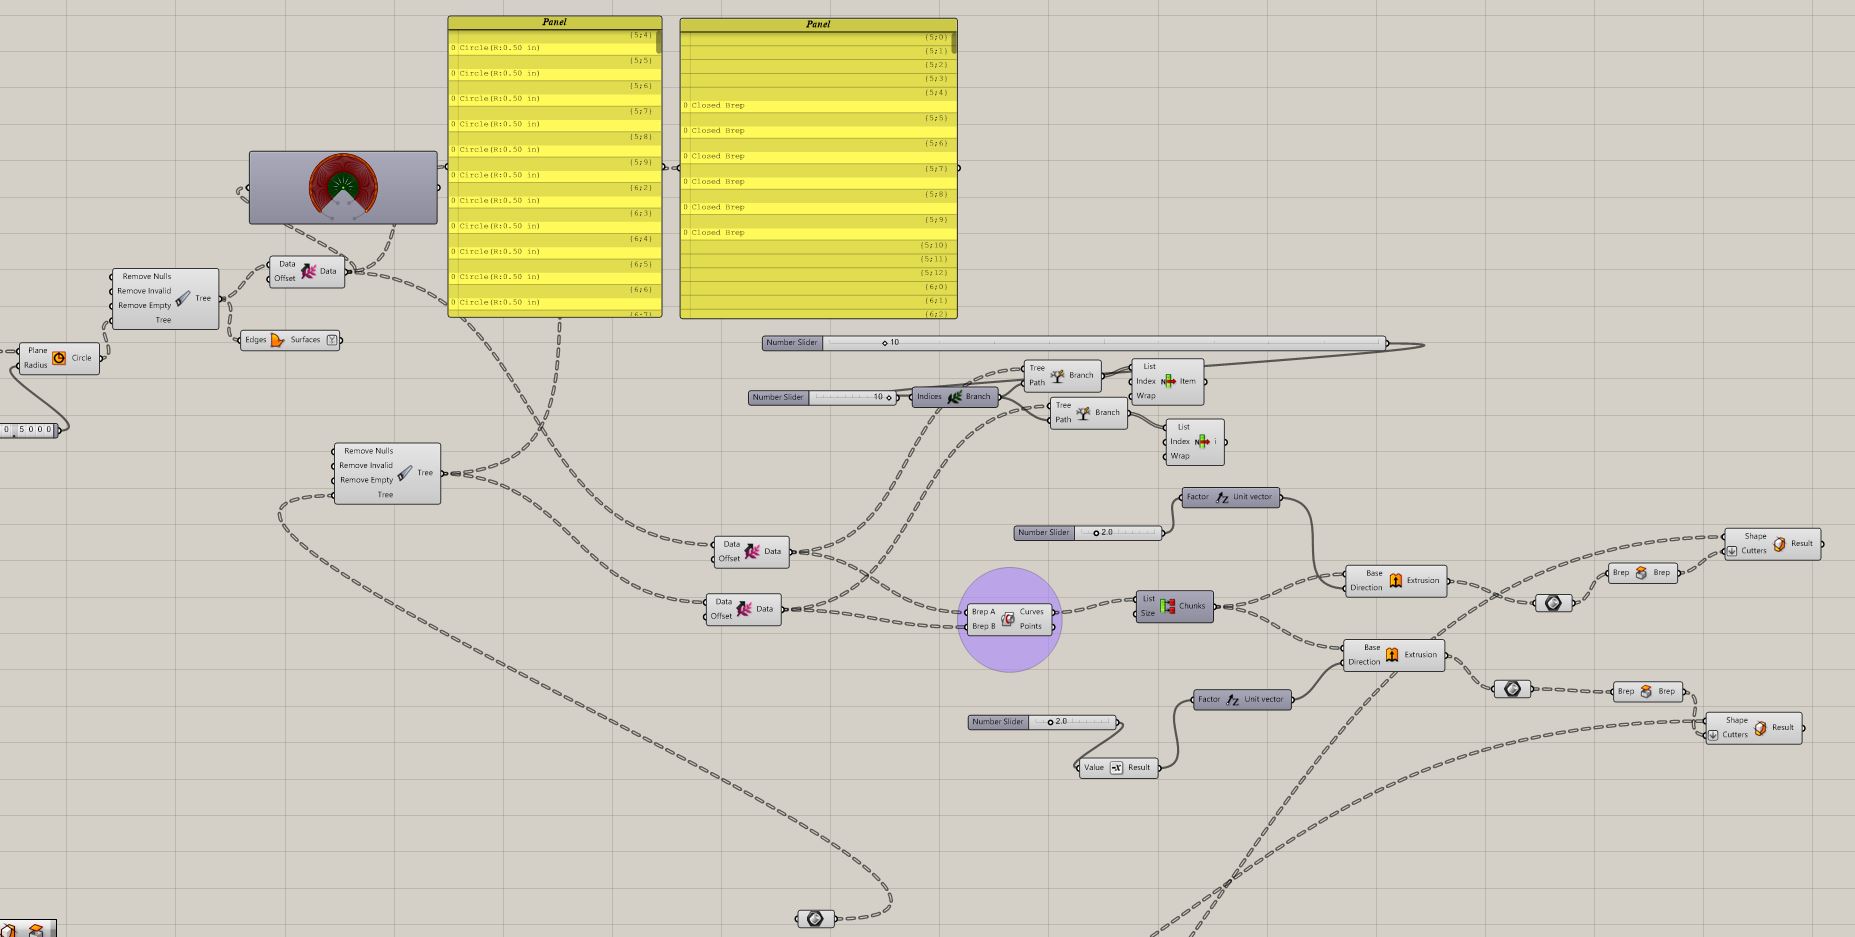
2). Then I used grasshopper to make components. I tried different ways to divide the surface into assembling pieces. At first I extracted the UV curves on the surface and wrote a grasshopper definition to transform them into solids. Then I got stuck because some of the components were 3D spatial surface and I could not figure out how to project them into a 2D board. I tried weaverbird to adjust the components but I failed.
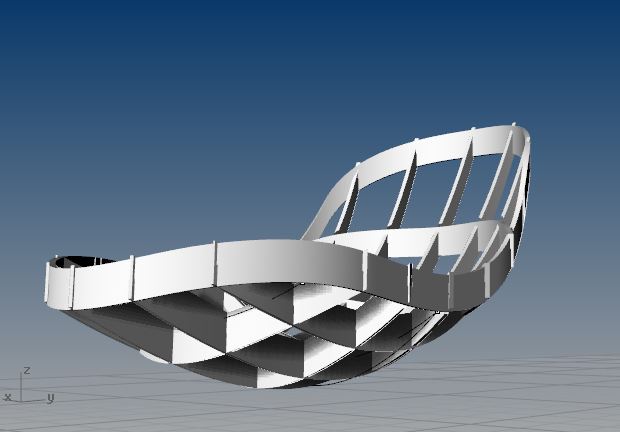 |
Then I tried another way. I projected a grid into my curve surface. Then I used grasshopper to make the solids and the assembling joints. For curves, to make the press-in joints by calculating difference is not accurate. The more accurate steps: calculating differences; finding the central points of the differences; Creating the cross section according to the position of the central points; Extruding the cross section and use Boolean calculation. Also, taking the stability and weight capacity into consideration, the distance between the horizontal components and vertical components were adjusted into 2" and 1.5".
 |
 |
3). Making the toolpath. At this stage, I took the tolerance of the machine into consideration. According to the demo Justin showed us, the tolerance of MasterCam is 0.1"-0.2". So I made several versions of toolpath, the size of the joint ranging from 0.47" to 0.5".
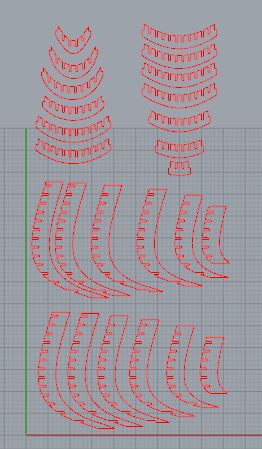 |
Another important thing is the drill points. If we only run the machine once, the corners will be left and will cause difficulties when assembling. Thus we need tree rounds: the first round for dill points, the second one for the path, and the last one for cleaning the corner.
 |
Setting in the MasterCam
The 3DS file for MasterCam needs careful setting. The process is relatively complicated and includes 3 steps:
- Add drill points.
- Set offset. (We do not want the drill to run inside our designed geometries.)
- Check compensation directions with the file. Also, after setting, in MasterCam we can preview the process of machining. Thanks to our TA Max and Calvin!
Machining
After warming the machine up, I started the machining! Once setting up, the process of machining was relatively fast because the machine can change the drills automatically. One important note: unlike laser cutting in which we can make marks, in MasterCam it is tricky to make scores. My way was to write the serial numbers directly on the components after machining.
 |
Assembling!
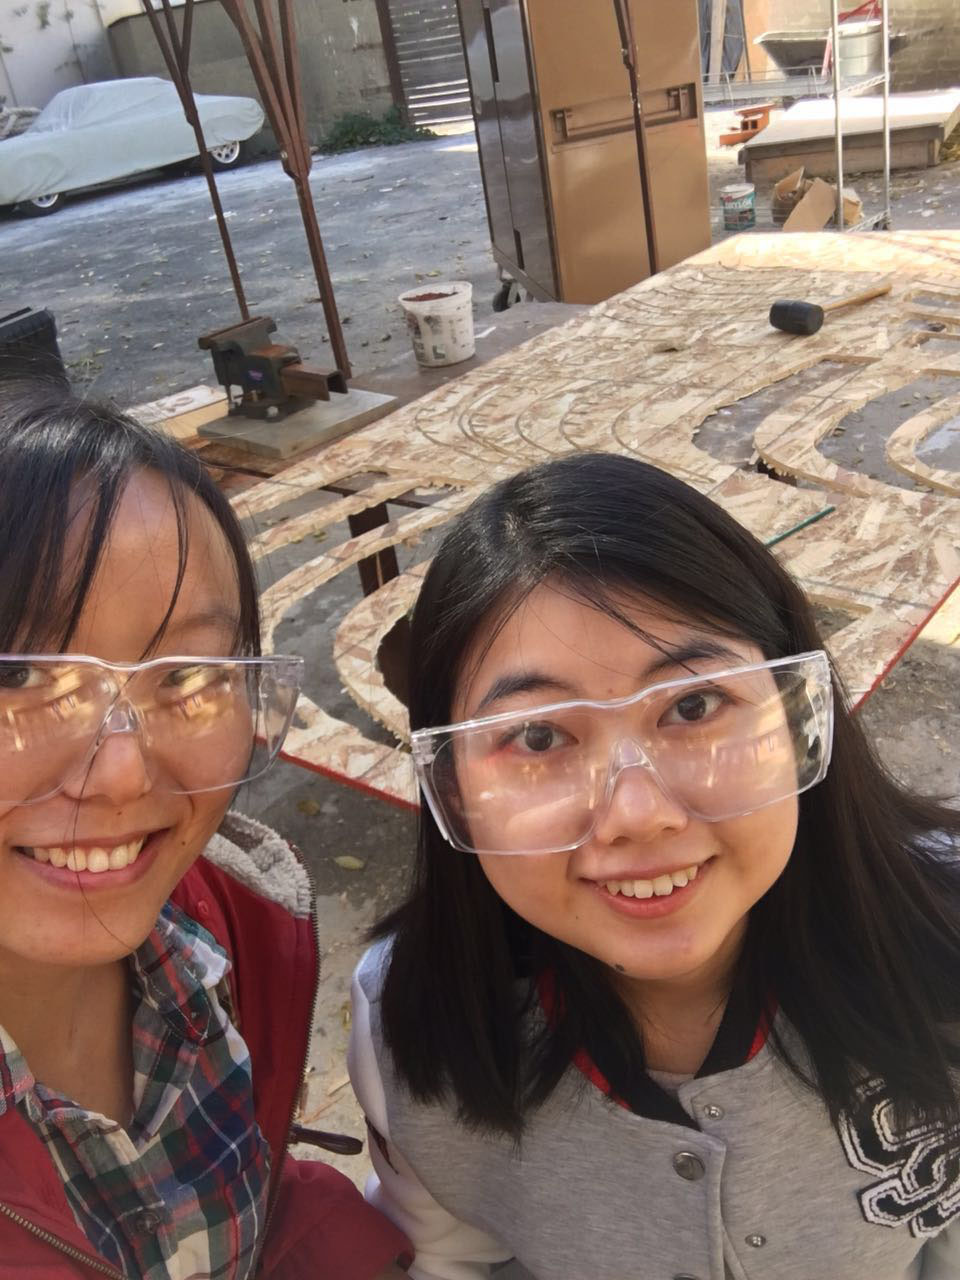
To assemble this alone is hard. Thanks to Qinzi who spent nearly the whole afternoon helping me with that! When assembling, I got difficulties and spent a lot of time in two parts:
1). Removing the components from the board required strength! I had 25 pieces and removing them took me a lot of time. The drill was helpful, also I used sand papers to polish them.
 |
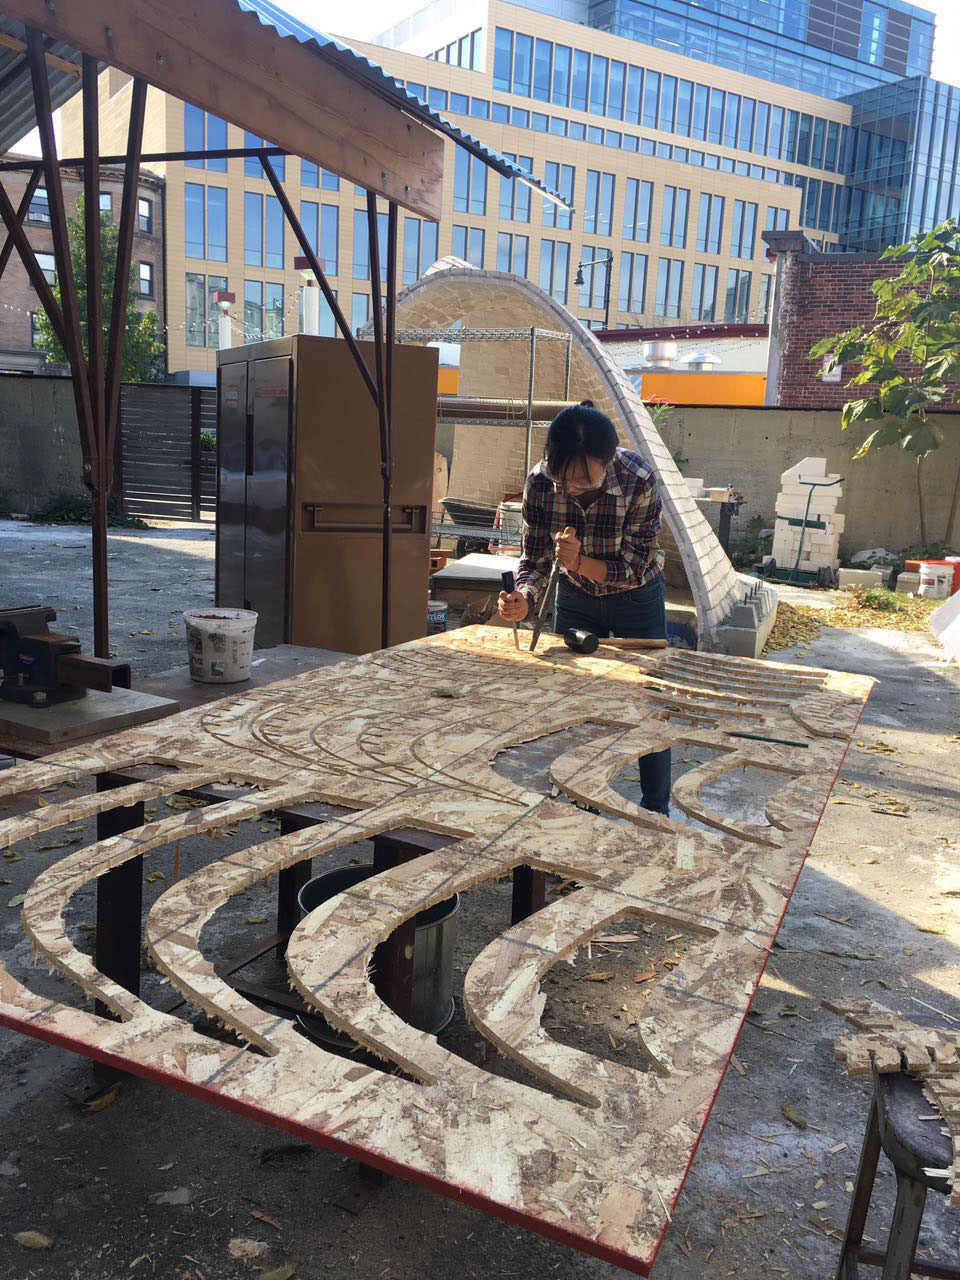 |
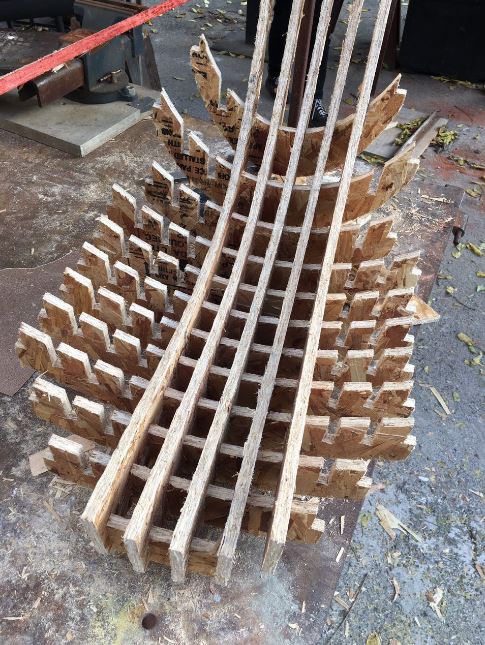
2). The most difficult part is to assemble the vertical components. The friction was much more higher than I expected. Since finally I used the size of 0.47", the grooves were tight. And also due to my design, I need to press a component in 12 grooves simultaneously. The friction was unbelievably high. We were frustrated and stuck by this problem for a long time, and finally we figured out and use hammers for strength transmission. It worked efficiently!
 |
Finally I got the lazy chair I designed. After I finished, I realized that it was more like the keel of a boat!
 |
 |
 |
Thanks again to Qinzi, whose focus is mechanical engineering and helps me figure out how to deal with the problems in assembling. She is also my first client in my lab.
 |
Design files:
Rhino design
Grasshopper definition
Rhino toolpath
Mastercam toolpath