Week 7 Embedded Programming
Our tasks this week are: 1. read a microcontroller data sheet
2. program your board to do something, with as many different programming languages
and programming environments as possible
and 3. experiment with other architectures
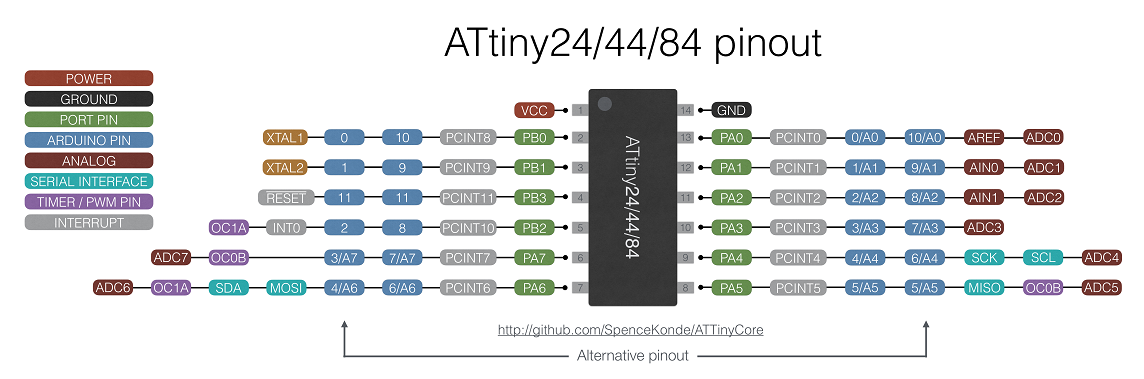
Data Sheet
There is a nice fundamental tutorial for beginners to start with before reading the data sheet (http://www.ladyada.net/learn/avr/index.html).Part of the Notes:
What is AVR?
- A family of microcontroller
- Modified Harvard architecture machine: program and data are stored in separate physical memory systems, but able to read data items from program memory with special instructions.
- Use on-chip flash memory for program storage
- Used in Arduino
ATtiny series
- 0.5 - 16 KB program memory
- 6 - 32 pin package
- Limited peripheral set
Expansion and Bit Manipulation
- T and T, True
- F and T, false
- T or F, true
- F and F, false
However, by the time I upload this blog, I did not finish reading the data sheet. It is so long and complex for me. I will keep figuring it out later since it is needed for realizing other more complicated functions for my final project, but this week after two days' reading I decided to jump to trying to use Arduino to get hands-on practice of programming the board first.
Board Testing
10-21 20:21Attempt to follow the tutorial (http://academy.kaziunas.com/tutorials/hello_echo_c.php) to test whether the board I made on week 5 is working. But when I linked everything in the shop and type either "sudo make -f hello.ftdi.44. echo.c.make program-usbtiny-fuses" or "sudo make -f hello.ftdi.44. echo.c.make program-usbtiny", the terminal will ask me for "fab key". Moreover, I was not able to type anything except for the enter key, and after three failures the command will be cancelled/ reset. Have no idea what's happening.
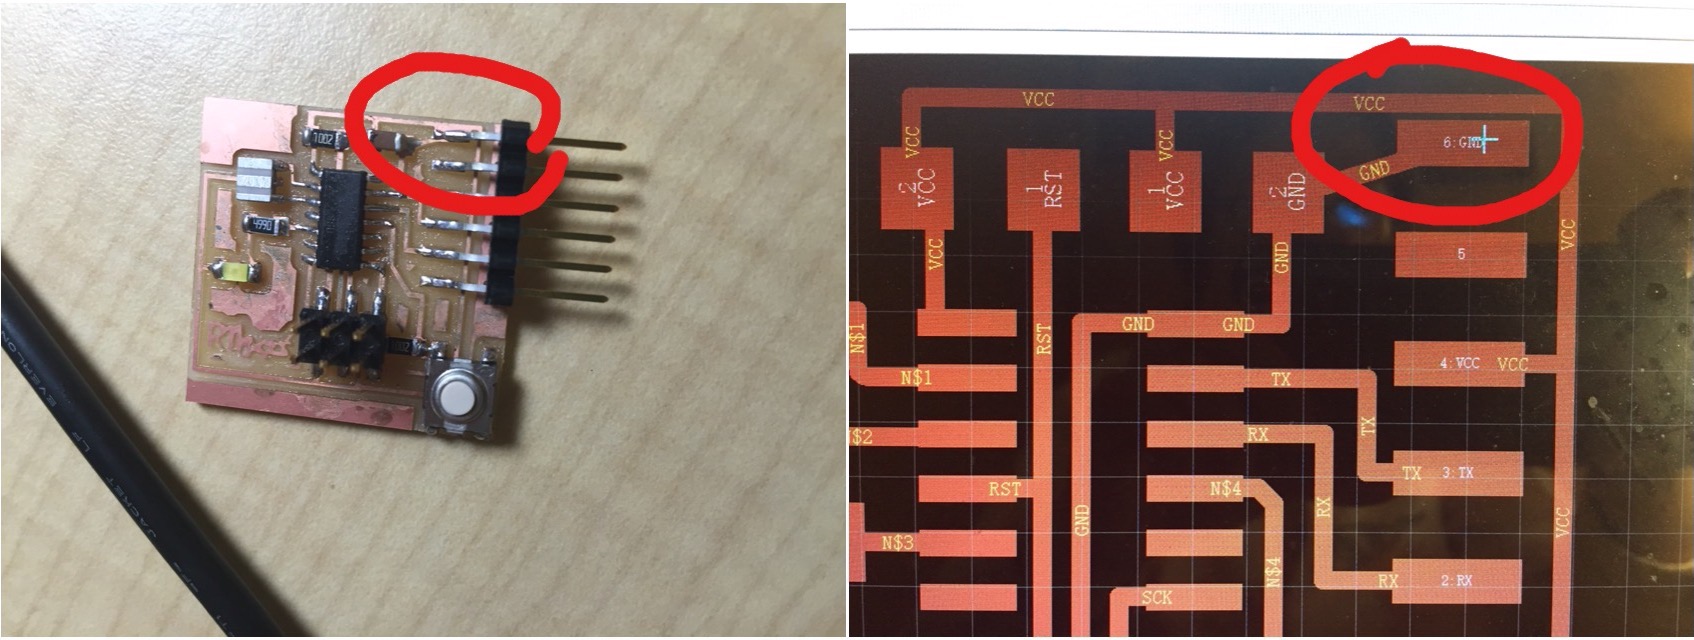 10-22 21:22 when looking at my board while reading/comparing with the datasheet, I just found out that the line link
to VCC was connected with the GND pin due to the little space I've left in the design… So I need to remake the board first. Sad.
10-22 21:22 when looking at my board while reading/comparing with the datasheet, I just found out that the line link
to VCC was connected with the GND pin due to the little space I've left in the design… So I need to remake the board first. Sad.
Second Board
 I redesigned the board to move the FTDI pins away from the VCC trace, linked it to the programmer and try upload the code.
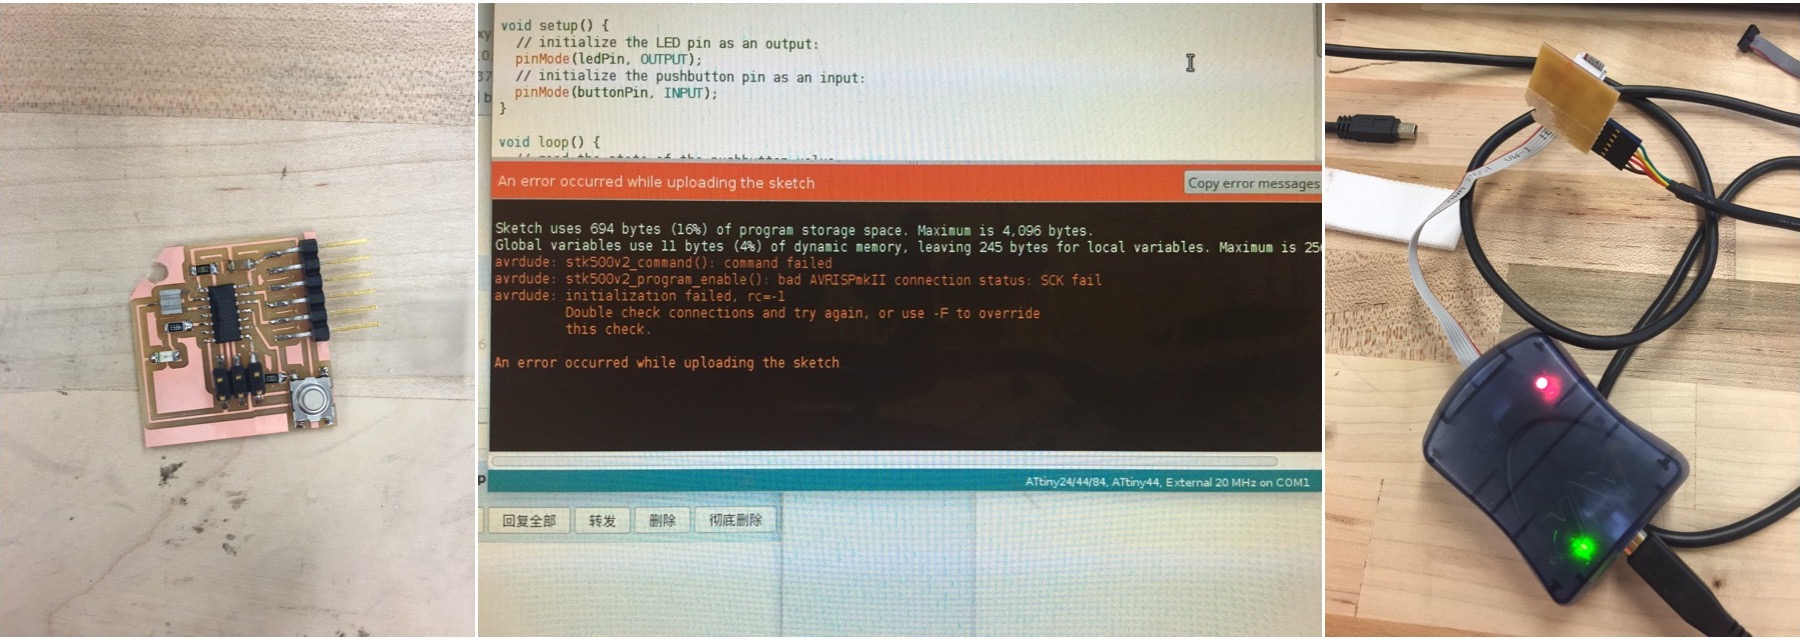
Still getting error:
I redesigned the board to move the FTDI pins away from the VCC trace, linked it to the programmer and try upload the code.
Still getting error:avrdude: stk500v2_command(): command failed
avrdude: stk500v2_program_enable(): bad AVRISPmkII connection status: SCK fail
avrdude: initialization failed, rc=-1
Double check connections and try again, or use -F to override this check.
I asked two TAs for help but none of them could tell what is wrong. We used multimeter to test the board and seems everything is
fine. Frustratedly, I know I cannot escape from making a new board and doing all these for the third time. One good thing is I am
pretty familiar with the modela now so everything works faster than before.
Third Board
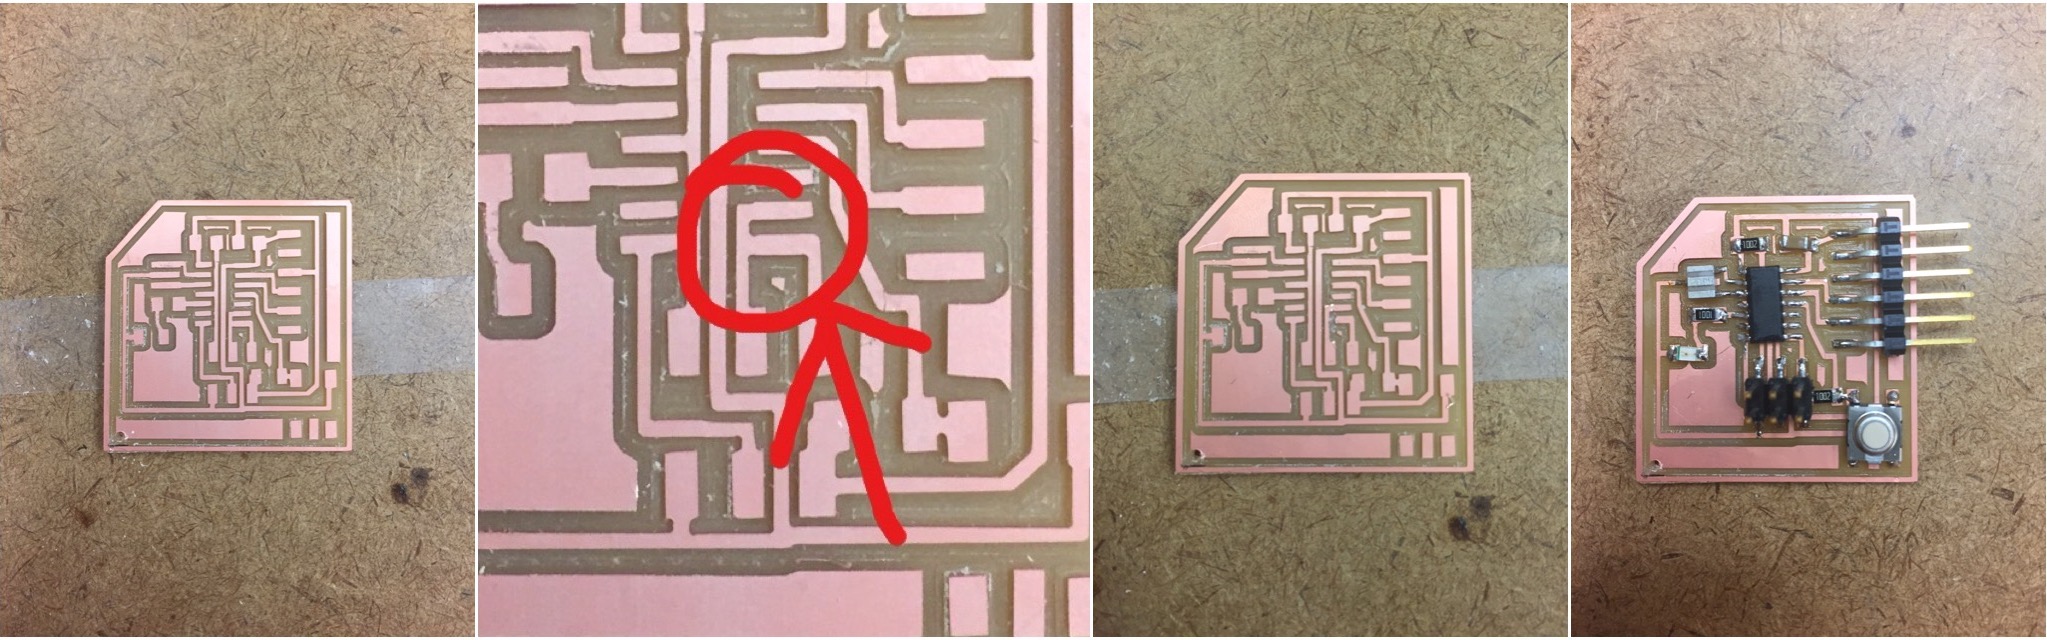 Problem found when I made the third board and check the trace before soldering.
This caused the shorts of SCK and MISO, it was not able to be detected while covered by the ATTiny chip.
Problem found when I made the third board and check the trace before soldering.
This caused the shorts of SCK and MISO, it was not able to be detected while covered by the ATTiny chip.Only until now has I realized the meaning of the error message I got in the first place: it already told me "SCK fail"! but I was not familiar with the chip and pins yet that is why I could not make effecient judgement and debugging at that time.
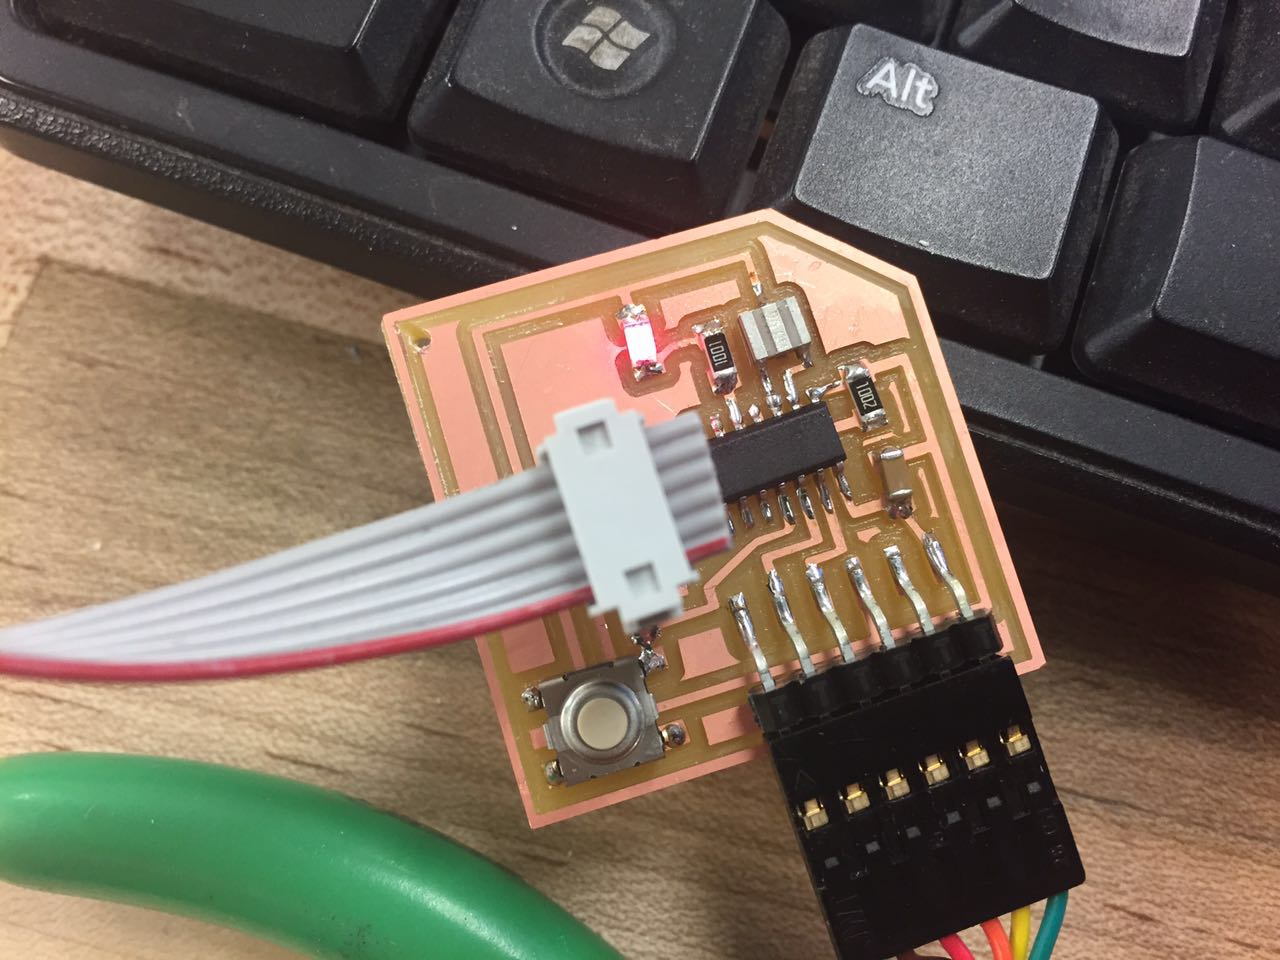
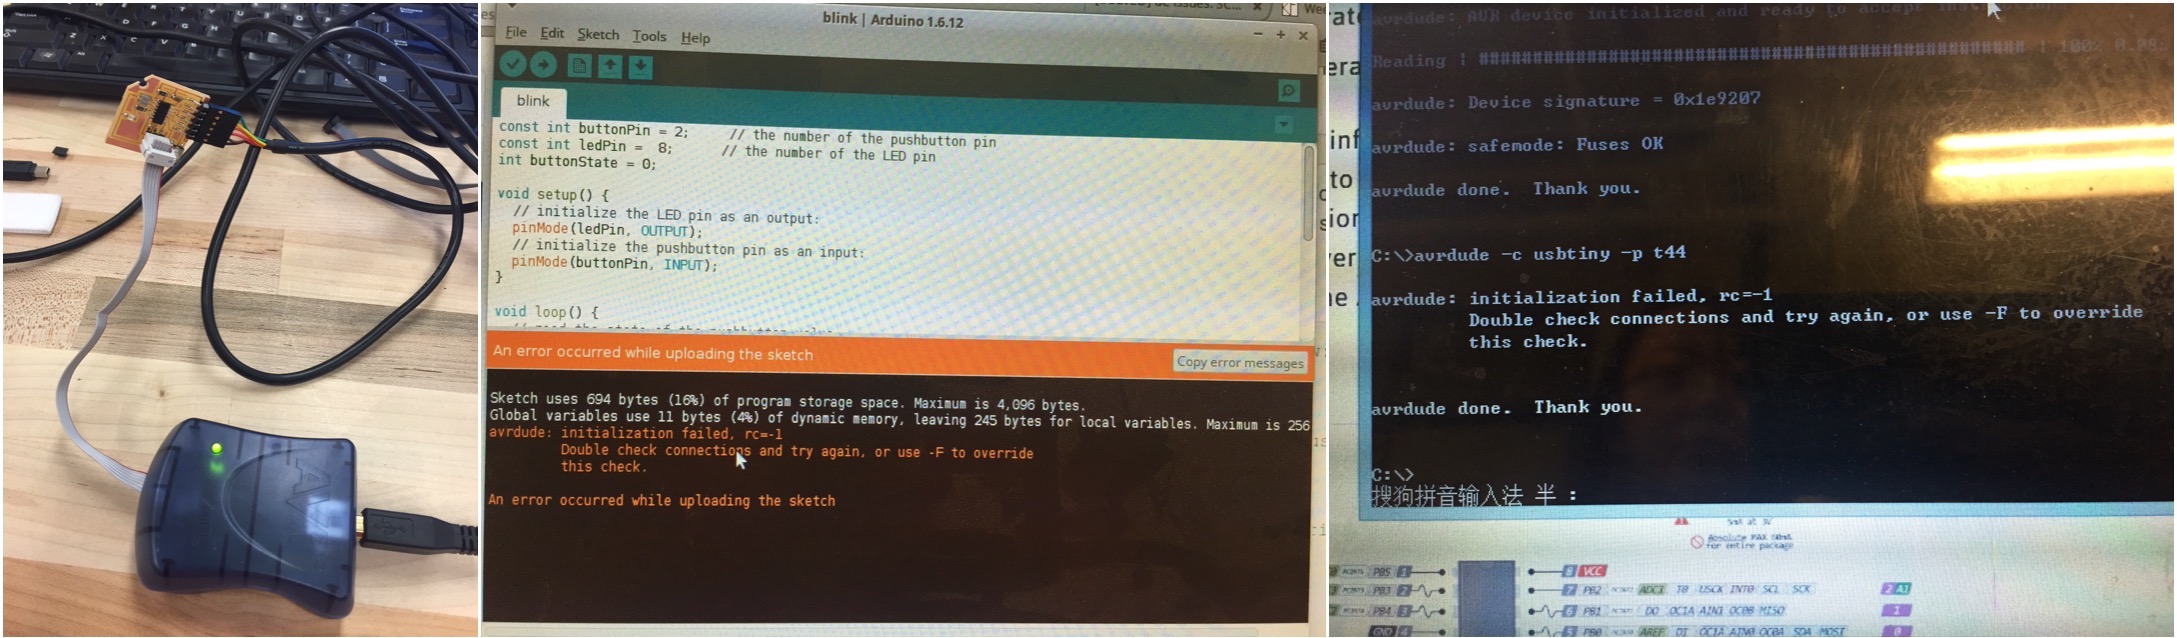
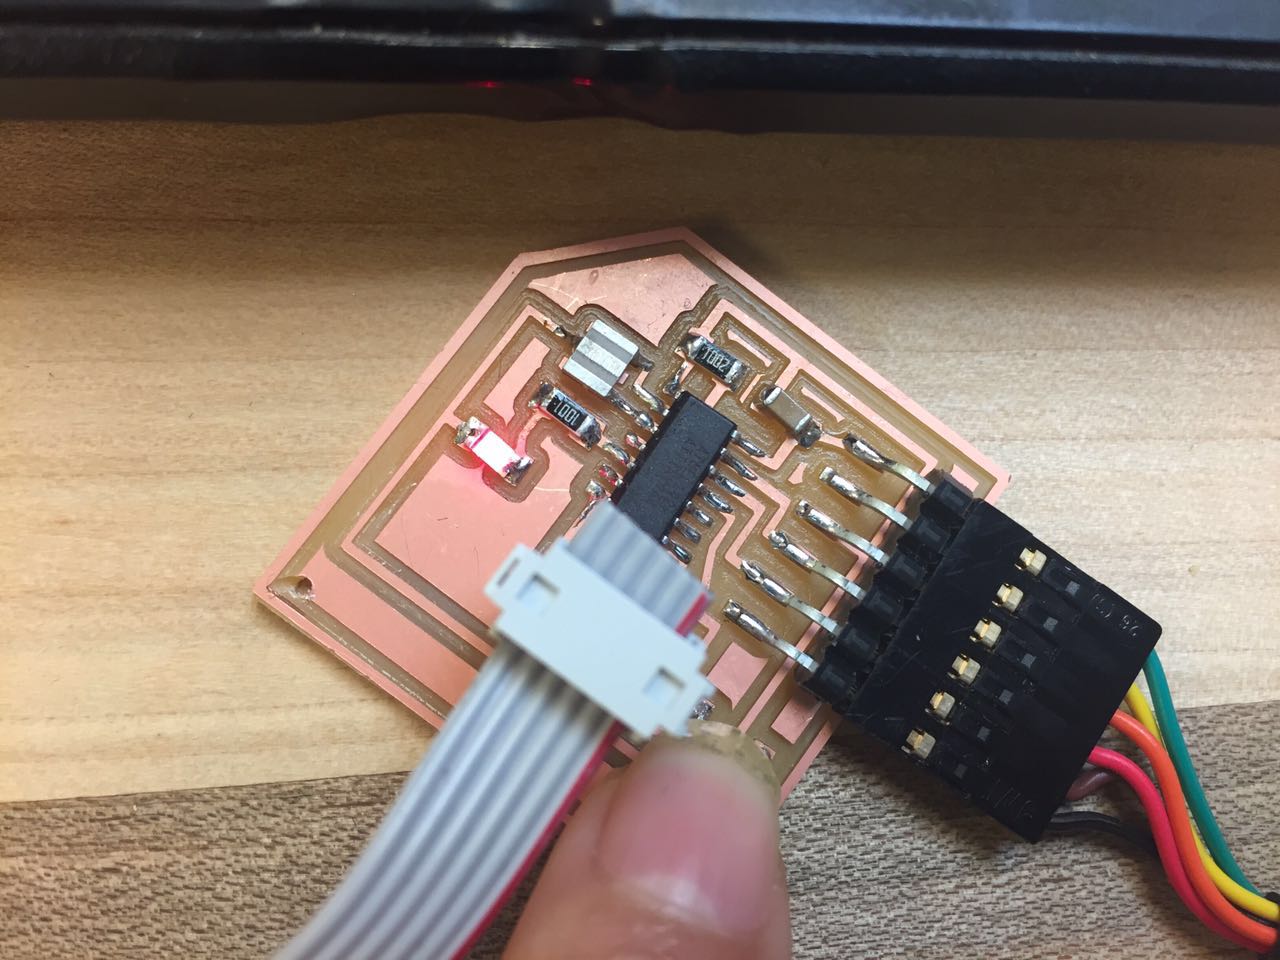 I cut the trace finished the board, uploaded the blink example in Arduino library,
finally it worked! Then tried the button, also worked! Yay!
I cut the trace finished the board, uploaded the blink example in Arduino library,
finally it worked! Then tried the button, also worked! Yay!
Trouble Shooting/Lesson Learned
DO NOT TRUST THE MILLING MACHINE! CHECK THE ROUTES CAREFULLY BEFORE CUTTING, AND CHECK THE CUTTED BOARD CAREFULLY BEFORE SOLDERING.Read the datasheet and try to understand and remember how the chip works. Error messages are valuable, only when you know what it is talking.