Step 1: Milling
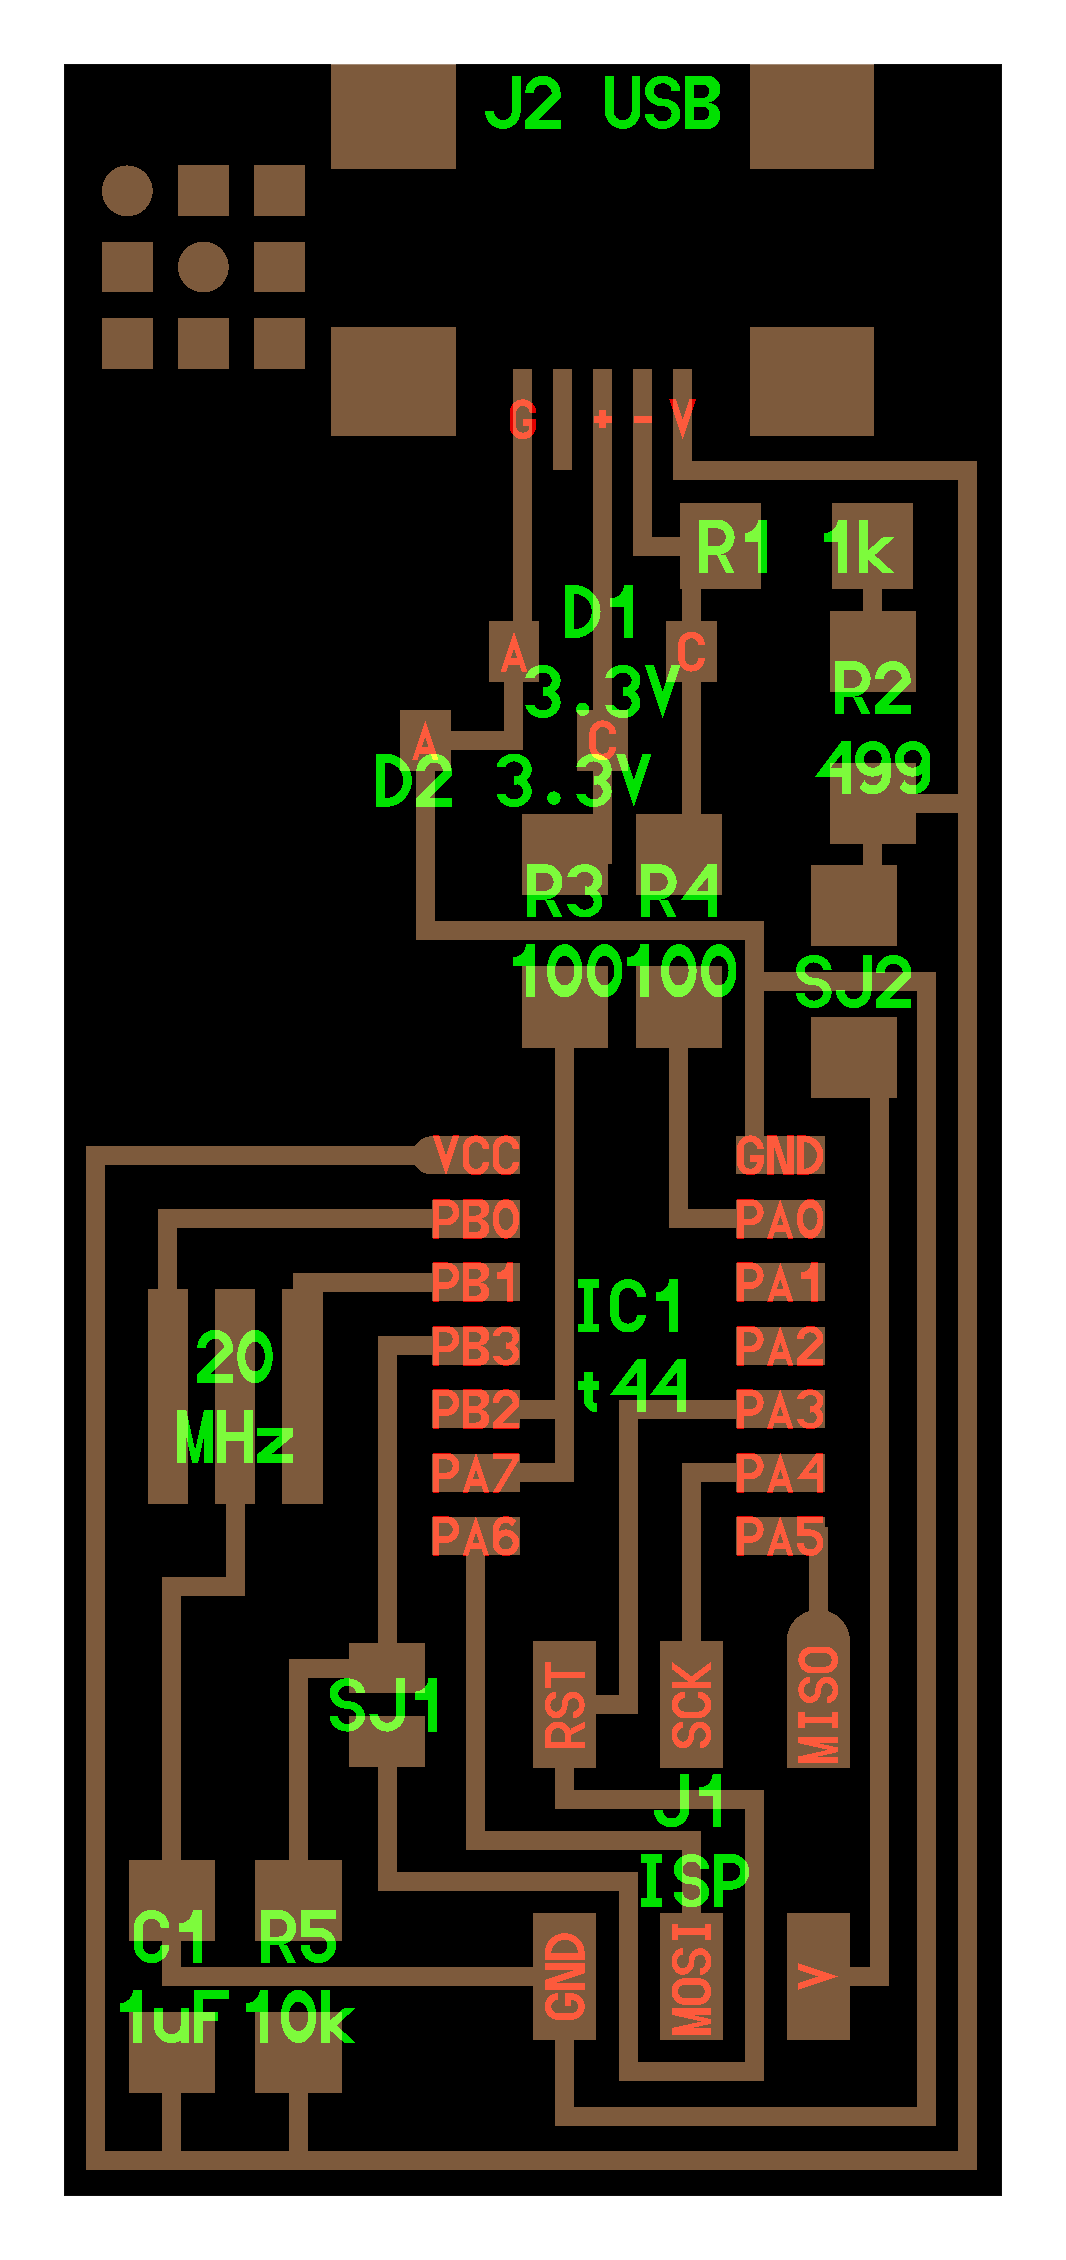

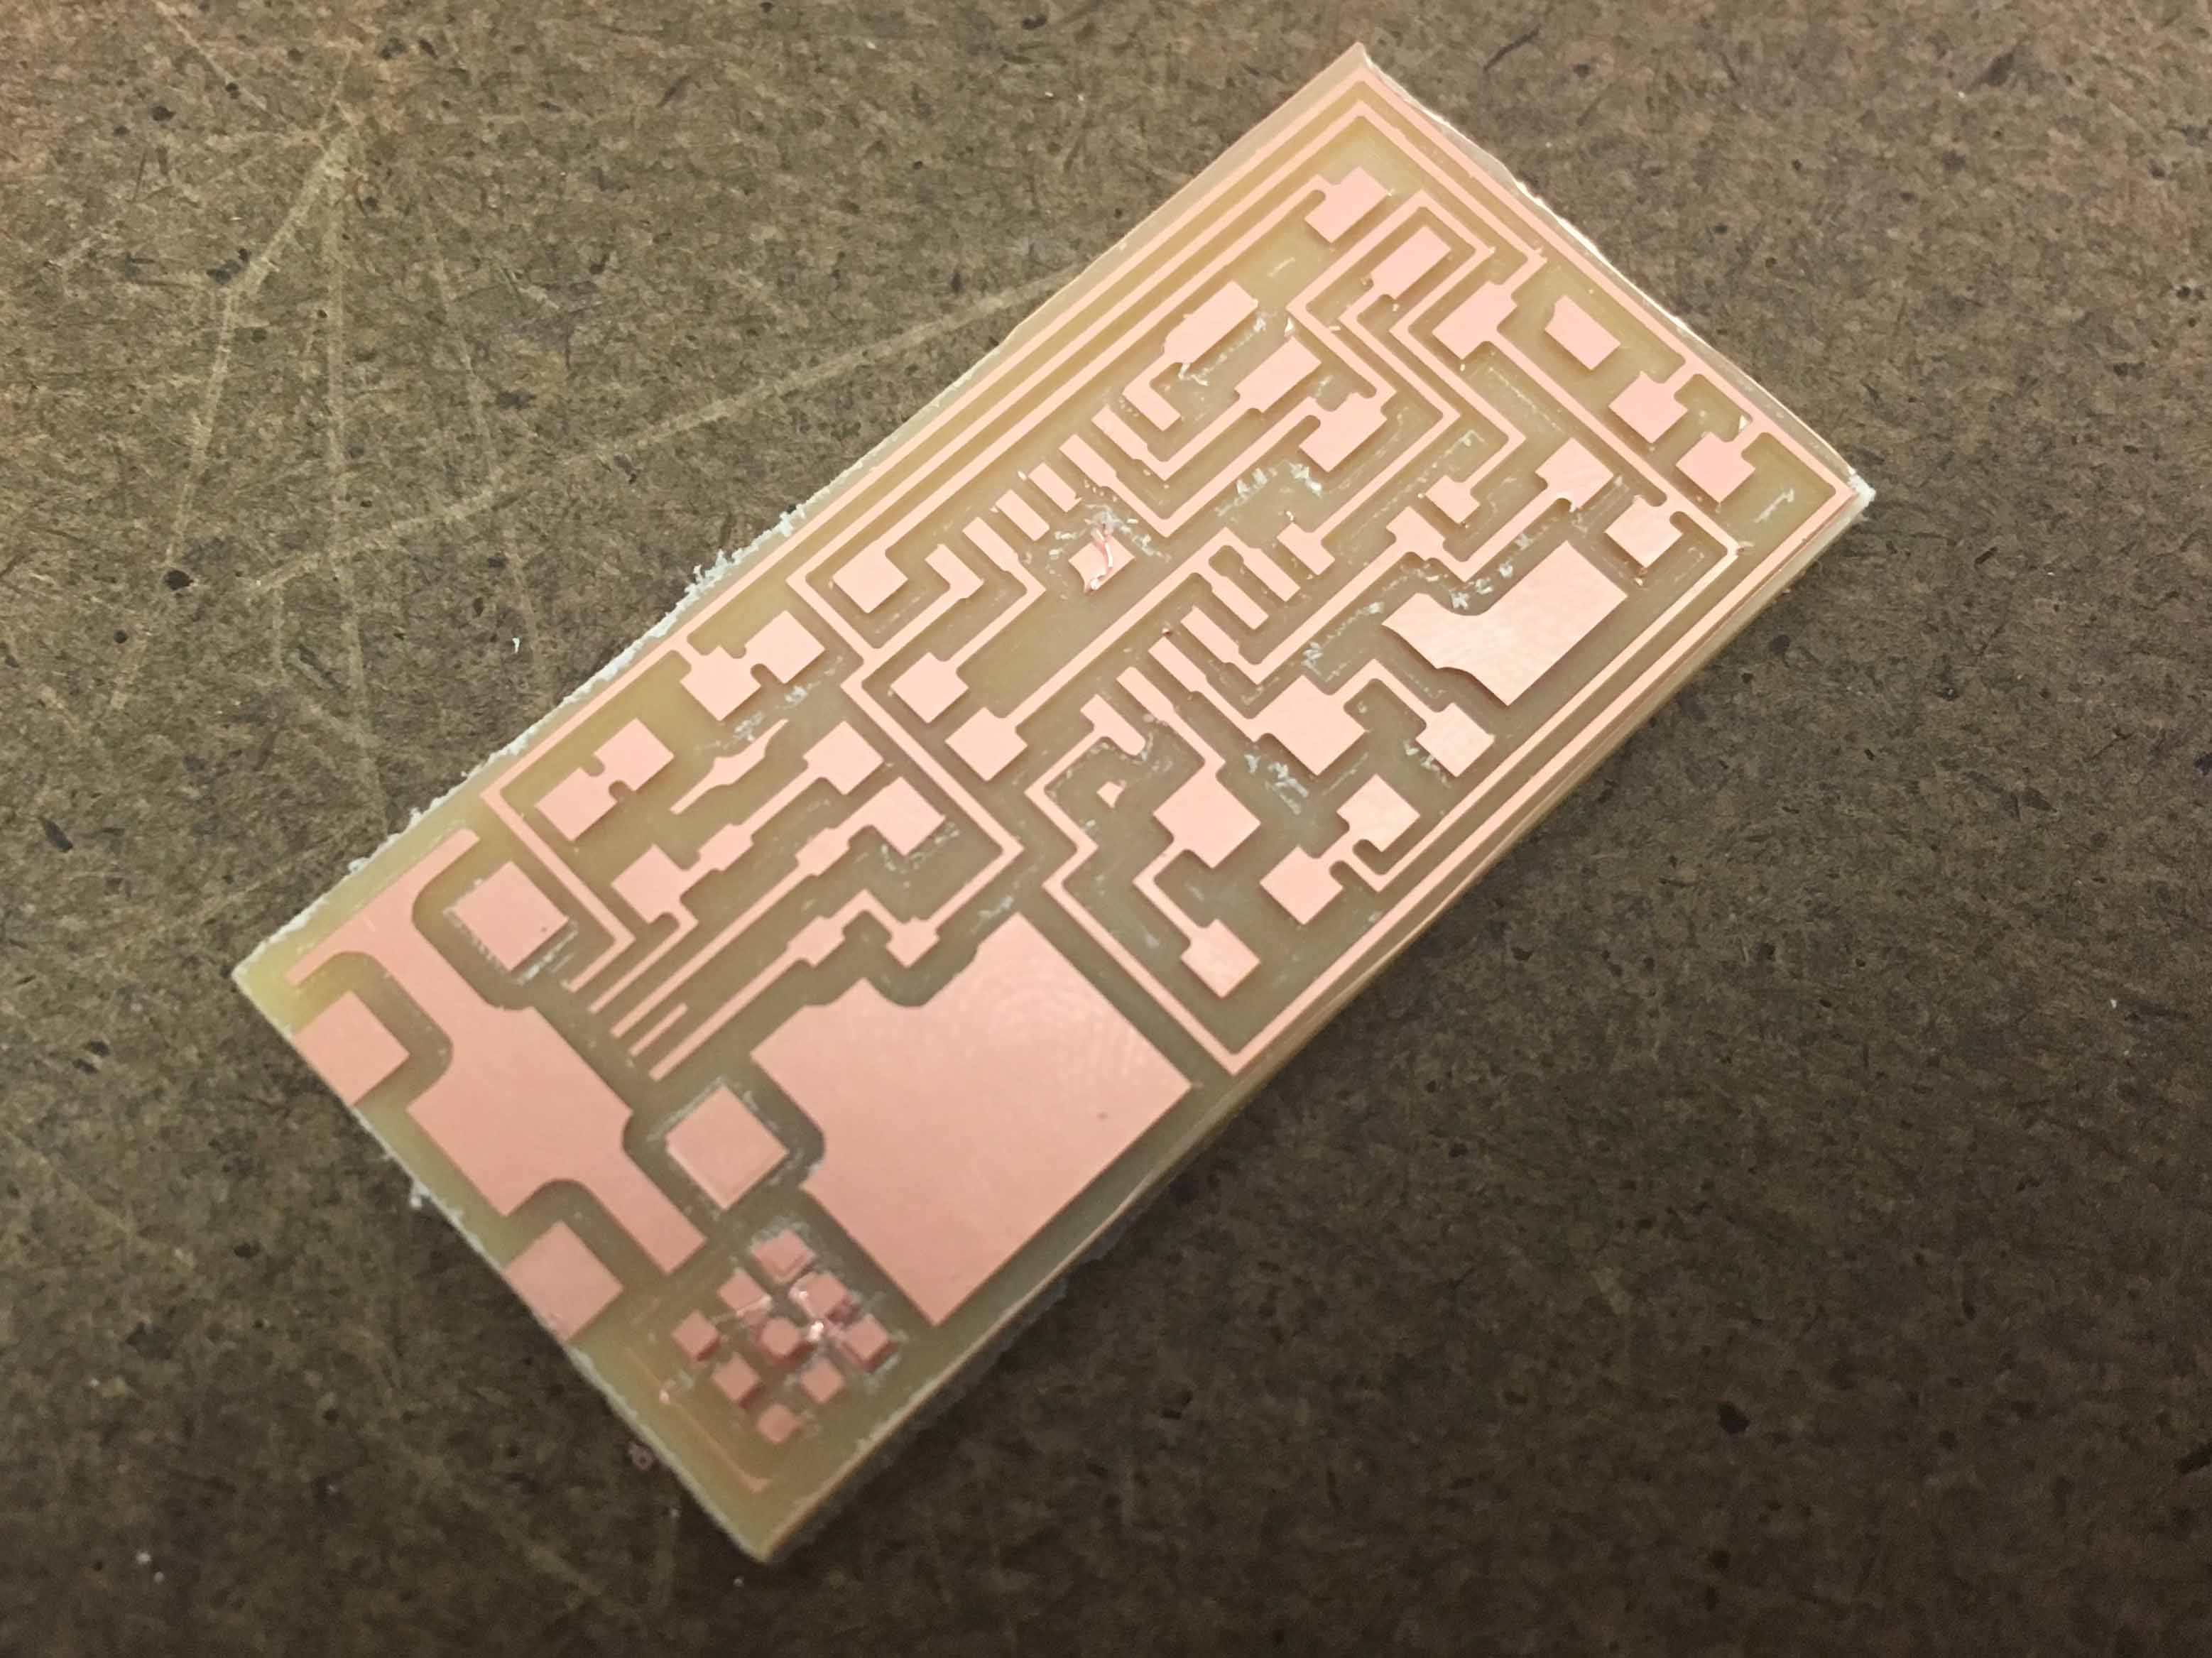
Those are the patterns of the PCB we are going to make this time
This is my first time to use PCB milling machine, different from the normal milling machine I used to use in my lab, it looks super tiny and cute! To mill the PCB, the first step is actually
1. Fix the board to the Modela(!!!It's super important and you will know why later!!!): It's very simple, just use the double side tape it on, and make sure the tape is not overlapping
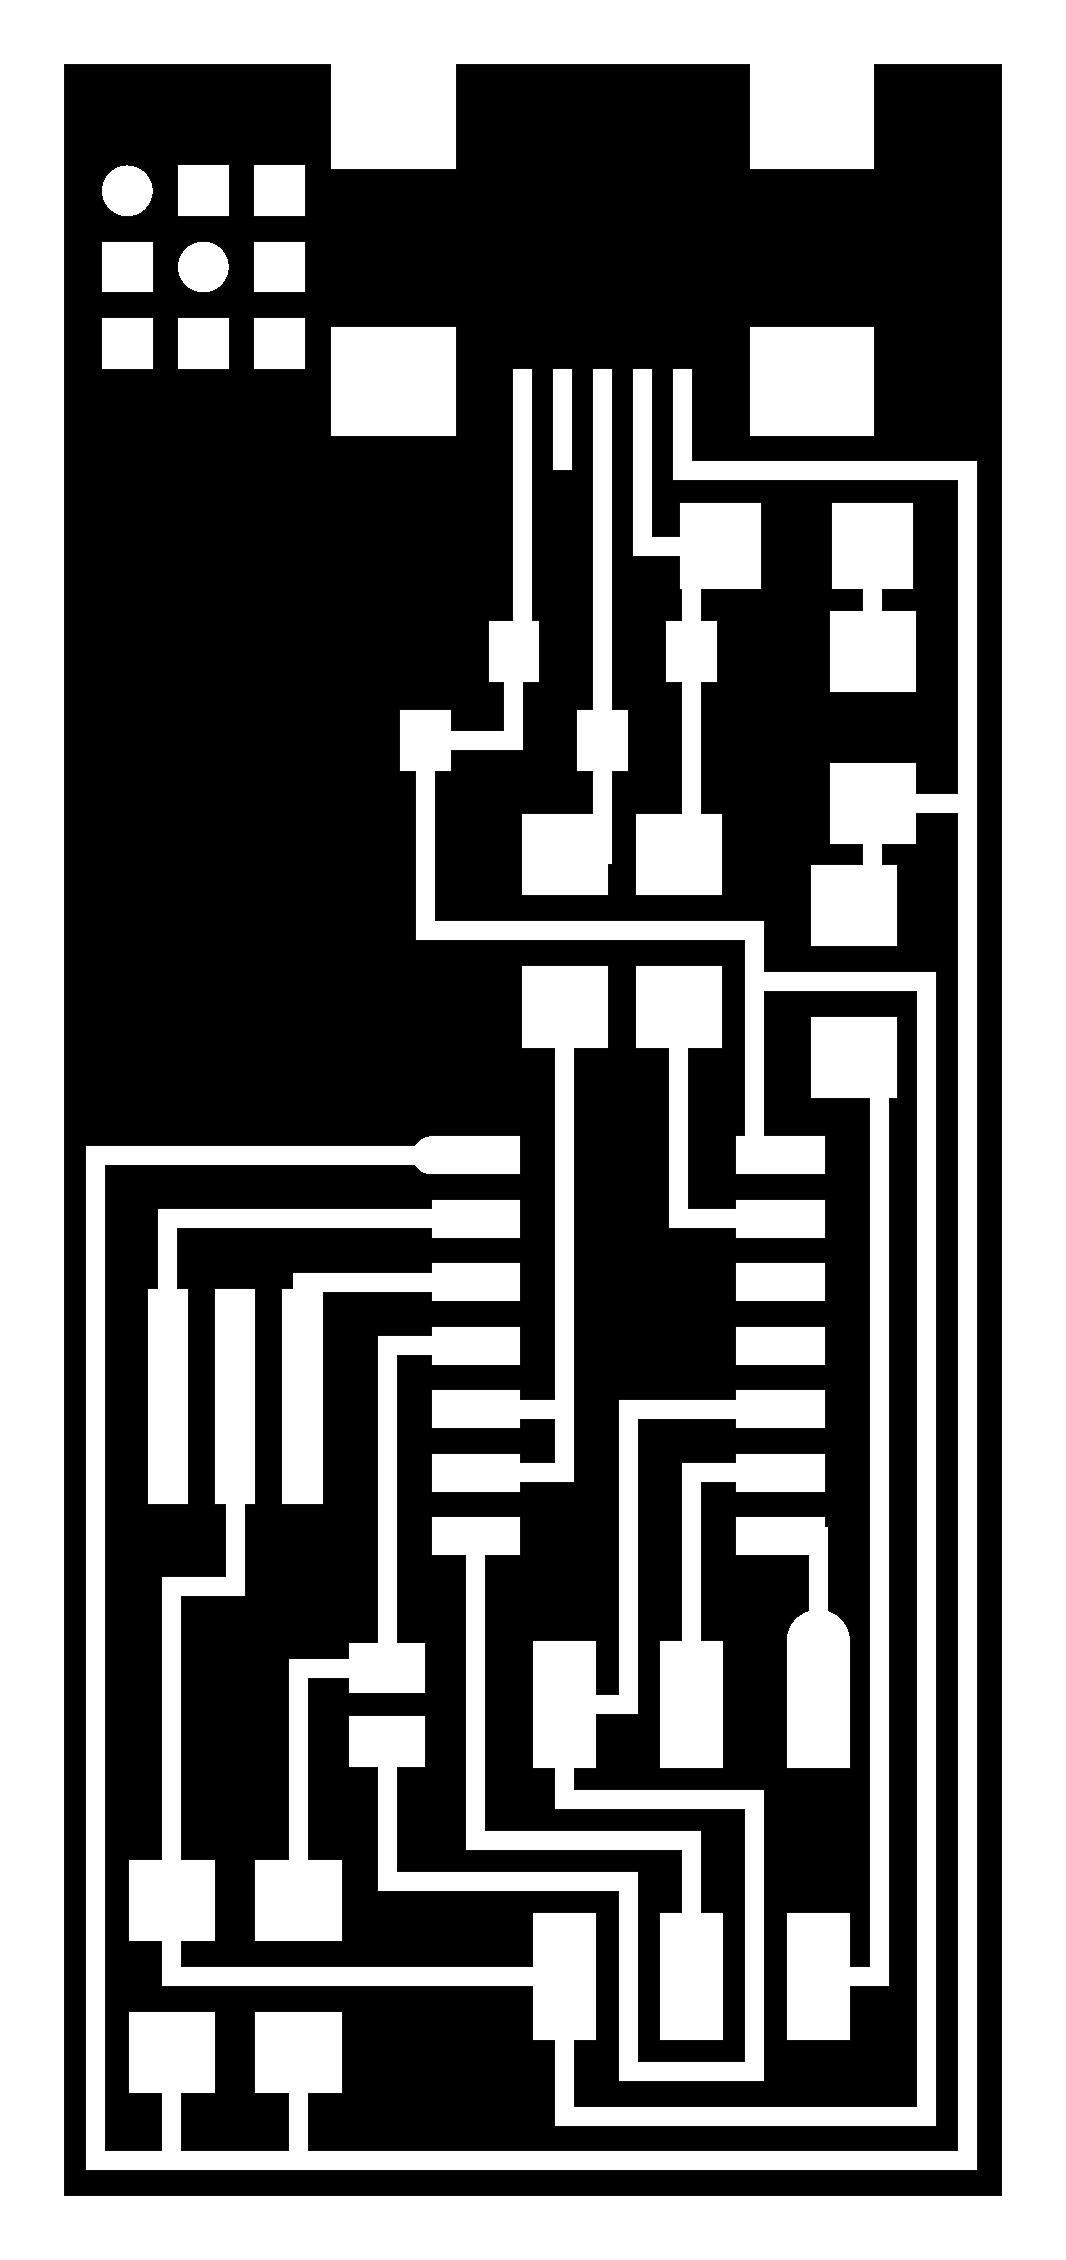
2. Generating files to send to the Modela: When cutting PCB, we should cut the trace first and then the board. **Remember to change the bits for different cutting. 1/64th endmill is for trace cutting and 1/32th endmill is for board outline.
***More detail tutorial are here***
However, altough it looks very simple when TA's tutoring. I still faced some problems and fixed them while milling my boards.
Learning 1. Did not tape the board tight
This was what happened when the board wasn't taped well on the machine. So when milling the outline, the board would come up too early that make the trace wrong.
Learning 2. If the surface isn't horizontal
While doing my second mill, I found that the bit is actually not cutting trought the metal without reasons. After using the level, my friend and I figured out that the surface of the machine was actually not horizontal. Since we were afraid of changing the setting of the machine. we just overlapped the double side tape and it succeed. :D
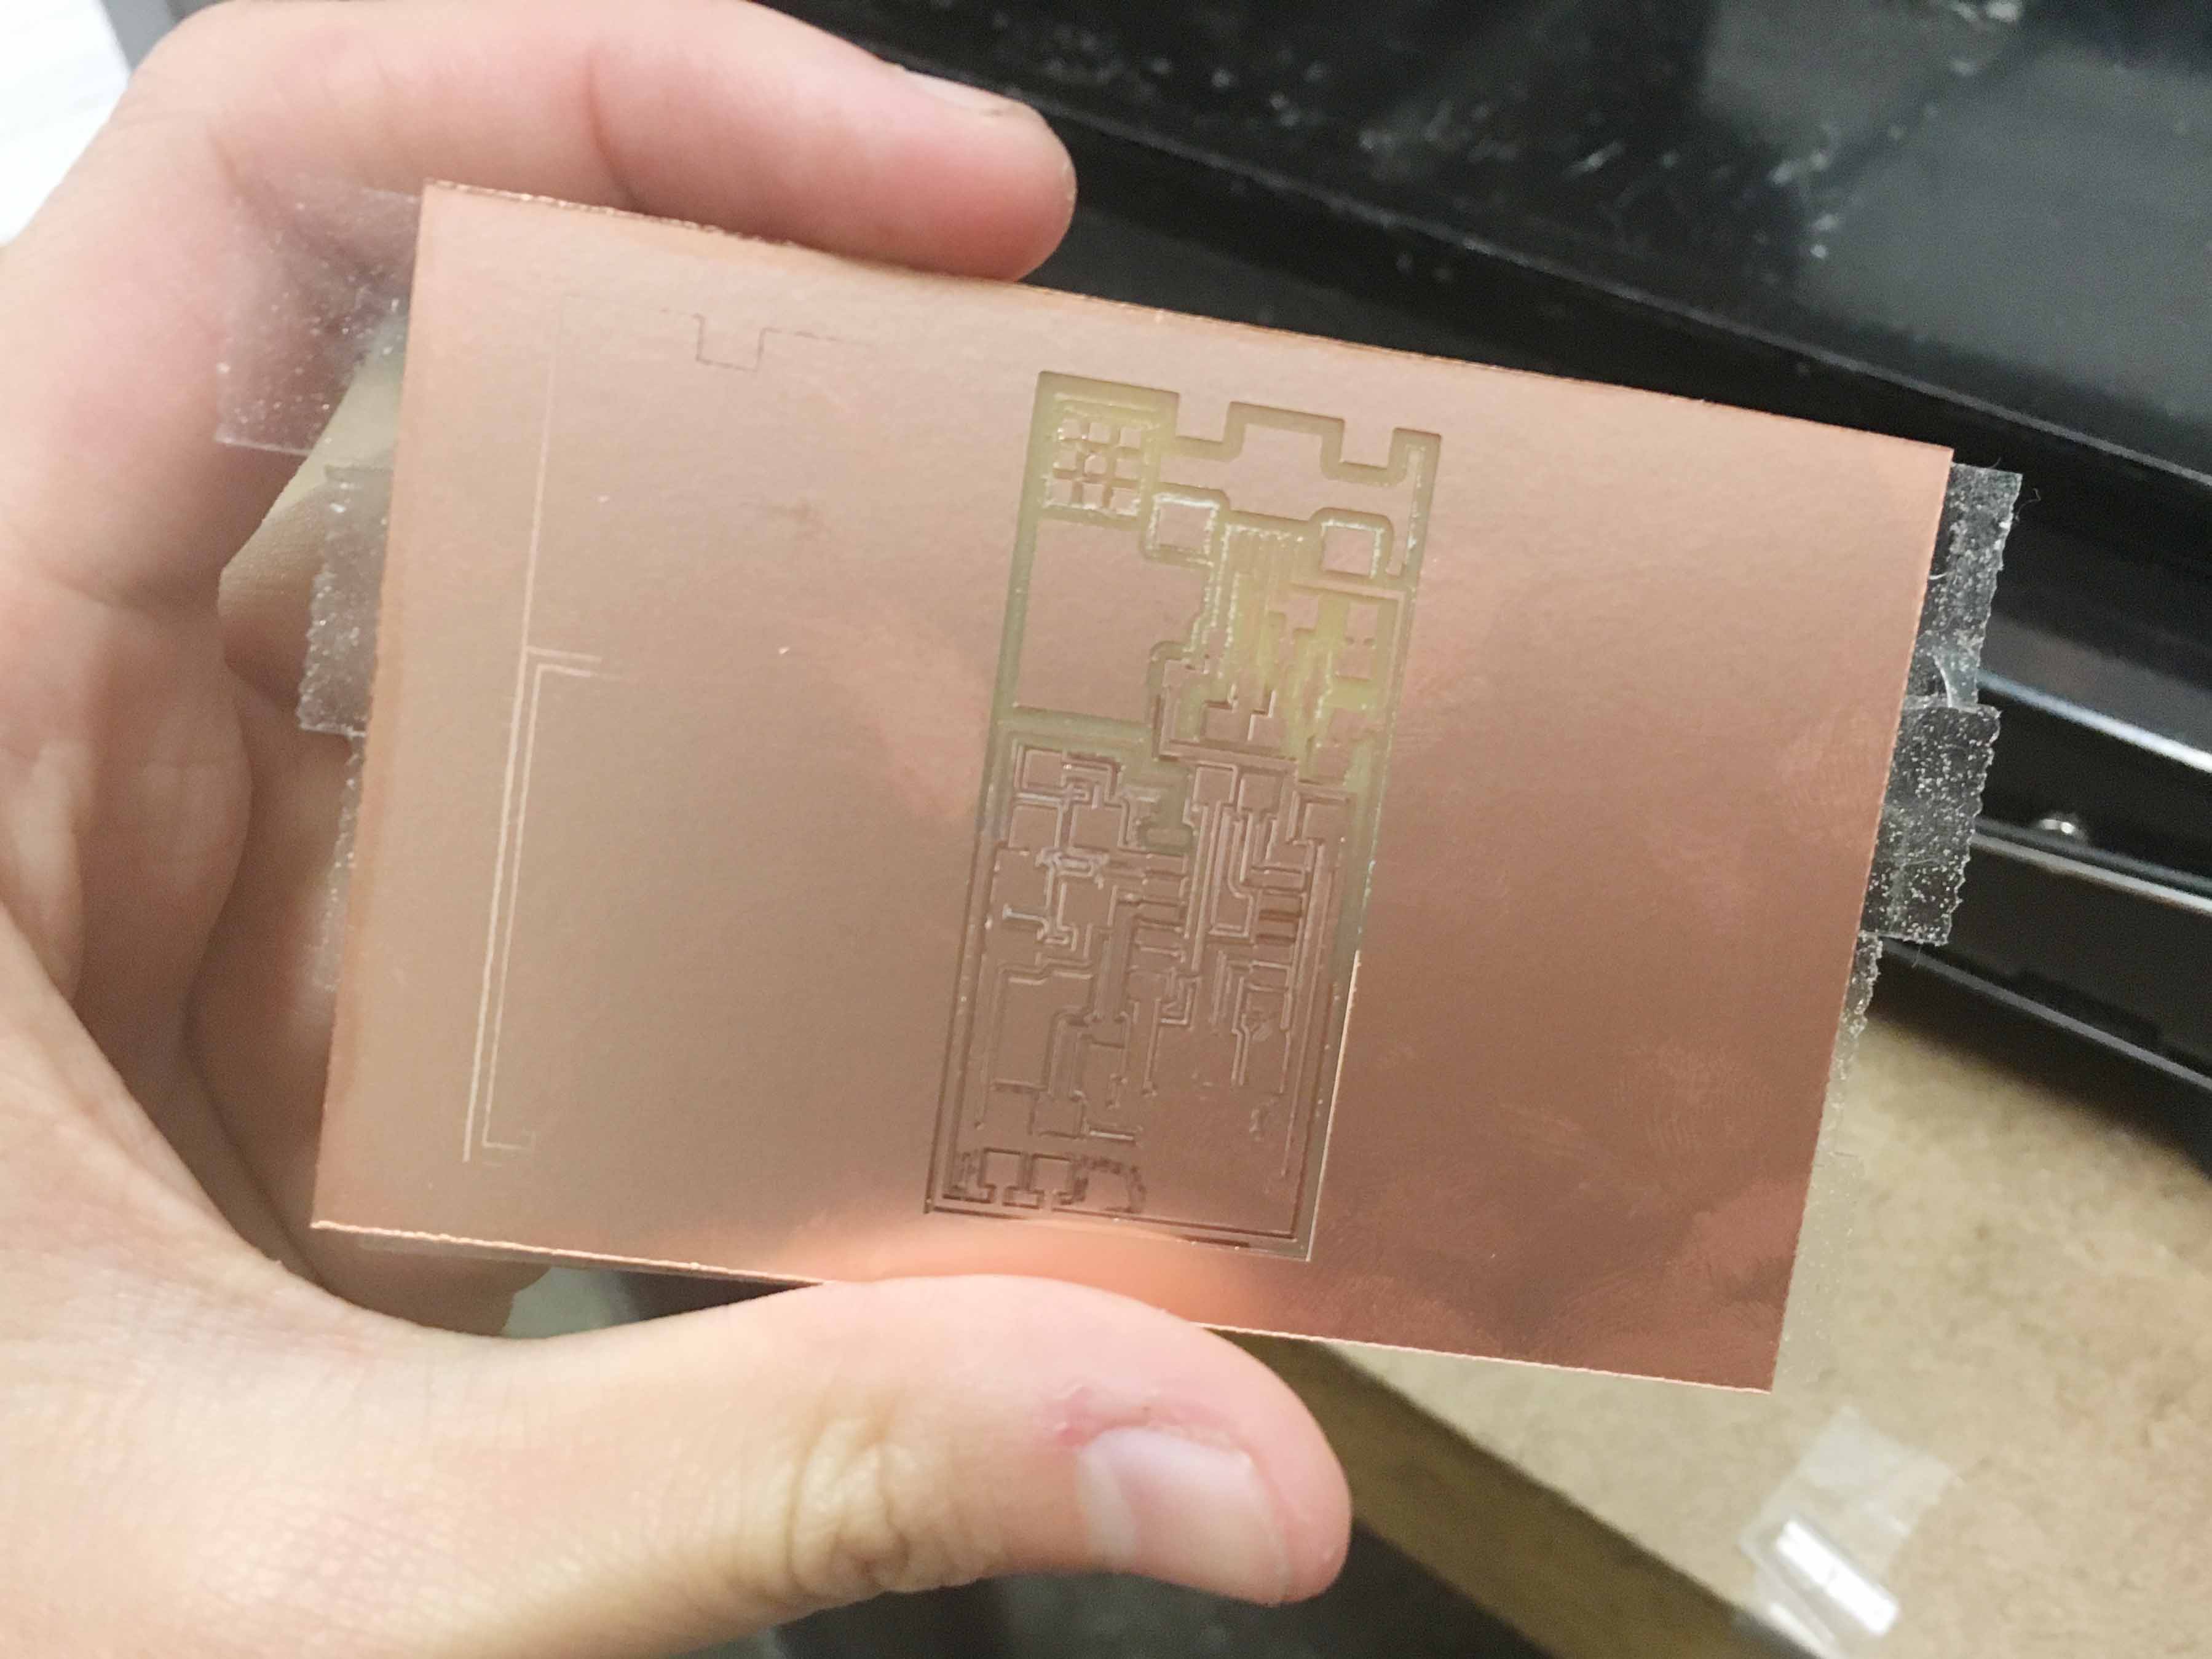
It's not cut through
Successful one!
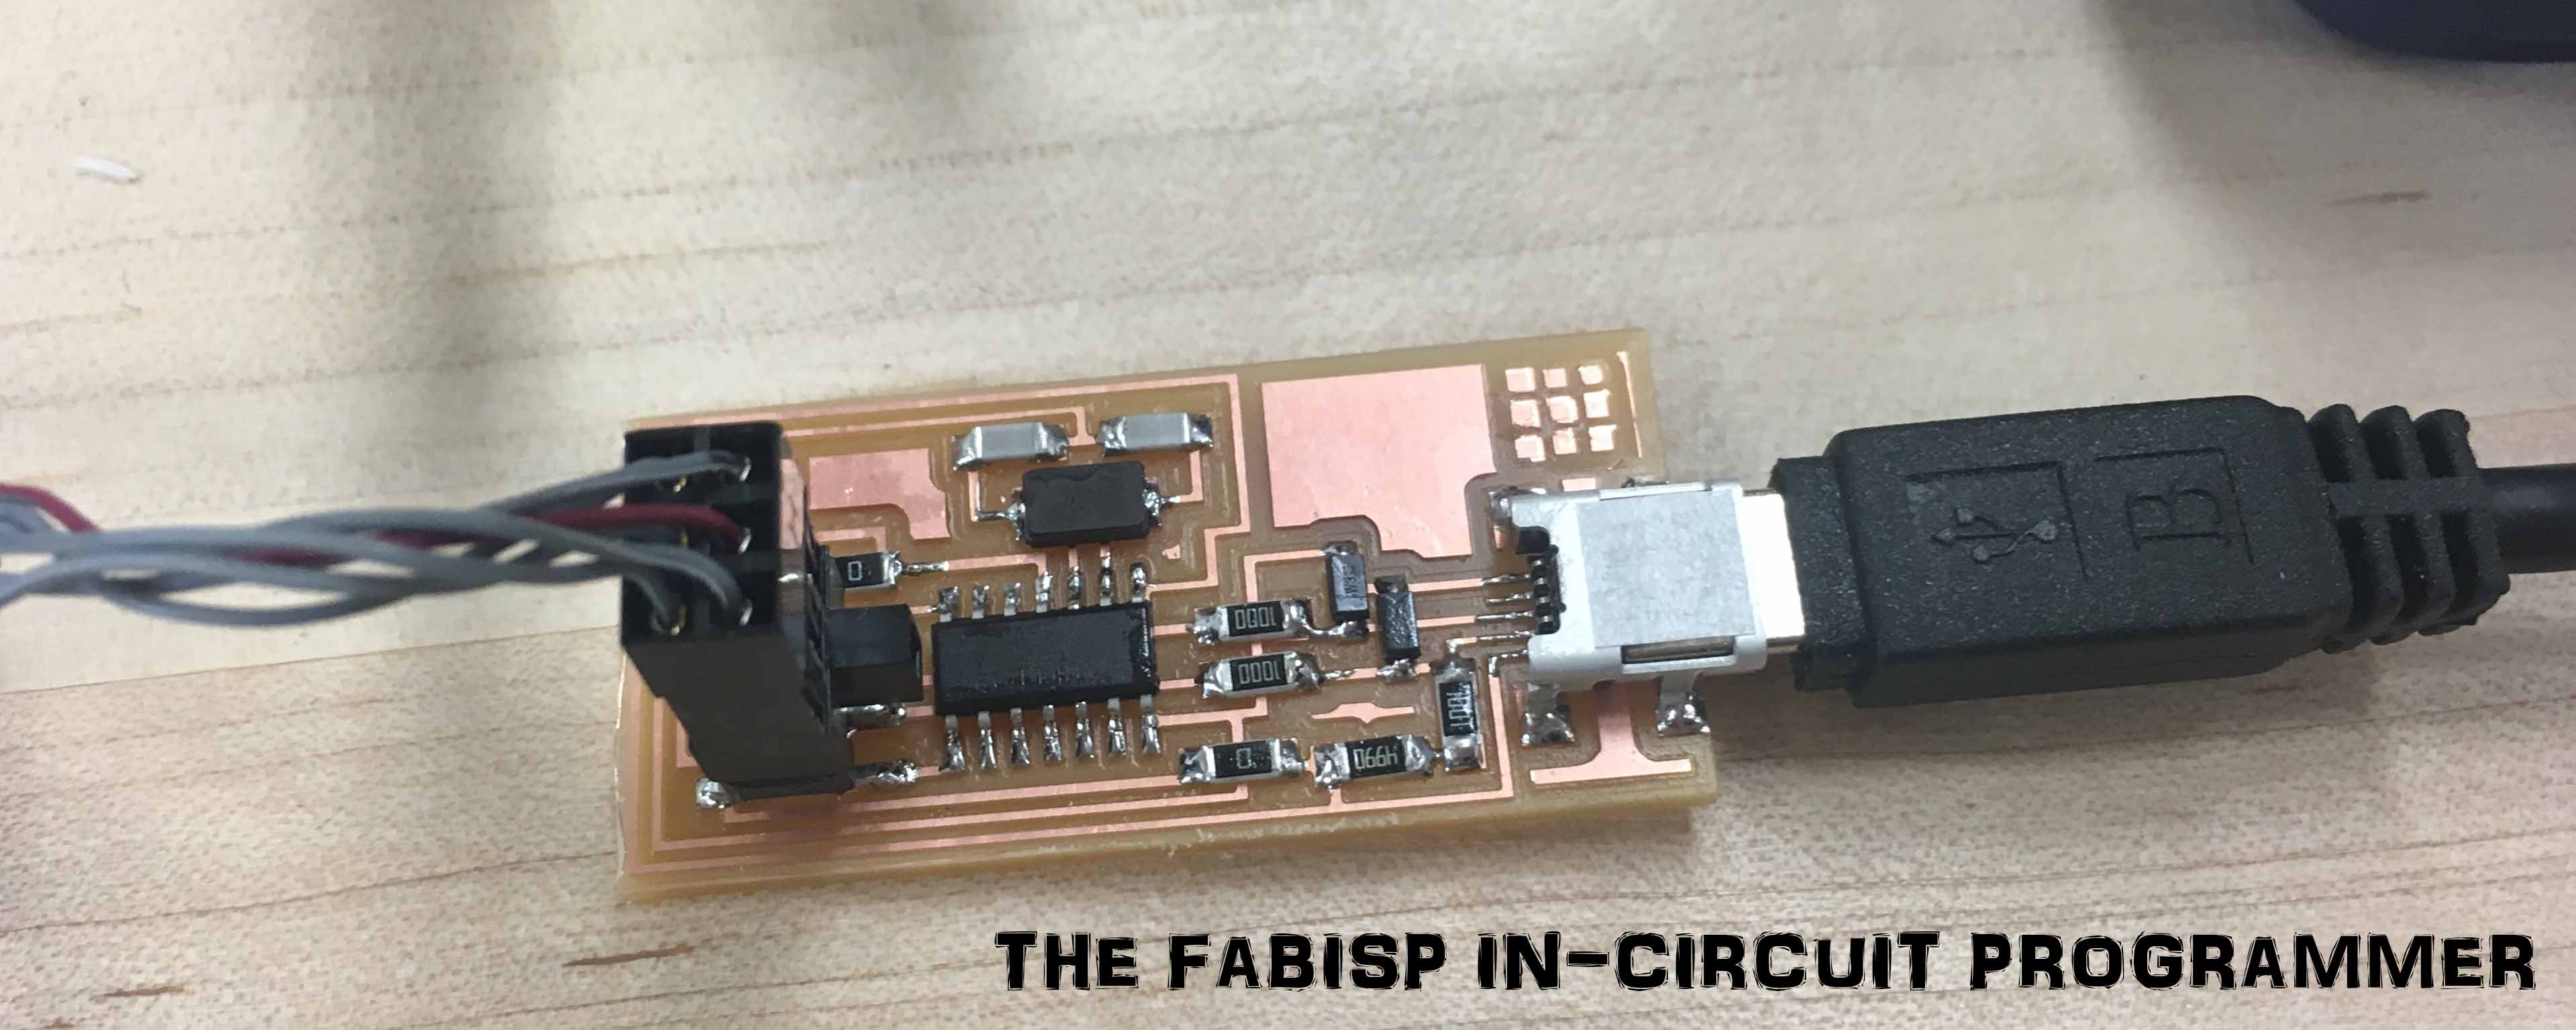
Step 2: Soldering
Since I have experience in soldering, it's not so hard for me to finis soldering the board.
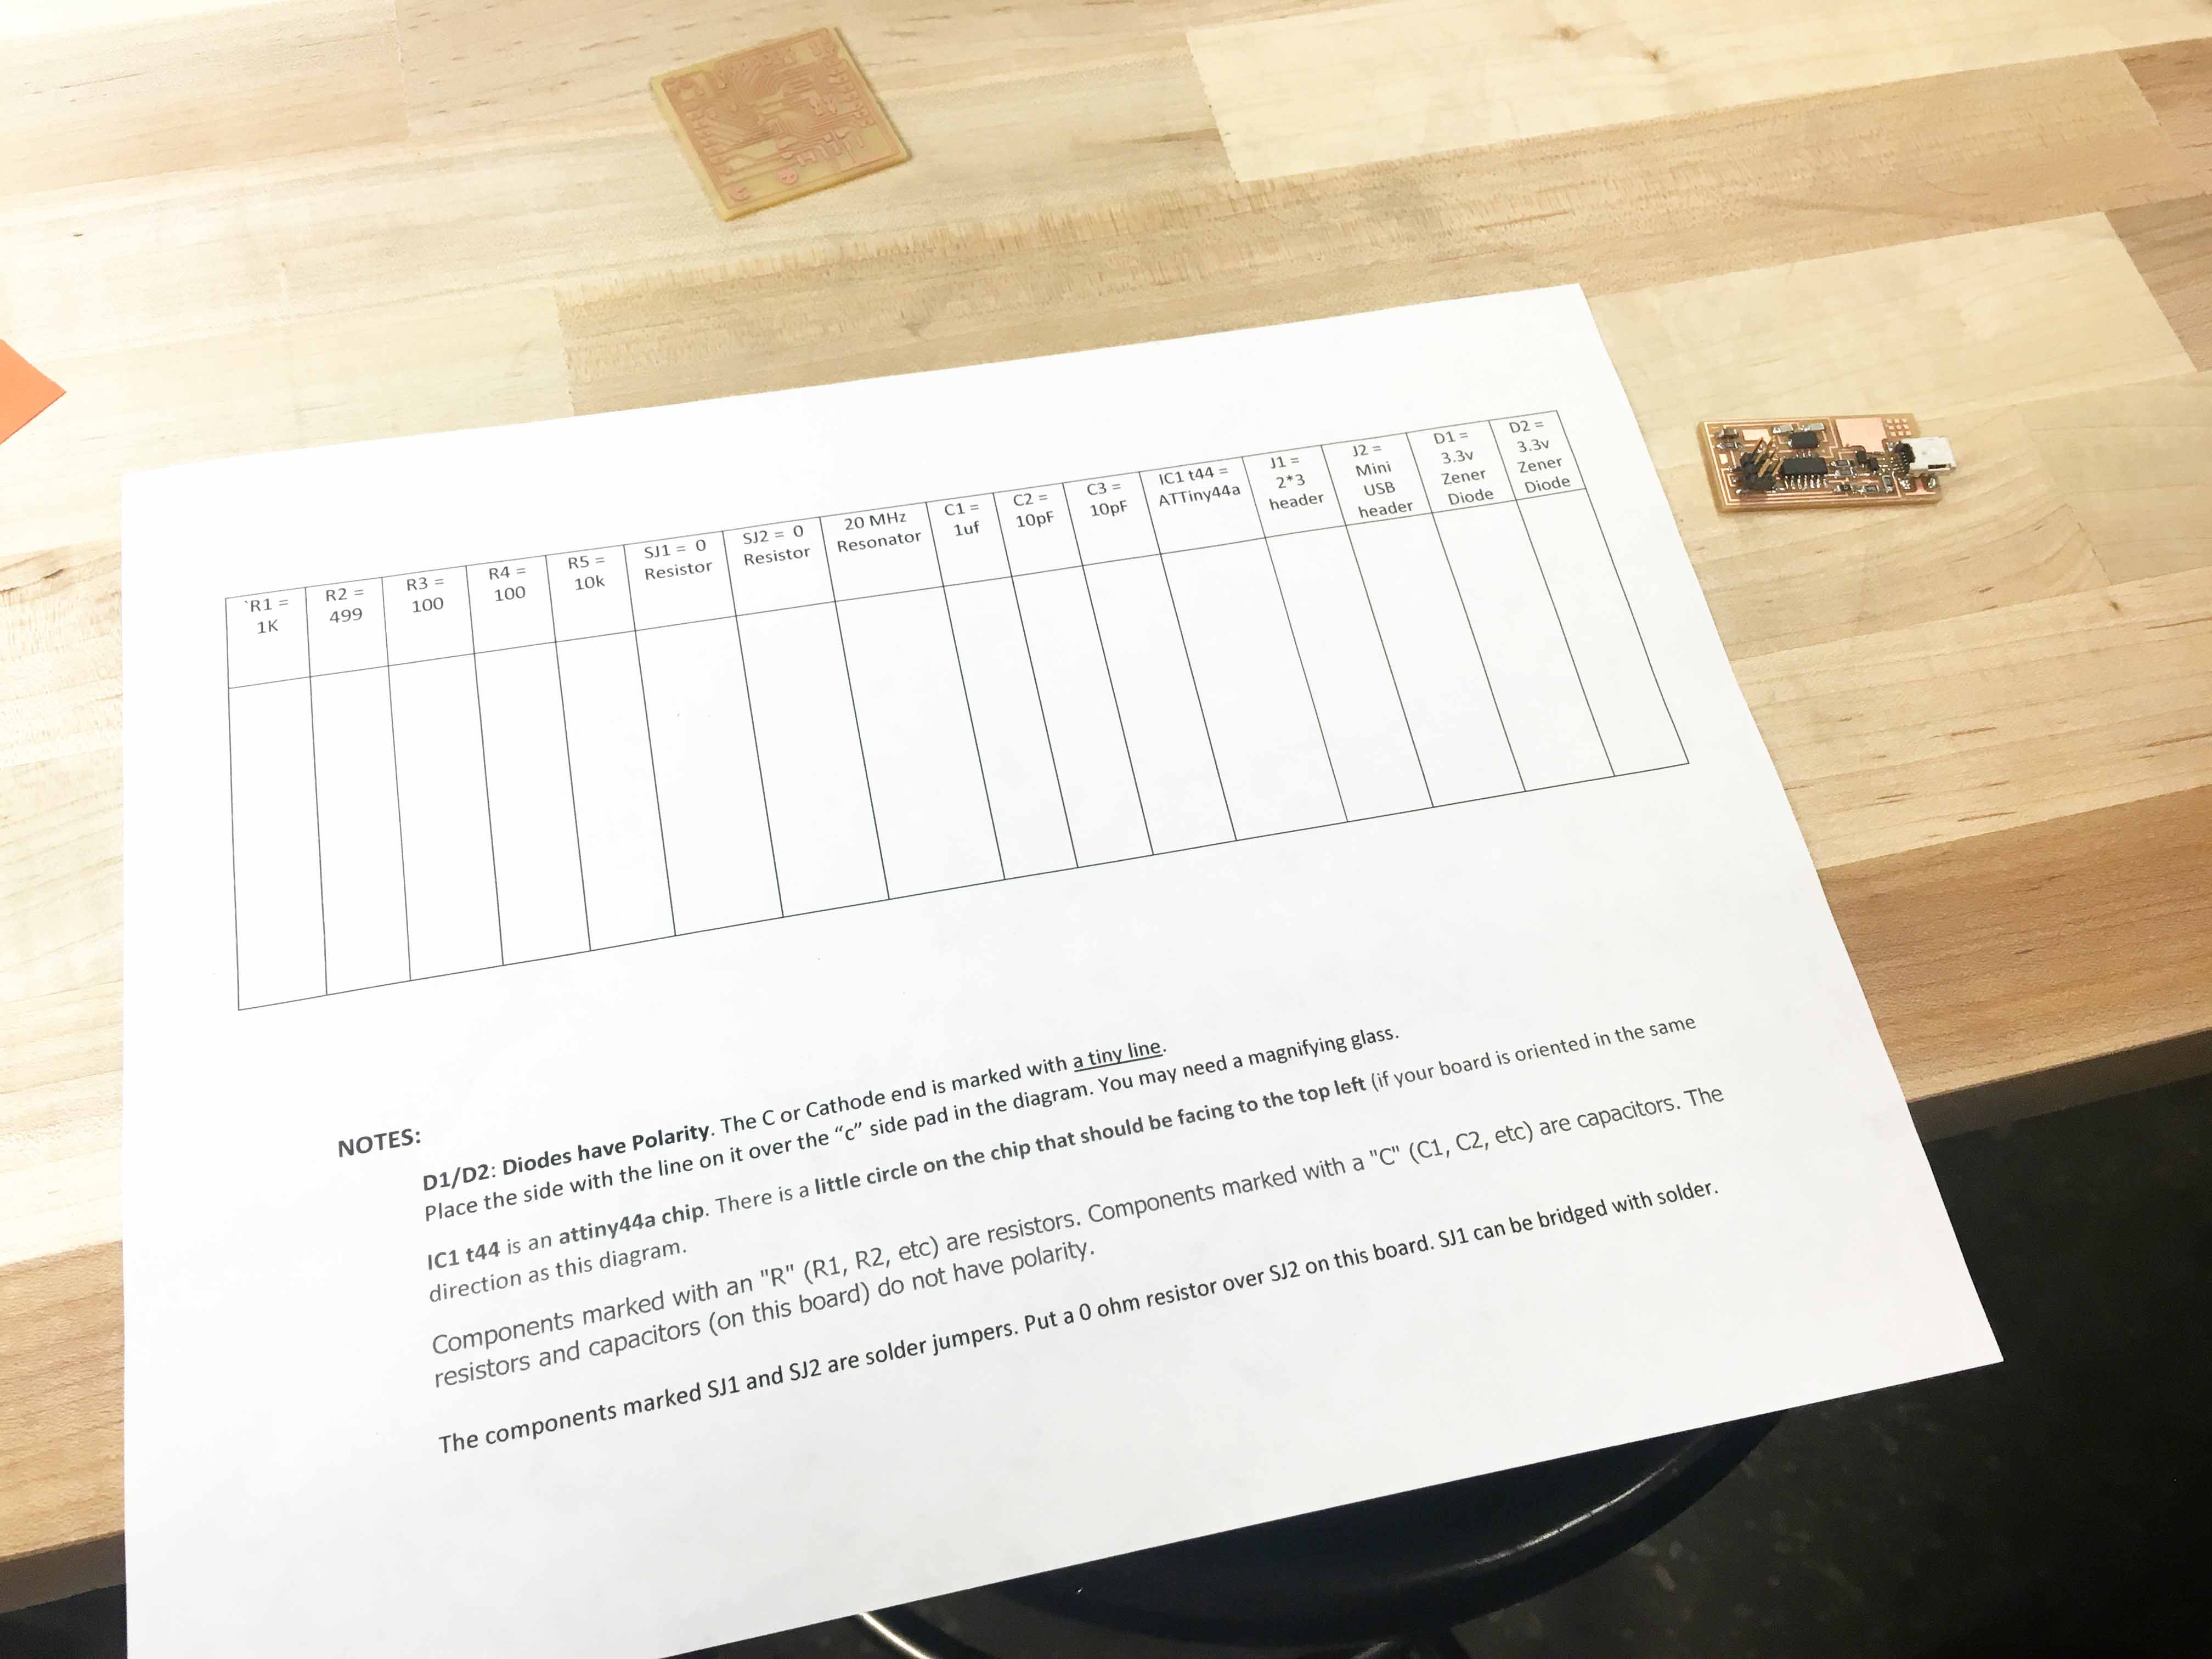
Find all the components
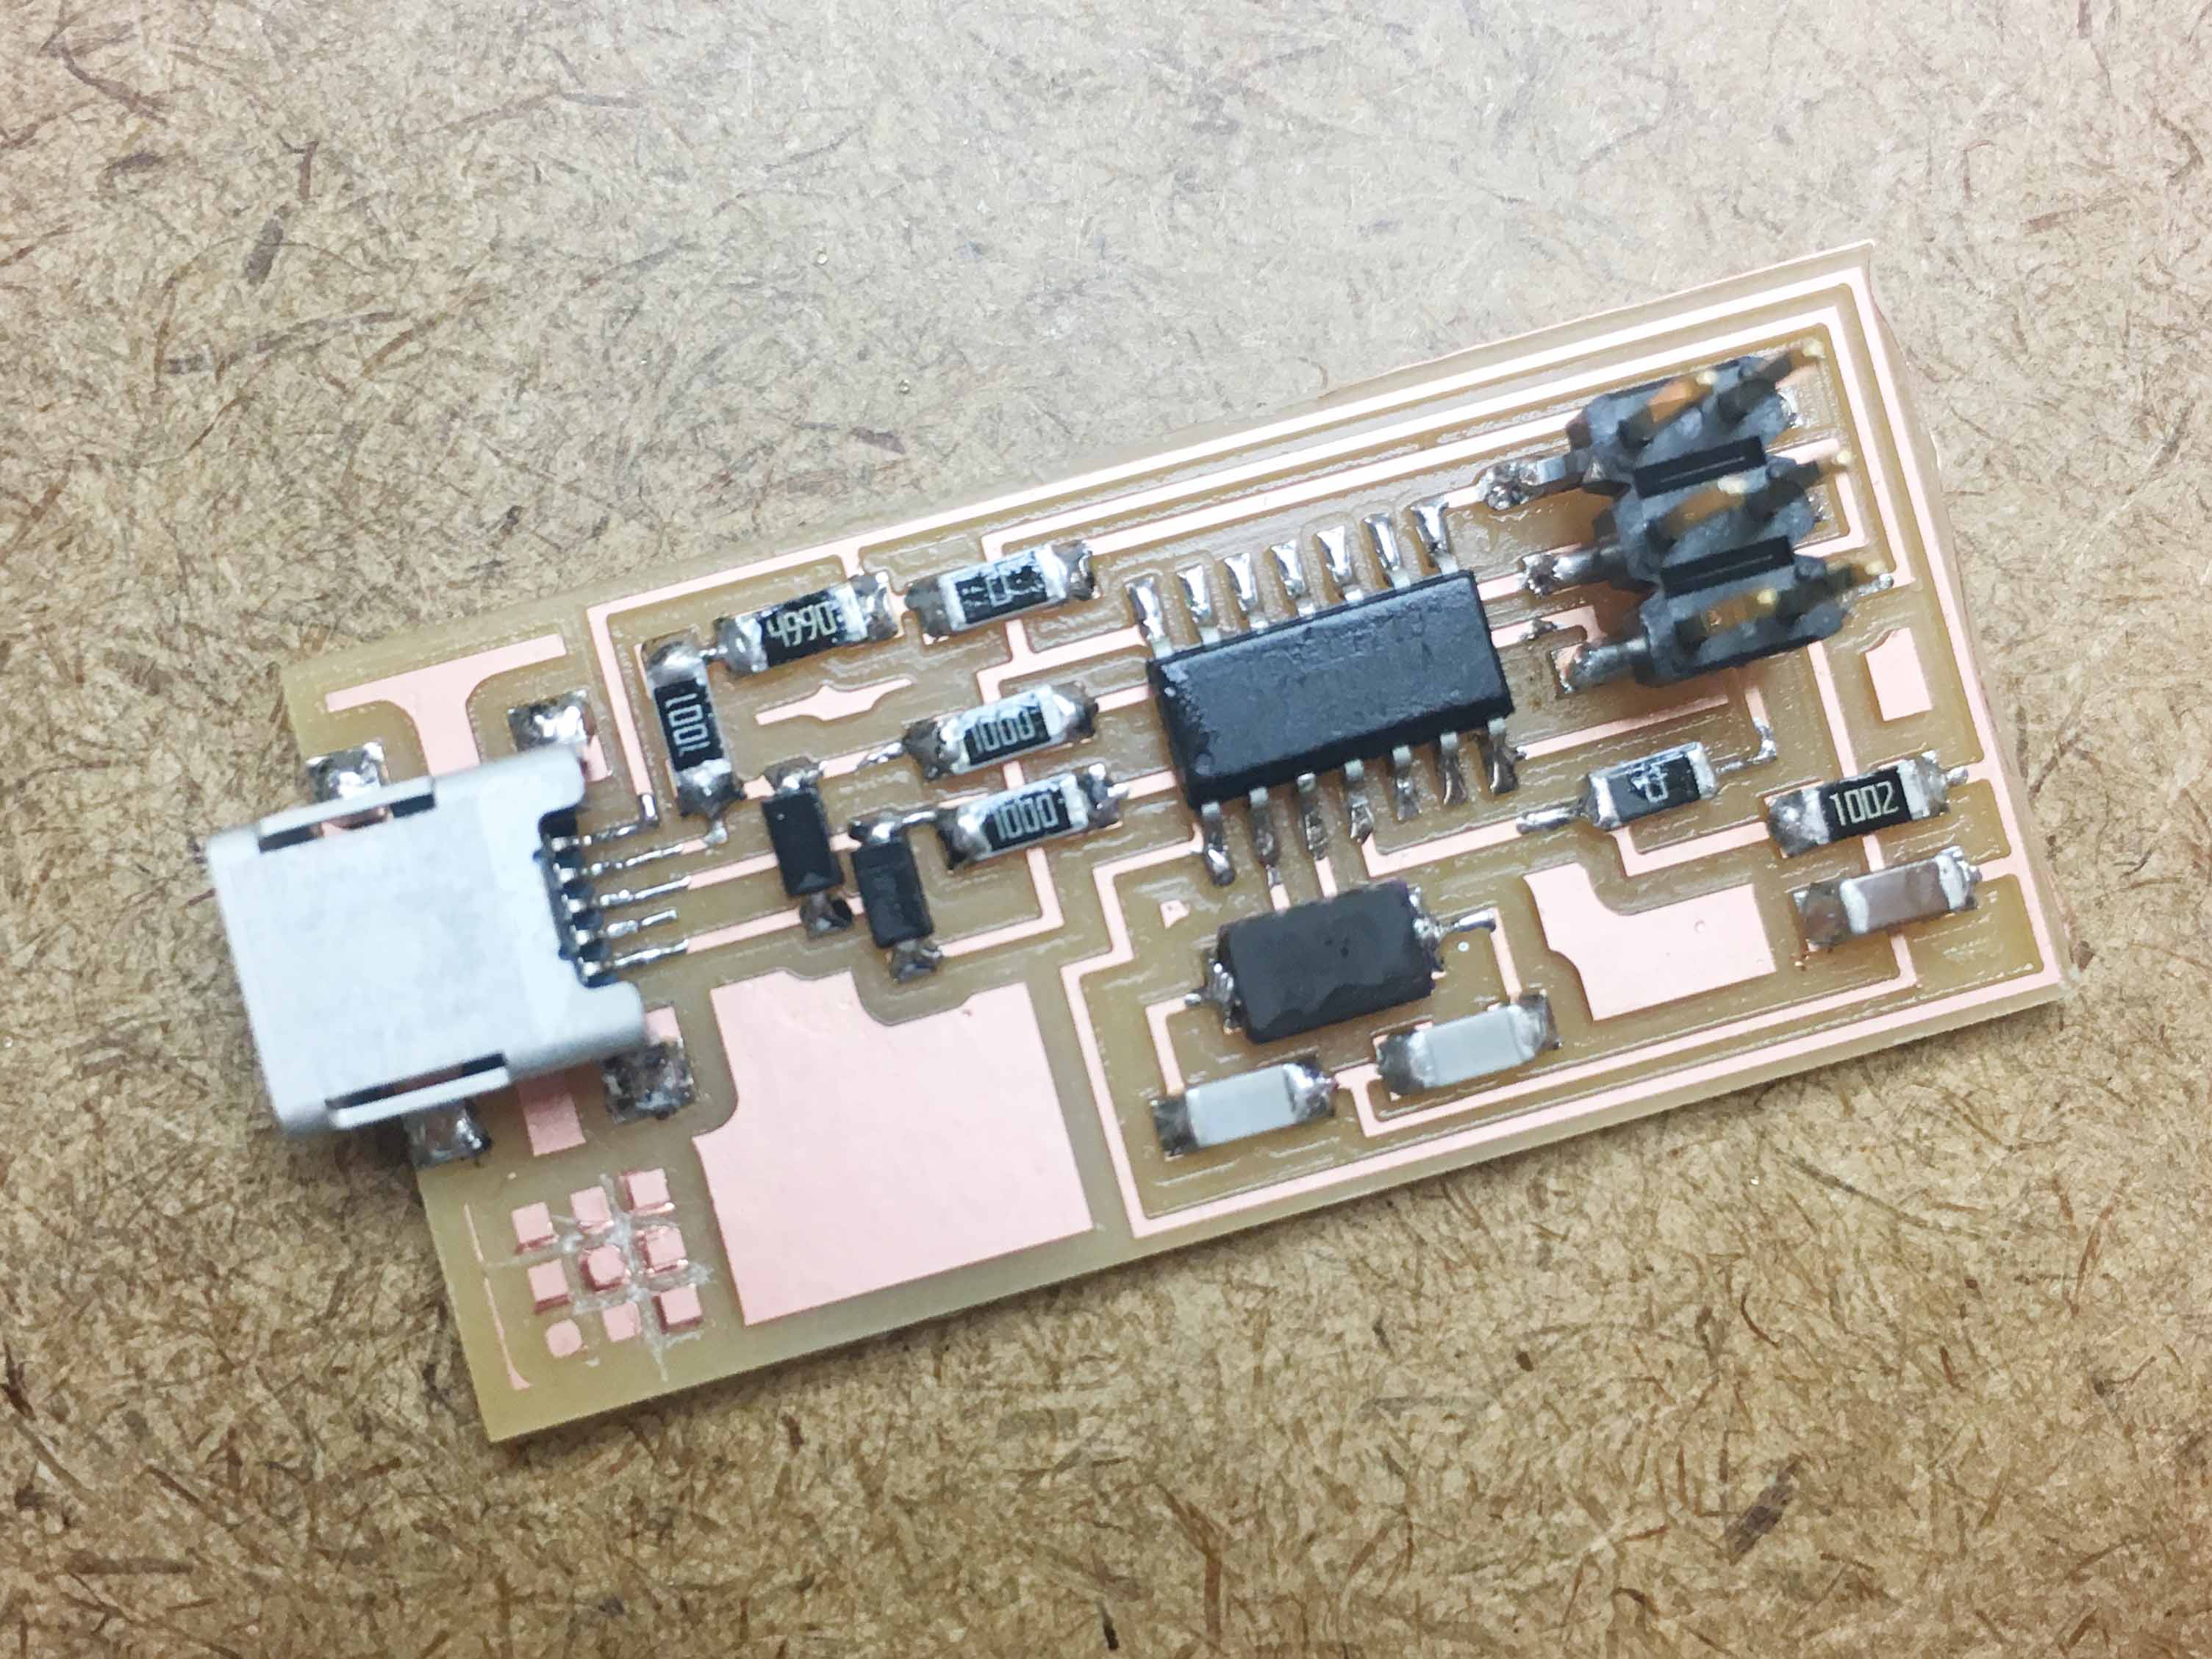
And solder them!
Step 3: Programming
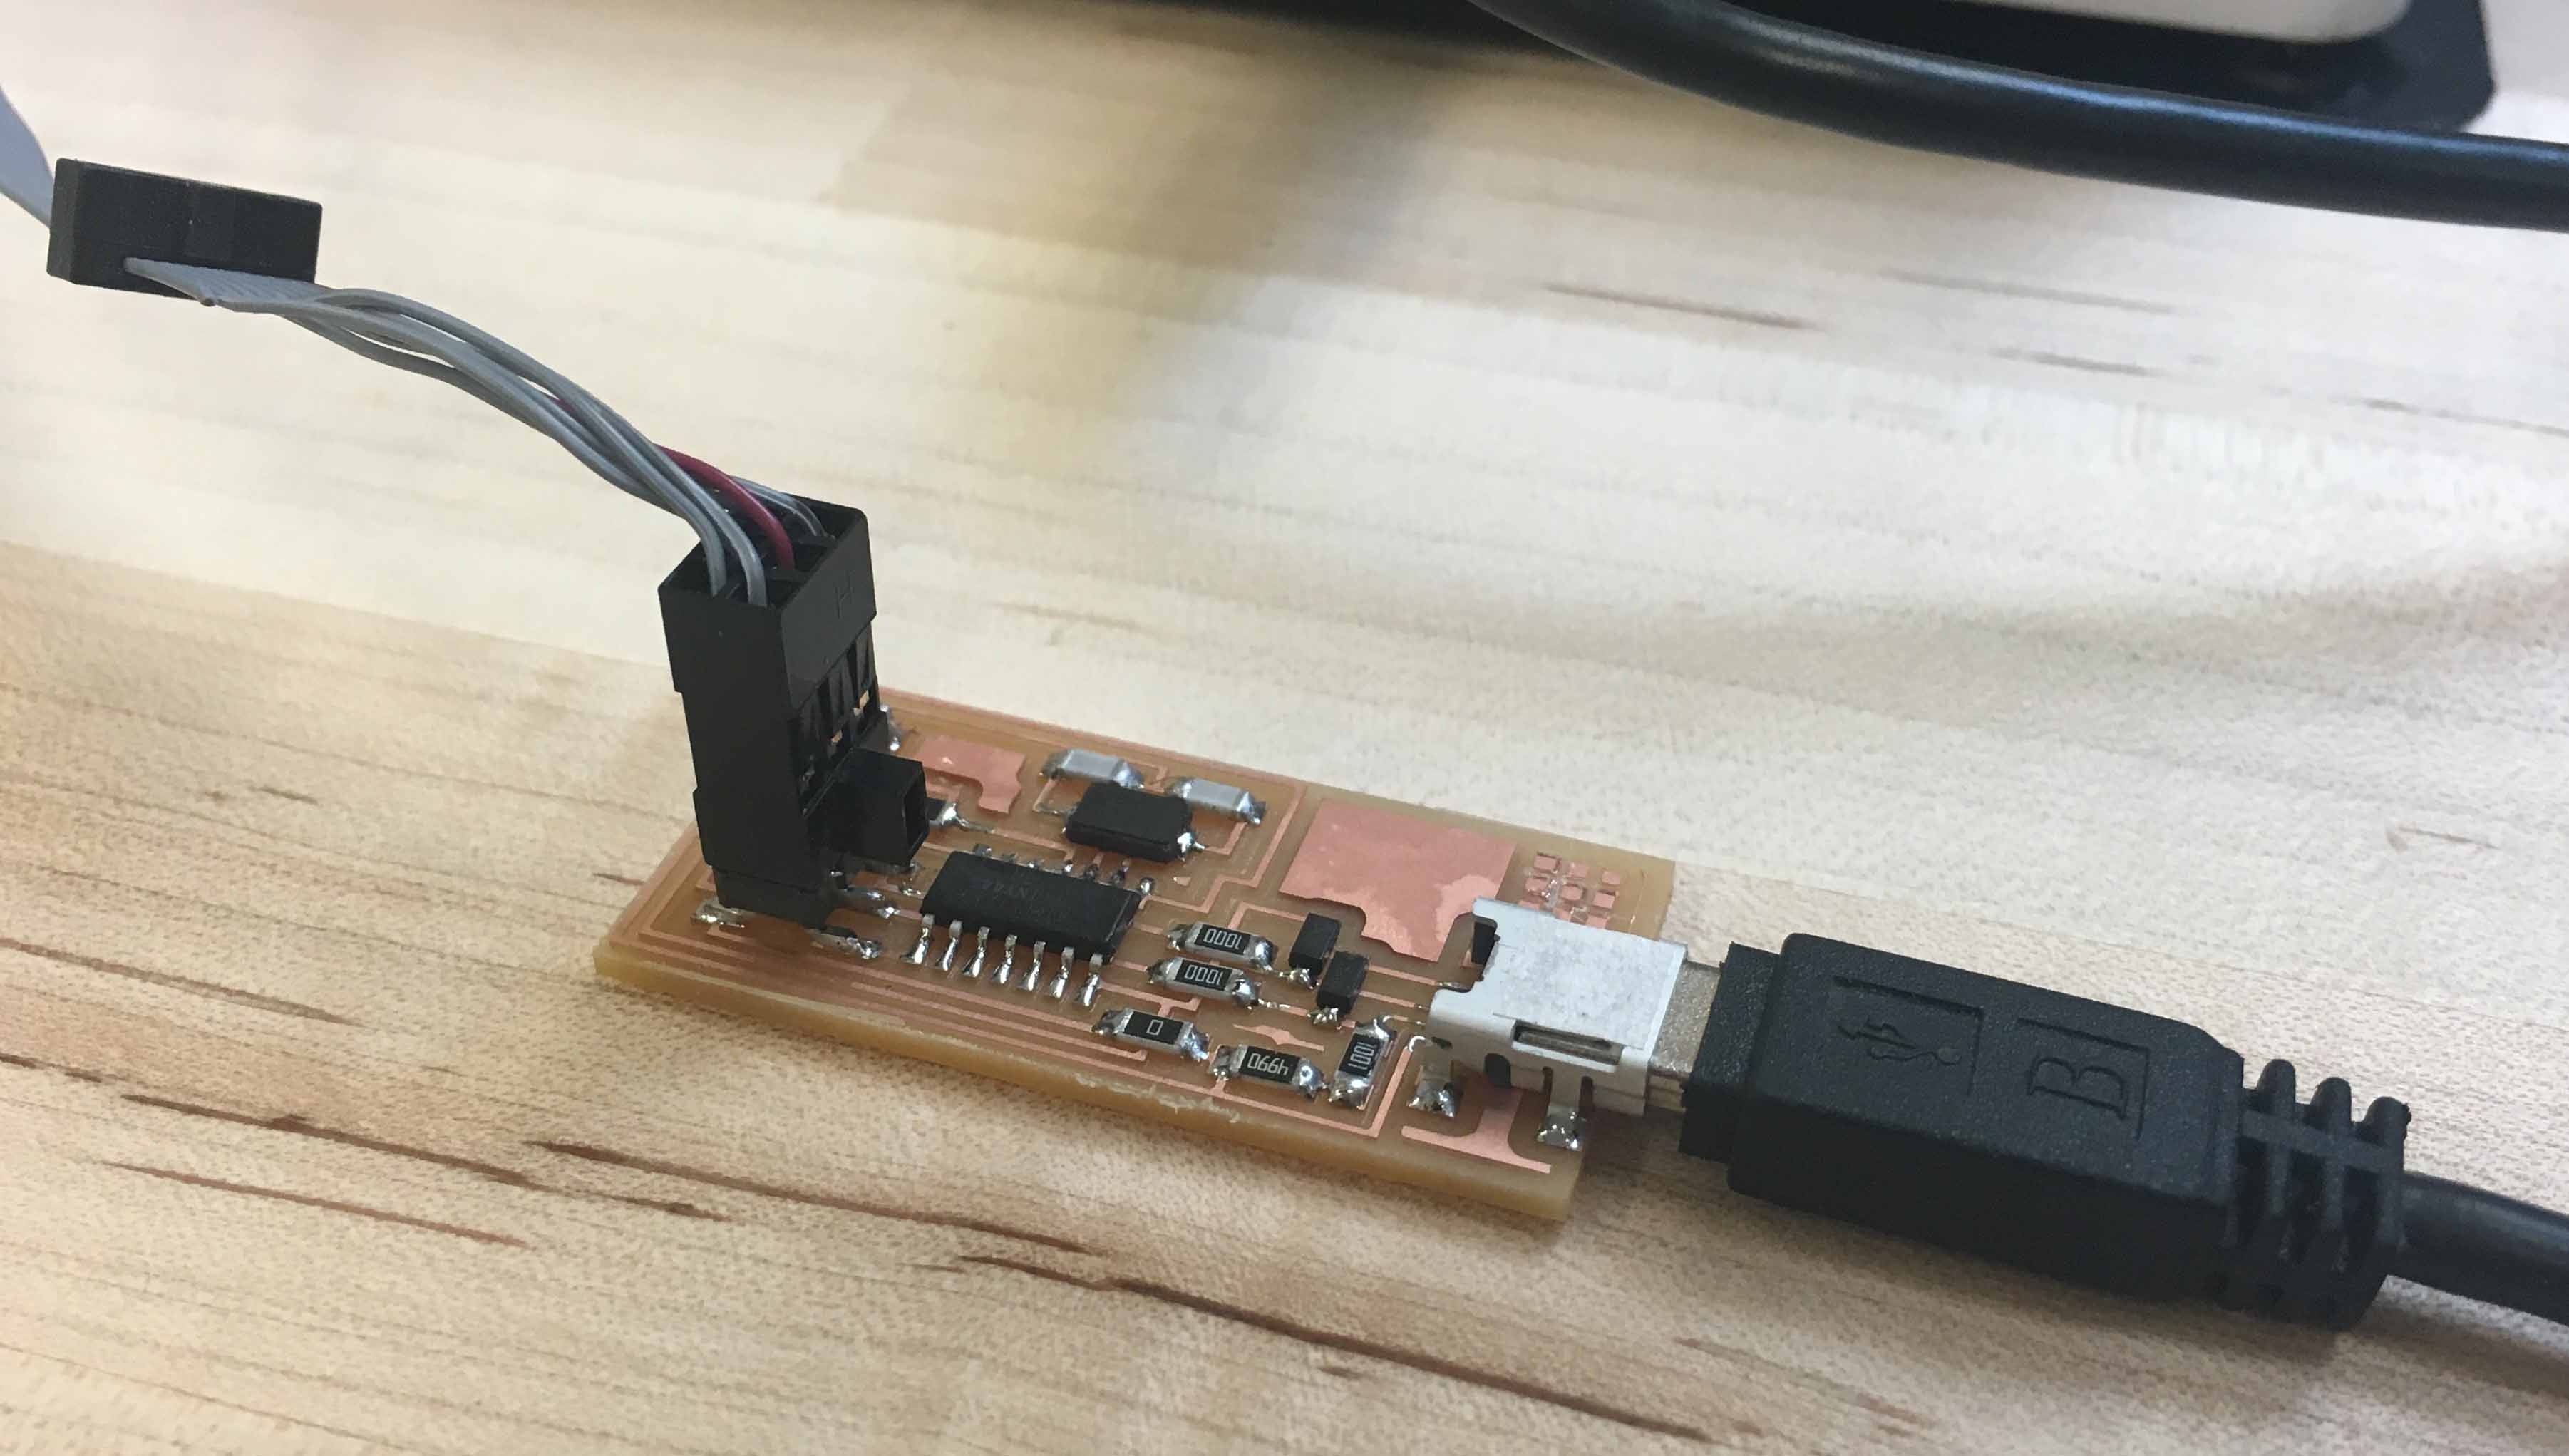
To program the ATiny44 on the FabISP board, we needed another in-system programmer.
The process is fairly straightforward:
1. Plug the board to a USB for power.
2. Plug the board to the AVRISPmk2.
3. Load the firmware:
i. make clean
ii. make hex
iii. sudo make fuse
iv. sudo make program
Here is my first CNC milling PCB!