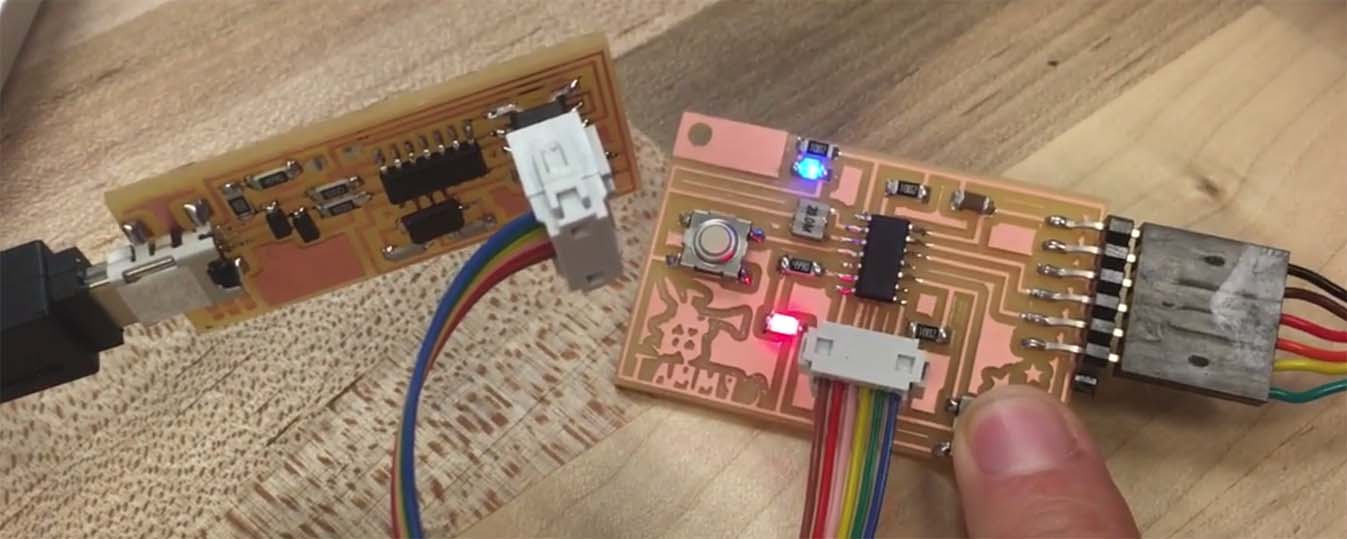
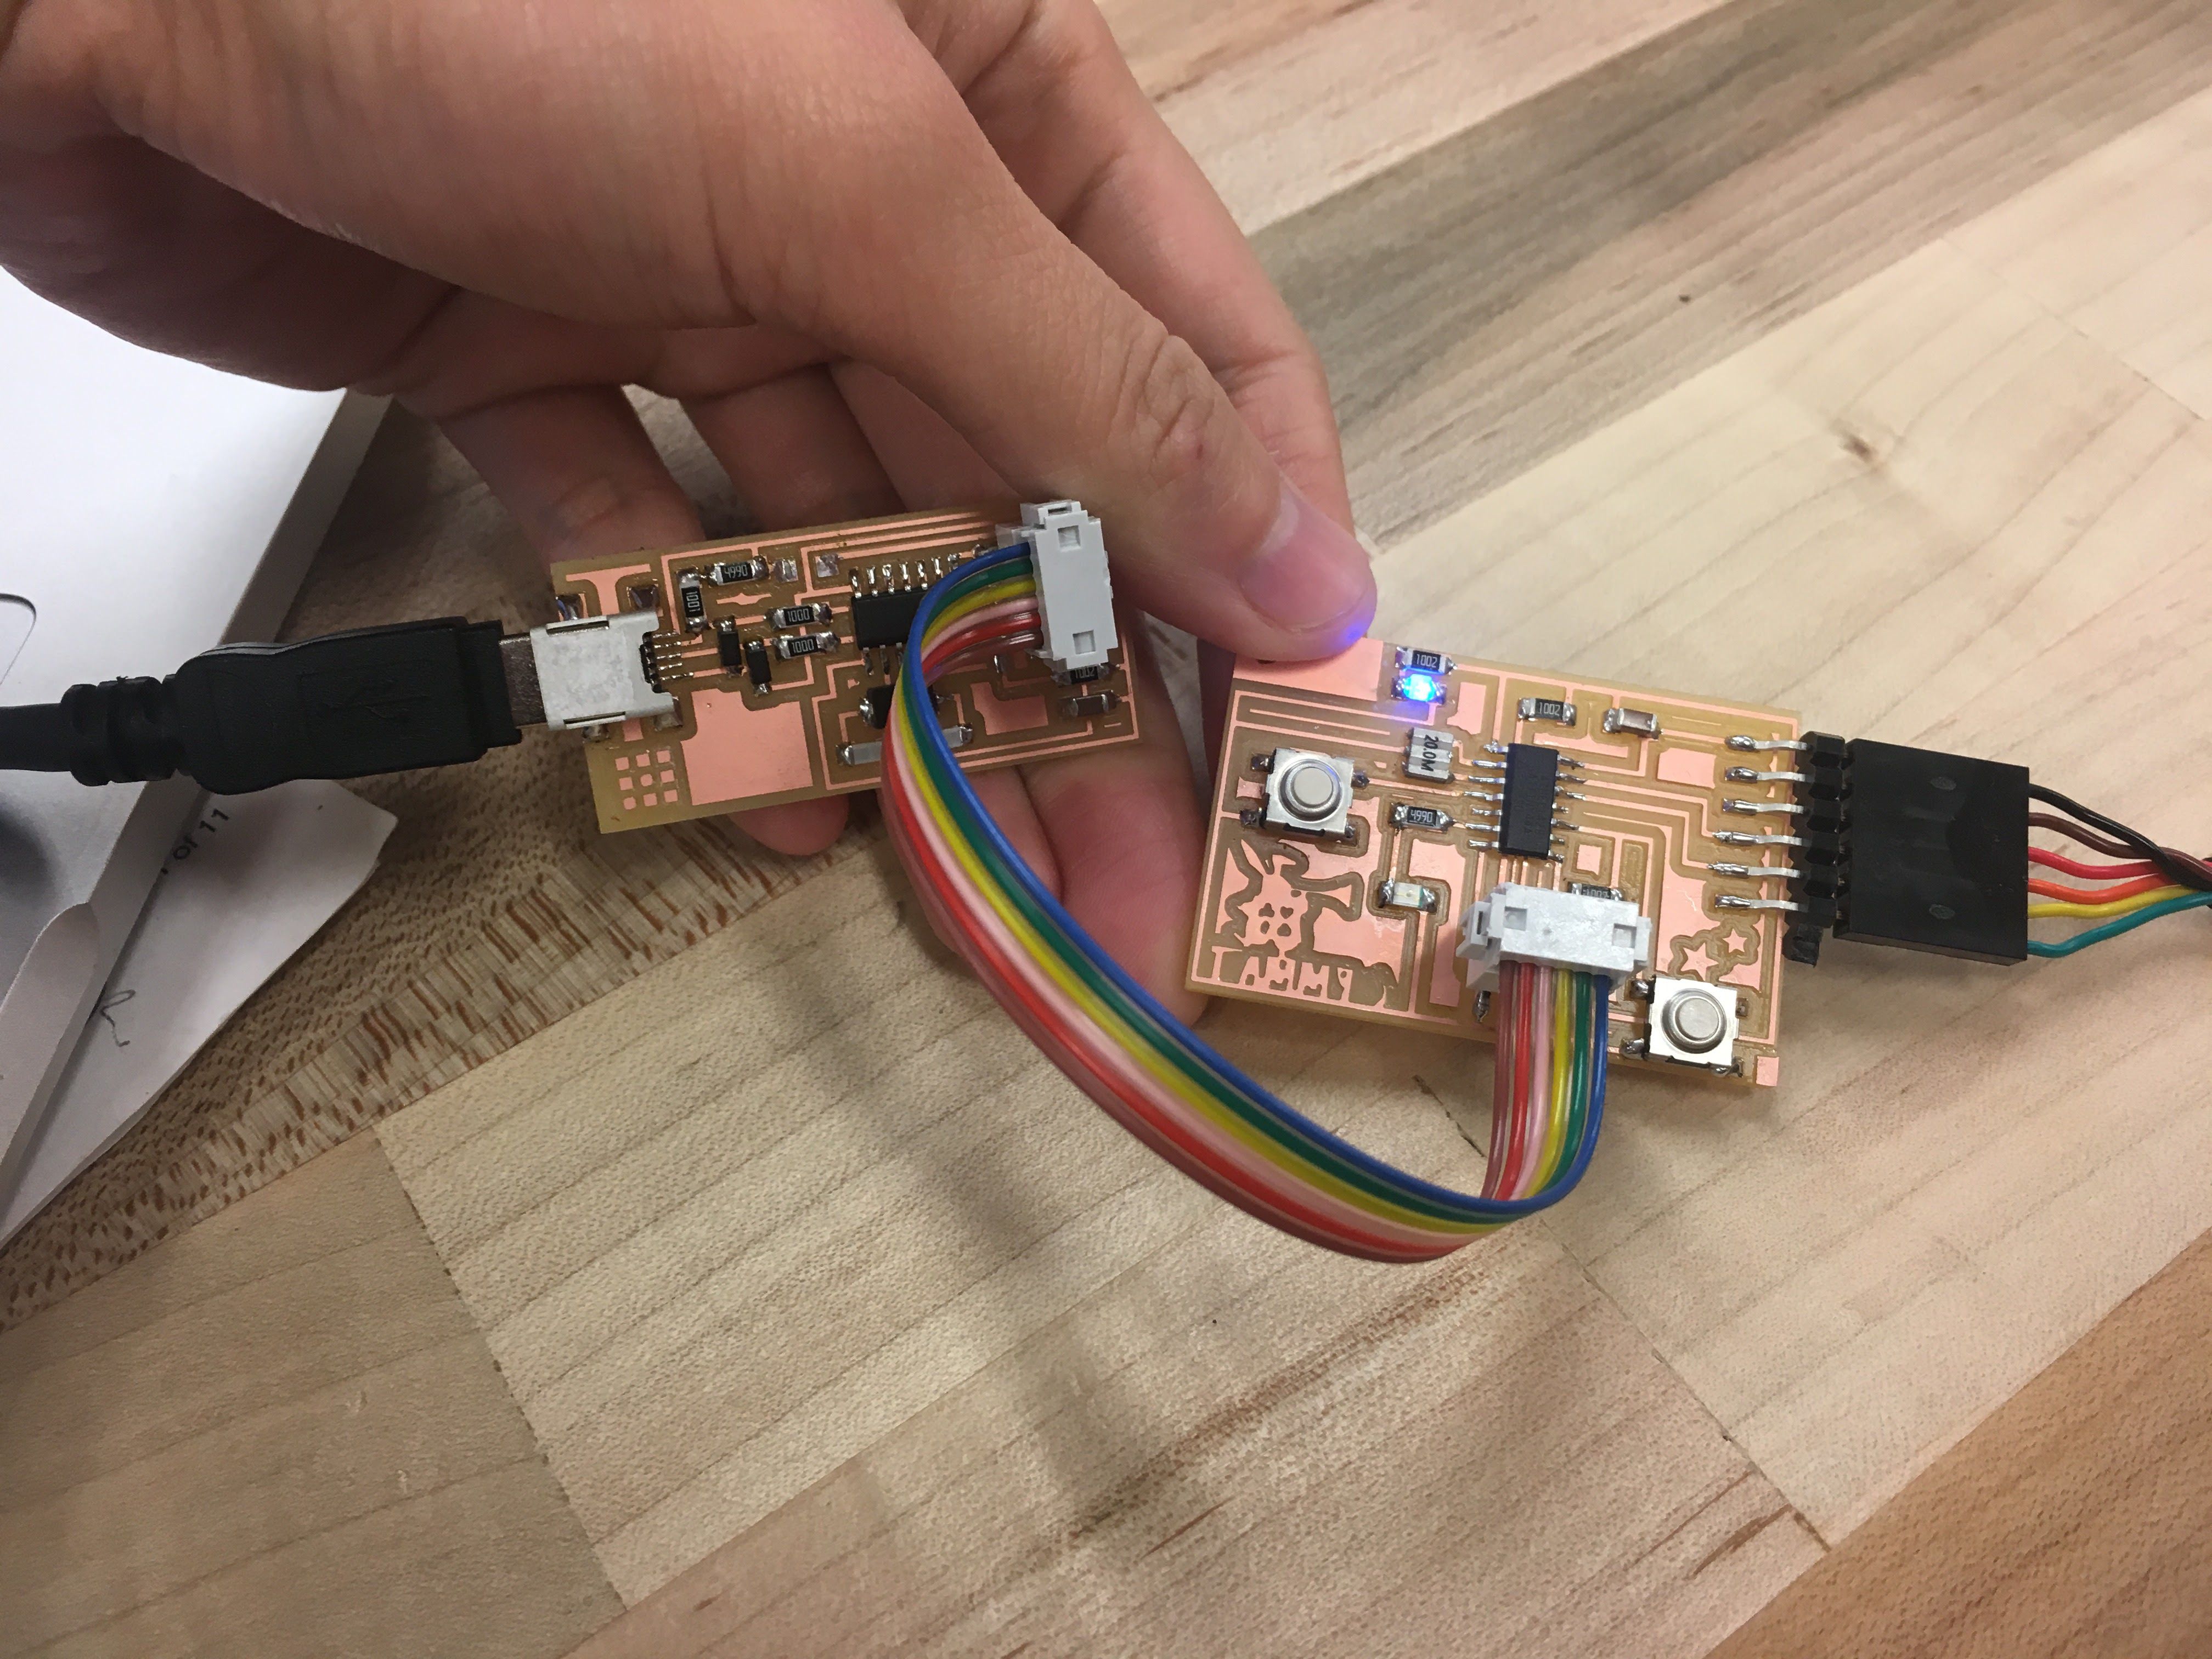
This week's assignment is to program the board we made two weeks ago. We are supposed to understand how a microcontroller works and learn how to program it. Two weeks ago in the Electronics Design week I made a basic board with 2 LED and 2 Button, but one button is for restting and one LED is just a signal of powering on. This week my aim to program the board to make the LED light up when the button is pressed.
Microcontroller
First of all, we should first really understand the components and the microcontroller we had in our board. The microcontroller I used on the board was ATtiny 44A, and here is the datasheet of it.
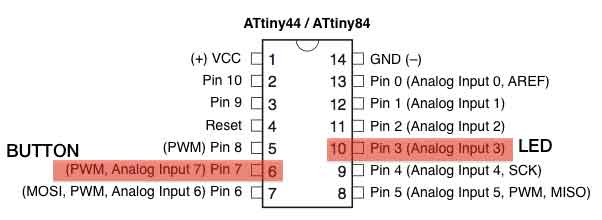
And is are how it looks like and the pinout of ATtiny44A.
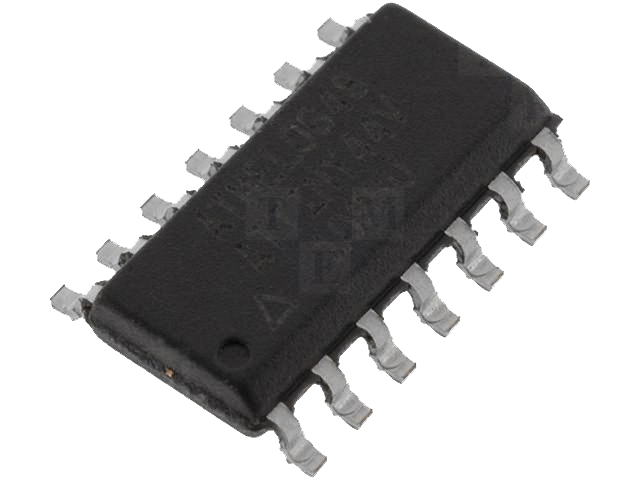
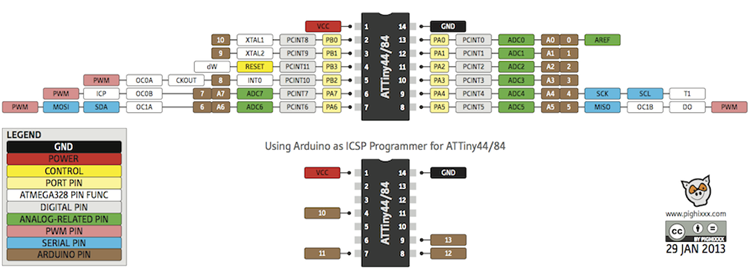
Knowing the pinout is very important because we will need it while programming.
Progamming
To program the board, we first need to make sure the in-system programmer (ISP) we made in week 2 is actually working and install ATtiny44A into our Arduino software. I follow this tutorial to get all the setup done before programming my board.
Setting up Ardino
Installing ATtiny support in Arduino
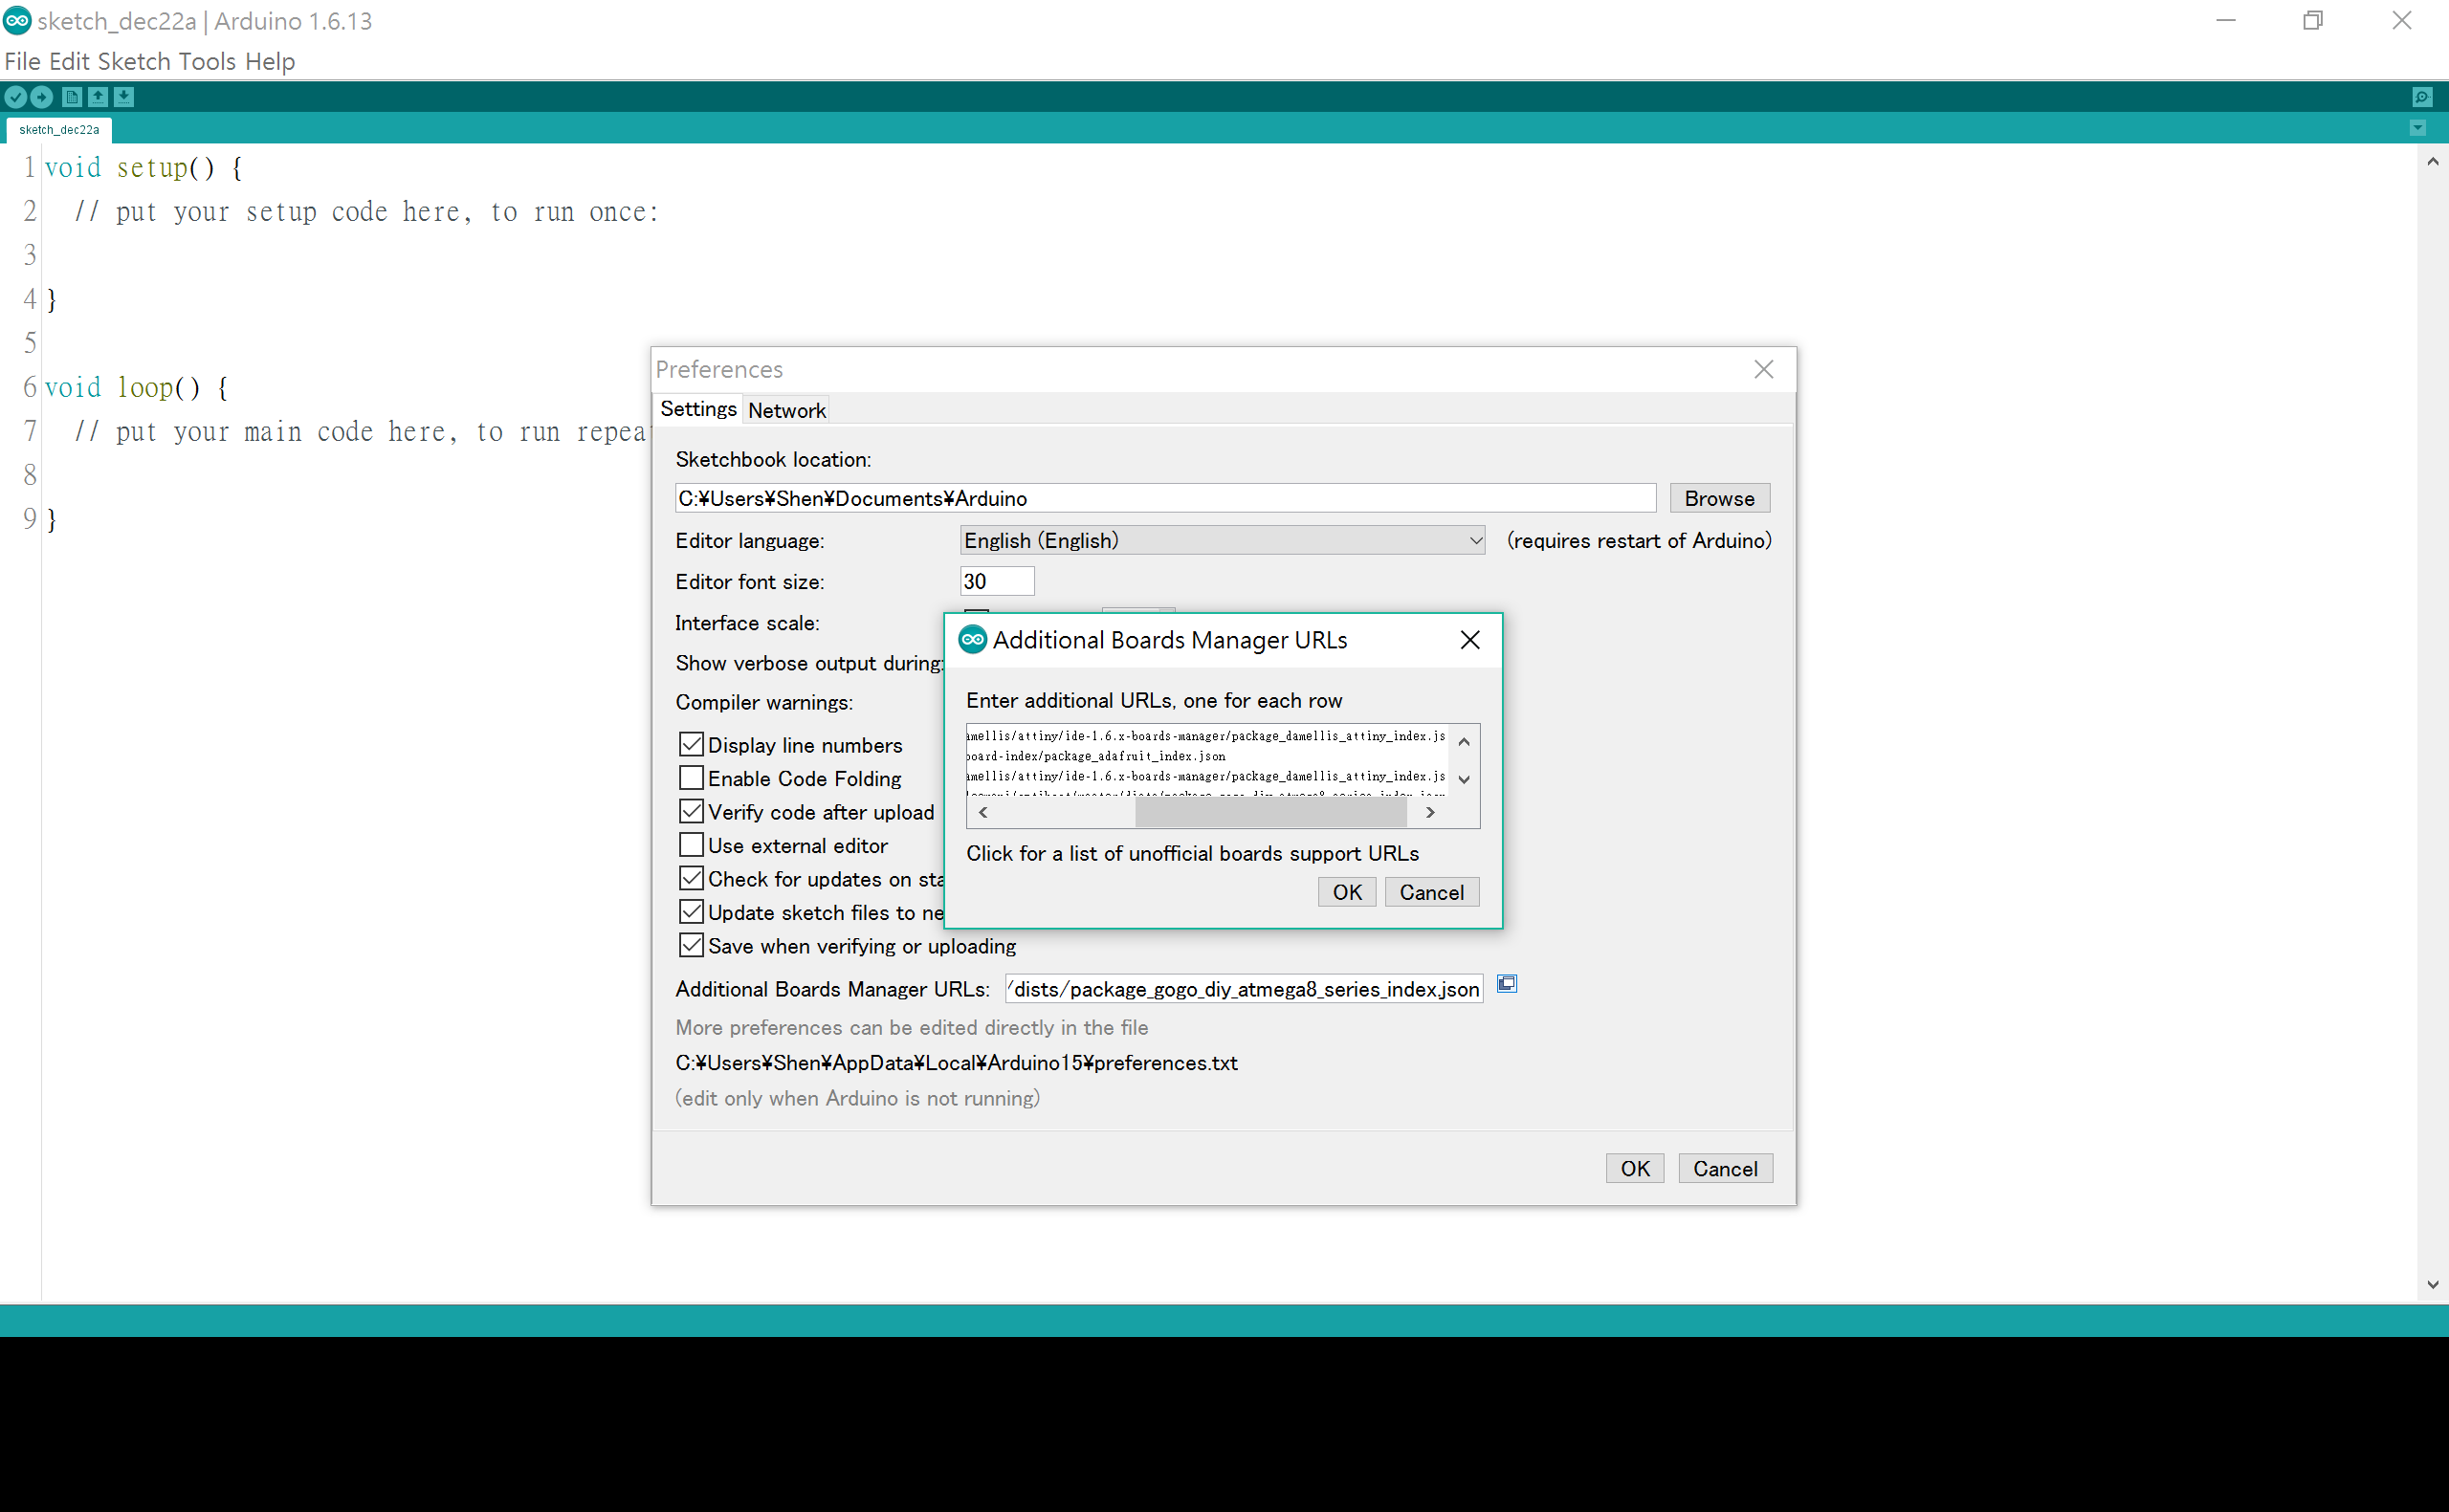
First of all, we need to download the package for Arduino IDE to talk to the ATtiny44A.
1. menu > preferences, type in
https://raw.githubusercontent.com/damellis/attiny/ide-1.6.x-boards-manager/package_damellis_attiny_index.json
https://adafruit.github.io/arduino-board-index/package_adafruit_index.json
Power and Connect the Boards
Configuring the ATtiny to run at 20 MHz
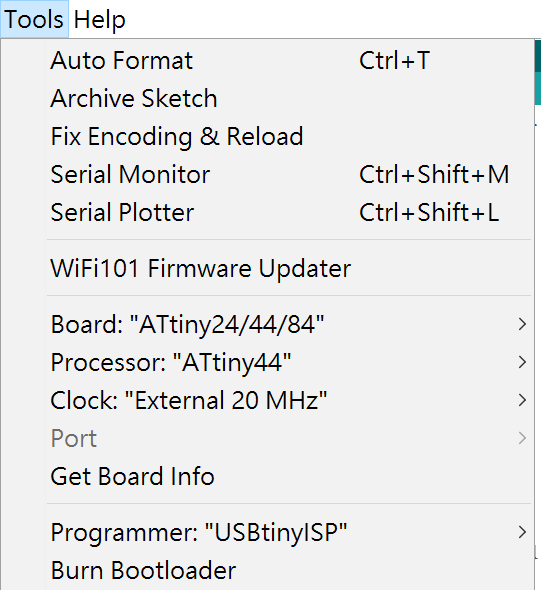
And remember to choose the right port!!!!!
Burn the Bootloader
But it's not working for my Windows!! :( Even I downloaded the driver...
So at the end I used the computer in the shop to finish my assignment...
Programming in Ardino
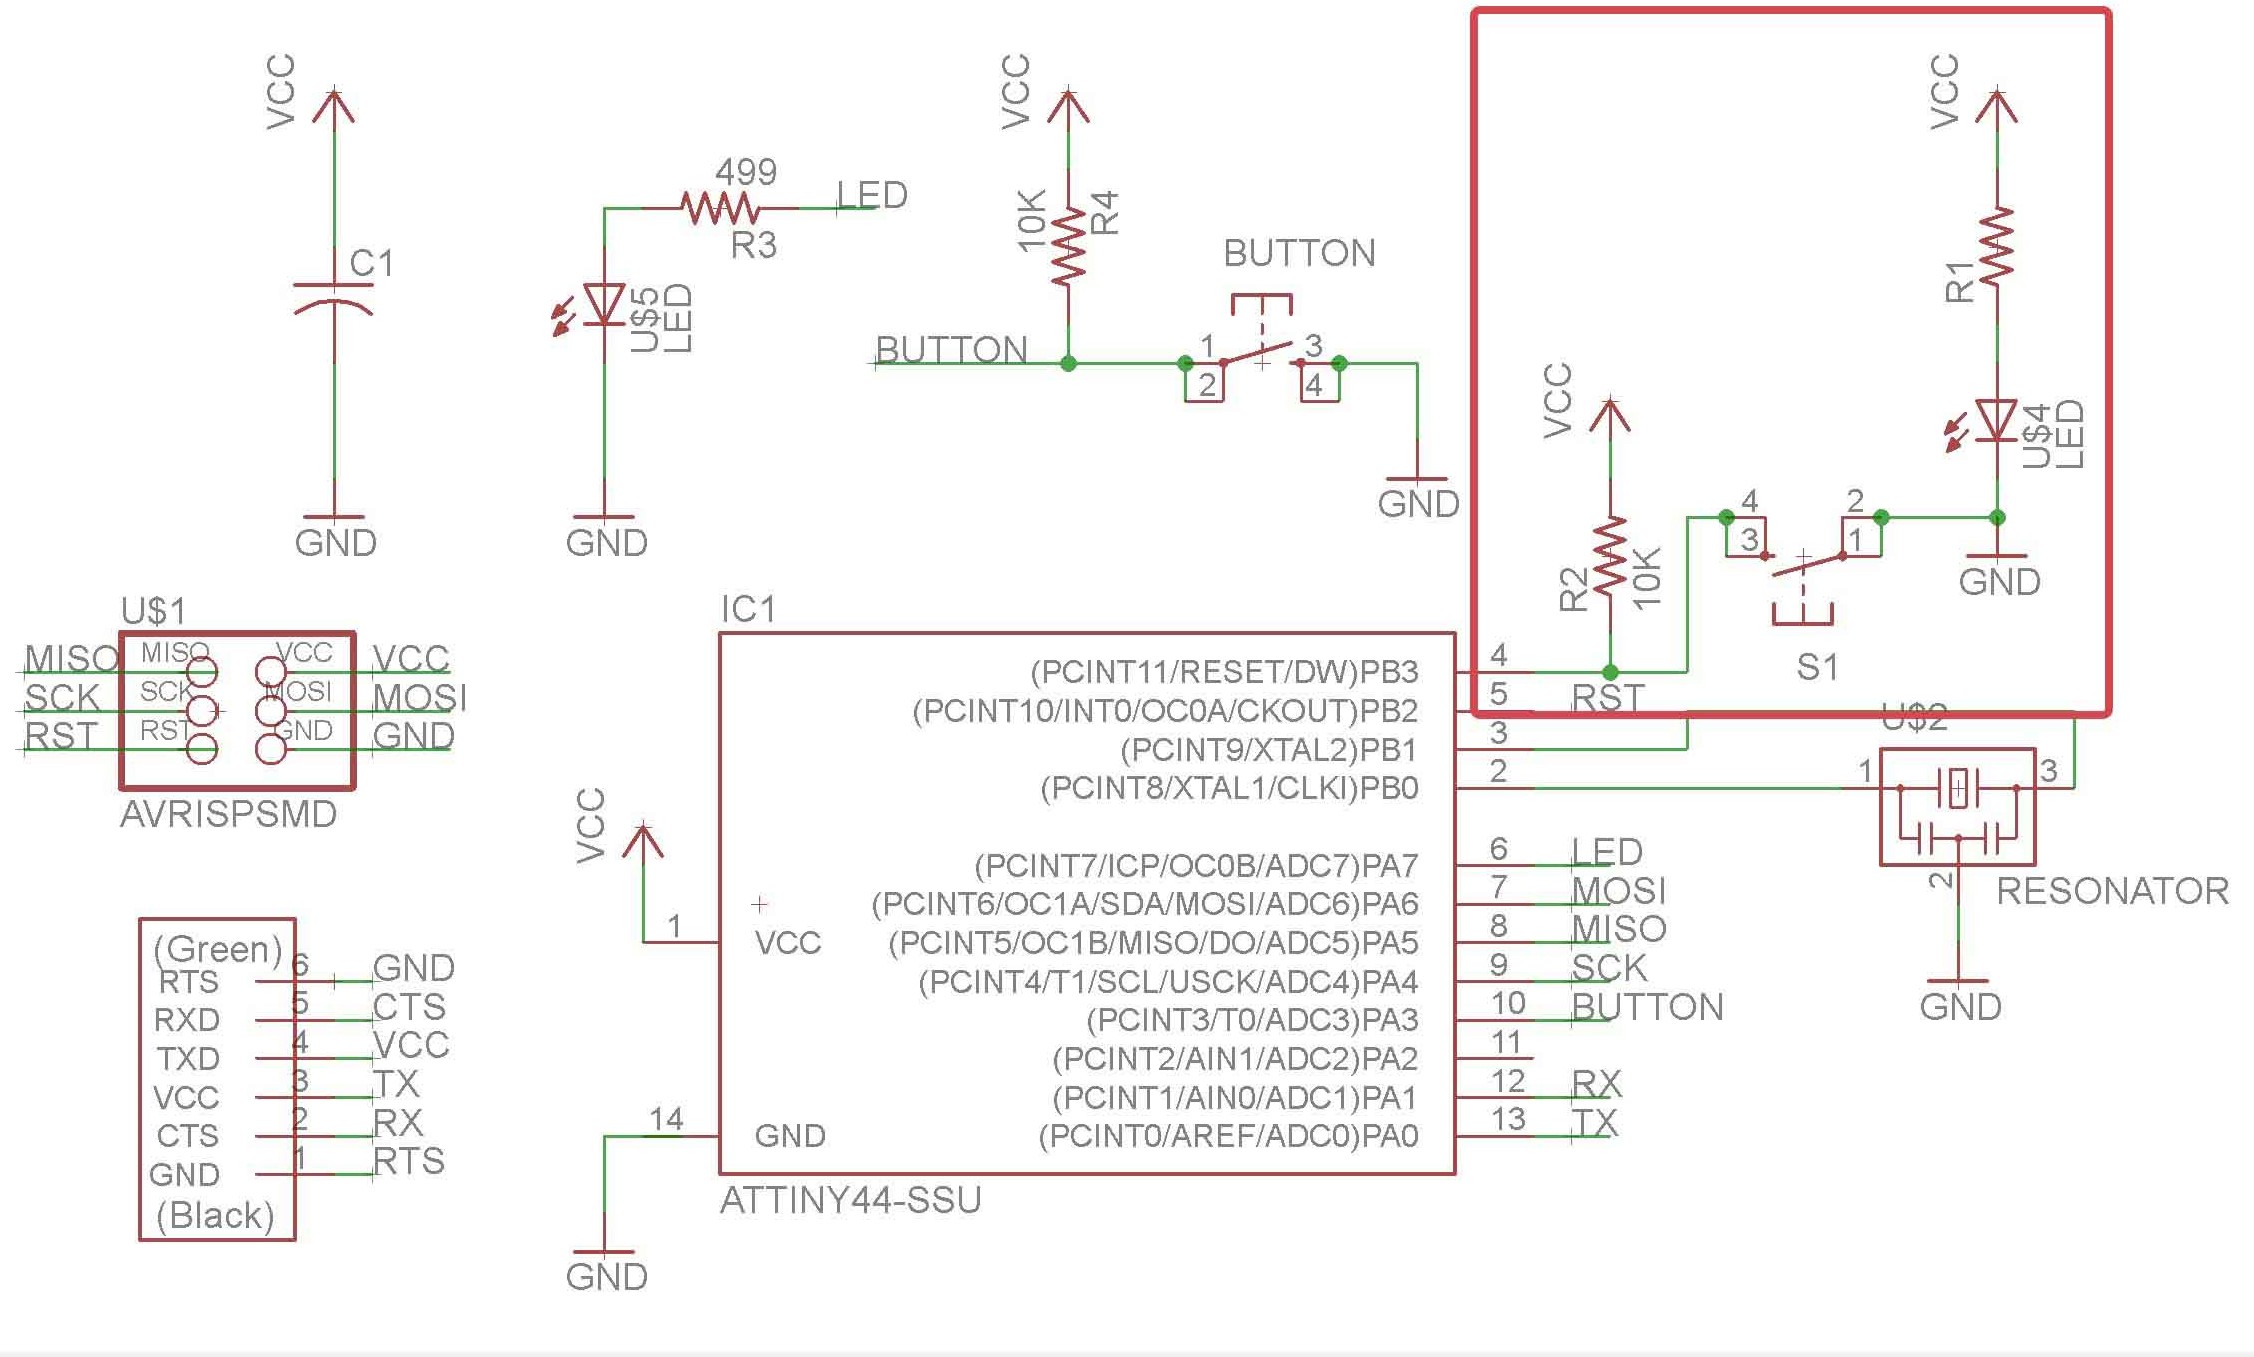
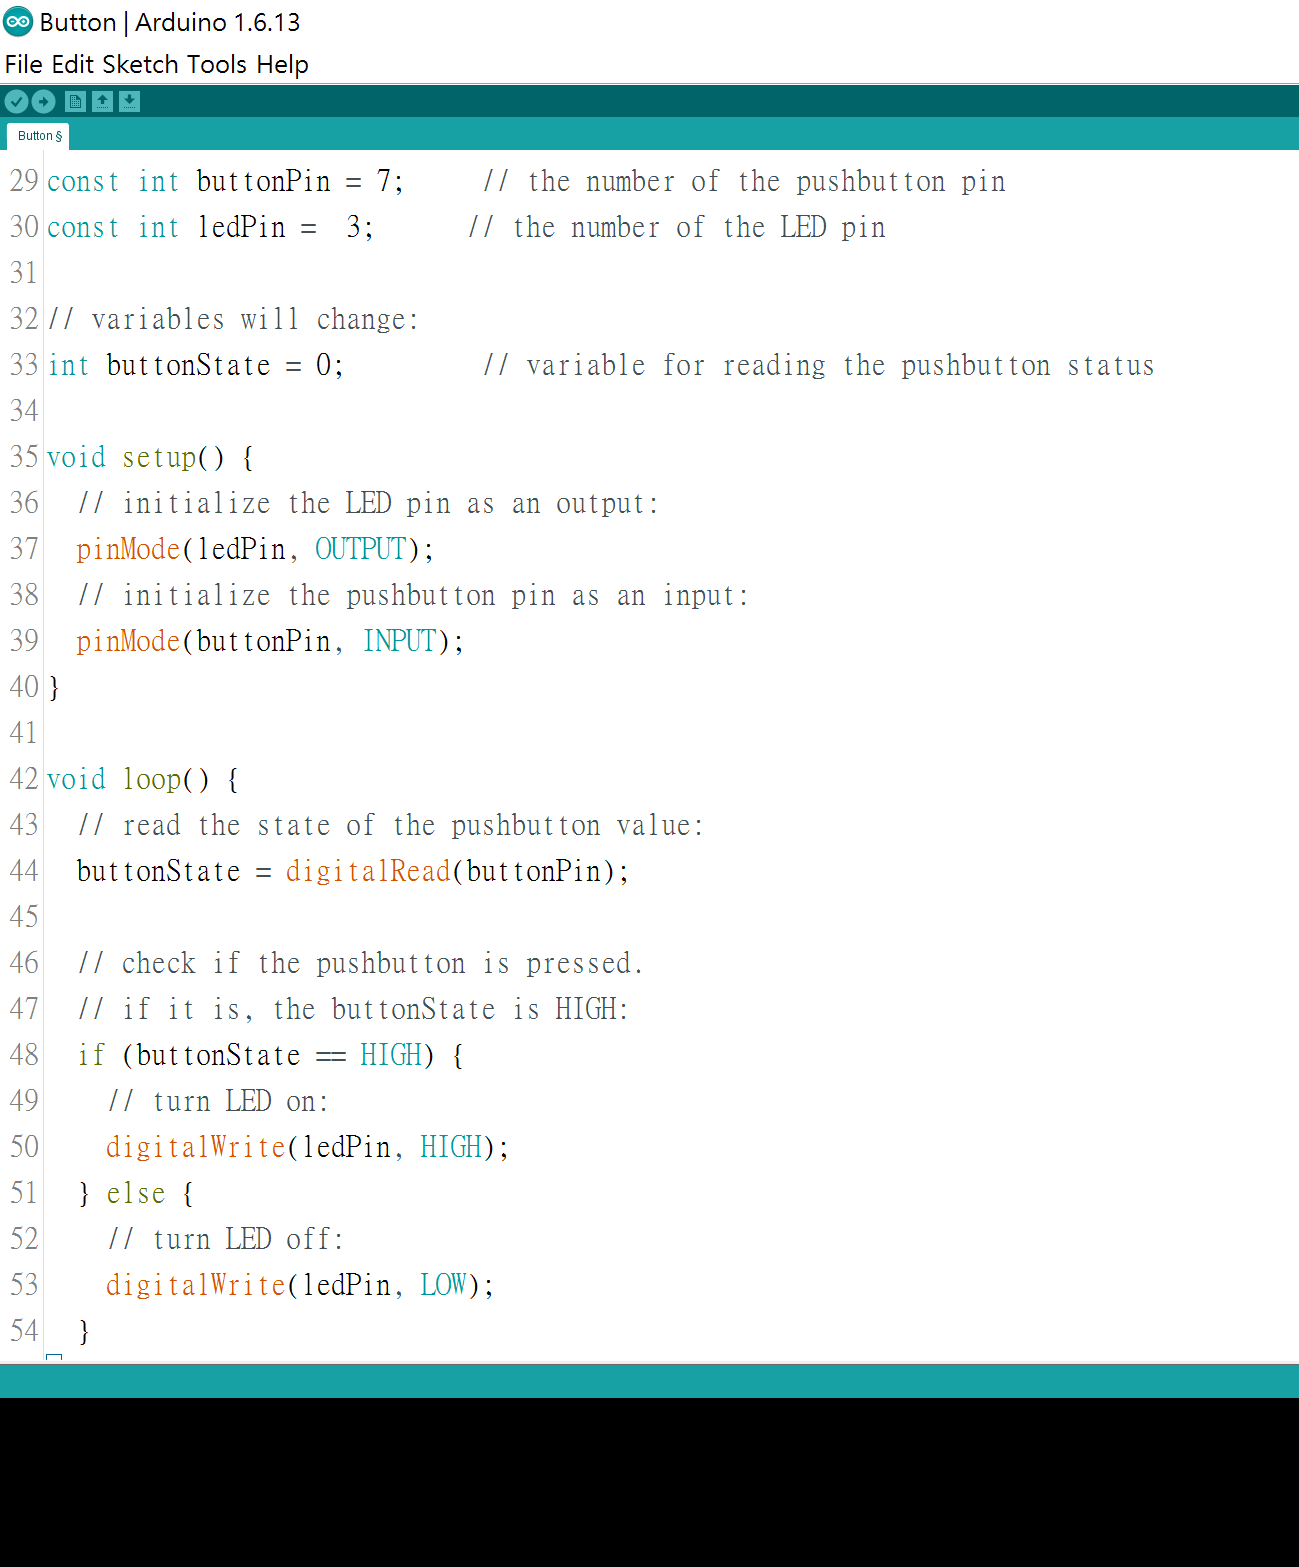
From the schematic I made two weeks ago, we can tell that the pins of Button and LED are 6 and 10, which are pin 7 and pin 3 for Arduino.
I used the example "button" in Arduino and changed the pin to mine. File > Examples > 02.Digital > Button
After I successfully ran the code, I also played around with it, and here are the videos of what I did!!