This week is super important for me because the biggest part of my final project is networking. I had a hard time thinking which networing module should I use, wifi, RF, of Bluetootn, and I ended up deciding to use Bluetooth module. I basically followed Dan Chen's website to finish my own part.
Bluetooth Module-HM10
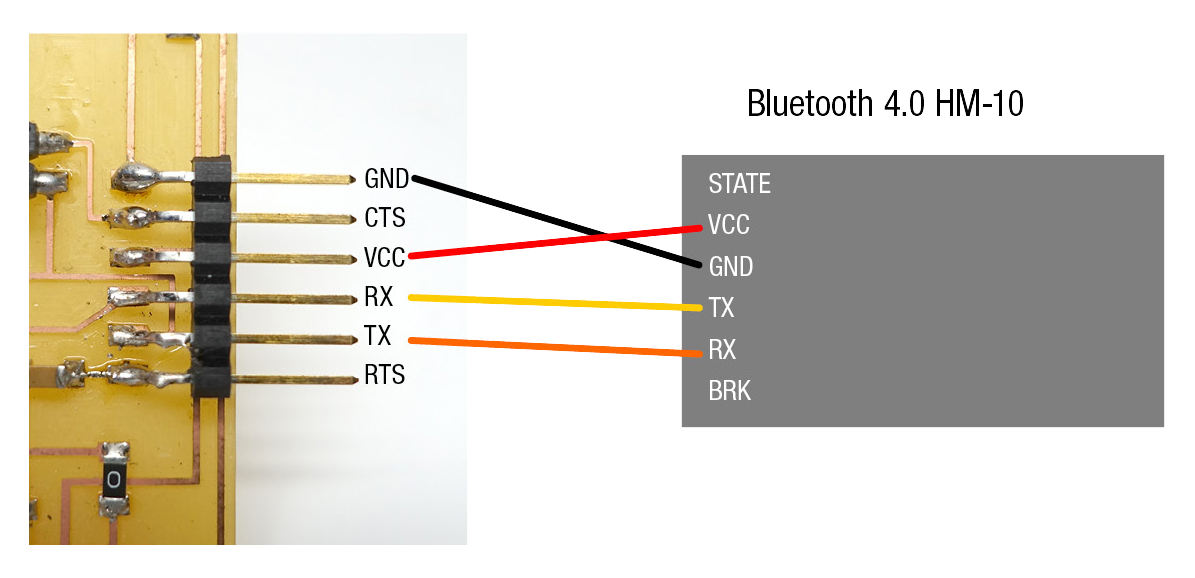
HM-10 is a BLE module for embedded system to get BLE wireless communication with BLE capable devices (e.g. iPhone and iPad). It is fully configurable by a rich and well documented AT command-set and allows transparent data communication via serial UART (default baudrate 9600bps). The Bluetooth 4.0 HM-10 is basically a breakout board for cc2541, it broke out the LED pins, RX/TX and also adding the voltage regulator that regular 5v to 3.3 v.
Setup with FTDI + Arduino Serial Monitor + AT Command
First of all, we need to connect HM10 and FTDI as the picture shows below.
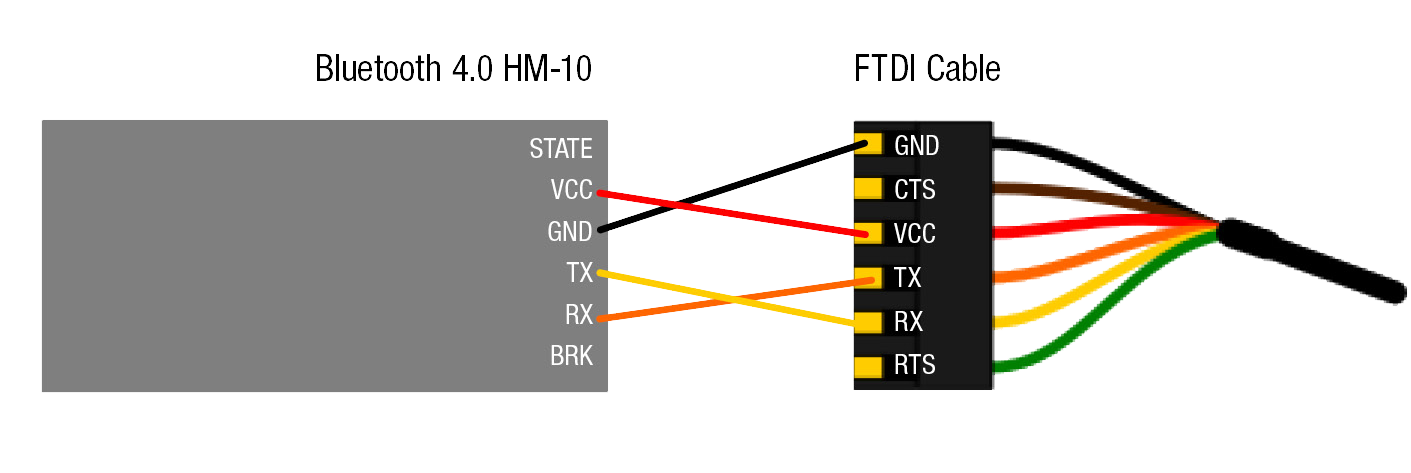
And then On your computer, open Arduino.
Make sure to select the correct usb serial port.
Open Serial Monitor and make sure the baud rate is 9600, this is the default baud rate.
Type in
AT+NAME? (NO SPACES IN AT COMMAND)
and you should get OK+NAME:HMSoft
Sending & Receiving (Both Ways): Setting the Master-Slave mode
Type in "AT+ADDR?" to get something the BLE's unique address.
Use AT+CON[param1] and AT+ROLE[param1] to pair to another device.
For Example,
BLE A has Address 11C11FF11DA1, and BLE B has Address 22C22FF22DA2
Send AT+CON22C22FF22DA2 to BLE A
Send AT+CON11C11FF11DA1 to BLE B
(Send the B address to A, A address to B)
Send AT+ROLE0 to BLE A
Send AT+ROLE1 to BLE B
(Doesn’t matter which one)
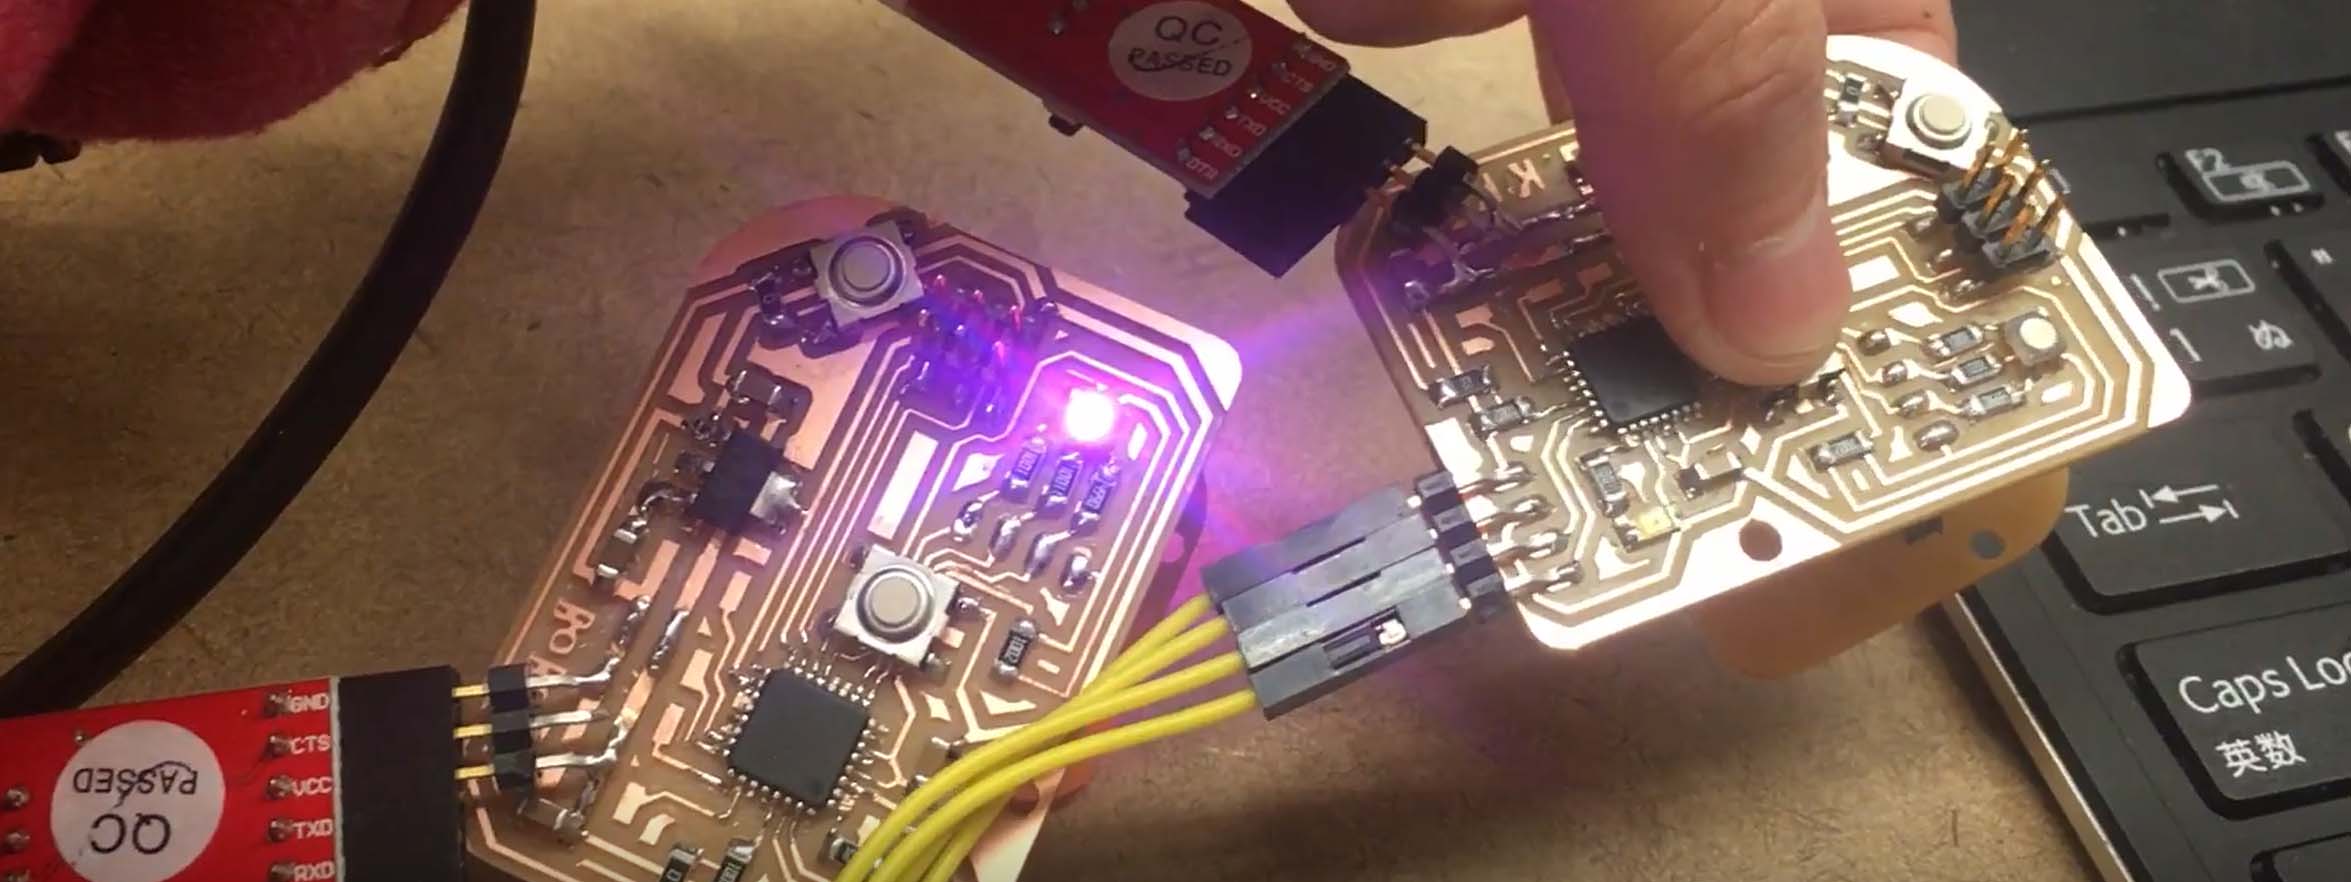
Connected the Board
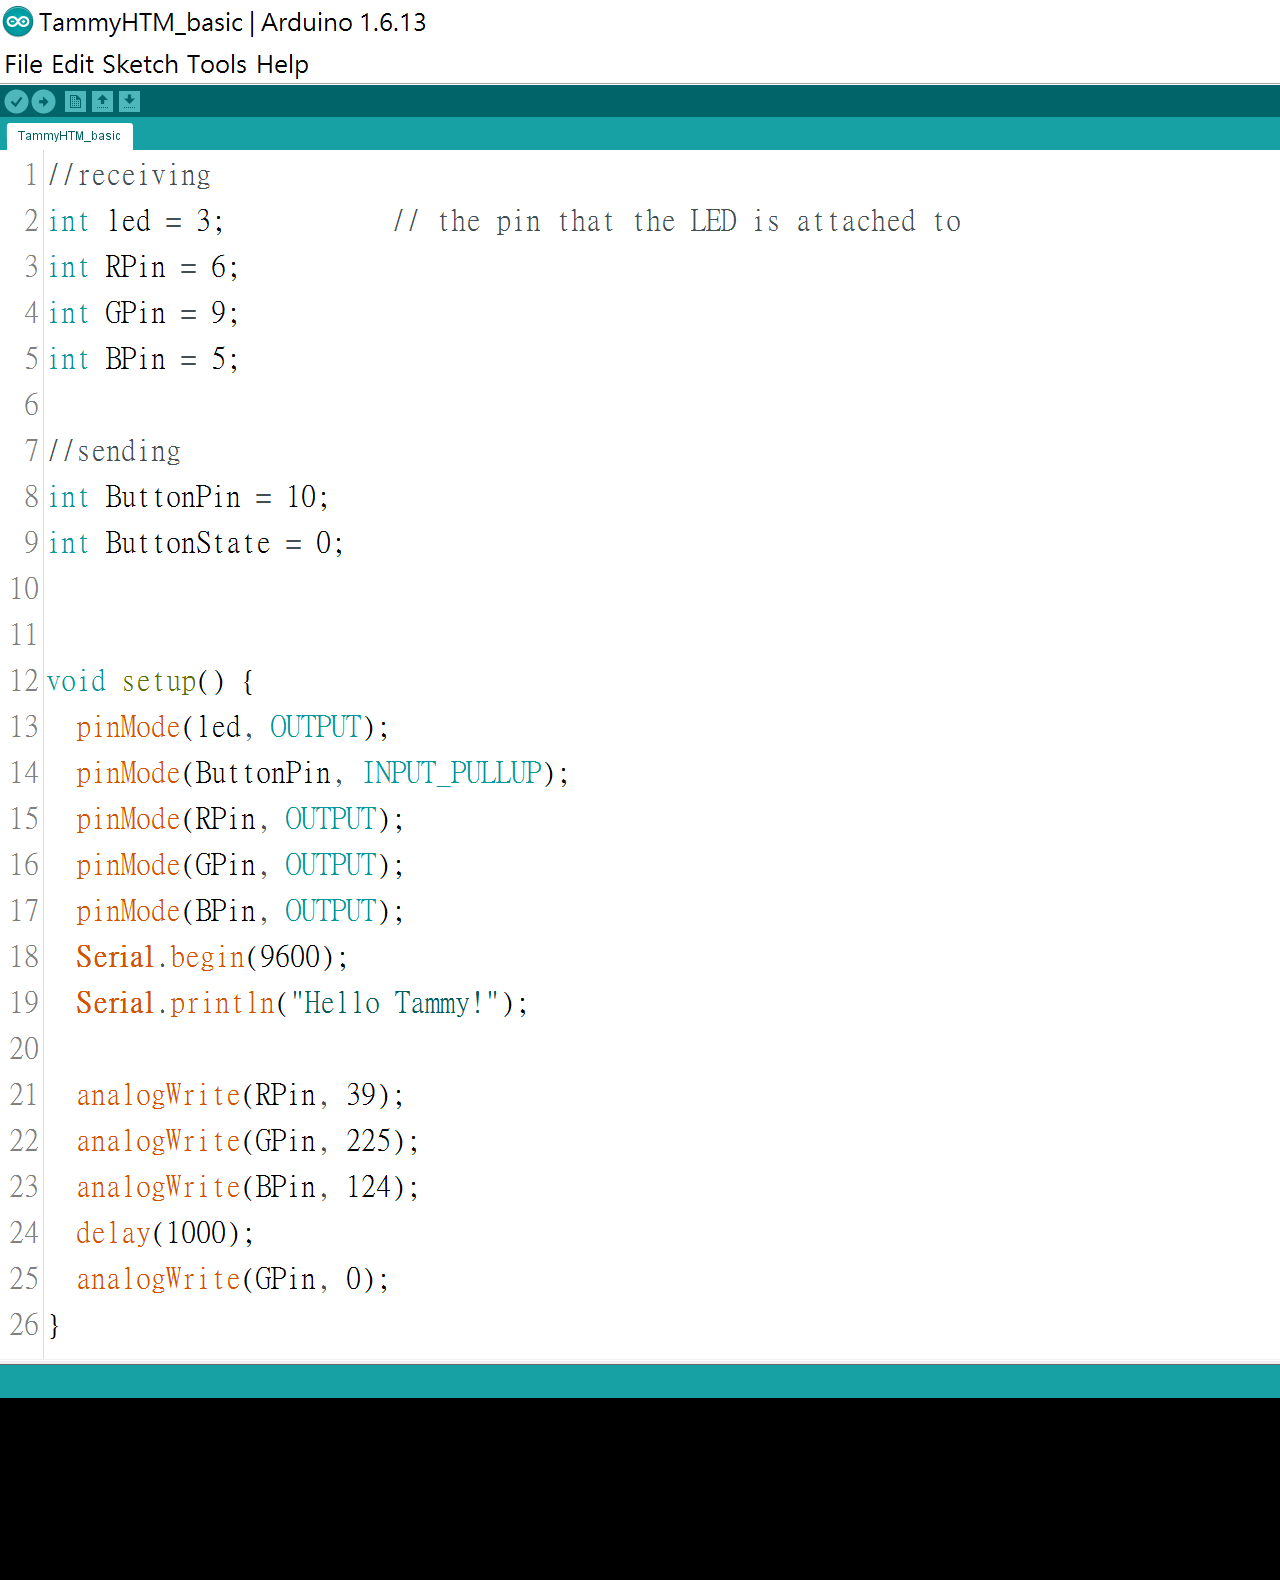
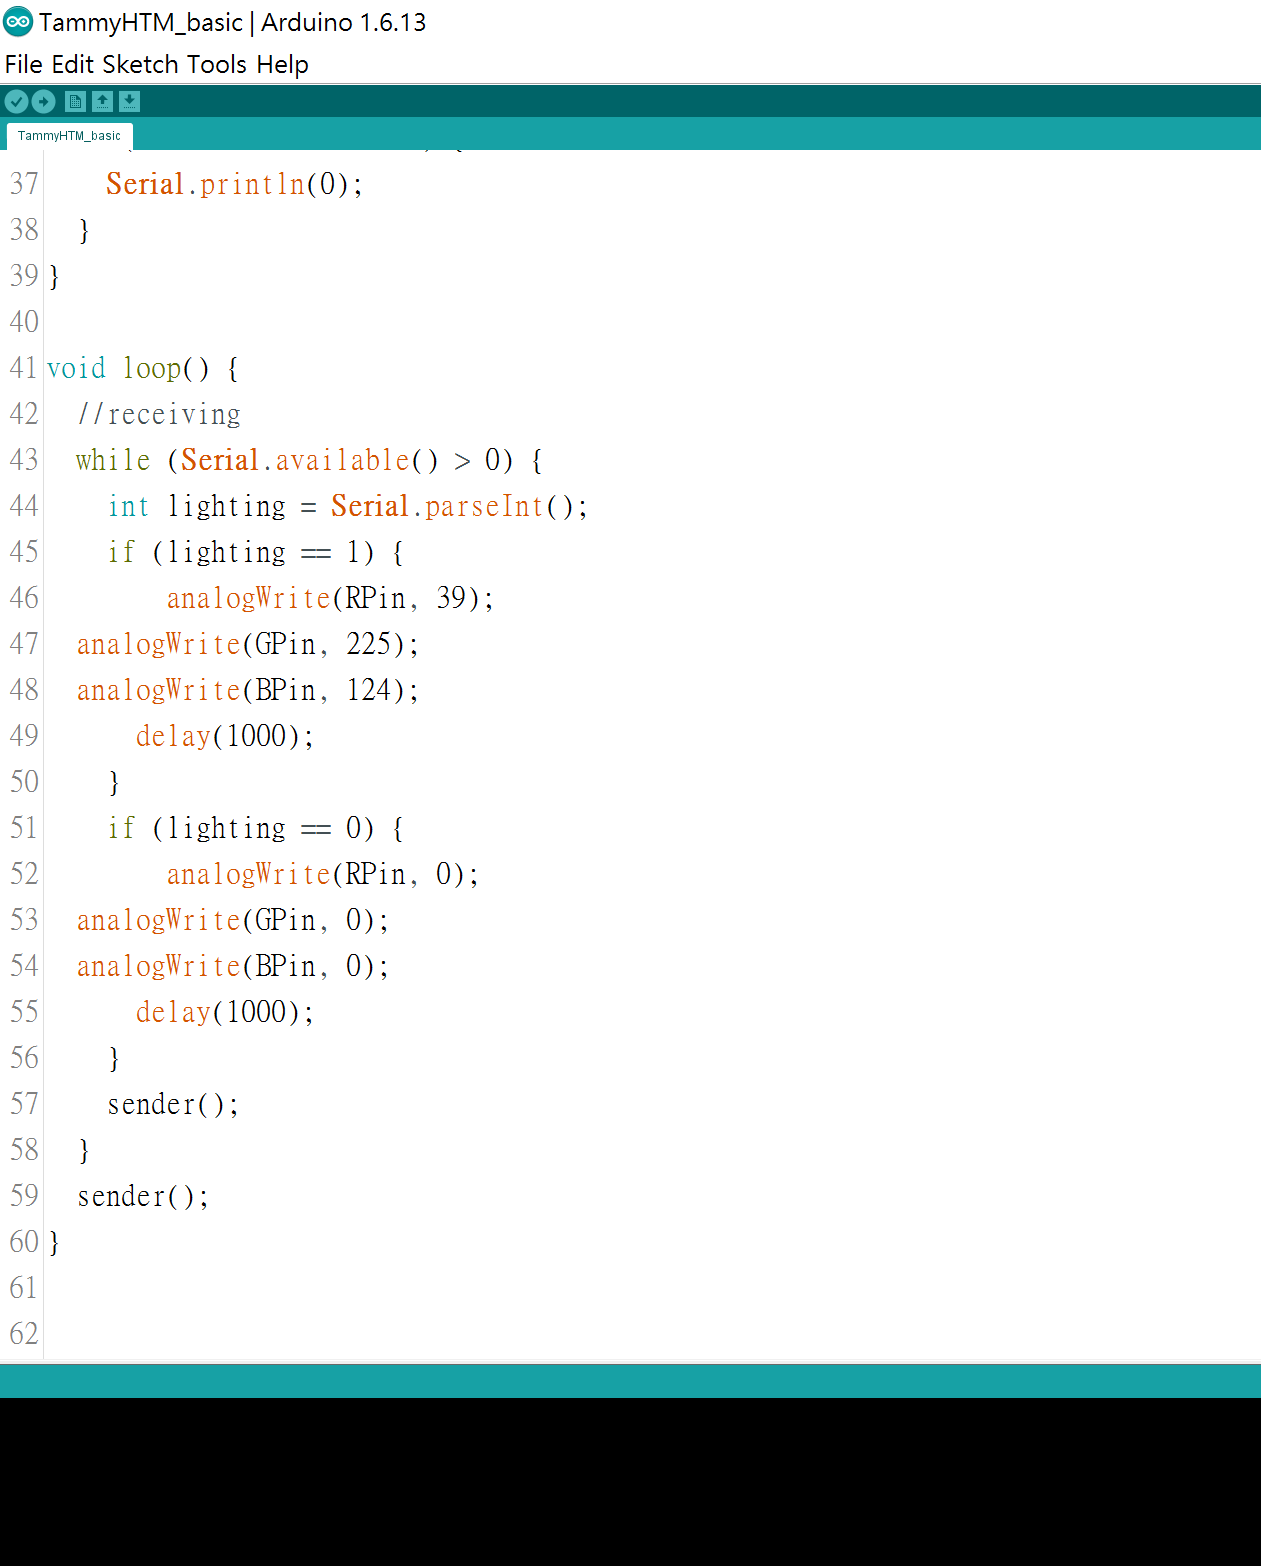
Coding
I found that I can't program my ATmega328P board with my computer... but I still wrote a simple code to light up LED and uploaded it from others' computer.