Week Six
Make something BigThis week we were asked to make something big with a 4' by 8' piece of plywood. I immediately decided I wanted to build either an obscure shaped chair or soemthing just generally cozy. I contemplated hanging it from the ceiling, although placement in my dorm would be a struggle.
Initially, I designed the chair to have 19 ribs, at about 3ft and the length of the chair to be 145 degrees of a 6ft circle. I struggled to fit the pieces on the 4' by 8' board and realized, witht he design I had right now I would ned to use 3 boards of plywood with a lot of empty space.
I went back to redesign the chair, with 13 ribs this time and only a 5ft by 2.5ft circle. this worked relatively well, except that the pieces still didn't fit! I decided to split up my ribs into two pieces with two pins to hold them together coming in from opposite sides. was rather worried about the structural components, but decided to proceed anyways.
I converted the file to a .dxf (as I was using solidworks) and was informed that in order for mastercam to work on my file I would need to desine layers. I put my file in rhino and added 3 layers:pockets, contours, and points. At points it would drill a hole, at holes it would cut out my joints, and at contours it would cut out the outline of my part....hopefully.
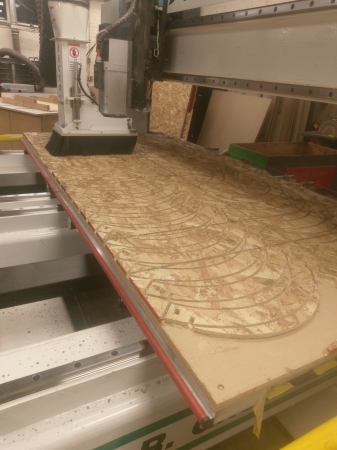
I submitted the file to the CNC Router and watched it run. It only took about 30 minutes to cut all my pieces out. Several problems arose while it was cutting through my board. The pins (to hold the ribs together) kept flying off the board before they were fully cut, I suppose the Router didn't leave an onion layer on this section. Also, while running through the "reoutline" section of the file, the bit broke, launching itself, while wedged in a pin, off the machine. I turned it off immediately,and alerted someone about the bit. I decided to take my pieces and start popping them out.
Some of my pieces had cut all the way through via the router and they were relatively nice compared to the other ribs that were splintered with woods on the sides when I chiseled them out of the onion layer.

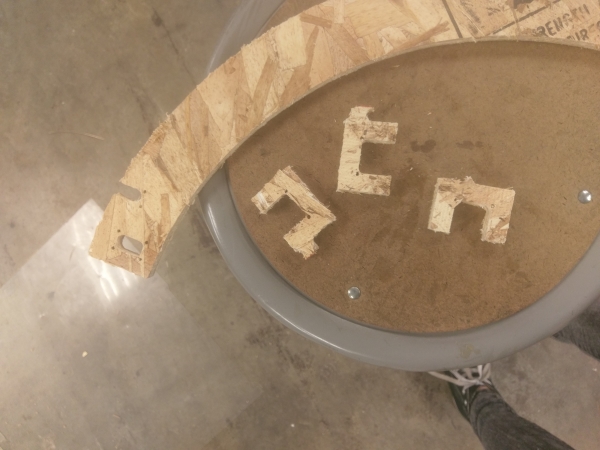
It didn't cut through enough to insert my pins (the few that worked) I ended up chiseling out little pieces until I could wedge the pins in. I took the half cut pins and used the bandsaw and chisel to give them the U-shape I wanted.

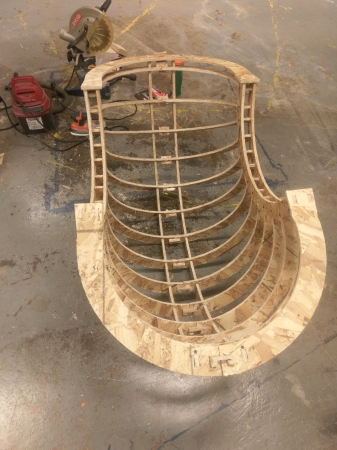
I pressed the pieces together and they fit nicely! I added some screws along the arms in order to hold it together more snuggly.
I carried it home so that I could work on it more effectively and, using a sander, smoothed out the sides so tht I would get less splinters. I stained it using some leftover stain from building my loft and cabinet (prior to this class) and decided it needed something comfy inside.
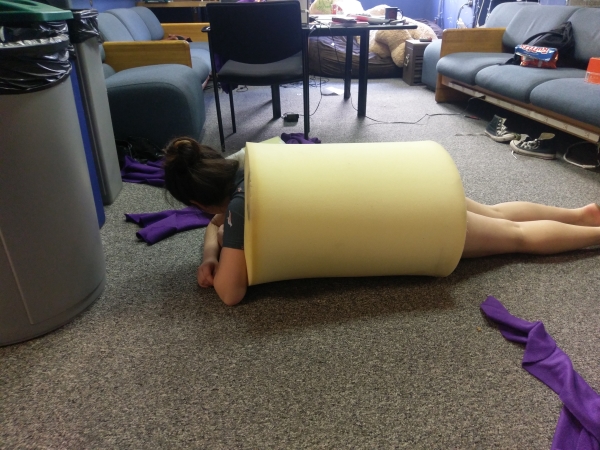
I took a trip to The Home Depot (my favorite store) and bought a large piece of foam about 3" thick. I molded it to fit in the cahir and sewed it into a large piece of purple fleece ( I thought the colours would look nice together).
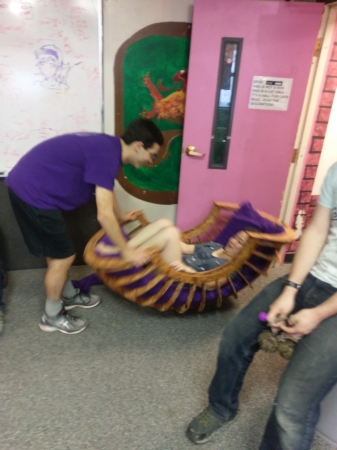
It was tested quite a bit by the other undergrads on my hall, and, as they haven't broken it yet I can assume it is pretty structural, and pretty entertaining. I suppose it will most likely be living here until someone breaks my little prototype. The biggest problem with it is the high center of mass, so it is rahter easy to push the chair over. It is also a little hard to actually sit in the chair because it is the same height on both sides when at rest. Perhaps we will hang it from the ceiling.
UPDATE: It lasted up until election day and it was so well loved by people on hall that I am planning on making a new one over IAP using a nice sturdy plywood instead of the mashed together wood that breaks so easily. People want it to return---Maybe we'll even find somewhere to hang it. Who knows?