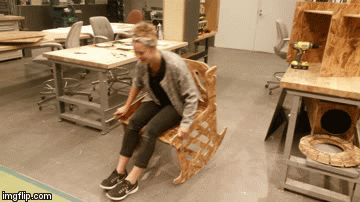
Our assignment this week was to 'make something big'. The main machine available was the 5ft x 10ft Shopbot. We were provided with 4ft x 8ft sheets of OSB, a cheap wood chip board. I decided to make a rocking chair
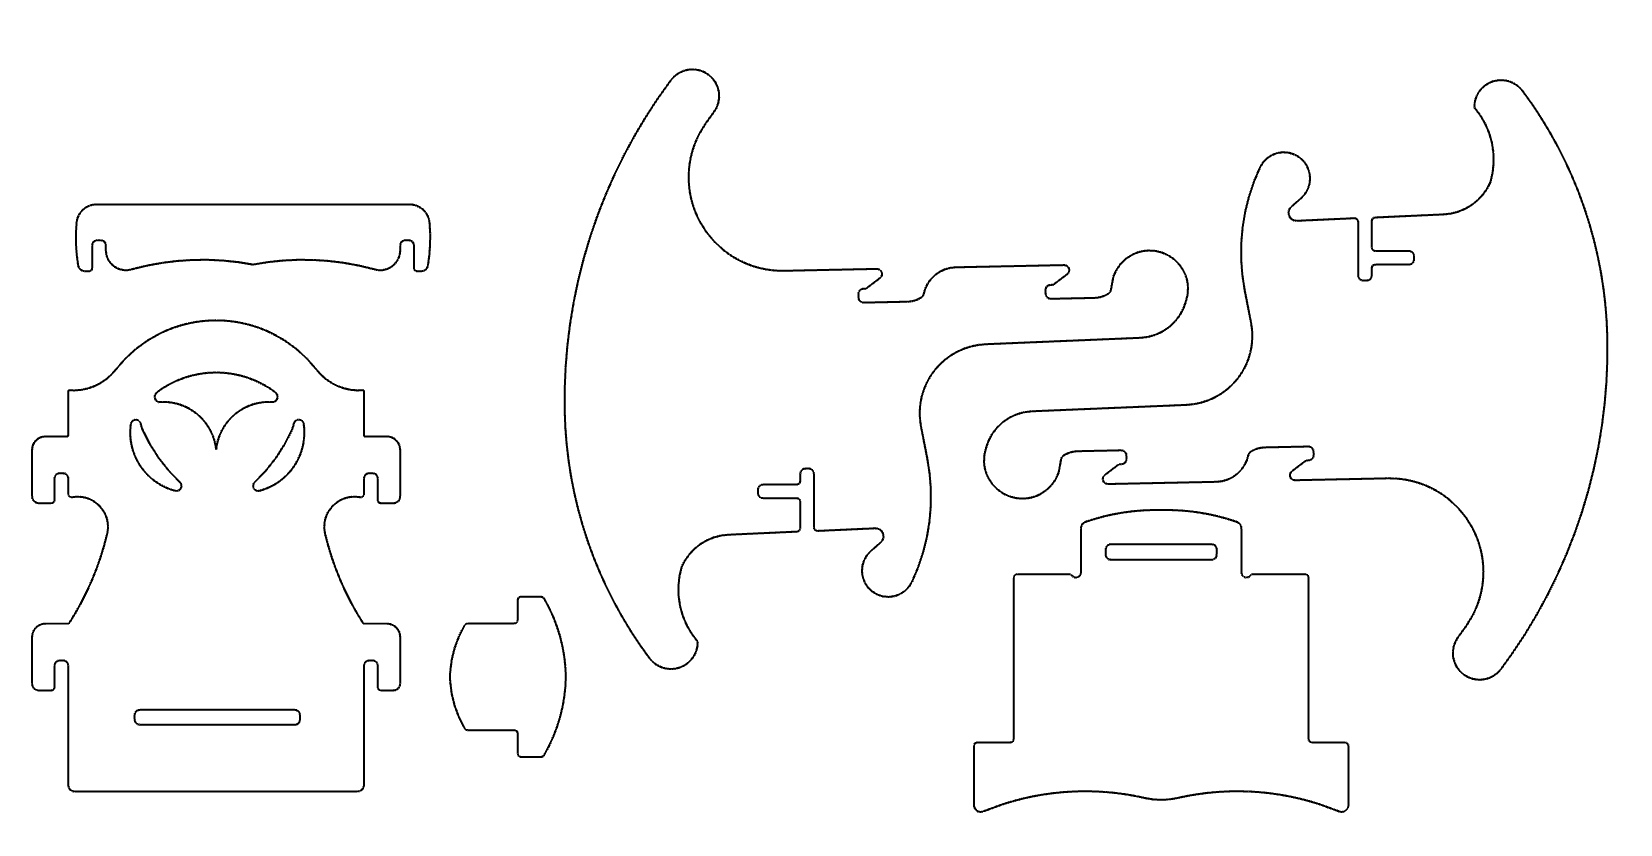
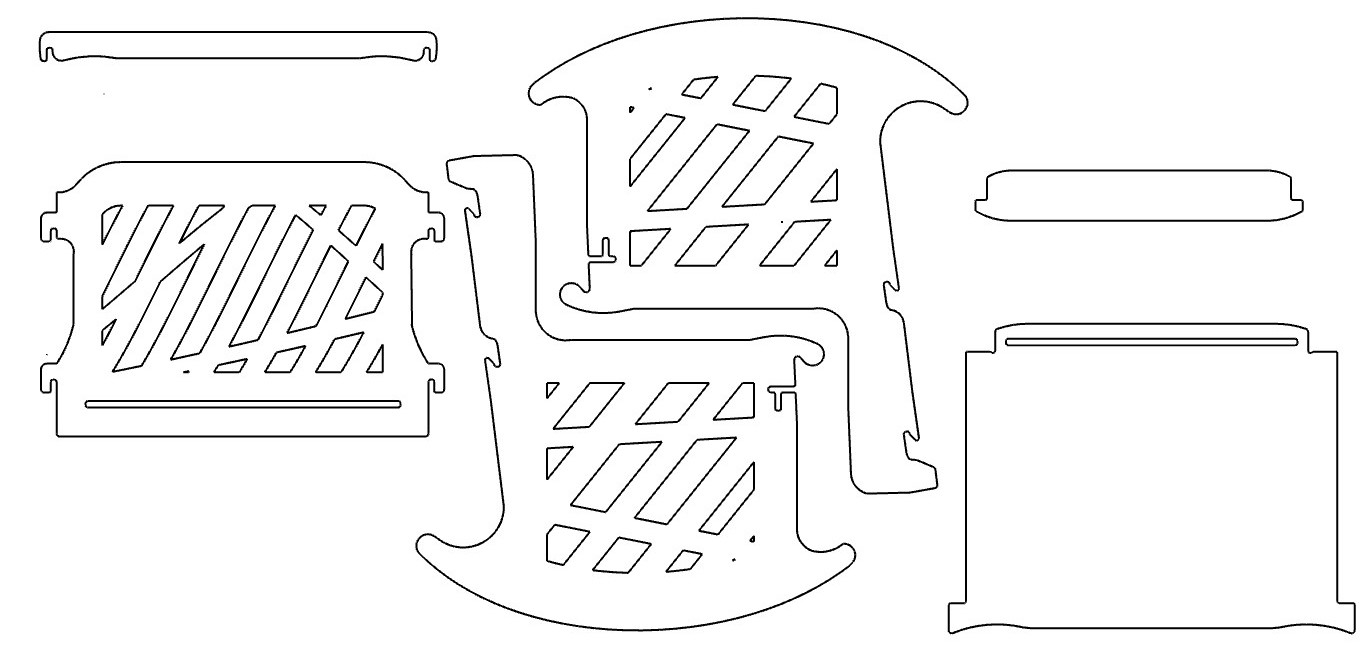
I took a bit of a short cut this week and started with a DXF file from the On Wood Art channel on YouTube. I then spent time scaling the parts up (the original design is for a kids chair), I added a hole pattern to reduce the overall weight of the part and add a little character to it. I also resized all the joints for the thicknes of the OSB and angled the back piece by 5 degrees in an attempt to make the sitting position a little more comfortable. The images below show the design before and after.
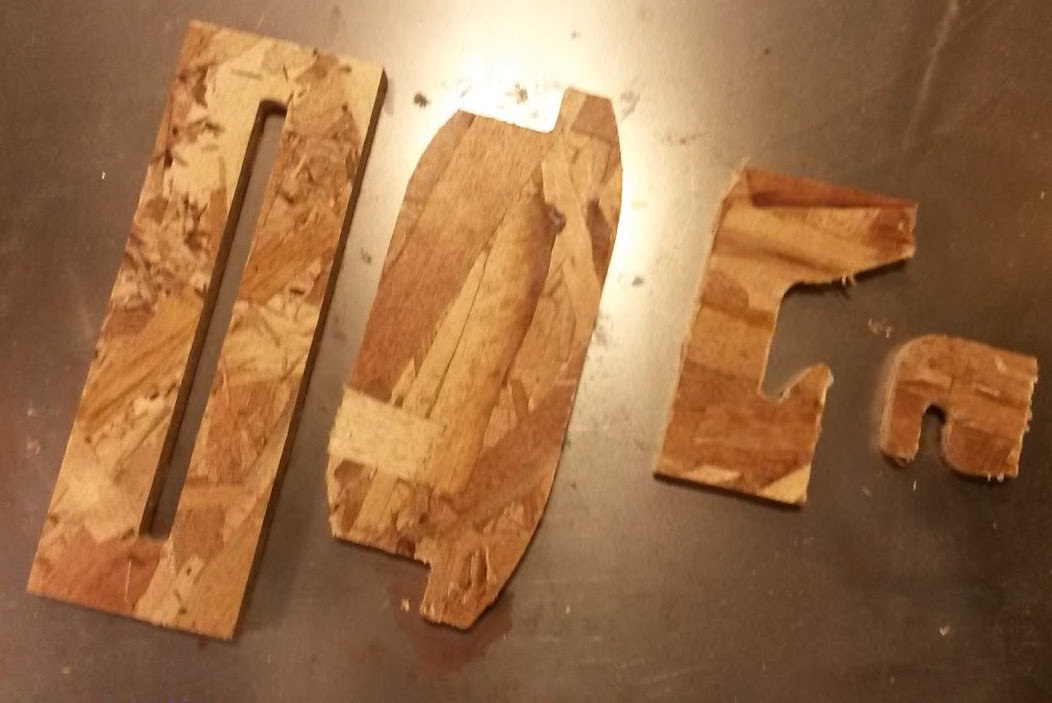
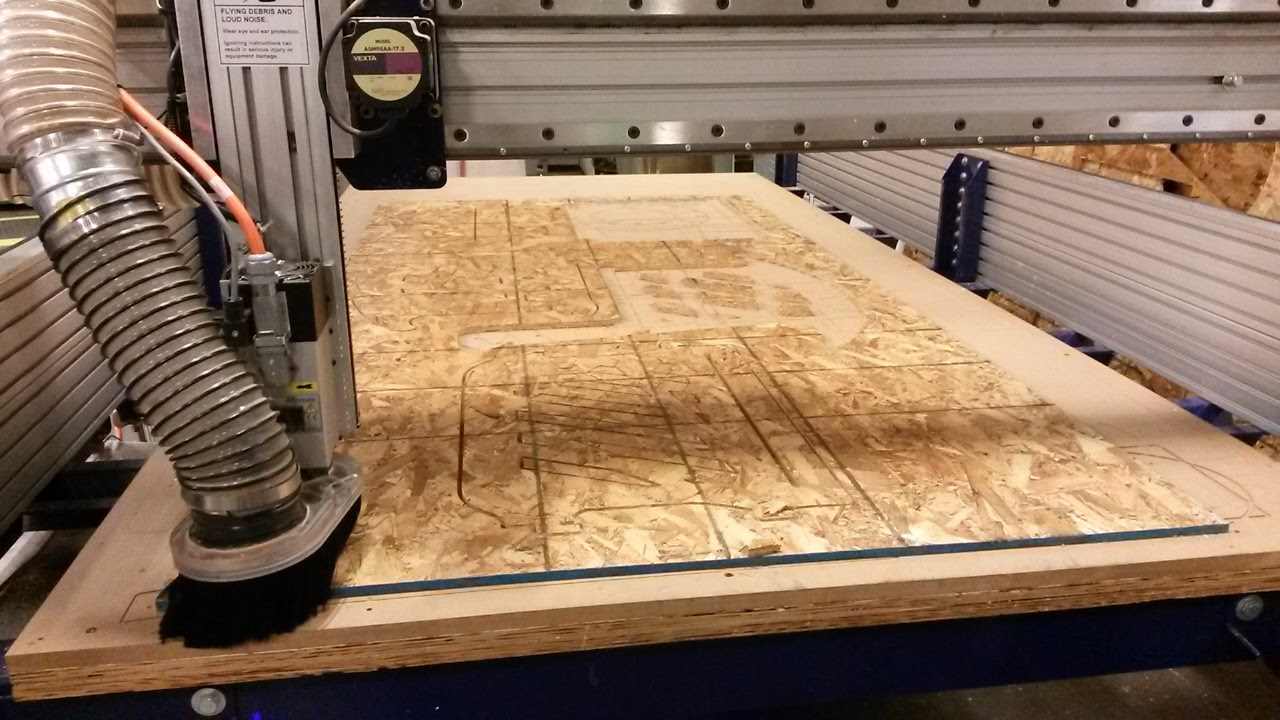
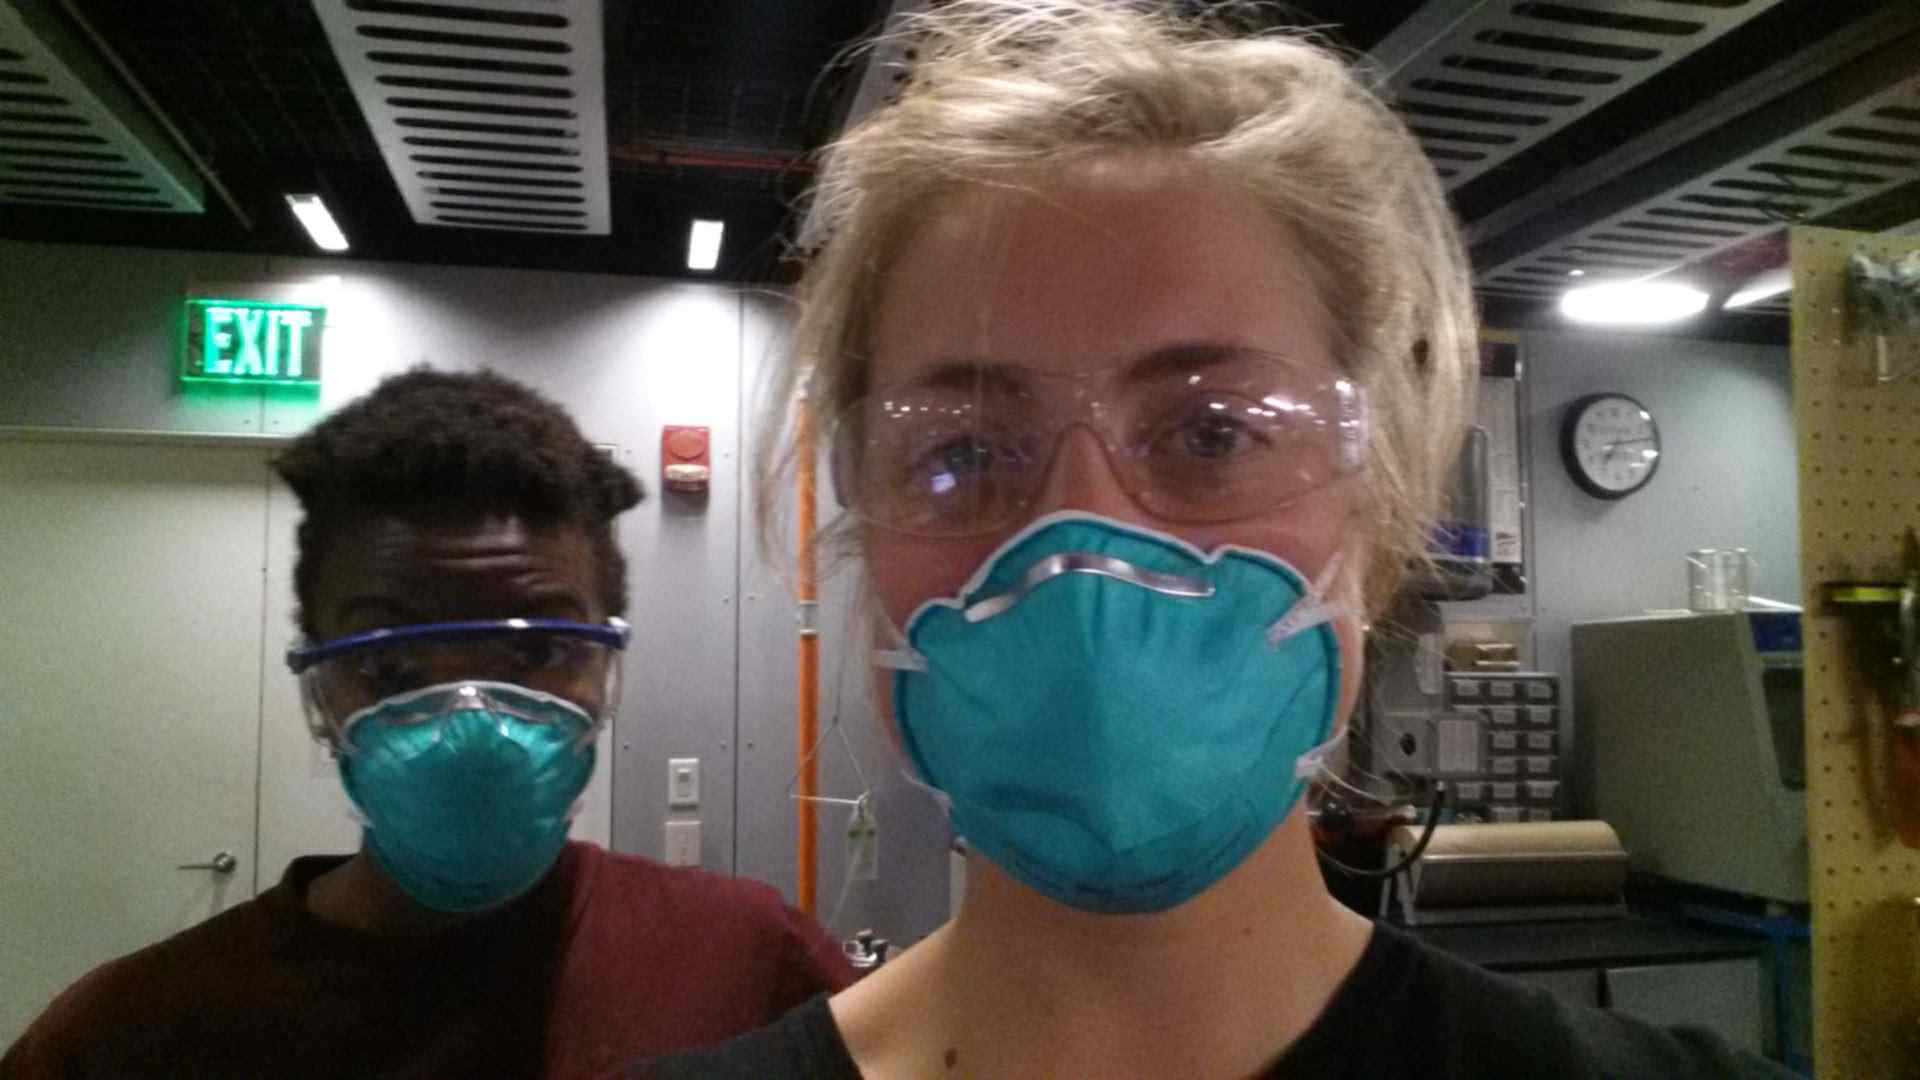
We fixed down the OSB to the bed of the Shopbot with wood screws. I started out by machining two representative joints to check that the tolerances would work. These came out well so I progressed with the main jo. This process went fairly smoothly once I'd re-scaled my file into inches. The machining process generated a lot of dust so Randi and I decided to use dust masks.
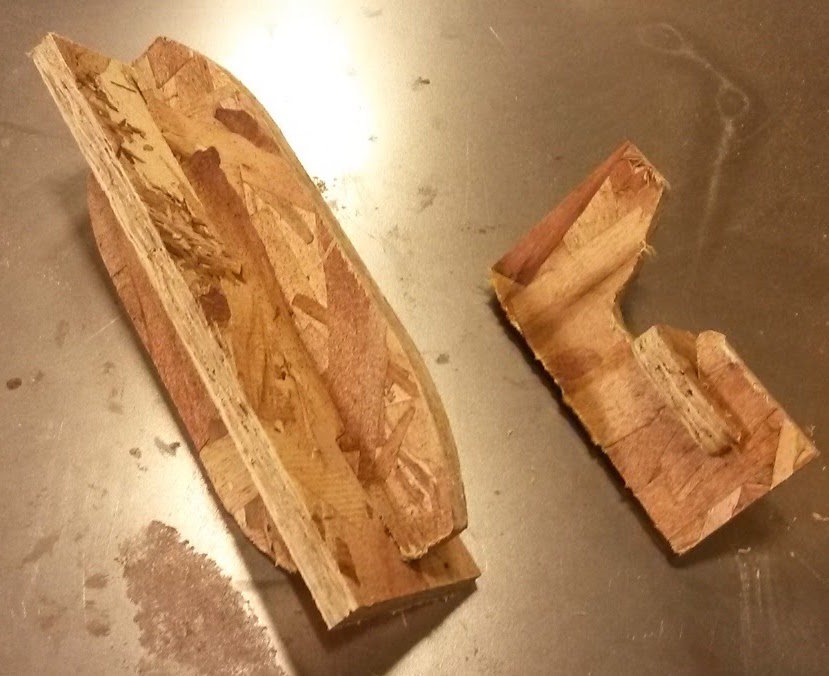
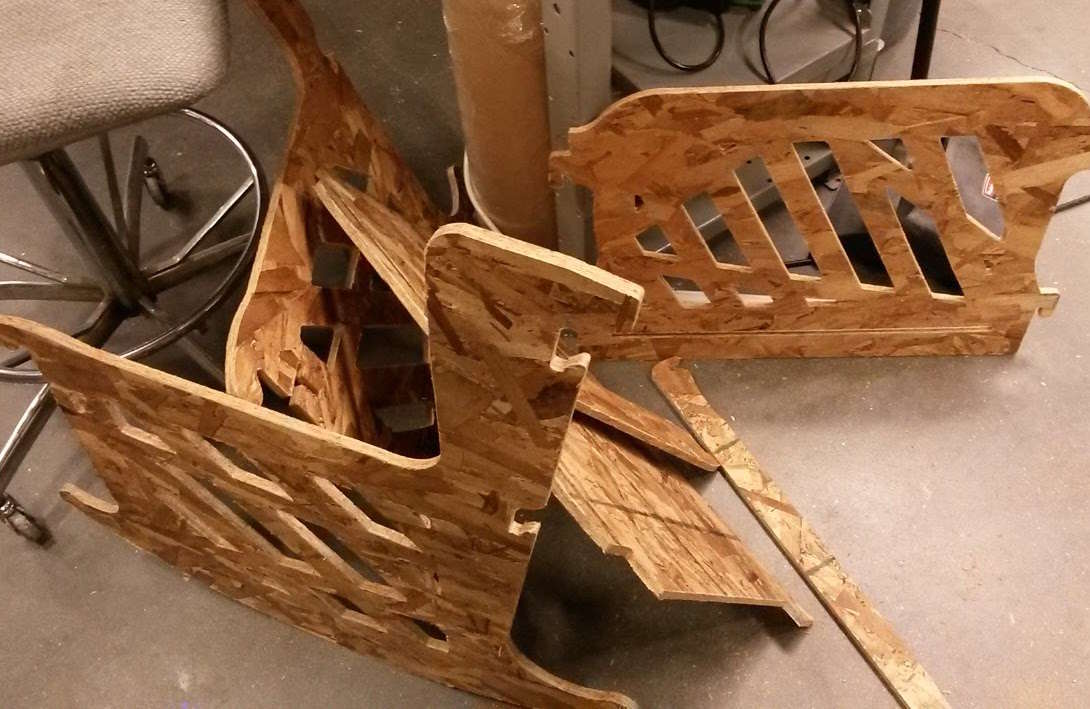
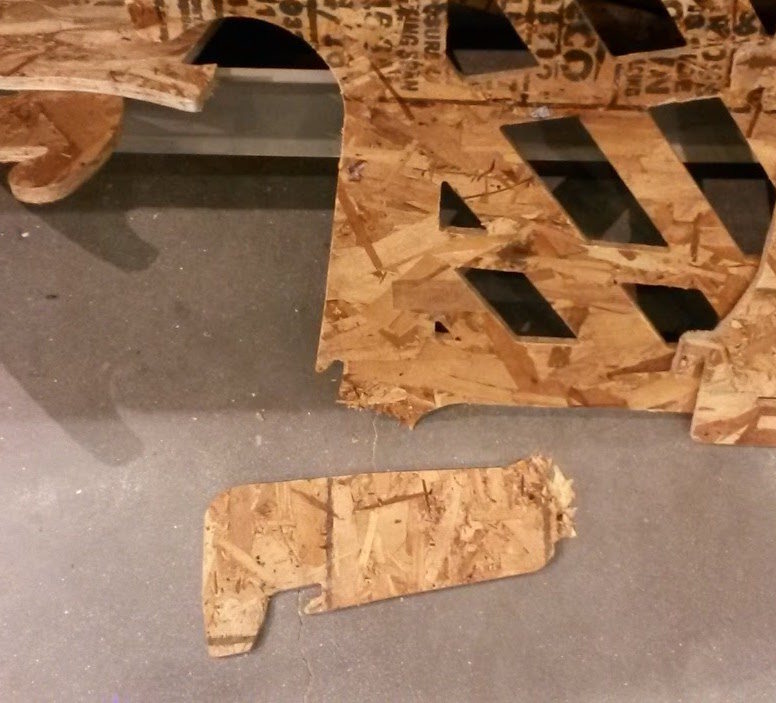
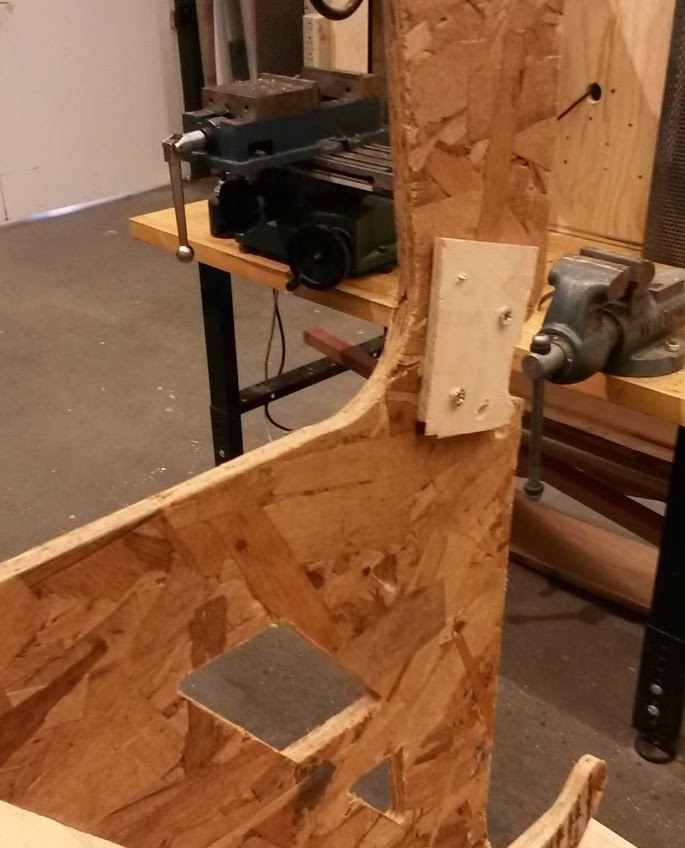
The joints were intentionally tight so parts required some filling. After machining I stored the pieces of the chair in a stupid place, when I returned the next day one piece had broken, it must have been knocked by someone. I managed to repair it.
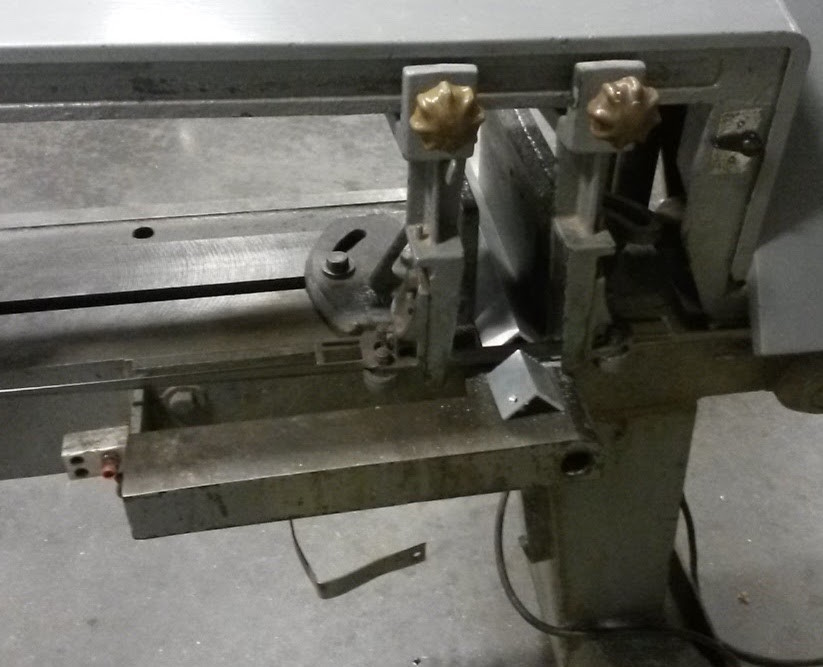
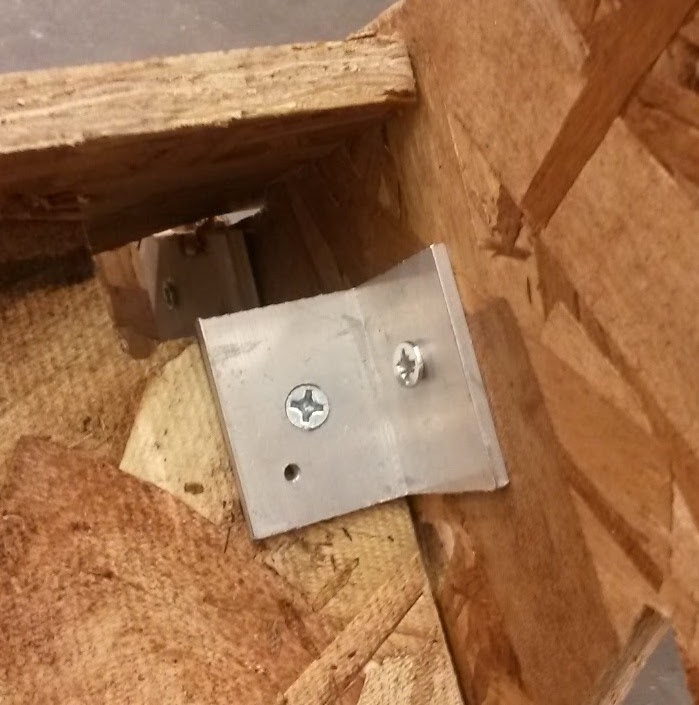
I also learned to use the horizontal band saw to cut two aluminium L brackets to reinforce the seat.
The chair rocked a little too well, it could probably do with a shallower curve on the bottom. Also OSB is possibly the worst material you could make a rocking chair from. This ended up like more of a splinter torture chair than a nice place to chill out.