This week's HTMaA assignment was to design and fabricate a 3D mold and then produce a fiber composite part with it. I couldn't come up with a reason why I would need a fiber composite part in my final project so I decided to build something fun this week. With the winter rapidly approaching, I decided to make a sled! I thought that a sled would be a good way to test the resiliency of the fiber composite material we will be working with.
The first step was to create a simple parameterized sled design using FreeCAD.
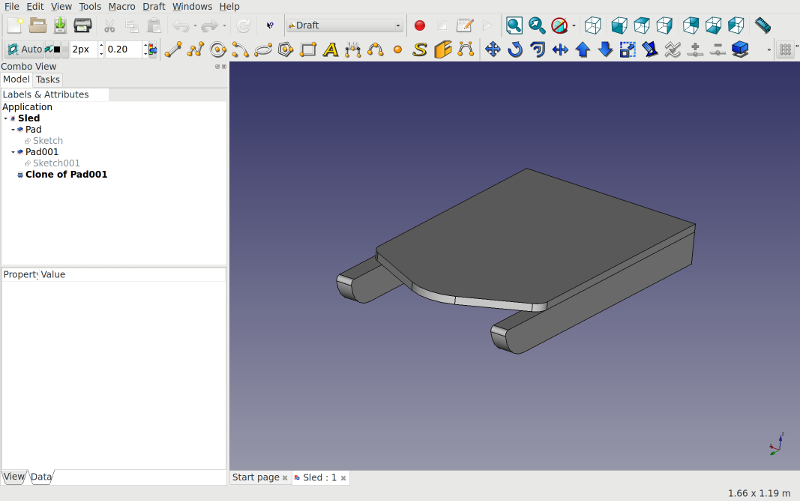
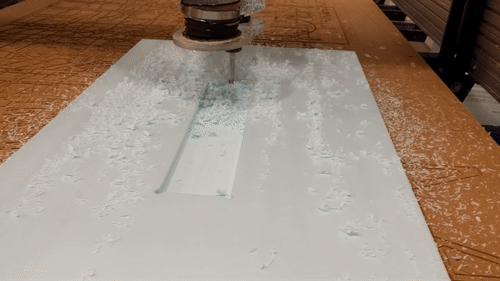
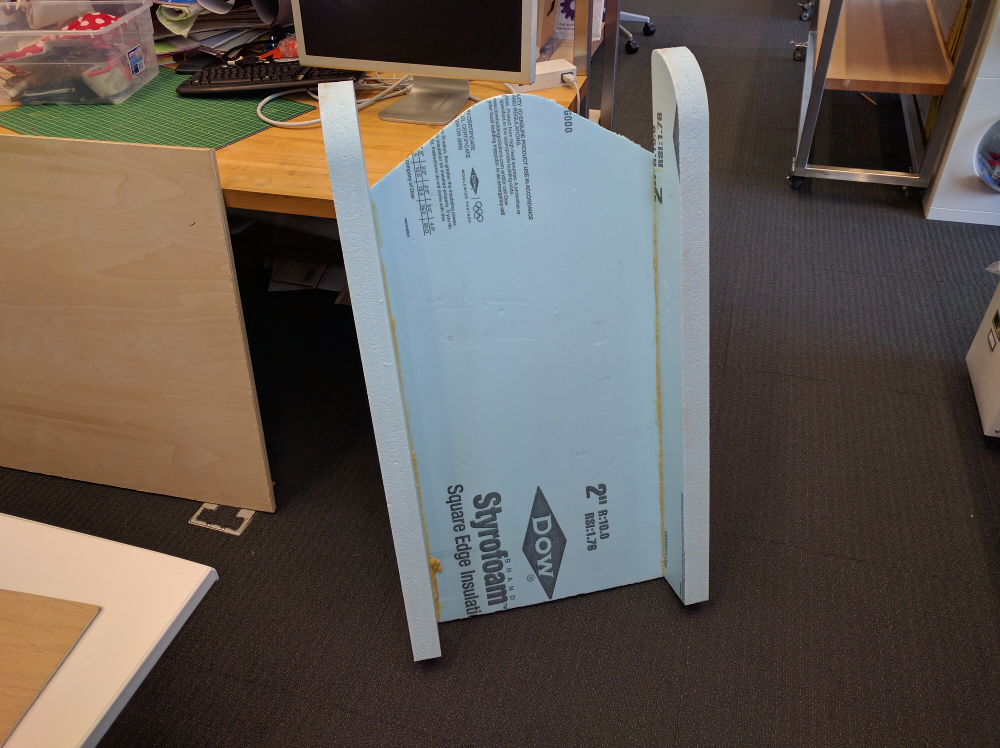
Since the foam doesn't add much weight, I decided that I would just encase the foam mold in composite fiber. The foam was only 2" thick so I cut out the top and the skis as separate pieces. Milling the foam turned out to be a very easy (but extremely messy!) process. I used a pocket cut to mill the top board down to 1" thickness then used a profile cut to cut it out of the foam block.
I wanted to attach the skis to the top before compositing instead of doing them as separate pieces. I used gorilla glue to attach the skis and placed weight on it to set overnight.
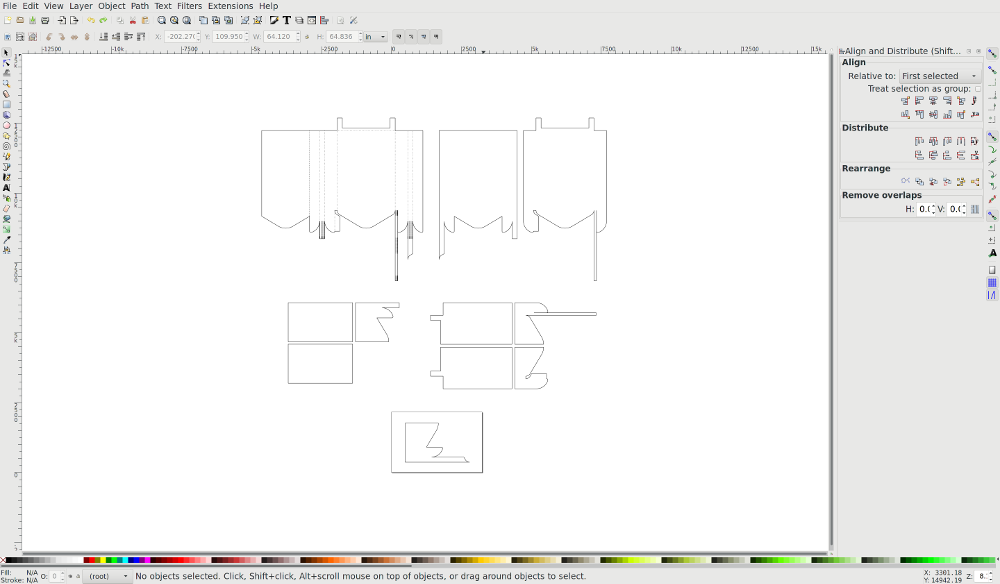
Since my model is pretty large I was a little worried about my ability to hand cut the burlap. Fortunately, I found a Blender extension for exporting Paper models. By modifying a few settings I was able to export an extremely useful vector graphic of my sled.
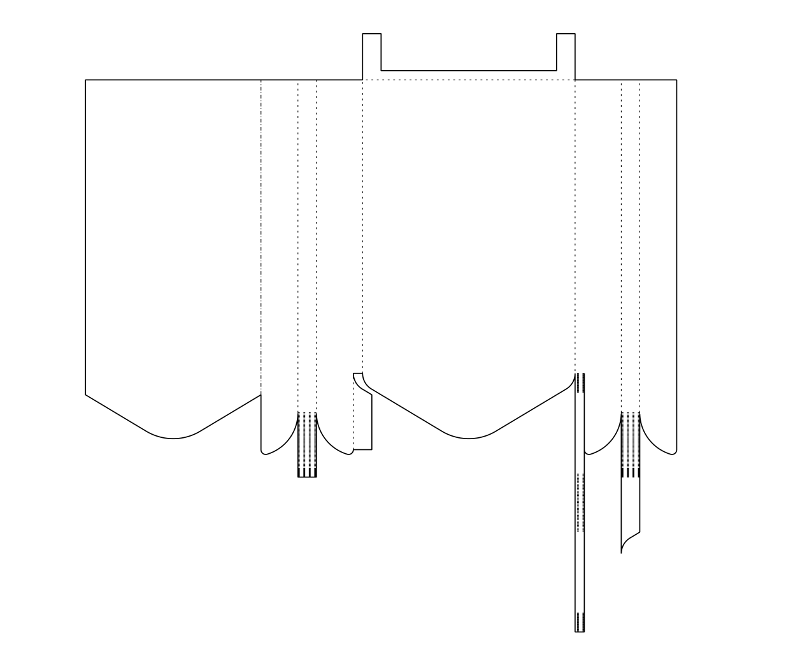
With a little editing in Inkscape I was able to split up the graphic into eight individual pieces that I would cut out with the laser cutter.
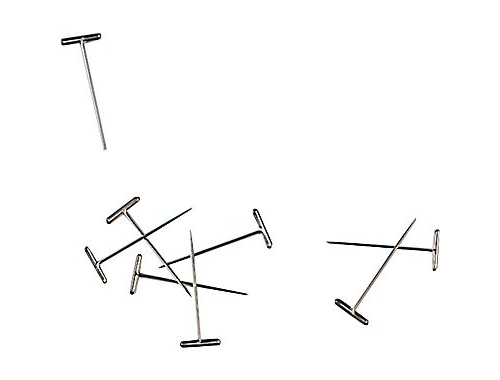
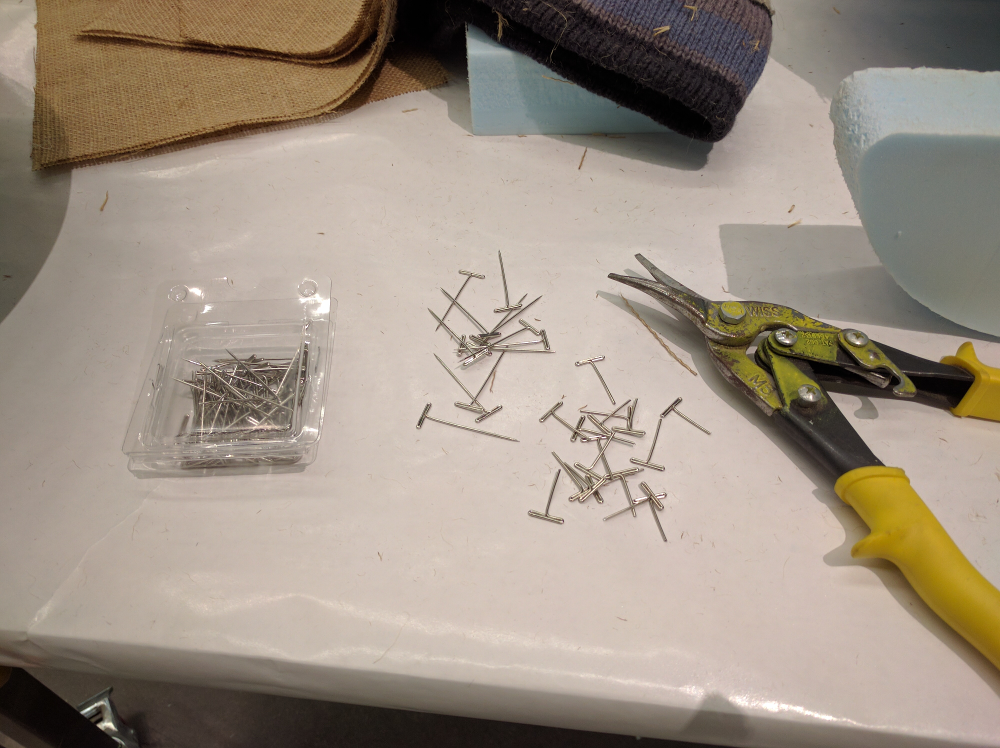
Because my model is so large I was concerned with the fiber material holding on as I was trying to place it. To work around this issue, I purchased some T-Pins that I used to pin the fiber material in place. I did not plan on removing these pins since it would be impossible once the epoxy has cured.
Since my model was so large I decided to only put two layers of fiber material. This may not have been a good idea in hindsight, but I also didn't want to use that much more burlap and epoxy for the assignment. Using the Spirit laser cutter I was able to quickly cut two layers at a time. I ended up having 10 unique pieces so I had to cut a total of 20 sections of burlap.
I realized that my T-Pins (1-1/2") were going to be too long for the top of the sled (1" thick). The pins were pretty strong so I grabbed a pair of tin snips to do the job.
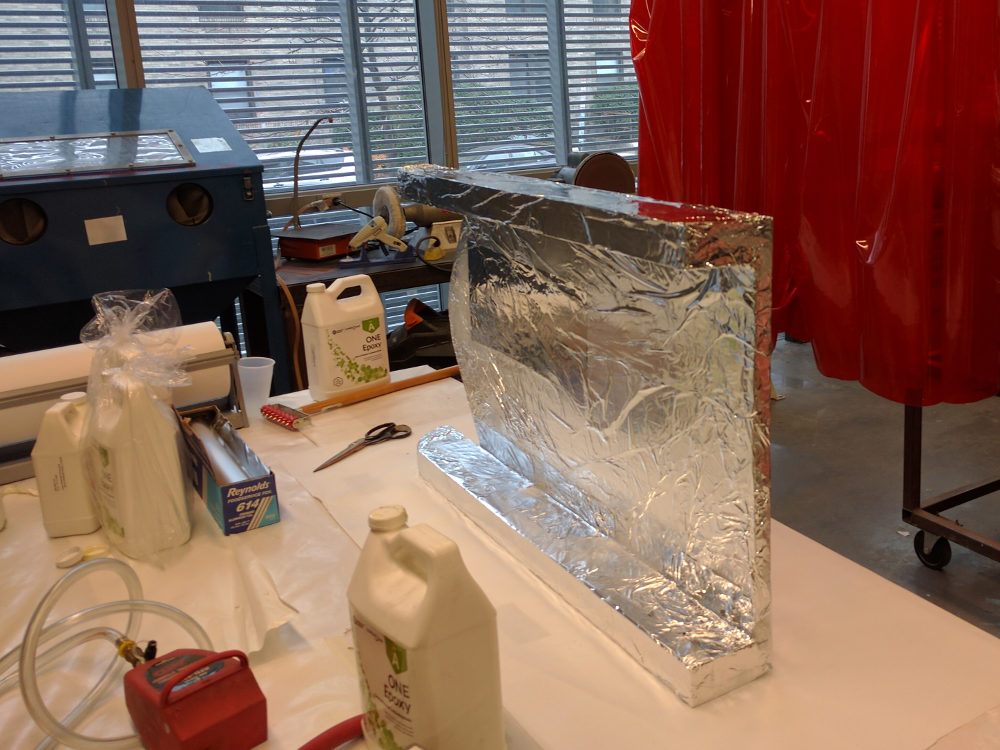
I used spray adhesive and aluminum foil to wrap the foam core of the sled. I thought it would be easier to get aluminum foil into all the crevases than the plastic wrap.
It took a lot of epoxy to coat all of the burlap pieces. I didn't want to risk mixing too much, but in hindsight I should have mixed a larger amount from the beginning. The burlap really liked to absorb the epoxy. I had to go for more epoxy about 5 times throughout the process.
Initially the T-Pins helped to help the burlap in place. However, once I flipped the sled to get to the bottom, they started to slide out. Once I placed all of the burlap pieces, I wrapped the entire sled in bleeder/breather material. Unfortunately when I tried to get it all into the vacuum bag a bunch of the burlap pieces shifted so I had to take it all out and reposition everything (maybe I should have listened and done a smaller model).
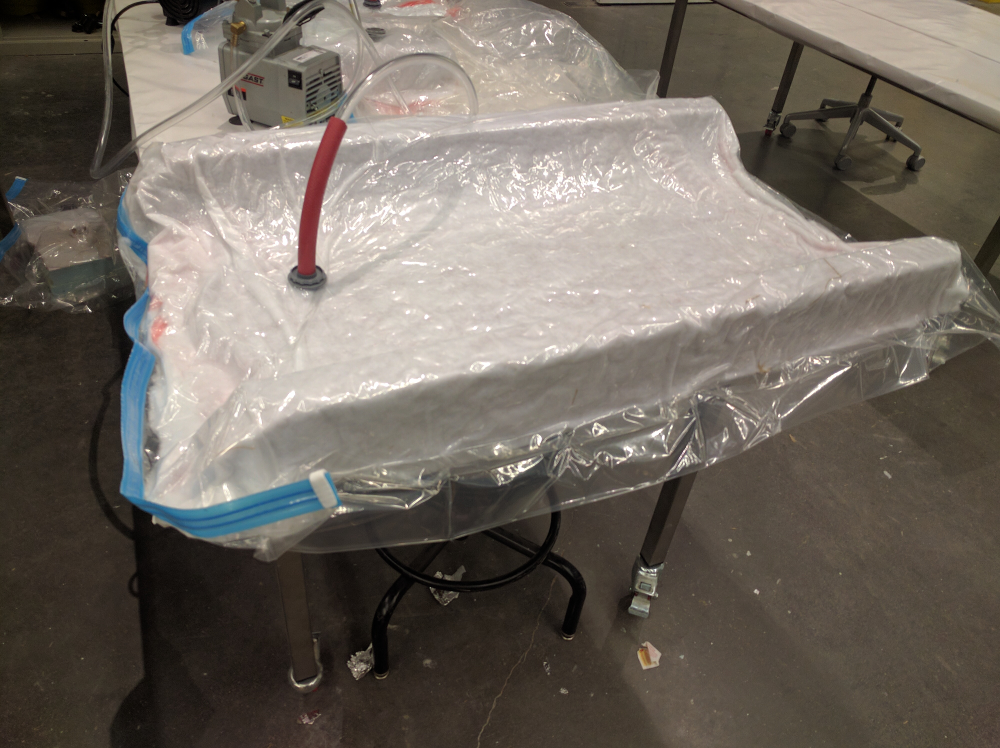
Let it vacuum for 3 hours
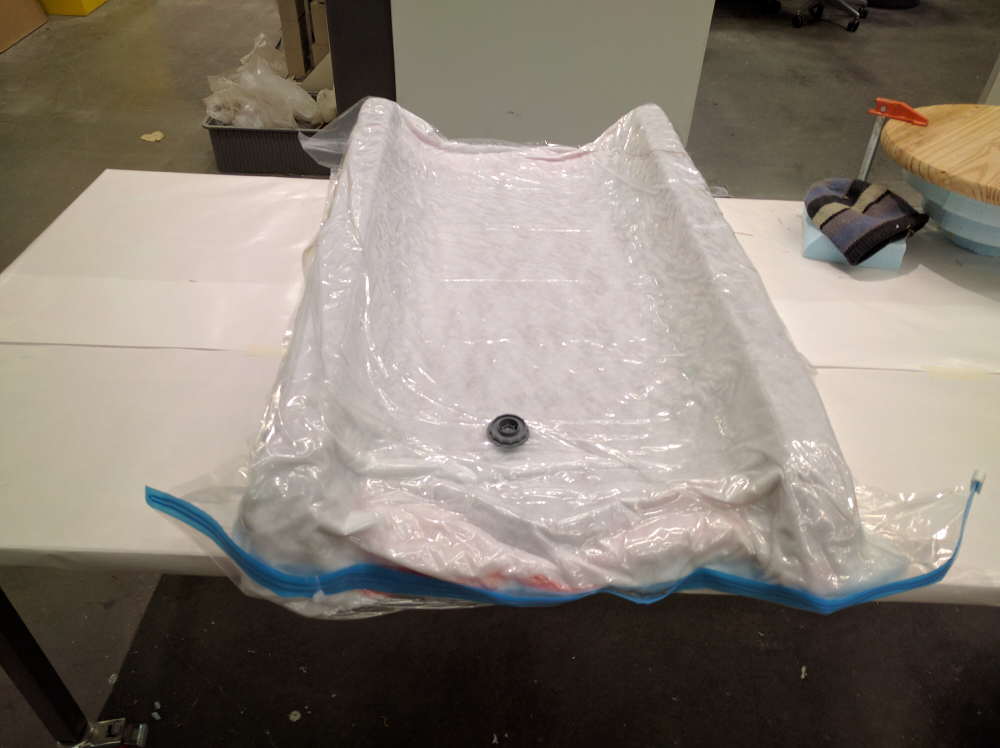
One mistake I made was that I didn't leave enough extra teflon around the sled. Once the vacuum process started it ended up pulling the teflon completely off of one side of the sled. This caused a bunch of the breather material to get stuck on one side of the sled. I guess this just gave it a "snow" effect.
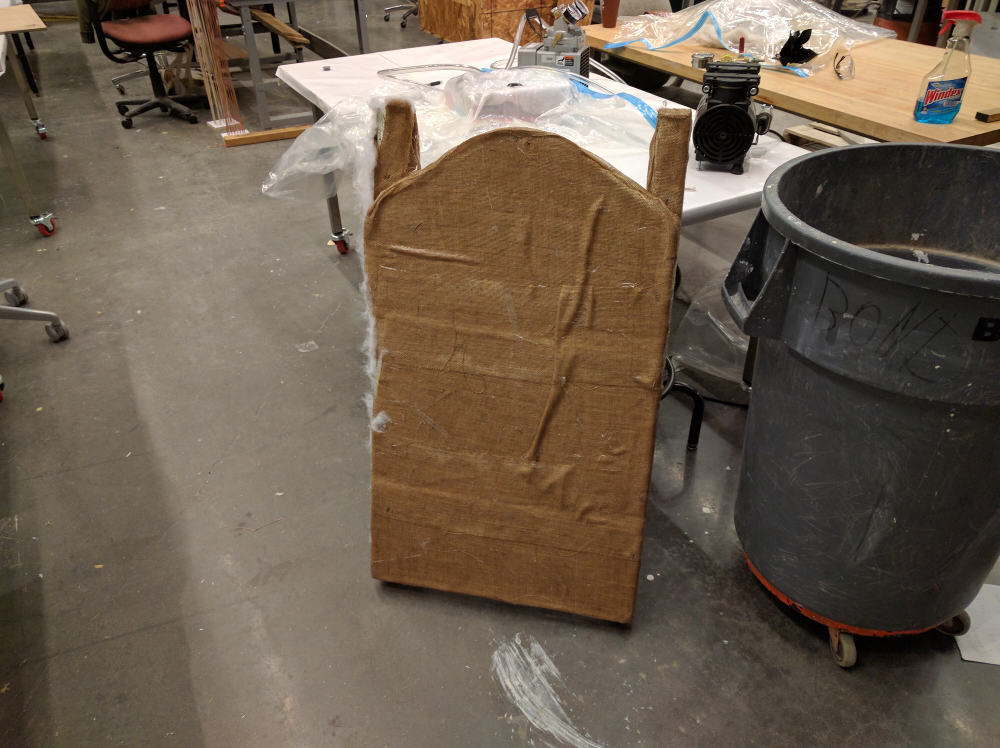
There are some areas where the burlap shifted and the foil is left exposed. This was one of the challenges of trying to wrap such a large object. Maybe I should have completed the top and the skis separately and then attached them after. We'll see how this things holds up after the first snow storm!