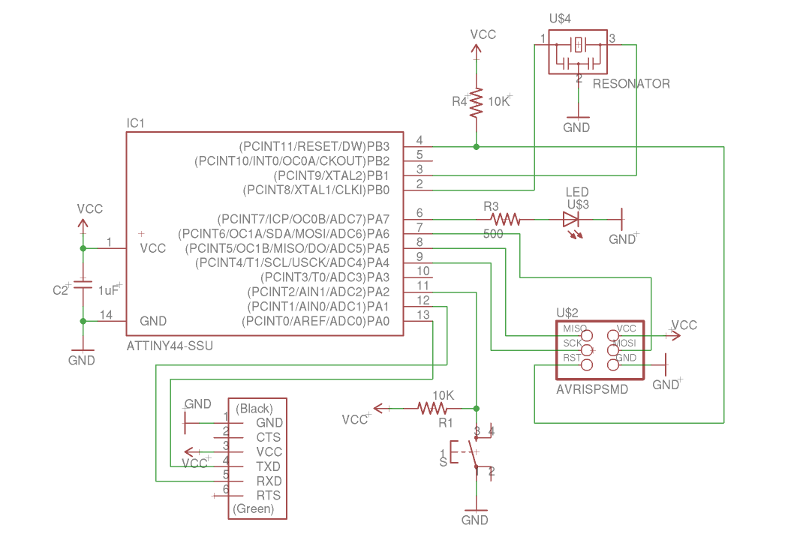
This week in HTMaA the assignment was to program the HelloFTDI board that we redesigned in week 5. The HelloFTDI board features an ATTiny44 chip which I have connected a green LED and momentary push button to two of the GPIO pins.

My goal was to first program the board using the FabISP programmer I made earlier in the semester. After a bit of hunting around I located an ISP and FTDI cable that I could use for programming my board. I use Arch linux so installing the necessary tools (gcc avr-gcc) was a snap.
Programming was pretty straight forward. The hello.ftdi.44.echo.c program compiled and uploaded to the board successfully. I used GNU Screen as a serial terminal by running the following command:
screen /dev/ttyUSB0 115200
The helloFTDI board echoed back anything I typed as expected.
Next, I wanted to adapt the hello.arduino.328P.blink.c program to the ATTiny44 so I started reading the datasheet. Fortunately, the ports and registers weren't that different between the ATTiny44 and ATMega328P so getting it working was easy.
Now that I had the LED on my HelloFTDI board blinking I wanted to interact with it using the push button. The most straight forward use would be to turn the LED on whenever the button is pressed. A digital flashlight!
To get this to work I had to consult the ATTiny44 datasheet again. I quickly realized that to read input data from the ports I would need to use the PINA register instead of the PORTA that was used for outputs. After playing with the bit shifting, I was able to create an alias, btn_read, that would read from PA2 in the PINA register. Now all that had to be done was to change the main loop to turn on the LED whenever the button was being pressed
//
// main loop
//
while (1) {
  if (btn_read) {
    set(led_port, led_pin);
  } else {
    clear(led_port, led_pin);
  }
}
Next, I would like to try to go a little lower level and use assembly language to program the board. To do this I will need to have a good understanding of the datasheet and how to interact with the registers on the ATTiny44.