
--How to Make (Almost) Anything--
--Week 07--
--Embedded Programming--
--Step 1: Installing Atmel Studio
A few options I determined were viable programming interfaces required different native operating systems, and Windows seemed to be the the one with the most difficult time to set up. One option was to partition my drive and install linux on a new partition, and this would have let me use native functionality. However, I decided to stick with the Windows OS, and one of the options available was Atmel Studio.Installing Atmel Studio was pretty straight forward - download the install files from the source location, and install with the defaults. One thing that caused a setback was that the Atmel Studio did not natively recognize the USBTiny programmer that we created a few weeks ago. So I looked at tutorials to help properly setup the environment. The tutorial is located at the following link: https://www.youtube.com/watch?v=Af5P79IzcyE
Another setback for the process was that i needed install AVRDude, as part of the process, but for Windows, the only source was from WINAVR, which, as we know, is notorious for deleting the contents of the PATH ENV variable. So I took the initiative of creating a restore point before the install, and left all the default settings, even the option to append to the PATH ENV variable (as this was highlighted as "recommended" in the installation procedure) - Sure enough, it deleted my existing PATH variable.
I then reverted back to the restore point I created and tried the installation again, and deselected the option to edit the PATH variable, because all I really wanted was AVRDude. This was successful, and I was able to go through the rest of the tutorial, without any hassles.
--Step 2: Writing and testing out a sample program
The intent here was to create a simple program that would turn an LED on once a push-button switch is activated. So, in the interest of I looked for a simple hello world program for hardware, which is often times geared towards turning an led on and off. I also wanted to do this in "C". I came across a sample program on how to blink an LED using the ATTiny architecture from https://tinusaur.org/2014/01/06/tutorial-001-blinking-led/ However, I needed to modify the pin description to fit the ATTiny44, and my board design, which used port 2 as the port connected to the switch.
--Step 3: Building the program and porting the program to the new board
The build process for Atmel Studio was pretty straight forward. Essentially select the "Build" option from the menu bar and subsequently select "Build Solution" (or just press the "F7" key) - as depicted in Figure 1a below.After the build process, the next step is to select "Tools" and highlight the option for the external device created for the USBTiny from the tutorial (in my case, I called the device "USBTiny ATTiny44A"). Figure 1b shows the process.
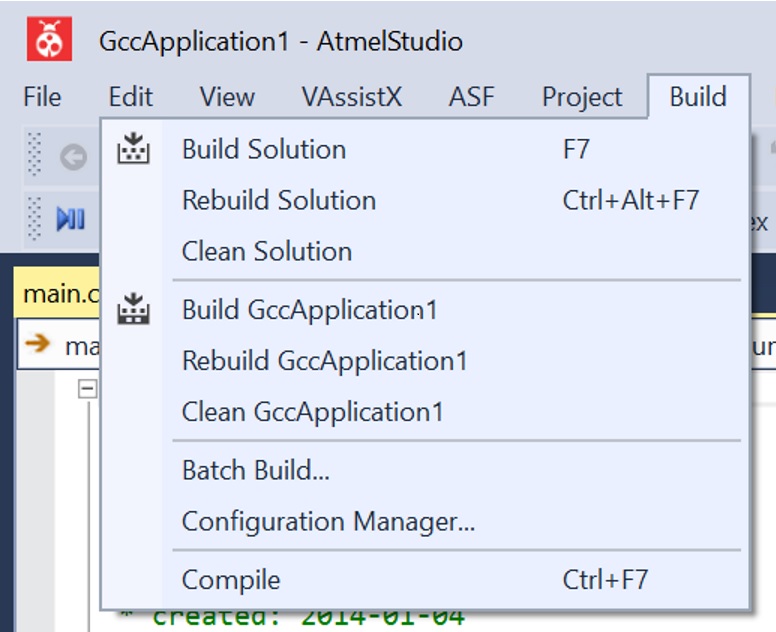
Figure 1a: Building a program in Atmel Studio
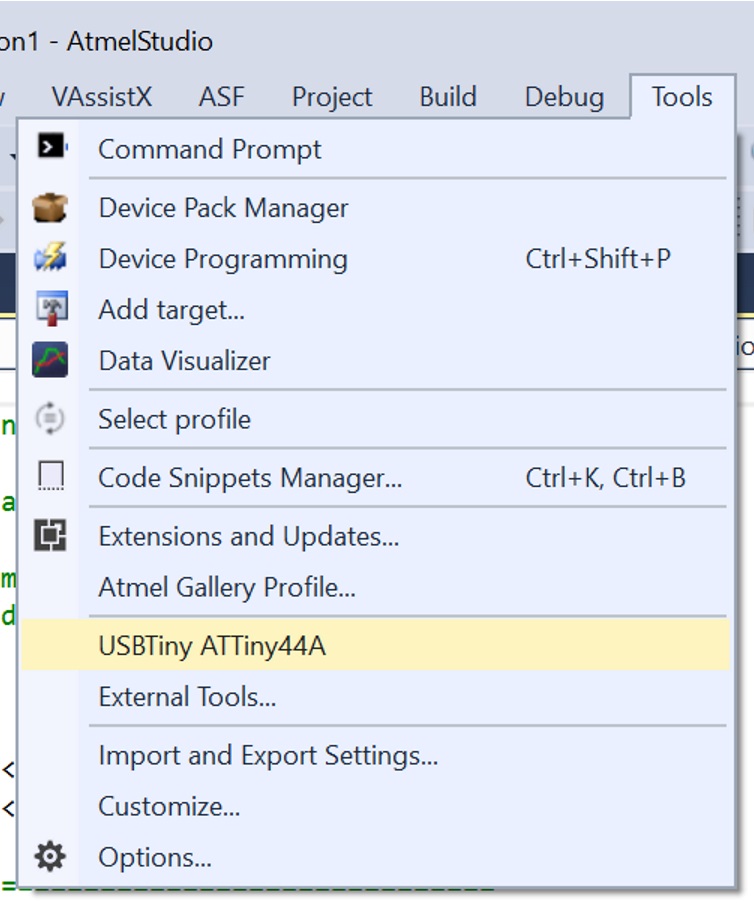
Figure 1b: Writing to the physical device via the USBTiny programmer
Once the process succeeds, the next step is the check that the program worked. I pushed the button on the board, and the LED did light up. The following video shows these results.