Chika Makes Things 2016
Week 4: 3D Scanning and Printing
Goals:(1)Design and 3D print an object that could not be made subtractively (2)3D scan an object
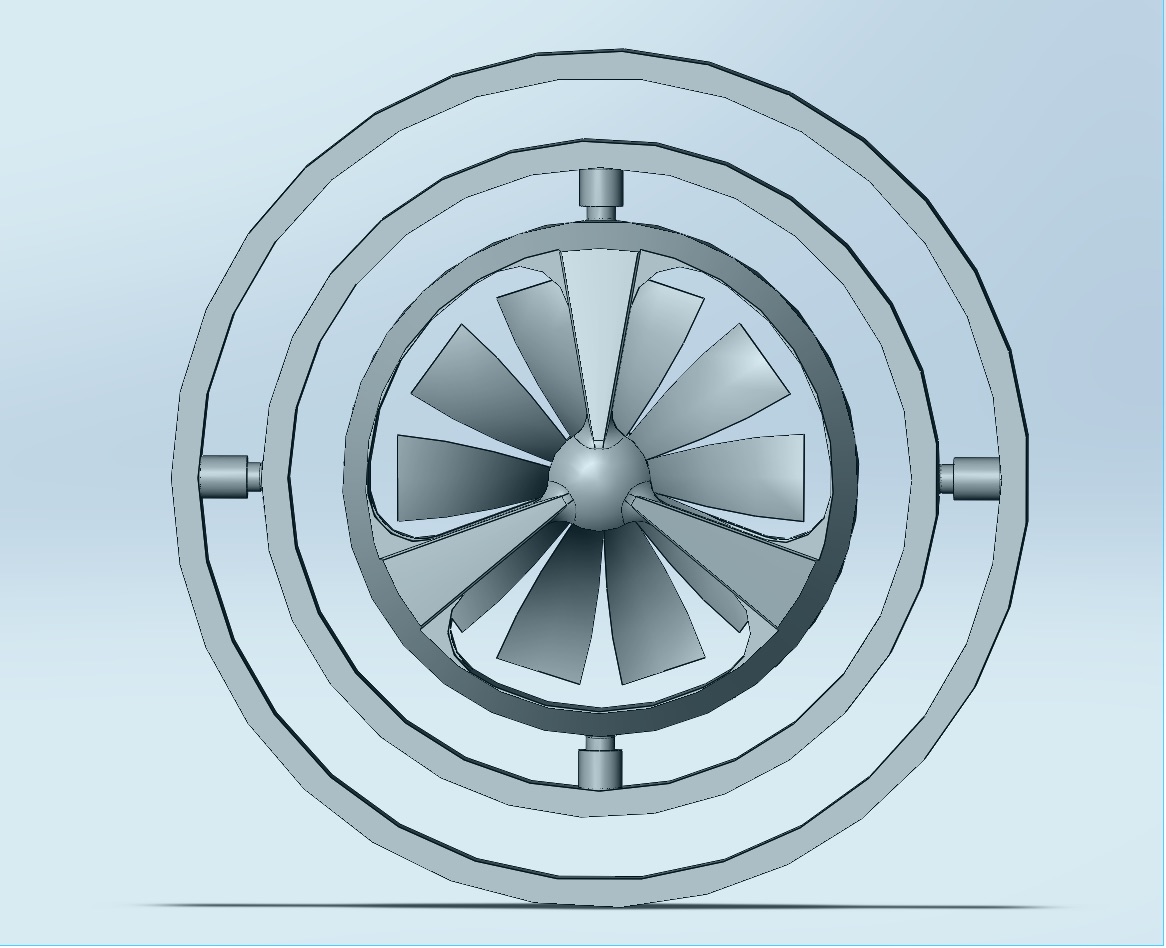
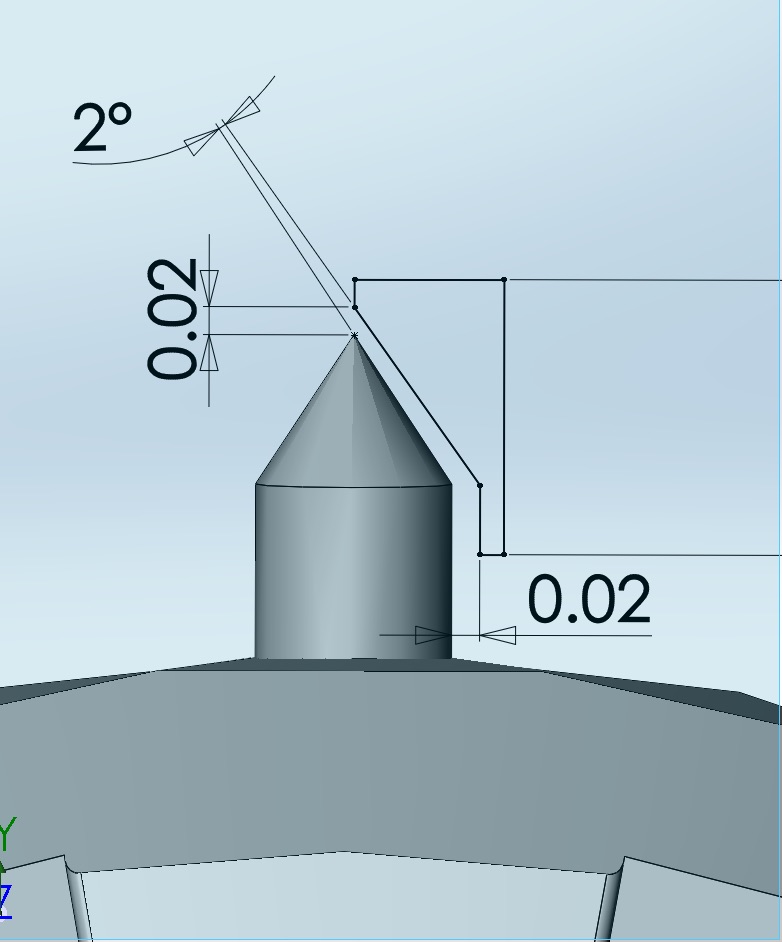
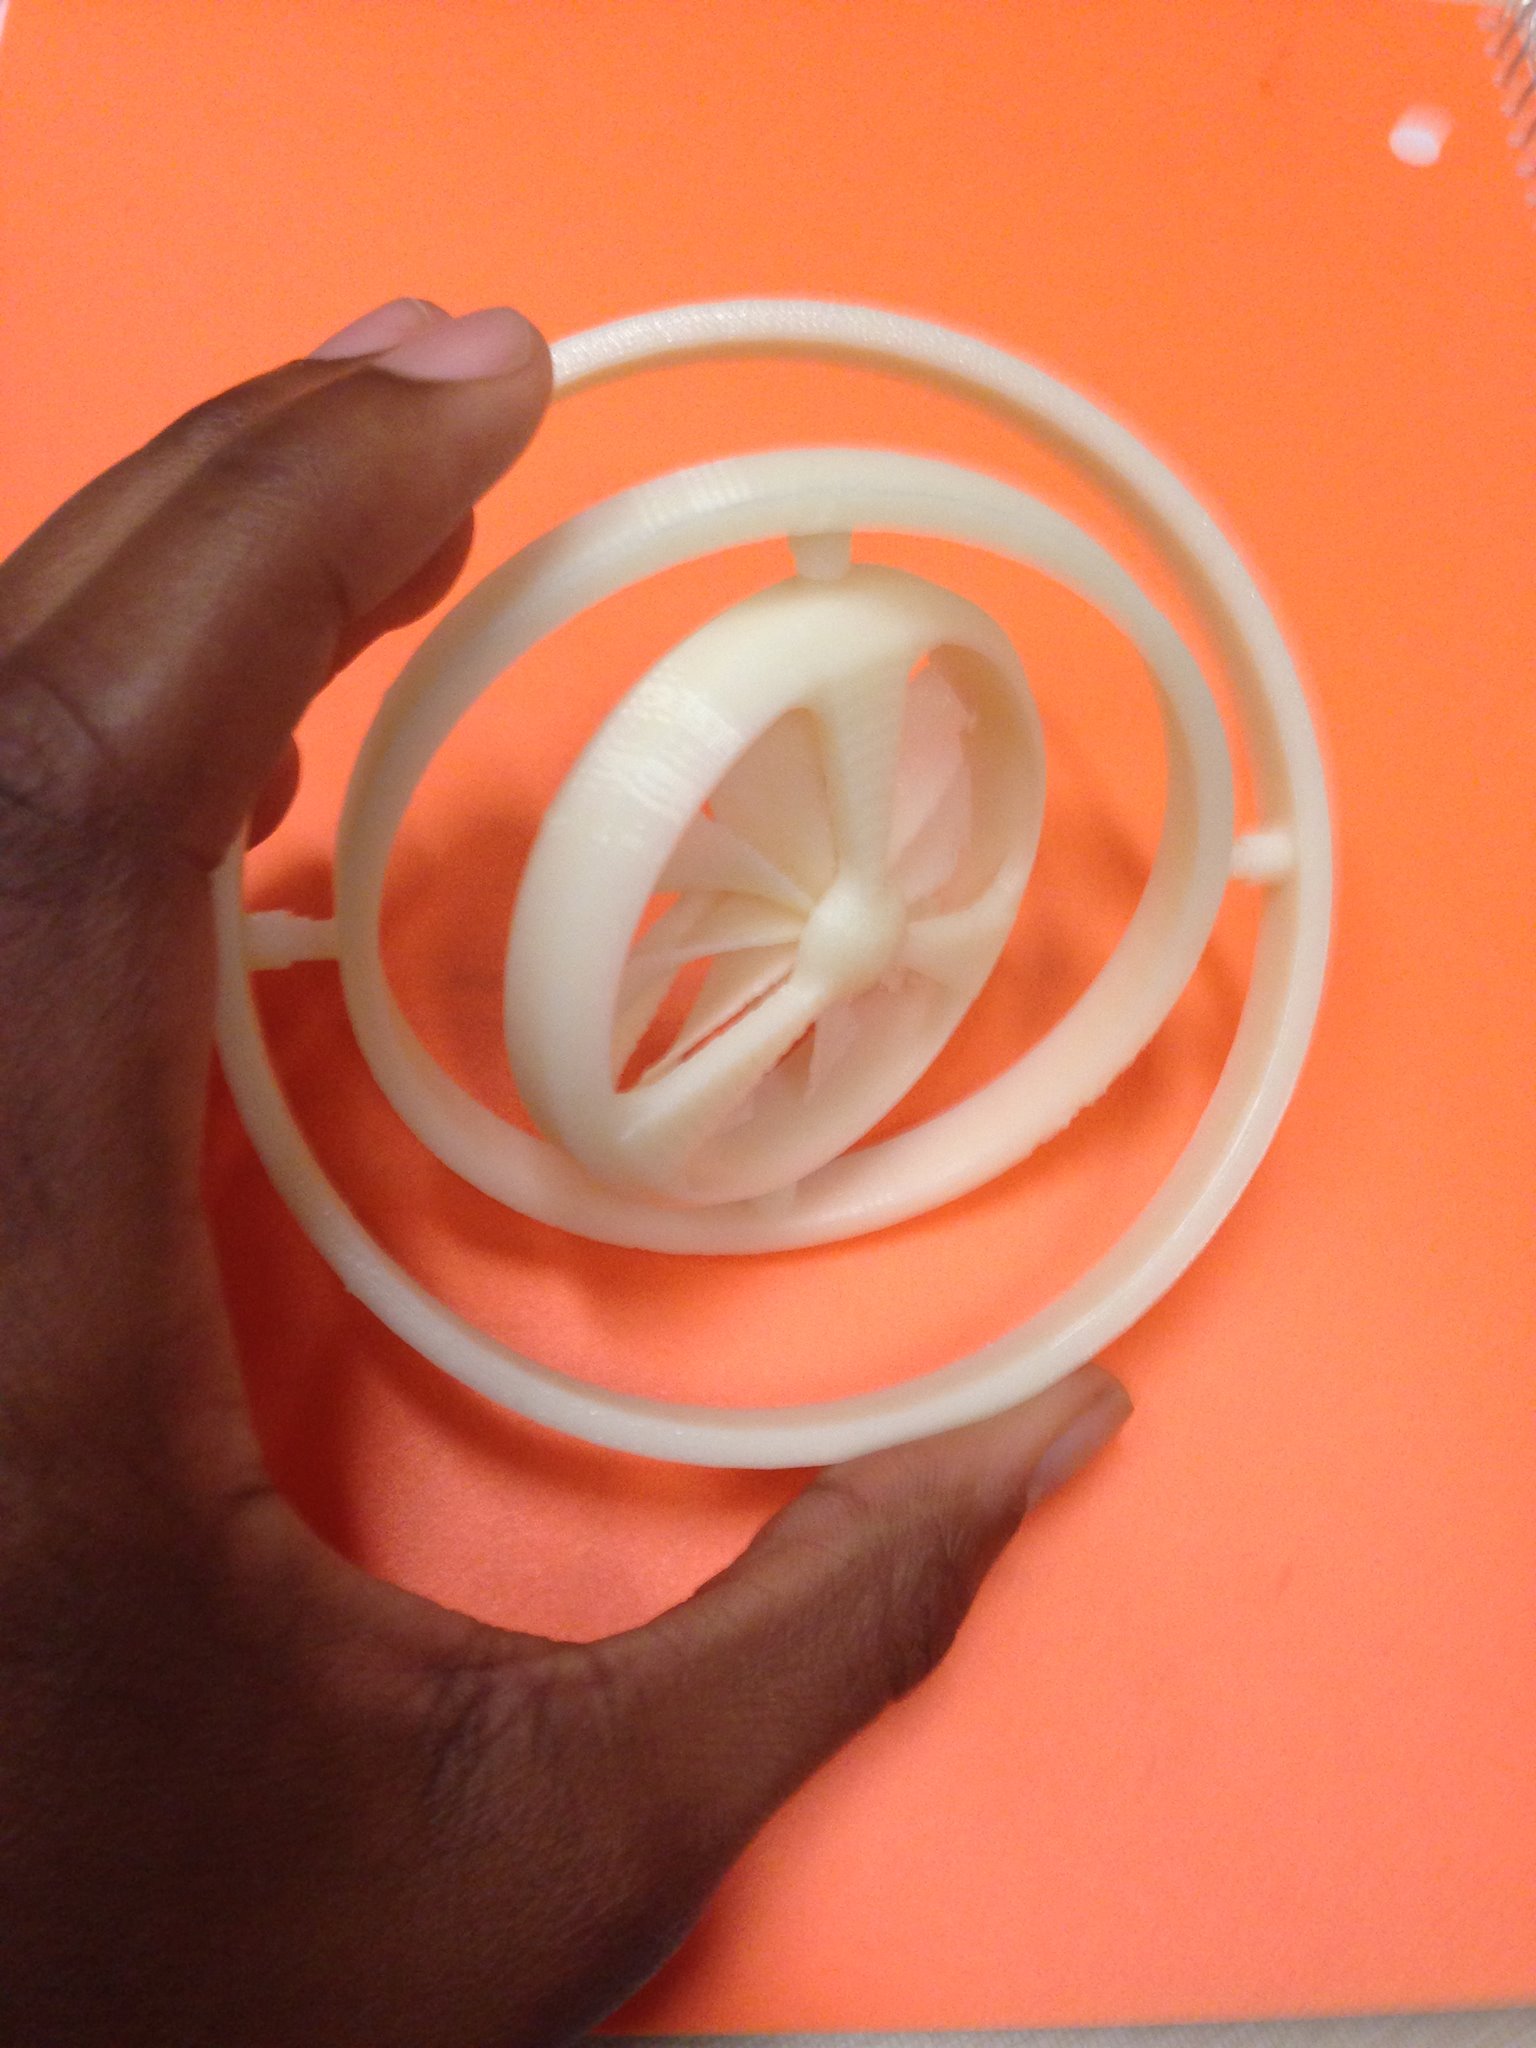
Process: I was most interested in 3d printing a moving part. I worked with a friend in undergrad to model a gyroscope for a CAD class and decided to update this design to address the printer constraints. This entailed designing the rotating pins of the gyro in Solidworks with enough space between moving parts to allow movement and avoid sticking from support material. The final design as well as the chosen clearance are shown below.
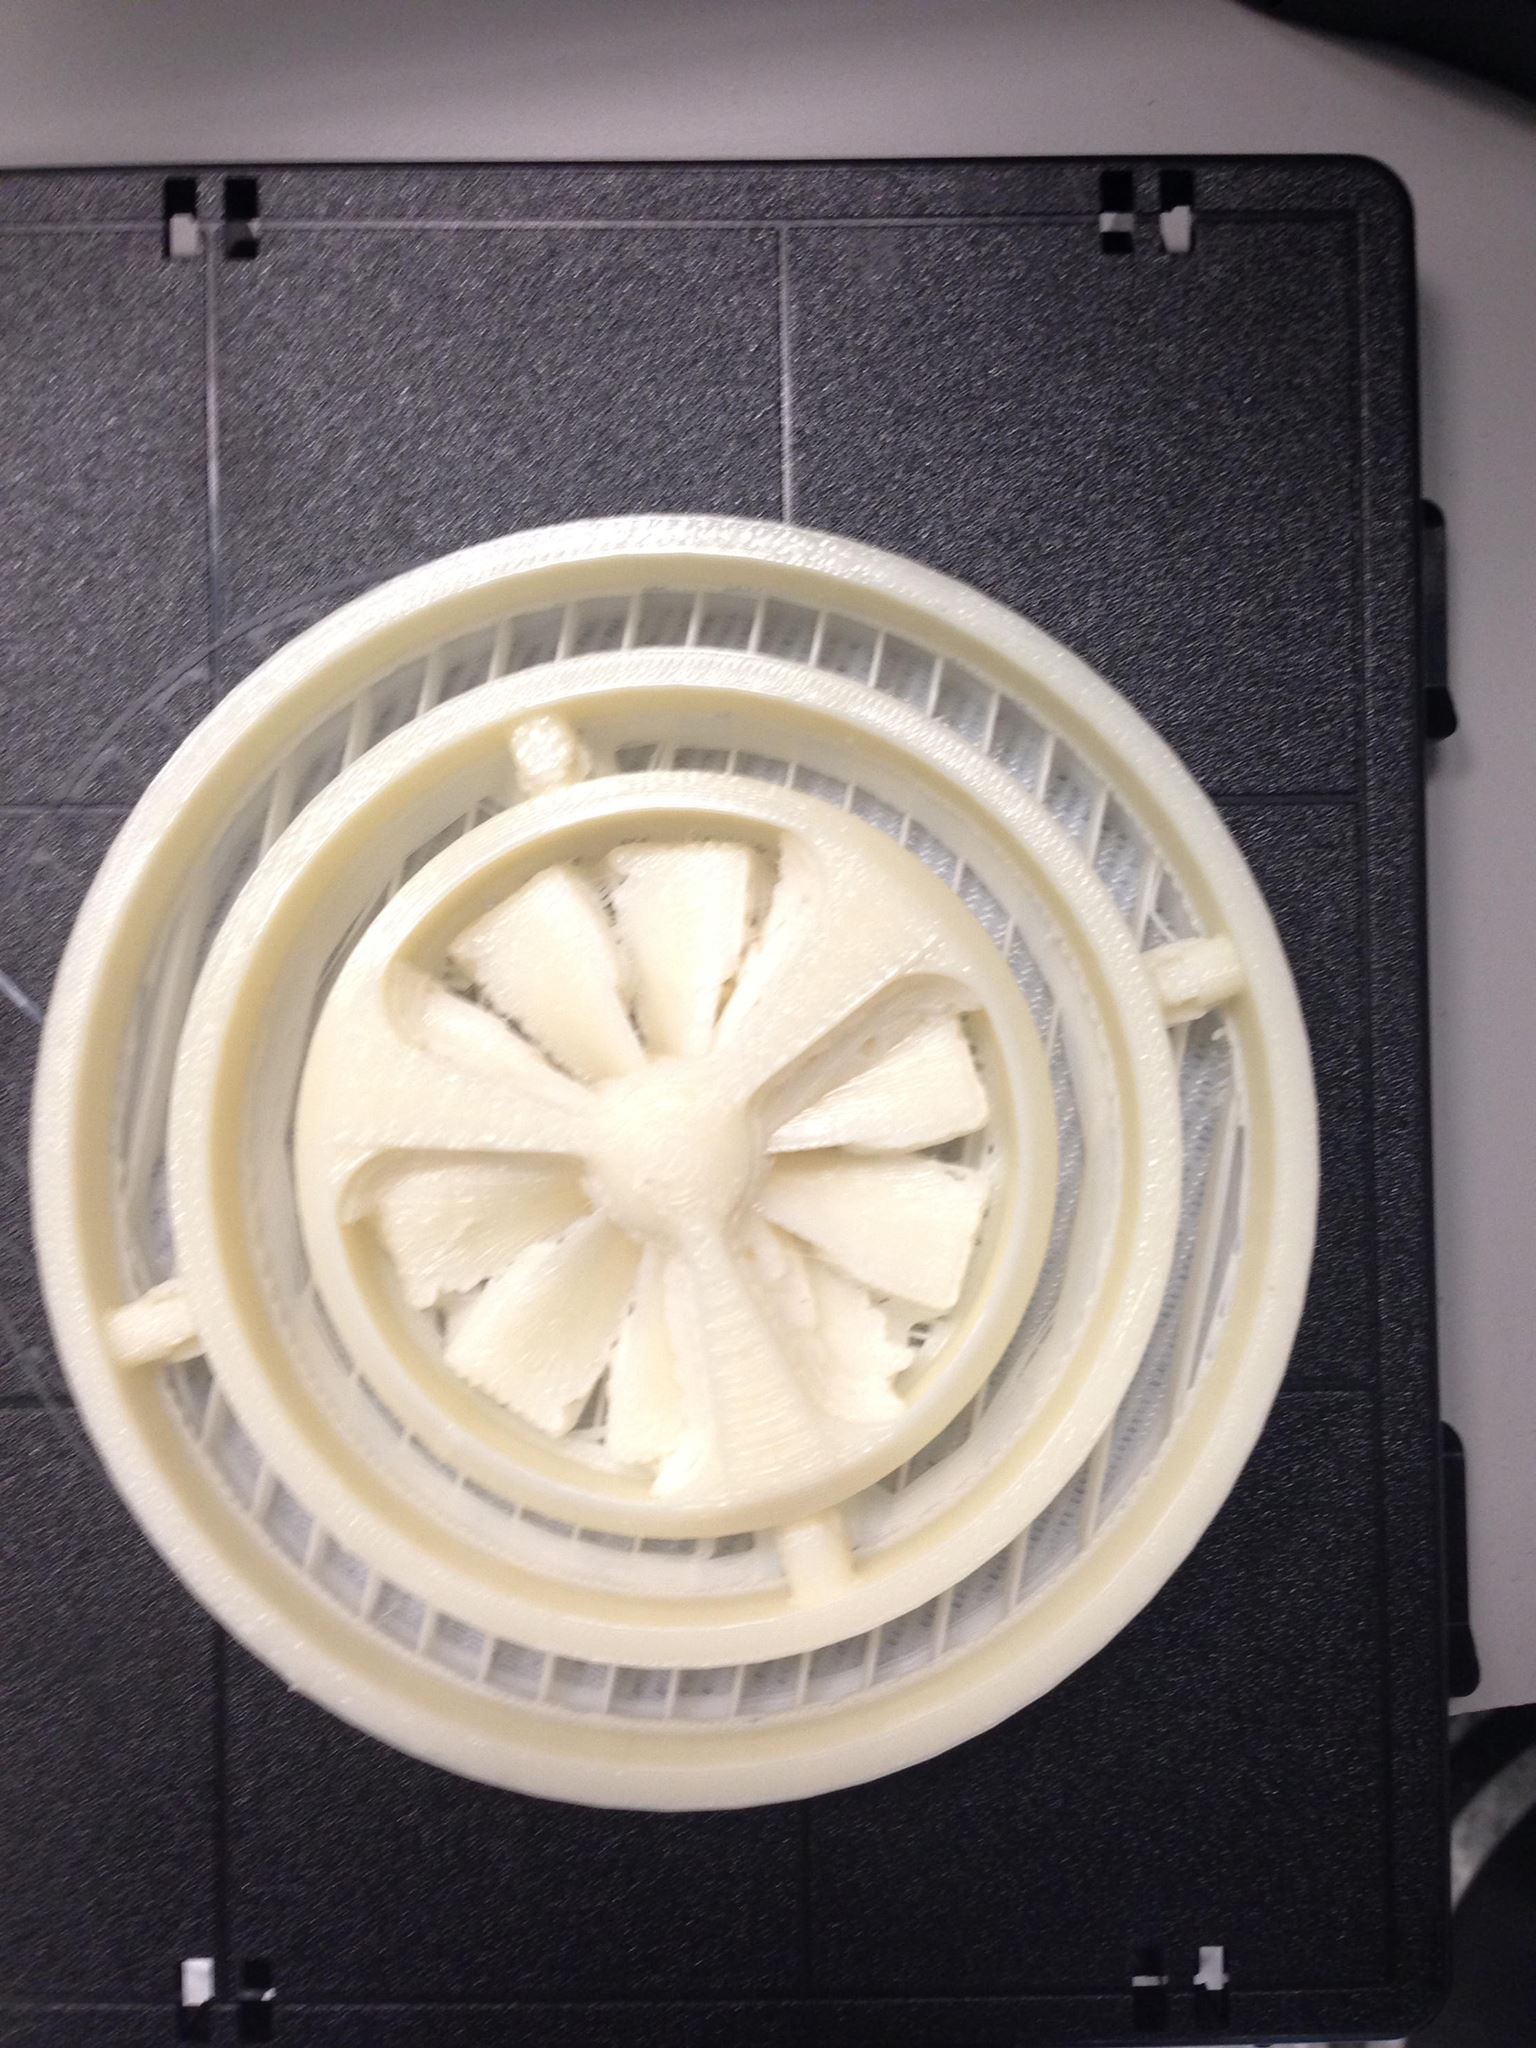
The total print took about 10 hours. Luckily, it was successful with the only difference between the design and result being some wearing away of the inner fan blades. In the future, I would resolve this by designing the blades with additional thickness. After removing from the printer, I cleared away additional support material by placing the gyroscope in the bath for half the print time (5 hours).
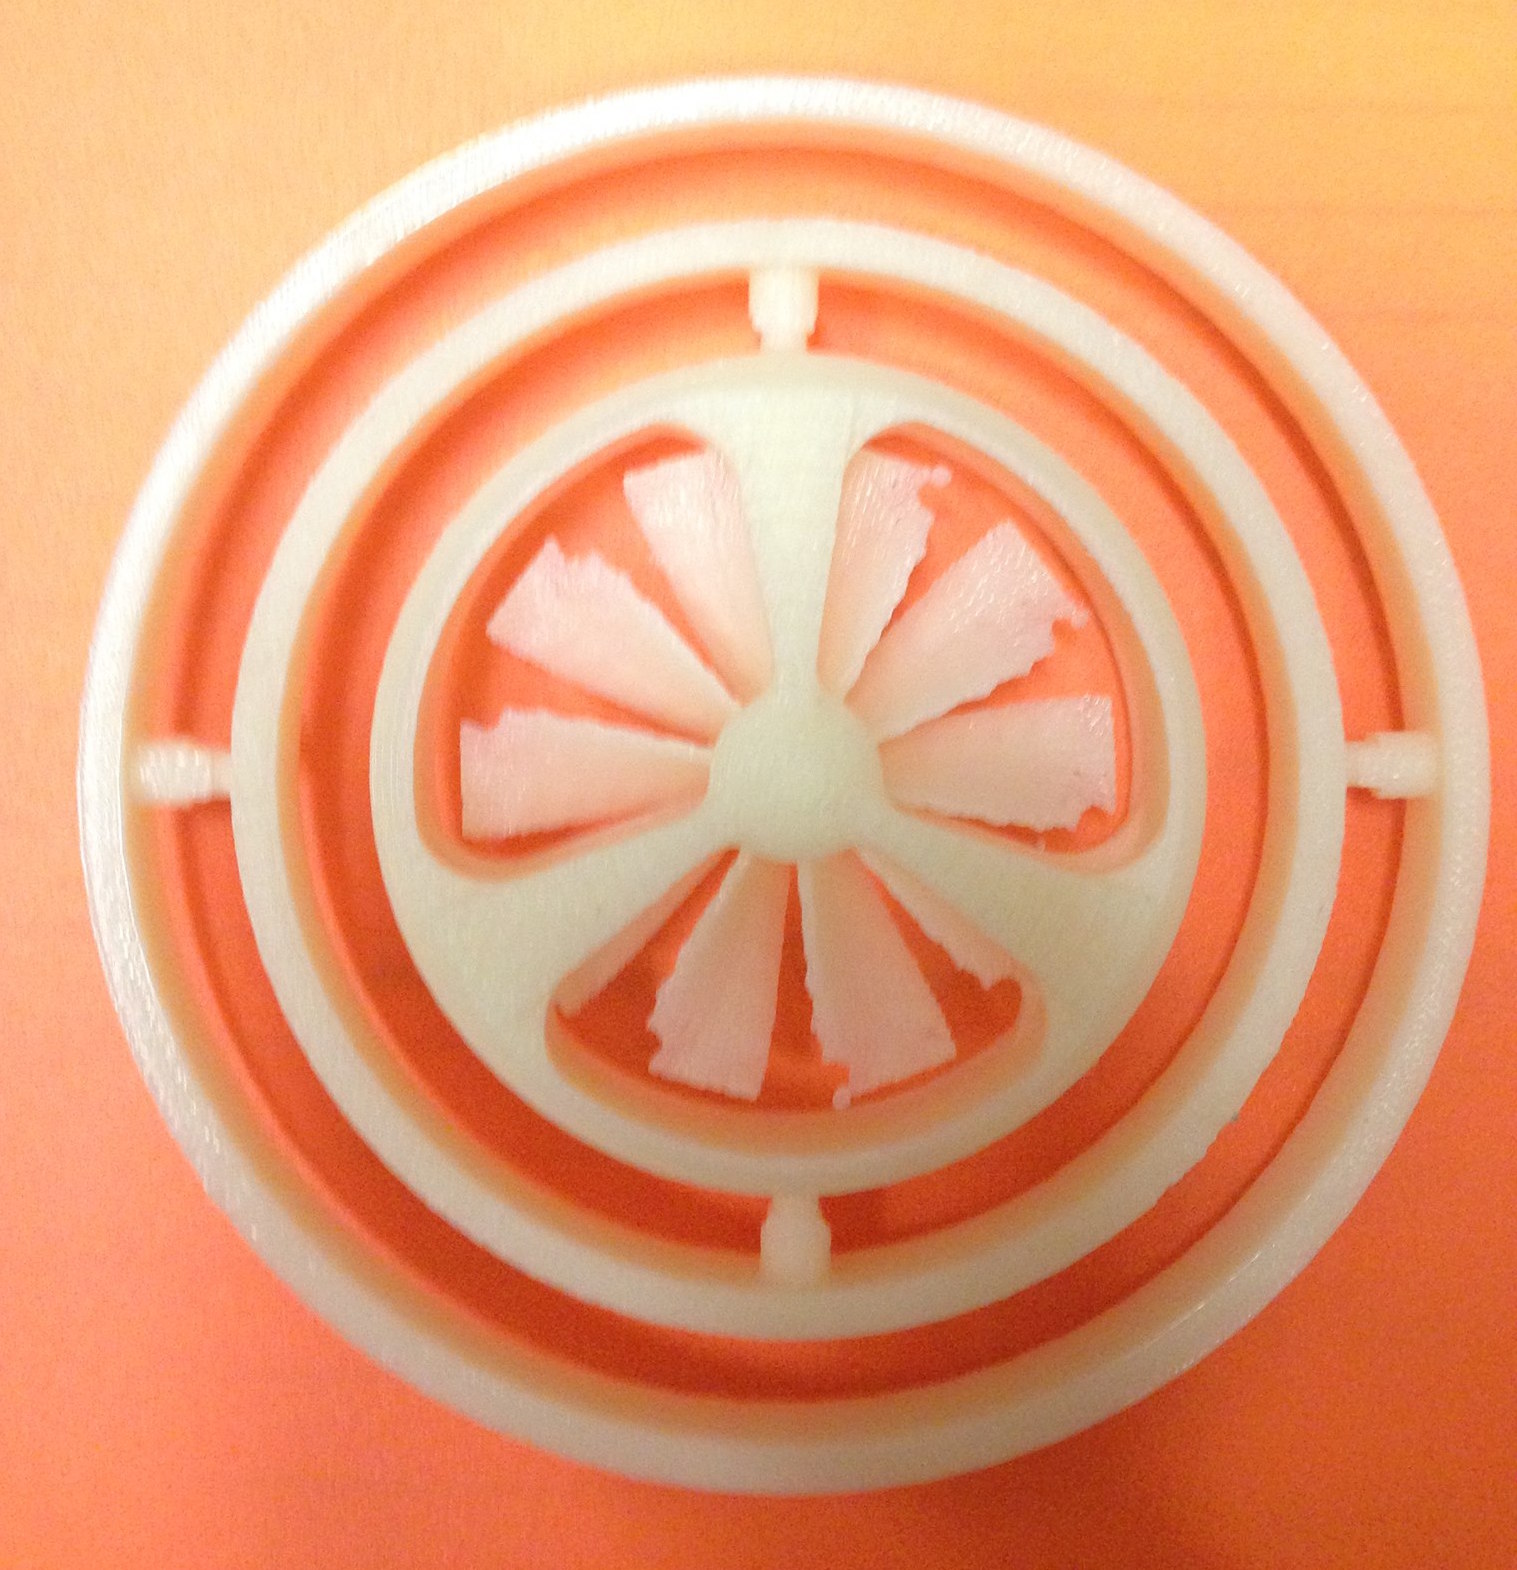
Here is the final result! I was able to rotate the rings about each incorporated axis as well as rotate the fan blades without issue.
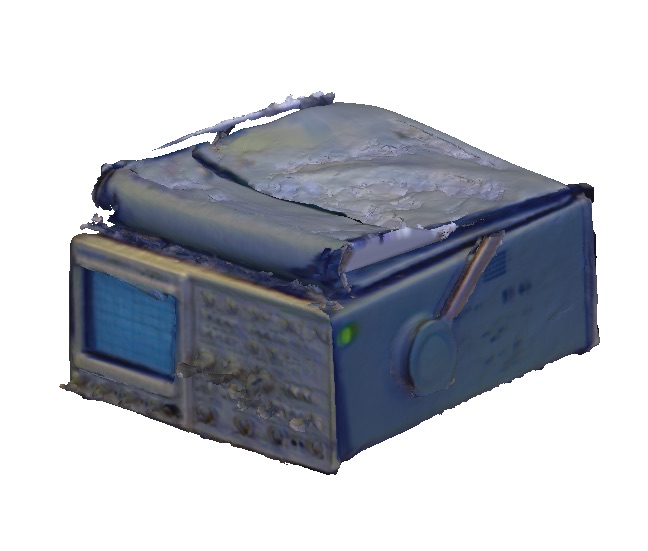
The second deliverable for the week was a 3D scan. I chose to scan an oscilloscope which happened to be sitting nearby in the lab. The setup involved creating a plain background for the scan (whiteboard), adjusting the height of the scanner to match the location of the oscilloscope on a rotating stool, and selecting 'small object' on the scanner's computer interface to insure the capture size was appropriate.
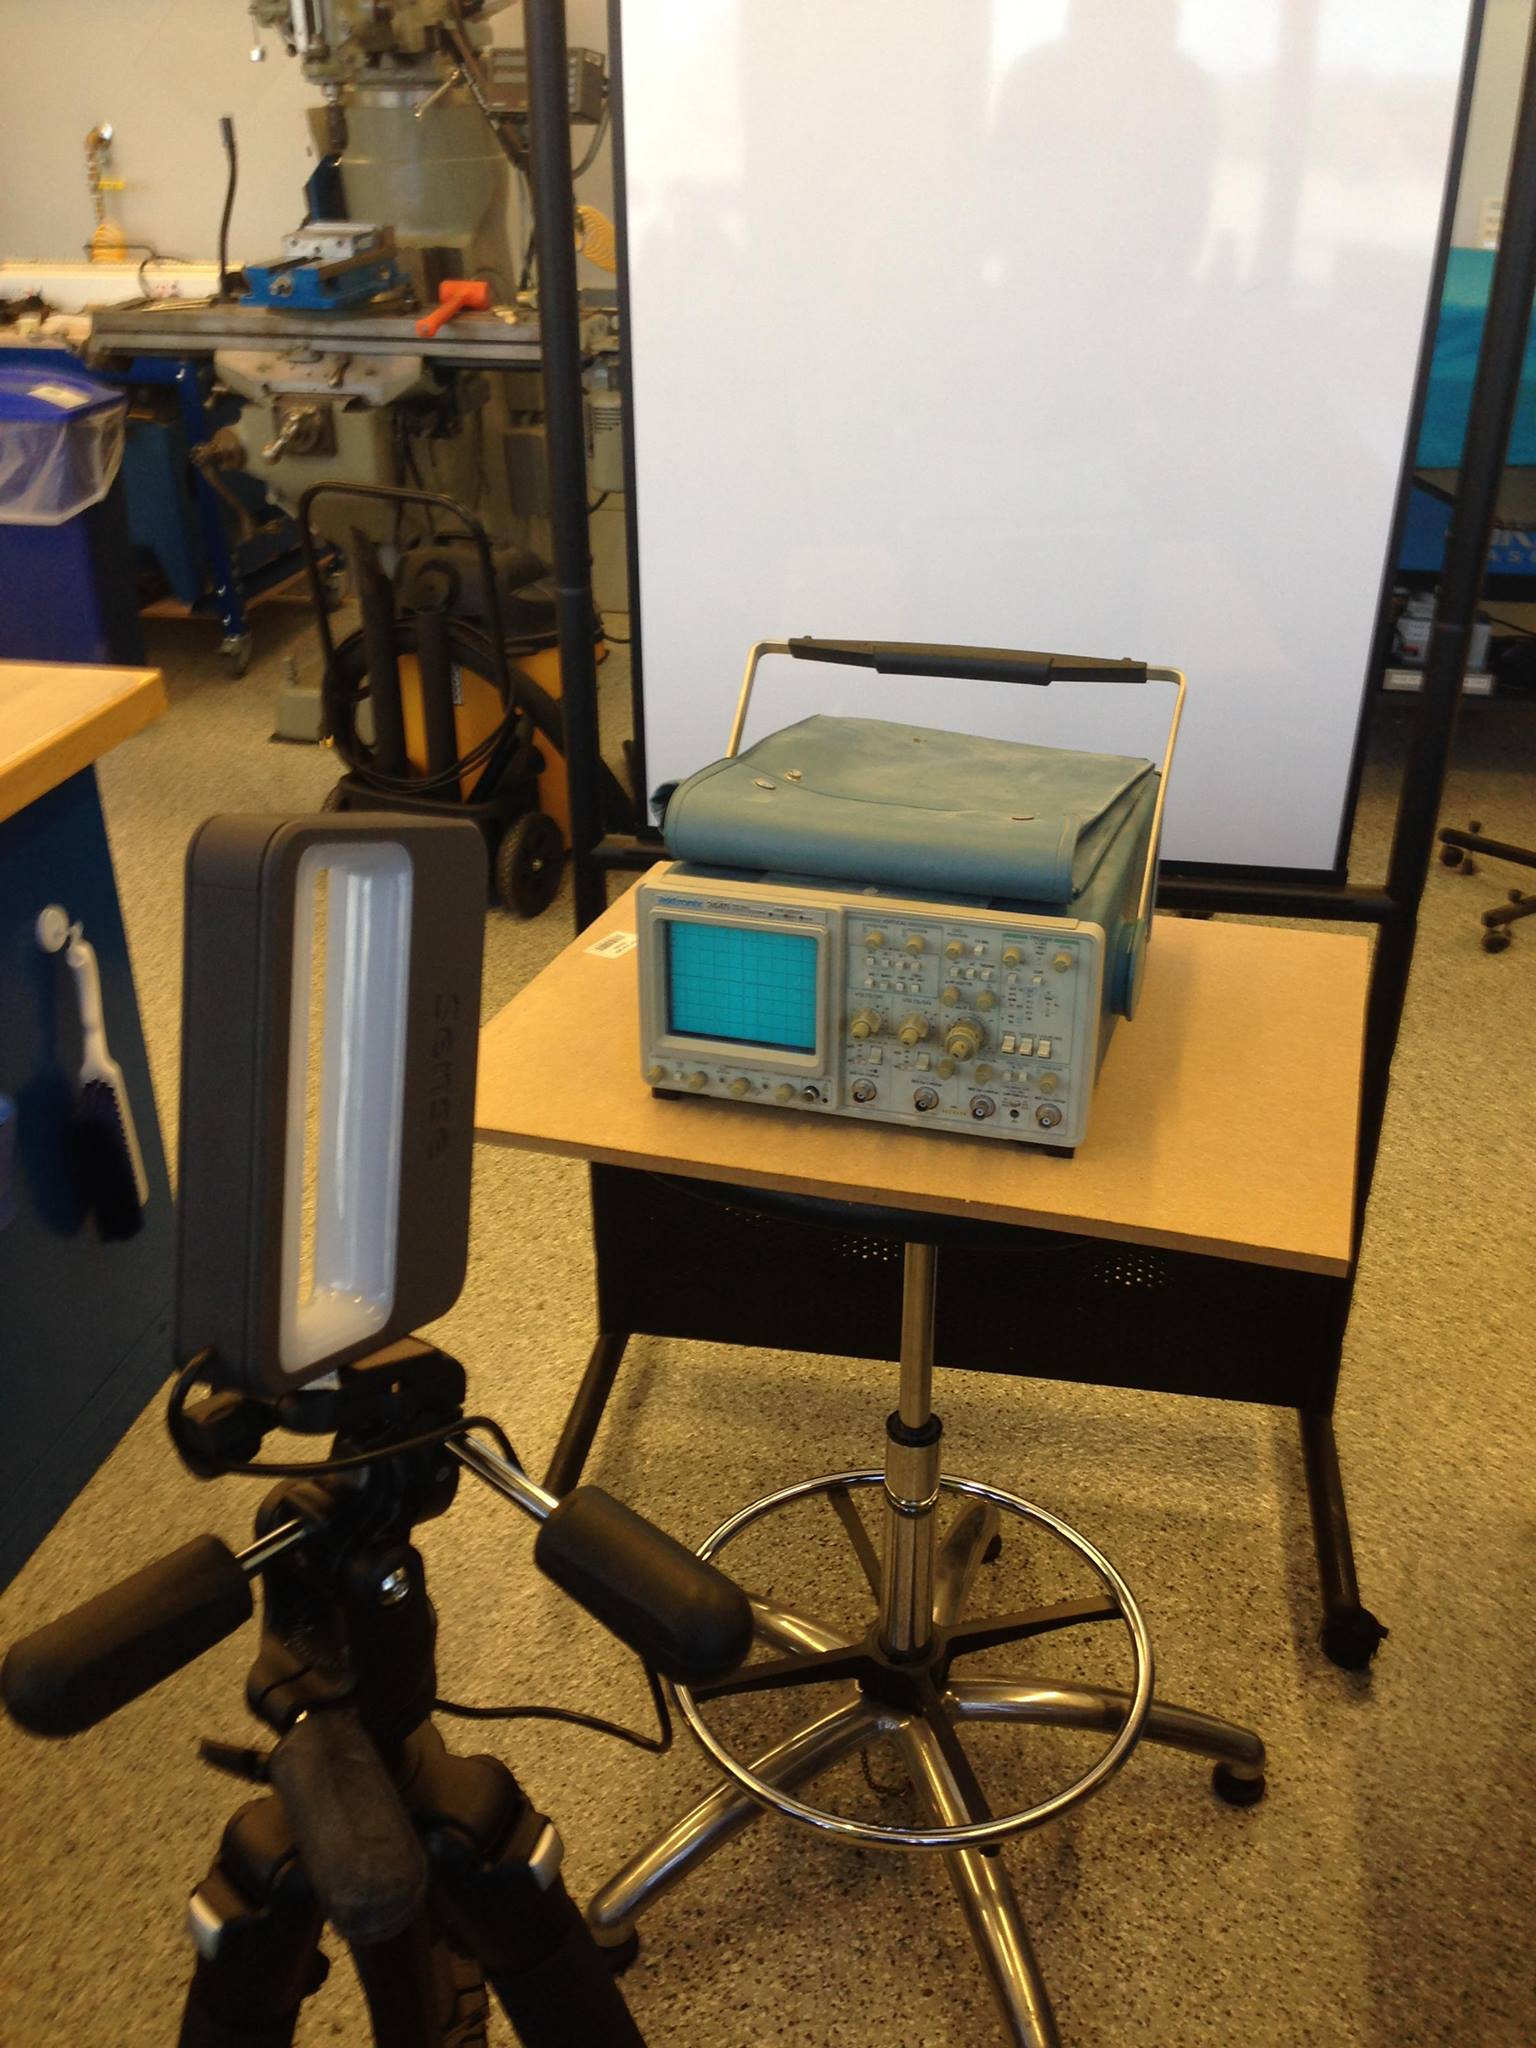
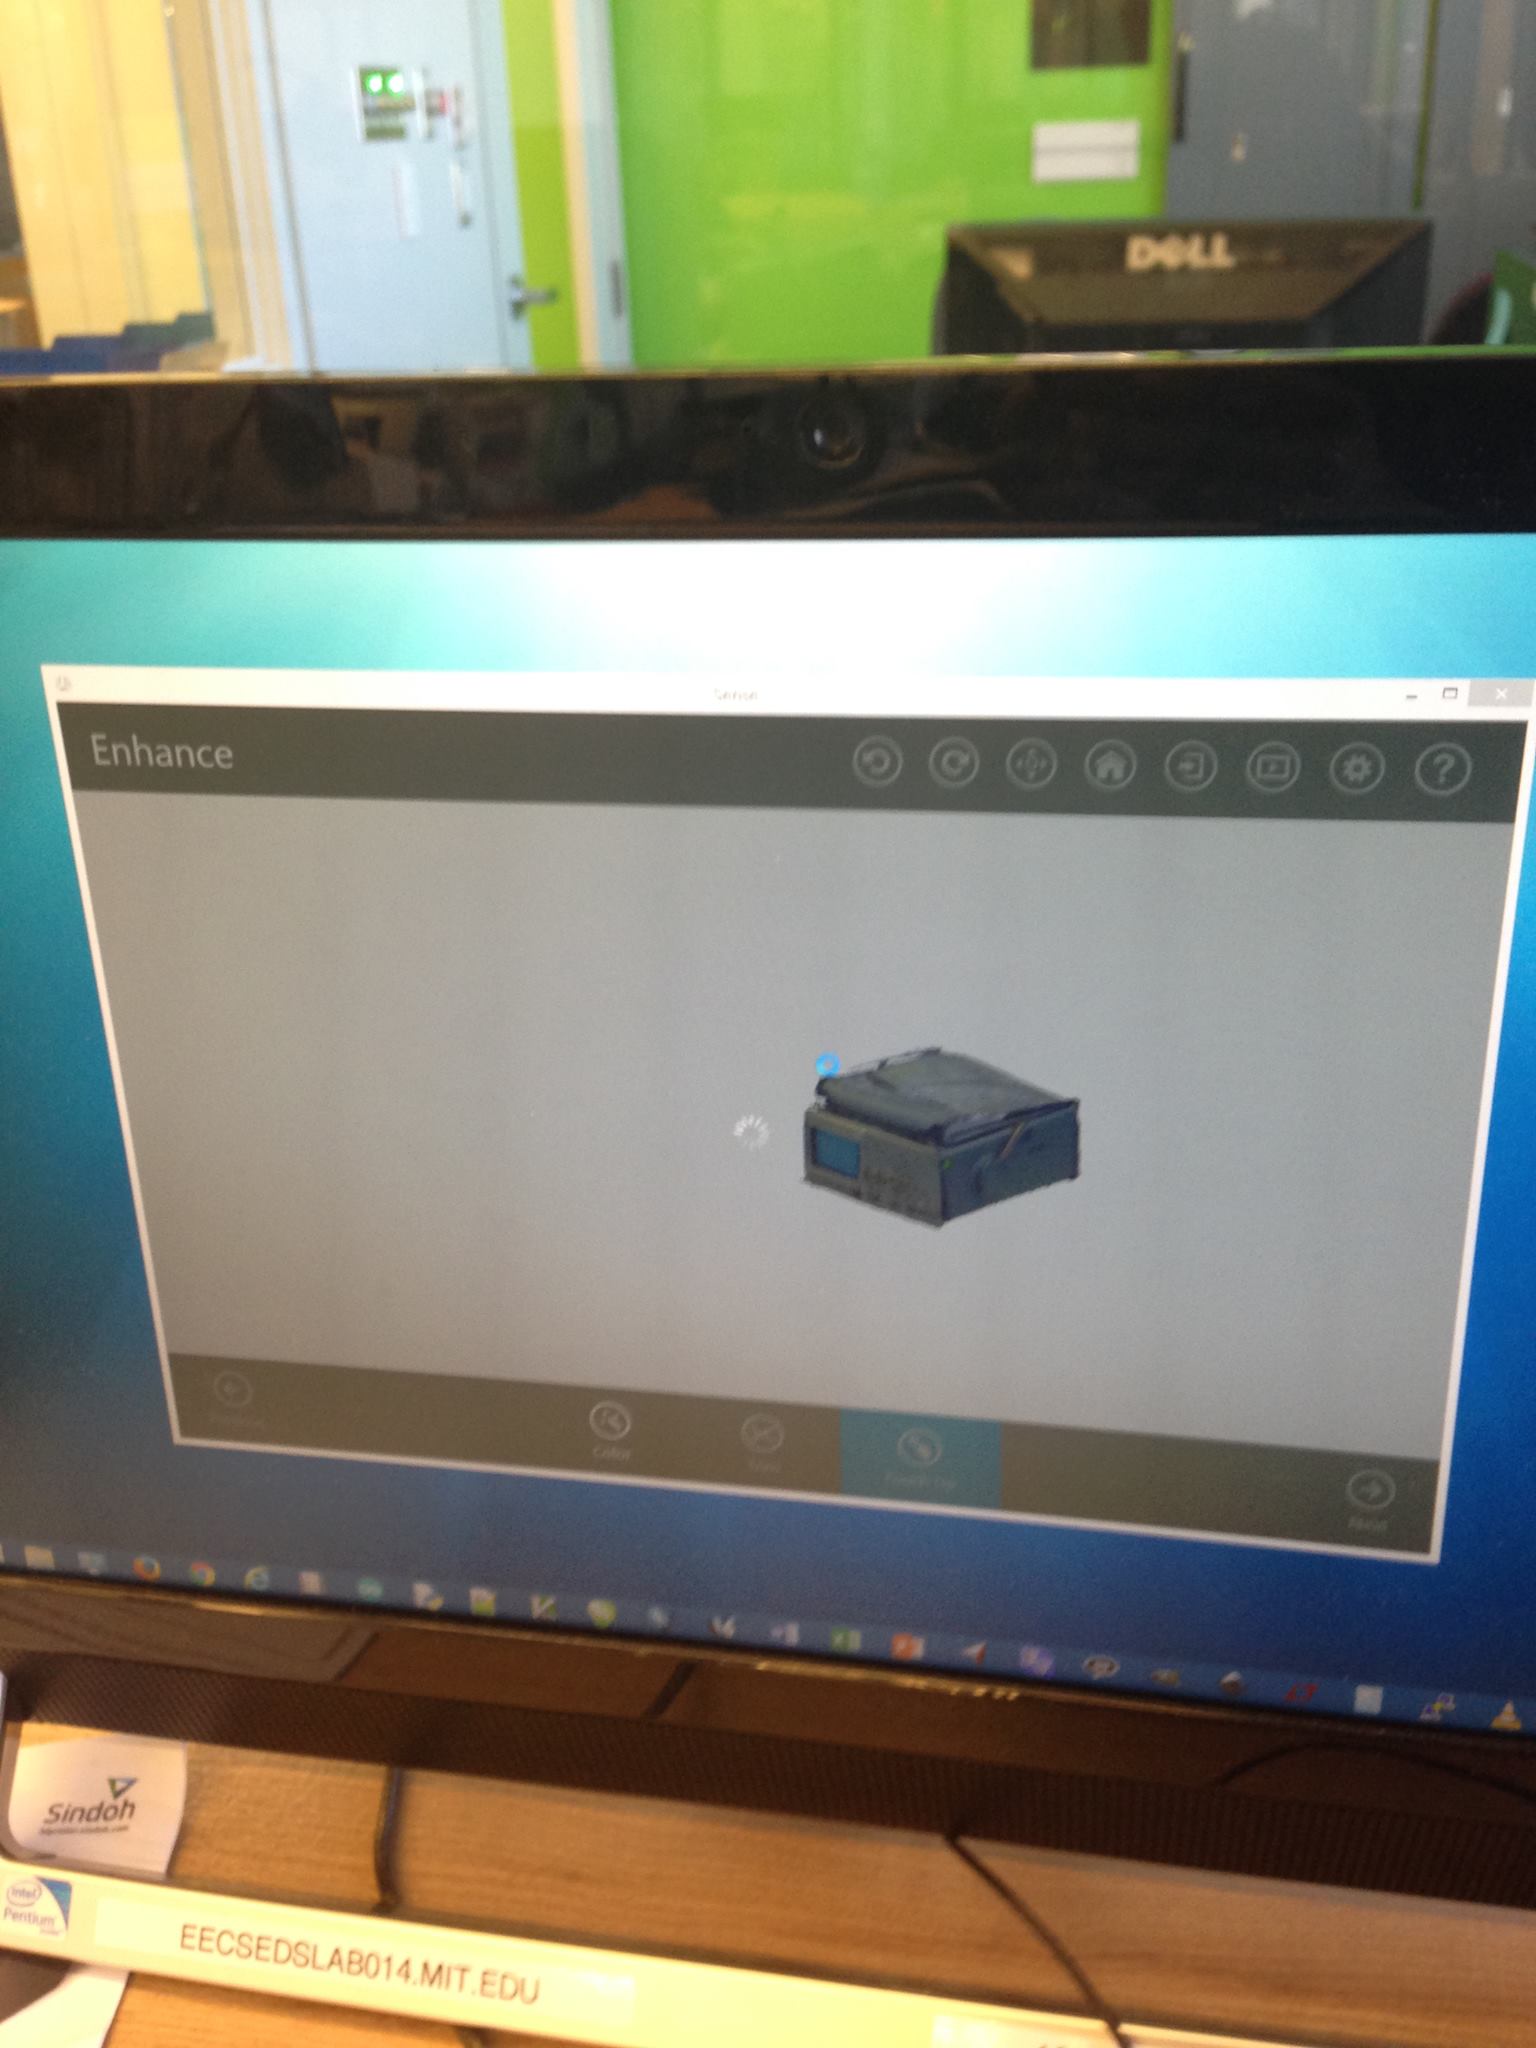
Challenges: The greatest challenge for me this week was getting a clear scan. I quickly learned that this was a two person job. I was able to get a TA to help me slowly rotate the stool holding the oscilloscope while I manned the scanner tripod and watched the monitor to ensure that the scanner was not losing track of the object. The final scan turned out okay. We captured the majority of the oscilloscope with the exception of the top handle. I noticed that the final scan could not capture the bottom of the device since this was not visible, and turned out as a shell. To address this outcome, I used a feature included in the scanner interface which filled detected holes. The final scan is shown below.