Chika Makes Things 2016
Week 7: Embedded Programming
Goal: Program the board designed in Week 5 to do something.
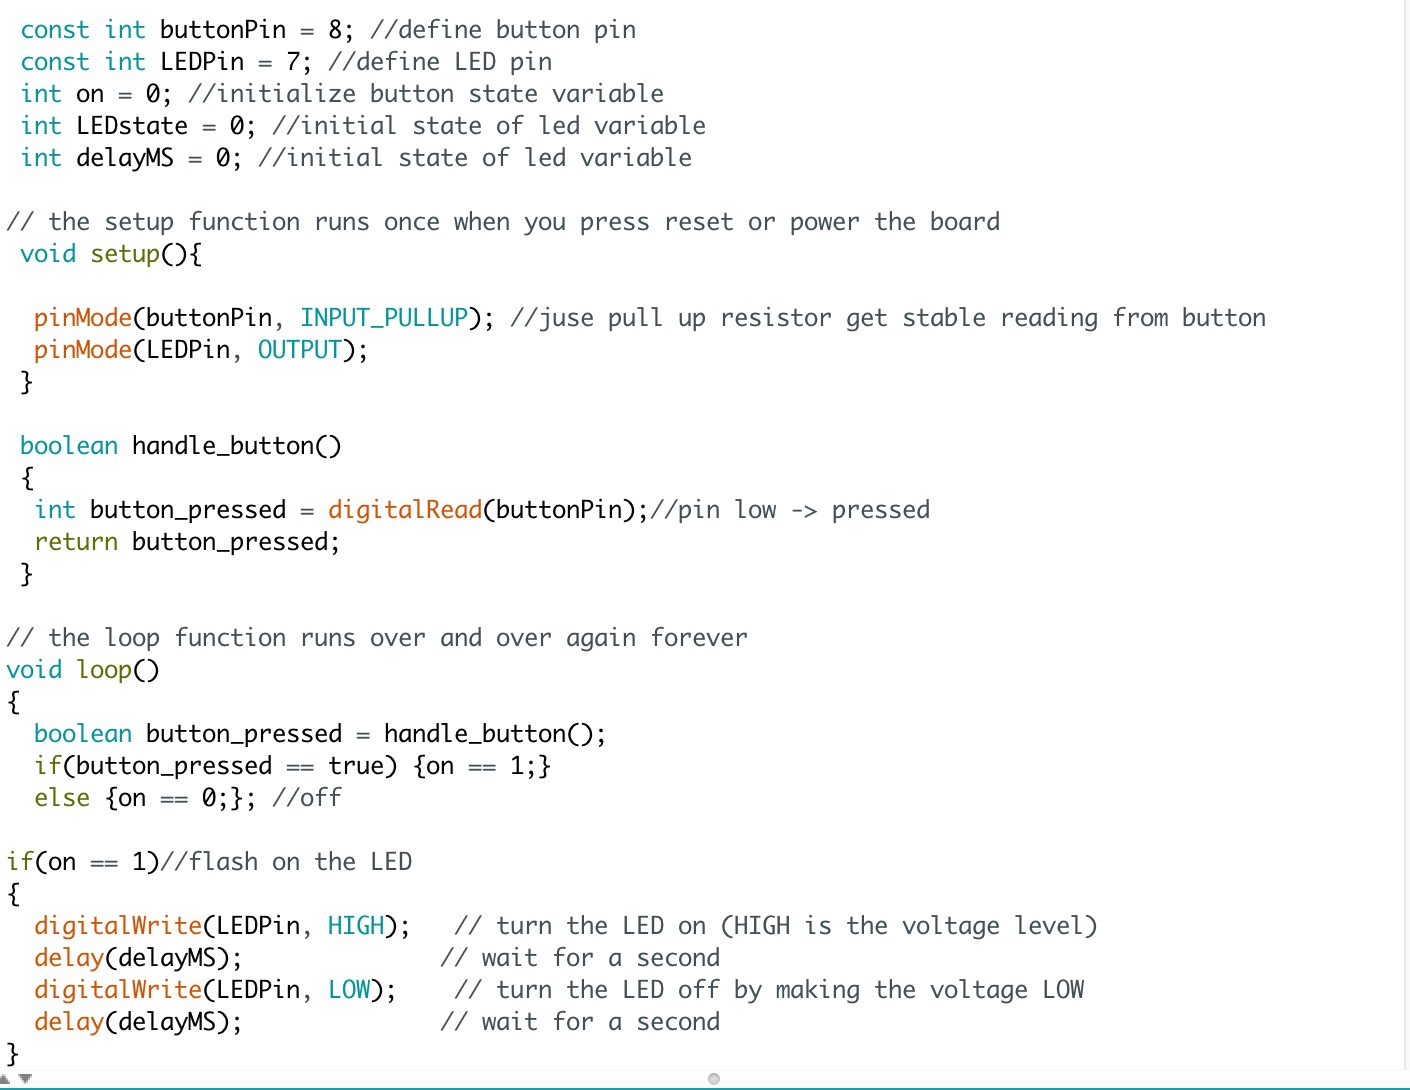
Process: I started by compiling a simple LED blink code in Arduino to make sure that I understood the programming basics and to check functionality of the LED. This involved installing the
ATtiny package in Arduino using this
tutorial. I updated the example blink code provided by Arduino by defining the button pin and LED pin as defined in the ATtiny44 datasheet. The finalized code should flash on the LED while the button is pressed.
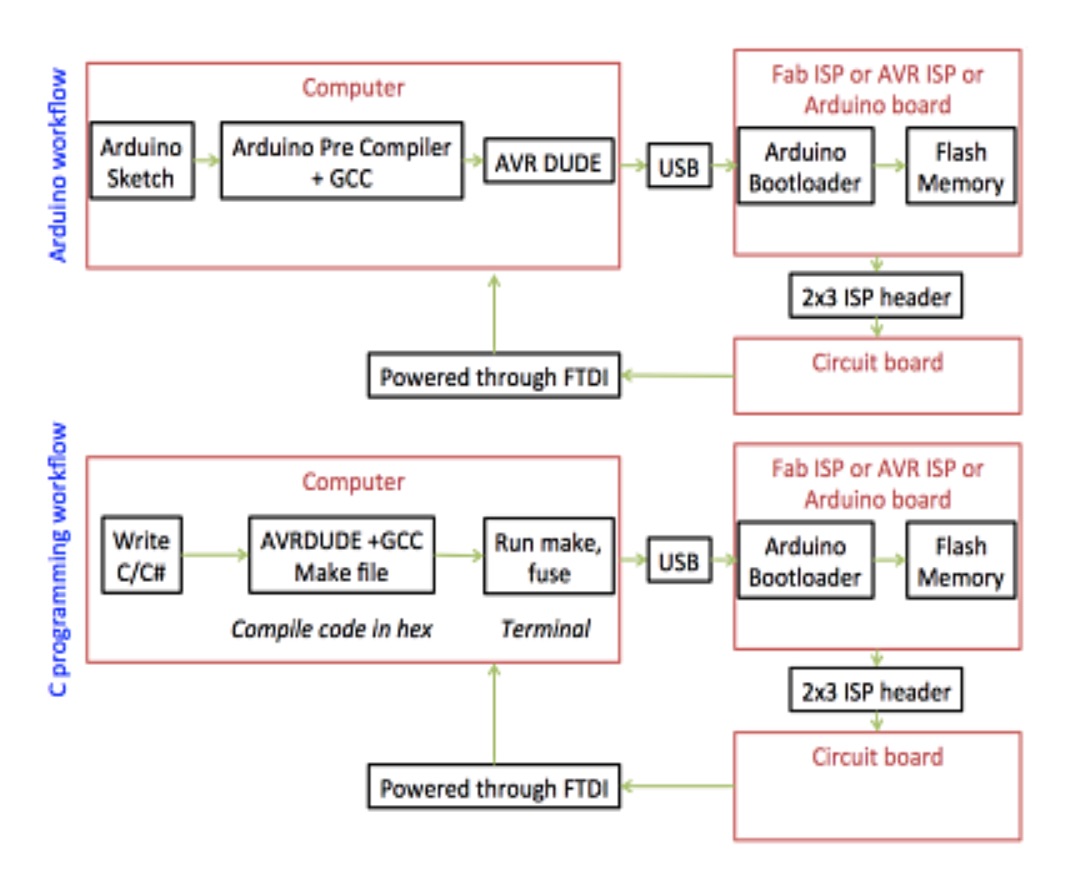
Next, I needed to clarify the connections between the computer, programmer, and board. I found this workflow made by
Pierre Bertrand especially helpful:
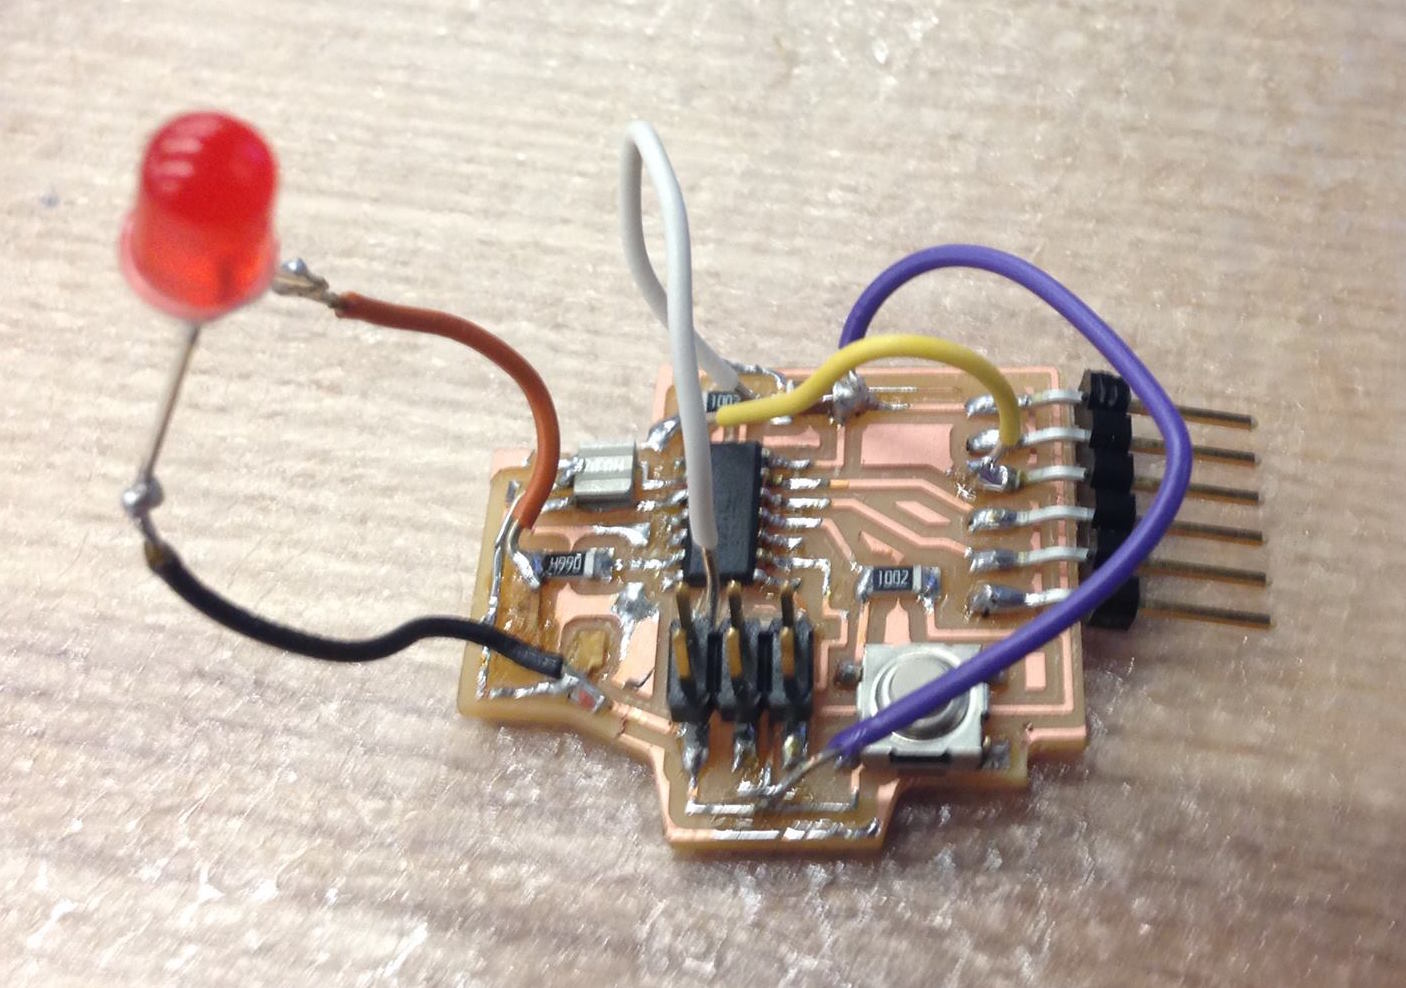
Challenges: When it came to actually programming the board I ran into problems. I received an error indicating that the board was not fabricated correctly. For awhile I could not figure out what the problem was. I visually checked for shorts, fused traces, and incorrect connections. This resulted in me discovering that the LED was soldered backwards. After fixing this the board still did not work. I moved on to checking all of the connections between VCC and ground which were fine. Finally, the problem was clear when I used the multimeter's option to beep if the components touching the leads are connected. I discovered that the 2 traces that were fused after milling, which I thought I seperated thoroughly with an exacto knife, were still in contact. The image below shows these traces right after I first milled the part.
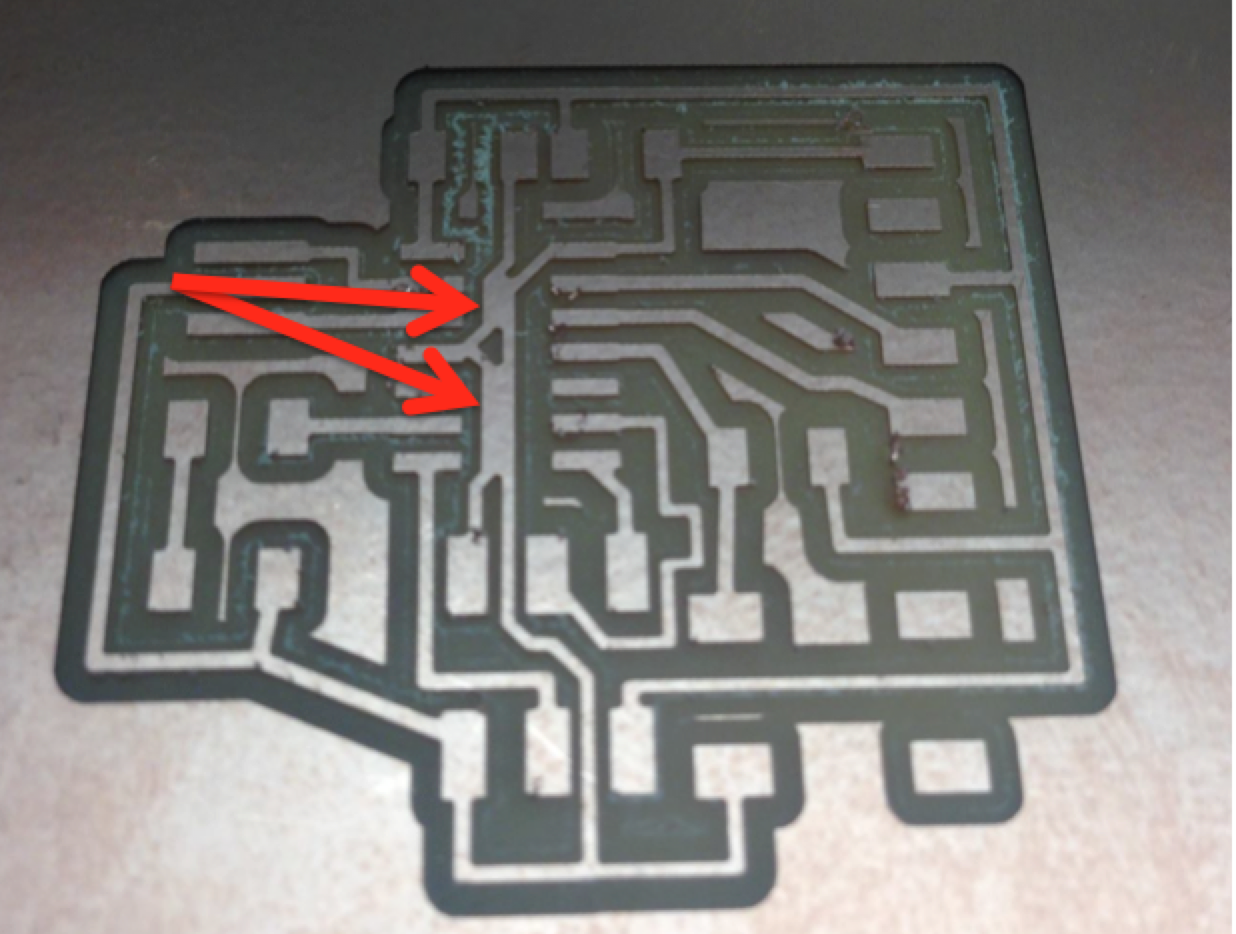
Since I worked backwards and started learning to program in Arduino before checking to see if my board could be programmed, this realization came pretty late. I severed these traces with an exacto knife and added jumper wires to connect the relevant components but ran out of time to debug further when the board still did not program.