This was a really fun week - we were given a very open ended assignment to make something big. I was a bit lost at first, and really worried about making something that works. One of the TAs for another section had sent out this video tutorial from Youtube, so I decided to use that as a starting point to learn Autodesk Fusion 360.
After going through the tutorial, I was worried about making sure that the pieces would fit together, and so I decided to take the stool design one step further and make something that was tall enogh for me to sit on, like a bar stool. I made the stool in Fusion 360, which became easier to use with practice. However, one of the hardest things was exporting it, especially since it was a combination of 2d sketches and 3d objects.
How to use the Shopbot
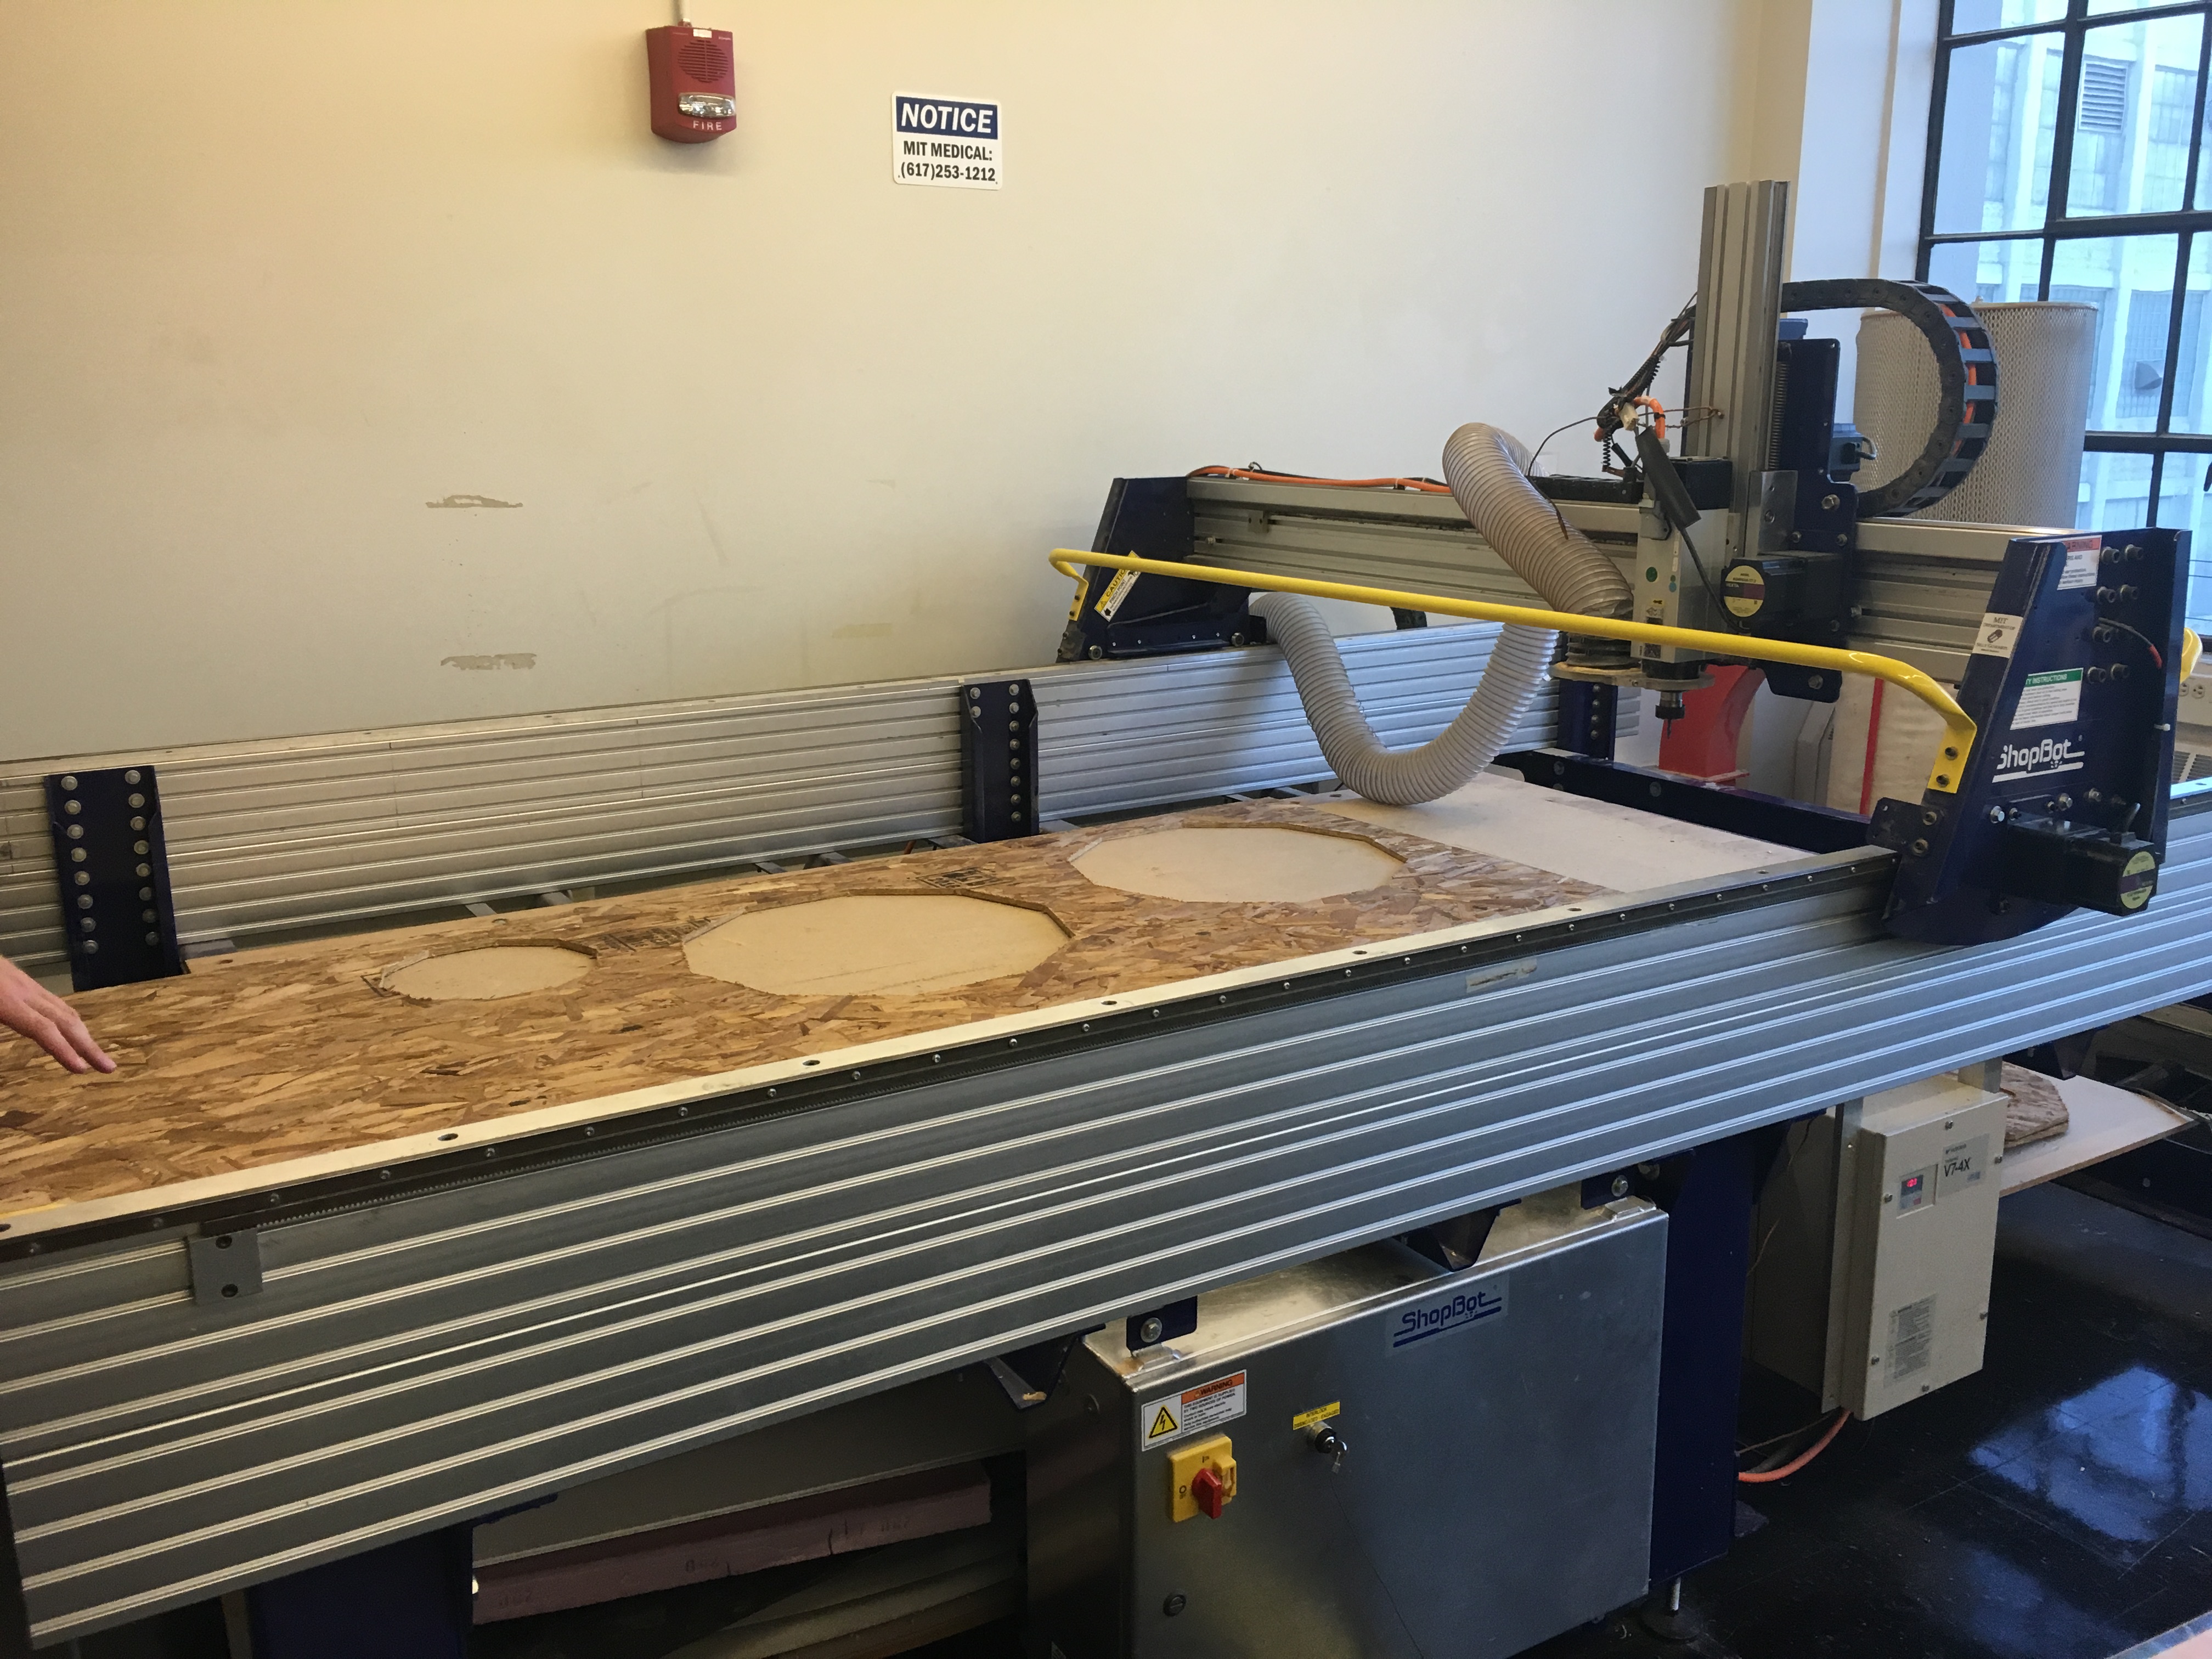
The Shopbot we used was located in N52, as a part of the IDC. The machine is really big, and can fit the whole 4 foot by 8 foot sheet of plywood on top of it’s bed. It’s a large CNC Router, and essentially uses a set of machine code lines to determine what actions it will do.
We initially got trained and went through the complete process of how to use the machine. First, you load the large 4x8 sheet onto the machine, and use wood screws to secure it down. This is to hold it in place as the machine cuts it out, but we have to be careful to not have our end mill hit into the screw as that would cause it to break / do some serious damage. After screwing our piece down, we move to VCarve, a tool to cut parts on the ShopBot. You import your file that contains the traces we want to cut, and then add tabs to the trace so as to keep it secured to the original board with small indentations so that it doesn’t go shooting out once the cut is complete. This is also important if we’re cutting out multiple items - we want all the items to be secured to get as accurate of a cut as possible.
The software has an easy way to add tabs which will be added to the final output!
Tutorial Milling Examples
Once we were ready to cut, we started out by first zeroing the machine. This is similar to the way we zero a laser cutter, or have to set the origin on the SRM-20 when milling a PCB. Here’s an image of how we zero the Z, albeitly the most important thing to zero. We use a metal plate associated with the machine that then is a conductive surface for the bit to touch as it comes down slowly.
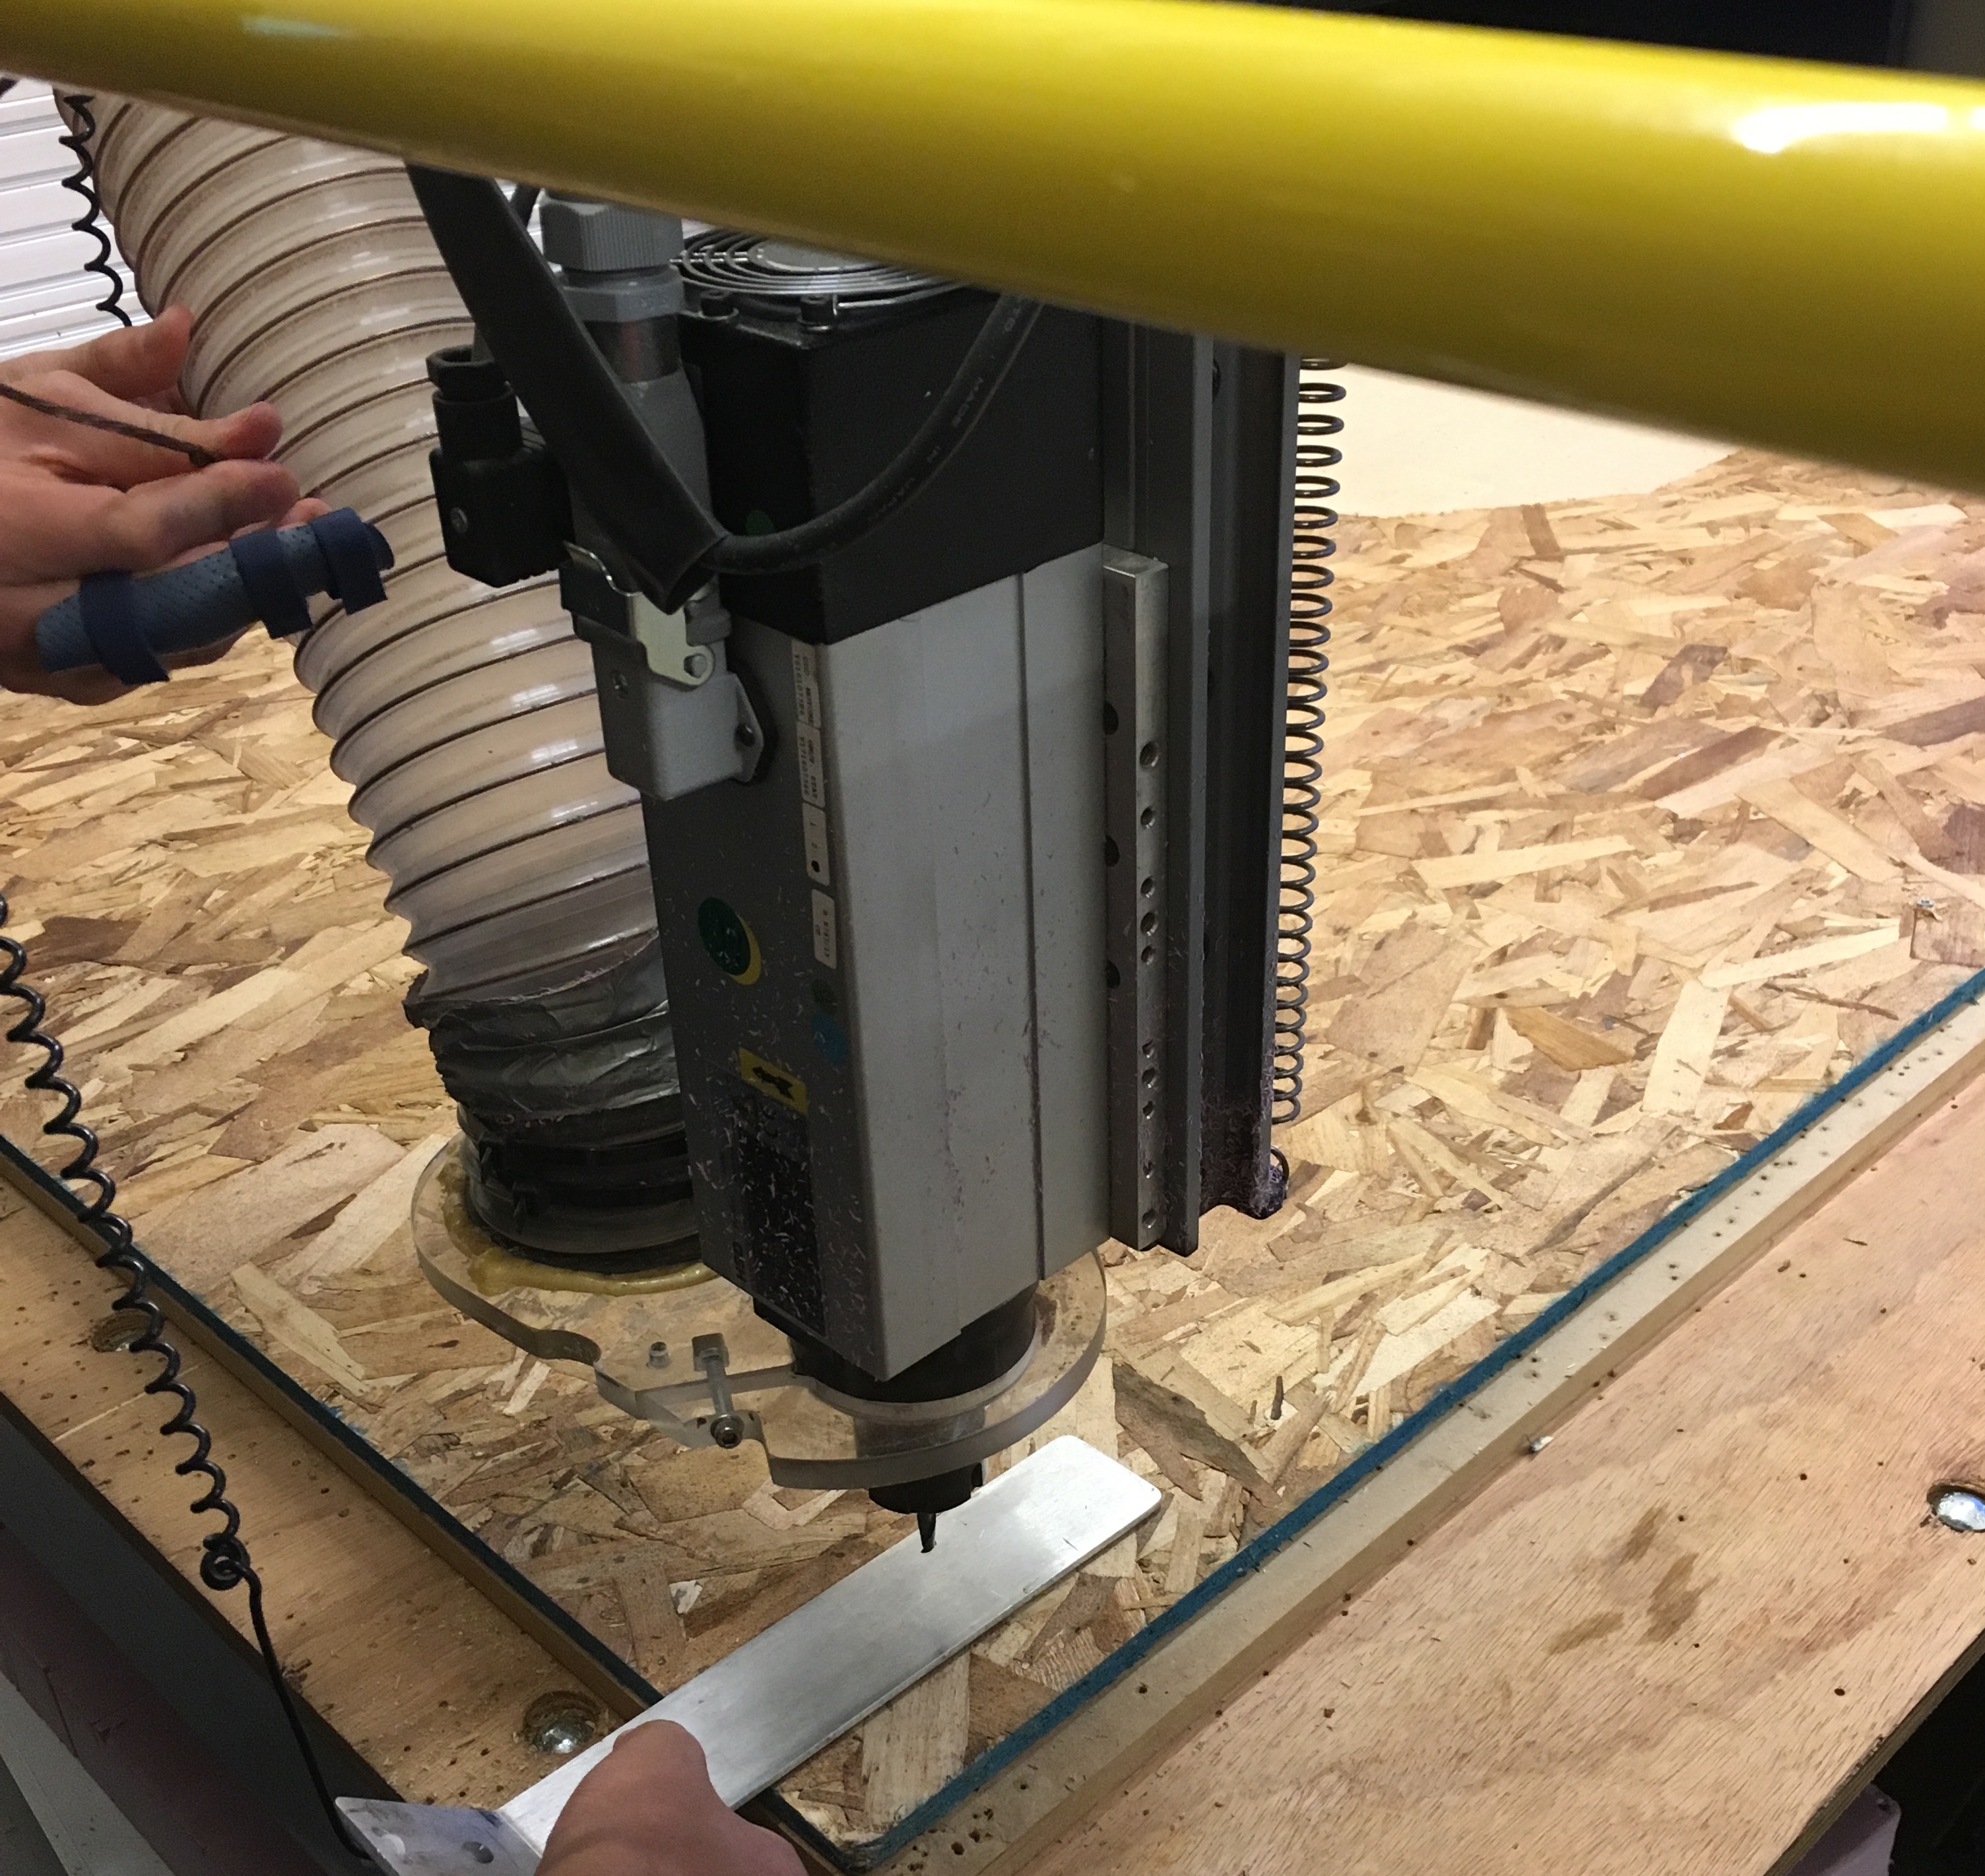
Once we had done that, we run the job but set the Z to be higher than it actually is, doing a dry run in the air. This allows us to see where the bit is going to go and also check if we will hit any screws / have any issues.
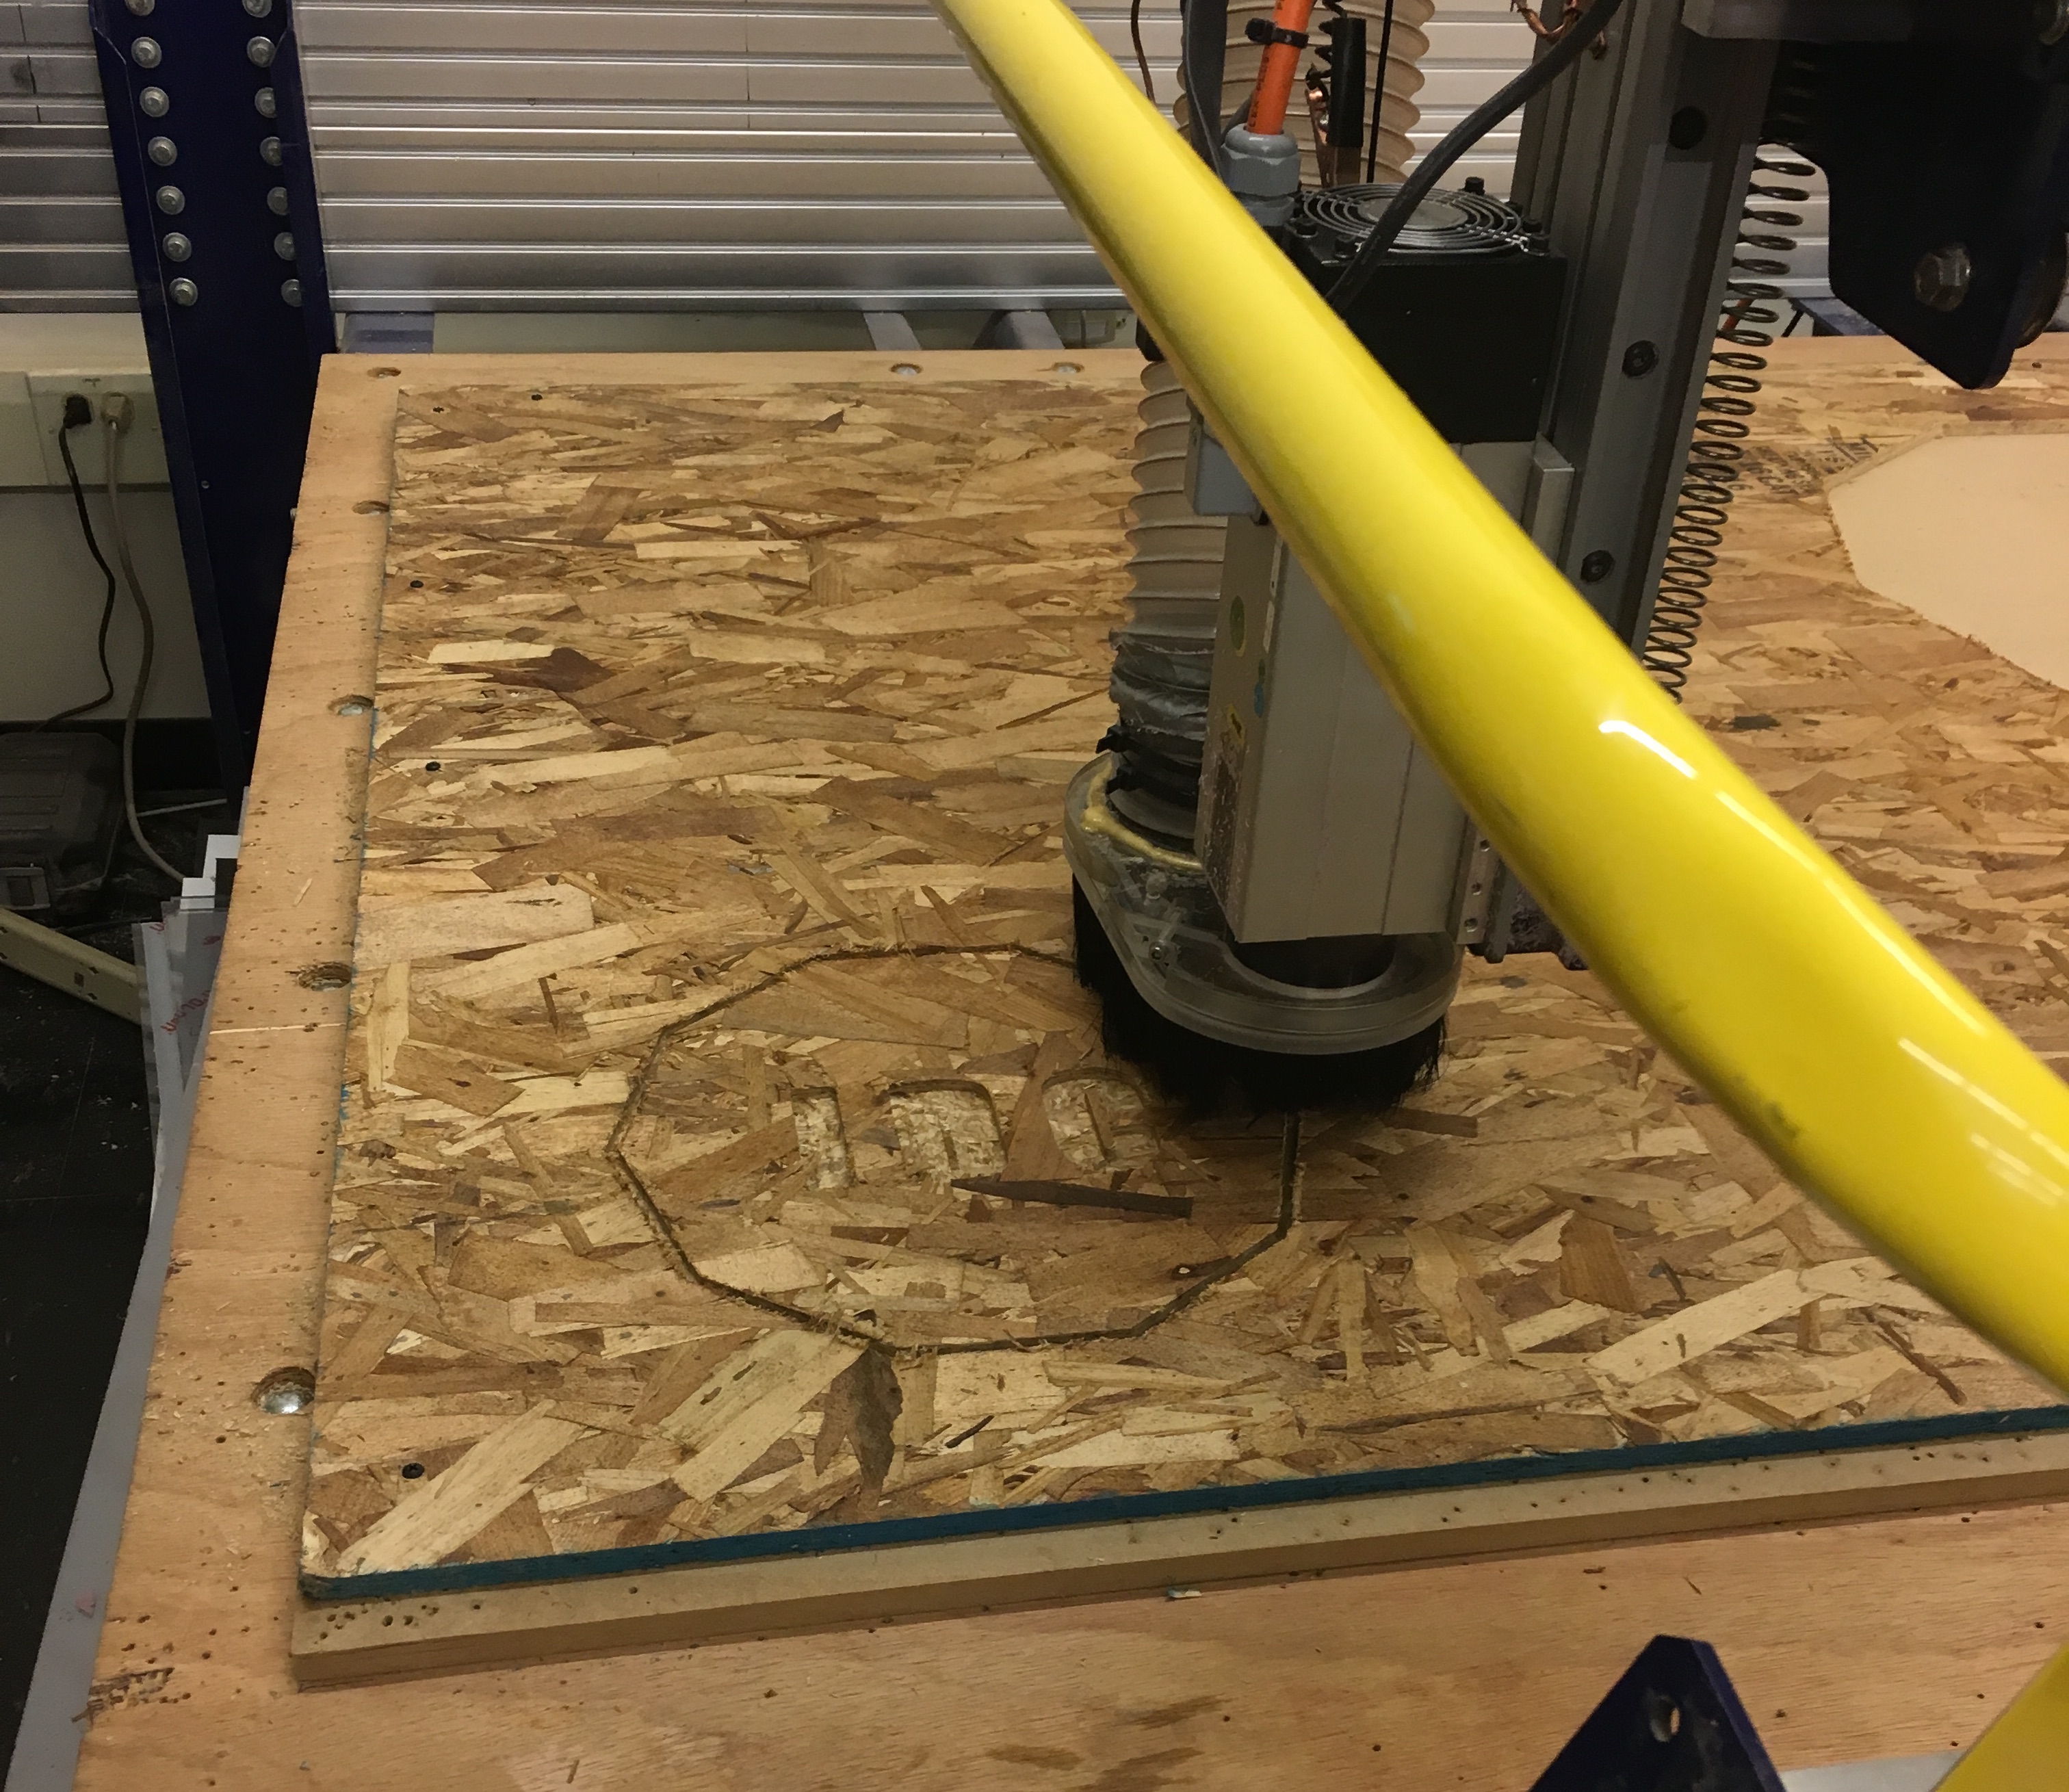
Once the dry run is complete or you’re satisfied, you can go back and reset the Z and then re-run the job again. Here are some photos of the initial disk cutout that we did as a part of the tutorial.
Cutting my bar stool
Cutting the bar stool was fairly straightforward. The biggest take away was to add in fillets or dog bones to make sure that the right edges came out exactly as we expected with the addition of the bit width into the calculation of the corner. Here’s a really good article that discsusses all of the nitty gritty details of parameters to set when cutting (feed speed, cut direction, etc) from Makezine.
During the cutting process, we have to wear ear protection as it gets quite loud as you can see from the video below:
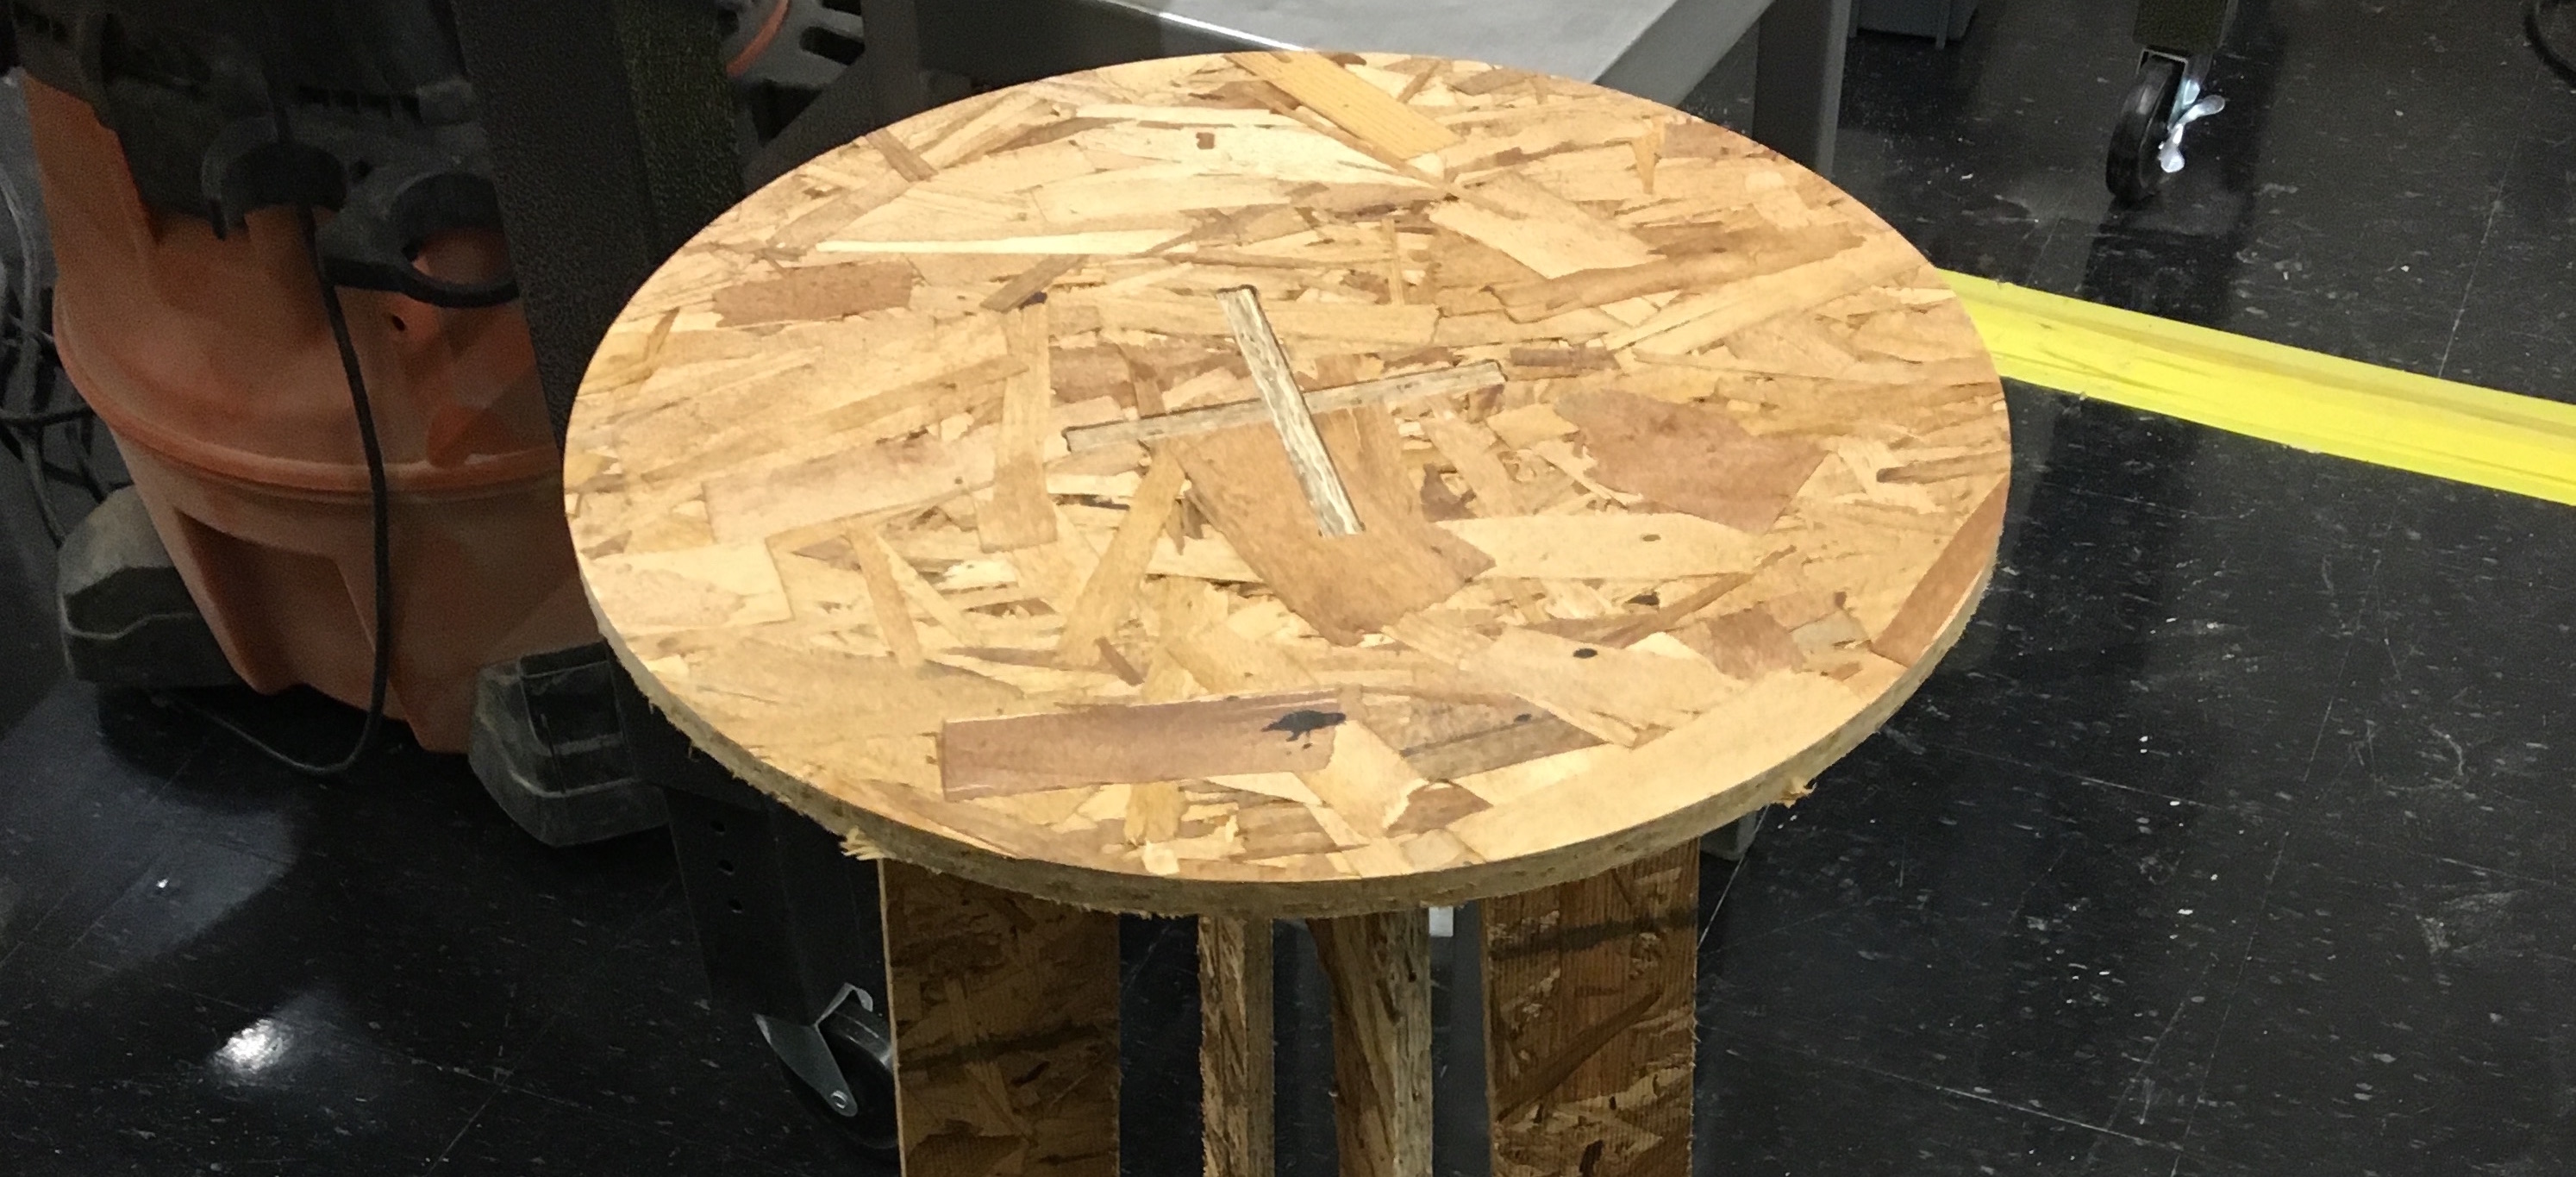
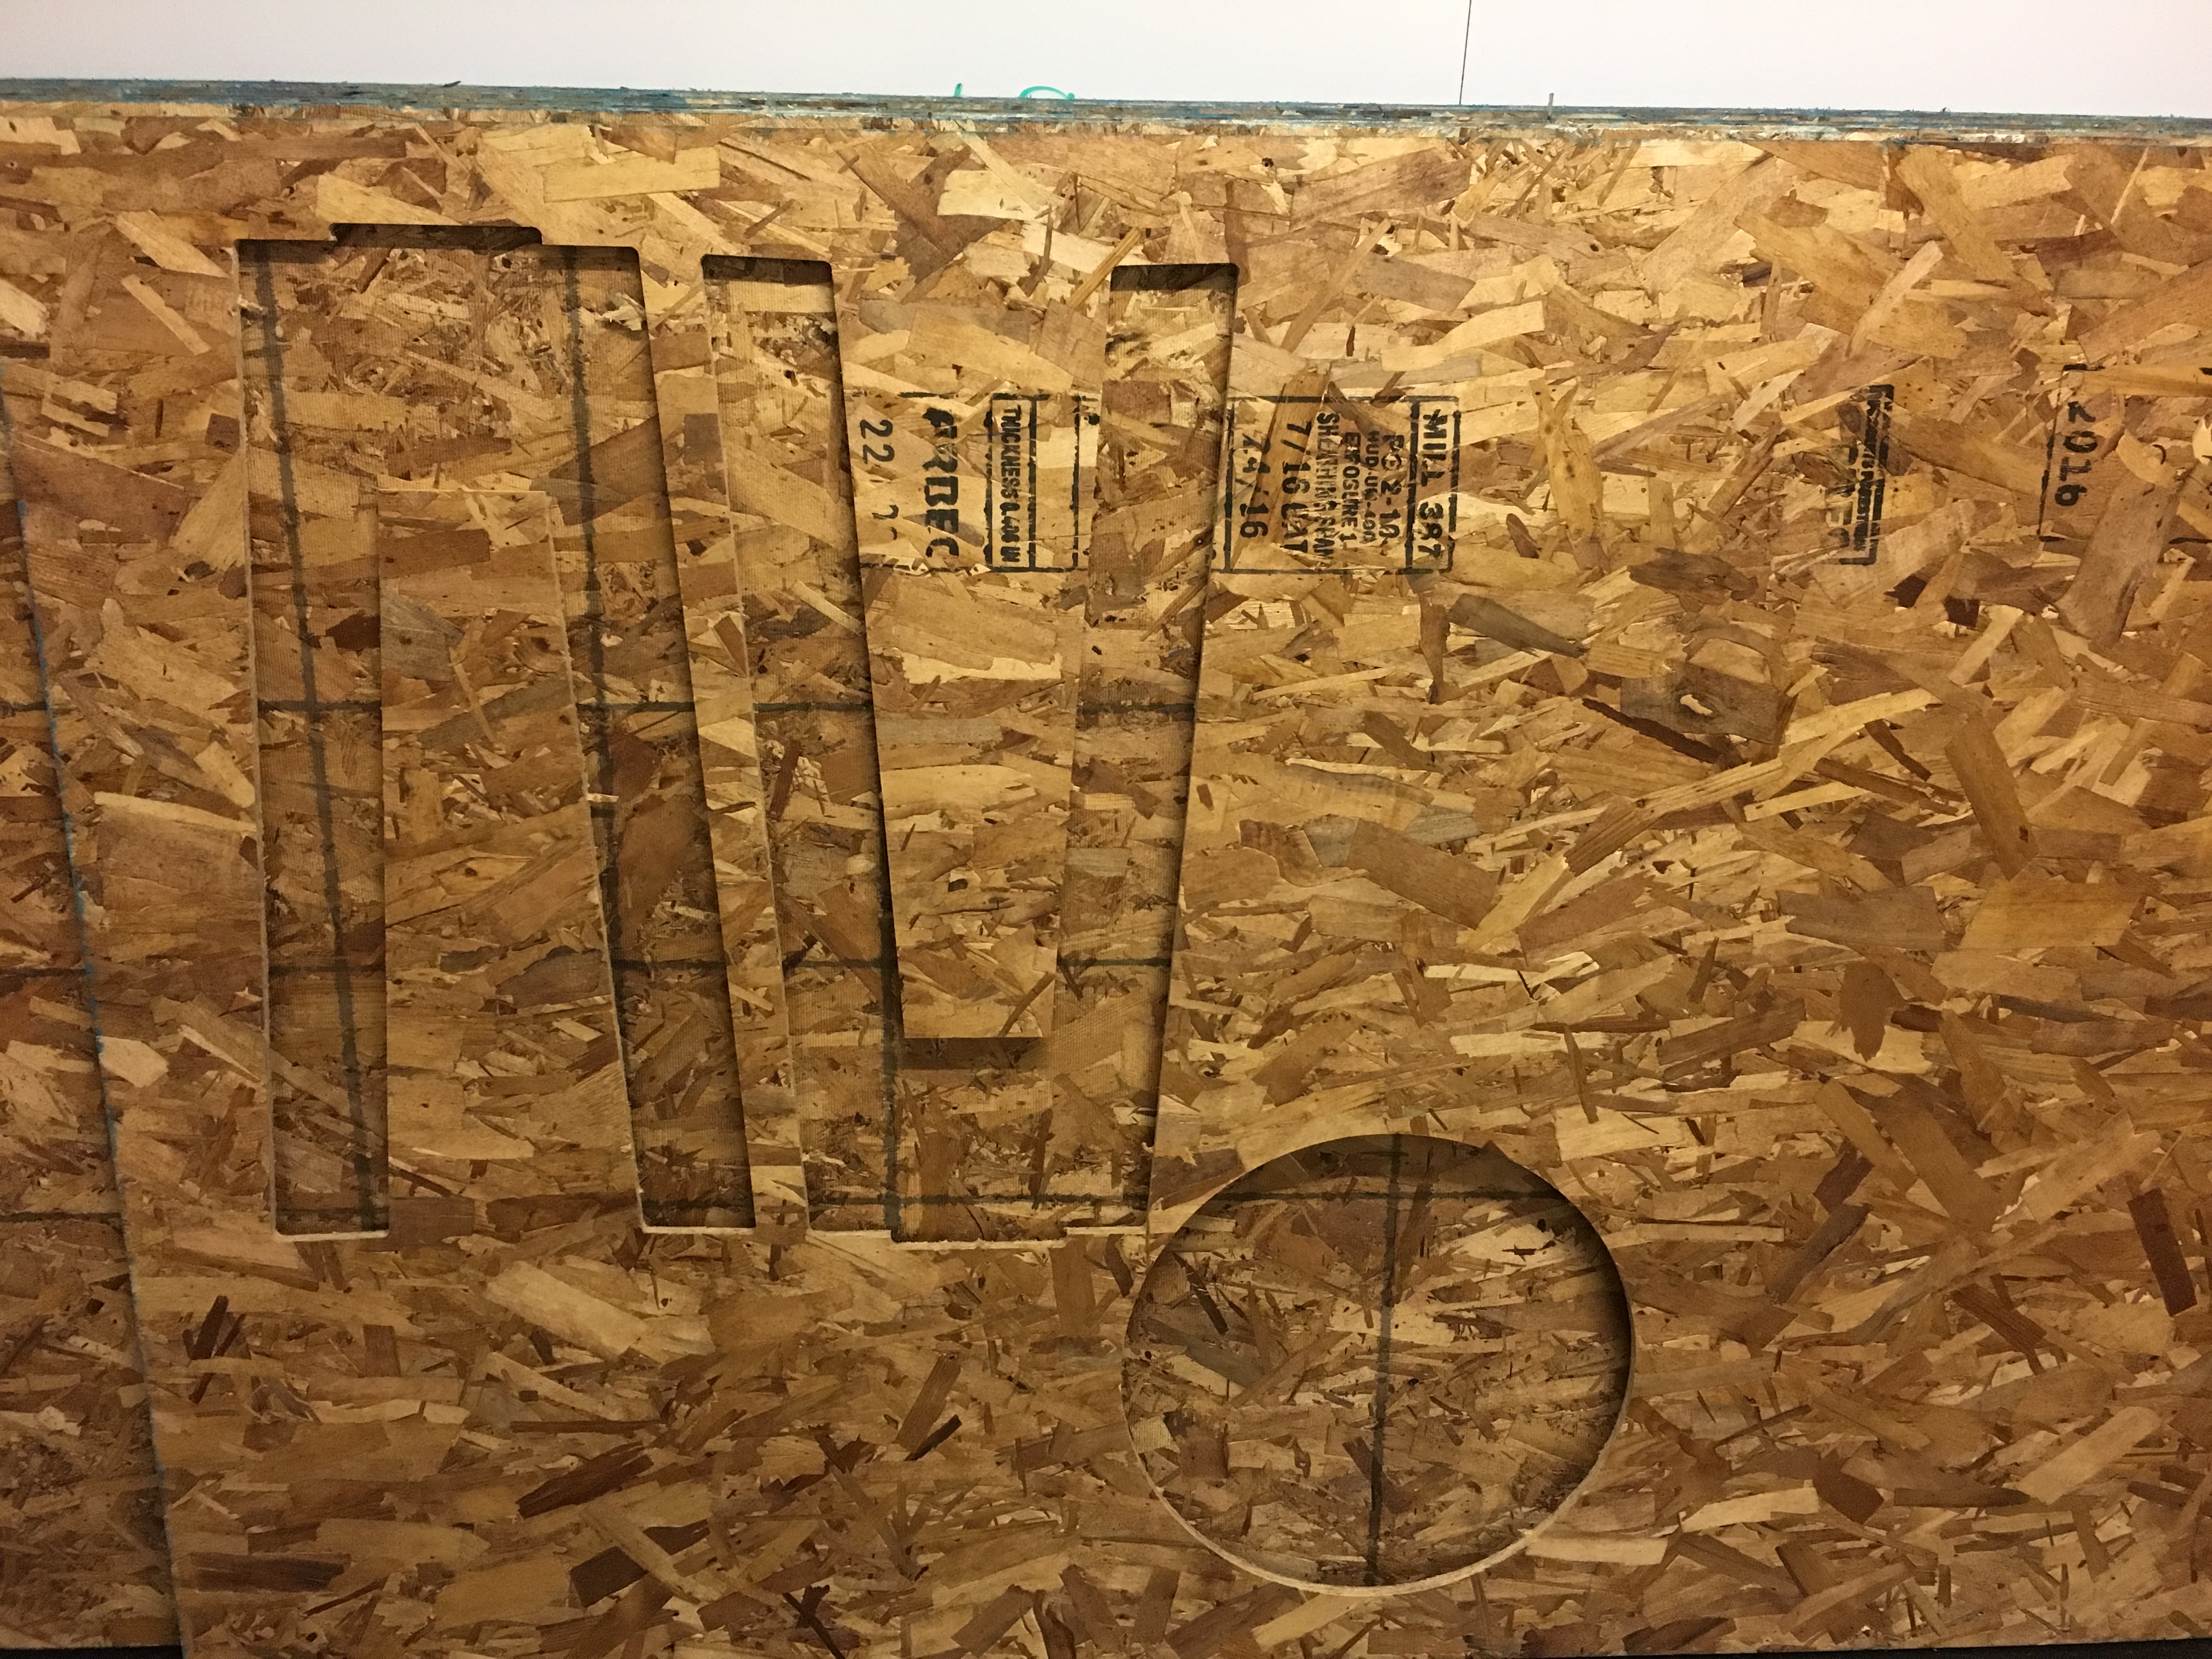
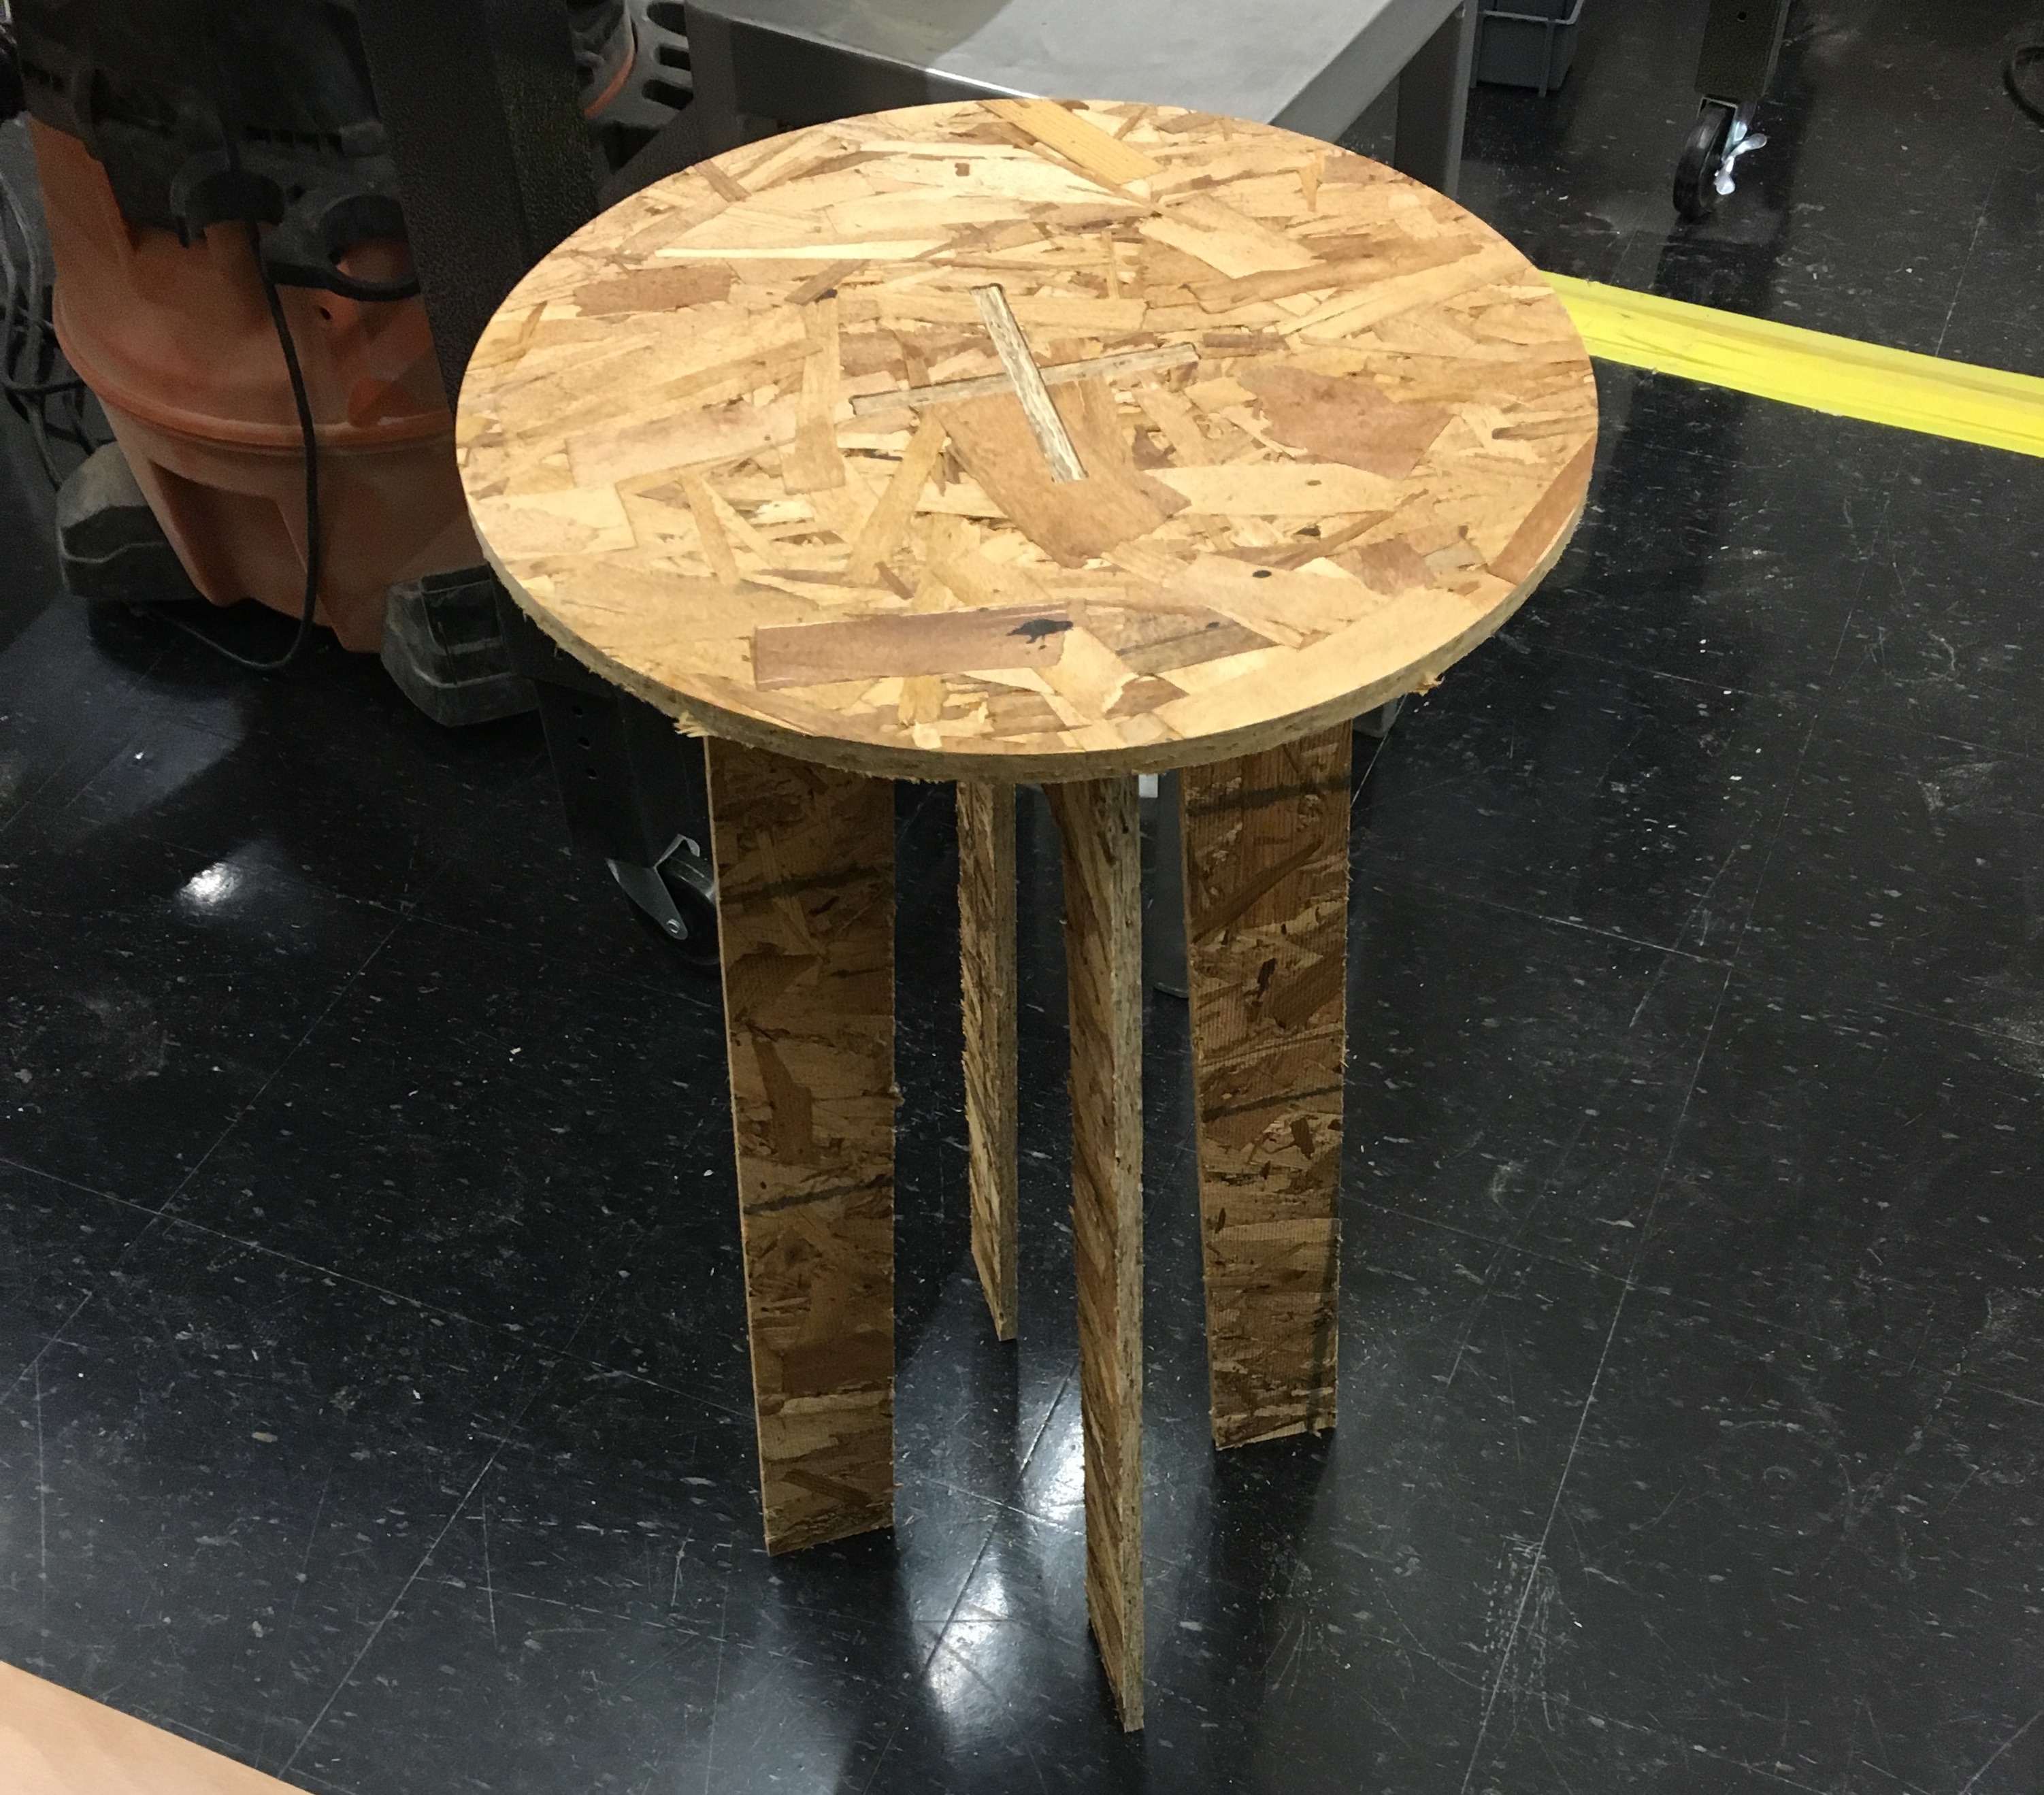
Once the stool was cut, here’s what the plywood looked like.
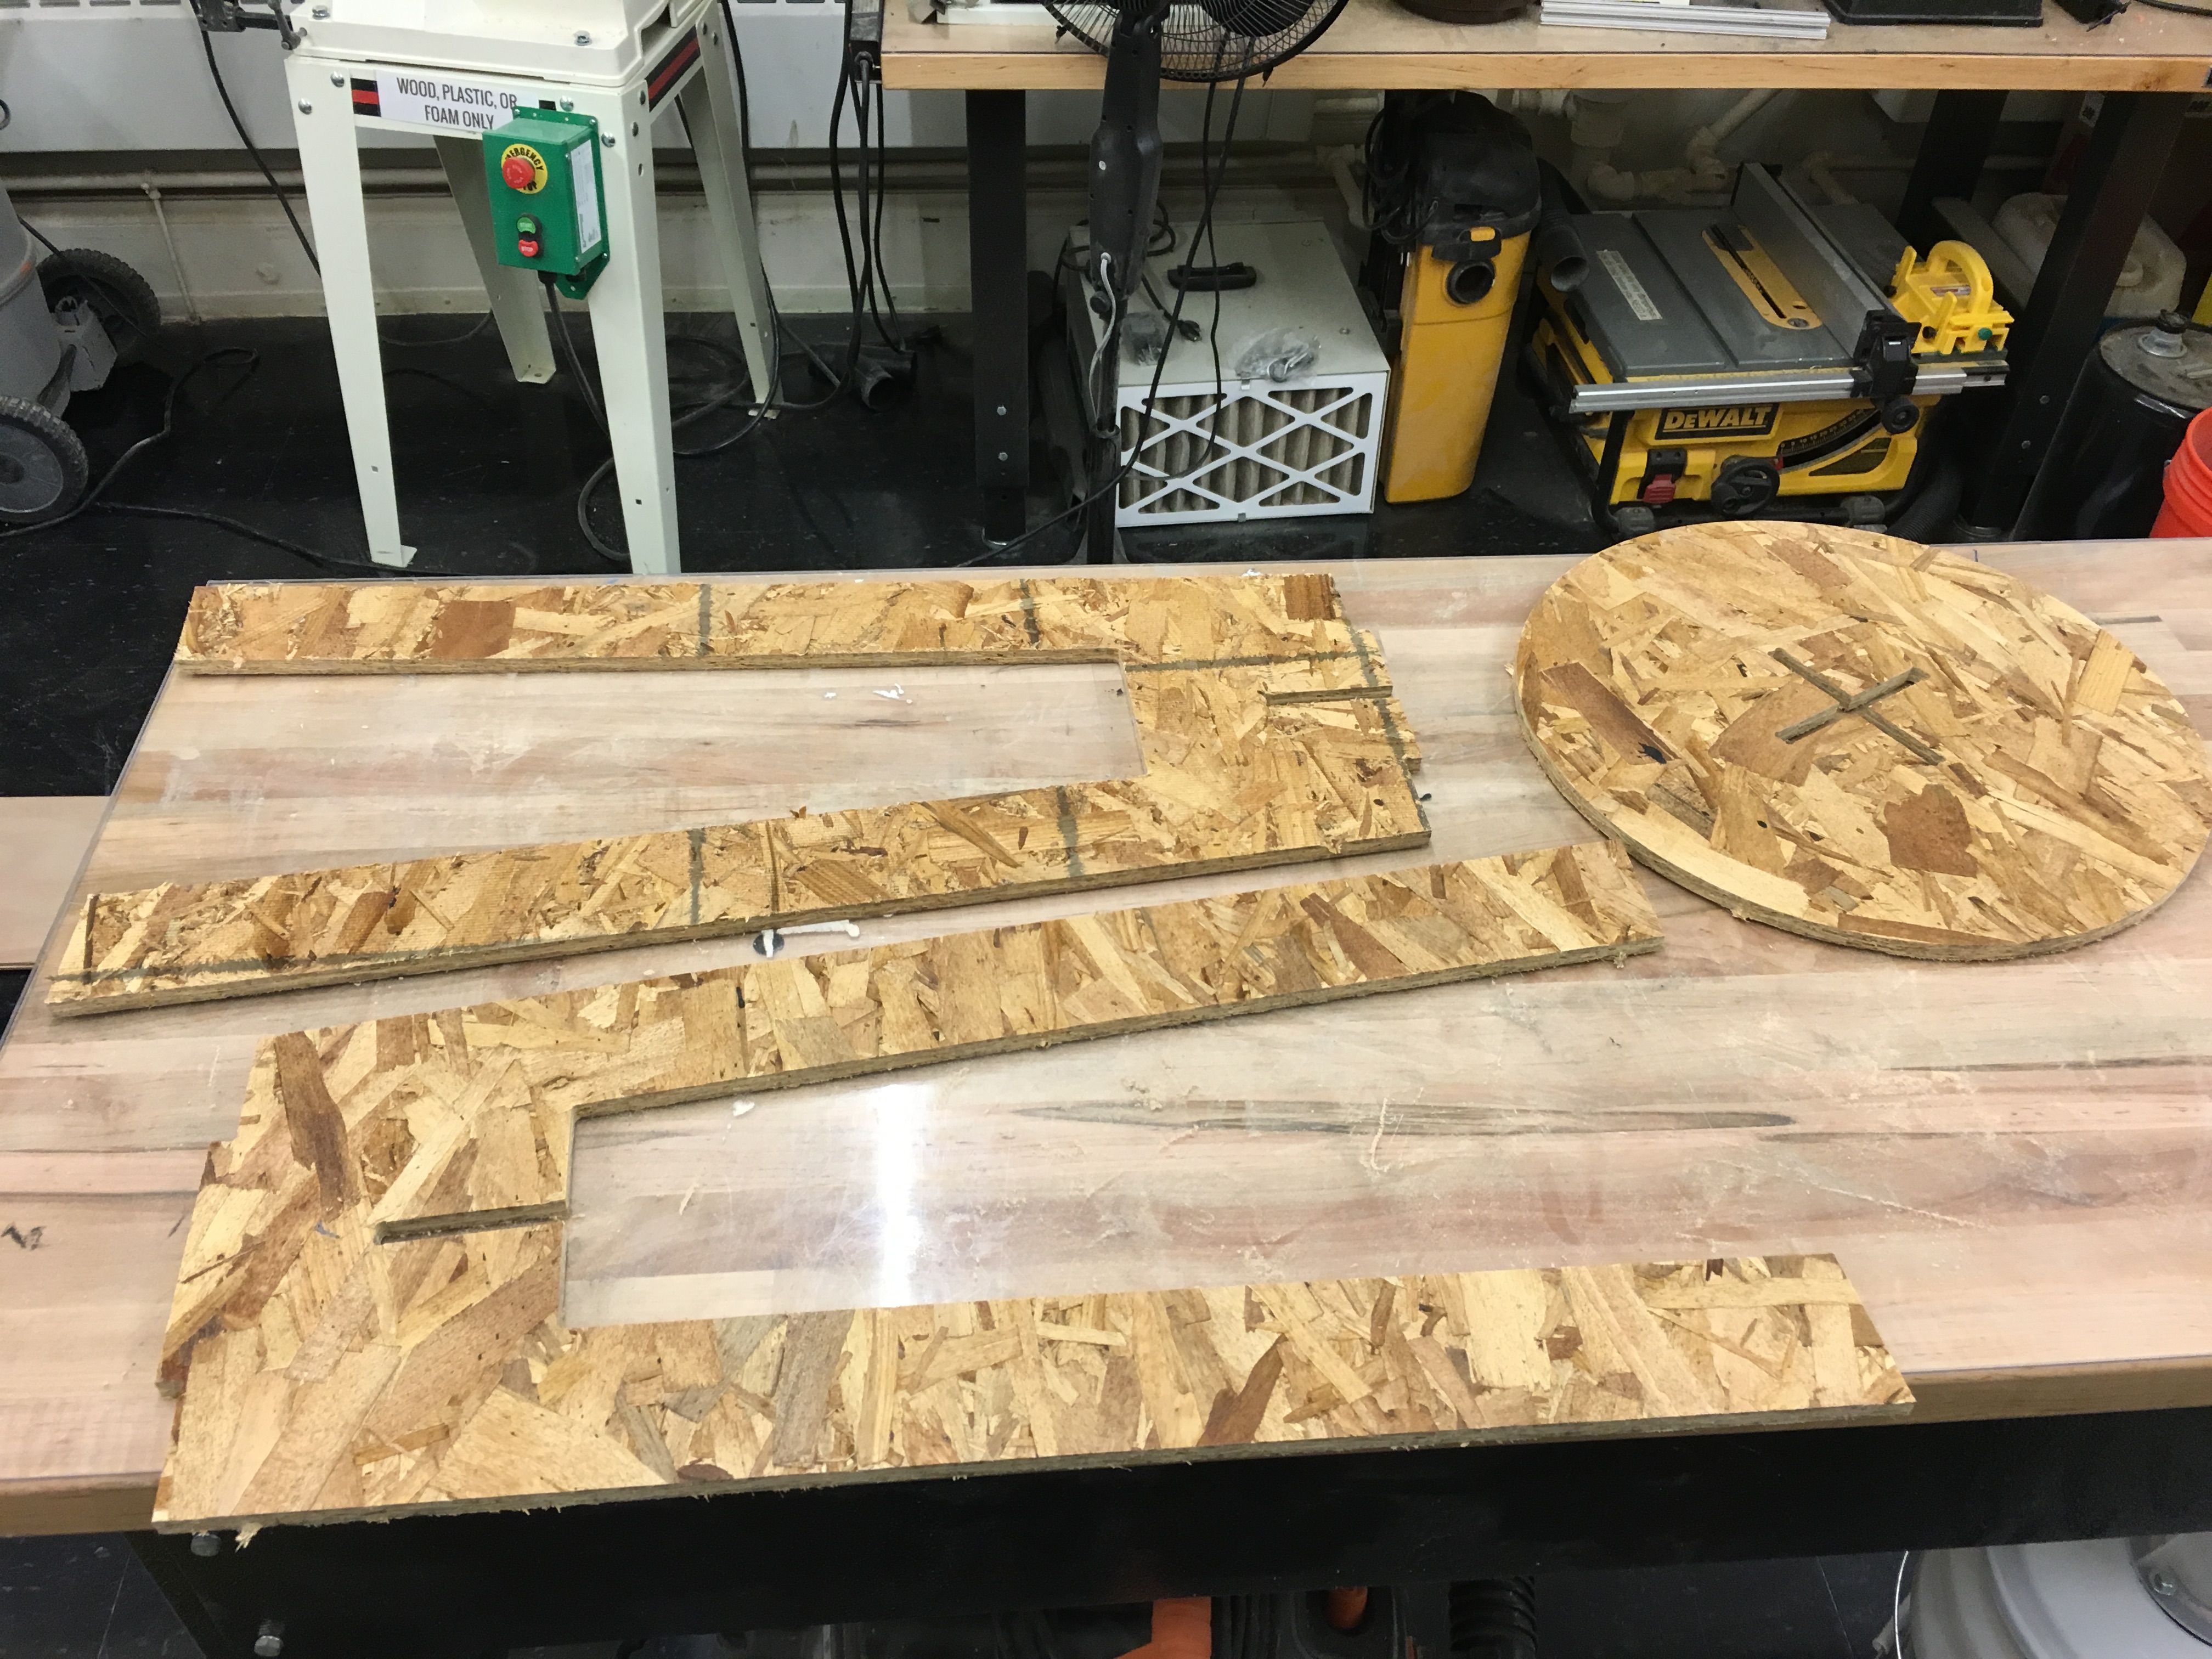
Here are the final pieces as well.
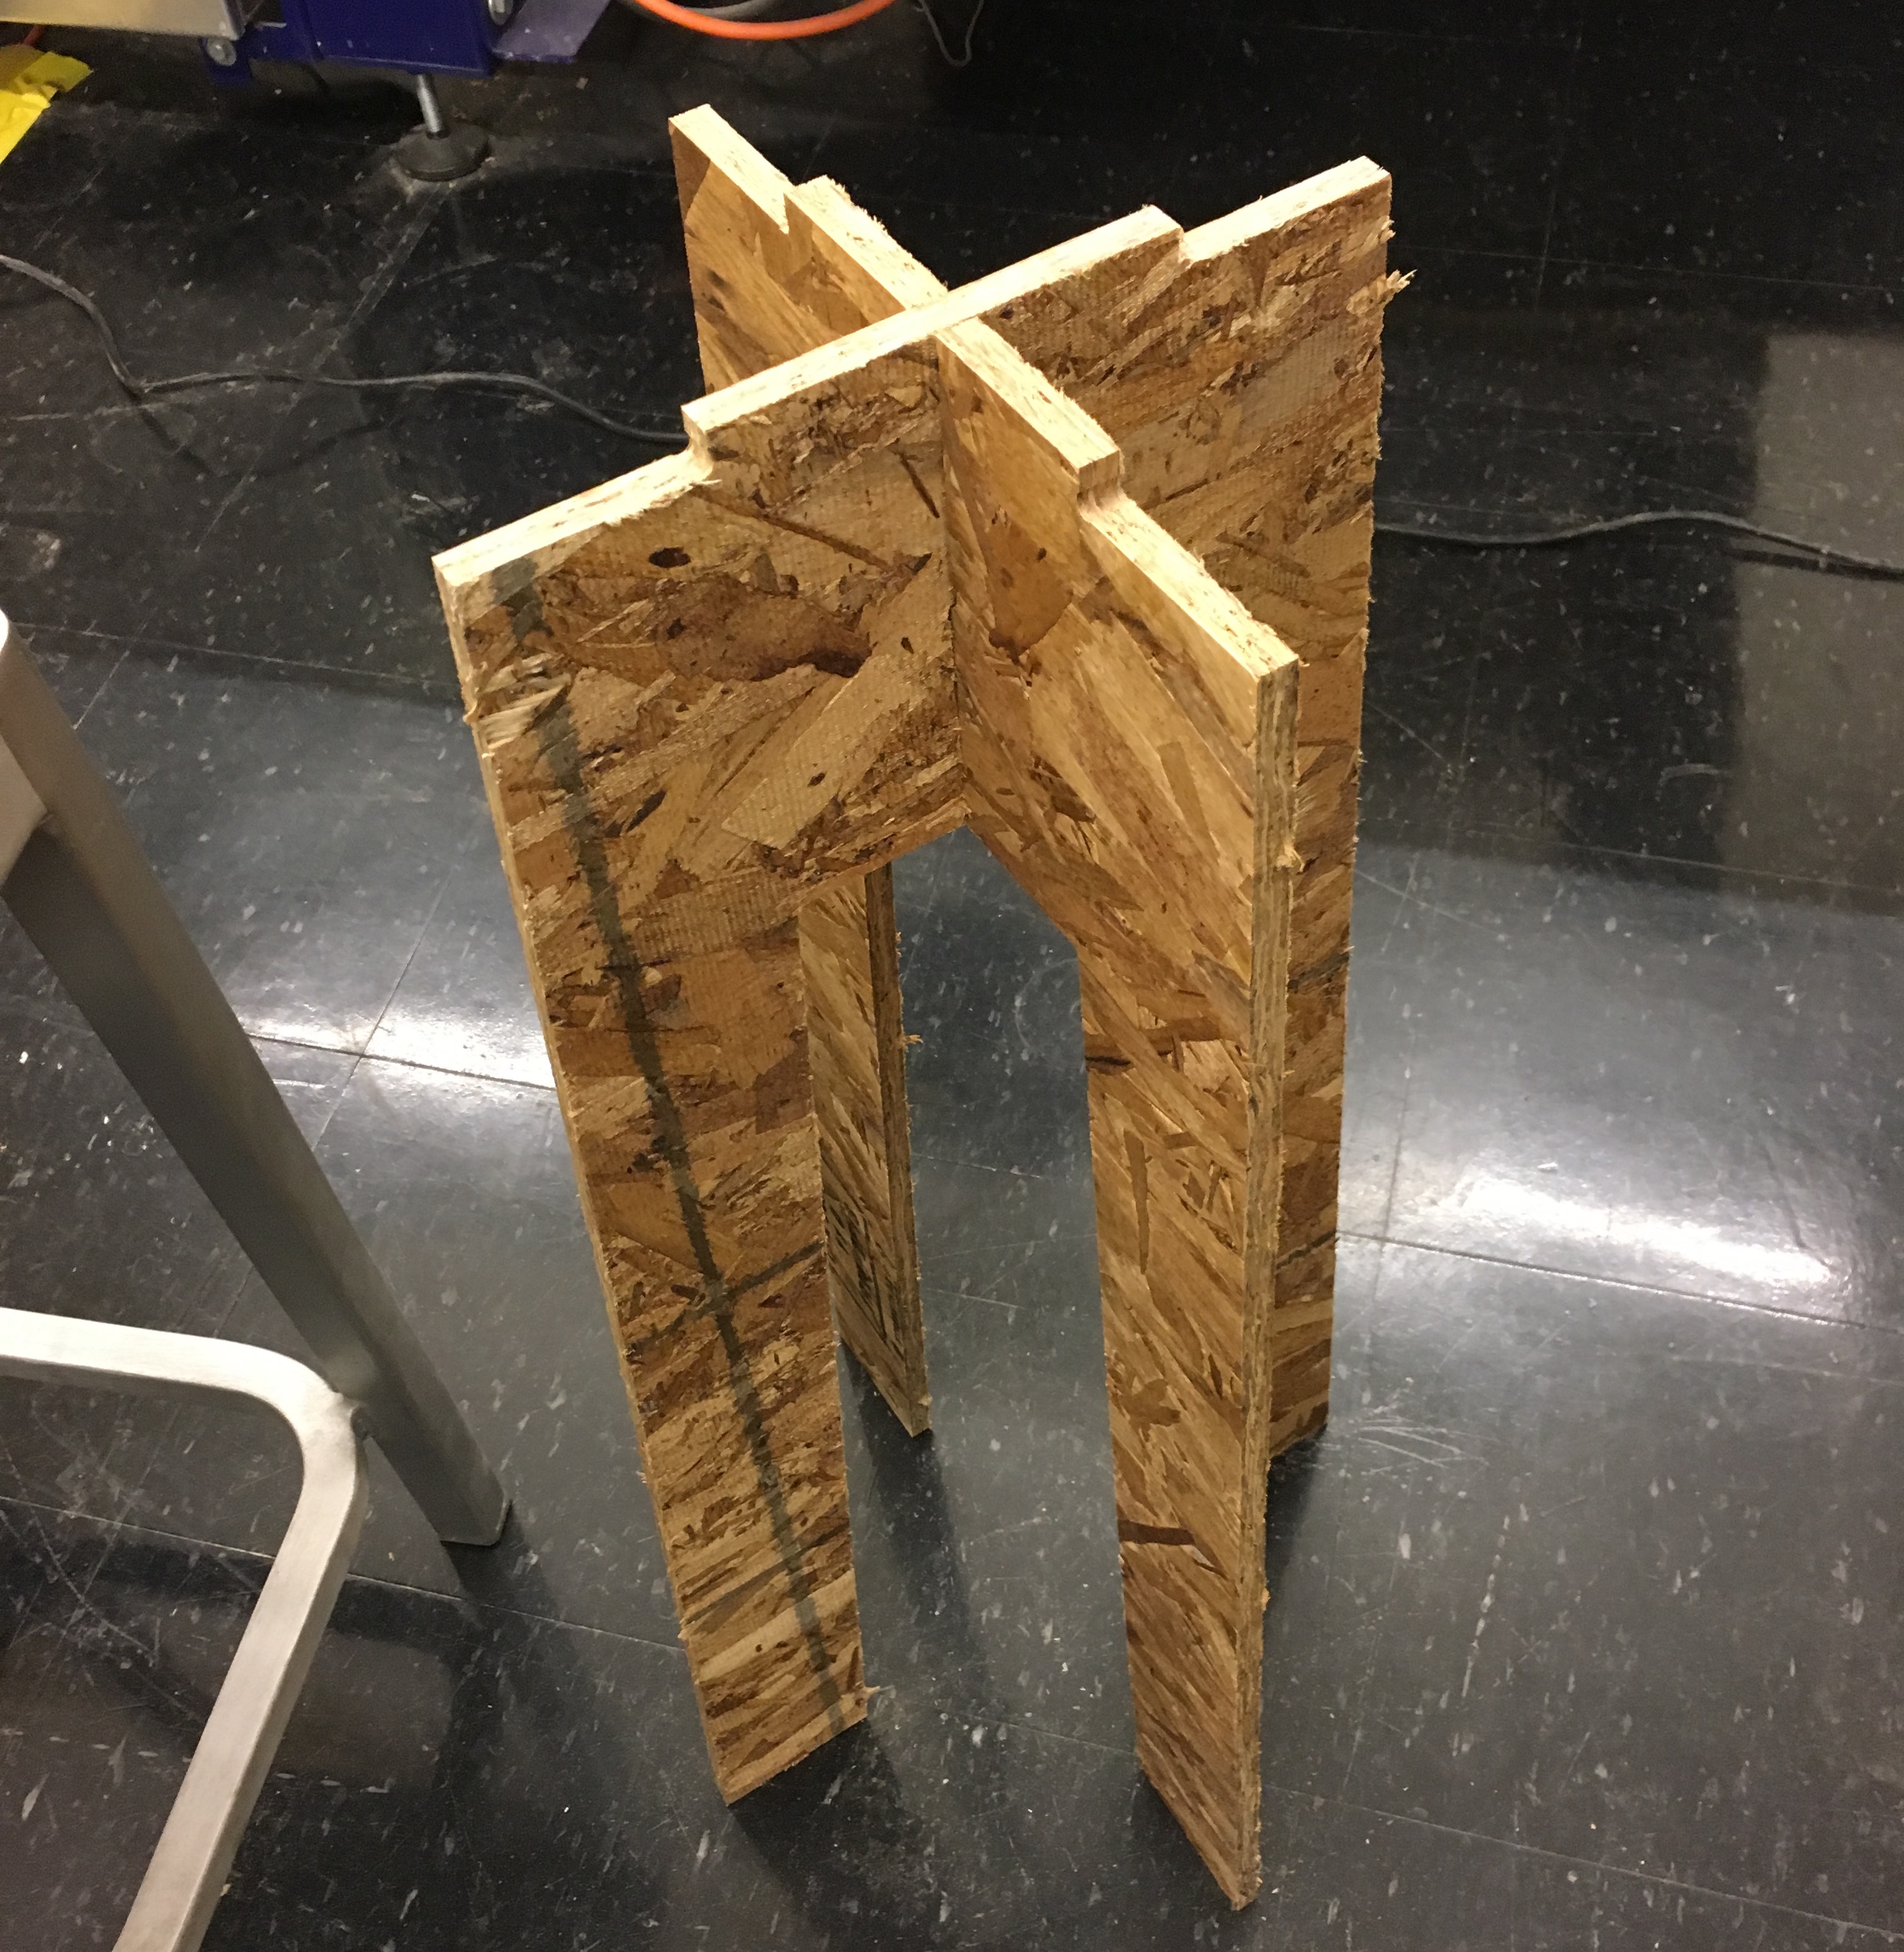
The pieces came out really well thanks to the new end mill that we were able to use because Sam Calisch had brought it with him. It resulted in a very smooth finish. Next, I tried to get the stool to stand up on it’s own and it did!
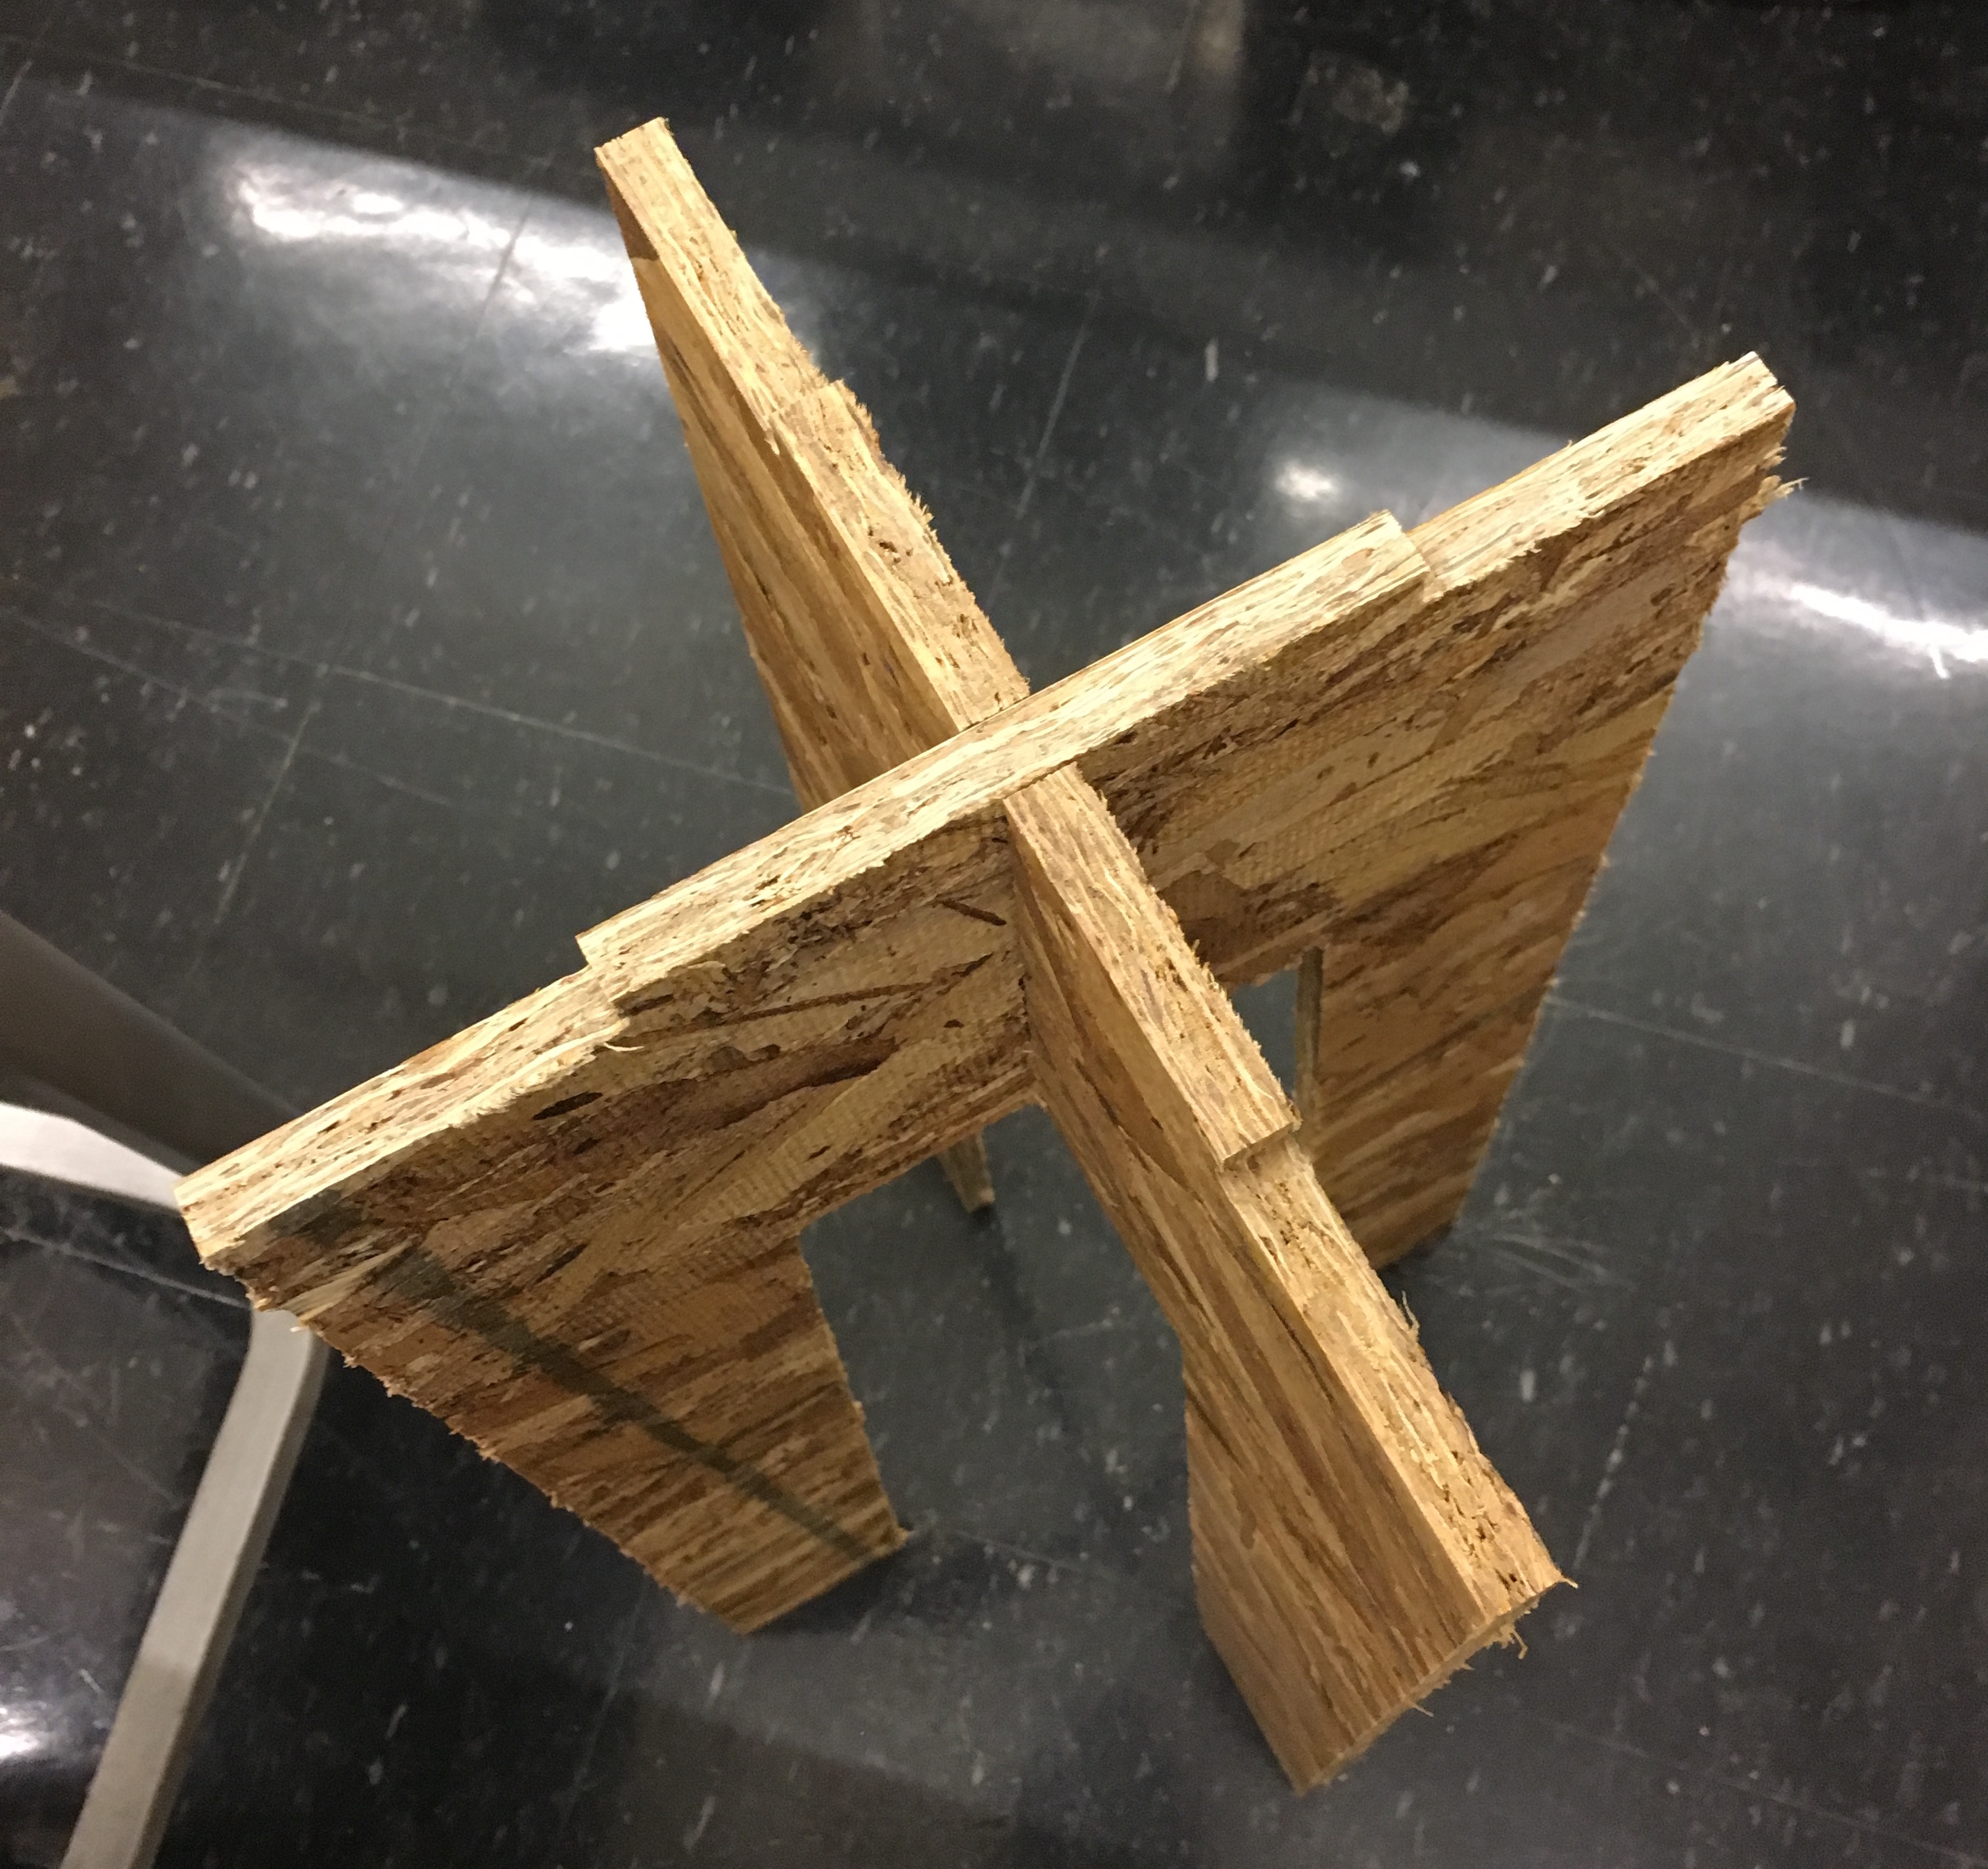
As can be seen from the top view, it’s very flat and sturdy as well. Finally, I put the top on it and had a full stool. It was actually quite comfortable to sit on - I had just made the seat a bit too large so that’s definitely something to make smaller in the future!
And here’s me sitting on the stool!
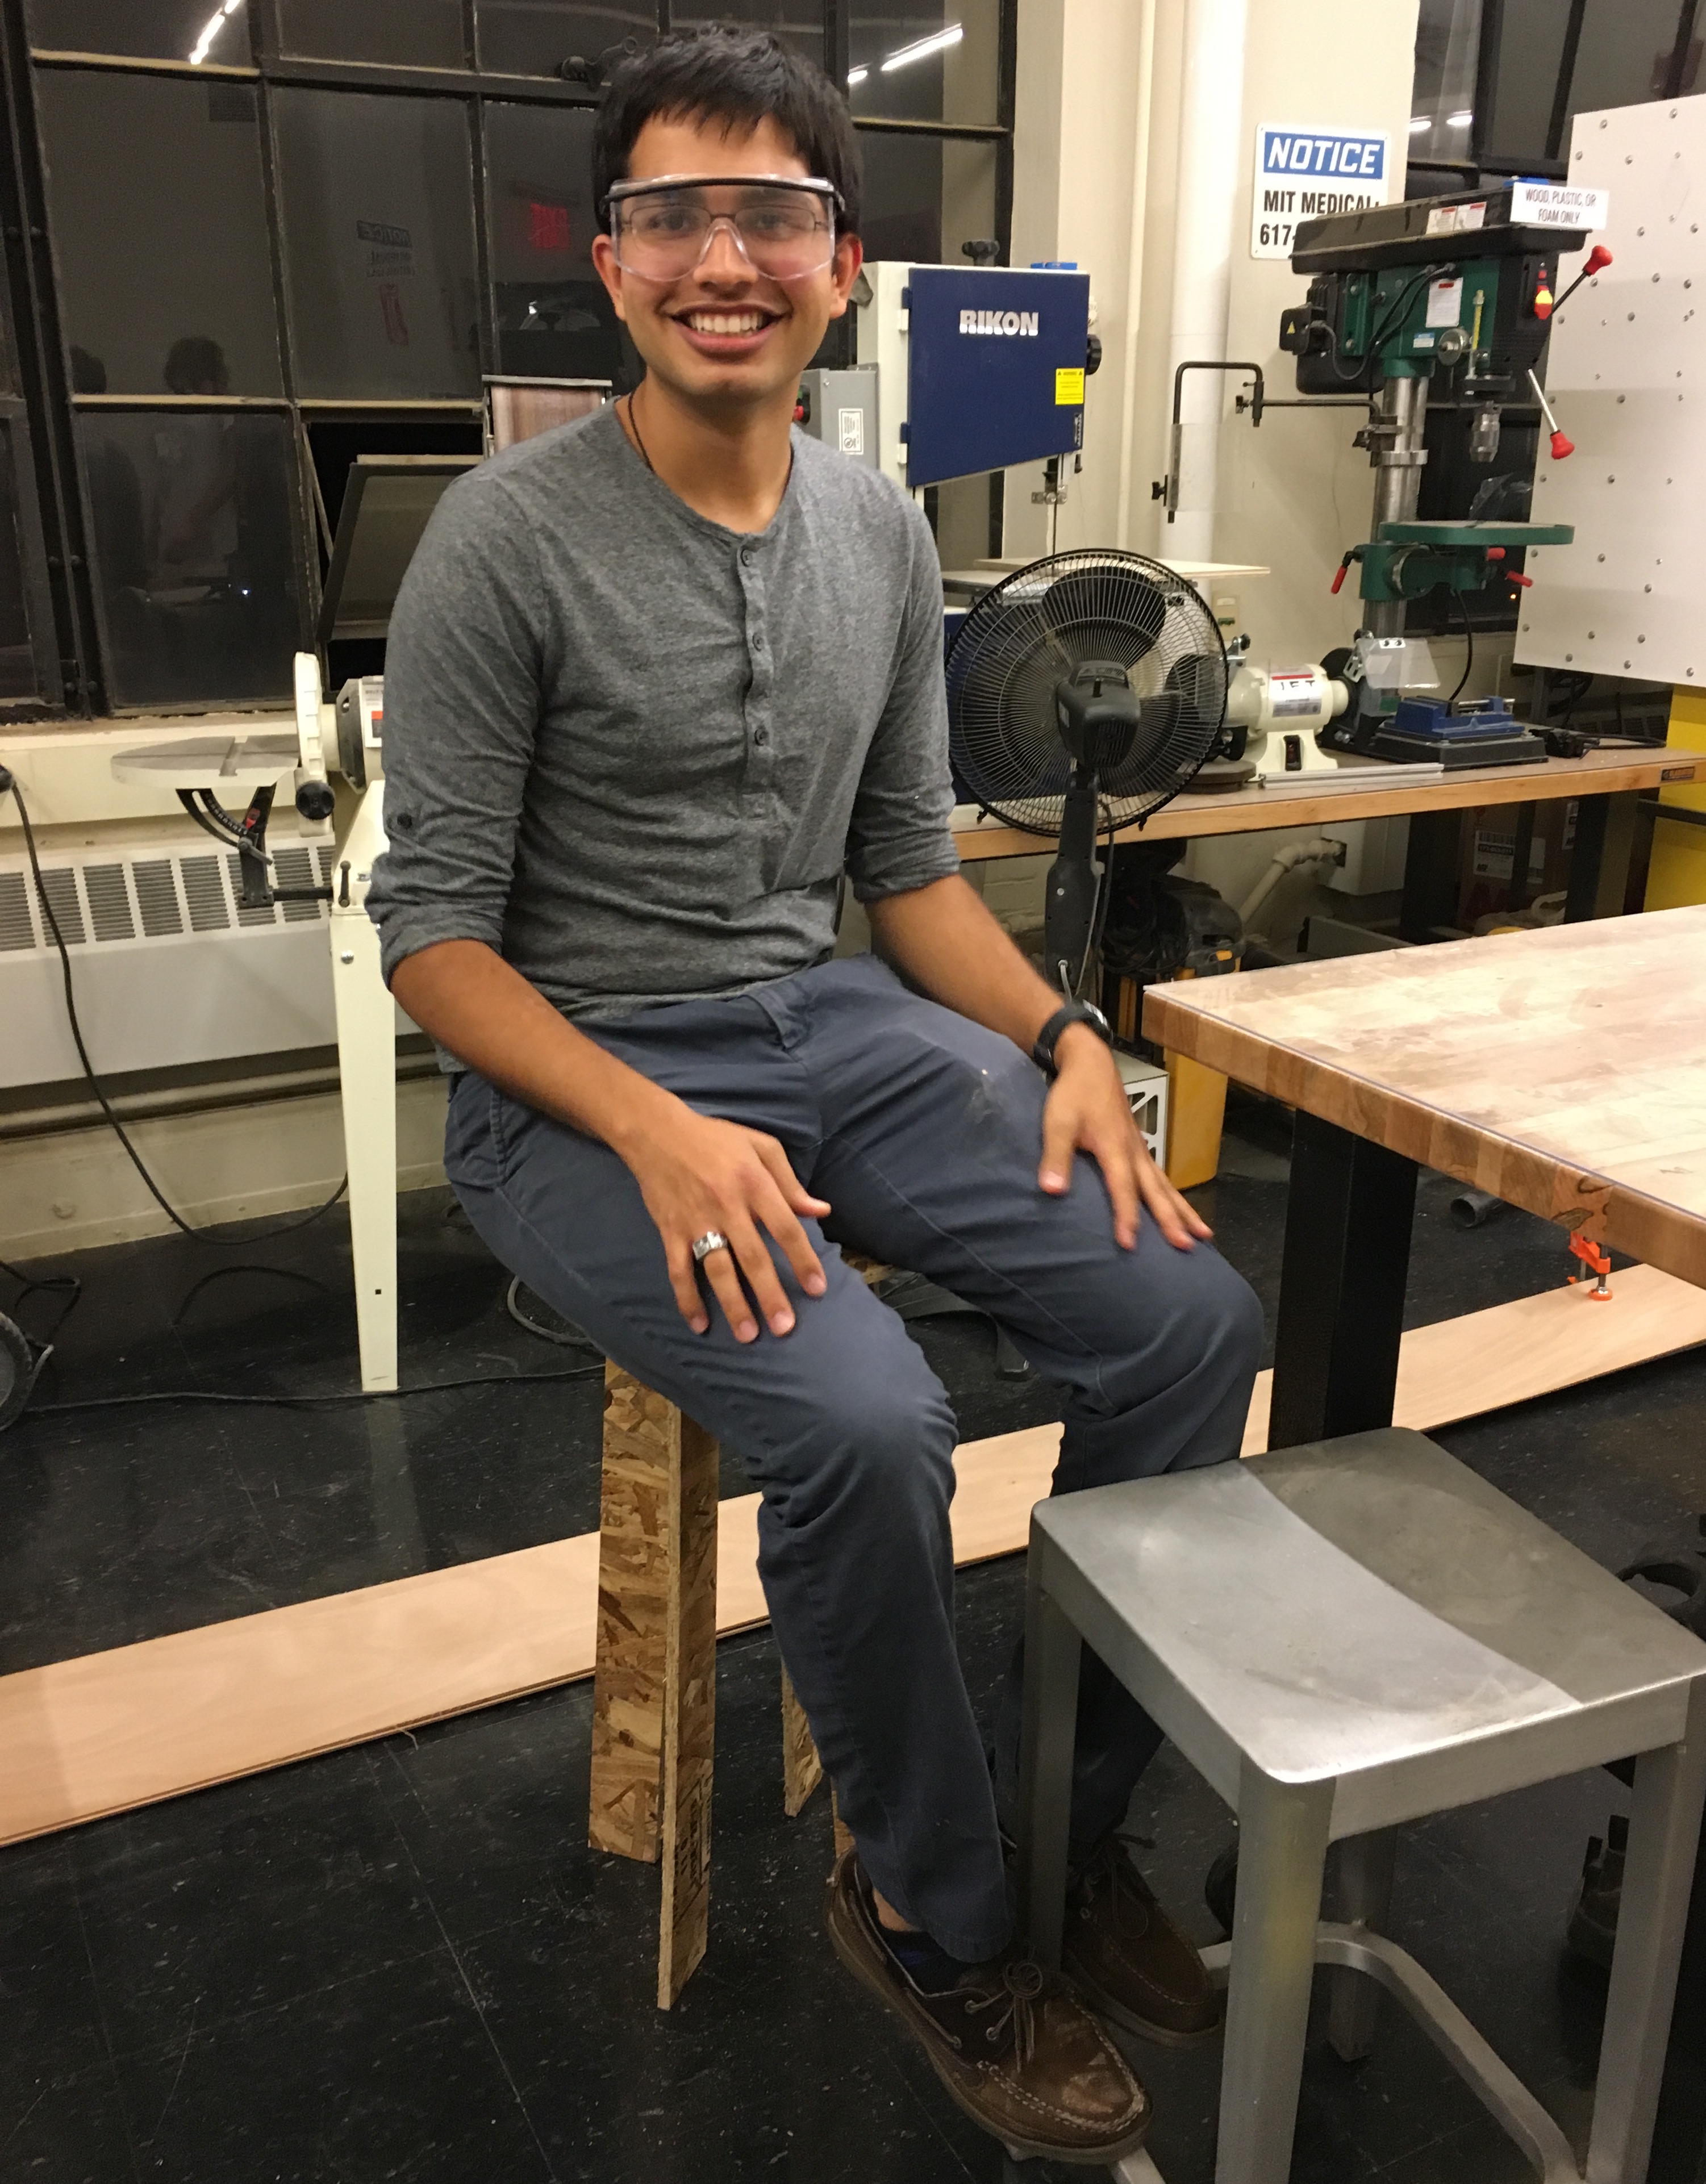
This was really fun, however, there were some issues with the stool. The leg bottoms weren’t completely straight, so there isn’t that much that the stool gets to hold itself up on, it’s just the edges instead of the complete leg. Also, I wish I had done something more innovative and complicated and would definitely try it out if I get the chance. I’ve been needing a bookshelf recently for my room too ;)