Week 3: 3D Scanning and Printing
Gyroid Vase
Oct 5, 2016
The Gyroid Vase
This week, the class was focused on 3D printing. Just like the laser-cutting assignment, I wanted to make something artsy, useful, and somewhat challenging to incorporate different skills. I decided to make a cylindrical vase with an exotic desing on its exterior. So I used Antimony's gyroid vase and made the interior a hollow cylinder. Scroll down for more on lessons learned, but here is the final prodct.
Assignment
This week, we were assigned to test design rules for our 3D printer, then design and 3D print an object that could not be made subtractively. Additionally, we had to 3D scan an object.
Tools used this week: 3D printer, 3d scanner, Antimony, Fusion360.
Basic Knowledge
Fused Deposition Modeling (FDM) or Fusef Filament Fabrication (FFF): An additive manufacturing technology commonly used in 3D printing. Sindoh's 3DWOX printer and stratsys uPrint SE both use this technology.
Sindoh 3DWOX: One of the two printers available in EDS. 3DWOX is a desktop printer; it's chepaer and has less quality than uPrint, but better for rapid printing. It has an enclosed chamber that maintains termperature for better quality prints. After printing, support structure can be scrapped off with a knife. Note that if you have a model that requires support in-between moving assemblies or an inaccessible part, then you can't print the model with this pritner. Max build size is 8x8x8 inch3 .
Stratasys uPrint SE: The higher quality, more expensive printer in EDS. The advantage of this printer is the use of soluble support material, which allows printing moving assemblies, overhangs, and generally more complex structures. After printing is done, you pop the printed model off the modeling base and dip in WaterWash for half the time of printing at about 70 degrees celsius. WaterWash dissolves the support material. At the end, you wash the model with water. Max build size is 8x6x6 inch3 .
Materials used in 3D printing: PLA (polylactic acid) and ABS are types of plastic most commonly ussed in 3D printing.
Resolution of 3D printing: Horizontal resolution is the smallest distance the printer head can travel and the vertical resolution is defined by how small the thickness of a layer can be. 3DWOX resolution is about 0.050 inch and uPrint resolution is 0.010 inch.
Filament: 3D printers melt filaments of ABS, PLA or other material to 3d print a model.
Infill and shell: Infill is the interior structure of a 3D print model and shell is its exterior structure. 3D printed models are usually printed with an inner mesh rather than a solid structure.
Support: Support structure is needed when a layer of plastic must be deposited on a previous layer. Overhangs and suspended structures are among thigns that need support.
Post-processing: process of smoothing the surface of the model after 3D printing.
Stereoloithography (SLA): A form of additive manufacturing technology where a model is produced by adding polymer layer by layer. This is the basic technology in most rapid prototyping printers.
Subtractive vs. Additive design: Additive design is a design where an object is fabricated by starting from one layer of material and step-by-step adding more layers to form the final product. Subtrative design is a design that can be fabricated by startng from a block of material and carving pieces out to make the final product.
Design constraints: As a rule of thumb:
- Avoid thing features since they will have poor integrity.
- Avoid thiin clearances. Otherwise, two sides of the clearance will stick together.
- Avoid very sharp overhangs.
- Orientation of 3D printing matters, since 3D printing is anisotropic. For instance, it's better to print tall and thin structures lying on their side than upright.
- Don't fill up solid structures, to avoid wasting material and time.
Mesh: In going from a 3D model to a 3D print, we need to create a mesh of the model. A mesh breaks down the model ito small shapes, like triangles. The mesh resolution is an important factor in printing. You can use software (e.g. Meshlab) to veiw and modify a mesh.
Mesh file formats: STL, OBJ, and 3DS are most common and useful.
Design software: For beginners, Neil recommended using Antimony, Fusion360 (free student licesnce available), or SolidWorks.
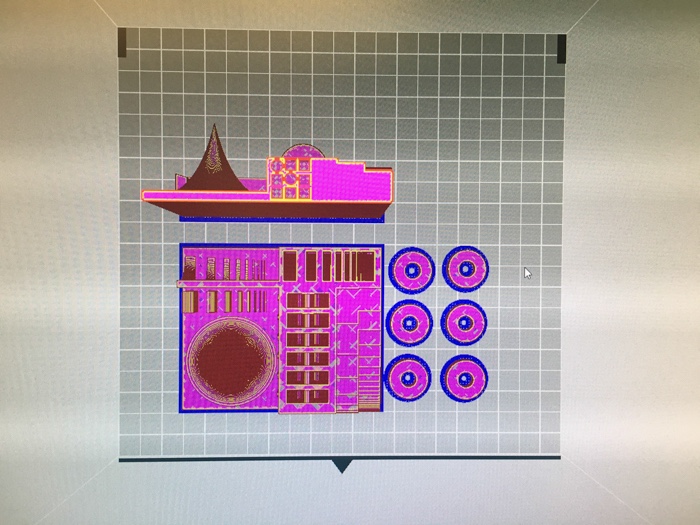
G-code: A programming language used in coomputer-aided manufacturing to control machien tools, with tool coordinates and tool commands. When using g-code on 3D print, usually color red represents build layers, blue suuport, and yellow the 3D mesh.
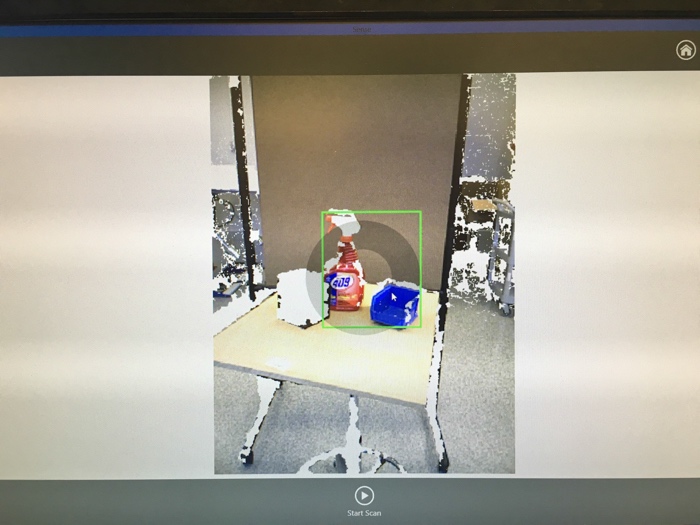
3D scanning: Generally, frustrating (proven by experience)! There are various methods such as tomography, confocal imaging, etc. For beginners, Neil recommended using Sense or photogrammetry. It's worth noting that going from a 3D scan model to a 3D print is a non-trivial step, since a 3D scan is not originally a mesh -it's a actually a collection of points.
Characterizing Design Rules for 3D Printer
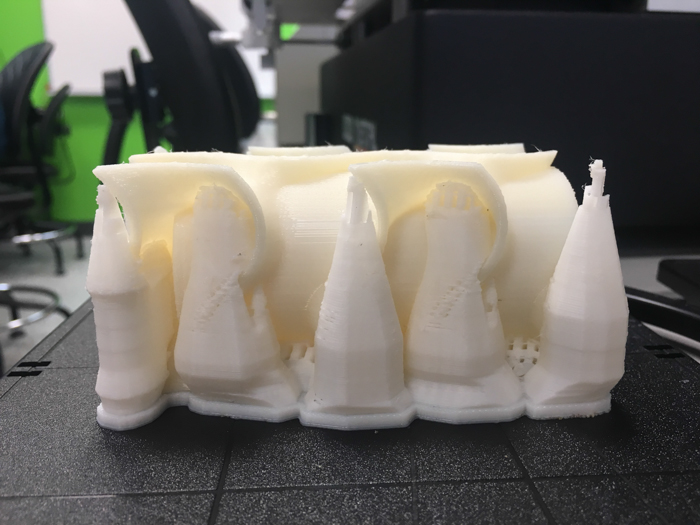
To test the resolution and constraints of the 3D printer, we used a test piece designed previously by one of the TAs. This piece tests overhangs, sharp edges, thin walls, narrow spacings, and resolution of printing. We printed one volume on its base (picture on the left) and one volume on its side (picture on the right), using 3DWOX. Surprisingly, the estimated time of printing for the piece lying on its base was longer, since the hot end has to travel longer.
 |
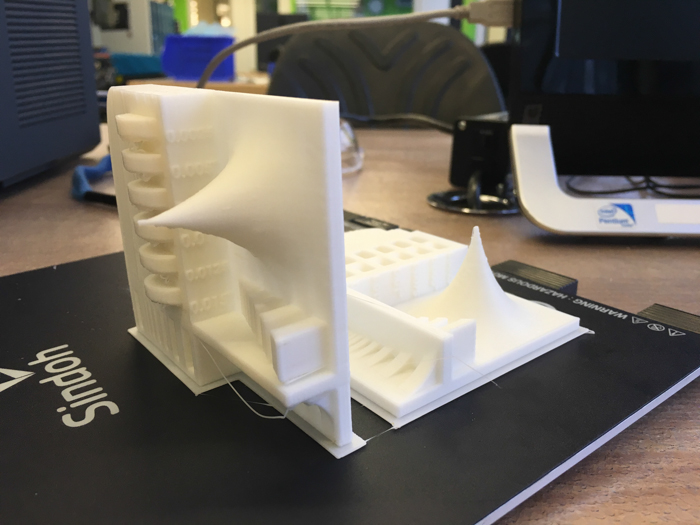 |
Here is what we learned:
- In both orientations, the narroest gap was printed successfully.
- Narrow walls were all printed on both directions.
- Sharp edges were sharper on the vertical direction than horizontal.
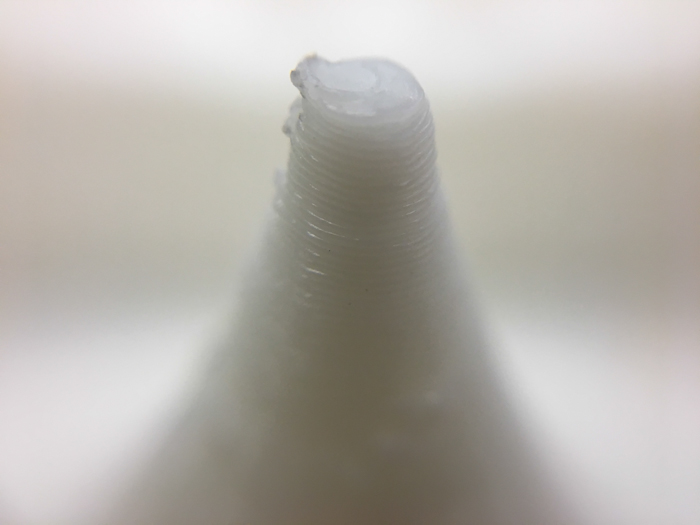
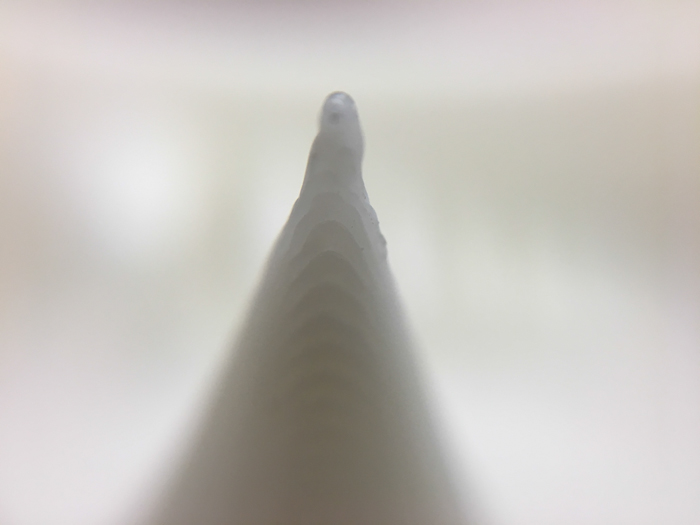
- The tip of the curved cone was printed sharply on the horizontal direction (picture on the left; the tip broke when we were scrapping off the base, but originally it was sharp.) However, when placed vertically, the tip made a randomly shaped overhang (picture on the right).
- When printed vertically, the printer left curvy filaments on edges that were too close.
 |
 |
Overall, the test piece printed horizontally had better results, although it added to the printing time.
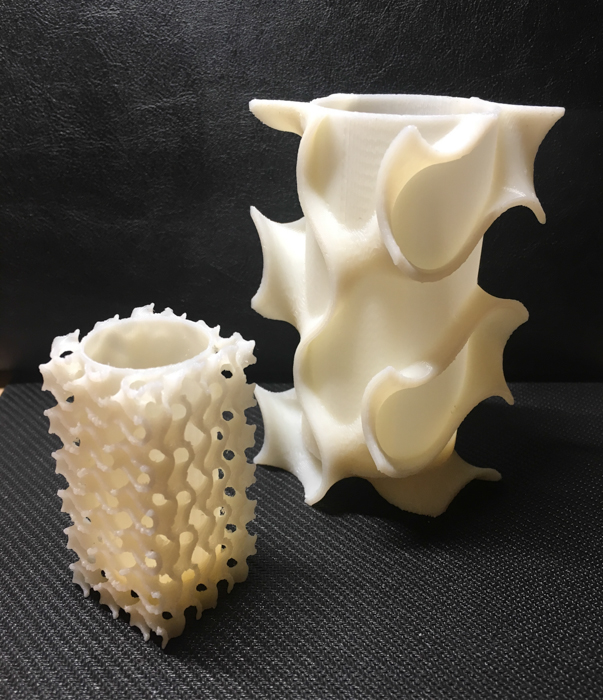
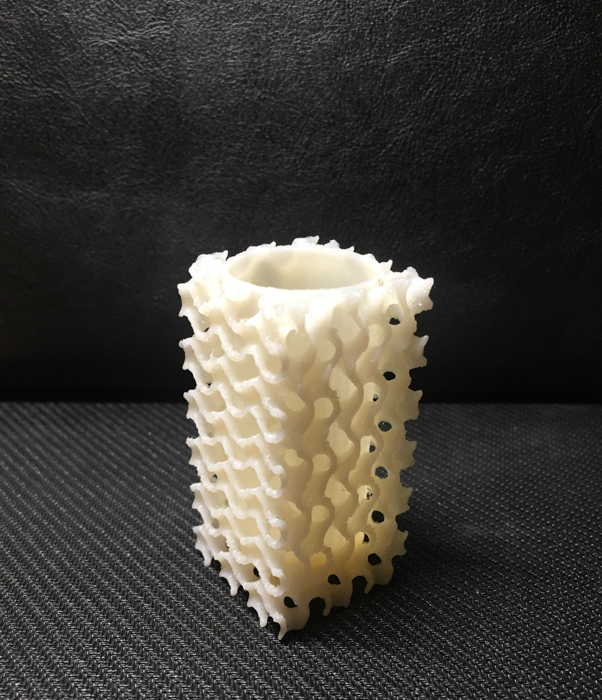
The Gyroid Vase
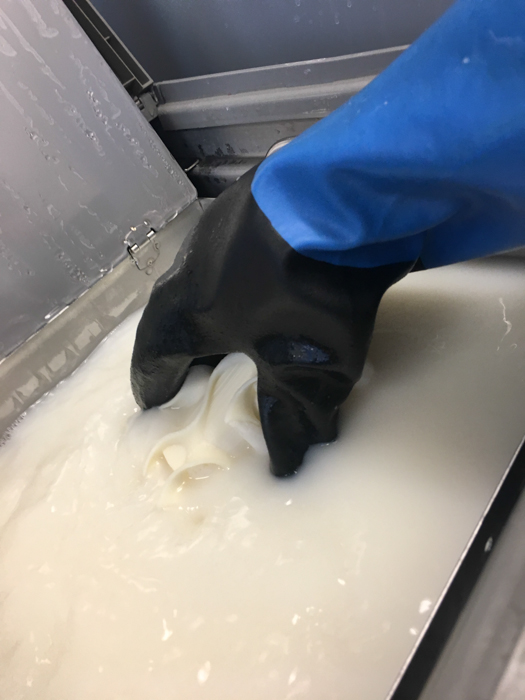
I made my design in Antimoony. Using Difference from the CSG options, I made the cyildrical interior of the vase. The flow chart and possibility of scripting functions in Antimony is very powerful. The graphic UI however has some bugs that makes the design process confusing. For instance, a sphere showed up in my design every so often. I usually restarted the program, and the design was back to its original form.
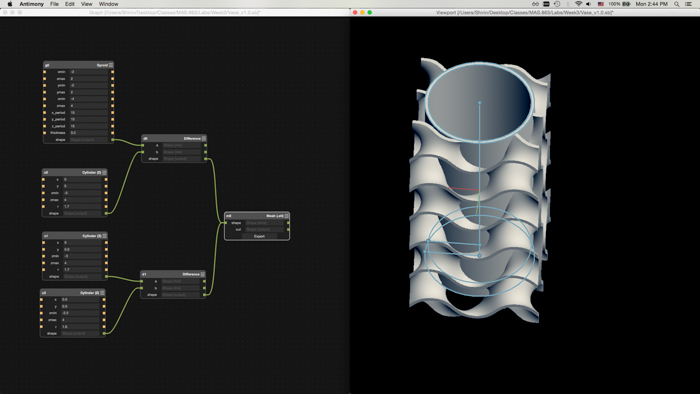
I exported the mesh in .stl format. When exporting the mesh, Antimony asks you to specify resolution in terms of voxels/unit. The default value is 11, which in my case resulted in empty faces in the mesh. Consequently, I increased resolution to 30, which made the file size 70 Mb. Procesing the stl file took longer than 6 minutes, with building support occuping majority of the processing time. So I realized I had to make the file simpler and smaller, or else it would take ages to print this piece. The minimum mesh resolution that avoided empty faces was 20 voxel/unit. But the more important factor was the periodicity of the gyroid's curves. More specifically, the initial design had too many curvatures, for each of which the printer had to make a separate support. By reducing the number of curvatures in each dimension, the support structure was significantly simplifies and the processing time was reduced.
At the end, I made two pieces for comparison. One that was physically larger (2x2x4 inch3 ) but with lower mesh resoluton (20 voxels/unit) and less curvatures; the other smaller (1.2x1.2x2.4 inch3 ) with higher mesh resolution (30 voxels/unit), and twice as many curvatures in each dimensions. Printing of the larger piece took about 9 hours and the other piece which was in a pack with another piece took also about 9 hours
Models were dissolved in WaveWash for 4.5 hrs at 70 degrees celsius.
 |
 |
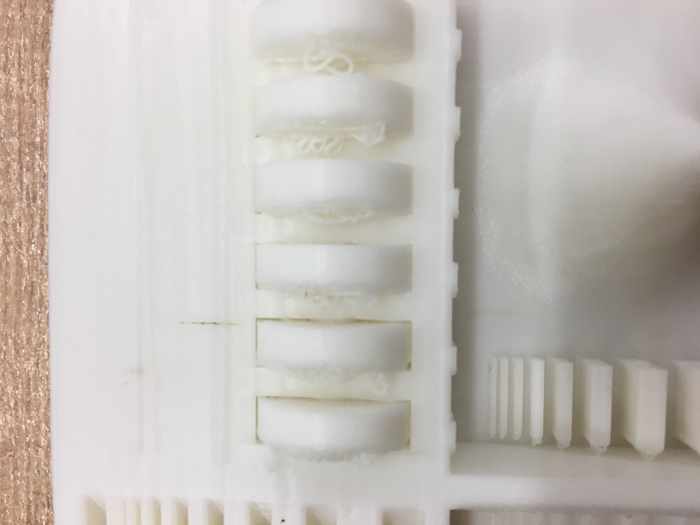
Later, I realized that little pieces of support inside the cylinder were still left on the edges. For the smaller pieces, some support was also left inside the curvatures.
 |
 |
3D Scanning Struggles
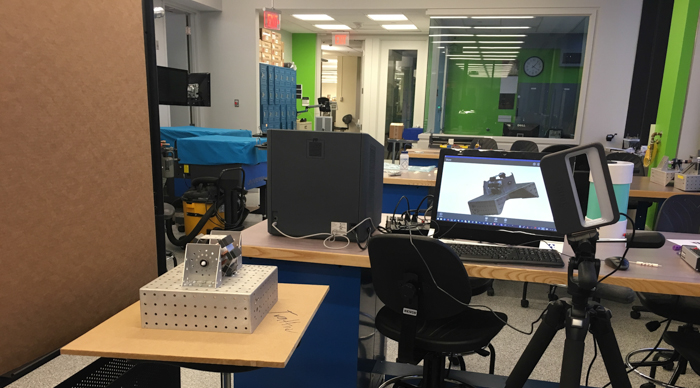
Using the Sense 3D scanner was definitely mroe challenging than I expected. The device GUI allows you to pick what you're scanning: small object, large object, or a portrait. First challenge was to hold the object and the scanner steady, otherwise a 'Lost Tracking' error would have appeared. Chidi and I used a tripod for the scanner and a chair to rotate for the object. Additionally, we used a cardboard as the background. But it was hard to tell if the background had any effect at all, since there were so many other variables that made scanning challenging. Following is a series of our failures and successes:
Scanning a glossy black box: Scanner didn't detect the object due to reflections from the surface.
 |
 |
Scanning a cyindrical speaker standing upright: Scanner failed to detect motion since the speaker was symmetrical on all sides.
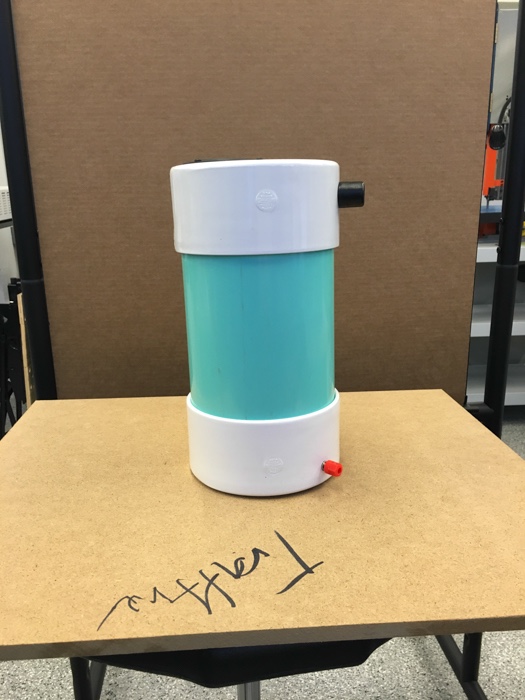
Scanning the same speaker lying on its side: More promising!
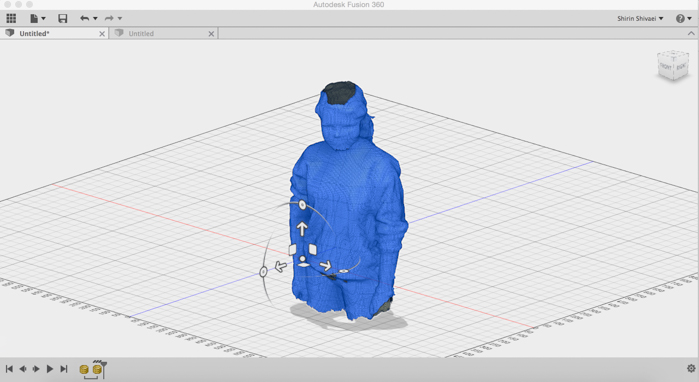
Scanning myself: Scanning my face was not so successful. Once I turned perpendicular to the scanner, it lost track of me. But full-body scan worked somewhat.
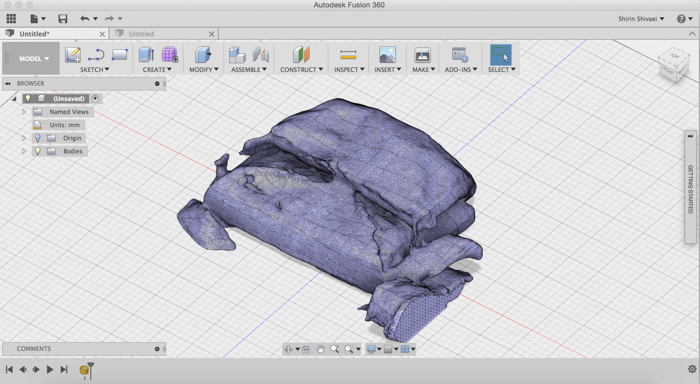
Scanning An induction motor: Successful suprisingly, although details weren't captured. The 'Solidify' option in the post-processing step made filled up parts that weren't scanned properly.
Scanning a bag: Successful. The material, cloth, seemed to play an important role.
Thoughts on final project...
I wanted to 3D print a brain model that I found online, but this week the printing time was very limited.
It'd be cool to 3D print the brain with a flexible material. Chidi told me about 3D printing with metamaterials, which allows 3D printing simple machiens. Looks pretty cool, but still in research stage!