Week 6: Embedded Programming
Programming with AVR Toolchain
Oct 26, 2016
Assignment
Read a microcontroller data sheet. Program your board to do something, with different programming languages and programming environments.
Setting Up the Environment
Programming environment
Depending on the level of abstraction, you can choose different languages and platforms to program the baord. On the lowest level is Assembly, which is very hard to write and debug. A higher level language is C, which is mroe intuitive for the human mind. We can also use Arduino programming language on Arduino platform, which is normally used for programming Arduino boards but can also be used to program avr chips on custom boards (like our echo hello-world board). Arduino is a set of C libraries and uses gcc to compile them. I decided to write my program in C and then adapt it to Arduino. I decided to write my program in C and adapt it to Arduino.
CrossPack for AVR development
A development environment for AVR microcontrollers on Mac OS X. It consists of:
Makefile
A .make file consisting of a set of instructions to tell the compiler how to compile your project. I used Neil's echo hello-world makefile as a template to make my own.
Hardware setup
We are using fabISP board from week 2 to program our board. FabISP and the baord are connected with a custom-made rainbow cable, and the board is powered up with an FTDI cable (a USB to serial converter.)
Programming the board
My board from week 4 has an LED and a button. I wanted to program the LED to blink once the button is pushed.
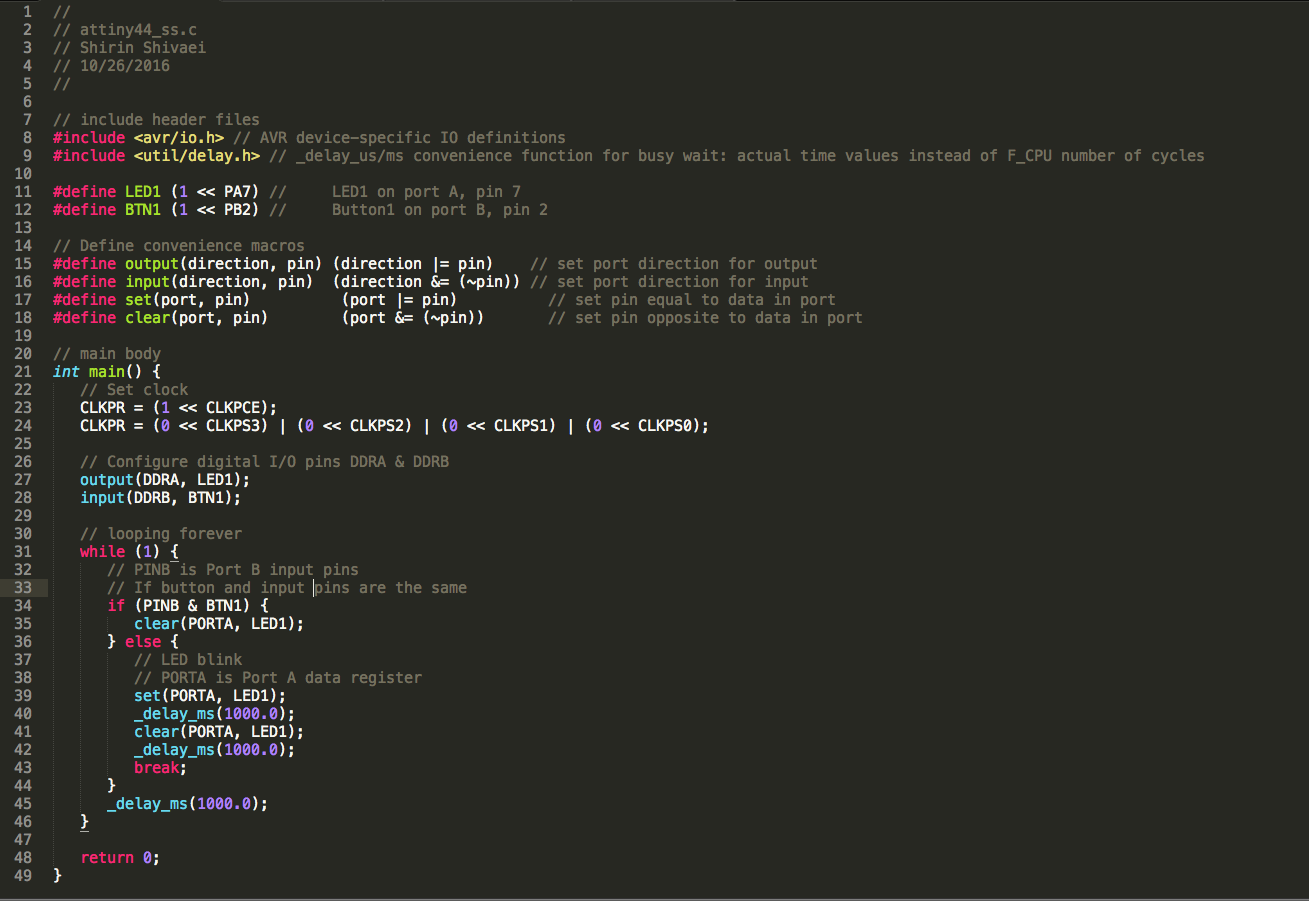

To load the program onto the board, run the following commands:
make -f makefile_name.make
make -f makefile_name.make program-usbtiny-fuses
make -f makefile_name.make program-usbtiny
When running program-usbtiny-fuses throguh fabISP, I got an error that USBtiny device could not be found:

I used another programmer to see if the bug is due to my board or fabISP. Since I didn't get the error anymore, so there is most likely a harware bug with my fabISP (which I programmed in week 2). For the rest of the assignemt, I just used the programmer.
But then the LED still didn't turn on! As I was checking voltages on different nodes, I realized that if I pressed down the microcontroller, the LED would turn on and if I let it go it would turn off again!
 |
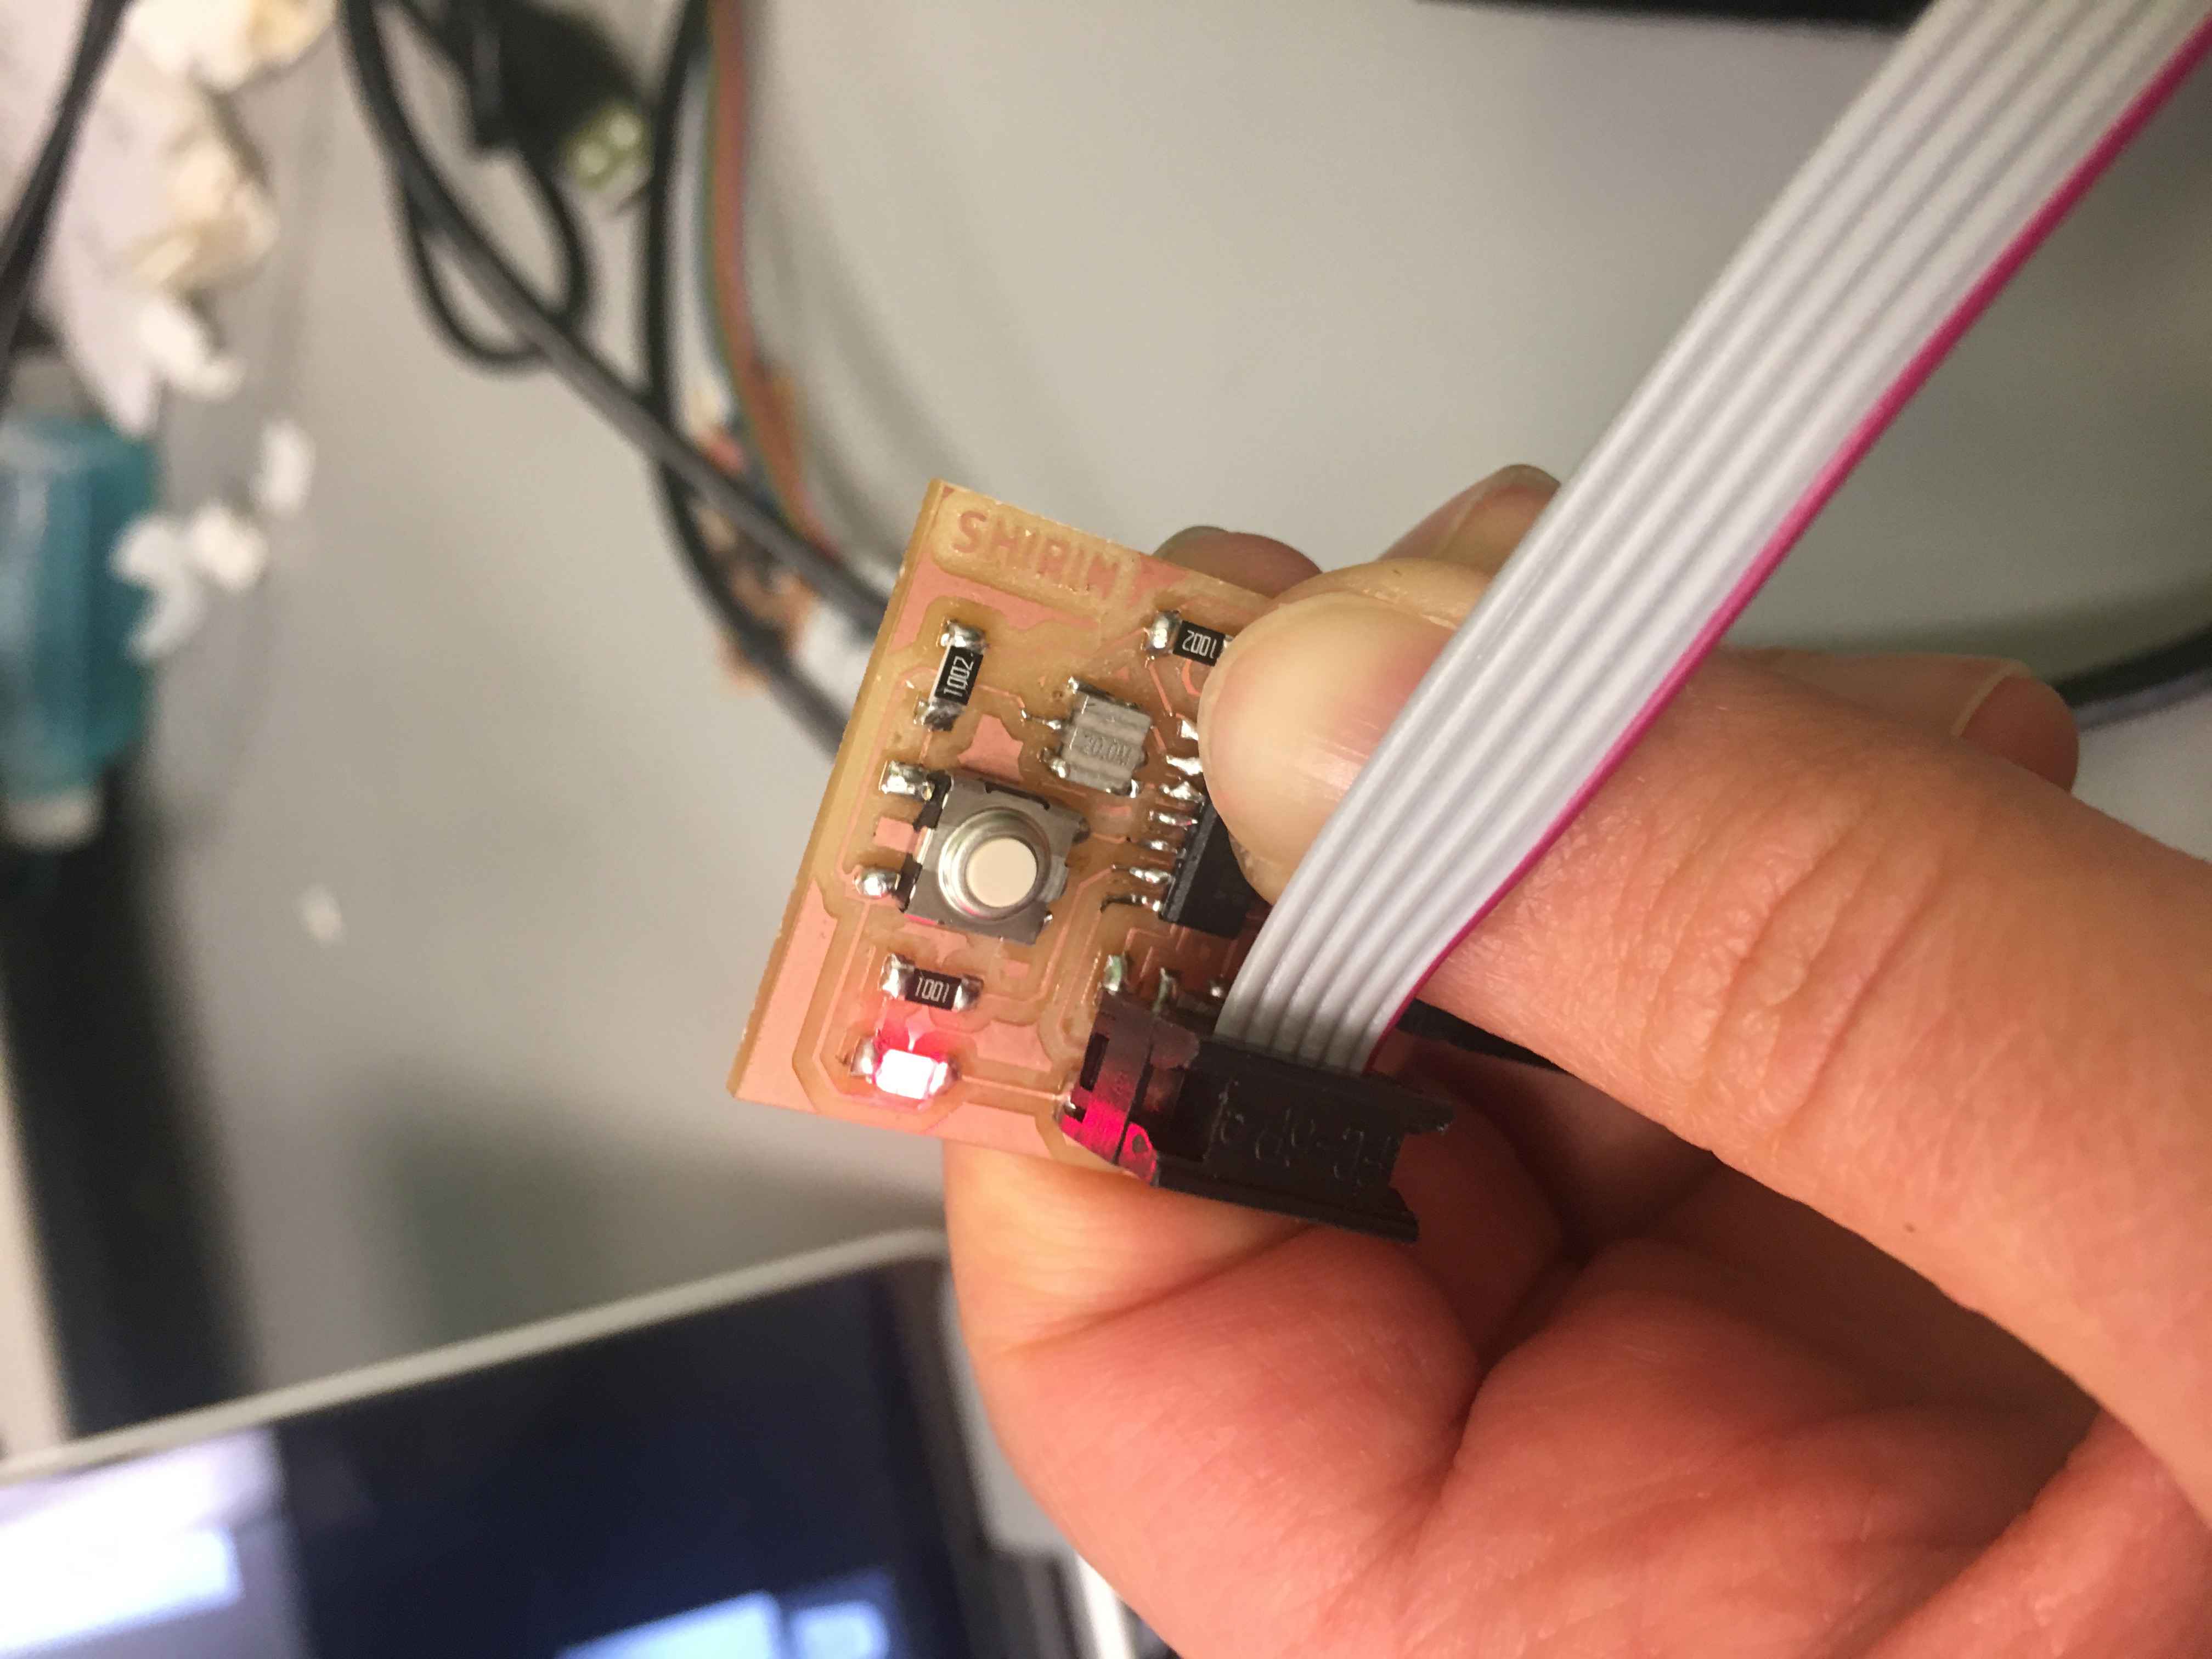 |
I resoldered the microcontoller, and it finally worked. Well kind of at least - I had to press the button a couple of times and hold it for a bit.