
Week 6: Embedded Programming
I've written dozens of programs using the Arduino IDE and using other tools like the ARM mBed toolchain. My priority for this week was to familiarize myself with avr-gcc and the Atmel libraries.
I had already programmed my Week 4 board with the provided serial echoing program so I was pretty comfortable with the flashing workflow. I wrote a very simple AVR GCC program to get the board to blink its LED. This was a good hello world for the libraries and IO structure that the Arduino Bootloader abstracts away (specifically all the registers).
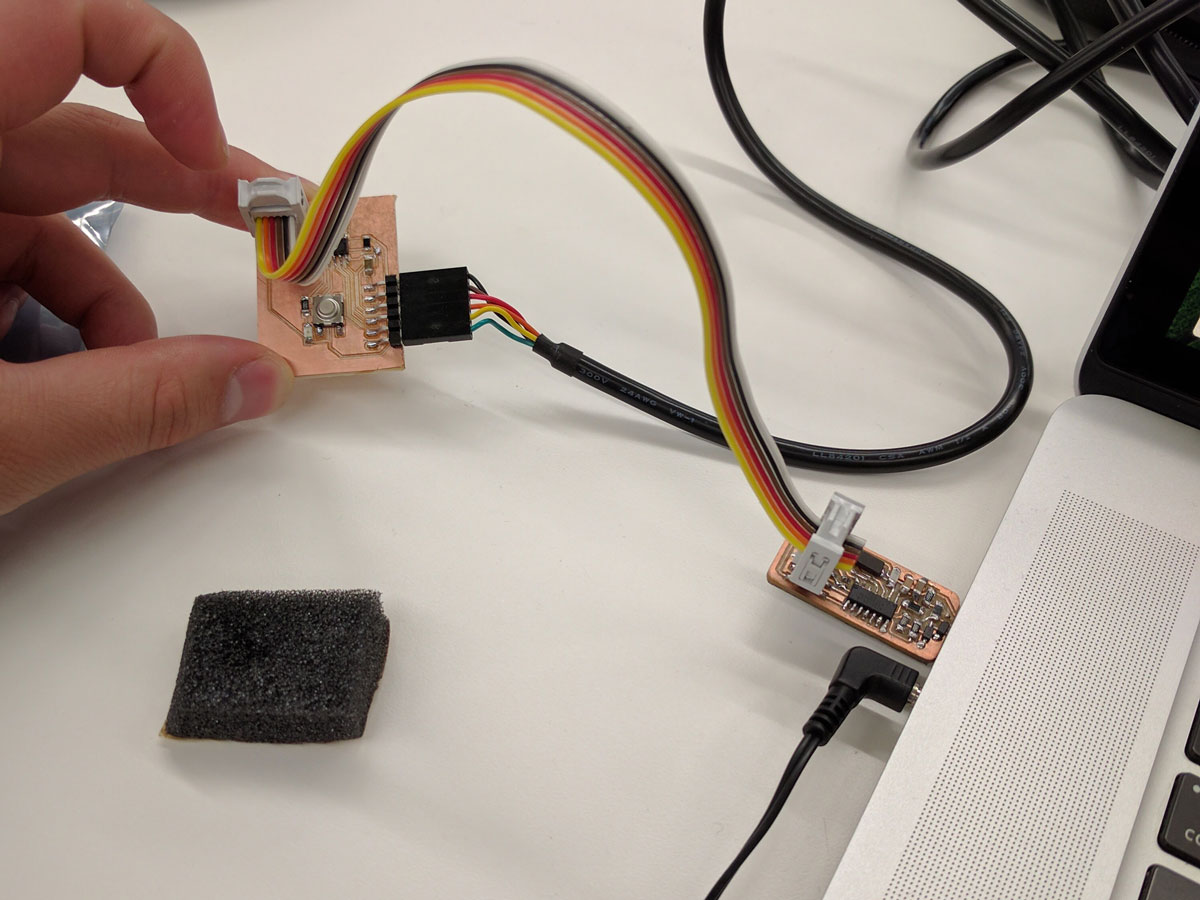 Image from Week 4 of programming and monitoring the board.
My final project is relying heavily on using busses like I2c to communicate between microcontrollers. I've written several I2c programs using the Arduino toolchain and Wire.h so moving to avr-gcc seemed like the logical next step. I decided to spend the majority of the week getting I2c working between two boards. I've already started working on the controller board for the final project, but it wasn't done and I didn't have time to mill and stuff a new board.
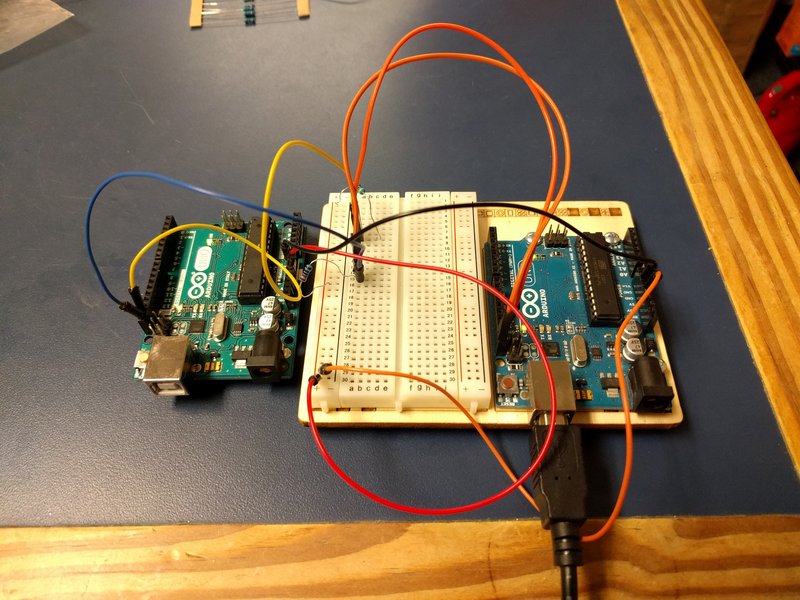
Luckily, I had a couple Arduino Unos lying around. While complete overkill, they break out the IO nicely and one of them was even attached to a breadboard. I decided to use them for figuring out I2c with avr-gcc since they can be used as a generic ATMega 328P target. Example flashing code for Uno target:
One of the goals was to get used to the new workflow that comes with using the avr-gcc toolchain. While I could have modified an Arduino library or downloaded a drop in "Arduino-like" library, I wanted to use the Atmel application note library (Master, Slave).
However, this caused several immediate problems. These libraries were designed for Atmel Studio which meant several libraries had to be exchanged (ioavr.h --> avr/io.h, inavr.h --> avr/interrupt.h). These avr-libc libraries are not drop in replacements so I had to rewrite the interrupt service routine (ISR) function declartions and switch out various low level function (sei() enables interrupts, _NOP() is the no operation instruction, _delay(uint ms) needs to be imported).
After this has been completed, the modified example code compiled. It sent a byte over I2c to the specified slave address, the slave then added one to the data byte, and then asked for the data back from the slave. My modifications mostly served to test the different addresses and learn about Atmel's library (e.g. turning the LED on for a success)
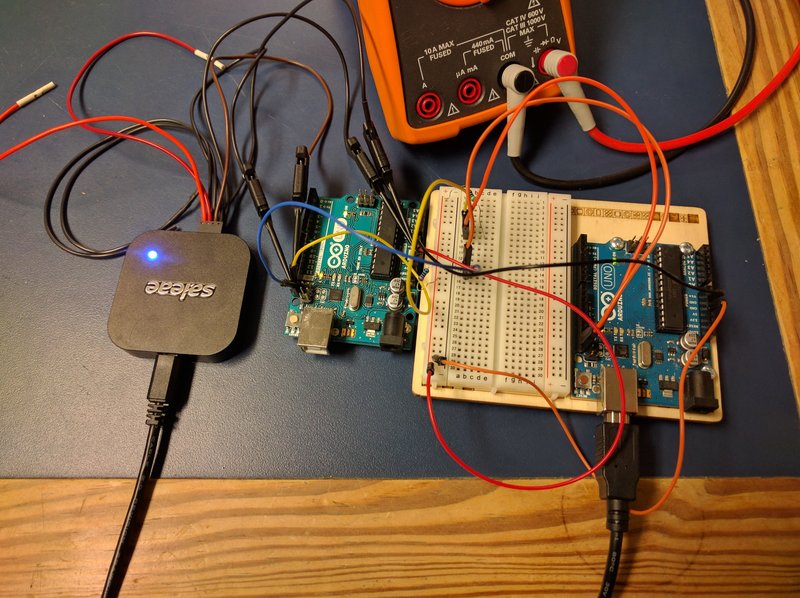
For better or worse, the week was mostly spent debugging the I2c code. After getting the code programmed and hooked up in the identical fashion to my Arduino IDE I2c demo, I wasn't getting any obvious communication between the two (none of the LEDs lit). I pulled out my Saleae logic analyzer and sure enought there was no signal...
 The advantages of having purpose designed and milled boards are very
apparent here... Hopefully I won't need to resort this too often.
The advantages of having purpose designed and milled boards are very
apparent here... Hopefully I won't need to resort this too often.
After a half-hour of fiddling, I realized that unlike the Arduino it was unclear if the internal pull-up resistors were enabled. I threw a 2.2k resistor onto SCL and SDL and there was signal! I still need to figure out if one of my board has a problem or if I wasn't setting the proper pull-ups.
However, as I had just taken the code from Atmel and crudely modified it, it was writing 100% of the time. This meant that the ACKs from the slave were being clobbered and the bus wasn't operating properly.
I threw some NOPs into the code and added a 10ms or 100ms delay between messages and the master and slave began communicating.
 The analog signal as recorded by the Saleae logic analyzer. Note: the
lack of sharpness on the state changes is due to the 10MS/s limitation
of the A/D of the logic analyzer, not some circuit issue.
The analog signal as recorded by the Saleae logic analyzer. Note: the
lack of sharpness on the state changes is due to the 10MS/s limitation
of the A/D of the logic analyzer, not some circuit issue.
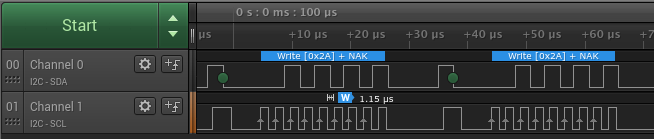
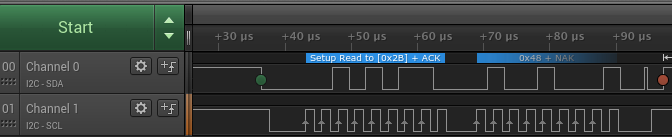 The digital signal showing both the address byte (0x2A) and the read byte
(0x48).
The digital signal showing both the address byte (0x2A) and the read byte
(0x48).
While I didn't get as far as I hoped this week, I was generally pretty pleased with how similiar writing avr-gcc code was to writing C code for desktop operating systems. I'll definitely be exploring the limitations of using avr-gcc in future weeks.