Technologies Used:
❖ GIMP 2
❖ Laser Cutter
❖ Roland Vinyl Cutter
❖ Rhino
❖ Autodesk 123D Make
❖ Atom (for html/css editing)
❖ Google Chrome (for inspecting source and stealing some poor previous students' website design - thanks Harpreet Sareen!)
Part 1: Vinyl Cutting
The first part of our assignment this week was to familiarize ourselves with the Vinyl cutter, and find a design/picture to cut and make a laptop sticker. The first idea that occured to me was to cut a sticker
of the logo of Harvard Law's Asian Pacific American Law Student's association, a student organization I am part of. It's actually a fairly intricate design, inspired in part by the Harvard Law crest shape,
and engraved with the ancient chinese script of the word "fa" (法)meaning "law".
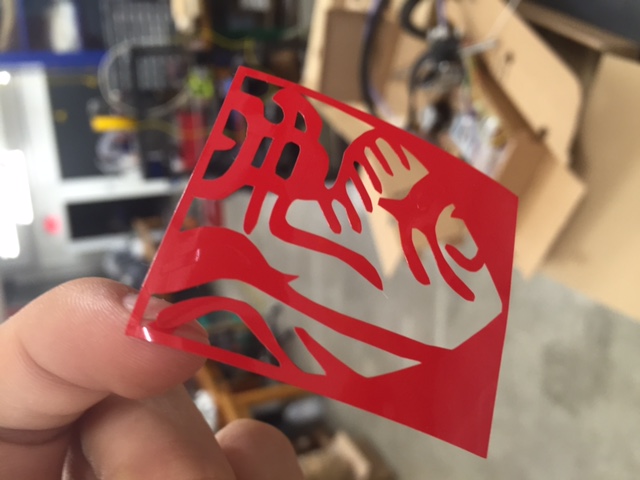
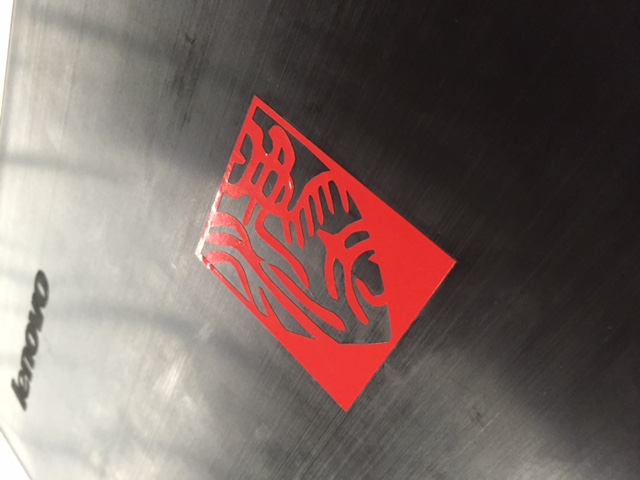
The entire cutting process was surprisingly straightforward once I produced a cutout in PNG form, to be inputted into fabmodules. I initially attempted to stick the "inner" engraving part of the sticker
on my laptop, but after a while I figured it wasn't worth the hassle of peeling ~7 tiny parts and aligning them. Instead, I would peel out the inner engraving and just use the more simple, two piece
peel out, while drawing a square around the logo to be cut along with the design. Took me a couple of tries to find the right sizing/alignment but I'm pretty satisfied with the result.
Part 2: Fun with Autodesk 123D Make
While this wasn't exactly our assignment as we were required to make a "kit" that ostensibly should be able to form more than one structure, I couldn't pass the chance to make something with this nifty program.
All that this really required of me was finding a 3D model, touching it up in Rhino, importing into 123D Make, and voila 2D cutouts! I experimented with a few different notch widths and eventually settled on .125in
which gave me a nice, but not terribly tight fit. The program even has a convenient "notch factor" adjustment that will round out the notch corners for easier fitting.
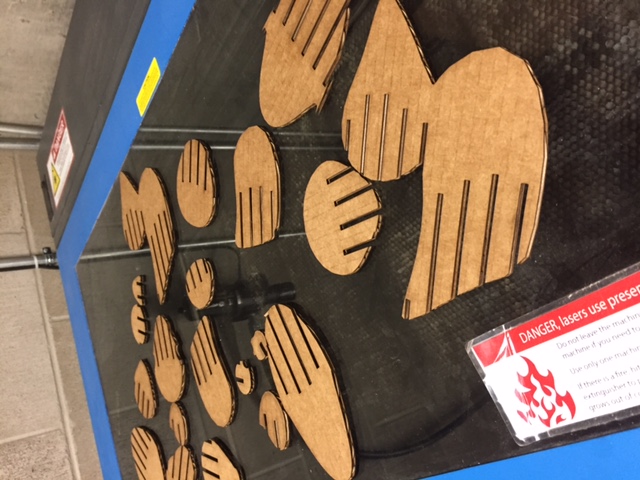
The tougher part of the project was really getting the corrugated cardboard and laser cutter to behave. The cardboard came in a form that made it slight bent convex when laid on the cutter, so whenever the
laser got to the middle part of the board the cuts would not only be surprisingly wide but also not deep enough to penetrate through the board. I ended up using 67 Power/15 Speed /250 PPI/Both lasers to finally get a relatively
clean cut.
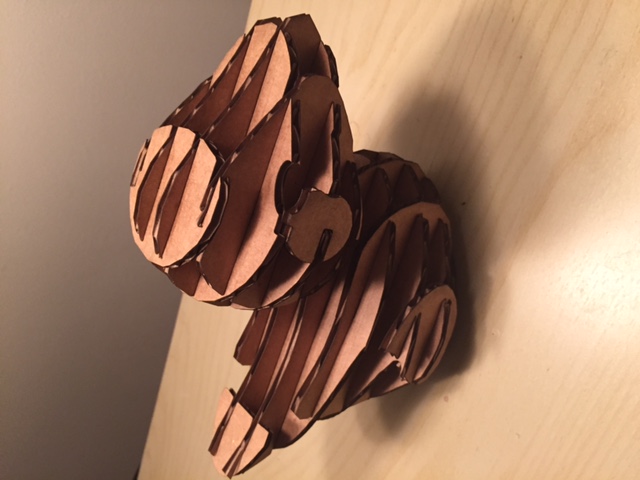
Putting it together was fairly straightforward too, especially because the program has an assembly instructions function that gives animated instructions on how to fit pieces together; it wasn't entirely
accurate but gave me a pretty good idea of how the pieces needed to be ordered. What a beautiful duck.
Part 3: Press Fit Kit
I thought a long time about what to design but couldn't come up with anything clever. I decided to go with my initial idea which was to create some kind of geodesic sphere. I was in the middle of reading
all the math about number of sides:angle ratio until I thought, why not just make it adjustable so I don't have to figure all this out. I decided to explore a type of kerf bend idea and just have the size
of the sphere depend on the flexiblity of my kerf design.
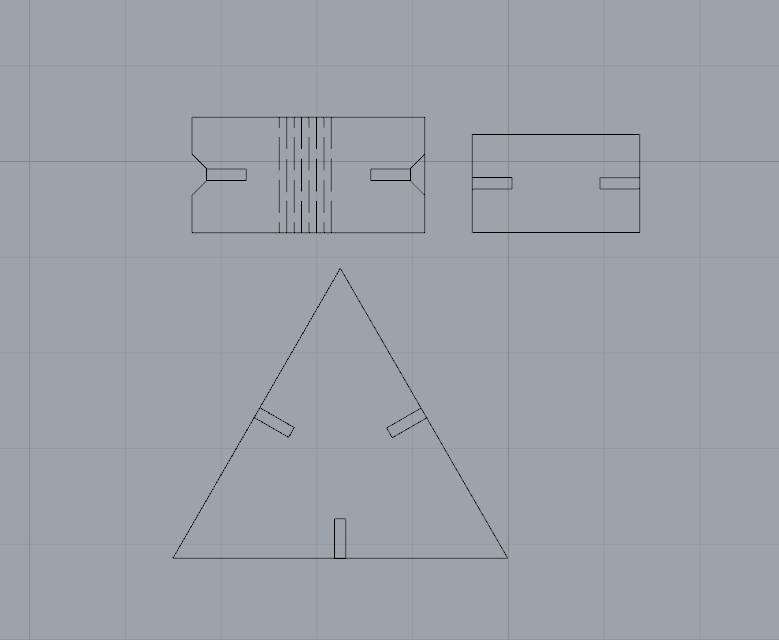
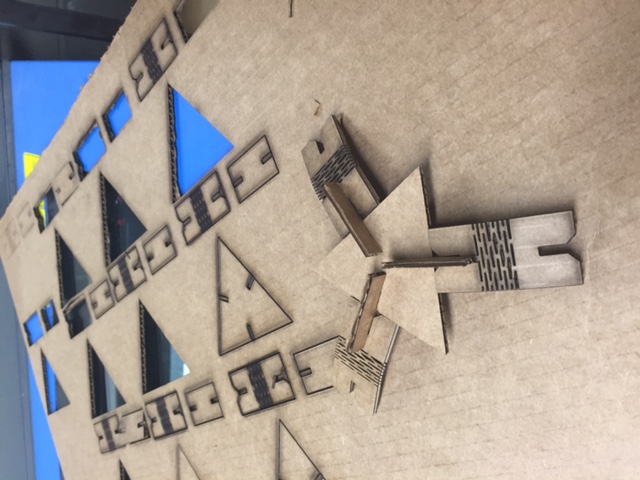
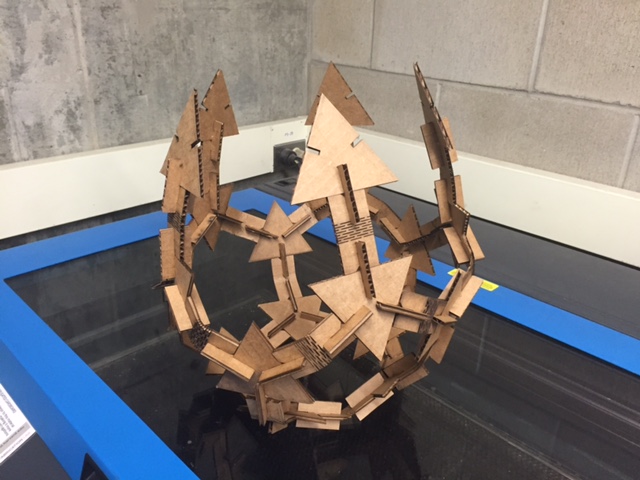
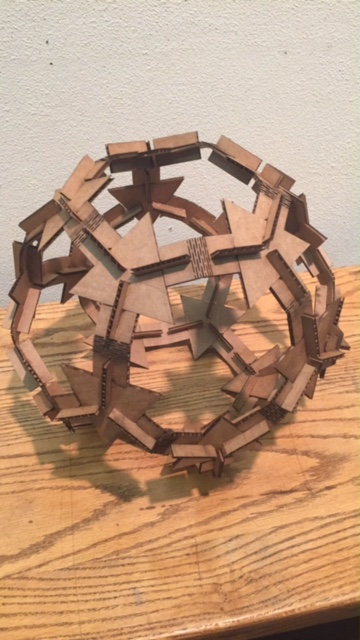
Like the duck design, these were also slotted at .125In and cut using the same laser settings. The final result was a 20 sided "sphere", aka an Isocahedron. I initially wanted to make something a little
larger but I realized the problem with the kerf bends was the unstability of the structure, so the structure had a hard time staying in shape as gravity put more pressure on the links near the bottom. Had the structure been expanded to have even more sides
I would have feared for its structural integrity. Oh well...
Part 4?!!?
I've always wanted to use laser cutters to crease paper for origami - the accuracy of the creases would be unbelievable. I neither have the paper nor the time right now to experiment but this could be a work in
progress soon. Stay tuned...