Technologies Used:
❖ Roland MDX-20 Mill
❖ Roland Vinyl Cutter
❖ Shopbot Desktop Mill
Part 1: Creating the Circuit Board
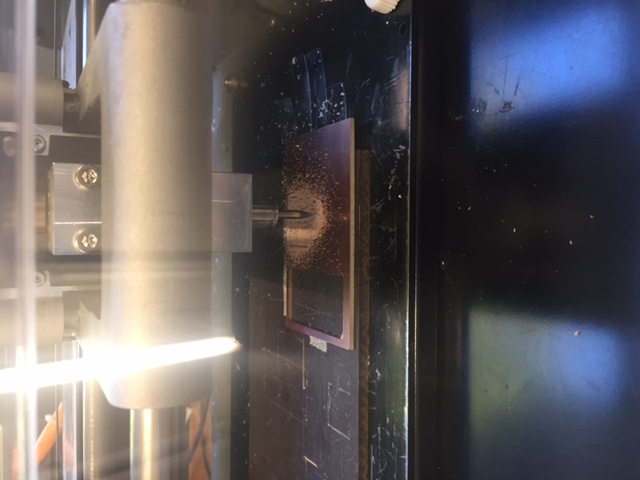
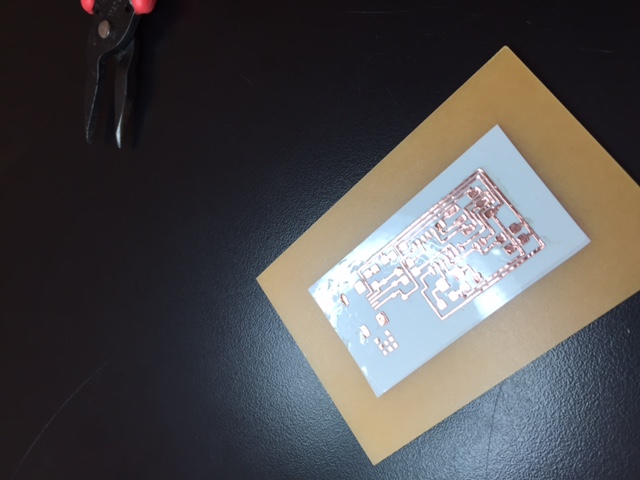
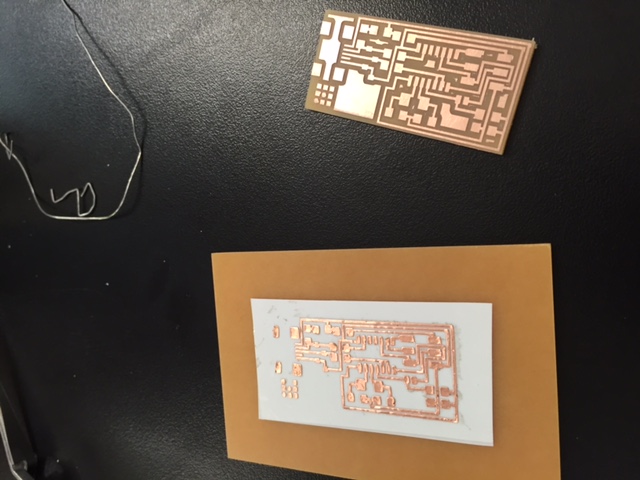
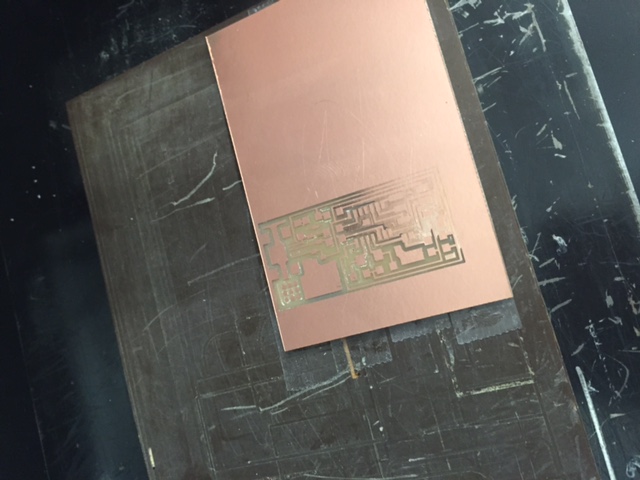
The first step this week was to cut out our own circuit boards using pieces of scrap copper. I started off using the Roland MDX-20, which I found to be rather
reliable though excruciatingly slow. I was pleasantly surprised the first board I cut turned out to be perfect - I thought I would be done with this assignment
in a couple of hours. Little did I know how wrong that thought was.
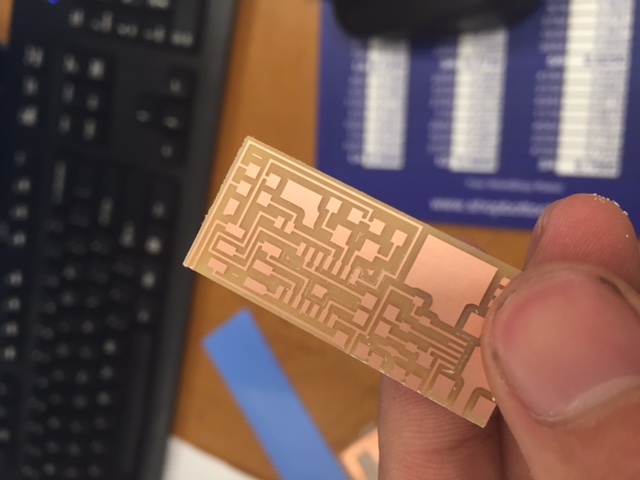
While I was waiting for the Modela to work its magic I decided to take the spare time to try my hand at cutting a circuit with the Vinyl cutter. I found that
though the process of cutting was much quicker and more straightforward, the post-cut processes would be extremely annoying. I used two layers of epoxy Vinyl
to back the sticky copper in case the soldering process tried to burn through the backing, and then stuck the finished cut onto the back of a piece of copper
base to give it stability when I would later try to solder. I realized pretty early on the pieces would move around quite a bit, and were already rather
unstable from the peeling process, which would end up being a huge pain during soldering.
Part 2: Soldering
I was pretty intimidated at the soldering process at first, and my first board really reflected a lack of experience. I tried to really reduce the amount of solder
used on every piece since I was afraid of shorts, but it turned out that approach just made my pieces poorly put together. After hours of resoldering and tinkering with
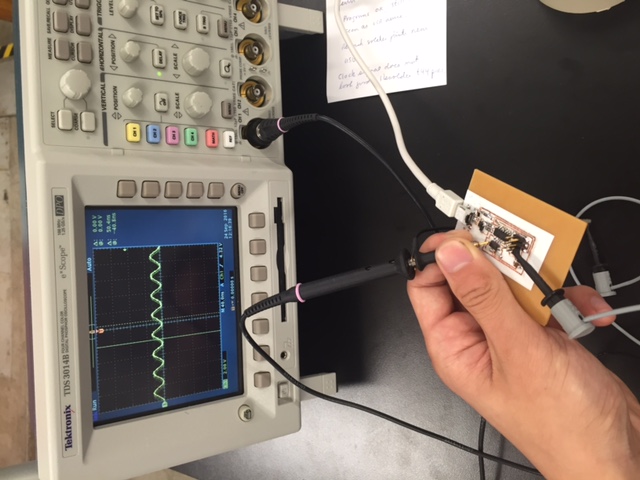
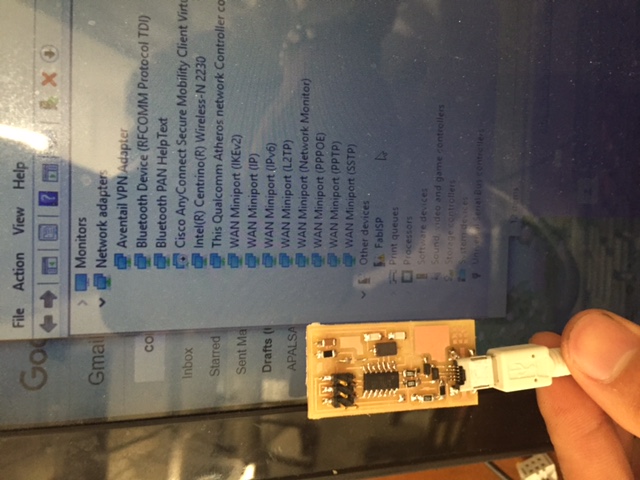
the first board I got the program to compile and download but ultimately could not get the USB port to detect the FABISP. I eventually gave up on this board.
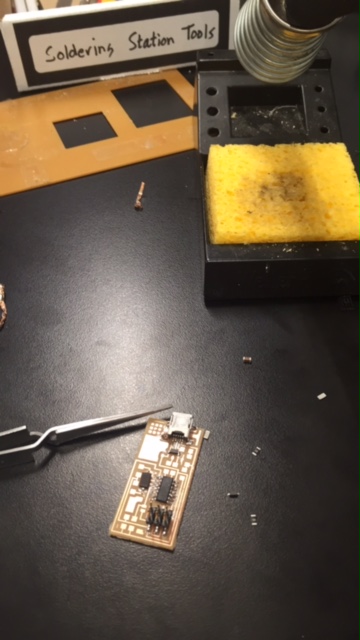

I tried to same process with the Vinyl-cut circuitry and it was as nightmarish as I imagined - all the pieces would move around when I tried to solder, and just a little bit of
clumsiness would really twist the pieces of copper that so easily peeled off. This one also got to making the program but ultimately could not get past this step.
Part 3: Creating More Circuit Boards
At this point I had began to experiment a little with the Shopbot, which had already solidified itself as a much easier and quicker way of cutting circuits. Unfortunately
my newbie circuit cutting luck ran out and I began to make all sorts of mistakes.
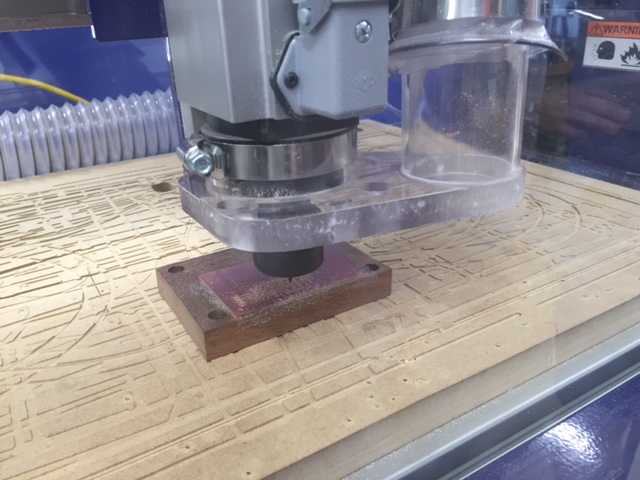
Some boards were likely not stuck properly to the table.
Other times I just couldn't read.
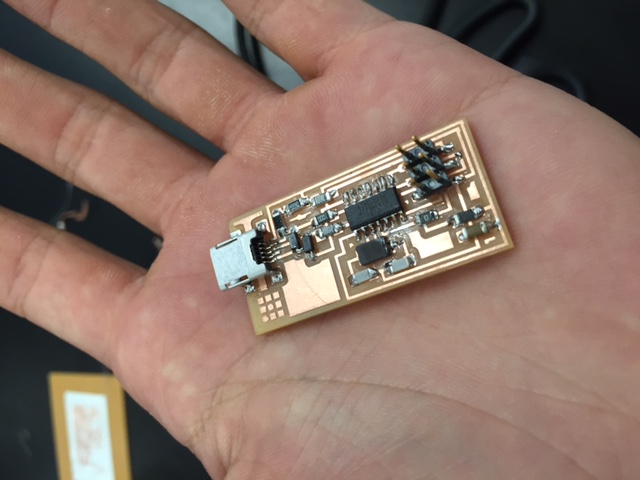
Part 4: Success
After many hours I finally got a board to work, program, and finally detect!