Technologies Used:
❖ ESP8266 (Afafruit Huzzah Breakout Board)
❖ Arduino IDE/Firmware
❖ AT Command Set
❖ Patience
Networking and Communications: ..........
Starting this week, I will be doing my assignments a bit out of order, to prepare for my final project. I decided that the best course of action would be to tackle the hardest element of my project, and work backwards to build out the other pieces. The basis for my project is this: I want to be able to control a microcontroller remotely, through the internet. Not bluetooth, serial, radio - but internet. Something about the ability to be anywhere in the world (with data) and talking with a device thounsands of miles away appeals to me, even though I doubt I will ever need such functionality. That's the dream I guess, even though I don't know exactly what kind of information I want my controller to recieve, and what actions to perform. The first step is building this pipeline.
So...wireless...where to even begin...
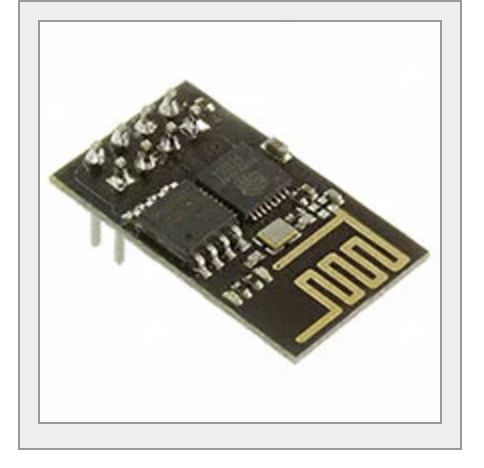
I went through a bunch of pages from previous projects in HTMAA, and did a few search for modules that might help me perform my job. Immediately, the ESP8266 module came up in my search - it was one of the most popular devices used by arduino fans, hobbyists, makers etc. Impressed and somewhat assured of my ability to accomplish this, I bought two ESP8266 WRK013678 from Sparkfun:
It's honestly been a long time since I've thought about the intricacies of networking, and after having a brief conversation with Rob Hart, and Tomer Weller, I had a gameplan. In theory it was simple. I would find a webserver to host data. I would then have two clients, one which is my microcontroller to scrape data from the webserver, and the other to send data. Thus, one would control the other.
Apparently these days this term "Internet of Things" is getting some hype - it's the idea that everyday devices have connectivity to the internet, and thus send and recieve data from the cloud. Why is this important you may ask? Because I had no idea how I was going to build my own webserver, but I've realized with the proliferation of IoT popularity, there are plenty, plenty of online platform that will store simple data free of charge, and have convenient APIs to send HTTP Requests! Tomer offered me a few options, and the first one I stumbled upon was data.sparkfun.com. This would end up being a horrendously maintained service but at first it seemed simple and intuitive to use, so I began with this.

Fine, ok, now for the client. The ESP8266 is an interesting little module - it can act as both a modem to connect to the internet, as well as a normal microcontroller, pins and everything. Because of this, there were a few approaches that one could take to send data requests and work with the data. The most intuitive way is to just use this one device, have it connect to the internet as well as perform the functionality. I think it's because of this that makes this particularly module so popular - it's very convenient. However, my research online, and Neil's advice was that it would be better to work the module in conjunction with another microcontroller. This would give the piece modularity as well as stability (which I've heard has been an issue if you try to do everything on the single chip).
I would begin the toughest week of HTMAA here, with the AT command set.
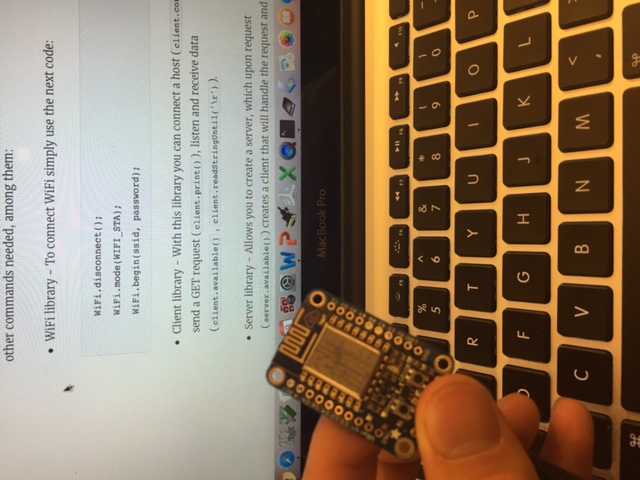
The AT command set is one of a few firmware options one has to work with the ESP8266 (along with NodeMCU's Lua, and Arduino's custom firmware). I picked this because it seemed like the default firmware, it was what a lot of other students had tried in the past and Neil recommended it. The idea would be my microcontroller would send AT commands through the serial RX/TX and talk with the ESP8266, which would in return feed the delicious data back into the microcontroller. Tomer recommended that as a first step, I should just get familiar with the AT commands by building a simple board and talking with the chip via a serial monitor. Simple enough right?
I began with the ESP chip I bought. The first sign of trouble is, unlike many modules, the ESP takes a 3.3V VCC rather than 5V, meaning I would have to mill out a board with a regulator to even power the device properly. This seemed like a lot of activation energy, but Rob recommended that I could simply use a breadboard and Arduino Uno (with a 3.3V power supply) and some wires, along with an FTDI just for testing. Great!
Not... This ended up not working at all. I used both the Arduino IDE and Coolterm to try and read my signals, but I got nothing. For some reason, it just never responded to me even though it did get power. I still have no idea why. I suspected it was because the FTDI cable was 5V, so even though the power was 3.3V, the signals were coming in at 5V which screwed everything up. Looking back I doubt this was the reason, but who knows.
Around this time, Rob got a shipment of ESP8266-12S, some kind of updated, different model with more pins for the microcontroller. This was also what Neil's Hello ESP board sample used, so I decided to give this a shot next. The milling and soldier process was fine - everything seemed to be going great until I plugged in the chip. It responded...but....
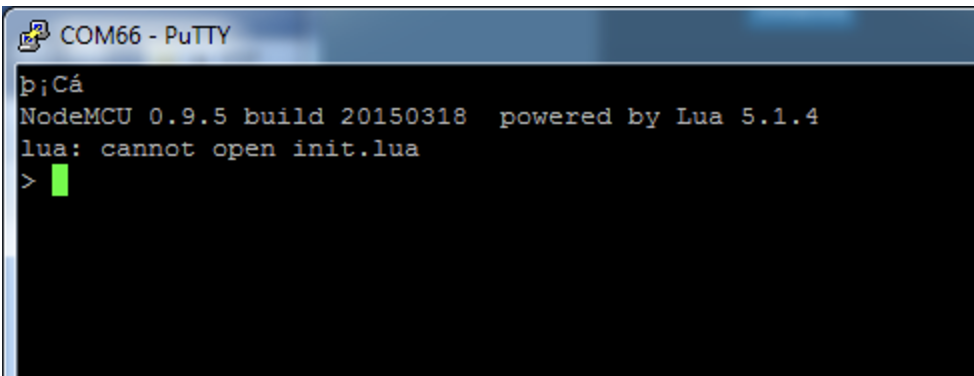
Ok so I typed "AT" hoping for a response but it was trying to tell me something about stdin:2: missing "=". What?? Is this my poor chip going awry again? I did a quick search on the internet and found that I had stumbled upon one of the other firmwares for the ESP8266: NodeMCU Lua. Seems like these days a lot of ESP8266's are loaded with non-AT firmware! A lot of users online seemed to have issues working with Lua on ESP8266, and it still didn't accomplish the modularity I was looking for. Ok please no, let's go back to trying to figure out AT.
While trying to mess with my Lua-filled ESP8266, at a certain point it stopped working, and I tried to resolder pieces to get it to go again, but everytime I plugged in the chip it just overheated and nothing happened. I decided I would just make another one because, hey, if I got it the first time maybe I could get it working again. I milled, soldiered, connected - same exact problem. No response, and overheat!! At this point I still didn't realize Neil's board is not conducive to reflashing the device, meaning even if I had gotten either chip to work, I still didn't have a easy mechanism to get AT commands onto my firmware, meaning I had made about 0 progress after who knows how many hours.
At this point my might be thinking, did this guy actually end up getting anything to work? Did he give up on wireless? Is this really that difficult? At this point I would still have a long way to go, but you know how in stories theres the deus ex machina, a fairy godmother-like figure that saves you in a time of need? Well, it was that moment for me, and this is what saved me:
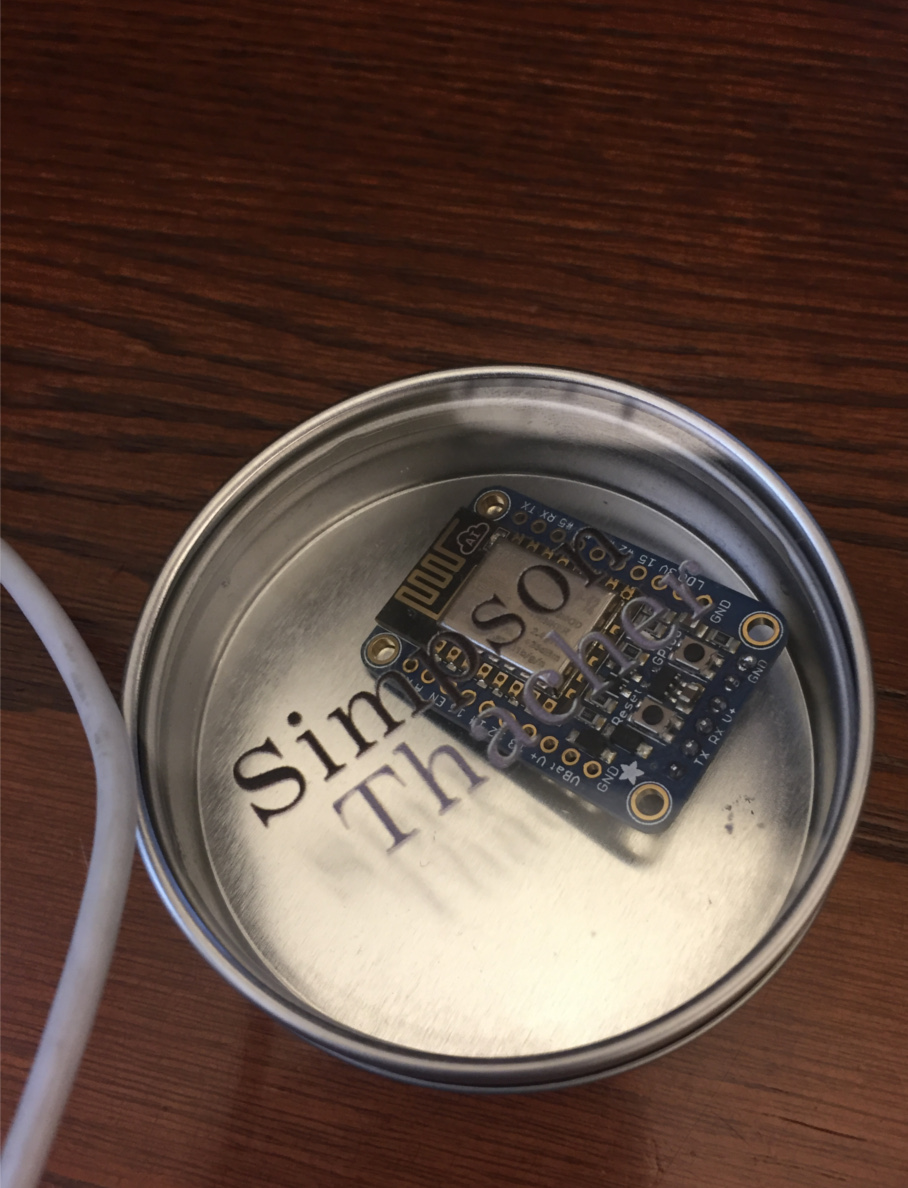
The Adafruit Huzzah ESP8266 breakout is a board that is pre-built, with some extra, nifty functionality. It's something you can easily make yourself, but given my current state of frustration, lack of previous electrical engineering expertise, and a rather rigorous law school curriculum I needed to get back to dealing with, this is exactly what I needed. It's a board were you can not only plug in straight headers to immediately test, but comes with two built in buttons to trigger the reset pin so you can reflash extremely easily.
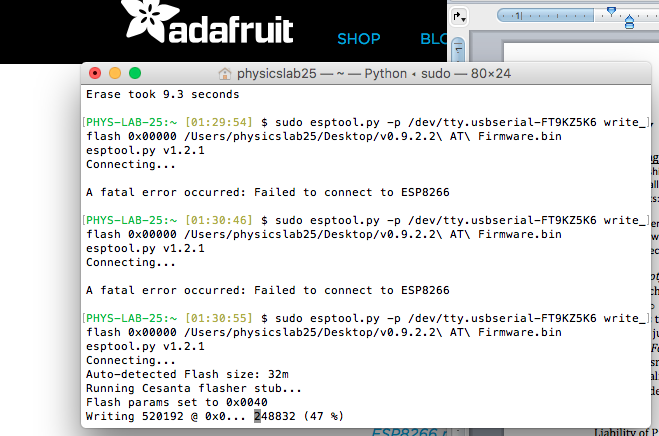
With this board I immediately got to trying to reflash. Somehow this process was extremely frustrating because I chose the exact wrong way to go about it and found all the wrong download files. Here's the wrong way to do it: you search google, you own a windows computer, and someone suggests this thing called ESP Flasher. It looks like an app from the 90s that might double as a computer virus, and it will not work for you for 4 hours. I tried all different downloads for firmware, and nothing responded. I got gibberish on all baud rates for hours. What a terrible, terrible experience.
<>
Somewhere through the night I gave up, and the next day I realized you can just use esptool.py through command line rather than that terrible application to reflash. At the same time Tomer offered me a copy of his firmware. Together, for the first time in who knows how many hours, I got an AT response.
Finally, I am on my merry way to communicating with the outside world. Or not. Ok so I realized after some testing that the AT commands, at least for me, on my setup, was extremely unstable. Here are some small insights, and tips and tricks in case you decide to go this route:
AT+CWLAP/other client commands will give you ERROR sometimes. The most common reason is you need to switch it into client mode, meaning either AT+CWMODE=1 or AT+CWMODE=3. Sometimes even on these modes it will give you error. Solution: IDK.
Sometime you will open a TCP connection and it will give you the response LINK, and then a few seconds later, UNLINK. Solution: IDK, apparently it differs depending on the network.
Sometimes you will get ERROR for whatever reason. Check that you are not adding extra spaces. Check that your quotes are the "straight kind" and not the "curly" kind.
Sometimes weird things will happen anyways...this is why...
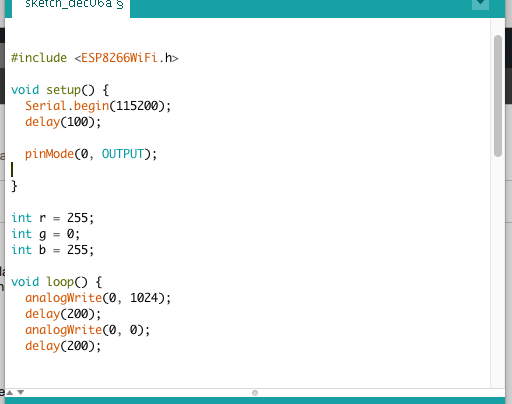
Custom. Arduino. Firmware. Ok you remember how there were 3 firmwares? There's one more, and its the firmware that works with the Arduino IDE, and eventually became my tool of choice. At this point the instability of AT has just made me all but give up on the wireless endeavor altogether, but I gave it one last shot because the Adafruit website had a tutorial on how to use the Arduino IDE, and I had Arduino open all the time for the serial monitor so I was like why not. I ended up scratching AT, and scratching the AT modularity idea altogether, although apparently you can use the Arduino firmware, and send the information through serial to a microcontroller anyways (check out some other people in my section).
The arduino firmware is surprisingly intuitive to use. There's a lot of good documentation on how to use the ESP8266 as a client, and Adafruit has a simple tutorial to get you started. After a couple more hours of wrangling with it, I managed to send HTTP requests through to Sparkfun, get a response, and parse the response for the data I needed. FINALLY!!
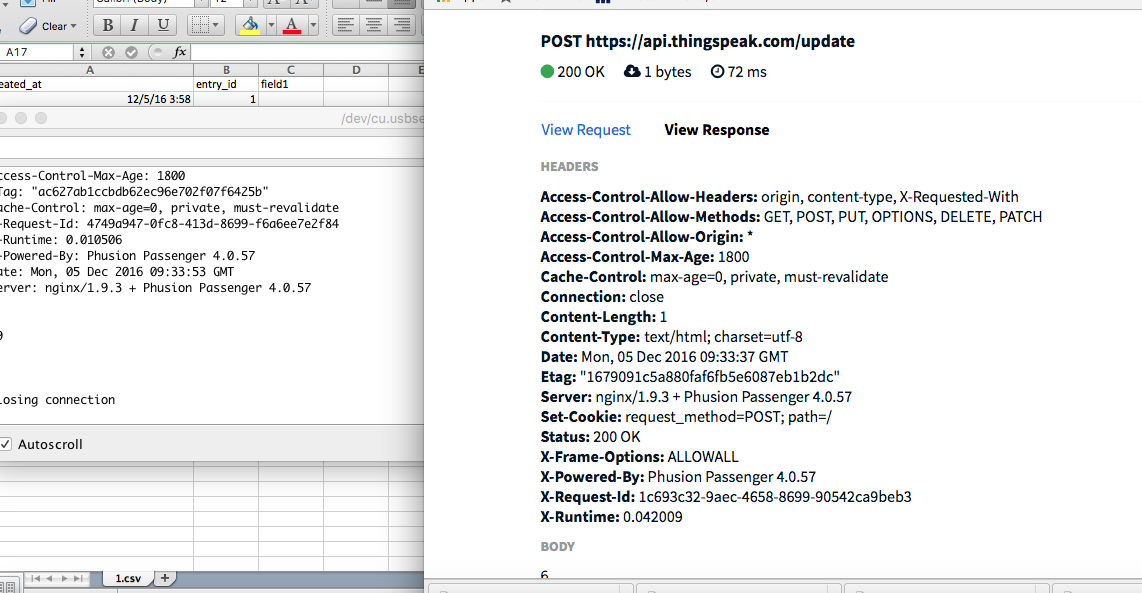
Ok last thought: don't use Sparkfun. I'm not sure what's wrong with their service but it's really slow and it times out a lot. I ended up switching to Thingspeak, which is basically the same functionality and simplicity but their servers are a lot better.
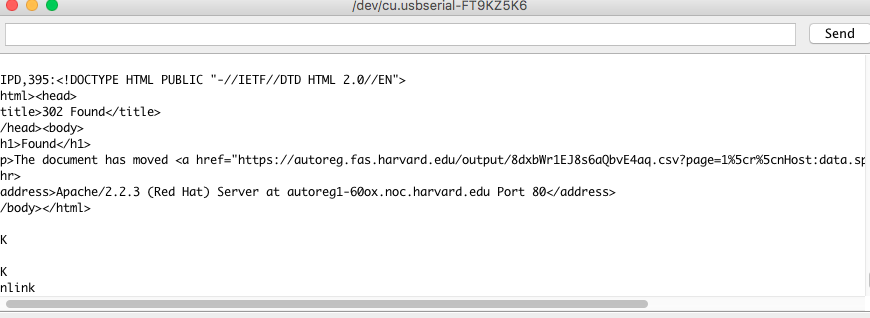
Also - try to use your own phone as a wifi hotspot to test - Harvard's internet needs you to register your device or something like that, so HTTP requests dont work well:
Woohoo internet!!