| Back to Index |
Okay! I've thought through the individual components to my Stellar Fusion Experience (patent pending). No individual shape or item should be very complicated to make, which is good, because there's a number of them. But they're all simple shapes.
The main challenge at the moment is to get the electronics working:
1. Make the "atom" force sensors.
2. Figure out how to translate the step response data into a linear numerical progression that the ATTiny 44 will understand.
3. Divide that data into six chunks: off, red, orange, yellow, white, blue.
4. Figure out how to transition smoothly on the RGB from color to color.
5. Figure out how to translate the step response data into the corresponding color, ideally on a smooth continuum.
Other outstanding questions include:
1. How to connect the star to the back of the sky bowl.
2. How to route traces to three RGB LEDs, and where should the resistors for each LED live (9 total)?


While sitting in class last week, I finally figured out a project that might feasibly bridge the gap between my vision and my skill. I've been thinking about stars a lot lately, and figuring out ways of making an experiential educational thing about the night sky. I was playing around with Chibitronics (LED/resistor stickers and copper tape, an easy way to make LED-centered circuits), when I learned that red LEDs take much less energy to light up than white ones. This makes sense, as red light takes less energy to produce than white light.
Putting a square of capacitive paper between the battery and the circuit basically means that a light touch will send a litte energy into the circuit, lighting up a Red LED but not a white one. However, add more pressure, and the White LED will light up as well.
I realized this might be an excellent way to express why different types of stars burn at different colors in an experiential way. Red stars exert relatively little pressure on their cores, where elements are fused. The greater the pressure at the center of the star, the brighter the stars burn.
So when Neil started explaining how step-response could be used as a de facto force sensor, I started sketching. By pressing two foam 'atoms' together, each containing one side of the step-response's capacitor, an RGB LED array at the core of a translucently-molded star could change colors from Red, to Yellow, to White, to Blue.
Fun as the fire-organ might be (see below, under Synesthizer), the more I thought about the logistics of actually pulling it off this semester, the less confident I felt in my ability to do so. There are too many variables, and too many things I'd have to research, experiment, and test, and I frankly don't think I have the time to do so. And as I'd literally be playing with fire, I felt discretion was the better part of valor. The Synesthizer seemed beyond my programming capabilities.
The foam Wedell-Williams (see below) is still on track, but would likely only involve 3D printing and milling. As it doesn't integrate many of the skills we'll be learning this semester, I'll be happy making it as A project, just not my final one.
Which leaves me with the Milky Way Umbrella (or, as I have pretentiously come to call it, The Siderium). I love the night sky, and frankly, the night sky in Boston sucks. But we're not alone. Fully 80% of North Americans - and one third of the human species - can no longer see the Milky Way. I'd like to remedy this, at least in spirit, with my final project.
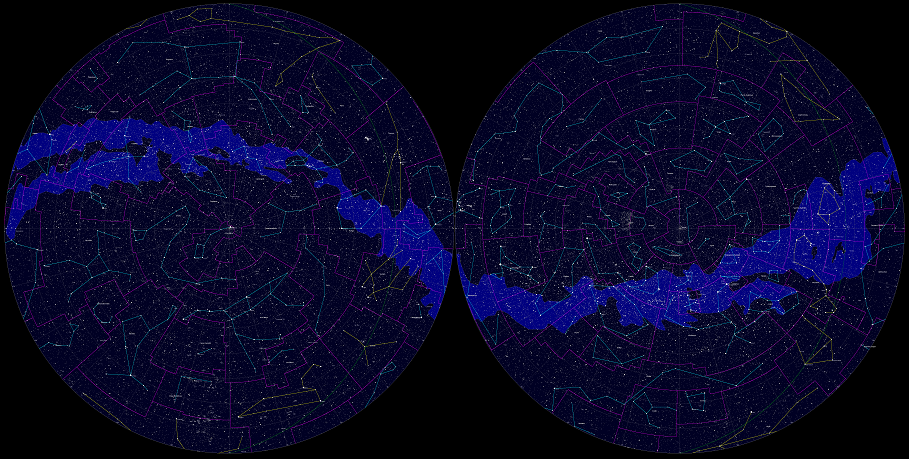
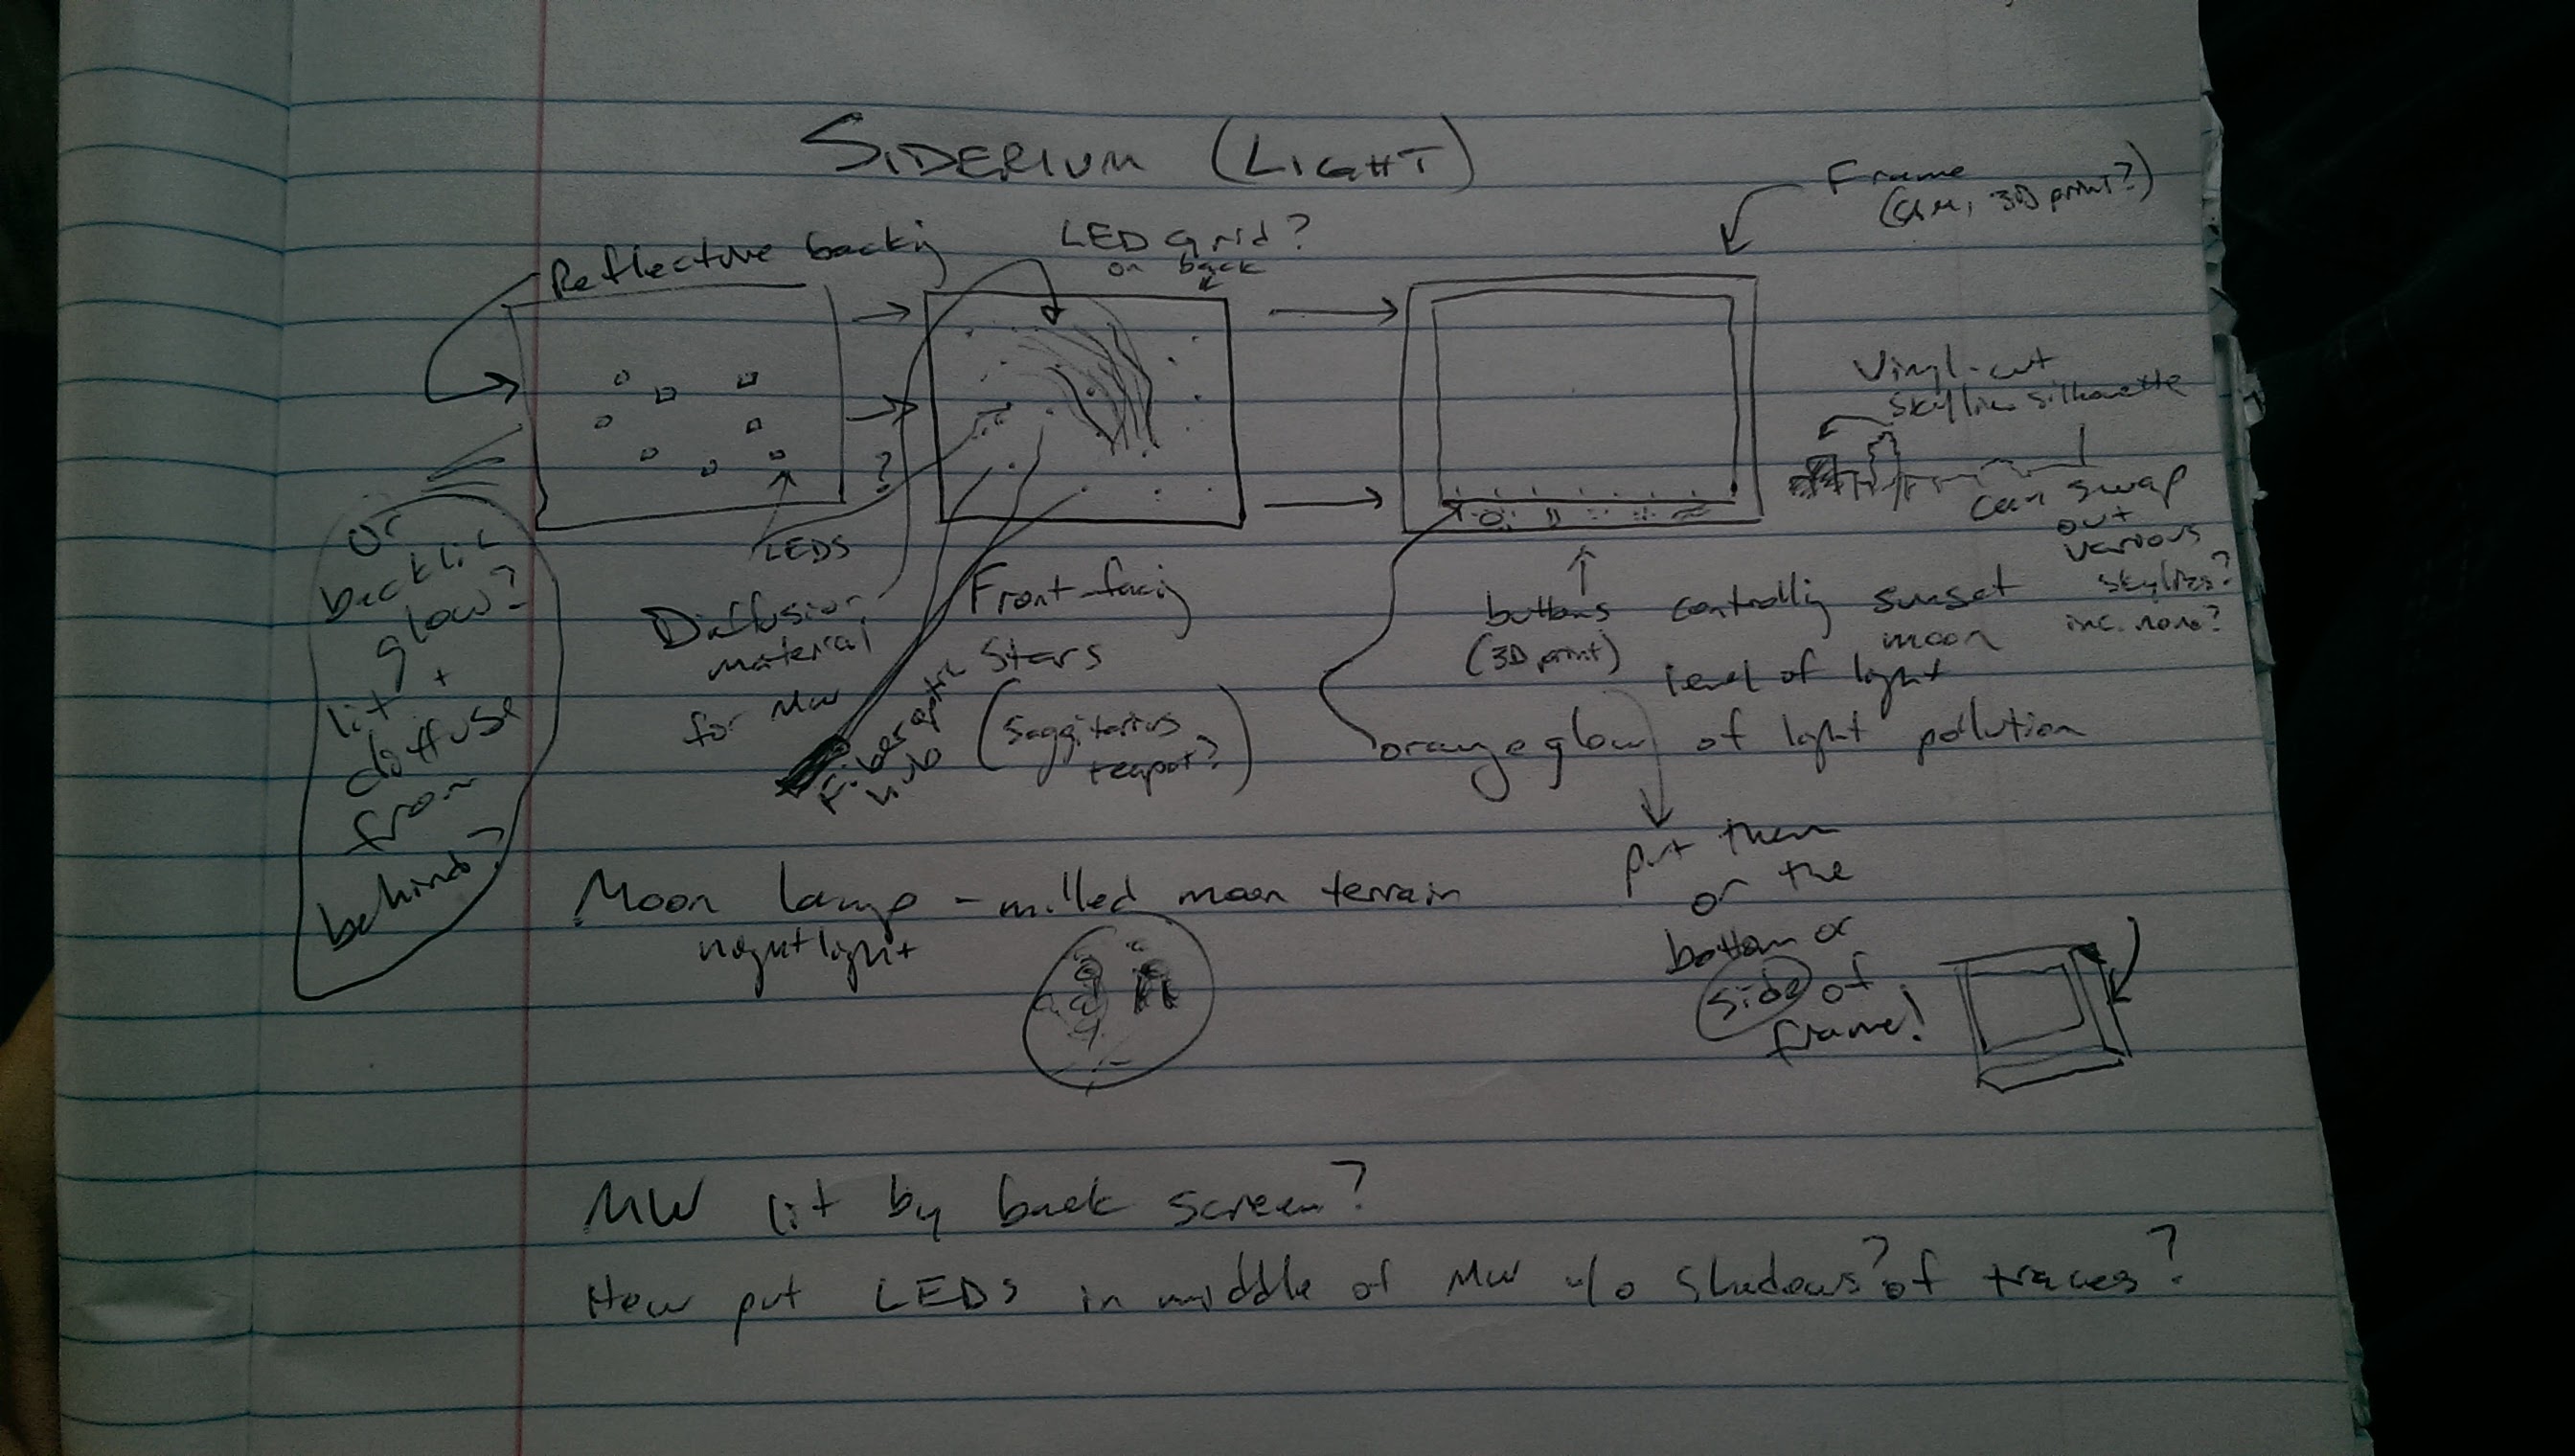
I'd love to install an accurate depiction of the night sky on something easily portable, ideally an umbrella. The user would look up, and their entire field of view would be accurately studded with stars of varying brightnesses and sizes, creating the sense of depth in the night sky that so few of us can view today. I'm planning on using a combination of LEDs, diffused light from LEDs, fiber-optics, and likely a reflective backstop that would simply shine through thousands of little holes cut (with the vinyl cutter?) into the front-facing surface. I'd also love to have a silhouetted horizon: a beach / ocean in the West, desert, mountains, grassland, small town, city, forest, mountains, etc.
I'd love to program it so that, when turned on, an orange/blue sunset fades in the West, a full moon (diffused light through a milled moon) glows in the East. Then, first the brightest stars spread from East to West, followed by the less bright stars, the finally the background stars and the diffuse glow of the Milky Way itself. I'd also love to program in the ability to display the effects of different levels of light pollution, and the ability to display only constellations. It'd also be fun if they could twinkle.
While I want the sky to be accurate, that would mean literally thousands of stars, so I'll be happy with an accurate, if toned down, artists' rendering. Which will still probably involve thousands of points of light. Tyler Nordgren, a professor of physics and astronomy, as well as an artist, did the gorgeous cover art for Paul Bogard's book The End of Night. I love his style, and would love to emulate it.

Of course, the myriad challenges in actually constructing the project include:
Material selection - reflective backdrop, surface for vinyl-cut copper circuitry / LEDs, front-facing material (that can be vinyl-cut. Also, want one that will minimize reflections and glare!), diffusion material for the Sun, Moon, and Milky Way
Star map - How do I make it look real without driving myself insane with the sheer number of stars? What software should I use to turn an extant star map into something useful to me? How do I transfer that to an umbrella pattern? What is the smallest hole the vinyl cutter can make?
Circuit design / lighting - how many LEDs do I need / can I afford? How do I link them all together so I can program in the planetarium shows I hope to? How do I integrate a fiber-optics hub? Do I need insulation? How much power will I need? Should it be powered in individual segments, or all come from one central power source?
Programming - How do I make it do all the cool stuff I want it to do?
Assembly - How do I layer all the layers? Will it work in a foldable umbrella? If yes, can I design my own umbrella mechanism so the armature is on the outside (the top), out of the field of view?
Maybe I'll just put it on the bottom of a hat brim ... or make a light-up poster instead.
Yeah, I think I'm just gonna do a framed picture with as much of the above functionality as I can manage. Lemme just worry about a couple dozen stars before trying to recreate thousands.
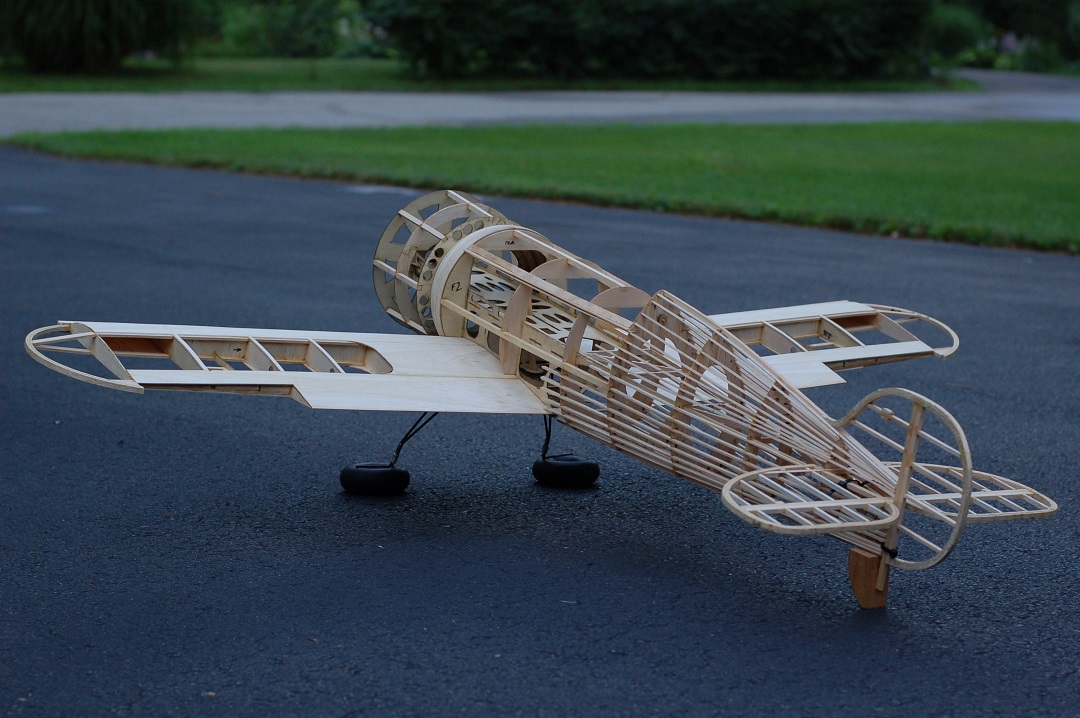
I fly model airplanes. Earlier this year, I framed up a balsa model of a Wedell Williams Model 44, with a 52" wingspan. It was my first technical build, and I'm proud of how it's coming. It won't fly for at least another year or two, though I'm confident it will eventually.
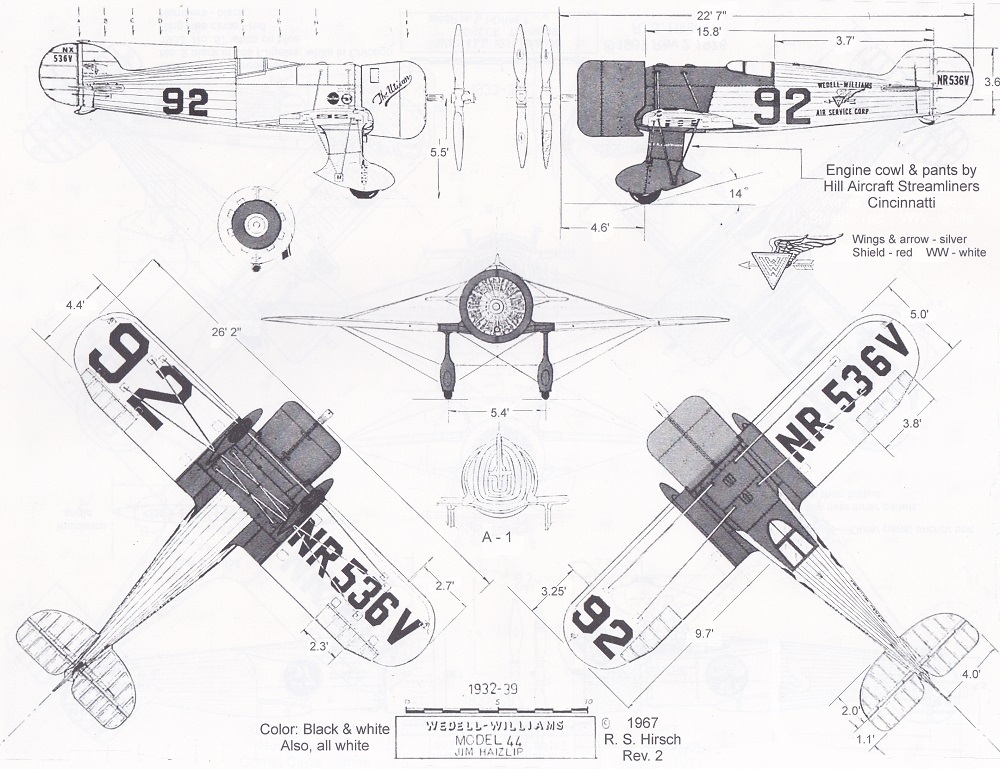
The original airplane was designed in 1930 by a guy named Jimmy Wedell. Jimmy had no formal training as a designer, so, using the TLAR techique ("that looks about right"), he drew the Model 44 in chalk on the hangar floor. Despite its humble beginnings, it became the first land-based aircraft to average over 300 mph on a closed course. All this to say, I'm nervous about flying my balsa model for the first time. It likely has a pretty high stall speed, making landings fast and tricky.
I have another airplane, a smaller foam one, that features a modular motor and servo system. This allows you to use the same motor/servo system in multiple airframes. My first idea for a final project is to create a foam version of the Model 44, to the right scale to utilize the modular power system. I did some math based off of the power system's prop size, and the foam WW44 would end up with an 18.75" wingspan. It'll be more skittish in the air than the 52" version, but provides a much lower-risk way to get used to the way the airplane handles!
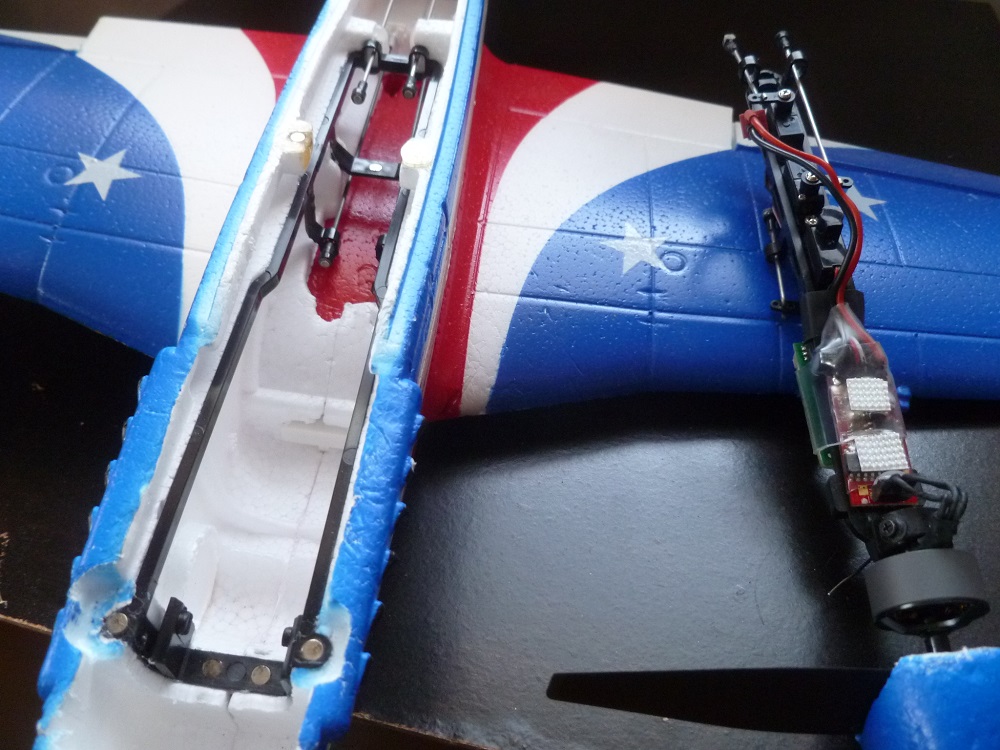
As you can see above, the power system sits in a plastic carriage in the fuselage, held in place by magnets. A challenge for me will be to get the precise dimensions of the mounting carriage, and recreating them for 3D printing.
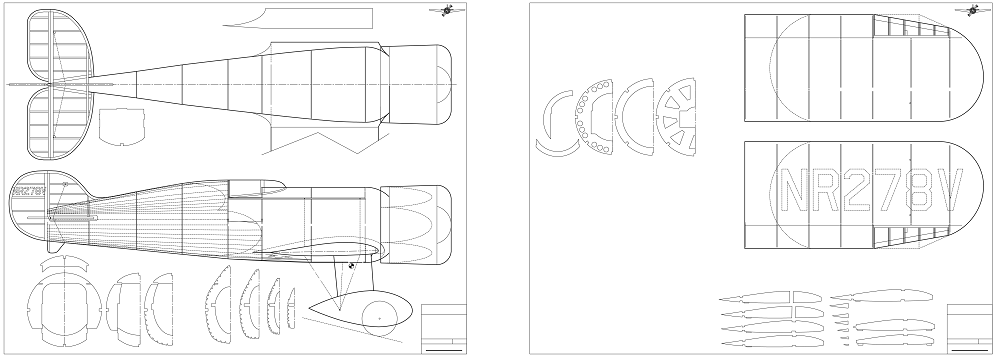
I knew recreating the complex curves of the fuselage in 3D would be a challenge. My balsa kit was designed by Jim Young, so I emailed him to see if he had any files he'd be willing to share. Very graciously, he sent me a simplified CAD file of his plans (seen above), which I'll use to build my 3D model of the airplane, and figure out how to recreate in foam. I'll likely make more than one, so I'll feel okay about crashing the first one!
I came up with an idea in high school that I have been saving for when I'm old, rich, and eccentric. (Or at least two of the three.) If you hold an open-ended tube over a significant enough heat source, the air in the tube will vibrate at the resonant frequency of the tube, creating a very loud, pure tone. As a final project, I made a Flambone, an adjustable-length open-ended tube that I held over a Meker-Fisher burner and played a song on. Ever since then, I have dreamed of making a fire organ, with multiple octaves worth of tubes humming with fire.
I'm not interested in designing propane plumbing this semester, which is largely what the organ would require. However, I think it would be a very useful skill to learn how to take the output from an electric keyboard and use it to create some sort of music visualizer. I'll likely keep it to some LEDs, but ultimately, I would love to create a piano for the deaf: a keyboard that, when played, creates a visual interpretation of the music on a screen. I'm picturing a colorful, swirling, fluid system (like Fluid Monkey) that shifts colors and patterns depending on what's being played. Major chords and minor chords shift the color palette, staccato and legato notes showing up differently, etc. Ultimately, I'd love to partner with a visual artist / app developer to help create this synesthetic appearance of painting with sound. I call it: The Synesthizer.
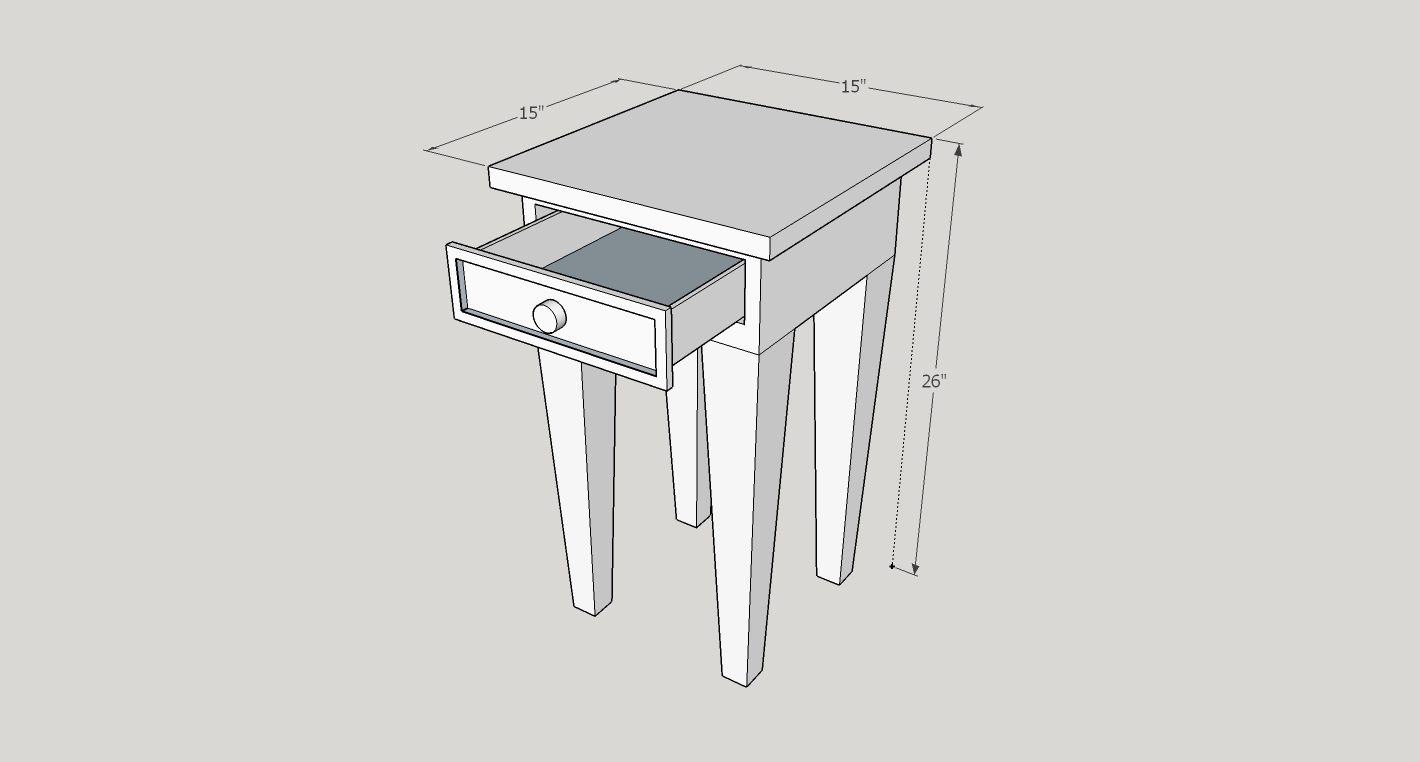
Just to get comfortable working in 3D, I drew up a quick design for a bedtable, and started trying to recreate another one of my airplanes, an SE5a. I likely won't make either, but they were useful design exercises.
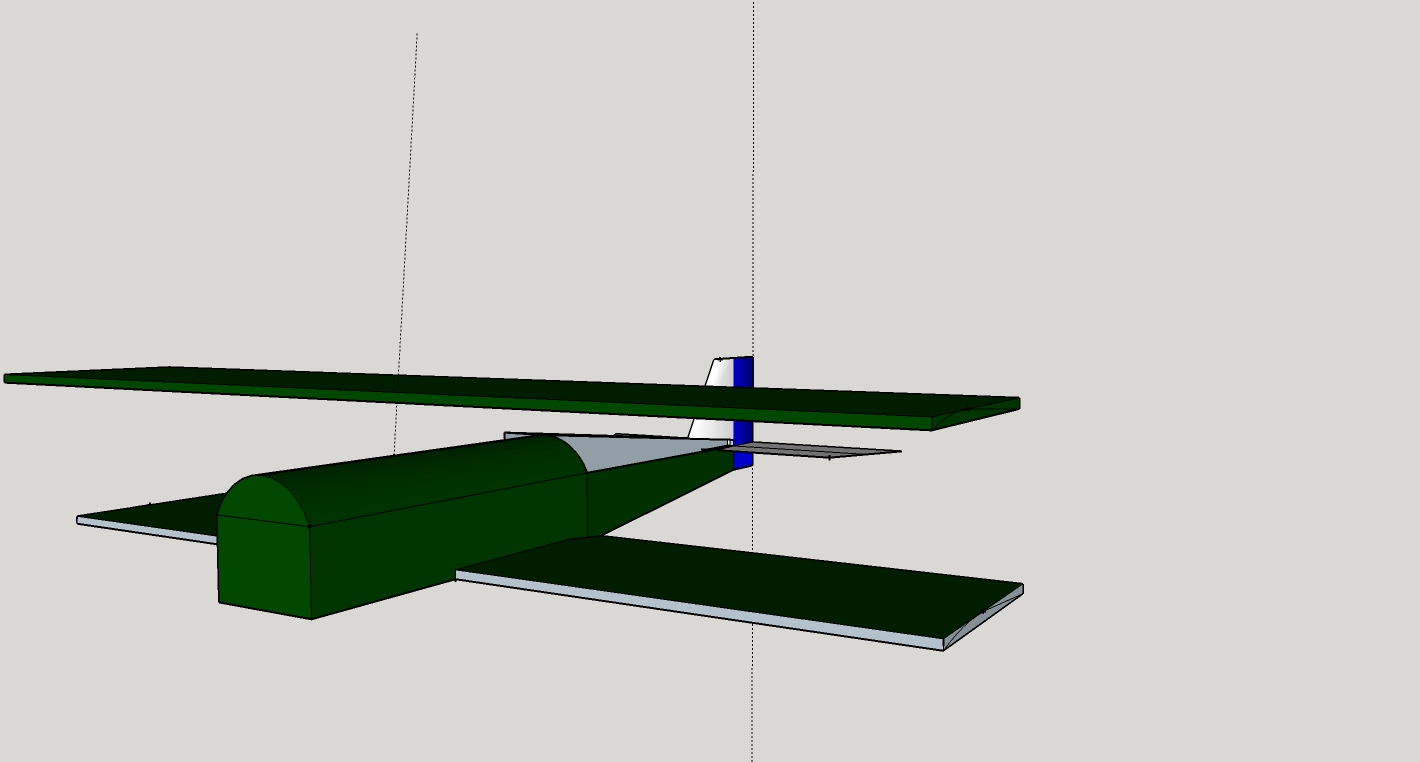
I'll include below my brainstormed list, some items of which may look familiar. I'm very interested in the night sky and public empathy, and may explore project options along those lines as well. I know I have lots to learn this semester, and many new project possibilities will present themselves!
- Pop-up planetarium- planetarium umbrella and hood, a projected VR experience? 360 degree? lawnchair + audio
- A thing that'll help people slow down and enjoy a moment, take a look at the world and think it isn't so bad? Some streetside therapy thing? A mini fab lab? A kit people can make stuff out of and take or leave?
- A daily "today in history" projector? A post-secret type personal "today in my history, or just 'today', where people can record a slice of life, an anniversary they're celebrating or grieving or simply remembering. "around this time last year..." recording played on audio, projected in text ... Link it to Twitter? Use it to crowdsource life-advice? "Today in MY History" memory receptacle ... connect with constellation and stars, night sky? Help people connect with other people and night sky, add stories to the sky
- Tricopter w/ winglets (lifting-body quadcopter?)
- AirCore carriage
- Adjustable t-Square (I need one, and I'm not sure where the nearest Harbor Freight is.)
- Fire organ - I SHOULD FIGURE OUT HOW TO WIRE SOMETHING TO A KEYBOARD. A KEYBOARD FOR THE DEAF W/ AN LED SCREEN + synesthetic music visualizer.
- A fun electronic musical instrument of some sort? A theramin?
- Something people can play easily, like the tone-matrix?
- A tea mug that you can steep in, with a built-in; a heat-activated timer? Better yet, a loose-leaf cage with a built-in, heat-activated timer.
- Bedside trey for pen, earplugs, chapstick. (milling? 3d print?)
- Headboard (with shelves?)
- Portable wind tunnel
- A stand for my cuatro.