Initially, I decided to try a nodejs example, in an attempt to start figuring out a new language (sad truth is, none of my CS classes have touched nodejs yet). So, I started off by downloading nodejs and skimming some online tutorials. Then, I ventured into the google sheets nodejs quickstart (there's a decent chance that I may want to push data from a google sheet to my final project.) The quickstart, linked here, didn't take particularly long.

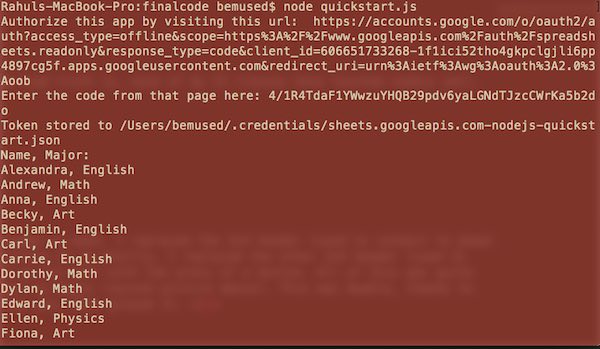
Once completed, I had succesfully linked a google sheet to a javascript script, that, when run, would fetch data from the sheet. Pictured below is a list of names (displayed in my terminal) fetched from some online google sheet.
After this small task, I spent an hour or so fiddling with nodejs and looking through some online tutorials. While it seemed incredibly important and interesting, it also seemed that it would take more time than I had to master. So, I decided to leave my nodejs ventures for another time, and transition to python.

The first thing I did was update python to the latest version (site above). I figured that it would make life easier (not so, as will be revealed). Despite having used Neil's .py scripts before, I had never run them on my laptop, so I was unaware of the extra software/modules that I may/may not have needed. In order to find out, I picked a board from a previous week (my capacitance board, week 9) and downloaded Neil's hello.txrx.45.py script. Of course it didn't work. I checked out some pages from previous years, and found that there were a few modules that I may need. I grabbed a copy of node-serialport and pyserial (git cloned from the respective github repositories), then tried again. Still nothing. This time, I was getting an error about 'Tkinter' not existing. A quick skim over the python code and some googling revealed that Tkinter is a fantastic python module for drawing, and that it definitely does exist. The internet gave me mixed answers about whether Tkinter is included with the new version of python, so I followed the advice below (from the python website),
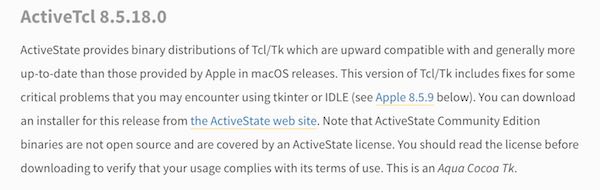
and downloaded the package from ActiveStateWeb.

I'm still not sure about whether or not that download was necessary, but I do know two things: 1) that was a community edition download (mental note to pay for the software if I ever intend to use it for something that requires redistributing). 2) it still didn't work. The 'Tkinter does not exist' error prevailed. Eventually, I figured out the problem (thanks to stackoverflow). See below:

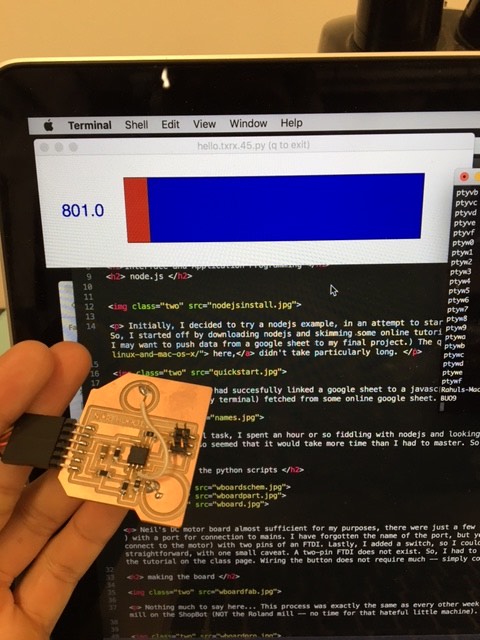
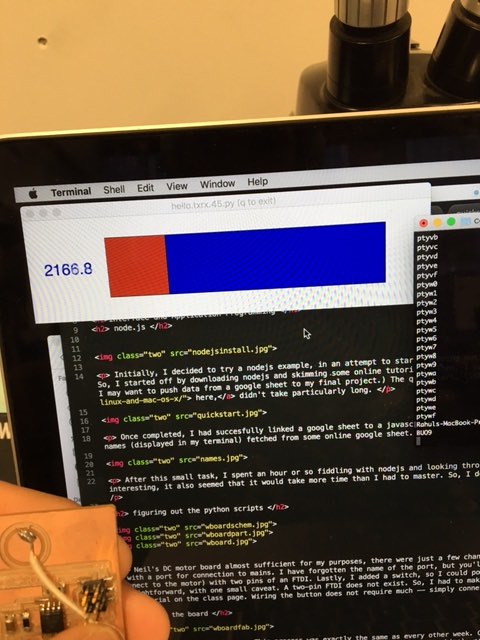
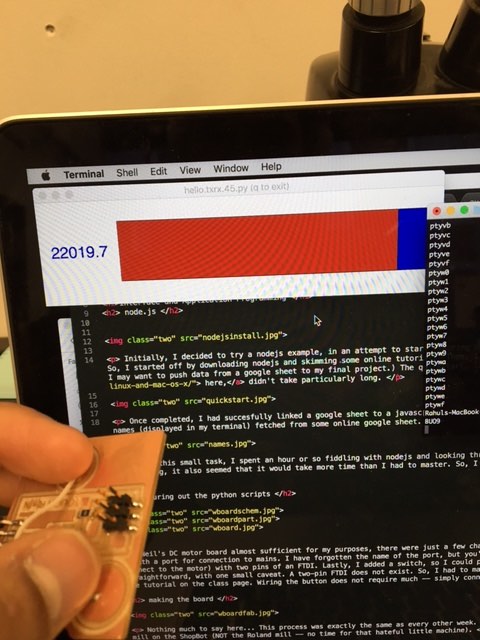
Was the problem really that obnoxious? Yes, yes it was. Someone decided to change the capitalization on 'Tkinter' in the latest versions of python. What a bright idea. So much for updating python 'making life easier'. Once that was changed, the code worked. It still failed when I tried to run it (python hello.txrx.45.py), but that was because, as I soon discovered, I was neglecting the command line argument. I changed the command to 'python hello.txrx.45.py /dev/tty.usbserial-A703BUO9' and it worked smoothly. As an aside, to find the serial number of your tiny: ls /dev .
After that, I took some time figuring out the rest of the code, so that I could change the visual. Thankfully, a friend of mine (not from this class) had both time and expertise, so he explained some of the code that was less obvious. Here's a breakdown of the most important stuff, I believe.
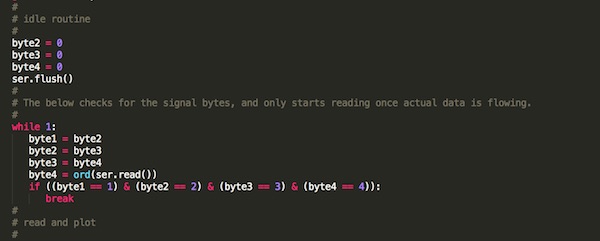
The code above, just within the start of the main function, ensures that we always read 'good' data by checking for the signal bytes that Neil incorporated into the hello.txrx.45.c code.
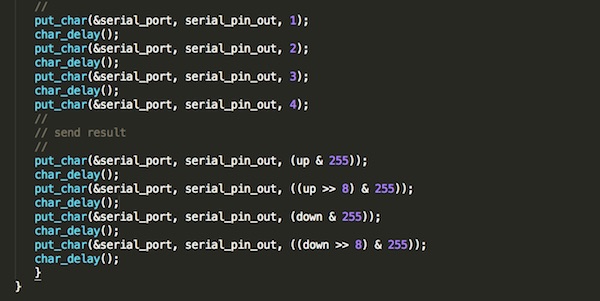
This is important, as it prevents us from ever reading incomplete data (in the event that the stream begins with some offset, or something similar).
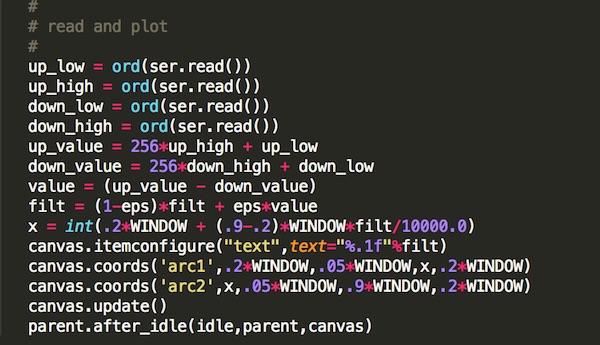
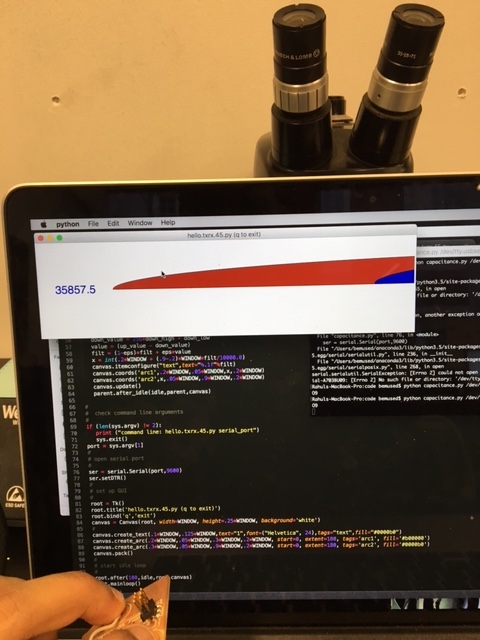
The code above is responsible for reading the incoming data and plotting the shapes within the window. The calls to 'ord(ser.read())' convert serial data from the tiny into integers, that are then manipulated ('up_value = 256*up_high + up_low') in order to produce the parameters for the shapes within the window. The canvas.coords calls position the shapes within the canvas (the window).

This code specifies that a command line argument (the usb serial number) is required, and auto-exits if one isn't provided. Also, a serial port is opened for reading the data from the tiny.

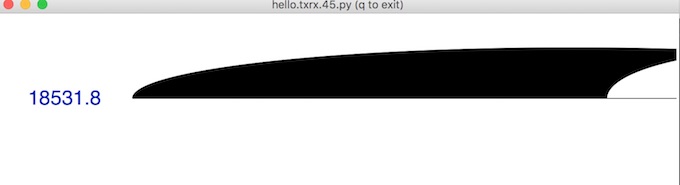
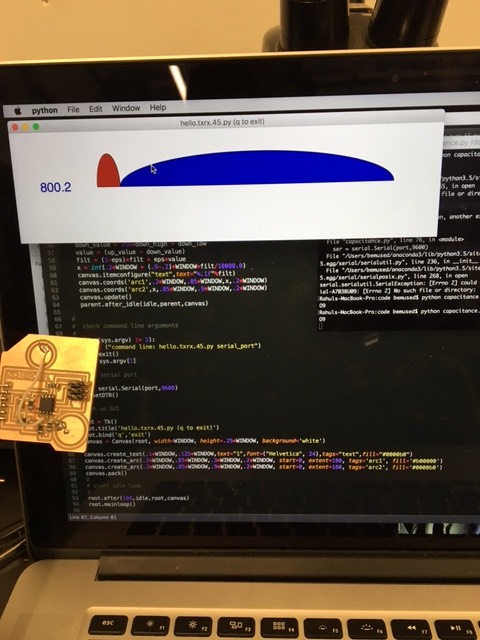
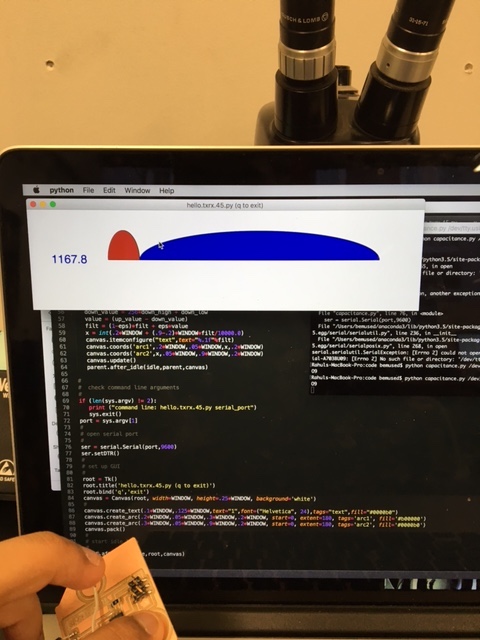
Finally, the code above is the code that determines the visual. canvas.create_text is the function that puts the moving text (the numbers that update with capacitance values) on the window, while canvas.create_arc draws a shape with the parameters that you determine. Neil's code initially used canvas.create_rectangle. I decided to go with canvas.create_arc instead, because I liked the idea of two arcs battling for control over a space. When you touch the capacitance board, one arc seems to eat the other.
black and white for fun: