The first component of this week's project was to vinyl cut 'something'. Cutting 'something' could have been incredibly easy, insofar as a square is 'something', but I attempted to design a something instead. The result was.... my name:

The design was a quick sketch on Inkscape. I did not do much exploration with some of the 'scarier' features on Inkscape -- the design was constructed predominantly through drawing rectangles, resizing and rotating, and occasionally adding a white or black fill. The only complaint that I have about Inkscape is that it needs an update -- badly. It will not run without running XQuartz in the background (draining battery), and the resolution on the interface is noticeably low. It doesn't make for a particularly inspiring work environment. Cutting did not require too much effort. Once Tiffany had shown me how to load the vinyl, and Dixon had shown me to how convert my images using the fab module, the actual cut was only slightly more complicated than simply pressing the button. After successfully cutting the sticker,

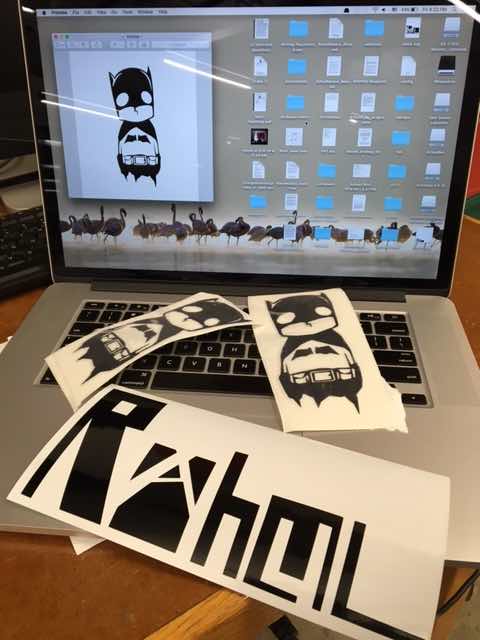
I decided that I wanted something that actually looked presentable, so I downloaded a batman decal from the web. Let it be known that 'professional' decals can be made with ease -- the only caveat being that very detailed decals occasionally require 10-15 mins of special attention with some tweezers -- revealing fine white space can be challenging. Nonetheless, batman was found,

and batman was printed.
As a side note, I fully intend to cut more vinyl stickers -- potentially some interesting, original designs, should I find the time and a miraculous aptitude for Inkscape. The technique of manipulating white and black space to create an image is certainly worth further investigation.
The most difficult element of this assignment is, easily, the designing. Drawing shapes on Rhinoceros or Antimony is quite doable, but figuring out the Grasshopper (or Antimony) workflow for parametric design entails quite a steep learning curve. I made a proper attempt at Antimony, but, eventually settled on Rhino (and the extension, Grasshopper), due to Nathan Melenbrink giving us a thorough Grasshopper introduction (thanks Nathan!). A note about Grasshopper for Mac... It's hard to find. At the time of writing (Sept 2016), downloading Grasshopper entails downloading a WIP variant of Rhino (that takes a little extra searching), and opening it through the command 'ExplicitHistory' in the Rhino command line. No, I'm not sure of the in-joke yet, but there must be one (opening Grasshopper on a Windows machine is quite literally as simple as typing 'Grasshopper'). This is what the Grasshopper workflow for Mac looks like:
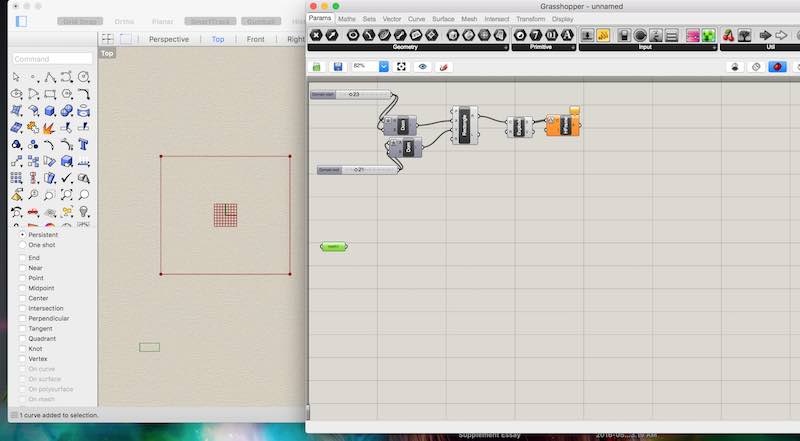
It is possible to create shapes in the original Rhino window and then 'export' them to the Grasshopper interface by creating a new curve (within the Grasshopper interface) and setting the curve object to be the shape in the Rhino window. It is also possible to create shapes by running commands in the Grasshopper interface (such as 'rectangle'), with customization available through rotations, transformations and surface subtraction. I built my initial shapes within the Grasshopper interface, but that's because my initial shapes were simply squares with an interesting notch distribution. If I find the time to cut some more inventive shapes later, it is almost certainly the case that I will not be designing them in the Grasshopper interface.
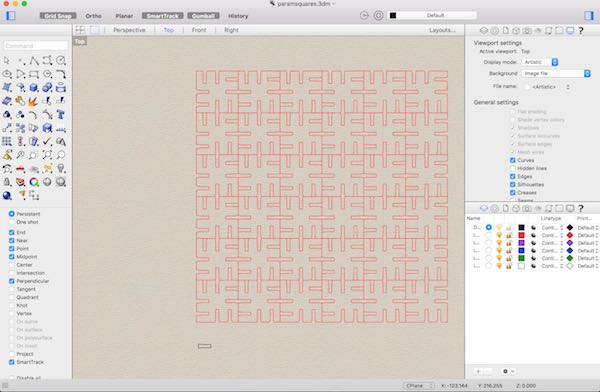
Above, you can see exactly why parametric design makes life much easier in the long run. The square with notches was designed once. I can change their size or number of notches by sliding two bars, and that change will propagate throughout the array of squares, immediately. Moreover, if I wanted more squares on a single page, that would be as easy as making my array bigger (another simple bar to slide). Overall, though I haven't mastered parametric design (or even qualified as a noviciate), the value is clearly evident. This is a skill to practice.
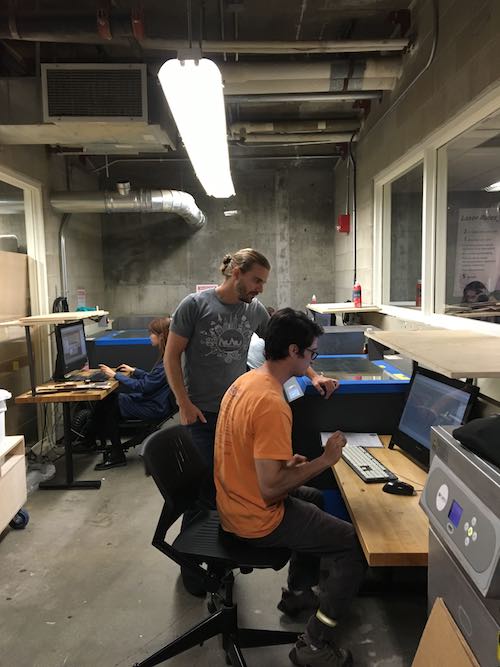
Compared to the designing, the cutting was a breeze. Pictured above is the fabrication lab below the Harvard GSD, a welcome change of scenery, after staring at the Grasshopper interface for a few hours. In general, cutting is as simple as sending your file, ensuring that the laser cutter is set up correctly, and watching the cutter do its thing (failure to do so could start a fire). Pictured below is the cutter 'doing its thing':
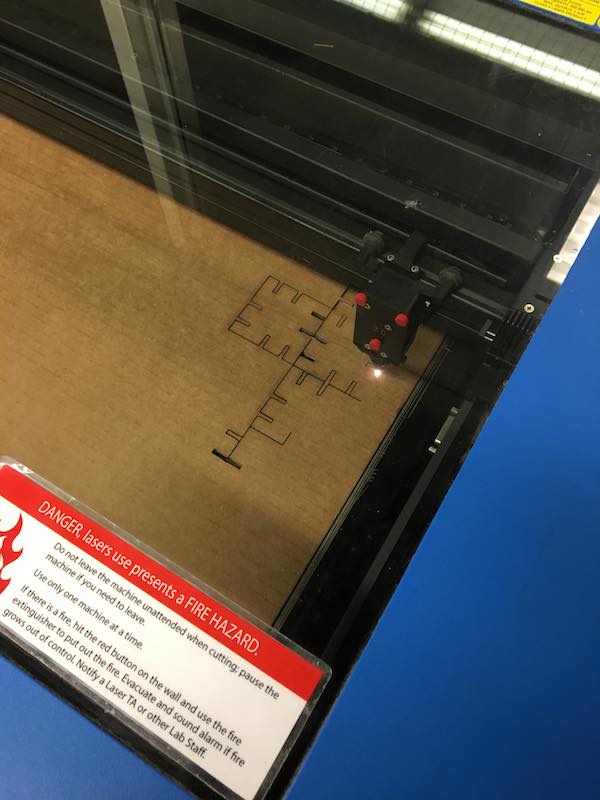
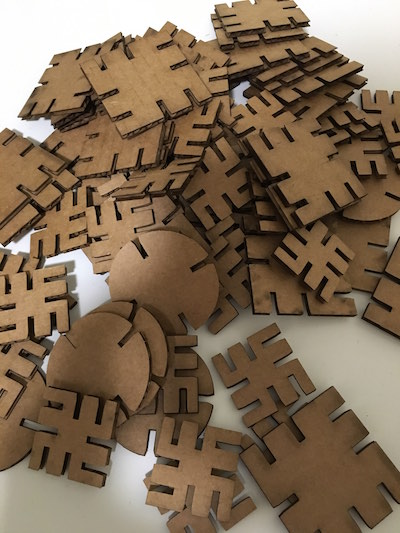
As far as trouble-shooting the cutting is concerned, there are only really two things that can go very wrong. Firstly, if the speed and power are not configured correctly, then it is very likely that the laser will cut through. This results in wasting an entire sheet of material -- okay if it's just some corrugated cardboard, much less okay if you've just wasted an entire sheet of store-bought wood or acrylic. Also, be sure to refocus the laser before beginning a cutting job -- an improperly focused laser will result in the same, even if the settings are correct. I confess, I wasted a sheet of cardboard due to neglecting this crucial step. The second thing that can go VERY wrong is:
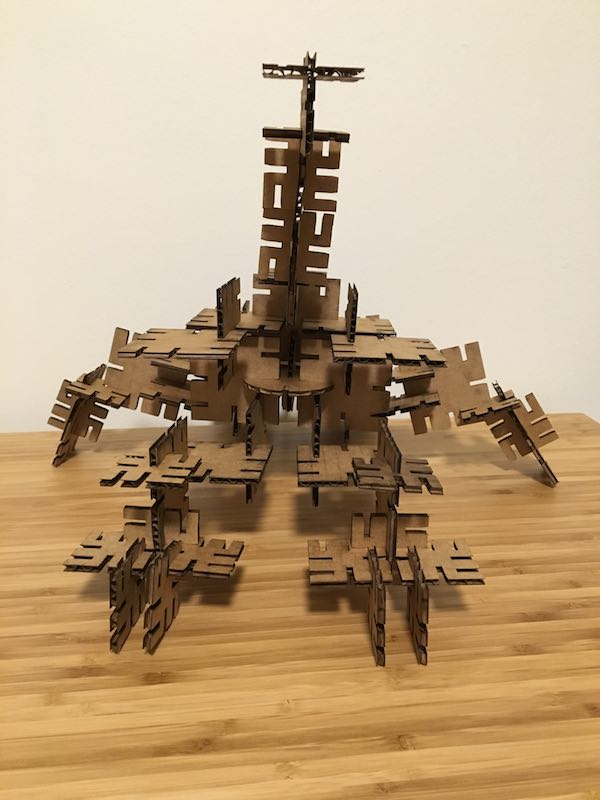
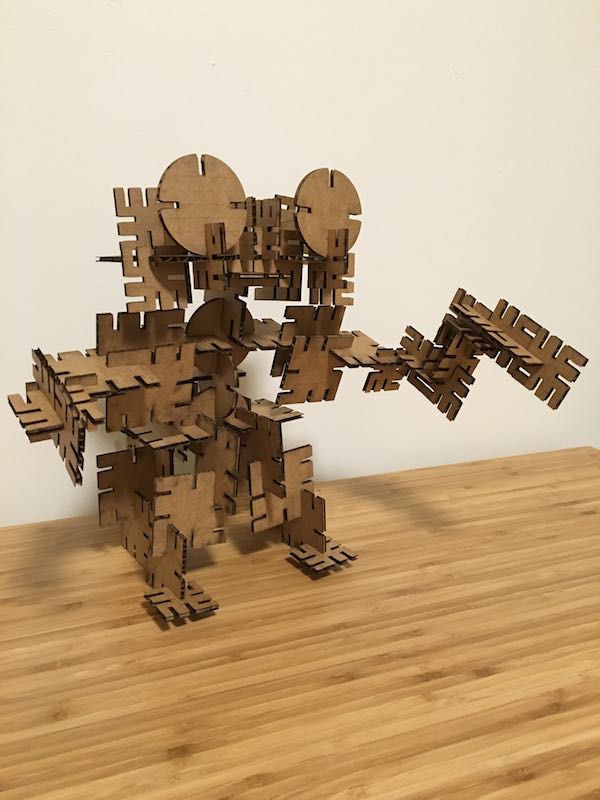
Jesting aside, it is a serious concern. Set the speed too low or the power too high, and the material will begin to smoulder. Leave that unsupervised, and you may return to find that you've misplaced your laboratory. It was necessary to set the power at 70% (high) and the speed at 10% (low) in order to cut through the corrugated cardboard. While watching the cutting take place, I certainly noticed some smoking and smouldering. Thankfully though, there were no incidents, and my work was rewarded with this:
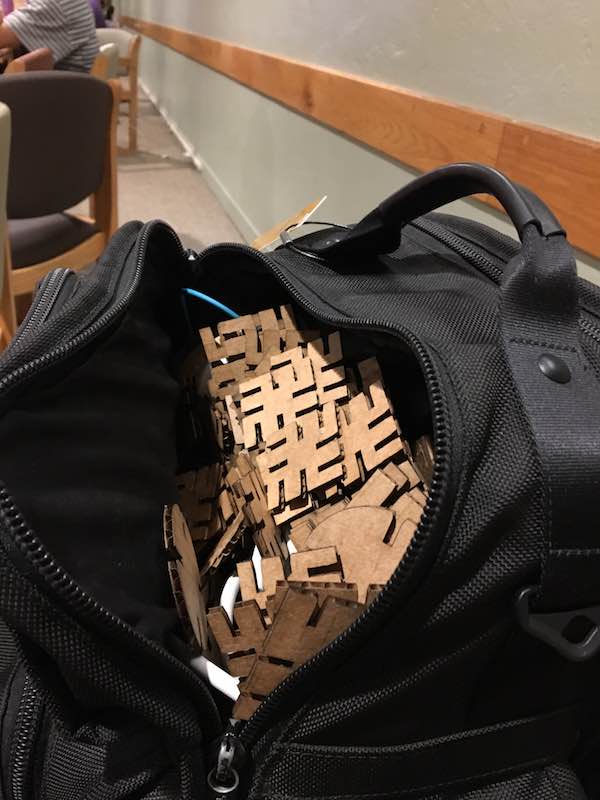
Note to self, bring a separate bag to transport all of the loose shapes... I pulled shapes out of my backpack for the next two days... Once the shapes were safely home, it was time to build. There is certainly a distinct appeal to being able to play with shapes and call it work.