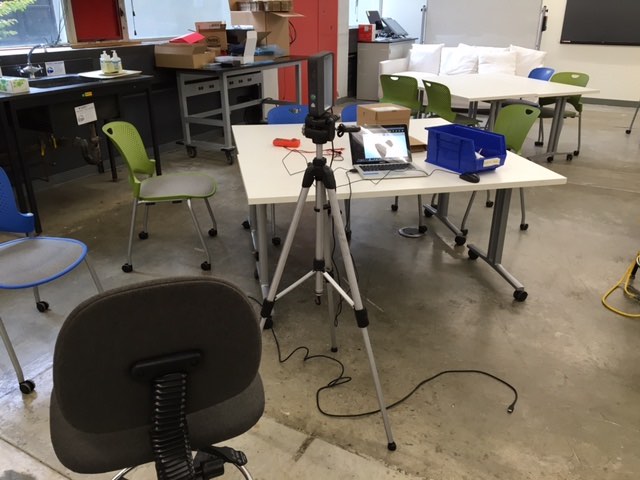
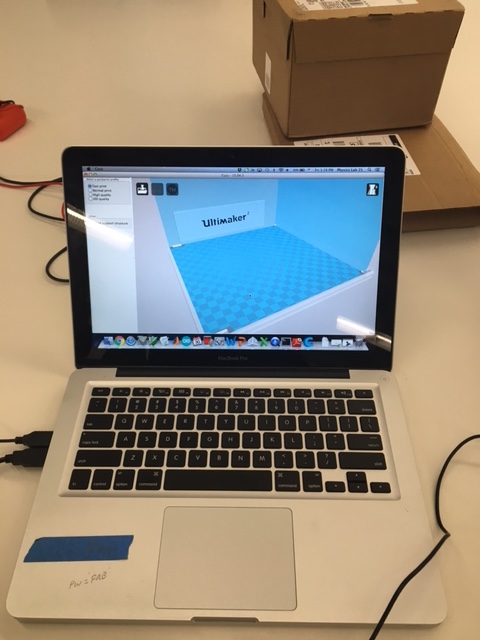
I decided to start this week's assignment with the 3D scanning -- partly because it seemed very interesting, and partly (okay, mostly), because the equipment happened to be set up when I entered the shop. 3D scanning is clearly a very new technology -- I say this because, whilst it works, it only does so one in every five tries. We had the Sense 3D scanner set up, and so it was my apparatus of choice for 3D scanning. Initially, I tried to scan a friend by holding the Sense device and walking around him very slowly. While this may work in theory, in practice, it lost the tracking over and over again and had to be aborted. Eventually, following some advice from Rob Hart, we mounted the Sense on a tripod, then sat on a swivel chair just in front of the device and turned ourselves around very slowly. This still didn't have a particularly high success rate, but it did work. See below for a picture of the setup.
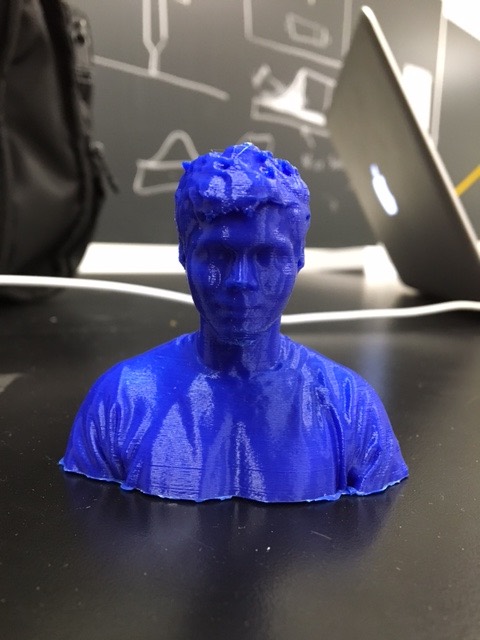
Actually printing the scan wasn't much harder. Once the scan is complete, be sure to save the file as a .stl (I still have no idea as to what the .ply default is used for). Then, simply upload the stl file to the printer software, set the print speed, nozzle size, etc. and hit print. I printed out the scan of myself on the Ultimaker 2+. A quick note -- if the software is slightly out of date and does not have information for the 2+ (only the 2), your print will still process and print correctly. I'm not sure about what difference updating the software would have made, but it certainly wasn't 'required'. Also, strangely enough, busts have been the easiest shapes to print thus far -- quite possibly because they don't require the machine to create many supports, so very little post-processing touching-up is necessary.
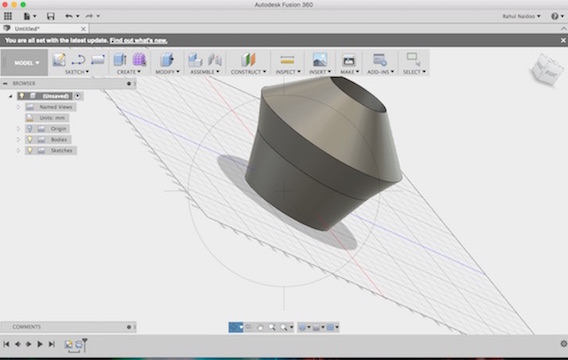
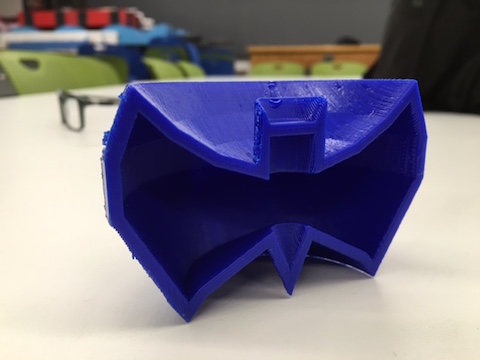
CAD programmes have the most hideous learning curves, it's official. I tried to design my 3D objects on Rhino (which I have some experience with, from earlier weeks), but the process proved to be too trying. So, I swapped over to Fusion 360. Fusion 360 also has a steep learning curve, but I found it to be far more forgiving than Rhino -- the controls also seem more intuitive. Initially, I played around with the functions that I understood -- elementary sketching and revolutions, and made some objects in the process. Most objects made with the revolution function end up looking like vases, though, and one can only have so many 'vase' designs. As a fun little time-waster (and introduction to printing something I designed), I sketched half of a Batman symbol on the xy plane, then used the revolution function to revolve it 180 degrees and bring a hollow Batman symbol to life.
After that elementary venture into the world of Fusion 360, I decided to do what any rational person would do; and designed a dinosaur. I started the design by creating a sketch (with the plan to later extrude). Sketching in Fusion 360 is surprisingly easy -- using the grid, shape tools and line tools can allow for quick, easy creation of shapes.
After the sketch was complete, I extruded certain areas (allowing for other areas to remain 2D), and then filled in the intentional gaps with 3D shapes of my using. I found that hollowing areas by creating pipes and setting them to 'cut' (as opposed to 'join') was very effective, and produced some interesting effects. The most difficult part about this process was positioning new 3D shapes (spheres, for example) in the correct place on the 3D model. Navigating the 3D space required adaptation, but it is a precise system. It's always important to not rush the process, and pay close attention to the coordinates in all 3 planes. Failure to pay attention to a single one will result in a piece floating far away from its intended position. Once the modelling was finished, it was time to render, and then export (to stl).
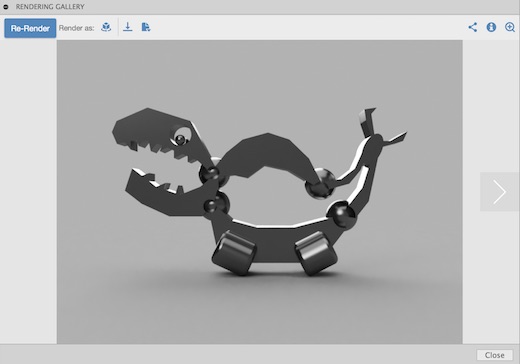
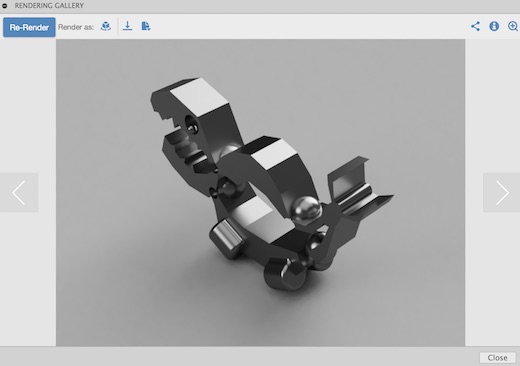
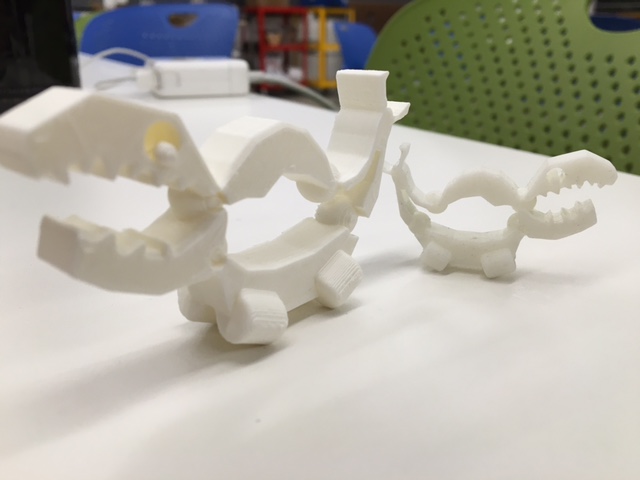
Thus far, I've printed the dinosaur twice -- once on the formlabs machine (in resin) and once on the ultimaker 2+ (in PLA). Of the two, I'd say that the resin print certainly seems to be of a much higher quality. However (!), the formlabs machine adds an obnoxious amount of support structures -- to the point that the model only looks good on one side, not the side that the supports were attached to. Supposedly, it can be sanded down, and I will try, once I locate the fine-grit sandpaper. Actually printing the models is quite trivial -- set the size (be sure to scale the print if the model is quite large), ensure that the nozzle setting is correct, and hit print.

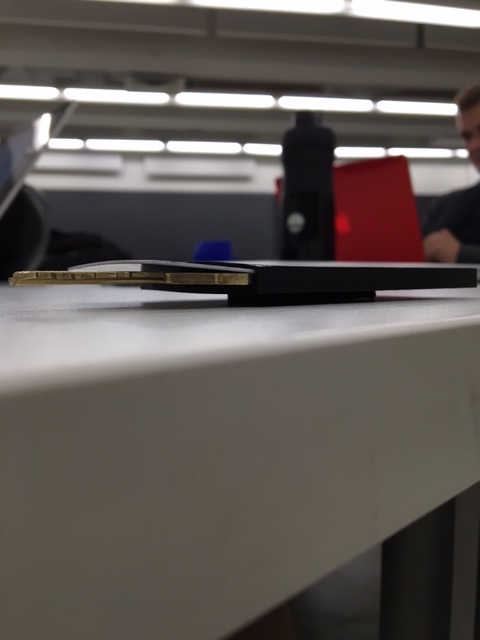
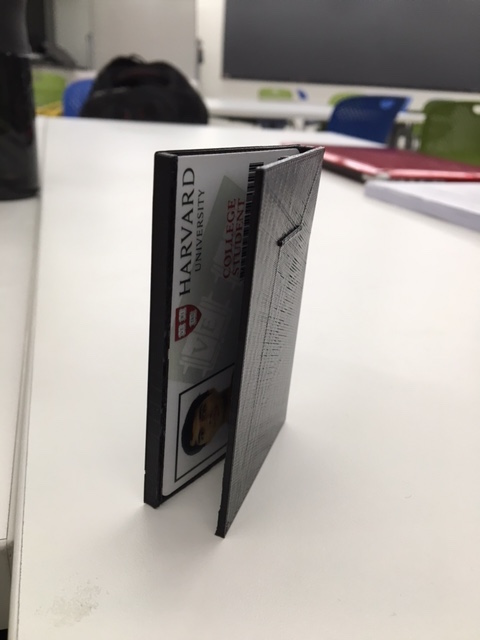
Occasionally, I have the problem of 'no pockets' when headed to the gym, or out for a run. As I always need my key and harvard ID, this often results in me taking an entire bag with me, just to hold the key and HUID. Enough(!), I decided. I set out to make a small carrying case for my HUID and my room key, with a clip, so that I could always hang my key and HUID on the waist of my pants, and never have to deal with the ridiculousness of carrying a whole bag for those two tiny items. Step one was to measure the card, to determine the overall size of the case. I settled on 88mm by 58mm, just enough size to fit the card with 1mm of space on either end (to ensure that it isn't too tight). I reset the grid in Fusion 360 (to make the measuring easier), then started sketching.
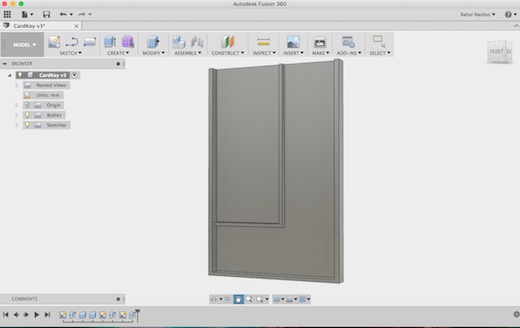
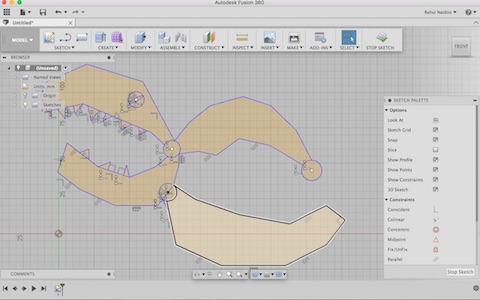
Adding a slot inside the case was somewhat difficult, just because my divider kept snapping to the grid, as opposed to the face of the case (when the divider that I was trying to add snapped to the grid, it was 'consumed' by the case, as it was smaller). After a few minutes of fiddling, I discovered that I was selecting the wrong surface to place the divider on, and that all I needed to do was select the face of the case as the base surface. After that, I added the upper layer over the entire case, and extruded my initials onto the upper layer. Creating a clip was initially more challenging than I had thought it would be, but became far easier when I adjusted my strategy. The original plan was to create a 'clip-like' shape with splines, then use pipes along the path created by the spline to form the clip. There were two major problems with this plan, however: one, splines are impossible to manipulate (or, at least, I don't yet know how), and two, I could not figure out how to flatten the pipe against the surface of the case, such that it was a clip, and not just a pipe attached to the surface of the case for some reason. Creating the clip became far easier when I abandoned the splines and simply used rectangles, along with one pipe, to fit a (much less rounded) clip to the back of the case. See below for the spline clip, and the clip I used.
Once that was done, it was time to render, and print.
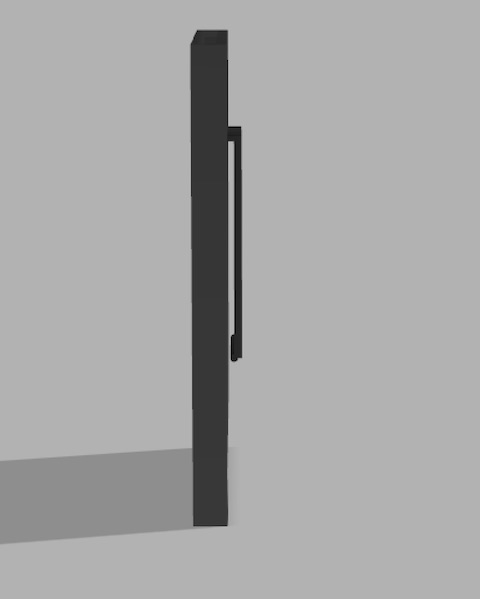
The print revealed three serious design problems -- all will be taken into account before designing something practical again: 1. Despite leaving just over a millilmeter of buffer on every edge, the case was still way too snug. I could not insert the HUID reliably, or the key. I'm unsure of exactly how much buffer is required, but I guess this is why 3D printers exist -- rapid prototyping, trial and error. 2. I was foiled by an old nemesis of mine -- gravity. The case was printed with the back face (clip side) facing upwards and the front face (initials) facing the build place. The problem, however, came from the interior divider that was mounted on the inside of the back face. The divider was designed to stop short of the inside of the front face (it did not cross the entire interior) -- this was designed so as to limit the movement of a (relatively) thick key, but still allow the thin HUID to enter the case. Because the case printed with the back face facing upwards, the divider dropped before the material could fully cool/harden, touching the inside of the front face and preventing the HUID from being inserted. I did manage to jam the HUID in partially eventually, but that was certainly not the planned design. 3. Above problems aside, why was I even designing such a stupid case?! 3D Printing the case showed me just how big, clunky and daft a plastic rectangle truly is -- I'd never actually want to carry that around. Just holding the plastic rectangle showed me that, even if the above two problems hadn't occurred, the case was still beyond use. If I were to try to design a fix for the card/key problem in the future, I wouldn't design a case that covers the entire HUID -- any case that does is immediately too big. It needs to be a small, clever design, that hooks a card, a key, and then hangs on the waist of your pants. Despite the problems, I documented the case. See below for pictures of the final product.

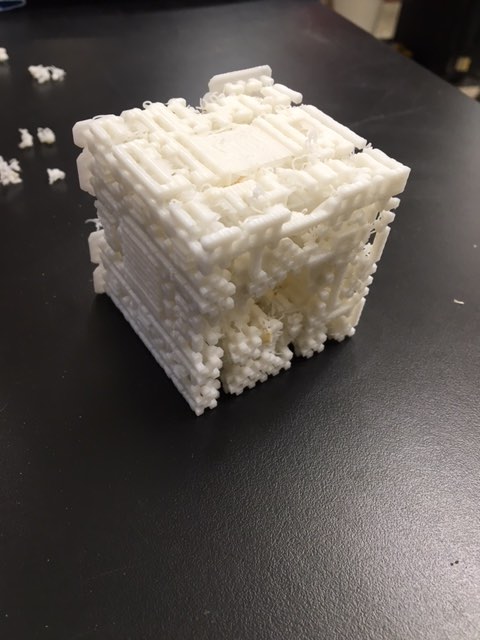
There were a few other small prints that I completed over the weekend (at night, when the machines weren't busy. The first, was a fractal -- primarily for a friend. Two comments: one, you can't print fractals, two, you REALLY can't print fractals. Despite the machine's best efforts, the detail was not captured, and the overall structure was compromised by supports (removing the supports was almost impossible).