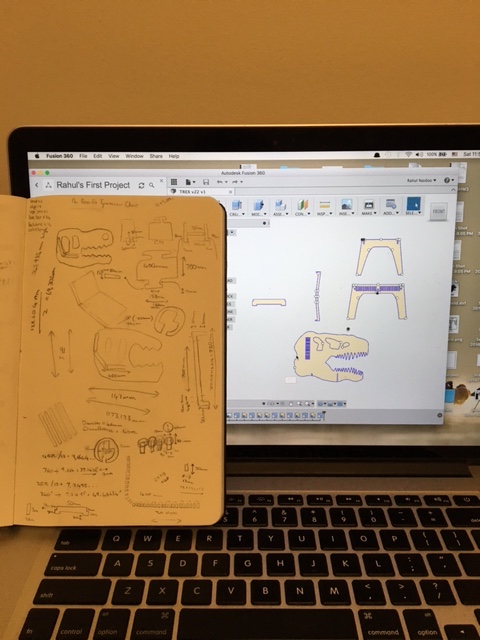
For this week's assignment, I returned to Fusion 360, following a great experience with the software in the 3D printing week. Fusion 360 did not shine this time. Altogether, it was sufficient, but there were times where it was buggy (force exiting after I measured something -- 4 times!) and other times where it lacked the functionality that I was looking for. For example, much to my dismay, Fusion 360 does not have a 'combine' function, for joining multiple sketch lines into a single sketch. This made manipulating sketches a nightmare, and even more problematically, the eventual number of elements in my sketch space caused serious lag. I had to force quit a few times, following working with a piece that Fusion insisted was over 2000 (!) pieces.
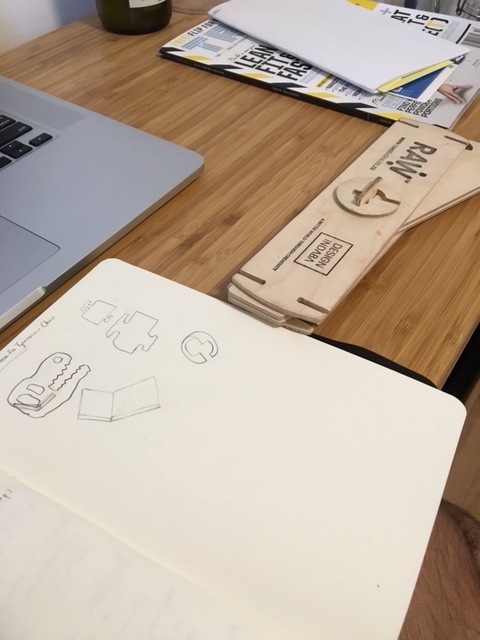
The creative process was quite straightforward -- having looked at the boards, I quickly determined that the only way to make something big with the materials provided was to design a press-fit (4x4 is quite small, actually). So, I immediately went to the only quality press-fit item that I own (the folded laptop stand in the image) to steal great ideas for joints and such. Then, I started sketching. Naturally, my first sketch looked somewhat like a dinosaur (I mean... what else is 'big'?), and thus, I had no choice but to pursue the idea further -- as Neil said, 'shoot first, then aim'. Eventually, 'dinosaur' morphed into 'dinosaur chair', as some quick google searches revealed an abundance of dinosaur press-fits, but no dinosaur chairs.

The design for the dinosaur change did change a lot over time. Speaking of time, I feel the need to mention this from the outset -- drawing 5 shapes for the dinosaur chair took 12hrs!!! Maybe I'm woefully incompetent and should cease CADing for good (probably this), or maybe I should have clarified my design further before beginning the CAD process (also probably this), but I'm not convinced that there is a world wherein it's reasonable to spend 12hrs designing a basic dinosaur chair... or maybe that's naiveté (also also probably this). The design changes were as follows:
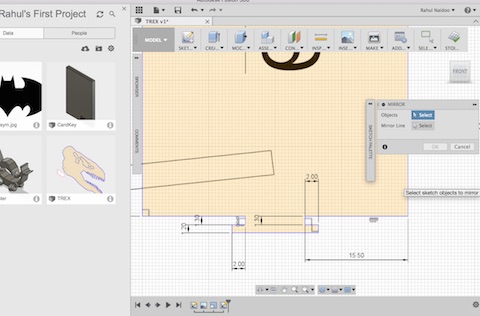
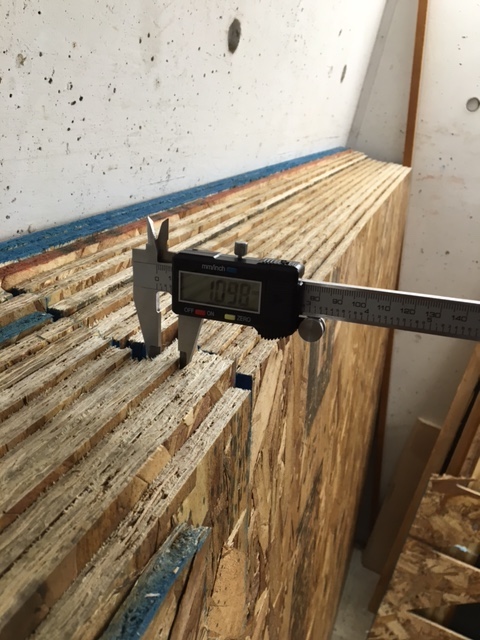
Clarify your design before you start CADing. Making parts that end up being scrapped is heartbreaking -- particularly when they took over an hour to get 'just right'. PARAMETRIC. Seriously. Make your designs PARAMETRIC. This is quite easy to learn, and the time saved is far greater than the time that you may spend leanrning how to design parametrically. I decided to forego learning about parametric design on Fusion 360 and paid dearly for my insolence. Not only did I have to redesign many parts, but I also had to resize my entire piece upon discovering that the boards aren't as thick as I initially thought (my notches were 11% too big, and, because I didn't design parametrically, the only reasonable way to resize all of the notches was to make the entire structure 11% smaller). On that note, also, don't spend 30mins mirroring rectangles when you could just use the 'rectangular pattern' function. It's not as scary as it looks, and mirroring objects over and over again may end up creating over 2361 objects (no reason why that number is so specific...) and then make Fusion crash... 4 times. Pictured below is the moment where I discovered that my notches were too big... trauma.
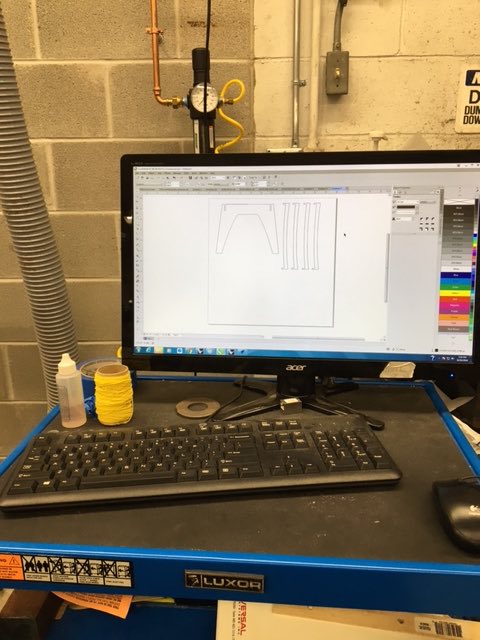
Exporting the .dxf files from Fusion seems difficult, but is actually quite straightforward IF you have a guru with you to walk you through every step. In the likely event that you don't have that: 1) Select each sketch individually from the menu, right-click, select 'save as dxf'. 2) Put all sketches into a single folder (I like to be organized). 3) Export them into CorelDraw (or some other vector program). 4) Weld and combine all of the sketches so that they are closed lines, not segments (apparently the shopbot struggles to read segments).
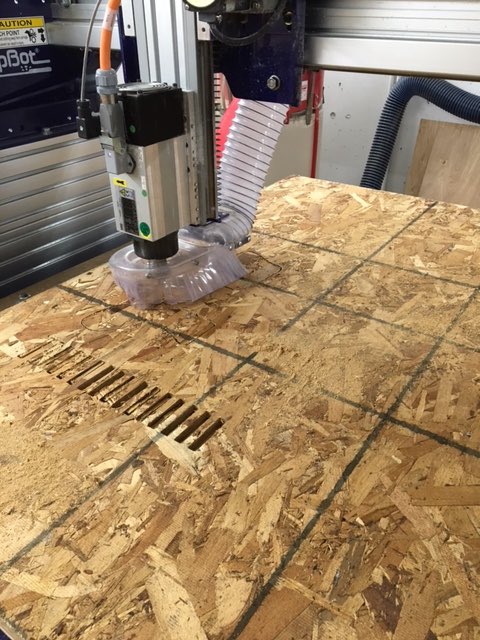
The cutting process is straightforward, provided that your files converted cleanly. I had an incredibly easy time cutting out my first sheet, but then spent over an hour trying to make the second work. dxfs don't export very nicely. Even after editiing in CorelDraw, I had some vectors that Vcarve (Shopbot software) insisted were open. No amount of welding or combining in CorelDraw helped. Eventually, Jonathan and Glenn (TAs) managed to figure out and fix the problems. I had some lines with 'double curves' (meaning that Fusion had exported two lines in the same place, for some reason), and so the extra curves were reading as open (sensibly, they weren't connected to anything). Also, one of my objects had exported as 3D, even though it looked decidedly 2D to me. The fix was to import my files into Rhino, delete extra curves (that Rhino helpfully points out), then run Make2D and Join. Pictured below: the CorelDraw screen that I spent far too long staring at.
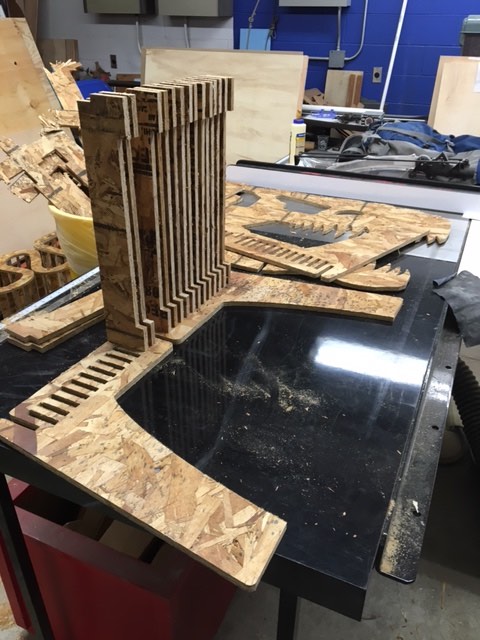
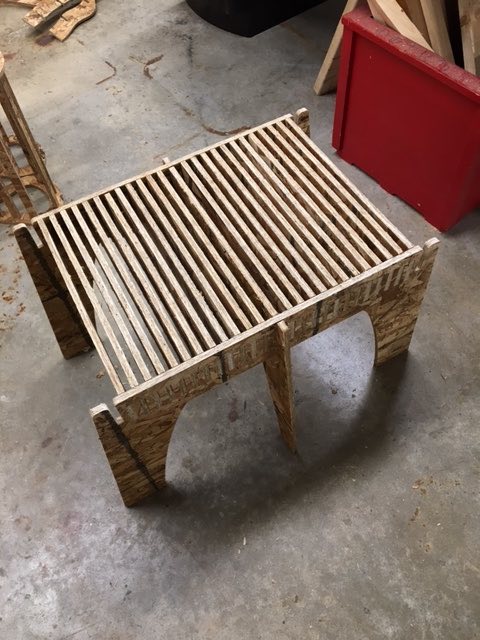
Once the pieces were cutting smoothly, the final matter to address was that of assembly. As I had resized the notches, they were a perfect fit... almost too perfect. Fitting the base bars into the leg structure was VERY difficult. Some of the pieces could be forced in, while others refused to go in at all (due to slight discrepancies in the thickness of the boards). When a piece wouldn't insert, I sanded it for about 20 seconds, then tried again. Eventually, the base was assembled -- following much sanding, and an assist from a rubber mallet.
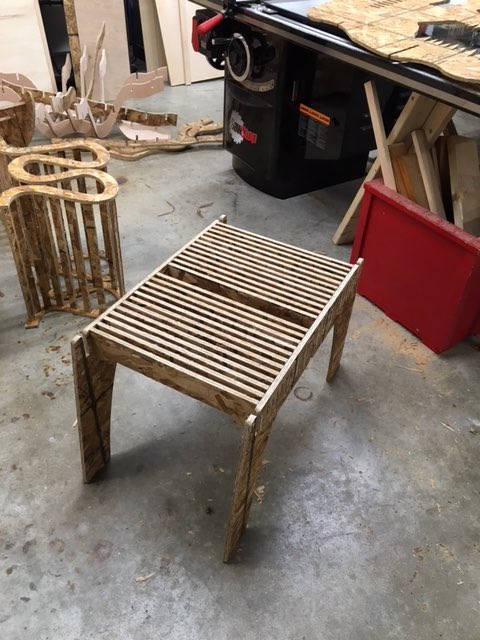
Then, the second leg structure was added (and, I must add, the piece became surprisingly sturdy with the addition of the second leg structure)
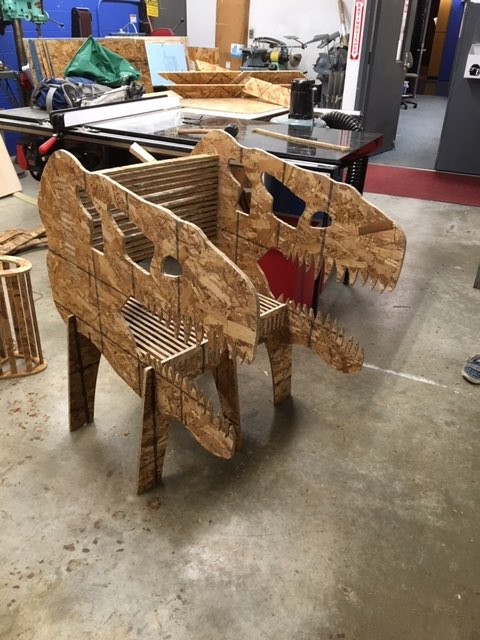
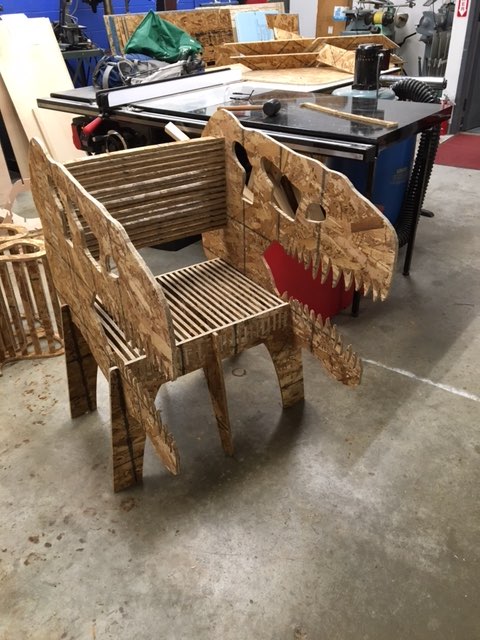
Finally, the TREX heads and a back rest were inserted.

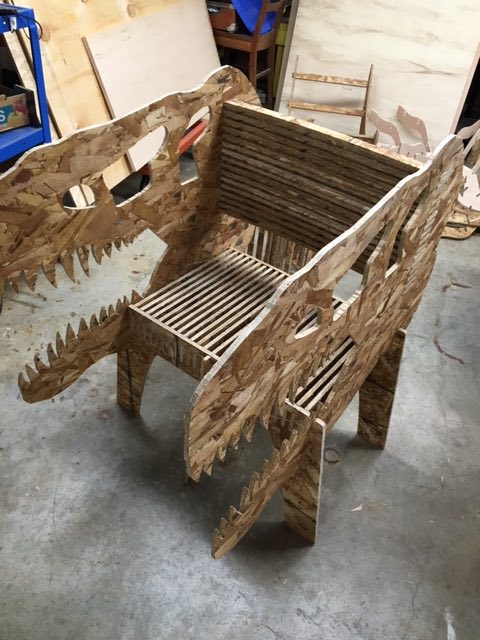
DINOSAUR CHAIR. That is all.