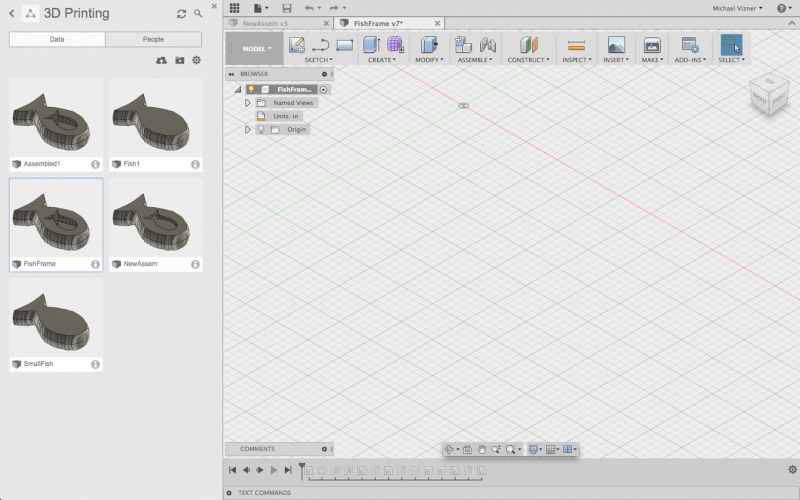
3D Printing & Scanning
This week’s home work was to test the limitations of a 3D printer (as a group), 3D print something that couldn’t be subtractively manufactured, and make a 3D scan of something.
Testing the limits of
the Ultimaker
While Glen was giving a run down of how to use the 3D printers we decided to print out the test object. I think he scaled it down but we don’t remember which made it impossible to test it against other printers.
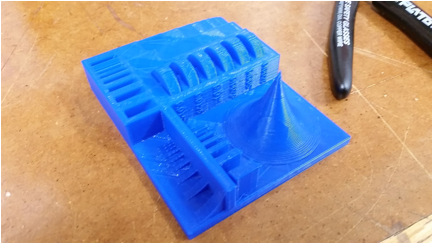
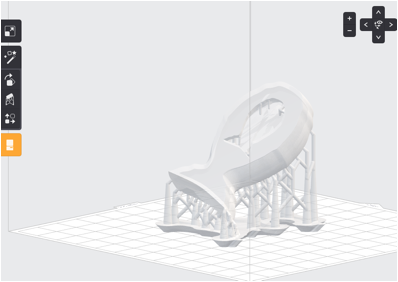
I was impressed by the ultimakers
ability to make a point on the cone. Additionally its ability
to make the curves closest to us in the image above. I had used ultimaker in the past and the one in my lab had a few
months of needing a lot of maintenance. This left me with a bad impression of
the machine. This test print has changed
my opinion of the ultimaker.
3D Print something
that can’t be subtractively manufactured.
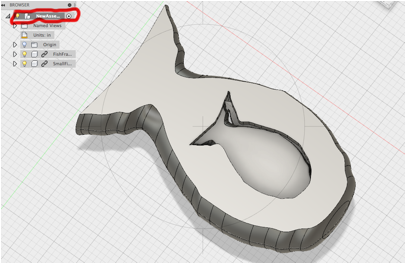
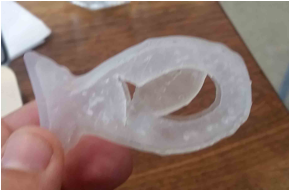
Fish inside a fish looked at through a fish!
For this project I wanted to make something inside of something else because I found it to be an interesting challenge. I decided to make a fish inside a fish. 1) I thought it was kind of funny, 2) it occurs in nature—I have a memory as a teenager of gutting a fish and finding an undigested smaller fish in its stomach, fascinating! 3) once I decided to cut a fish shaped hole in the side of the project the absurdist in my was amused to say “I made a fish inside a fish that you look a through a fish” for homework.
Making the model.
I began the process by drawing a fish with my Wacom in order to continue thinking about how a young child might be able to engage in these processes.
Steps to making the fish:
1) Draw fish in illustrator, save as .svg, import to Fusion360
2) Revolve drawing
3) Create work-planes on either side of the revolve and slice upwards
4) Save, make a new part and import work so far at 50% scale this will be the small fish
5) Return to original and split the resulting body in half
6) Shell both halves
7) Reimport original fish drawing at 45% on one of the faces of the body. Use this shape to cut through the entire body.
8) Make a new file import both the shell and the small fish. Place the small fish inside
9)
Right
click on the top of the hierarchy and export as .stl
for printing
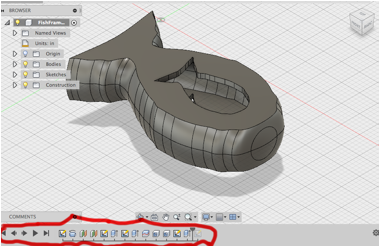
This week I made a new connection within fusion360. As past assignments in this class have shown I am tring to figure out the relationship between inventor’s UI and Fusion. The hierarchical structure on the left side does not show the operations done on sketches, bodies, etc. It used to do this in inventor. Now that info is stored on the bottom of the screen in a timeline (with a cool play button that allowed me to make the .gif above).
Printing the model
I have used the hobbyist/education FDM printers (Ultimaker & Makerbot) and wanted to try using the FormLabs SLA printer to learn something new. I also did not have much faith that I would be able to suspend the inside fish and then remove the supports with the FDM style printer.
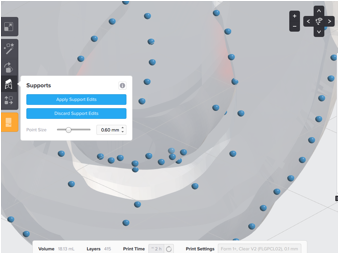
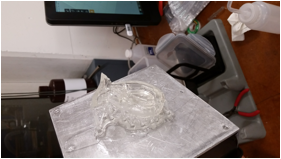
I imported the model into PreForm, Formlabs slicing engine, and used their algorithm to orient and place supports.
I prepared the printer by making sure the resin tank was clear of debris.
Then sent the file to print.


Fail!!!!!
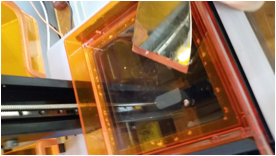
In analyzing the fail I realized that the small fish must have dislodged during the print and fallen through the back of the shell. Ruining the layer and creating debris in the path of the laser which resulted in a pile of semi-cured resin in the tank that I had to clean out. This is the equivalent of the spider’s nest an FDM printer would produce if a print failed.
I realized I needed better prepare the print. Dixon explained to me that the SLA tries to reduce surface area between layers to optimize performance (the opposite of FDM) this is great for some applications but in this case it created an angle that was too great. I went back to PreForm and oriented my print the other way so that the bulk of the inside fish would be printed first. This is when I realized how powerful PreForm is and where I think it sets itself apart from other benchtop printers.
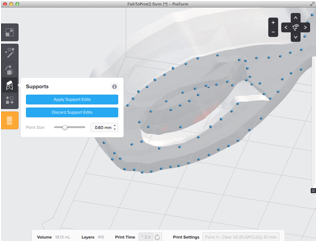
It allows you to add your own supports by clicking on the spot you want to place them. It also glows red showing you places where it thinks it might fail. This is awesome compared to Cura and MakerBot that give you very little control of where and how your supports are placed.
Below is an example of having a red space then adding a support. The blue orbs are attachment points for supports.
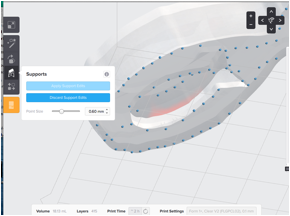
\
In order to secure my small fish I added a lot of extra supports on it’s nose (where it begins to form).
I sent it to print. Waited an hour. And… Success (In a gooey mess)!!
Next the piece is knocked off into an alcohol bath to remove excess resin. After that it took a while to cut off all of the supports, especially the ones inside the shell. I felt a great sense of satisfaction when the inside fish became free and started floating about. Mission accomplished!! Once the piece is ready it needs to cure. We have a home made UV chamber that speeds up the process but it can also be left in the window.
(of course I found a way to cure fish for my homework! hahahahahaha!!)
A NOTE ABOUT MATERIAL
SAFETY!!!
It is not safe to touch the uncured resin with your bare
hands!!!
END NOTE!!!
Here is the finished product:
Attempted with FDM
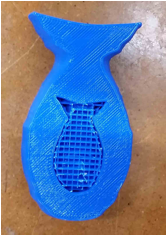
For comparison and to try the other machine that I had not
experienced I tried to print the same thing in the Sindoh
3DWOX. I was very impressed with the UI
on the machine and the ease of changing filament. It is all
modularized and the used just interacts with the touch screen on the
machine. It was able to print my design
but there is so much support structure it would take forever (if even possible
to remove).
3D Scanning
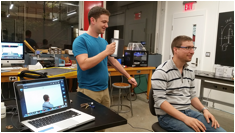
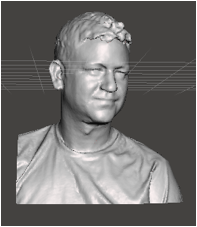
For this part I used the Sense 3D scanner. It was surprisingly easy to use. I found the welcome screen of their software a funny comment on today’s world. That is there is special function for scanning humans.
Here is a picture of me scanning Yuval and the result of Yuval scanning me.
I am now a bit too preoccupied thinking about all the mediums I could produce myself in. To name a few.
· Butter
· Chocolate
· Wood
· Plastic
· Tin-Bismuth
Things I learned / You should look out for!
· The ultimaker has impressive tolerances (when it works!).
· To save an entire file as a .stl you have to click on the top of the hierarchy on the left side.
· Operations on sketches & bodies are shown on the bottom of the screen in fusion360.
· When SLA fails it leaves a blob of semi-cured resin
· SLA tries to reduce surface area between layers to optimize performance (the opposite of FDM)
· The place your own support feature of PreForm is AWESOME!!!
·
THE FORMLABS RESIN IS NOT SAFE TO HANDEL WITH BARE HANDS!!
· 3DWOX is very user friendly
· FDM is not appropriate for this project (unless I design supports in my model)
· 3D Scanning is a bit finicky but all in all cool (and promotes narcissism)