Computer Controlled Machining
“Narcissus weeps to find that his image does not return his love”
-Mason Cooley
The assignment for this week was to make something big using large format machining. I knew from the beginning that this week would be particularly challenging, time wise, because I was traveling for the FabLearn conference (http://fablearn.stanford.edu/conferences/stanford2016/) where I was, fittingly, presenting on a large scale toy I have been working on.
Idea Generation
I started thinking about large things I might want to make:
· Some piece of functional furniture
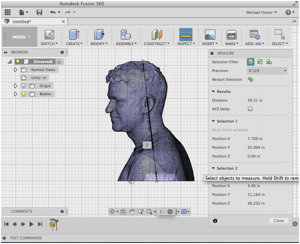
· A sliced bust of myself from the 3D scan
· A globe in slices
· A four faced figure from Ezekiels vision
The idea of cutting out my own image and having a 3 foot version of myself was unsettling, which led me to the idea of the globe. The plan was to make a globe in fusion360 with the continents either indented or raised. I would then put the slices about an access so that they could spin freely which would turn the whole thing into a puzzle.
Modeling
This week turned into a lot of messing around with new modeling techniques and mesh manipulating software.
I didn’t know how to sketch on a curved surface so with some googling I found this helpful video (https://www.youtube.com/watch?v=CUk3sHRYjQM). Using this technique I was able to get a shape on to a sphere, but couldn’t figure out how to make an extrusion of it. That killed this idea.
The next Idea was inspired by Ezekiel’s vision of a four faced figure. It has the face of an angel, an ox, a lion, and an eagle. Pretty awesome! My plan was to download .stls of the animals and use the 3D scan of myself for the human form (not trying to make any angelic claims just trying to get my HW done). Turns out combining meshes is harder than I thought.
I started with MeshLab. Their point based align tool allows you to
scale the objects easily but to get them to line up was really difficult. I
think if I was trying to put similar meshes on top of each other it would have
been easier. 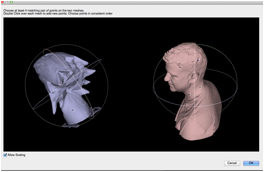

When I tried to do this last week the eagle head wouldn’t line up at all. I went to reproduce it for this post and I got the behavior I wanted…..
After struggling with MeshLab I tried moving to fusion. Fusion would not let me scale the meshes other than selecting what unit they were, and would only let me place them when I first put them in the file, not again after the initial place. This became really frustrating. I knew I wanted the whole thing to be about 3 feet so I used the inspect tool in fusion to find the size of the stl then put it in mesh mixer and used their scale tool resaved and put it back into fusion. It was then really challenging to place the objects how I wanted them so I gave up on this idea.
The Maze.
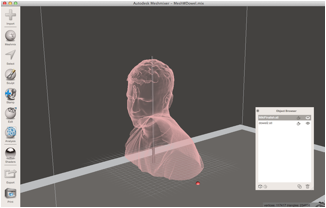
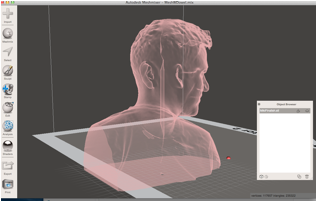
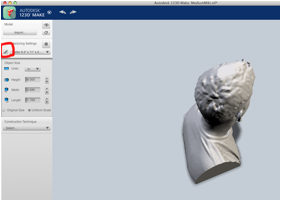
I got back to Boston on Tuesday and still did not have a model to work from. I had just finished my Stats midterm and was getting ready to go to the shop when a friend gave me the idea to build a modular maze that a marble or bearing could run through. I liked this idea a lot and thought about it on the train. When I arrived at the lab the idea of starting a new design from the beginning given the time seemed unreasonable and so, I was faced with the only design I had. My own bust…
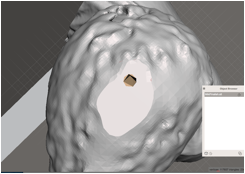
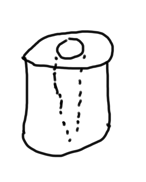
Punching a hole through the model.
I thought that I would be able to make a cylinder in fusion
and then subtract it from the mesh. Turns out you can’t do this. Logan
recommended I try MeshMixer. This required me to make a cylinder in fusion export it as an .stl then once I had two meshed mesh mixer would allow me to
CSG subtract them.
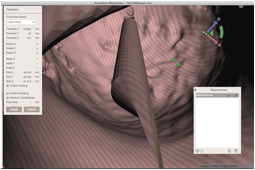
Here you can see the two .stls lined up. Looks just right.
Once I did the operation the cylinder no longer remained a cylinder. I did a lot of inspecting but couldn’t figure out what to do.
I spoke to Rob and he told me I could use 123dMake, which I was planning on using for the slicing to put a dowel through my drawing, THAT’S THE WHOLE POINT!!
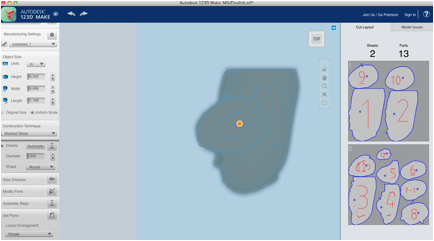
The Final Design
The final design was to take the bust of myself, slice it, stack the slices on a dowel and let them spin freely so that it would be a puzzle of sorts. I wanted it to be 3’ tall (bigger than life size) to fit the requirement of big. I knew this would be too many slices so I decided to space the slices every 3” this reduced the number of necessary slices from 51 to 12. In order to space it I would need collars on the dowel to hold the slices in place. Here is the general idea.
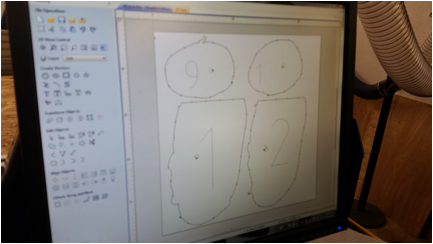
Preparing the slices.
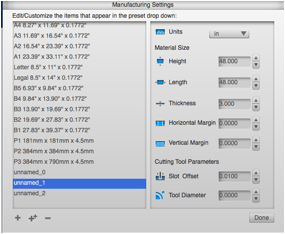
· I put the .stl in 123DMake,
· Scaled it
· Made a custom material 4’x4’x3” (for this I lied to the computer. The plan was to space the roughly ½” OSB 2.5” so I told the computer my material was 3” thick. If I made this thing Solid it would be wayyy to heavy.)
· Put a dowel through it
· Exported the drawings
Cutting and collars
I measured the dowel and it had variable thickness from .936-.941. I knew that I would want two size holes. One for the collars and one for the sliced pieces. I set up a cut on the small shop bot to cut out the following sizes from 2x4s.
1) .94”
2) .945”
3) .95”
4) .97”
5) .99”
6) 1”
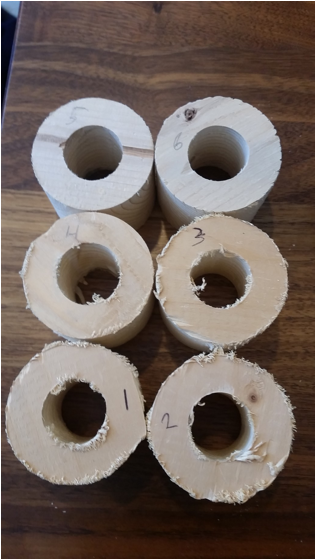
I decided to go with .97” for the collars and 1” for the slices
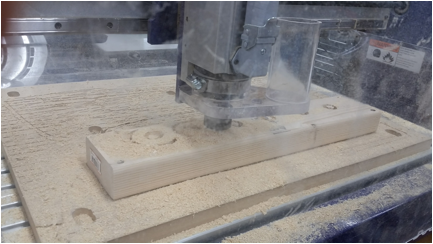
I set up to cut out a bunch of the collars from a 2x4 I figured out I could cut six at once.
For some reason they all fit on one way but not the other. Something happened such that the hole tapered in…
Something got misaligned…
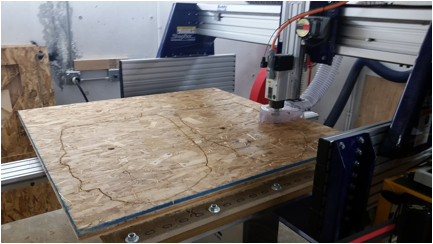
I then set up to cut out the large shapes. For this one I put tabs in because I didn’t want the large shapes to get disloged.
Set Zeros and cut away!
It became clear to me around 10pm that I would not finish the assembly L. After all the pieces were cut out and tabs removed, I stacked the pieces using the many collar and odds and end I found around the shop to get an idea of what it would all look like once it was assembled.
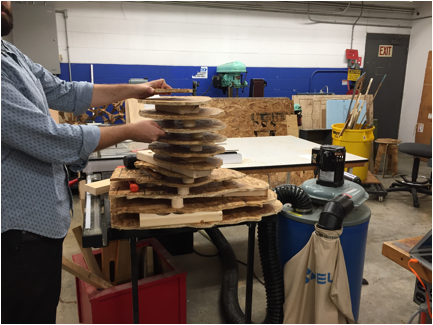

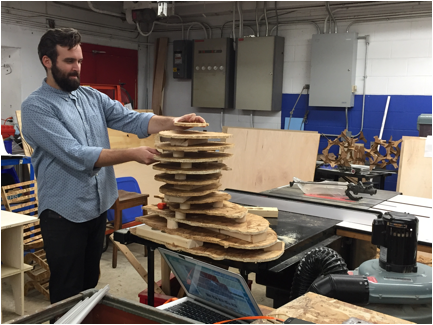
SPECIAL THANKS TO JON!!!! For staying late, and playing late night Jenga with slices of my head.