Molding and Casting
The White Shell
This week’s assignment is to make a mold and make a cast in that mold.
Ideation:
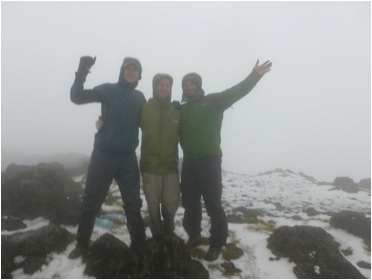
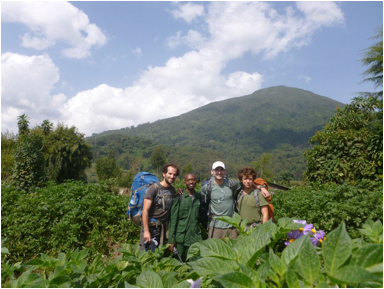
On March 19th 2012 I set out to climb mount Karasimbi with my friends Nathan and Trevor. This was my first high altitude mountain (4507m).
Karasimbi is known as the “white shell” and so I thought it would make for an appropriate goal for this weeks assignment seeing as drystone and hydrostone come out white and kind of shell like.
Generating the model:
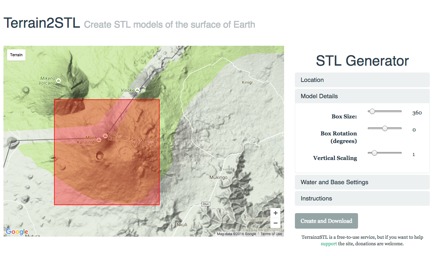
I began the processes by generating a .stl from the website http://jthatch.com/Terrain2STL/ . I zoomed in on Rwanda and found the mountain. I put it in the bounding box and clicked create and download.
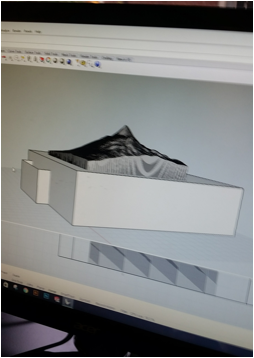
Glen helped me chop the bottom off the model off in Rhino, I need to find a software to manage meshes that works for me. I have had some success with mesh mixer and meshlab but I am not yet proficient
Milling in machinable
wax:
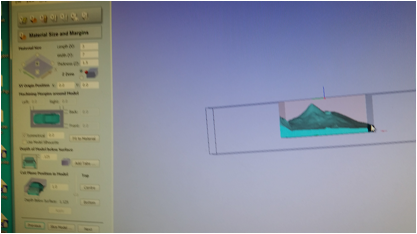
I opened partwoks3D the shopbots 3Dtoolpath software, and imported the model
 .
.
I fed the computer the size of my wax block and it placed my model in the center. I wanted it to be to one side, both to conserve material and to account for zeroing. I had very little margin for error on the walls.
Danielle recommended lying to the computer. So I told it the block was actually smaller than it was, and it worked!
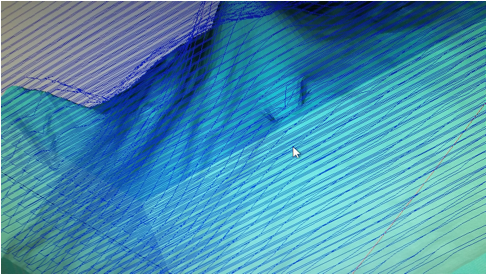
I then created the rough tool
path, I was curios how the machine would handle the crater next to the peak. I
used an 1/8” end mill for the rough cut and wasn’t sure it would fit in. Here
you can see it was planning to start it the one shaped V line going in.
Here is the result:
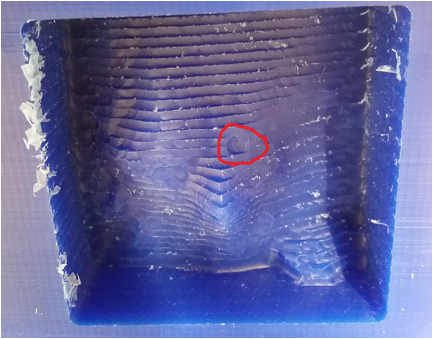
The red circle shows the machine’s first pass at the crater.
I prepared the smooth cut with the 1/8” ball nose in two directions and it showed a much finer resolution on the crater.
Results:
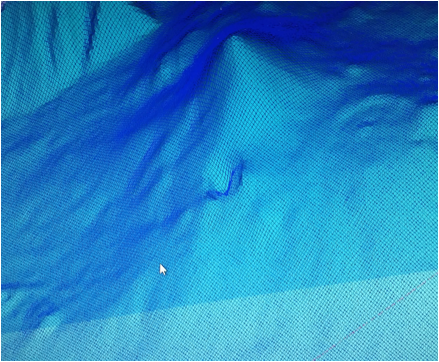
The crater came out with nice detail!
I needed a channel
around my model for the oomoo to pour into to create the walls of my mold. I
used the cut out tool path option and a ¼” end mill. In the cut out
option it allows you to leave material so that it doesn’t cut all the way
through. I left ¼” .
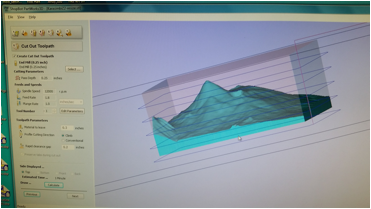
What I did not specify yet is that I used a downcut bit on
the first pass. If you look at the
picture above this one you can see the wax shaving stuck in the channel cut out
by the mill. It was packed in there pretty hard and I could not get it out. I
switched the bit for a ¼”upcut did another pass and it removed the dust.
Making the Mold:
For the mold I used Oomoo supplied for us in the lab. I filled my wax mold with water to figure out what volume of Ooomoo I would need, ~ 4oz. Then I mixed equal parts of the compounds. I put the mixture in the vacuum chamber to pull out as much of the bubbles as I could, however it seemed like it was making more bubbles…
There are no pictures of this part because it is messy…
I poured the oomoo into the wax positive of the mountain trying best to not let the oomoo fold over itself and pouring a thin bead to pop bubbles as they come over the edge of the container. This process is much easier to write about then do… I left the oomoo for two days.
When I returned I found it popping out of the wax positive. Either there was A LOT of air trapped or someone messed with it.
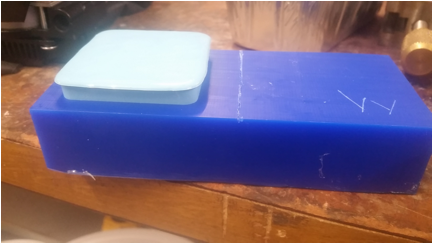
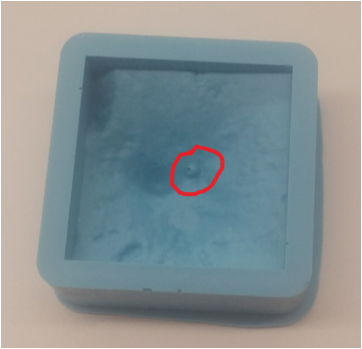
When I removed the mold it looked good with the exception of the crater. A bubble must have gotten stuck in there. I thought to fill the hole with superglue but wasn’t sure if it would hold with the silicone or maybe dislodge and get stuck in the drystone. I left it off thinking it would be easier to cut out the chunk from inside the crater.
Casting with
Drystone:
Drystone needs to be mixed with water by weight. The instructions recommend 18-20 parts water to 100 parts Drystone. I filled my mold with water to figure out how much water I would need and then weighed it. 36g of water. This means I would need between 180-200g of drystone.
Measured it out, and mixed. Remember to add powder to liquid not the reverse. The drystone mixture was interesting, as I mixed it, it seemed very brittle and crumbly, but when I let it sit it acted more like a liquid. I poured it into my mold. And let it sit overnight.
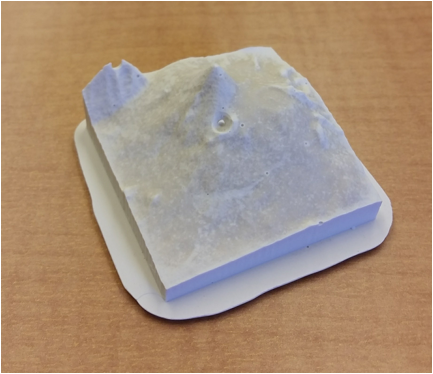
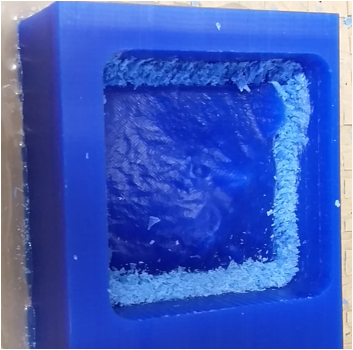
Here is the final product. You can see the result of the crater bubble in the mold. You can see the result of the bubble in the crater. Also the surface finish is dark, not sure why. I let it dry out of the mold for two days and it did not change. My only theory is that maybe I didn’t mix enough and some drystone sediment came to the bottom of the mold which is now the top of the cast?
It’s funny to see nearly 15,000ft reduced to 1.5 inches.
Things I learned/ you
should look out for:
· A little lie to the computer goes a long way
· The cut out tool path can be used for making a channel in a one piece mold
· Use and upcut bit while milling in wax.
· It’s not easy to pour oomoo without introducing air.
· Remember to add powder to liquid not the reverse.
The top of my model looks a lot like the top of Karasimbi!