Jaclyn Berry
wk11: Input Devices
Microphone
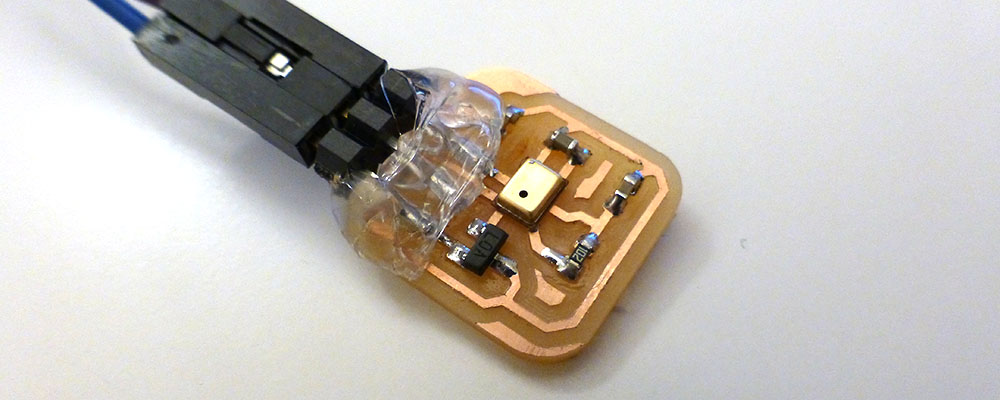
This week I decided to test out microphones. My final project robot will use microphones as "ears" and will run away from spaces with louder noises. I chose the SMD analog microphone in the fab inventory and drew up a breakout board in eagle. My board was based on Neil's example for the analog microphone. I learned he used a RC integrator circuit as a hardware filter for the sound waves. I'll need to look into this more another time.
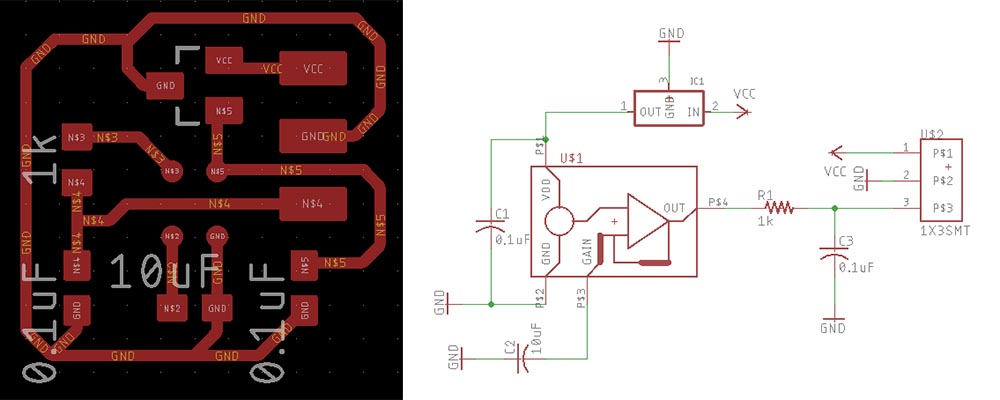
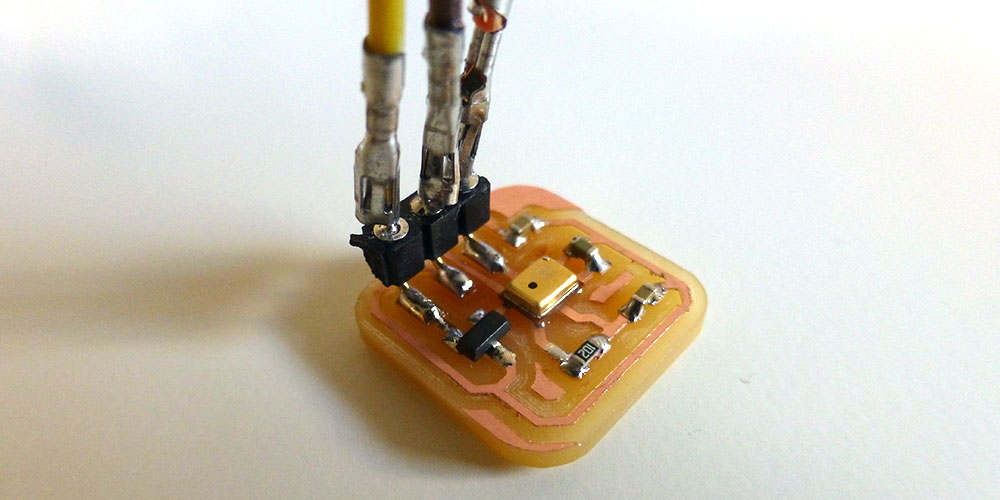
I milled out the board on the SRM-20. The job was not as clean as I would have liked because the new sacrificial layer would not stick down to the wooden block. Nevertheless, my tiny boards came out ok. I soldered the microphone first—this was my first time using a heat gun for reflow soldering. It was pretty simple!

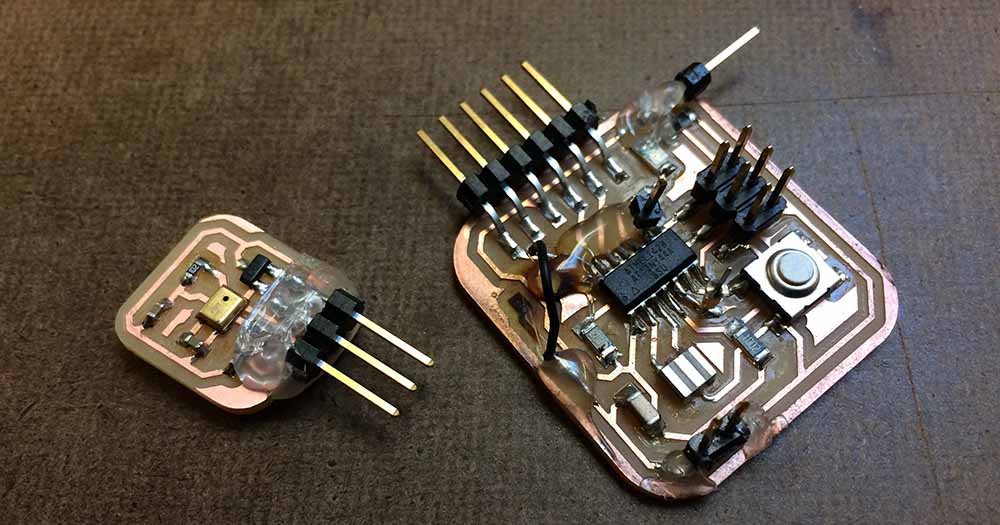
I stuffed the rest of my board with 0603 capacitors and resistors. I had trouble deciding which header pins to use. At first I tried soldering on the FTDI pins, but then changed to these fancy-looking surface mount vertical pins I found in one of the bins. As it turns out, the fancy pins were much harder to connect to... but I wouldn't know that until later.
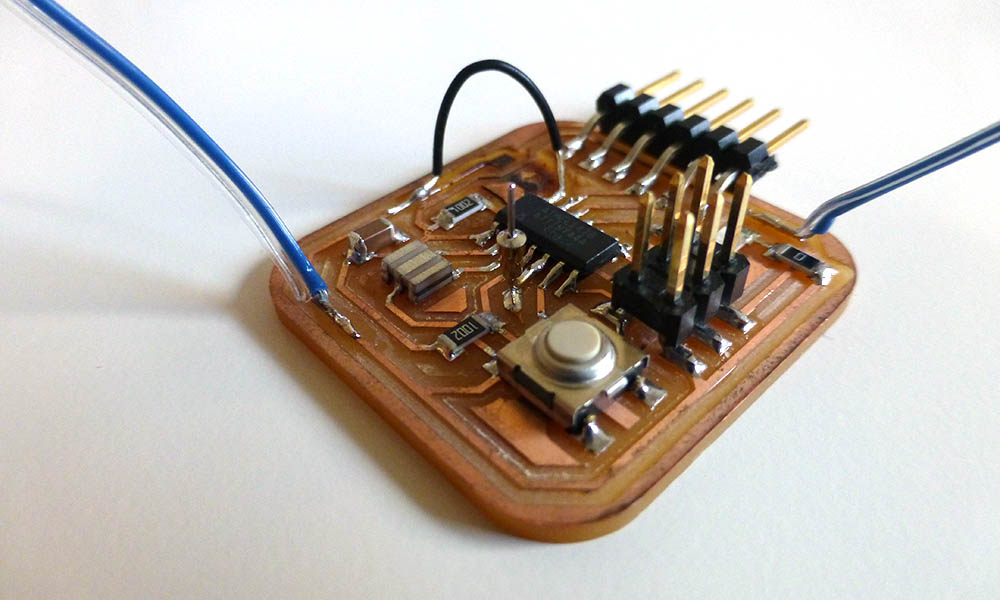
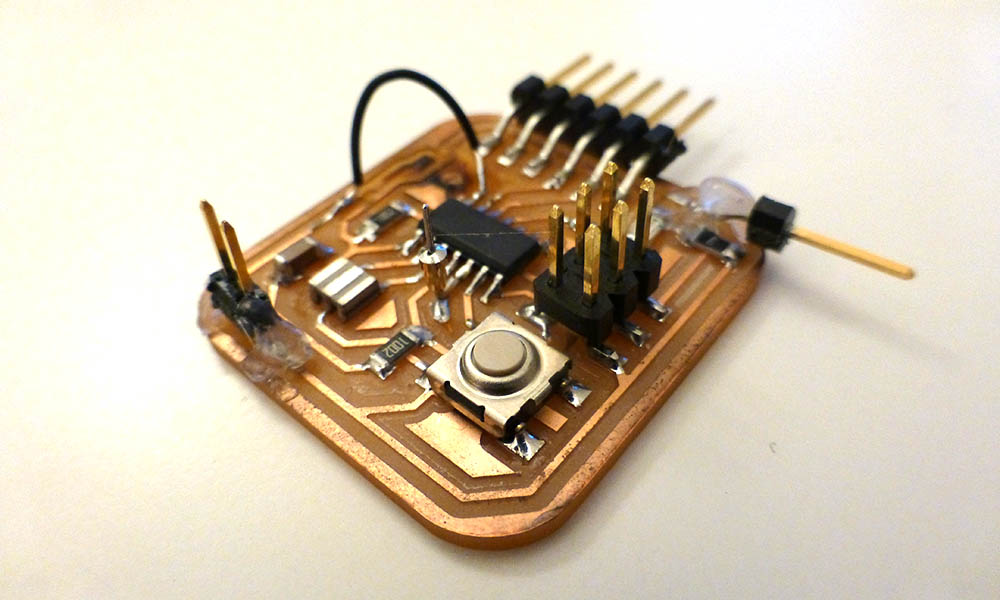
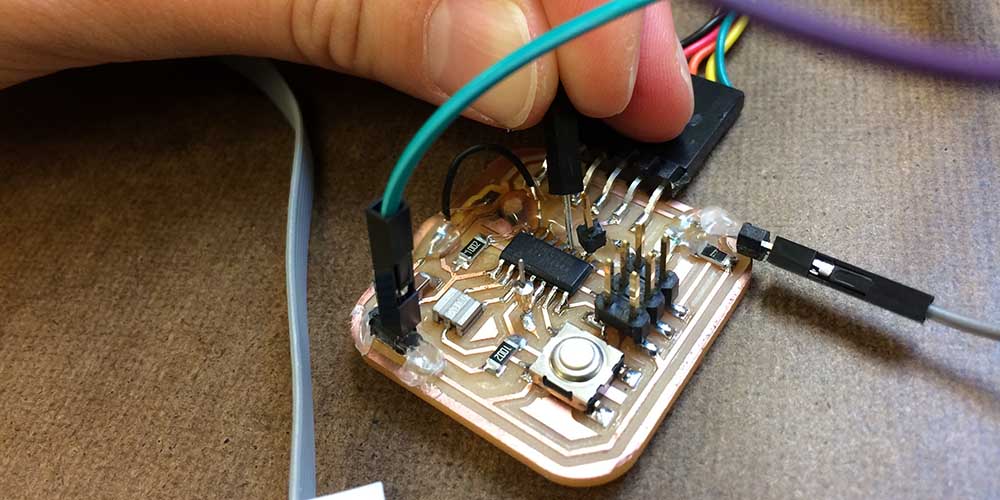
I started drawing up a board for the ATMEGA16U2, but it turns out to be much more involved than I expected. So for this week, I tried to connect the microphone to my old attiny44 board. This also ended up being very time-consuming. I performed a lot of surgery on my board to create extra breakout pins for unused pins, power and ground. I also made some jumper wires for the fancy pins on my microphone board (not ideal).
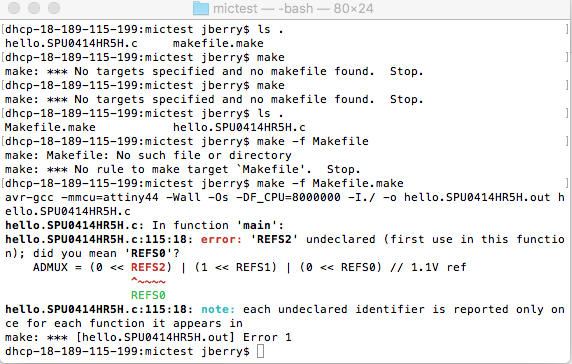
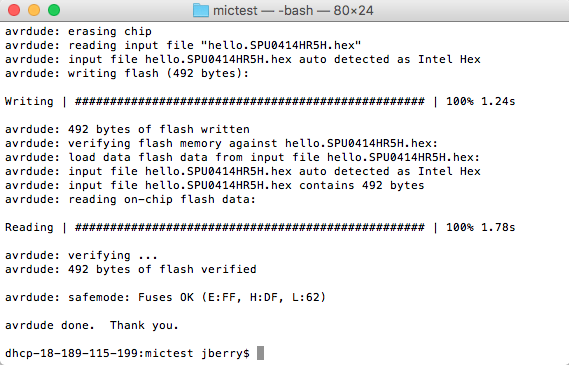
I tried flashing my board with the Neil's makefile, but it turns out the attiny45 and attiny44 are not fully compatible. I ran into several erros while trying to upload this code (different registers, etc...) And ultimately was not able to get the code to work.
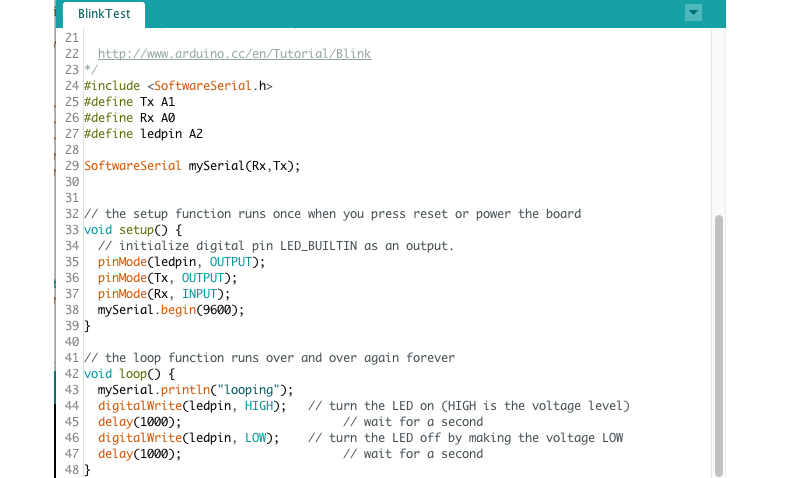
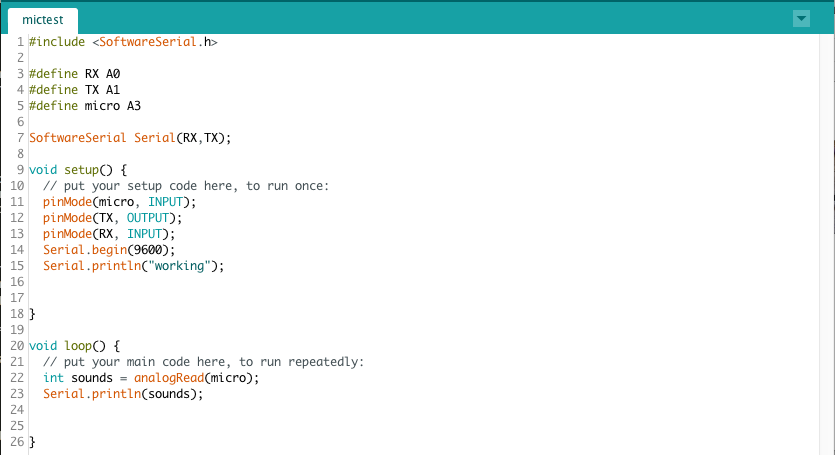
I tried writing a simple program in Arduino to interface my microphone with my attiny44. After some initial problems, I realized that the attiny cannot use Serial directly in the Arduino IDE, instead I had to use SoftwareSerial. It took me a few hours to remember how to do this properly, but eventually I got my attiny talking to the serial port.
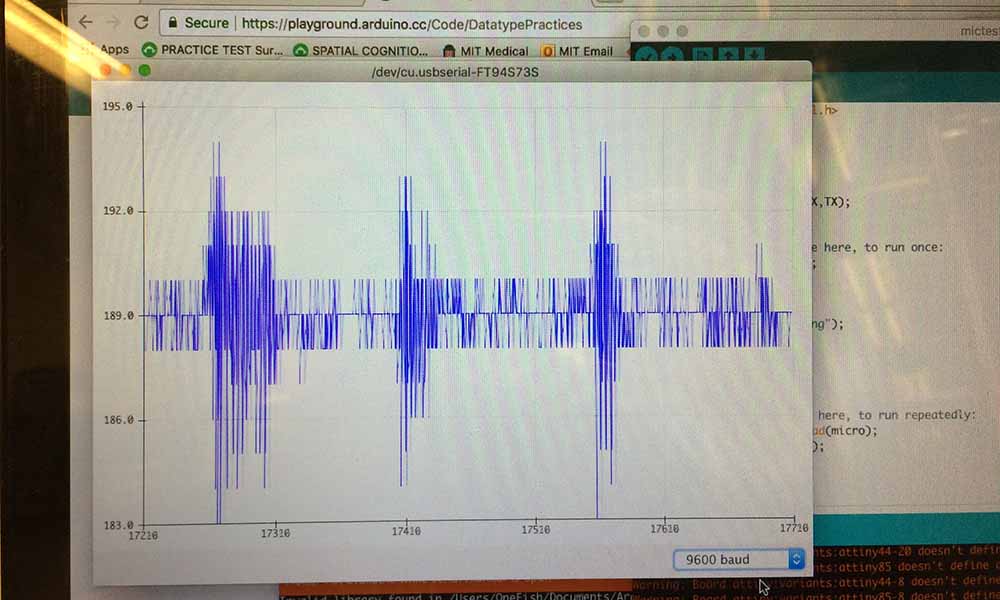
I still hadn't managed to get my microphone talking to the microcontroller. I wasn't sure if it was my lousy connection to my attiny or something else, so I tested my breakout board with an Arduino UNO to see if it was even working. After a bit of fiddling (aka uncrossing my wires) I got the microphone working and displaying on the serial plotter in Arduino.
At this point, the fancy pins were really a pain in the neck, so I did a bit more surgery on my boards for easier breakout pins.
Unfortunately, after so much surgery the traces started falling apart and off the board. So, hot glue to the rescue!
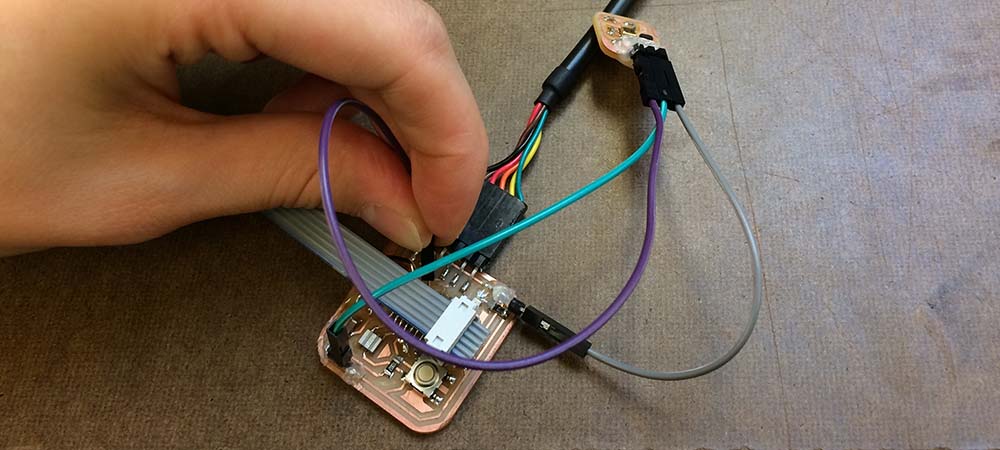
My microphone board was still not talking to my attiny. I checked the attiny datasheet again, and found out that the B pins are only digital pins, they cannot read analog signals. So I had to connect my microphone to an available A PIN. I managed to solder a header pin to what looked like an available A pin, but it turned out to be SCK. So, almost at the point of despair, I decided to just use a jumper wire to probe a pin on the attiny.
And it finally worked! Microphone talkig to Attiny44 talking to the serial port!
I think it's the end for this attiny board though... Good thing I have a 16U2 in progress.
How to Make (Almost) Everything | Fall 2017