Jaclyn Berry
w4: 3D Scanning and Printing
Test 3D Printer
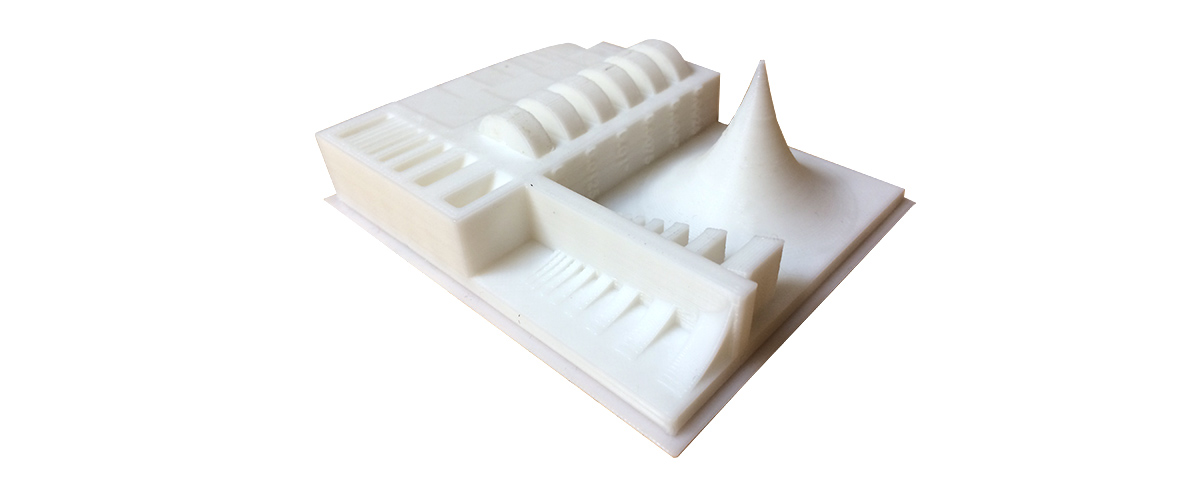
Before this class, the most experience I had with 3D printing was making small toys with a Printrbot Simple Metal at home. I wanted to use this assignment to try out new machines and test the limitations of this fabrication method.
I started this week's assignment by testing the capabilities of the 3dwox printer with my section. The test print was surprisingly large and took over 6 hours to complete on the easy settings. We decided to use the easy settings as a baseline for future prints. I was pretty skeptical of the print-in-place wheels. As it turns out, the resolution of the printer was great, but the wheels were completely fused to the rest of the print.
Soluble Support
I wanted to try printing a nested speherical ornament. I understood that a nested ornament would require some kind of dissolvable support material. Jenn and Paloma pointed me to the ABS printer that uses dissolvable support. The only limitation was that the object had to be fairly small because the materials were very expensive.
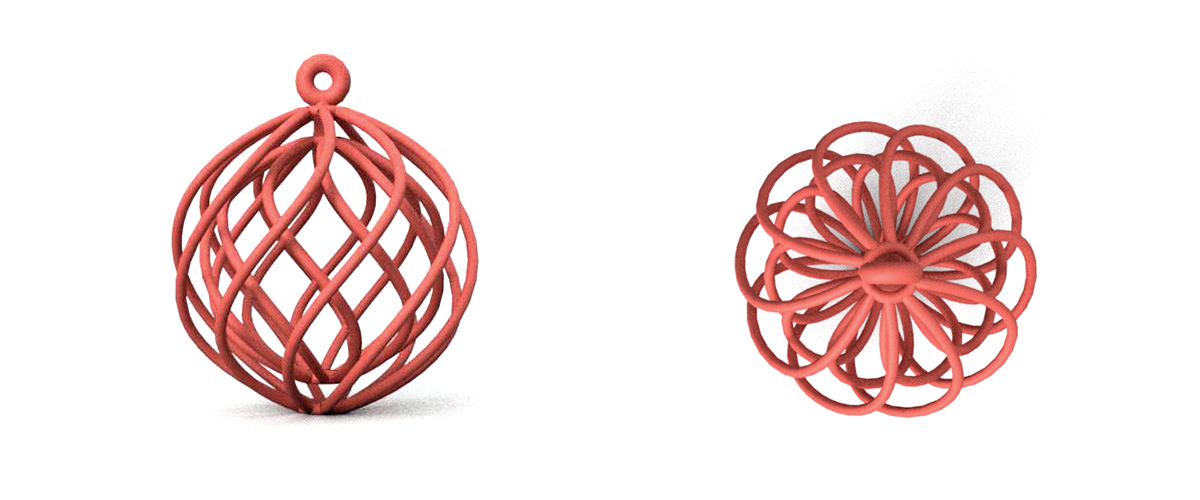
I designed my ornament in grasshopper (something I have been trying to do more lately) and sent it out to print on Thursday afternoon. The first print failed because there was not enough support and the geometry was very fragile.
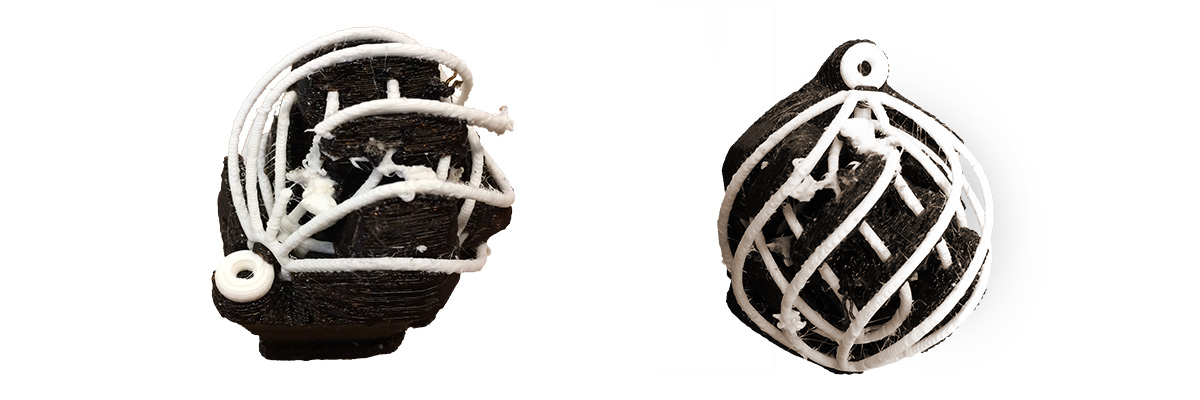
Jenn was very generous and printed a second version of my file with full support. The second pass came out much better than the first.
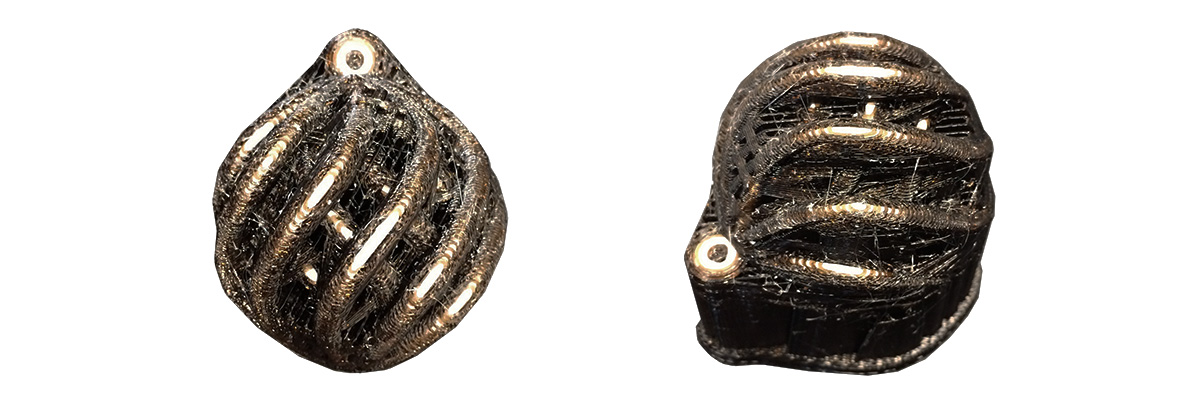
All elements were intact after dissolving the support, although they were still a bit rough looking because of the resolution of the extrusion printer. Both spheres can be spun very gently!

Print-In-Place Wheels
I tested out techniques for printing wheels. I drew several iterations of a spring-loaded toy car in Fusion (a learning exprience in itself). My first iteration was modeled as one interlocking set of pieces and would have required dissolvable support, but I felt I should try something different.
For the second iteration, each element of the car was supposed to be printed as a separate piece. I tried printing this version with my home printer (I was out of town over the weekend), but failed. I realized that 3D printing wheels was slow and better suited for a laser cutter. I also learned that the thickness of my spring was too large because the printer tried to add "fill" between the shell layers, which created a lot of webbing.

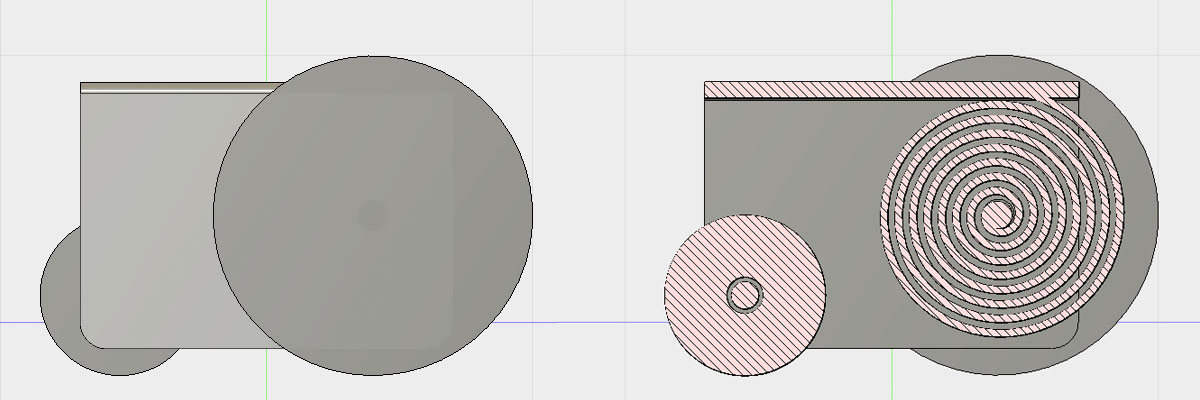
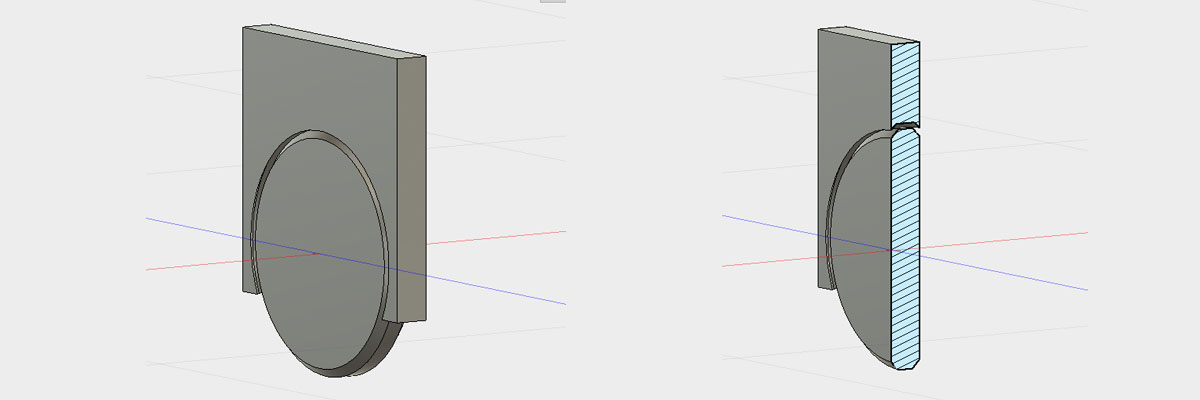
I went back and tried testing two different methods for print-in-place wheels. The first method was modeled as a loose wheel on a body with an axle. I allowed for a small gap between the wheel and the body so the wheel could be pried free. Had there been less contact area between the body and the wheel, this may have worked, unfortunately the wheel completely adhered to the body.

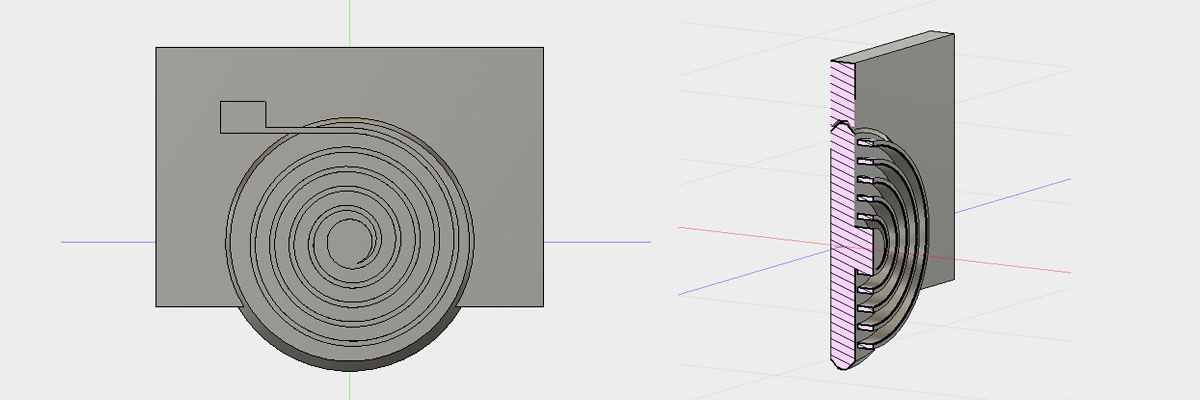
The second method was a wheel held in place by the body (no axle). I had to adjust the tolerance between the body and the wheel a few times before the wheel rotated freely, but it seemed like a viable solution.

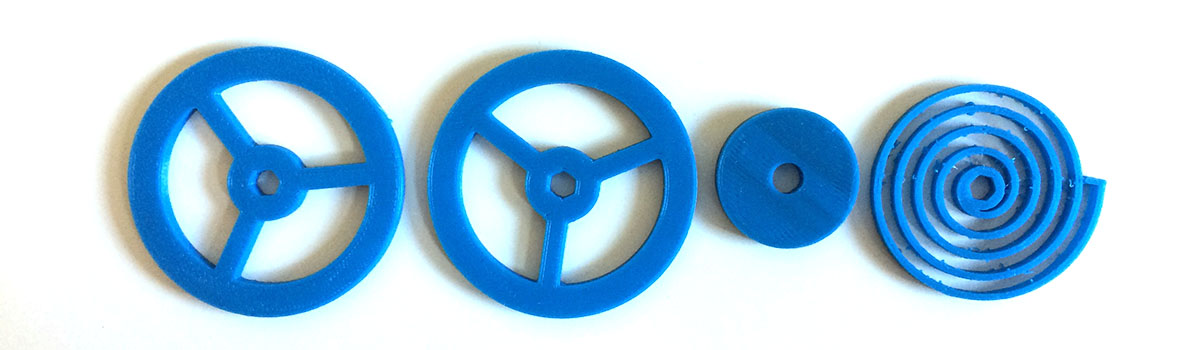
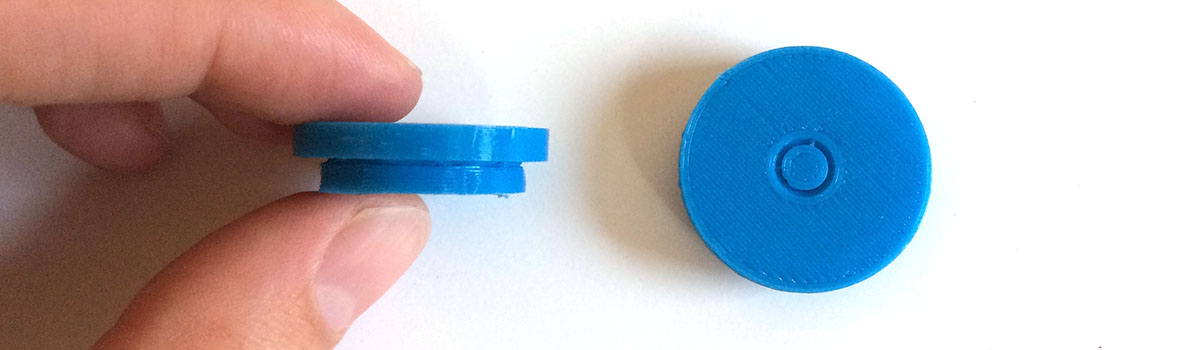
I tested out my axle-free wheel with a spring. The body, wheel and spring were printed all as one object. In this test, I created too large a gap between the spring and the face of the wheel, so half of the spring is deformed. The wheel also got stuck to the body in a few place and had to be cut apart with a knife. Despite the errors, it is mostly functional.
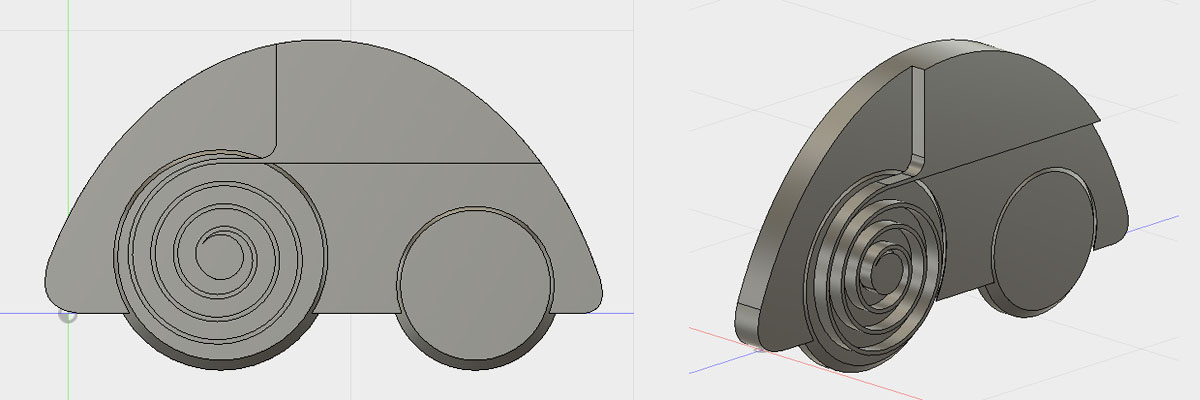
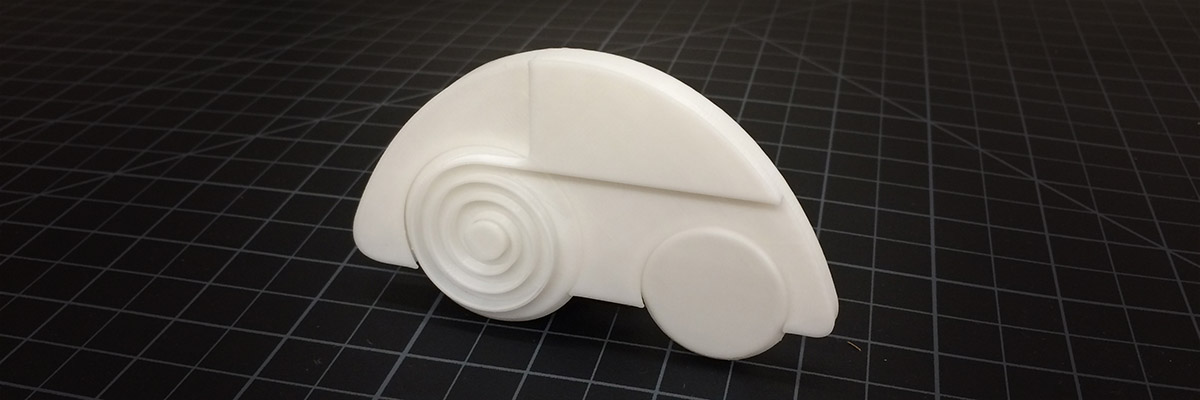
Finally, I used my new wheel technique to print a whole 'car.' This car was printed as a single job on the 3dWox in the Architecture shop. While it cannot stand and the wheels are too slippery to actually move the car anywhere, the spring is fully functional and the wheels turn freely. I fixed the tolerance between the body of the car and the spring, so the spring was perfectly formed and easily detached. The tolerance between the body and the wheels may have been slightly too large this time (I increased by .1mm to improve rotation) because the front wheel tends to fall out.
Scan
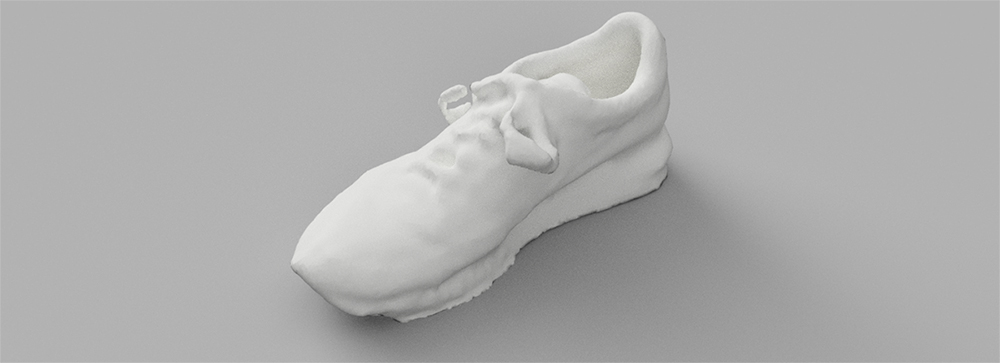
The 3D scanning process was a bit tricky. The scanner in the architecture lab frequently lost tracking and I had to start over multiple times. My classmate recommended circling my object (my shoe) at a constant viewing angle first, then trying to fill in any missing details. This strategy worked pretty well. The scanner was able to capture the general shape of my sneaker, but it had trouble mapping the laces. I imagine the density of light points is not high enough to capture such small objects. The resolution was very low. I would probably avoid this method of for creating a 3d model in the future.
How to Make (Almost) Anything | Fall 2017