3D Printing from the 4th Dimension
First let's all just appreciate how freaky tesseracts are.


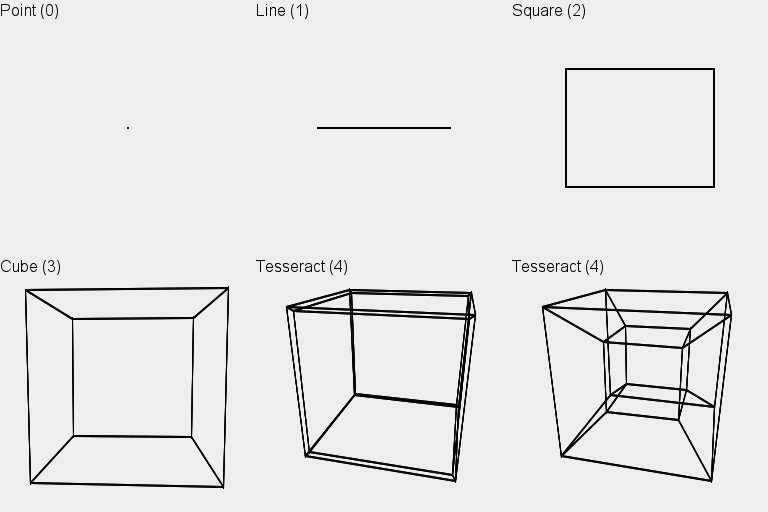
The cubic projection duplicates a cube and shrinks the copy; the rhombic projection duplicates a rhombohedron and translates the copy a side length along the diagonal.
 It turns out that this visualization of a tesseract - a cube within a cube - is actually just one of one of four possible parallel projections into 3D space.
Two of the others are relatively bland, but the last one - the rhombic dodecahedron - is stunningly symmetric.
We can't let the printer-makers catch up! When they come out with 4D printers I'll be here talking about penteracts.
Anyway, it was pretty clear that I had to 3D print something from the 4th dimension.
I had used Fusion 360 to design my construction kit, but this seemed like a math-heavy project, so I decided to give Antimony a shot.
The design took me three days. I scrapped everything and started over twice. I was faced with catch-22: without a physical model in my hands, I couldn't picture the design very well, so I couldn't CAD a model to physically print. This, combined with slow rendering in Antimony (a single rotation in the viewport took a few seconds to finish rendering) made visual feedback almost unusable. I ended up just trusting the math, writing a lot of trigonometry in Python, and checking the render every once in a while to make sure the signs all checked out.

Apart from slow rendering, I found Antimony surprisingly easy to work with. Subgraphs are unbelievably useful for abstraction: I first made a line subgraph, then used four lines to make a rhombus subgraph, then used six rhombuses to make a rhombohedron subgraph, then used the rhombohedrons to make a (rhombic) tesseract. You're supposed to need eight cubes to make a tesseract, but since this is getting project back down into 3D space, half of them will be lost inside insersections, so I only needed four.


The resulting Antimony model was parametrized by thee side lengths a, b, c and two angles α, β.
A true dodecahedron is equilateral (a = b = c) and equilangular (α = β = 70.33...) at a special angle arccos(1/3).
Unfortunately, this places two vertices of the tesseract in the center of the shape, so I decided to skew one of the sides a bit to avoid intersection.
I settled on a = b = 18mm and c = 12mm, which divides the asymmetric layers into perfect thirds.


Finally! Time to print. I exported the Antimony model to an STL file, and opened it with the Sindoh 3DWOX software on the desktop in the architecture lab to generate the GCODE for the printer. Eleven minutes later I had a tesseract!


This little thing is surprisingly hard to photograph - none of these pictures feel like they're of the same object, and none of them feel like they capture the sheer weirdness of the actual print in front of me now.