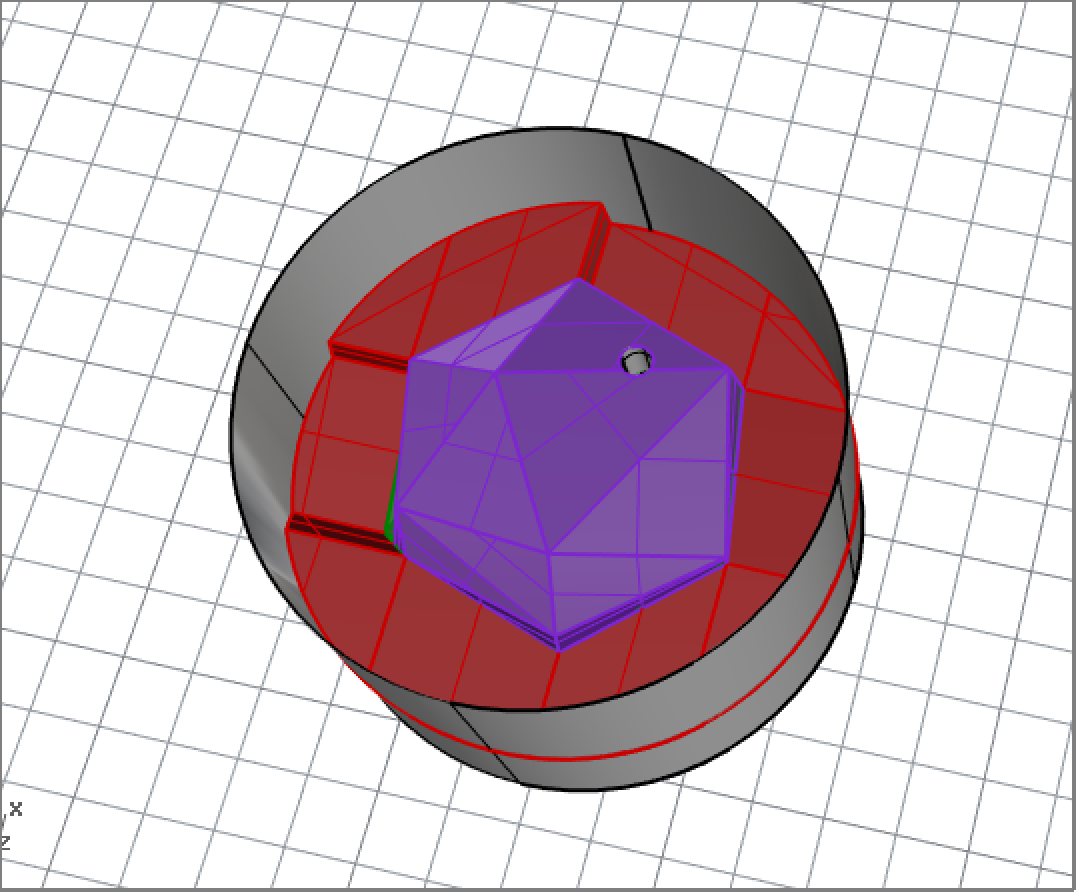
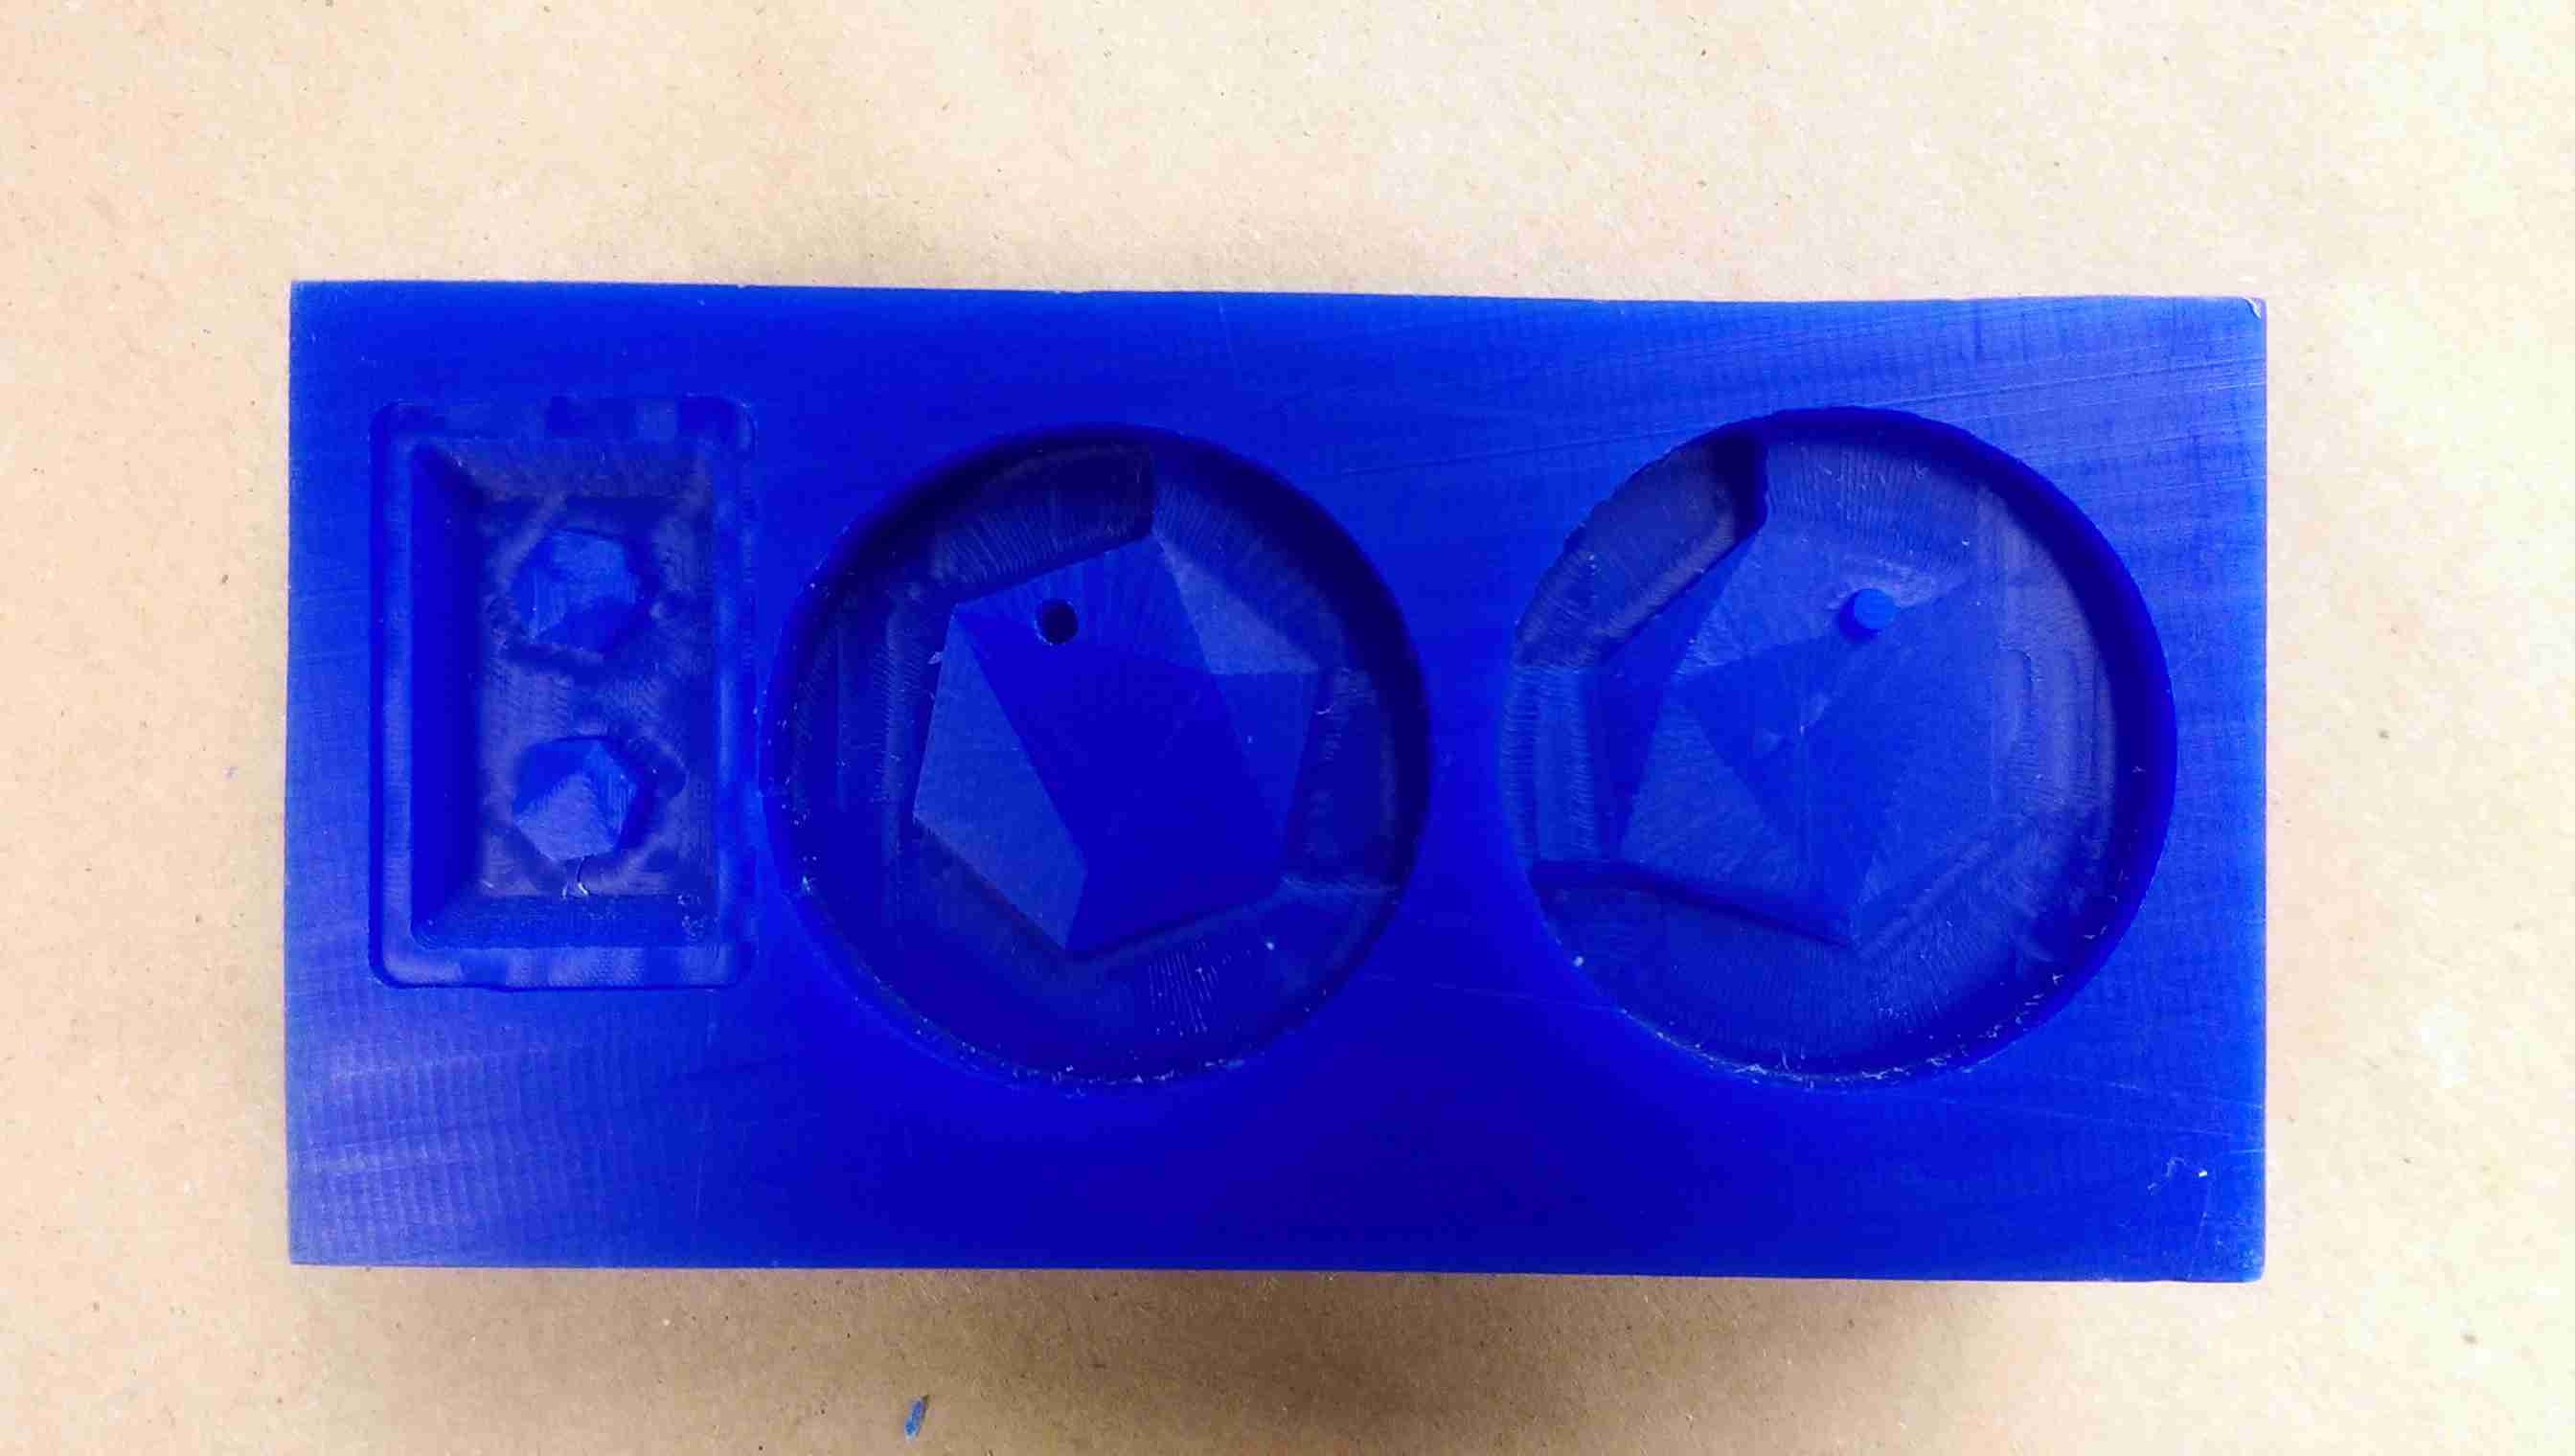
This week we had to use a 3-axis mill to mill machinable wax, cast Oomoo into that to create a mold, and then cast drystone into that to create a finished piece. Because the piece of wax was fairly small and I no need for more random trinkets in my life, I decided to make jewelry. I decided to make a necklace pendant with a two part mold and stud earrings with a one part mold. I designed a hexagonal solid with triangular faces in Rhino, mainly just using a lot of boolean splits and changing the model into a mesh and back to NURBS to create the mesh-like triangular texture. I then used the face edges to make a parting line, and extruded the lines outward to form the surface of the mold. For the two halves of the pendant, I made circular cups to hold the Oomoo. For the earrings, I created a rectangular cup and added draft angles.
Setting up the file to mill was the fun (read: worst) part. In my efforts to fit my own subtle jewelry tastes, I had made the parts too small to effectively mill with an 1/8" endmill, so I had to scale up my file a bit. Note to future students: make sure there are no gaps/holes/etc. in your design that are smaller than 1/8". After scaling it up, I put the file in MasterCAM and Calvin and Jen helped me set up my toolpaths. Because the part was so small, we were able to do it all with an 1/8" flat endmill. The first toolpath used a linear motion and just a 0.1" stepdown to clear away material without break the tool. The other toolpaths dealt with each part of the mold individually. I used a radial motion to mill the two circular pieces and a scallop motion for the more rectangular one. I then set the feeds and speeds based on a resource Calvin found on the internet for machinable wax: 100 feed rate, 50 plunge rate, and 4000 spindle speed.
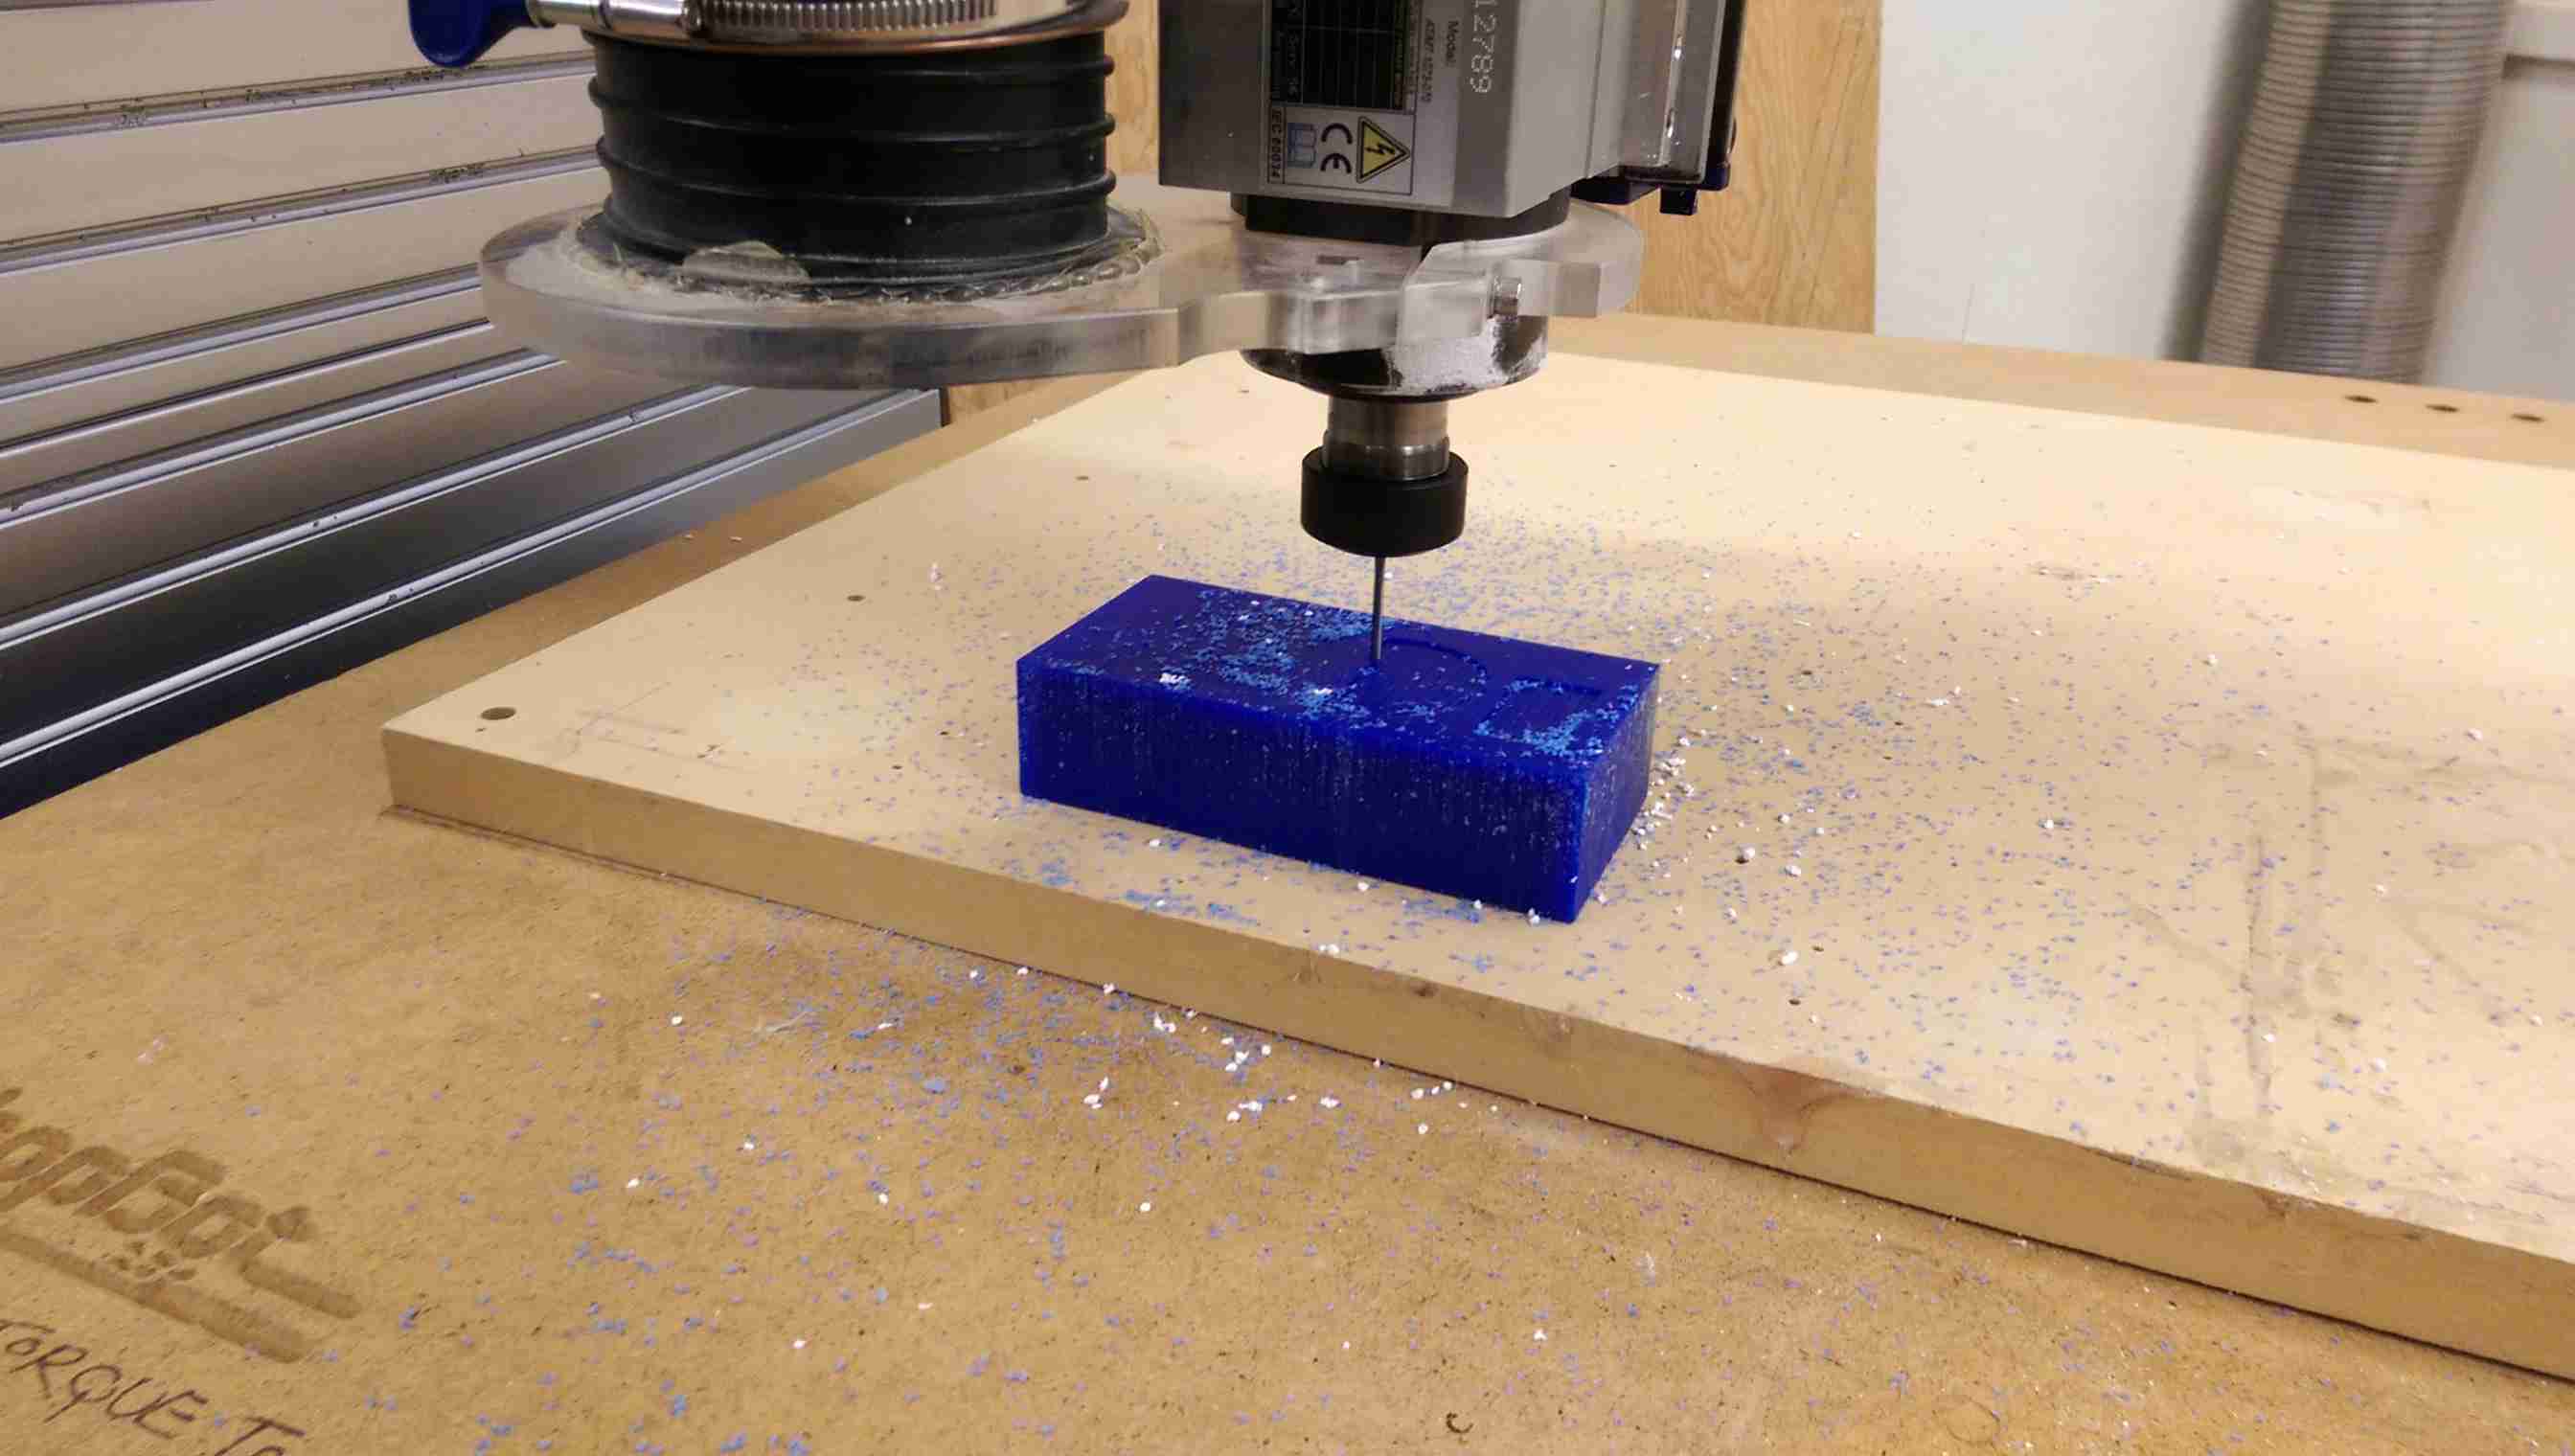
To actually mill it, Calvin and I used the Shopbot, fixtured my part with hot glue, and put in the 1/8" flat endmill and tightened it to the proper torque. The job took roughly 20 minutes to run. For some reason the Shopbot decided to up the spindle speed to 18000, even after setting it in both MasterCAM and the Shopbot software, but fortunately it did not cause a problem with the milling. Other than that, everything went pretty smoothly with the milling process.
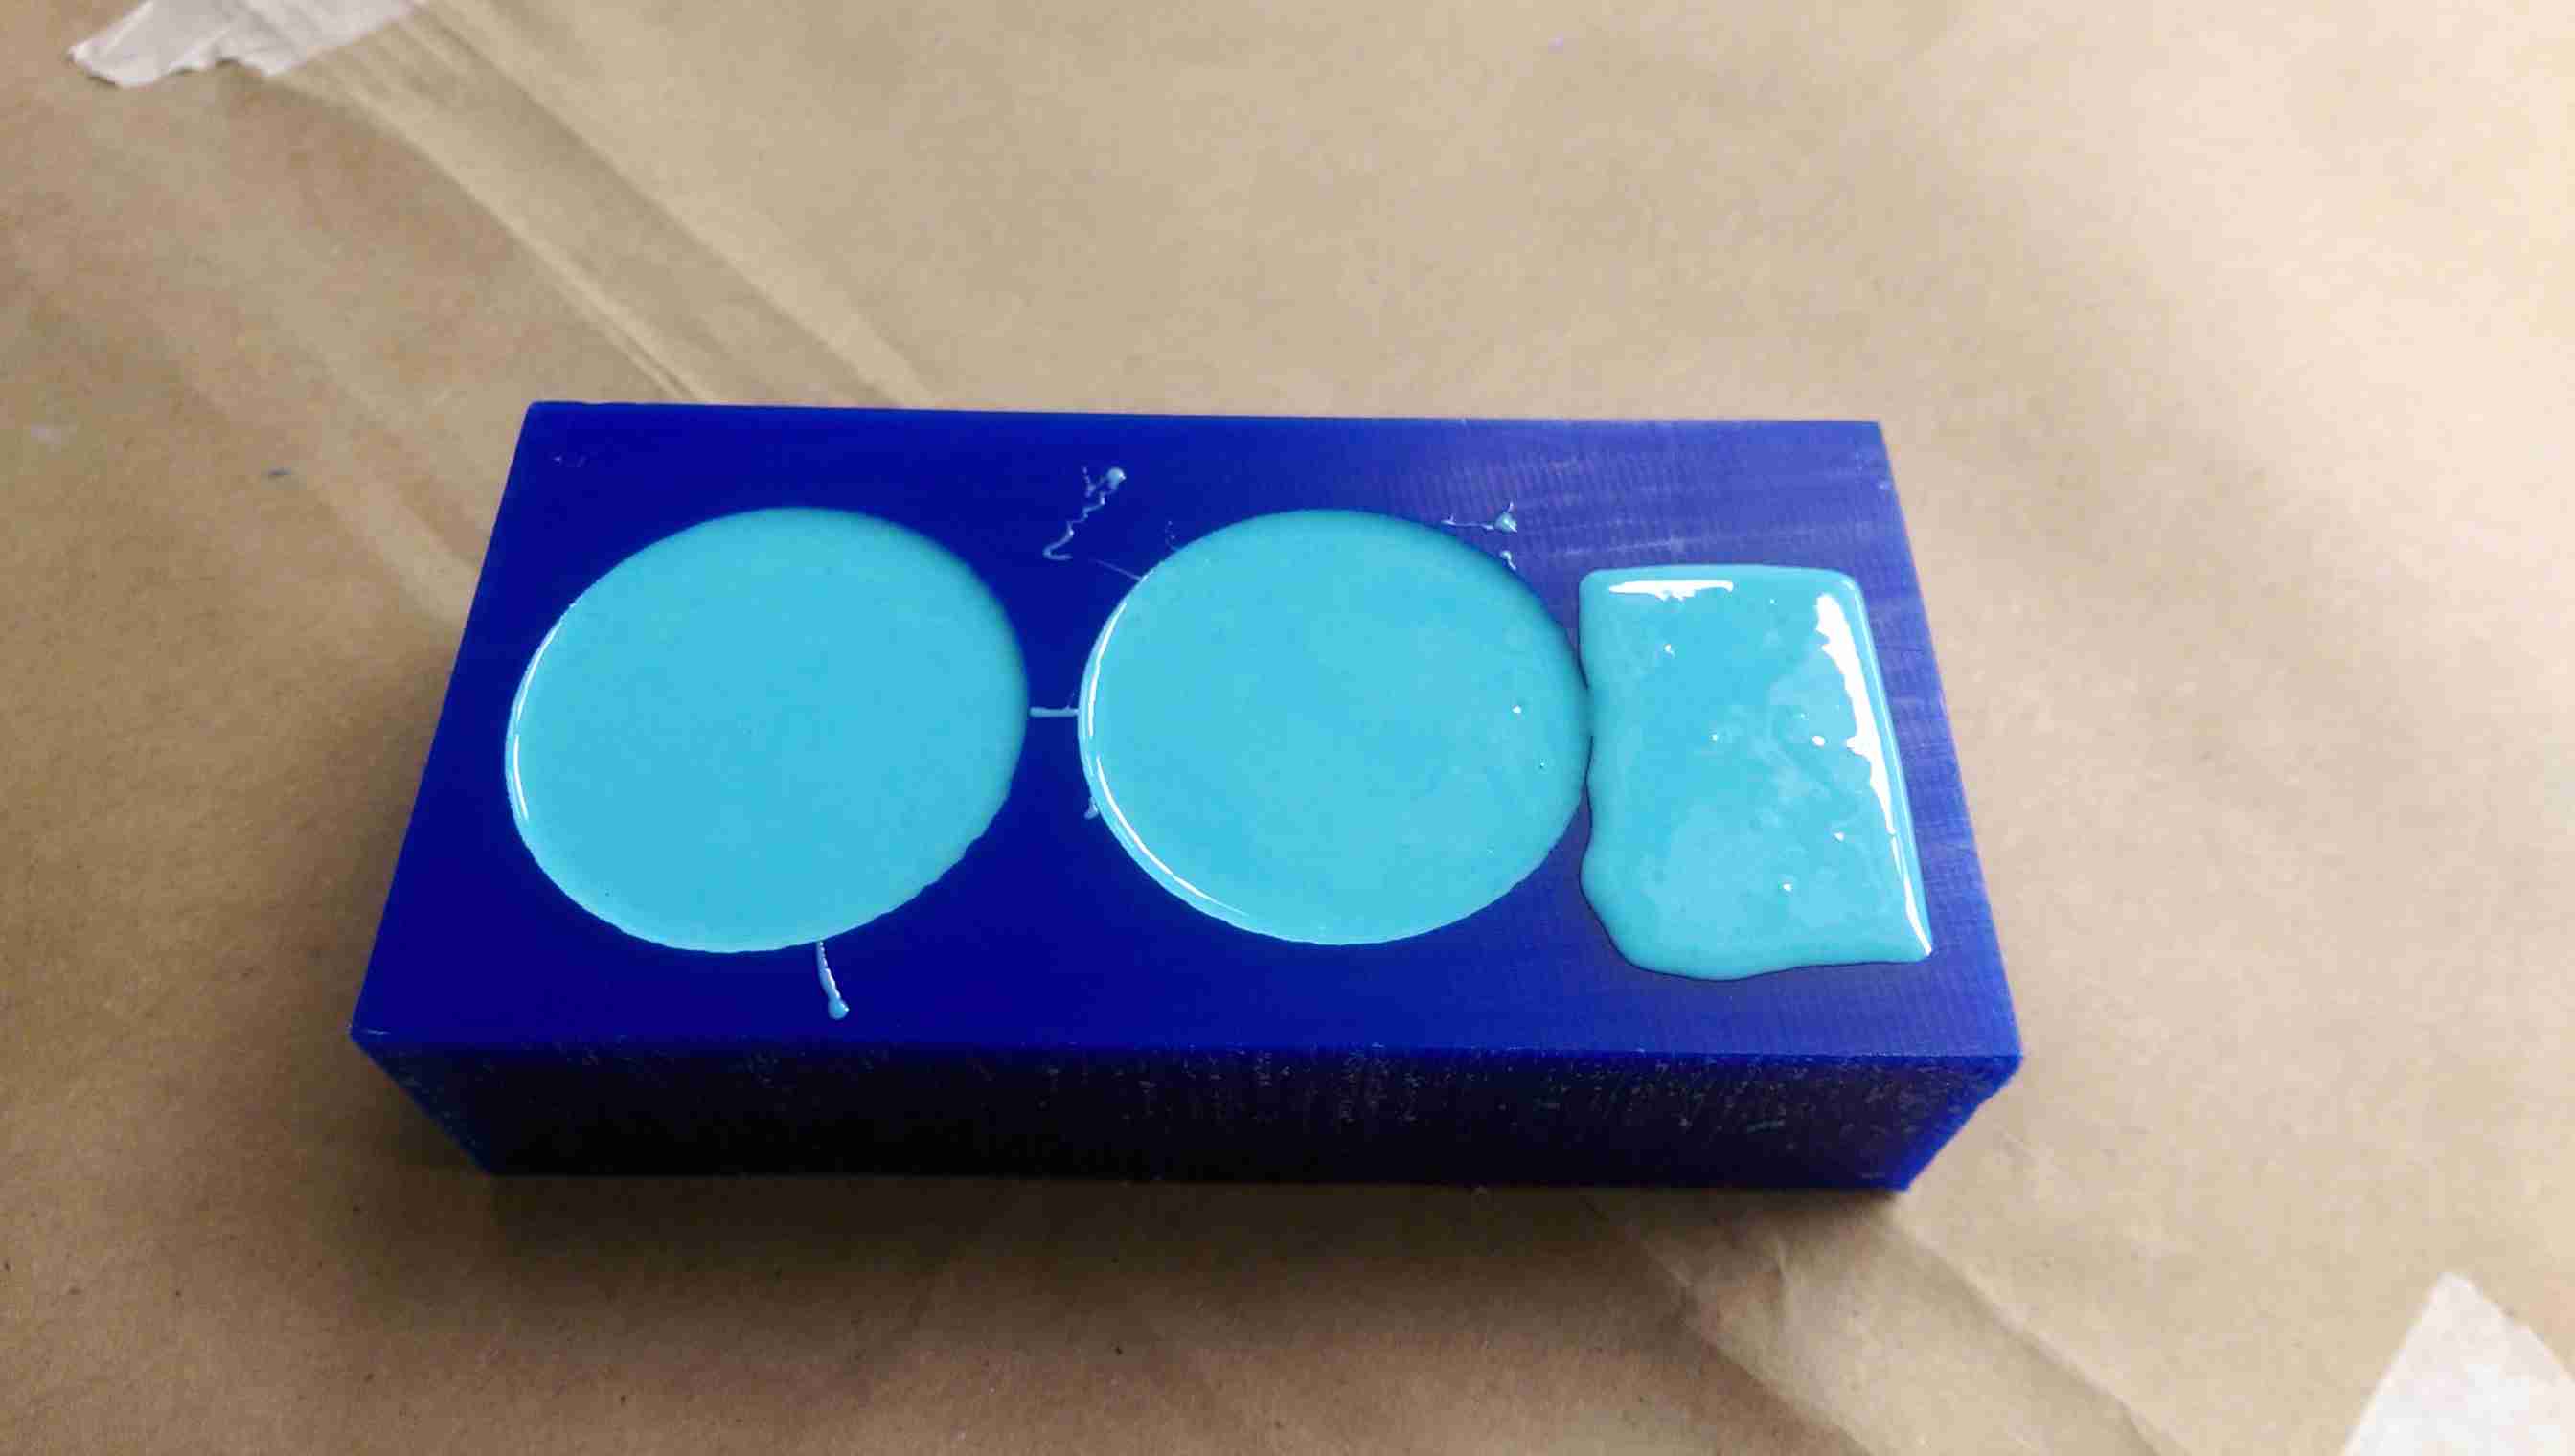
I then cast the Oomoo, which was a very easy and surprisingly clean process thanks to Jen's tip to put brown paper everywhere and to use two disposable cups to mix, transfer, mix some more, and then pour into the mold. I tapped it to get out the bubbles (and also to get out my own stress by the end) and then left it overnight to dry.
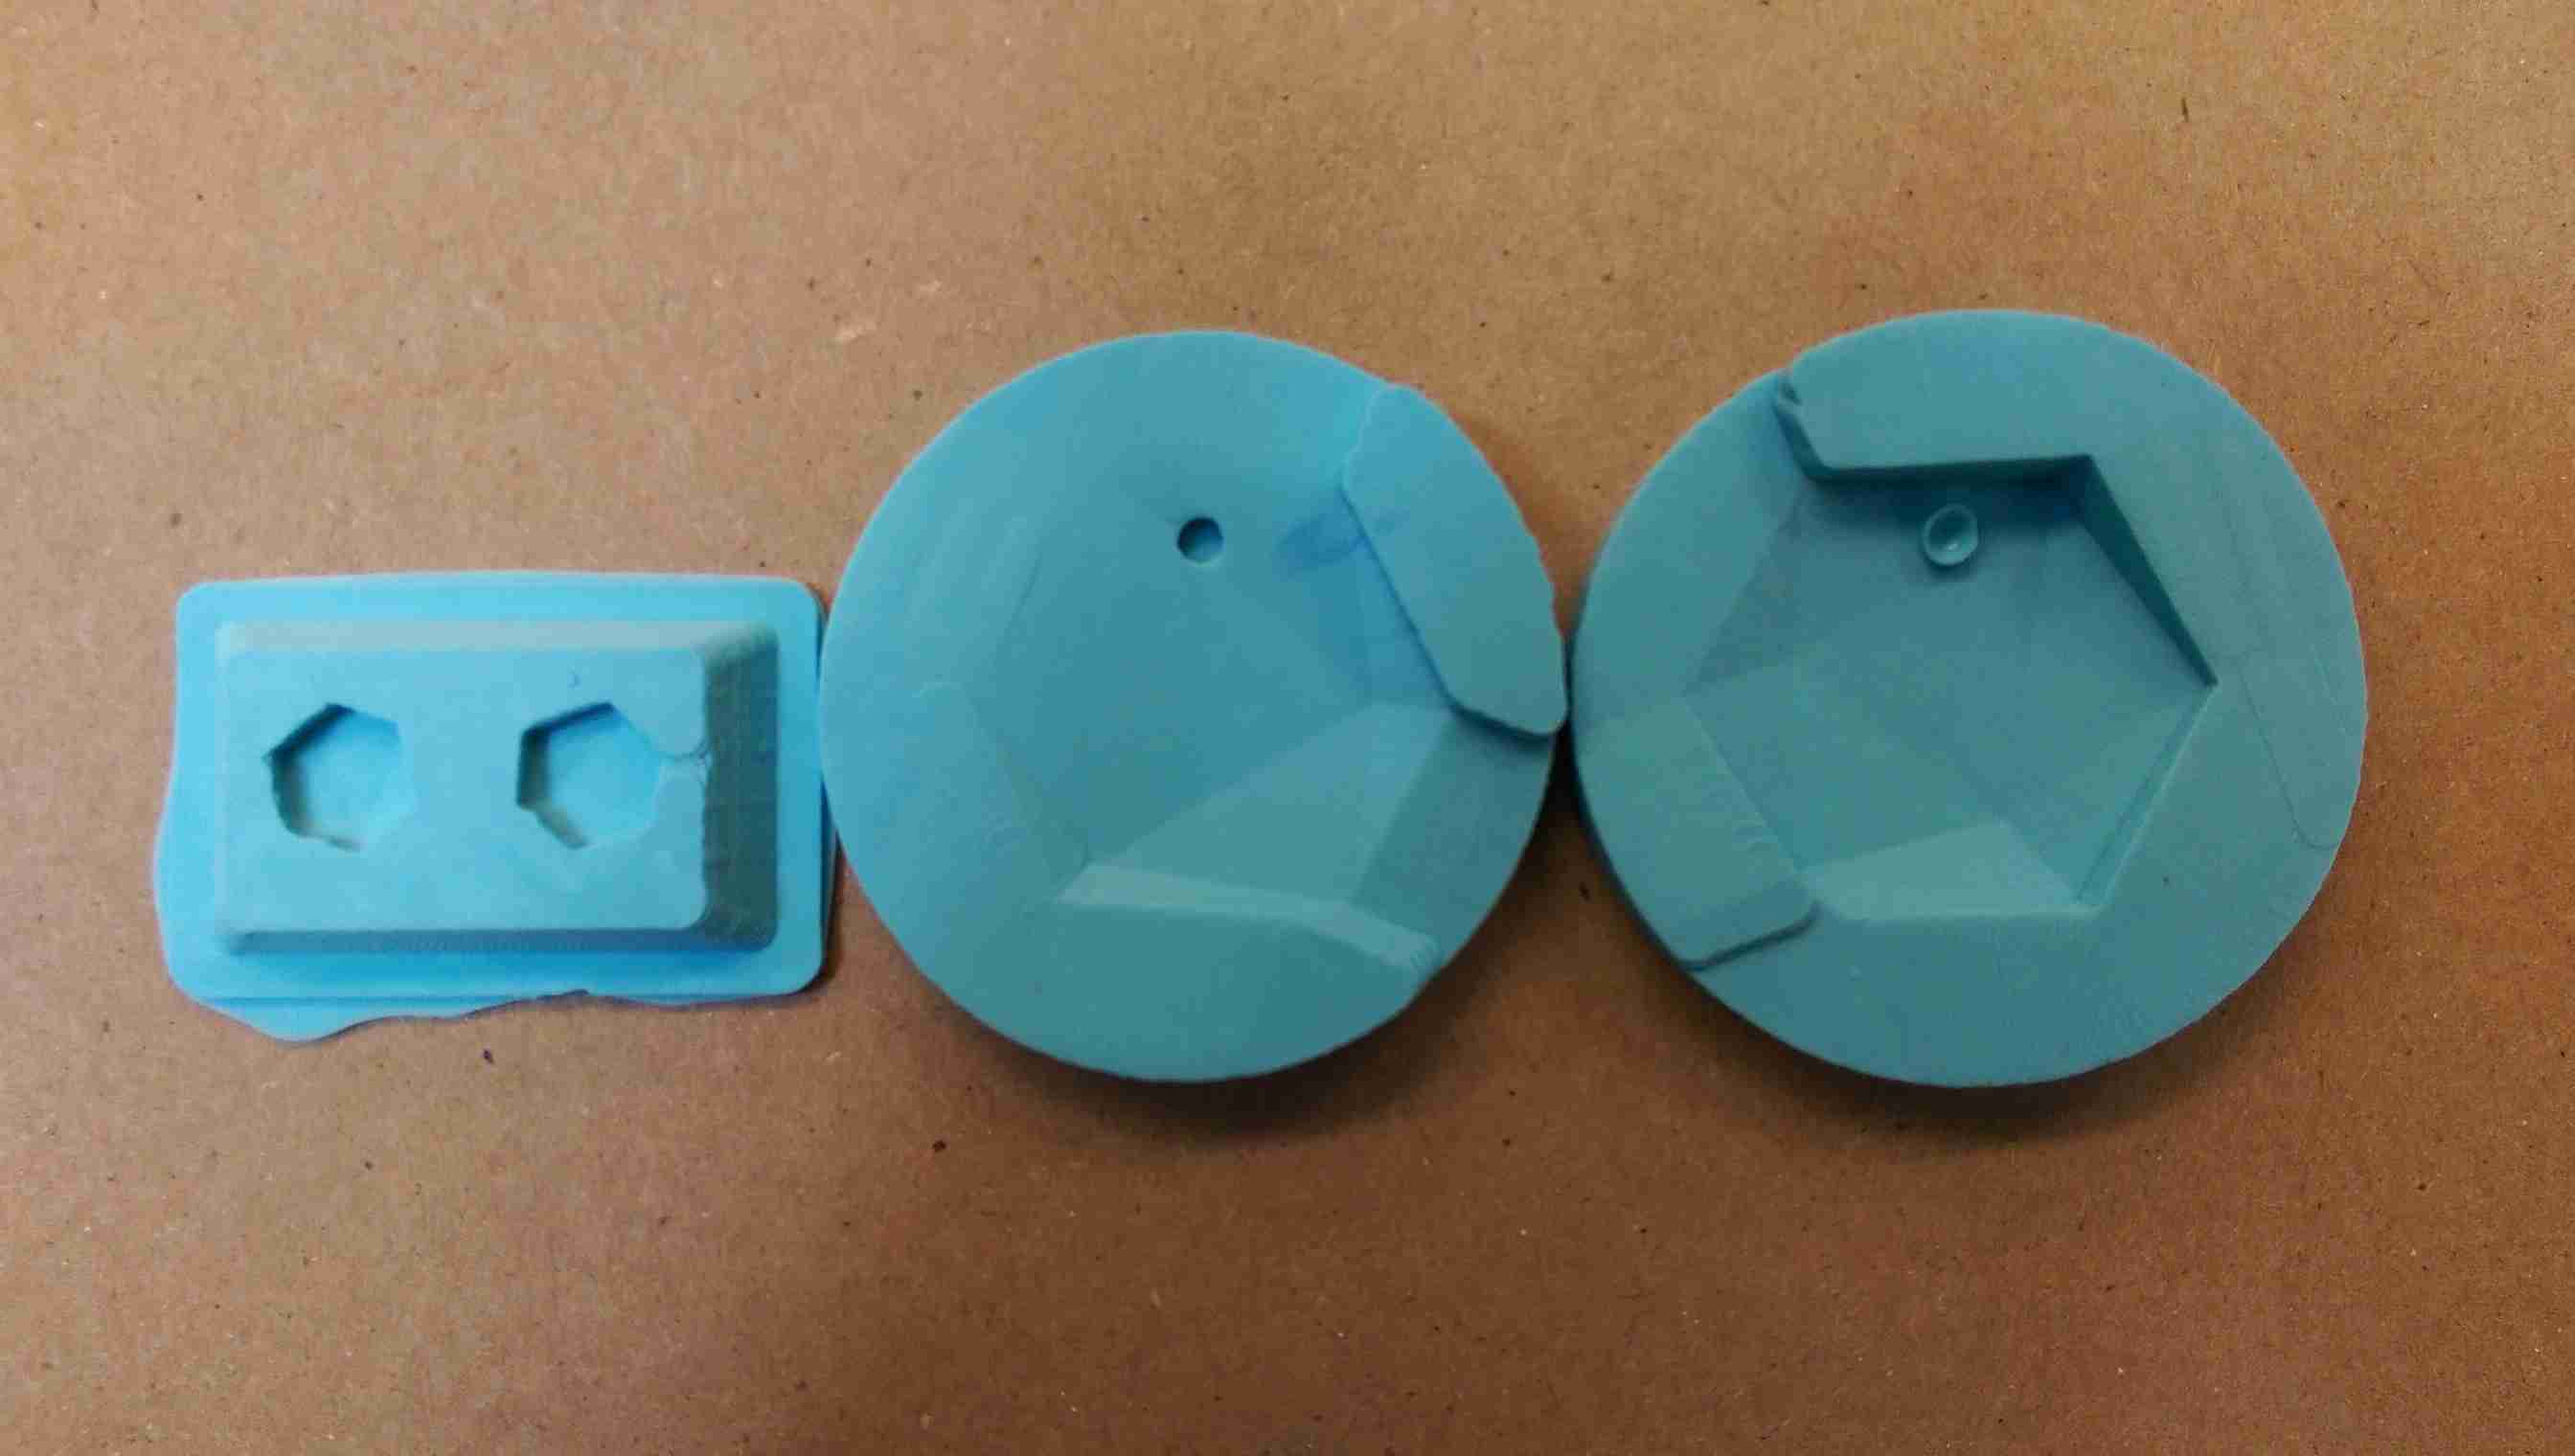
I came back the next day and pulled out the oomoo. It looked pretty good. There were no bubbles, which was nice, but the cylinder I had added to form a hold in the pendant didn't work out quite as I had hoped, so I had to improvise with the paper part of a cotton swab inserted between the two part of the mold.
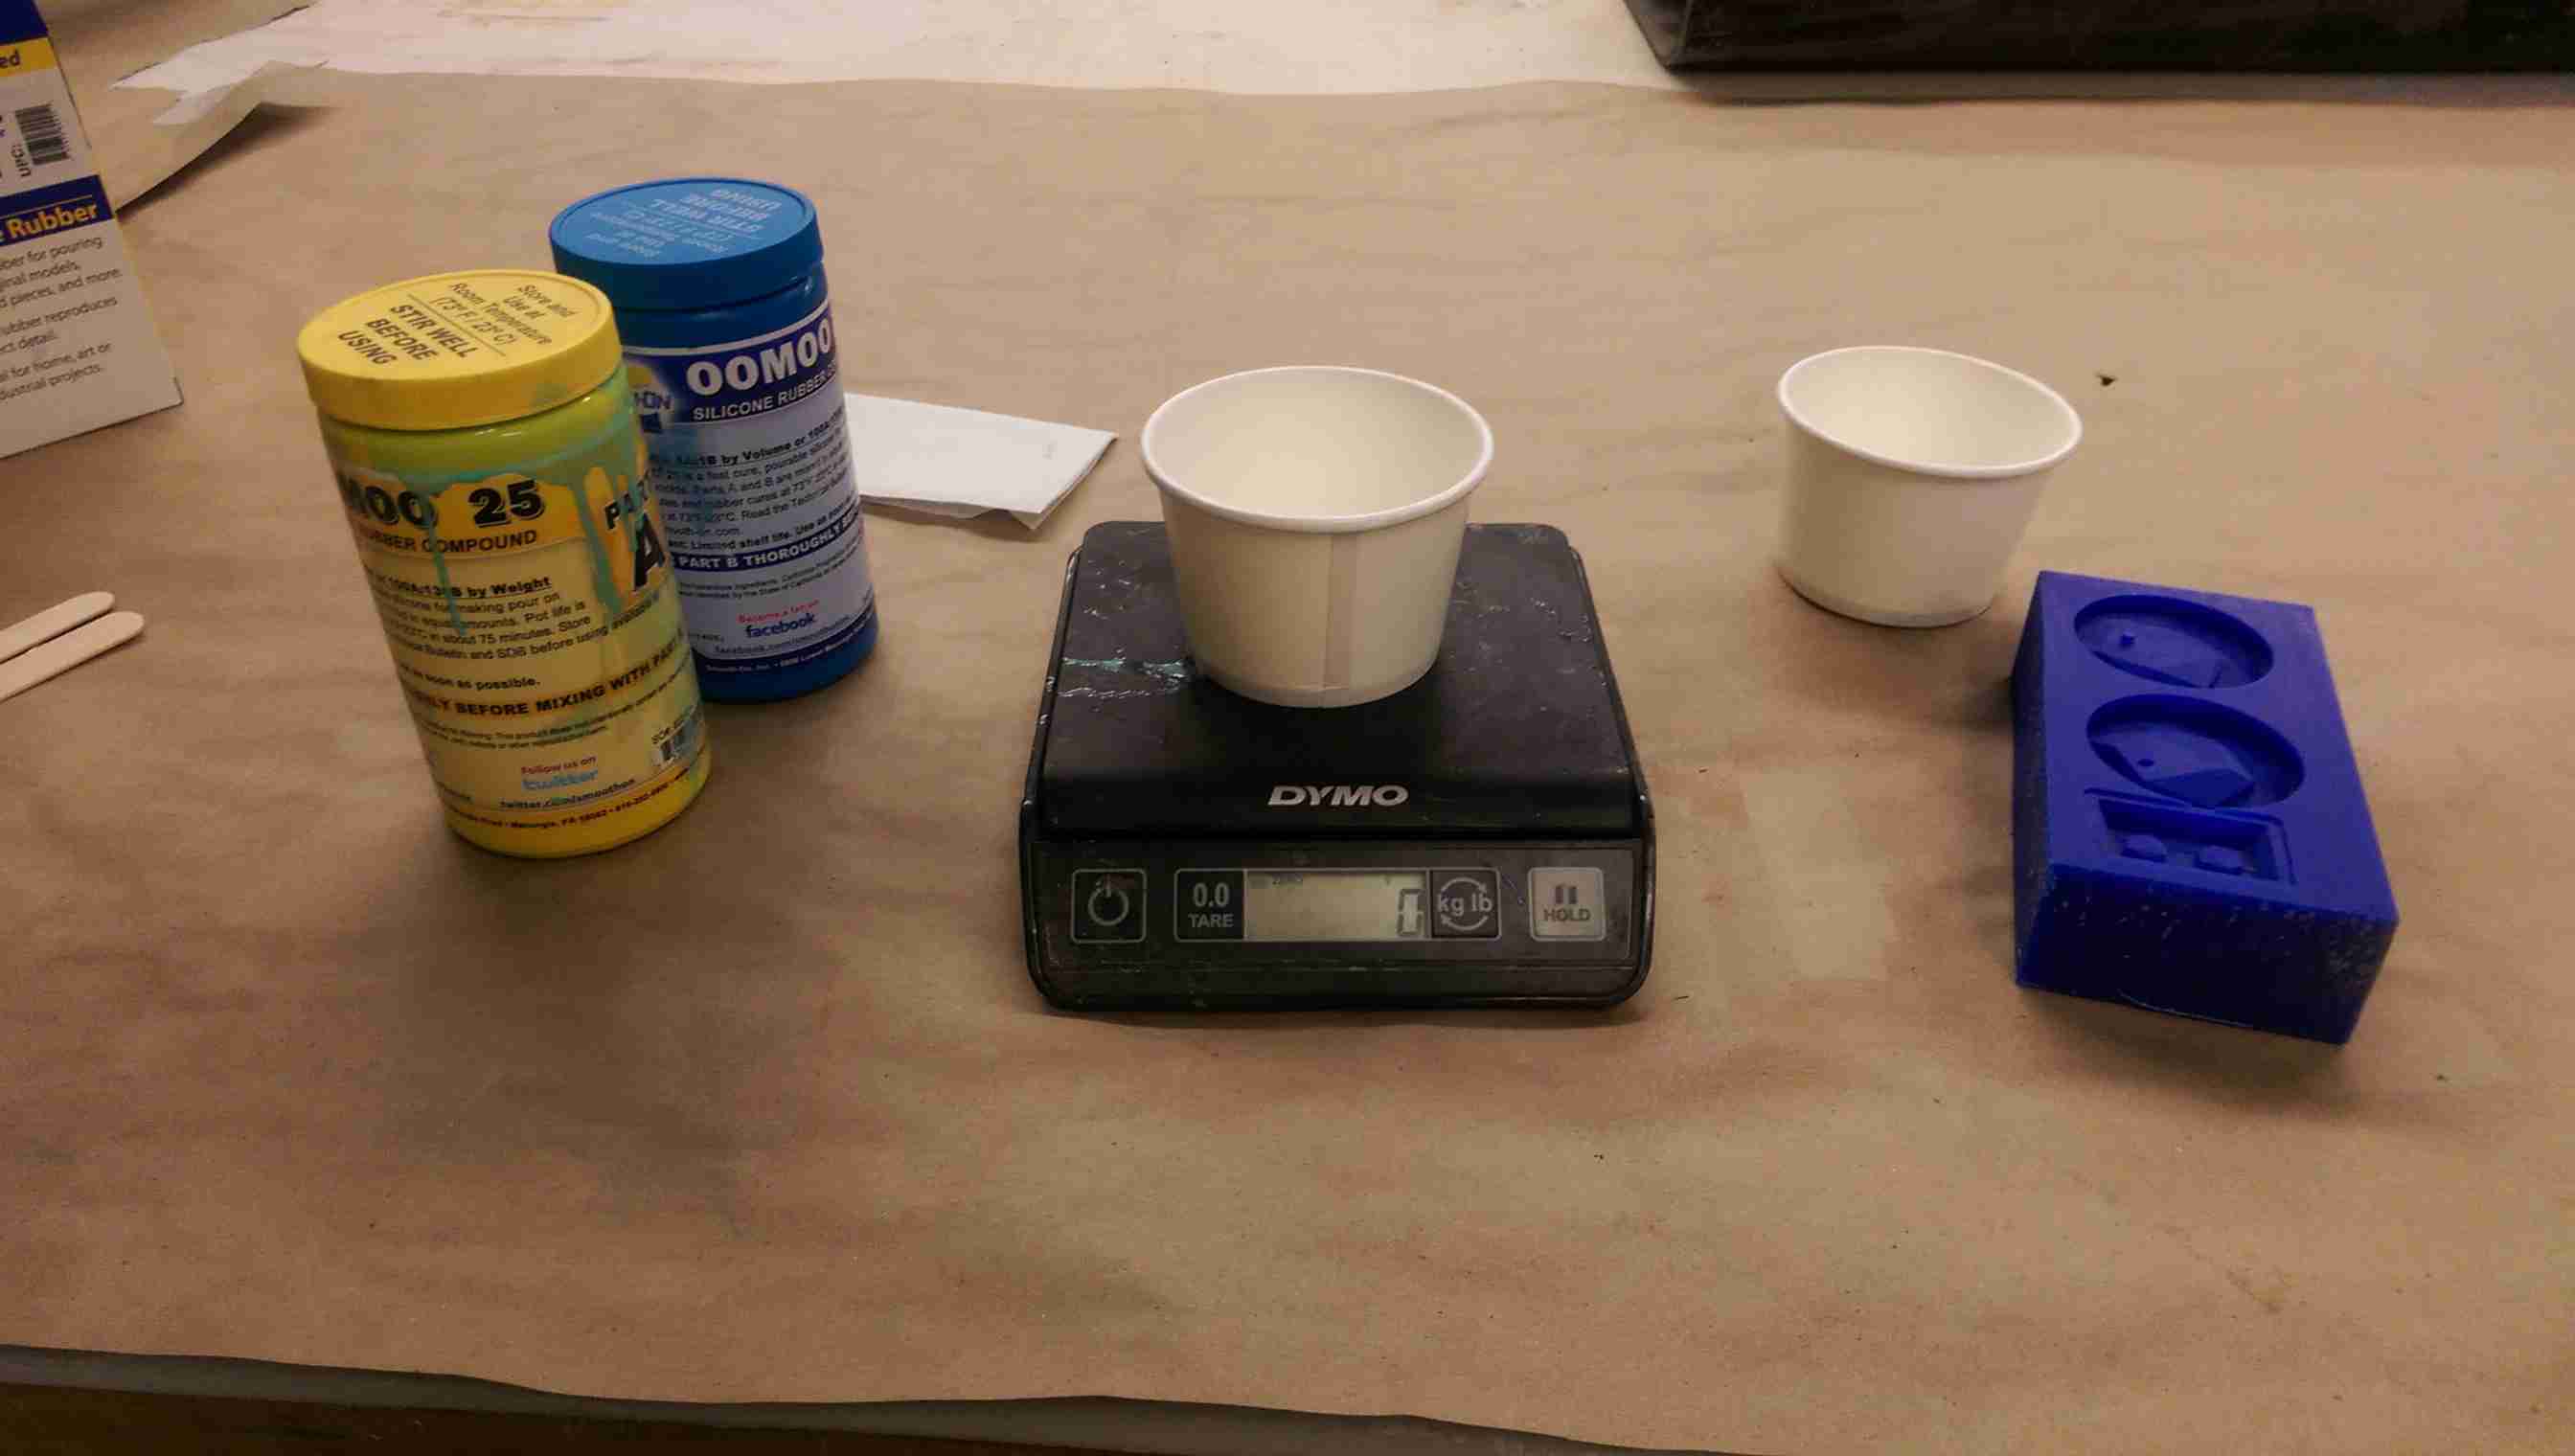
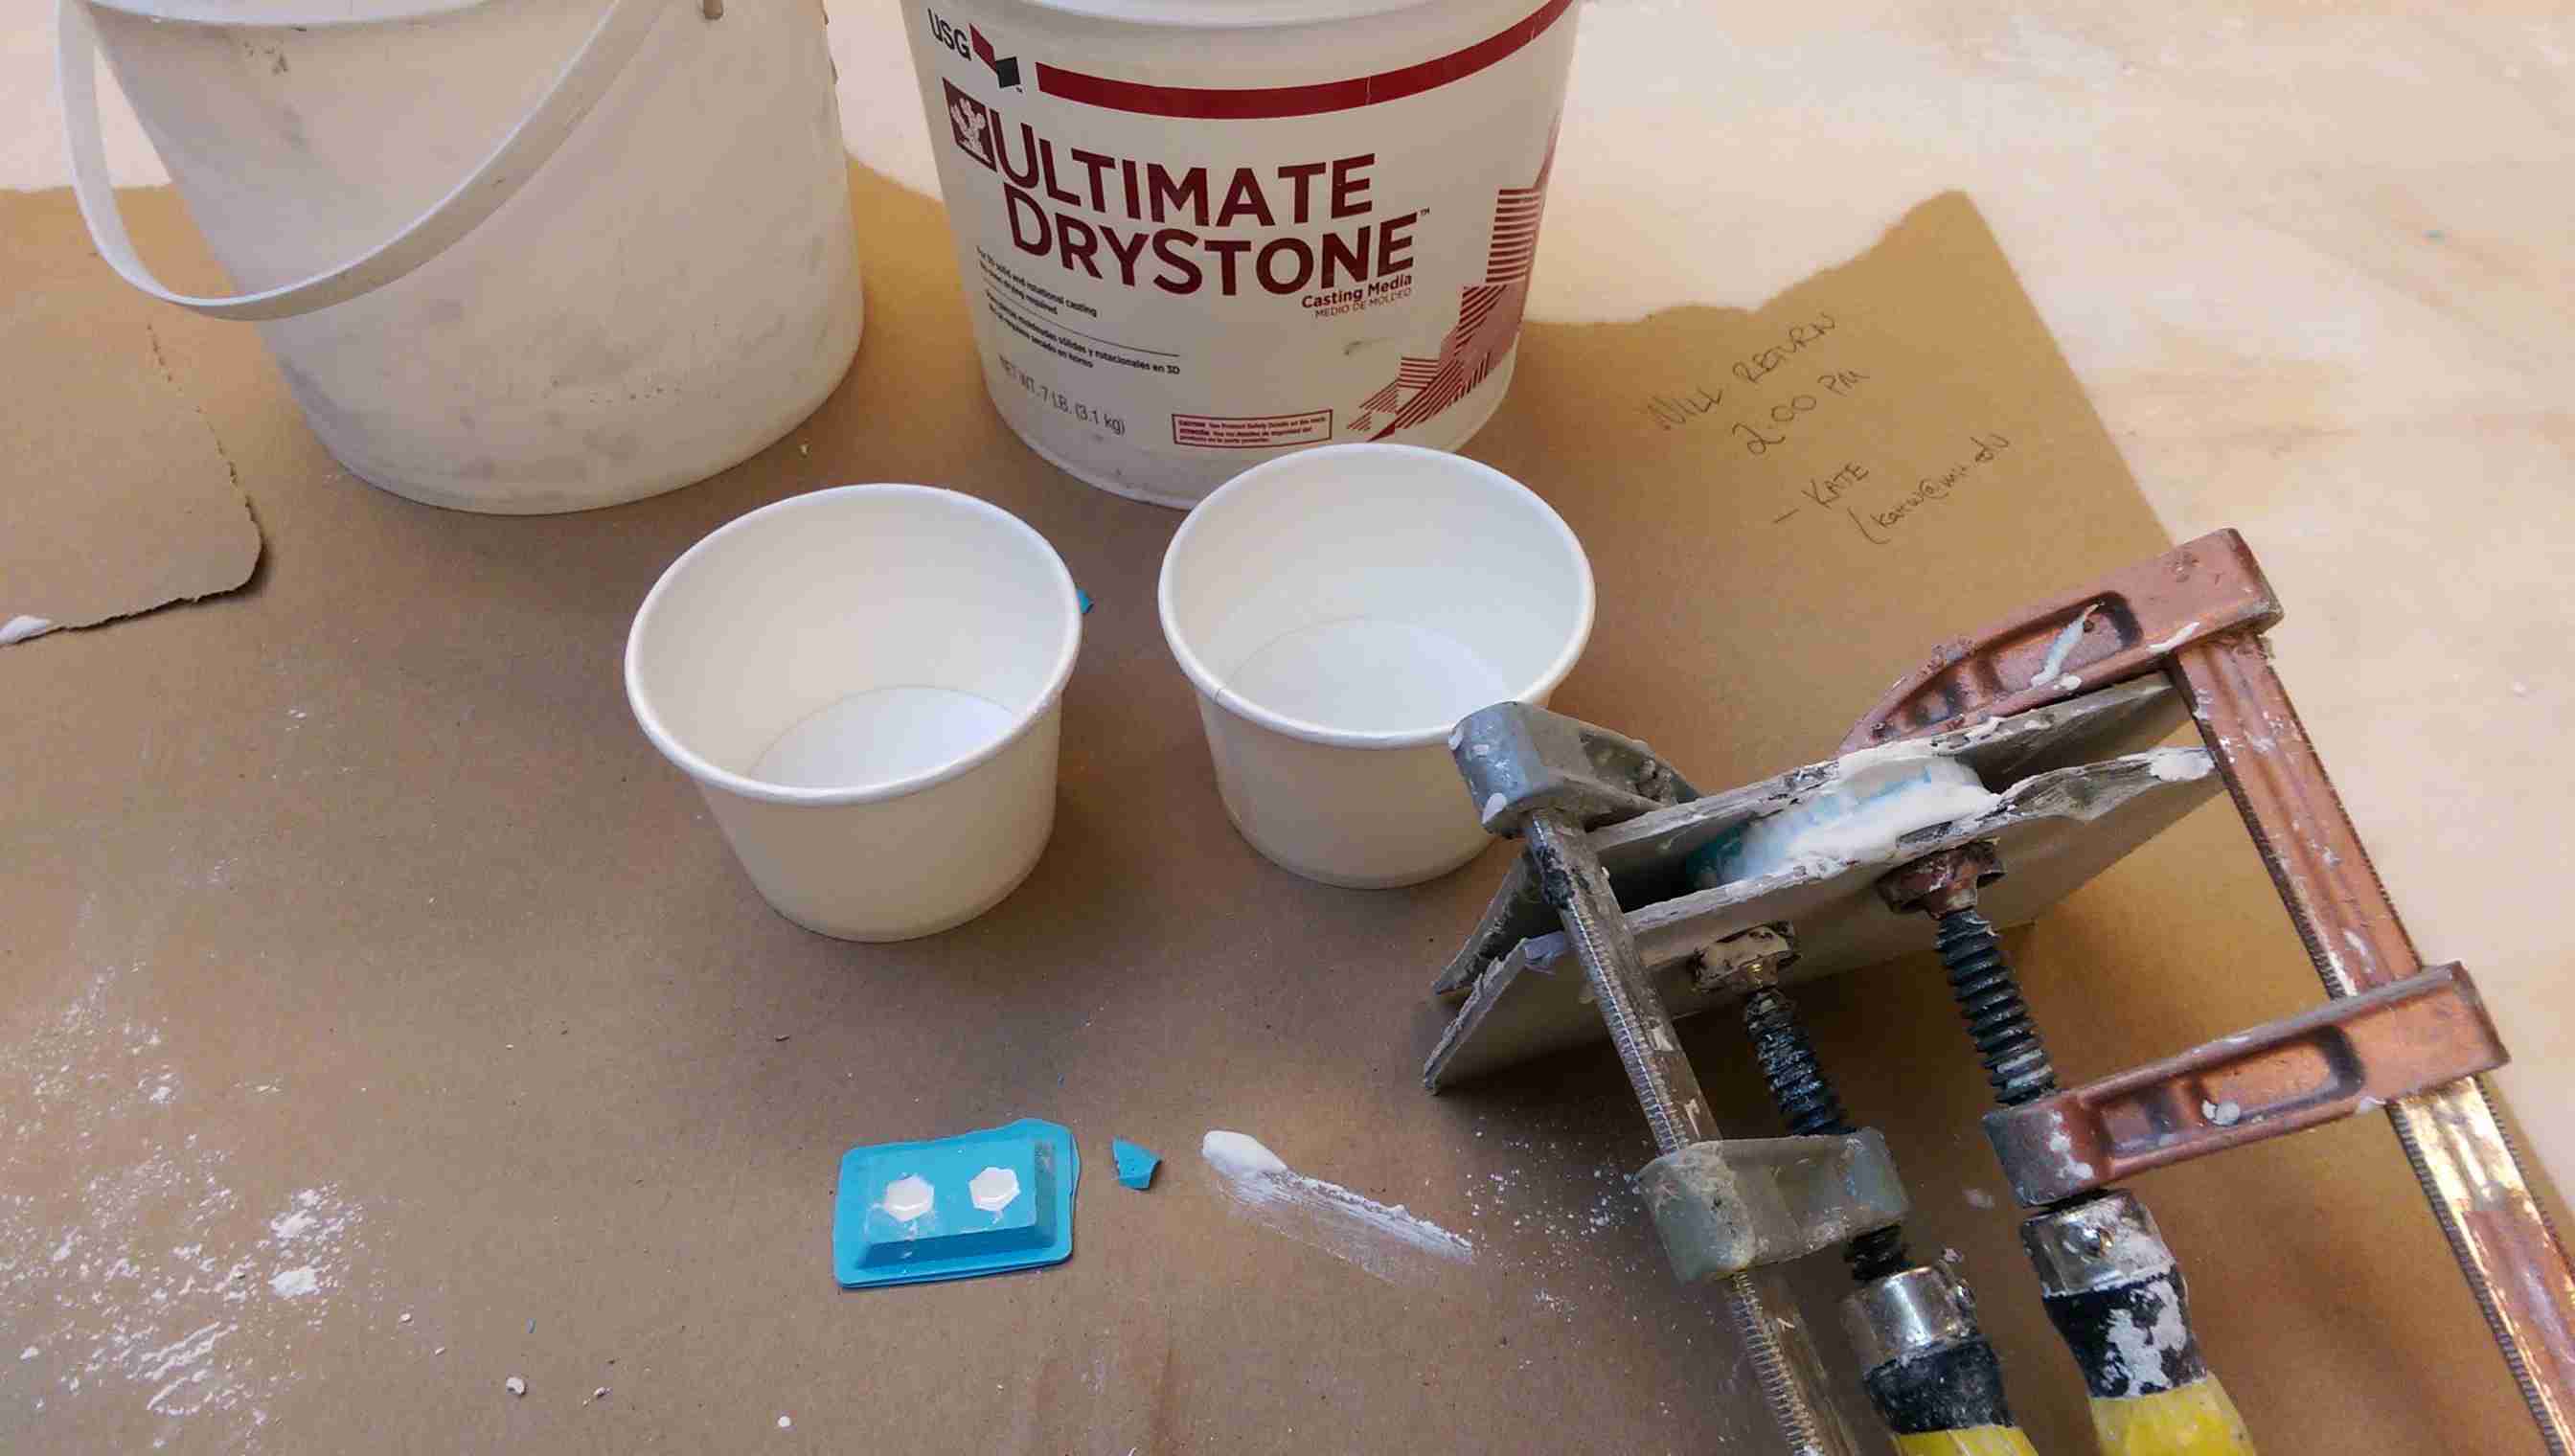
I then cast the drystone, using a 5:1 drystone to water ratio by weight. My part was small enough that I didn't need much, so I got to experience the fun of measuring exactly 0.2 oz. of water. Jen told us that our instincts about how much water to add would be wrong, and sure enough, even after following the USG website's instructions, I thought I needed more water. Fortunately, I waited a few seconds and the mixture turned from a thick, grainy paste to a pourable liquid, which I then poured into the mold. The two part mold was a little difficult to pour into, so I ended up cutting the oomoo a bit to make the spout larger. It still took a lot of shaking and jabbing with a popsicle stick to get it to settle into the mold.
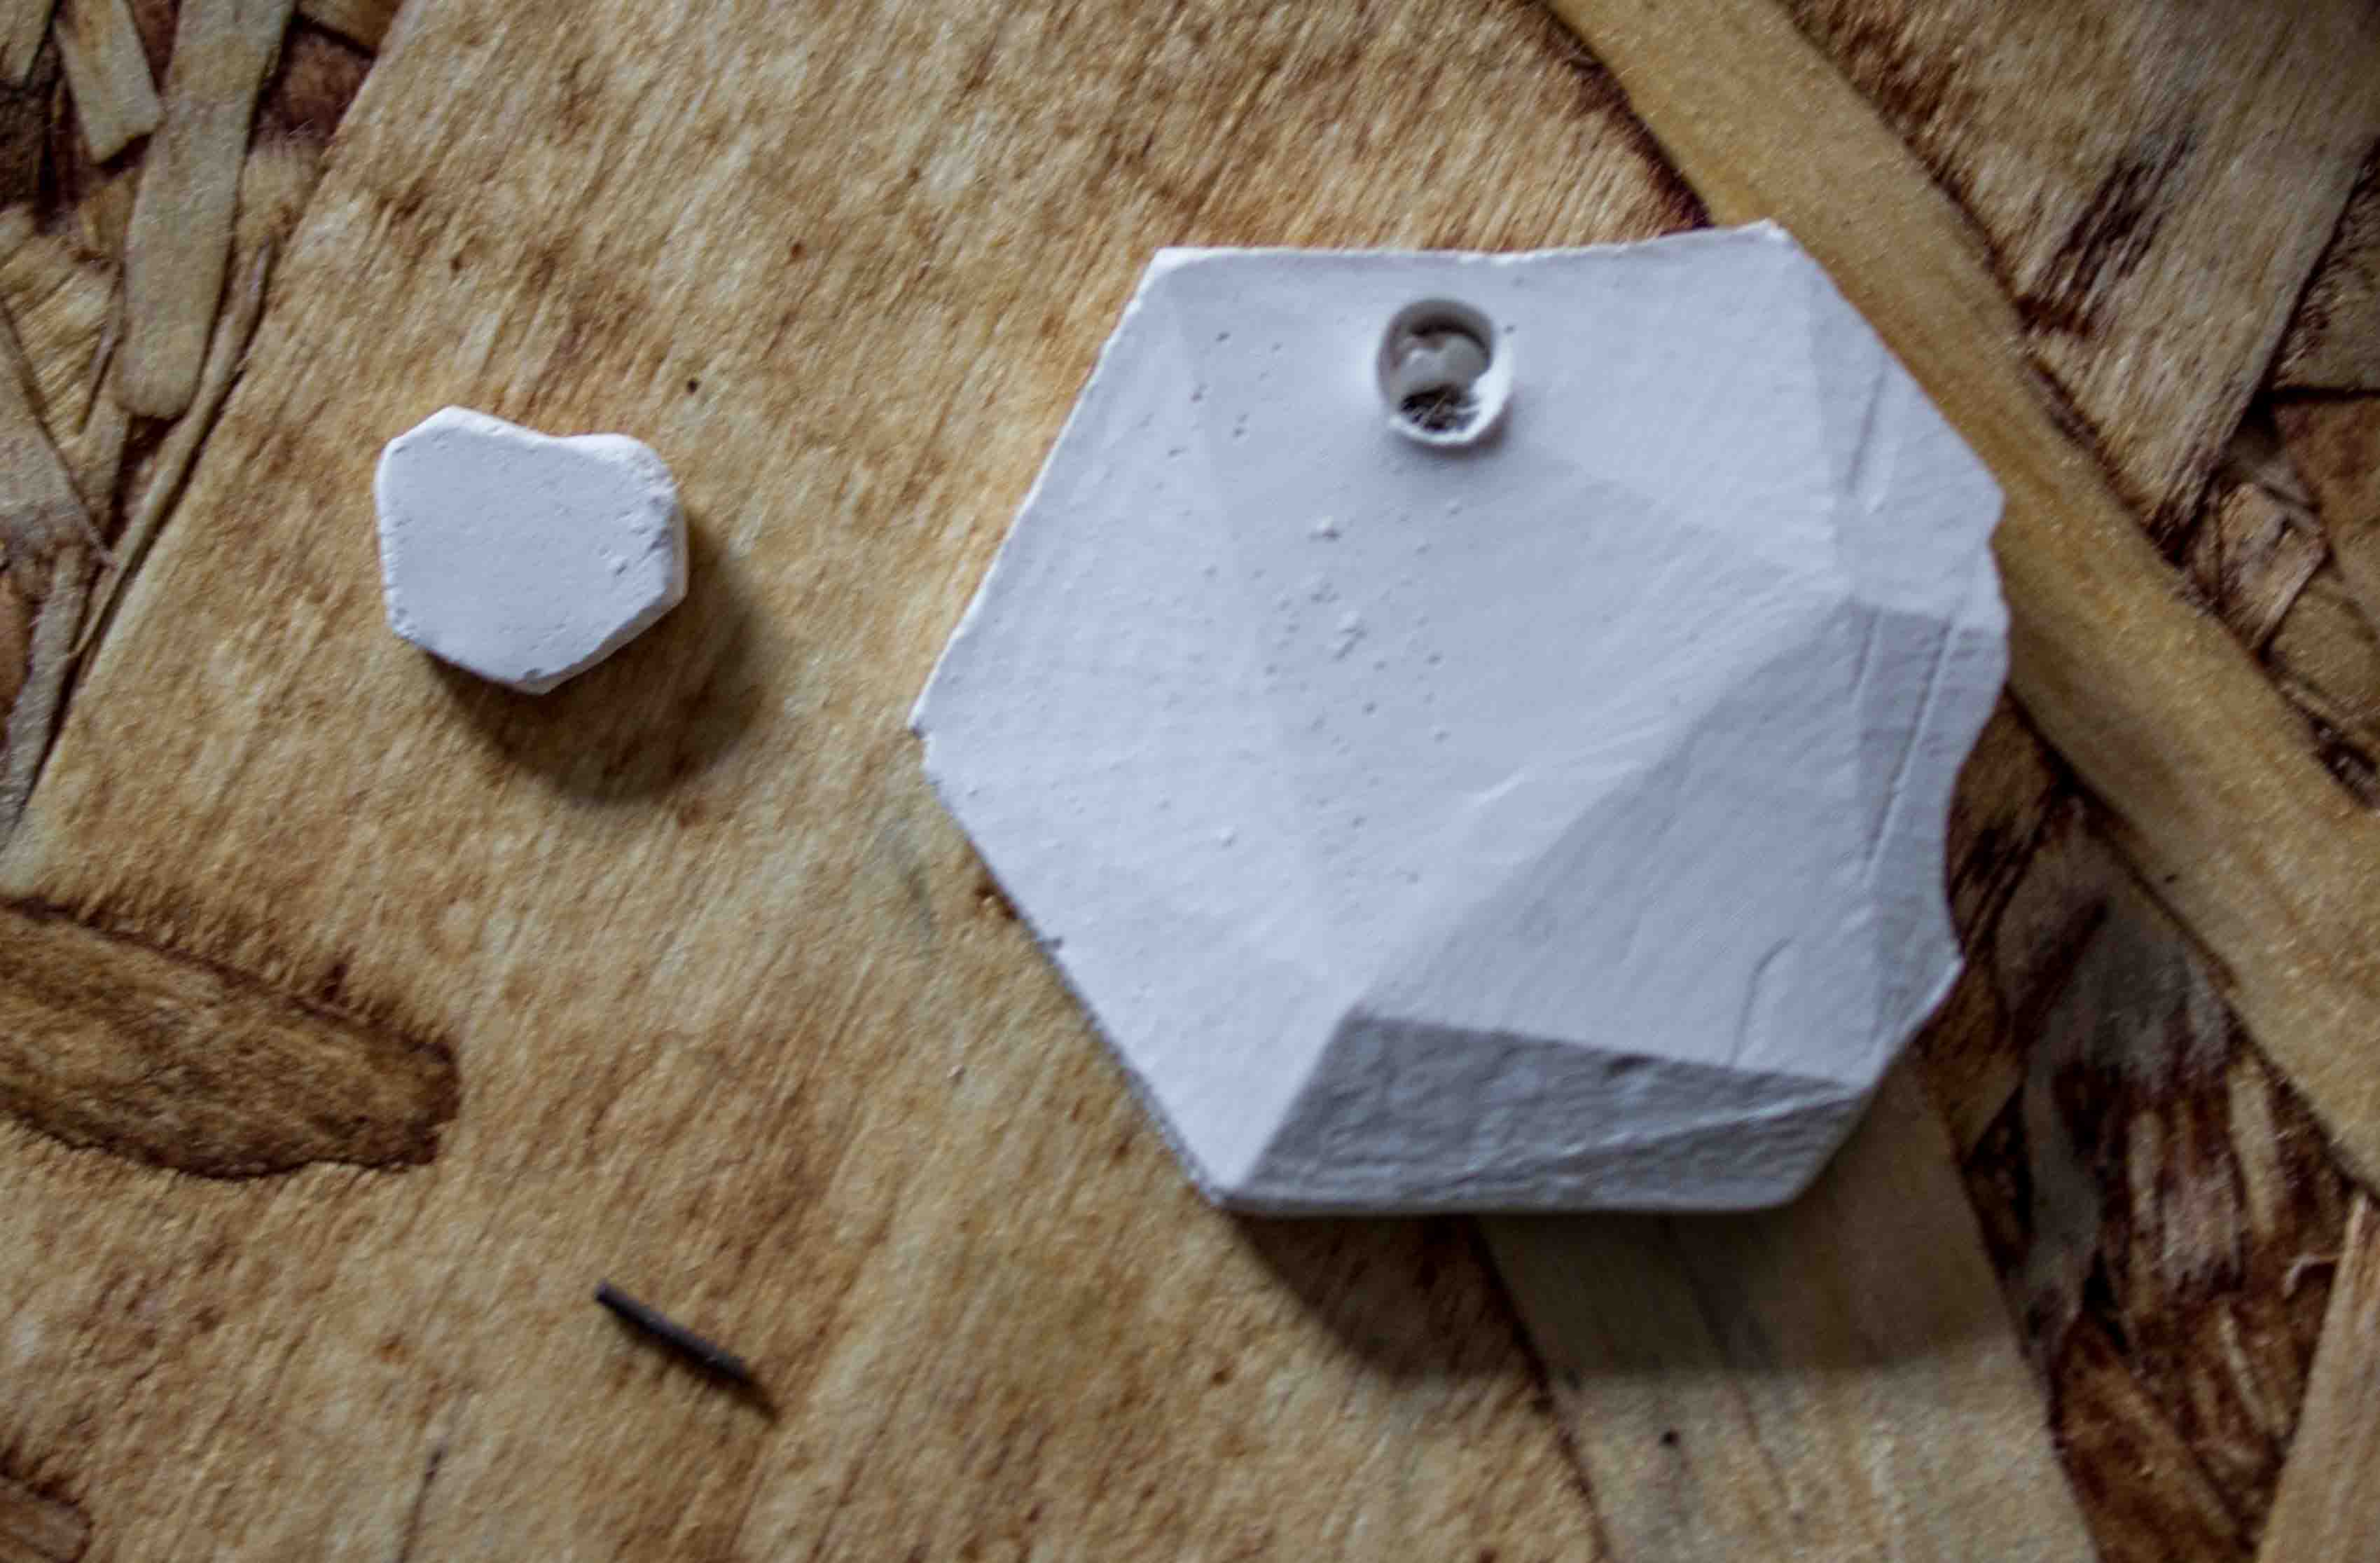
I ended up doing three batches. The first and third were just straight drystone, and the second was drystone with a big of black dye swirled in. The black dye mostly just created a faint gray tint, though there was a bit of a spotty black texture on one of the earrings in that batch. The final pendant came out a bit messed up because I didn't add quite enough mixture to the mold, so it was missing the top edge. One earring also broke in transportation. Other than that, I was pretty pleased with the results. I added earring posts and backings to the smaller pieces to make earrings and a wire jump ring and cord to the pendants to create necklaces. Looking forward to wearing them to class tomorrow!

Setting up the file to mill was the fun (read: worst) part. In my efforts to fit my own subtle jewelry tastes, I had made the parts too small to effectively mill with an 1/8" endmill, so I had to scale up my file a bit. Note to future students: make sure there are no gaps/holes/etc. in your design that are smaller than 1/8". After scaling it up, I put the file in MasterCAM and Calvin and Jen helped me set up my toolpaths. Because the part was so small, we were able to do it all with an 1/8" flat endmill. The first toolpath used a linear motion and just a 0.1" stepdown to clear away material without break the tool. The other toolpaths dealt with each part of the mold individually. I used a radial motion to mill the two circular pieces and a scallop motion for the more rectangular one. I then set the feeds and speeds based on a resource Calvin found on the internet for machinable wax: 100 feed rate, 50 plunge rate, and 4000 spindle speed.
To actually mill it, Calvin and I used the Shopbot, fixtured my part with hot glue, and put in the 1/8" flat endmill and tightened it to the proper torque. The job took roughly 20 minutes to run. For some reason the Shopbot decided to up the spindle speed to 18000, even after setting it in both MasterCAM and the Shopbot software, but fortunately it did not cause a problem with the milling. Other than that, everything went pretty smoothly with the milling process.
I then cast the Oomoo, which was a very easy and surprisingly clean process thanks to Jen's tip to put brown paper everywhere and to use two disposable cups to mix, transfer, mix some more, and then pour into the mold. I tapped it to get out the bubbles (and also to get out my own stress by the end) and then left it overnight to dry.
I came back the next day and pulled out the oomoo. It looked pretty good. There were no bubbles, which was nice, but the cylinder I had added to form a hold in the pendant didn't work out quite as I had hoped, so I had to improvise with the paper part of a cotton swab inserted between the two part of the mold.
I then cast the drystone, using a 5:1 drystone to water ratio by weight. My part was small enough that I didn't need much, so I got to experience the fun of measuring exactly 0.2 oz. of water. Jen told us that our instincts about how much water to add would be wrong, and sure enough, even after following the USG website's instructions, I thought I needed more water. Fortunately, I waited a few seconds and the mixture turned from a thick, grainy paste to a pourable liquid, which I then poured into the mold. The two part mold was a little difficult to pour into, so I ended up cutting the oomoo a bit to make the spout larger. It still took a lot of shaking and jabbing with a popsicle stick to get it to settle into the mold.
I ended up doing three batches. The first and third were just straight drystone, and the second was drystone with a big of black dye swirled in. The black dye mostly just created a faint gray tint, though there was a bit of a spotty black texture on one of the earrings in that batch. The final pendant came out a bit messed up because I didn't add quite enough mixture to the mold, so it was missing the top edge. One earring also broke in transportation. Other than that, I was pretty pleased with the results. I added earring posts and backings to the smaller pieces to make earrings and a wire jump ring and cord to the pendants to create necklaces. Looking forward to wearing them to class tomorrow!