Zach Cohen / How to Make (almost) Anything
Molding and Casting / Extruder Cap
I set out this week to make a mold for an extruder cap that I could use to test the pneumatic bladder for my end effector.

Mastercam, as usual, gave me a headache, but once I properly organized my drive surfaces, the file prep was straightforward. Milling the mold also went fairly smoothly, in part because I chose to considerably reduce the size of my piece so that I would not have to make extra walls, as well as to limit the depth that the endmill would go to not risk throwing my stock off the bed.

Mixing the silicone was straightforward, however pouring without making a mess was not. I was able to limit the overflow so that only a thin skin remained around the edges. Still it was not as clean as I would have liked.

Curing took a little bitter longer than I expected, likely because I slightly exceeded the 1:1 ratio. Demolding was very easy because their was no risk of the silicone and wax together, however I had to be a little careful because of the thinness of the cast pieces.

Pouring the plaster was a little bit difficult because my sprue was very small and mold was not very volumetric. I had to go very slowly and pause several times to tap the material down, as well as get rid of air bubbles.
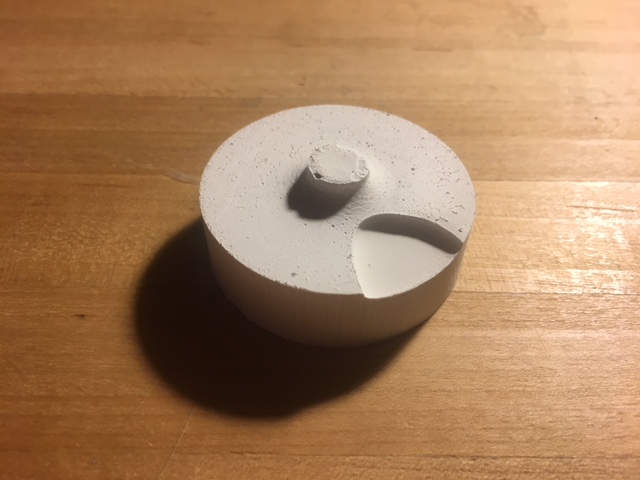

The cast came out pretty well except for a pretty big pocket of material that was missing, most likely due to an air bubble that was never burst. I kind of like the shape of the missing piece though, it looks like a fingerprint. Other than that, the resolution and fidelity were good though and the material seems to be pretty strong. Moving forward, I will try the same cast in acrylic so that I can actually test the pneumatic bladder mechanism.