
Project management:
Creating a webpage for my work has been the most challenging part of my experience in the class so far. I have lots of experience with website editing using a CMS platform, and blogging on wordpress and google, but I have never done actual web development using html. I also have very limited experience using the command line. Because I'm so new to this work, and my understanding of the concepts which drive this work is at the novice level, I've spent many hours reading beginners guides, downloading and exploring GUIs, watching tutorials on various websites and trying to get myself up to speed enough to participate in the class. My twin girls, ages 13, were even trying to help me, because they are learning code at school.
It's been a frustrating experience, but I hope it will ultimately be empowering, once I have learned the basics. I view web development and programming as skills that will enhance my work and allowing me to take my work to new levels, so I have tried to stay positive even as I've been a bit discouraged. I'm thankful to Charles Holbrow, who has spent time sitting with me, teaching me how to use Windows powershell (which is different than the command line taught in the recitation) to access Git with my local files. I can only hope that with practice, it will get easier. Update: this work is continuing through week 2. Still having trouble on Saturday and am now getting behind. I googled "CMS for Git" and am going to try an open source front end software that will allow me to focus on the products and processes I am hoping to grasp, and not getting caught up on learning html and the git interface in superhuman (for me) speed. Unfortunately, after many attempts to use Netlify as a CMS for the site through Github, I was unable to connect with the repository. I just kept trying and now I've got the basics down.
Computer controlled cutting:
It has been a fun and enlightening process to learn how to translate vector files into the laser cutter and vinyl cutter to create beautiful and geometrically consistent designs. I downloaded Fusion 360 and began to teach myself how to create with the CAD software.
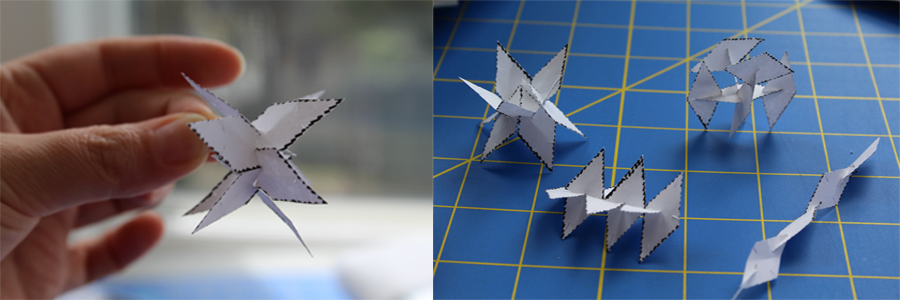
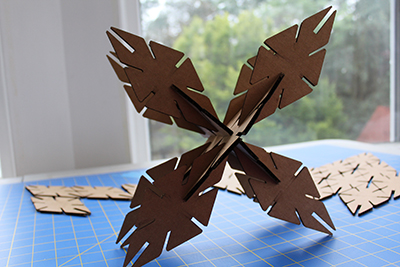
At the same time, since my background is in art, I made models of the diamond forms that make up a Morningstar, printing out various sizes and configurations, and testing where the notches would work well for connection and trying out different combinations with a ruler and a blade.
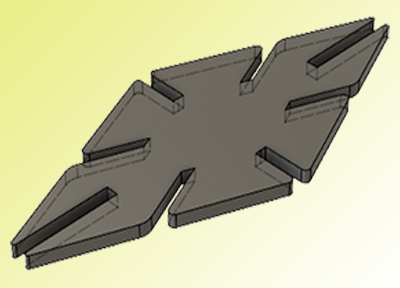
I decided to create notches on the x and y axes, and well as four placed at an angle bisecting the sides. I estimated that this would allow me to try different orientations resulting in a few different types of possible three dimensional patterns. Meanwhile, learning the CAD software was slowly progressing, and I ended up with a design that has allowed me to move forward with laser cutting.
However, when I tried my first cut with the file image, the laser began to cut double lines, apparently accounting for the three dimensionality. I had to flatten the image in order for it to cut correctly. I also had to create a file that would tell the laser exactly how many pieces to cut.
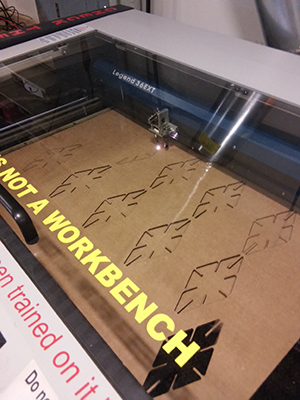
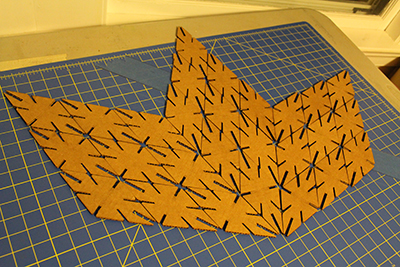
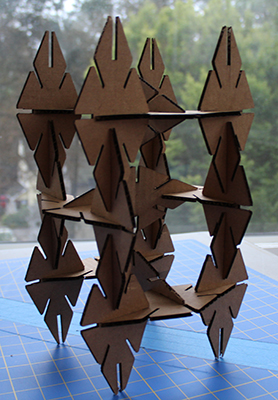
In order to create the form I seek to experiment with, I need at least 72 diamonds to create a full morning star and 144 to create a full 3D form. Since each diamond is about 80 mm/ 3.15 inches long, John in the CBA lab helped me to decide to make about 30 diamonds so I could experiment with differing configurations and extrapolate out from there with the cardboard test diamonds.
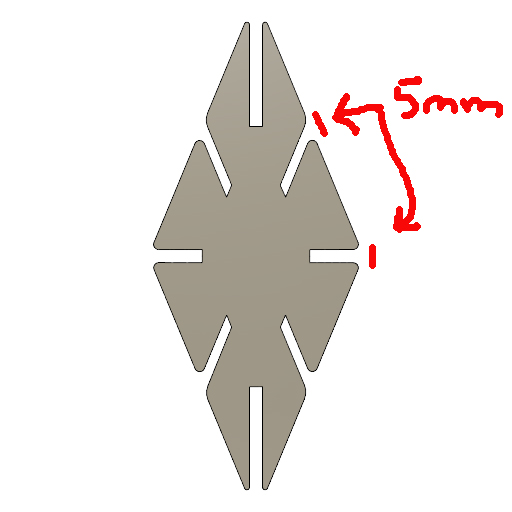
I found out that the diagonal notches, which I had calculated in Fusion, came out much narrower than I expected.
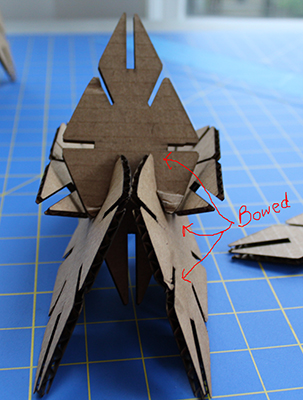
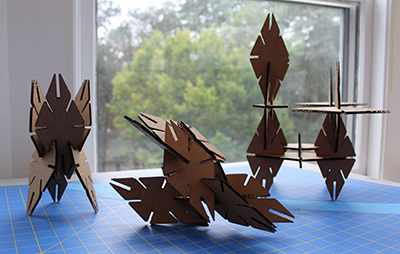
This led to a connection that was difficult to make because it was too tight, and if forced, the cardboard would buckle. I also realized that the diagonal notches were impractical for connecting the diamonds, and created connections whose orientations, while visually appealing, did not really lead to additional possibilities for creating more complex structures or forms.
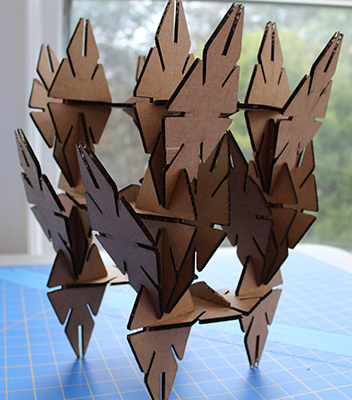
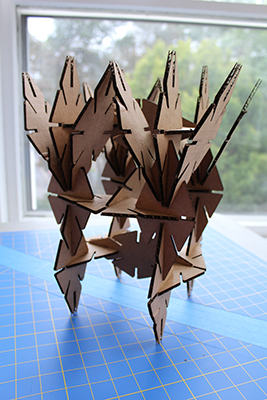
They instead limited the possibilities for connections. I will have to rethink this aspect. Overall, the form created some very unique combinations.
Working with the vinyl cutter was satisfying. I updated an old Photoshop-created Morningstar design in Adobe Illustrator and was able to make it much more responsive and slick. During the vinyl cutting training, Tom introduced the idea of using registration marks to create a multi-color piece. I planned out a 4 color starburst pattern. I also added the text "You Are On Native Land," because, despite the presence of Native names everywhere, tribes, Indigenous people and culture are very invisible in this region. I brainstormed ways to clandestinely post the vinyl cut sticker on government buildings, bridges and other local structures, or putting it on a metal or plastic sign which could be hung in different locations to make a statement.
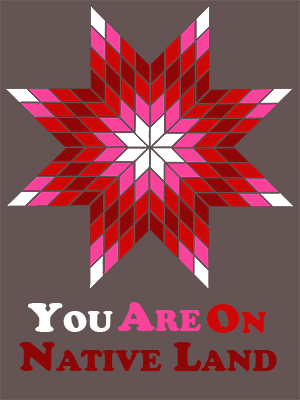
I still plan to do this, however, for the purposes of the assignment, I created, like many of my classmates, a laptop sticker with a truncated image of the Morningstar and the text. I chose a color, maroon, which would blend well with the black color of the laptop.
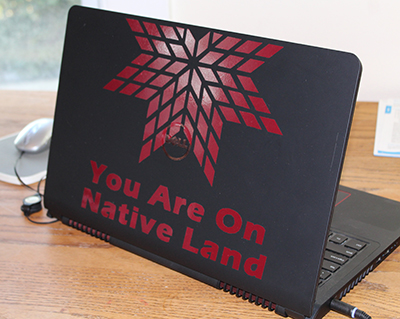
The gloss of the vinyl also adds a reflective quality to the front of my laptop, which is a nice touch.