8.2 machining with wax
8.3 moulding and casting
The task this week was to:
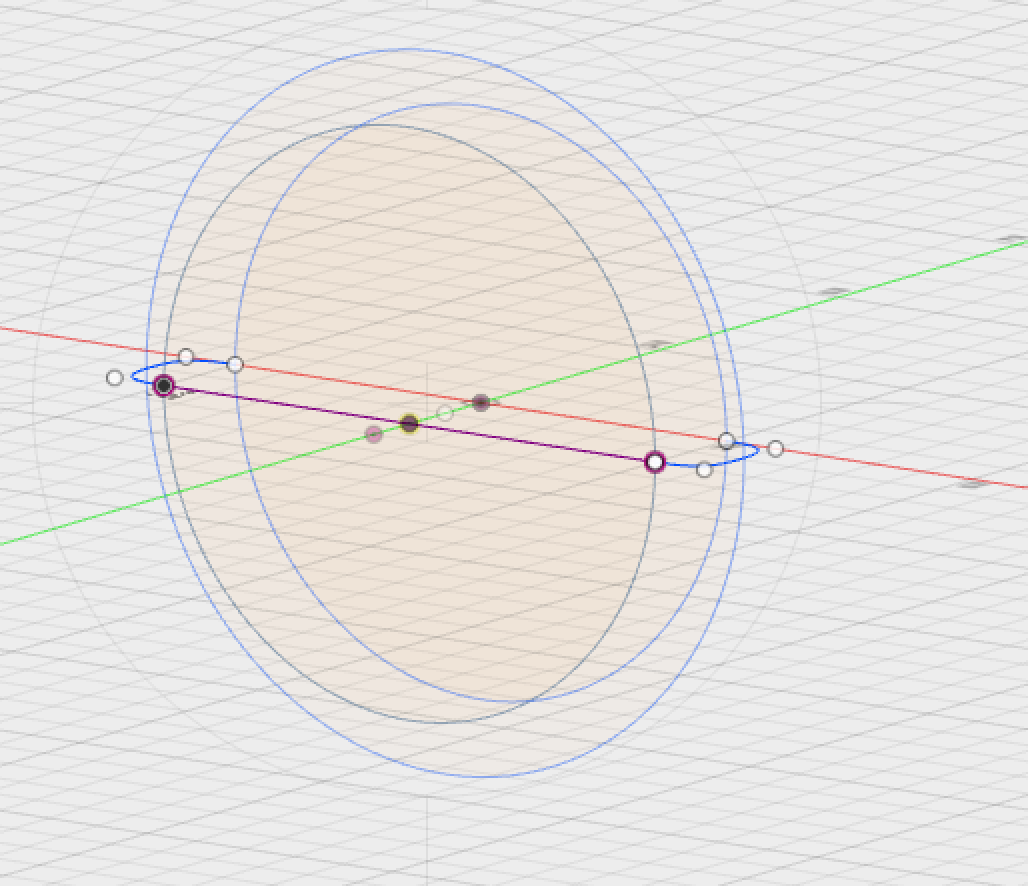
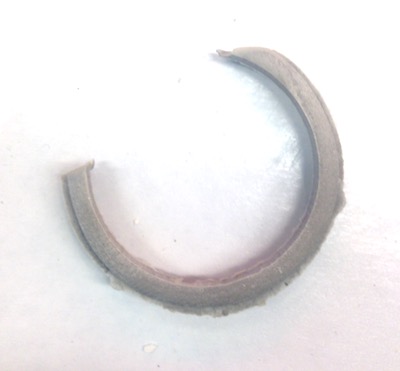
Using the offset planes tool, I made a 3 circle construction, and used conical curves to define curve of wheel rim. As the tool can't machine underneath a lip, the inner surface of the wheel is flat (though ideally it would hook over -- possibly using a more complex, 3-part mould). I used the sweep tool to extrude this line into a surface around the wheel.

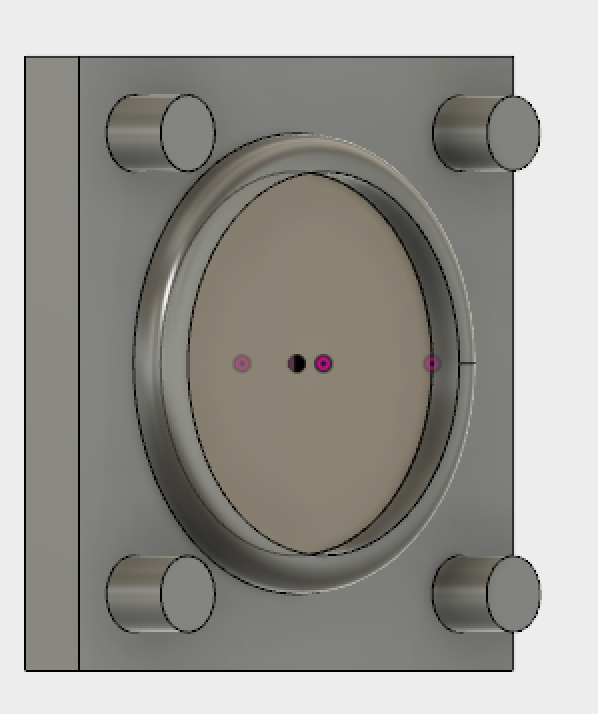
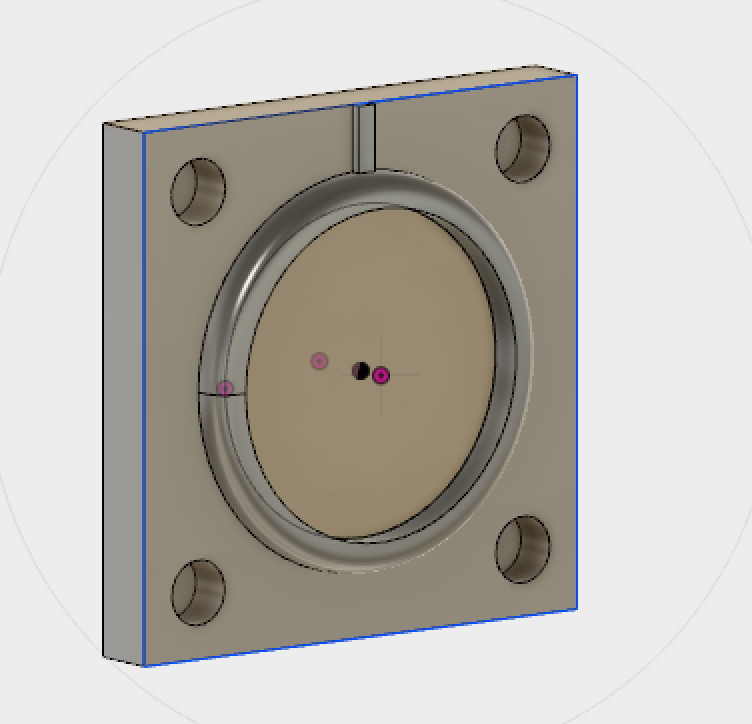
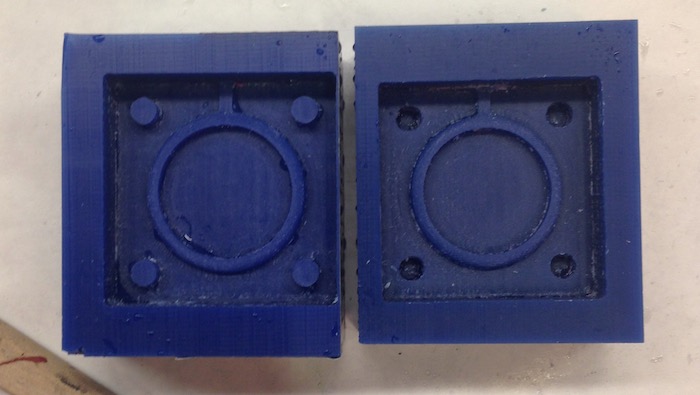
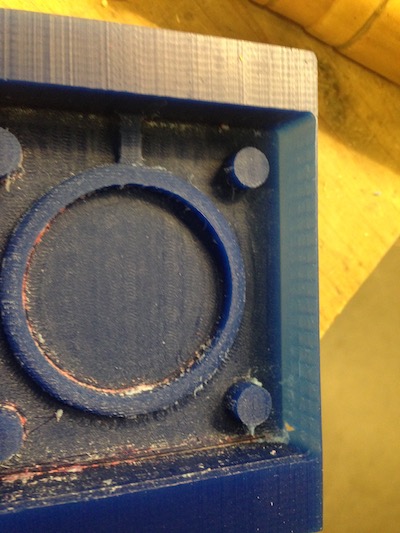
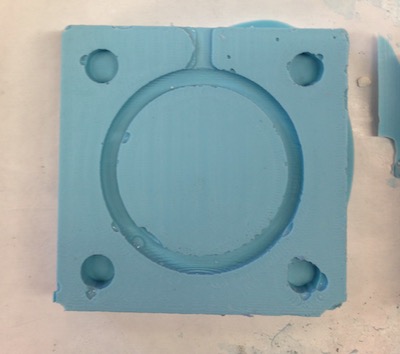
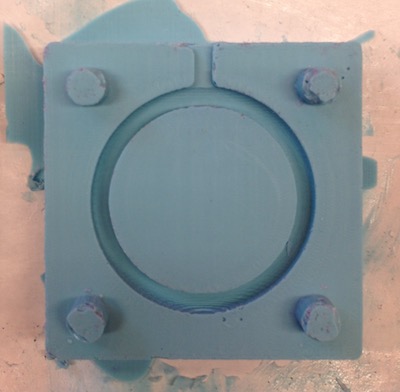
In order to make the curve of the wheel rim, I would need to use a 2-part mould. Once I had made the wheel, I split it into 2 halves, and embedded each in a block, with registration marks (4 cylinders, extruded positively and negatively respectively) to align the 2 halves.
I hadn't exported directly from fusion to .stl before, but this was fairly simple. had to download meshmixer as wouldn't load into slic3r. .
As I wasn't cutting a bowl shape (or similar), I used a flat endmill for both the rough (you should always use a flat endmill for this) and the finish cuts. The parts came out very smooth, with a speedy machining time: it was cool to see the shopbot I'd cut out a whole chair on a week ago be used for a task as delicate as this. One of the mistakes I made was to scale the piece in the program, as I realised I'd made my .stl file twice the size it should be, making one half of the mould a fraction of an inch larger than the other.
I was also a little off with zeroing the second part, taking the shopBot extremely close to the edge of the mould. This was nervewracking while clearing the kerf, but fine once supported with duct tape.
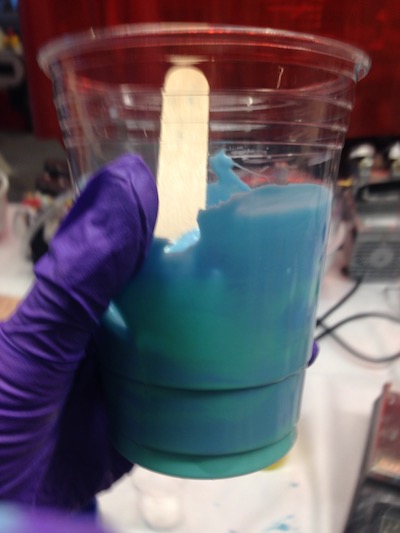
Oomoo is made by mixing 100 parts of a turquoise Part A, with 120 parts (by weight) a blue Part B. It's important to mix at every stage: first the Part A (which you assume may have been sitting on the shelf for a while) and Part B, then, when mixed together, to eliminate all inhomogeneities in the mix. The turquoise on the sides of the cup above indicate that it still needs more mixing.
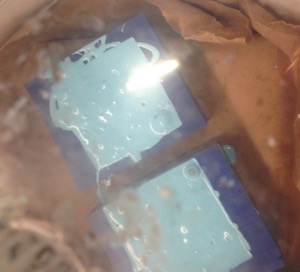
Once mixed, the cup is placed in a vacuum chamber, which brings air bubbles to the surface. It's important to avoid bubbles, as these can cause issues with the mould, making it break, or have poor surface properties. The inside of the mould should be sprayed with mould release, to ensure easy extraction. After this, the Oomoo is poured, taking care not to pour directly onto the desired part, but instead to tilt the mould, so that the Oomoo flows smoothly over the surface.
Once poured, the moulds are placed back in the vacuum chamber to extract more bubbles, then left to set. Theoretically, this only takes 25 minutes, though I left mine for well over 36 hours.
This can be seen from the results of my first cast, which did reasonably well around the bottom edge of the mould, but where the sediment of the hydrostone had settled, leaving just water at the top, there was nothing there. In order to test whether this is a problem with the mould (the inlet is quite fine), or with the mixture I used, I've left a second test overnight.
- design a 3D part
- machine the part from wax
- make a mould, and use that mould to cast parts
modelling a wheel
I am still getting the hang of Fusion, having not used much since week one, but it turned out to be easier than expected (especially with a much faster laptop), and I enjoyed using the software a lot more than I did before. The part I wanted to design was a silicon wheel rim for the robot I'm designing. This would give the wheels (which could be laser cut from wood or acrylic) better grip on surfaces like carpet.Using the offset planes tool, I made a 3 circle construction, and used conical curves to define curve of wheel rim. As the tool can't machine underneath a lip, the inner surface of the wheel is flat (though ideally it would hook over -- possibly using a more complex, 3-part mould). I used the sweep tool to extrude this line into a surface around the wheel.
In order to make the curve of the wheel rim, I would need to use a 2-part mould. Once I had made the wheel, I split it into 2 halves, and embedded each in a block, with registration marks (4 cylinders, extruded positively and negatively respectively) to align the 2 halves.
I hadn't exported directly from fusion to .stl before, but this was fairly simple. had to download meshmixer as wouldn't load into slic3r. .
machining
Once the part was rendered as a mesh, I exported the .stl files to the Partworks3D software to talk to the ShopBot. This software takes the user through a number of stages to plan the toolpaths, then exports the calculated toolpaths as .sbp files, which talk directly to the machine (using VCarve). As with x-y milling on the ShopBot, it's really important to make sure the axes are zeroed correctly before calculating the toolpaths. This is defined in the second tab, where the size of the part is also planned.
depth of cut
One of the problems with using a much thinner tool is that the length of the tool is considerably shorter. This means that the collet can collide with the features of the part if not designed carefully. Collisions are really serious with machining harder materials, but can still destroy wax, so the design needs to avoid this problem. Luckily, my design is quite shallow, though it means that I shouldn't try and make the 'block' of the mould -- the negative space at the top of the wax -- too large, for fear of damaging the sides.Tooling choices
Milling the part typically consists of 2 stages:- rough cutting, where you move in big steps to cut out the bulk of the material
- finish cutting, where you refine the cuts made to the piece, leaving a smooth surface
As I wasn't cutting a bowl shape (or similar), I used a flat endmill for both the rough (you should always use a flat endmill for this) and the finish cuts. The parts came out very smooth, with a speedy machining time: it was cool to see the shopbot I'd cut out a whole chair on a week ago be used for a task as delicate as this. One of the mistakes I made was to scale the piece in the program, as I realised I'd made my .stl file twice the size it should be, making one half of the mould a fraction of an inch larger than the other.
I was also a little off with zeroing the second part, taking the shopBot extremely close to the edge of the mould. This was nervewracking while clearing the kerf, but fine once supported with duct tape.
moulding and casting
oomoo
The first step in making the cast part is to make the mould. To do this, we're using a product from Smooth-On called Oomoo. Oomoo is non-toxic, and sets to form a flexible, silicone mould. This means that it can only be used to cast non-silicone parts (not ultimately what I want from the wheel rim), but so long as it's used carefully, it doesn't damage the wax part, and is an easy substance to test the mould.
Oomoo is made by mixing 100 parts of a turquoise Part A, with 120 parts (by weight) a blue Part B. It's important to mix at every stage: first the Part A (which you assume may have been sitting on the shelf for a while) and Part B, then, when mixed together, to eliminate all inhomogeneities in the mix. The turquoise on the sides of the cup above indicate that it still needs more mixing.
Once mixed, the cup is placed in a vacuum chamber, which brings air bubbles to the surface. It's important to avoid bubbles, as these can cause issues with the mould, making it break, or have poor surface properties. The inside of the mould should be sprayed with mould release, to ensure easy extraction. After this, the Oomoo is poured, taking care not to pour directly onto the desired part, but instead to tilt the mould, so that the Oomoo flows smoothly over the surface.
Once poured, the moulds are placed back in the vacuum chamber to extract more bubbles, then left to set. Theoretically, this only takes 25 minutes, though I left mine for well over 36 hours.
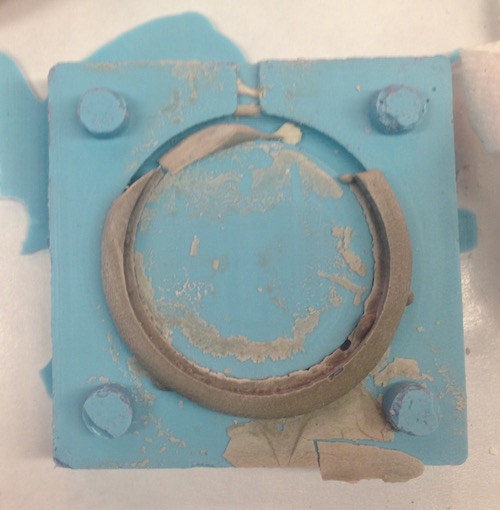
hydrostone
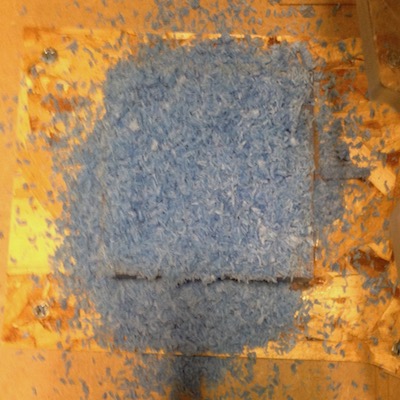
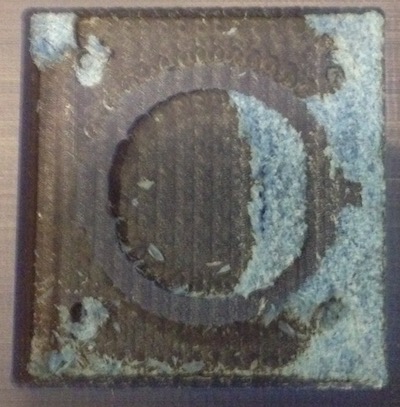
After the moulds have come out, the next step is to mix a hydrostone cement to form the part. The hydrostone is a plaster with an added polymer, that gives it good setting and structural properties. This comes in powder form, and is mixed directly with water. The first time I mixed the drystone, I was concerned about getting the liquid (which was quite viscous), into the mould, so added some extra water. This turned out to be too much, and not all the water could be fully mixed.
This can be seen from the results of my first cast, which did reasonably well around the bottom edge of the mould, but where the sediment of the hydrostone had settled, leaving just water at the top, there was nothing there. In order to test whether this is a problem with the mould (the inlet is quite fine), or with the mixture I used, I've left a second test overnight.