Week 14: Composites
A few weeks ago, I wanted to build a full structure for the pumping system-- but then I practiced some spiral development and realized that was all way too ambitious. So I decided to go with the Portacool's existing pumping system, and build a composite tank to hold the water... but then our expert TA Grace advised me that this could be disasterous, especially with large volumes of water splashing about during transport. So I narrowed my scope again and decided to just build a splash-guard to hold water down in the bottom of the system, which turned out to be plenty ambitious (for me at least) for a weekend project.
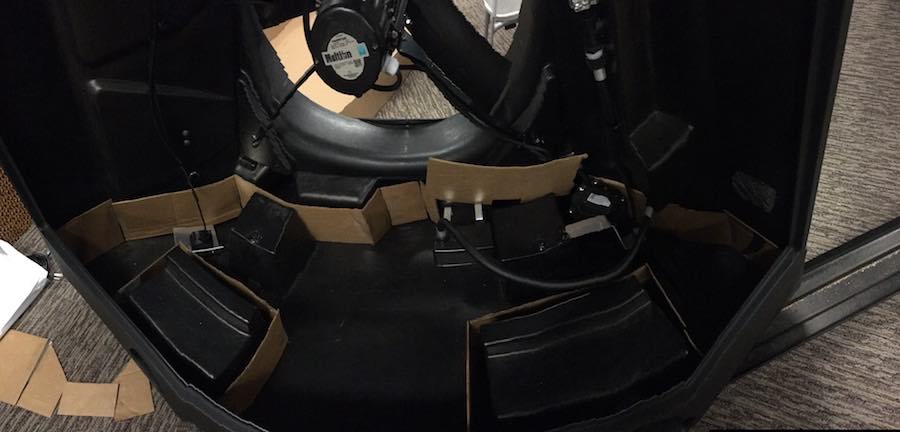
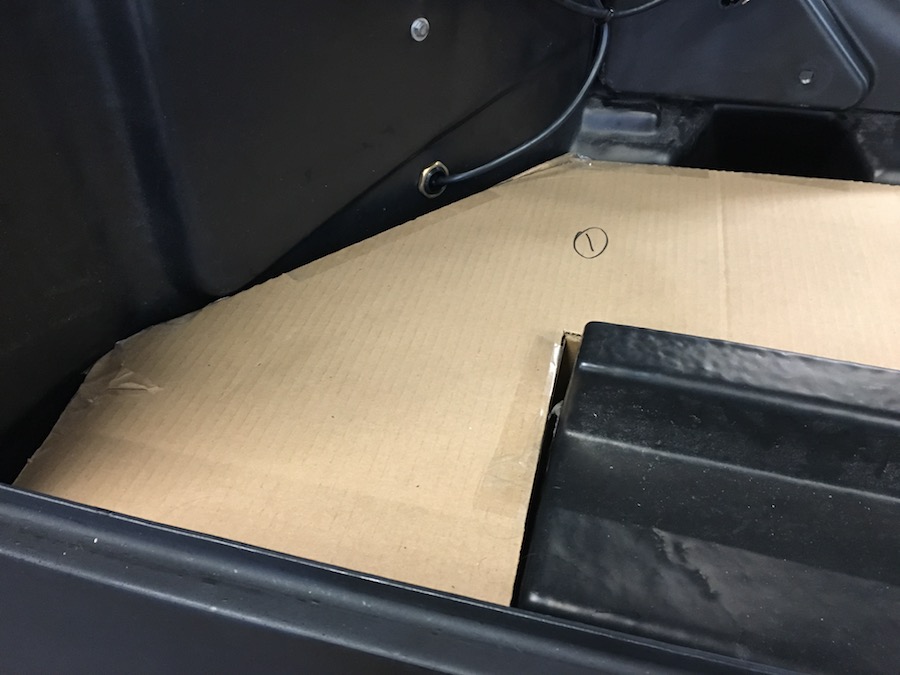
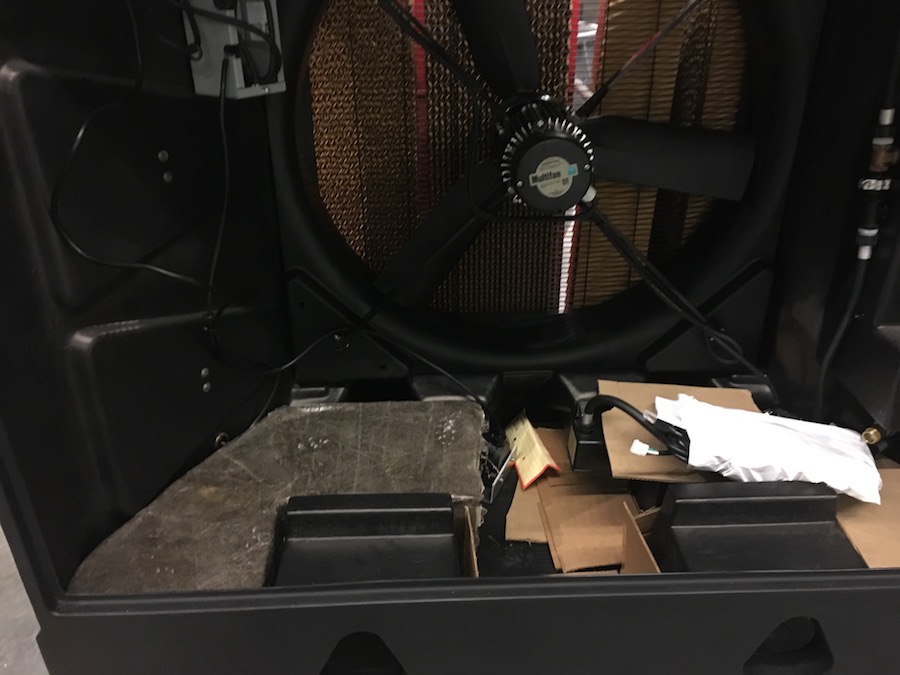
Here's the bed of the Portacool, which turns out to have all sorts of strange angles and curves and bows a bit along the sides-- which all made it very hard to come up with a simple cover for the interior. Mike from PreserveAir convinced me to discard the idea of CADing a foam mold, so I decided to build it out of cardboard instead. Then I can test it before I build up the composites, too, I started by measuring everything, and then laying out a frame of cardboard.
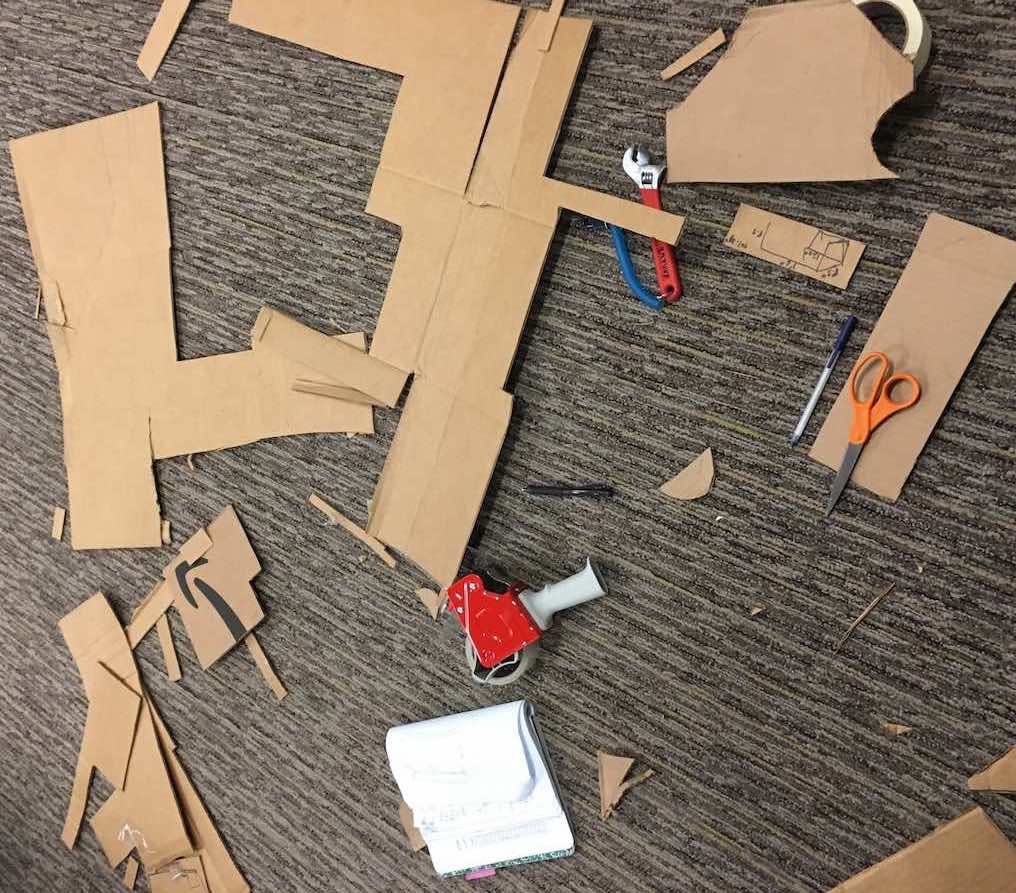
Cardboard craft time! I know how to cut and tape cardboard. No fancy digital fabrication business here.
Ahhhh curved things are difficult to model... Cardboard was a great idea in terms of malleability and rapid prototyping, but none of my measurements quite corresponded to reality and I'm not skilled enough with precision engineering to make this cardboard actually work. I briefly entertained the thought of 3D scanning the surface, but wasn't sure whether that would actually work since I'd have limited angles. You can see how I kept fudging the dimensions.
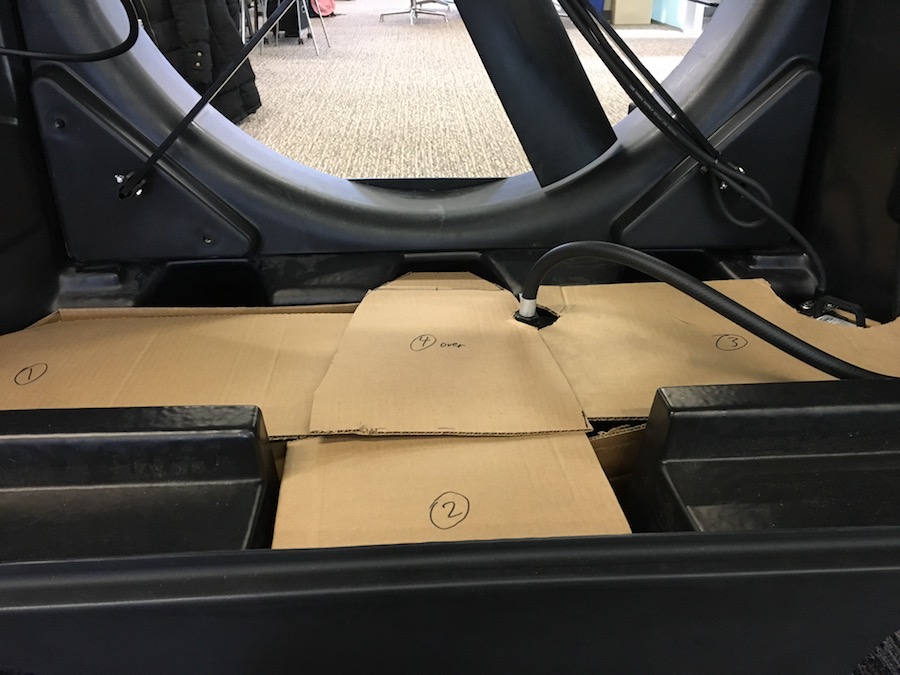
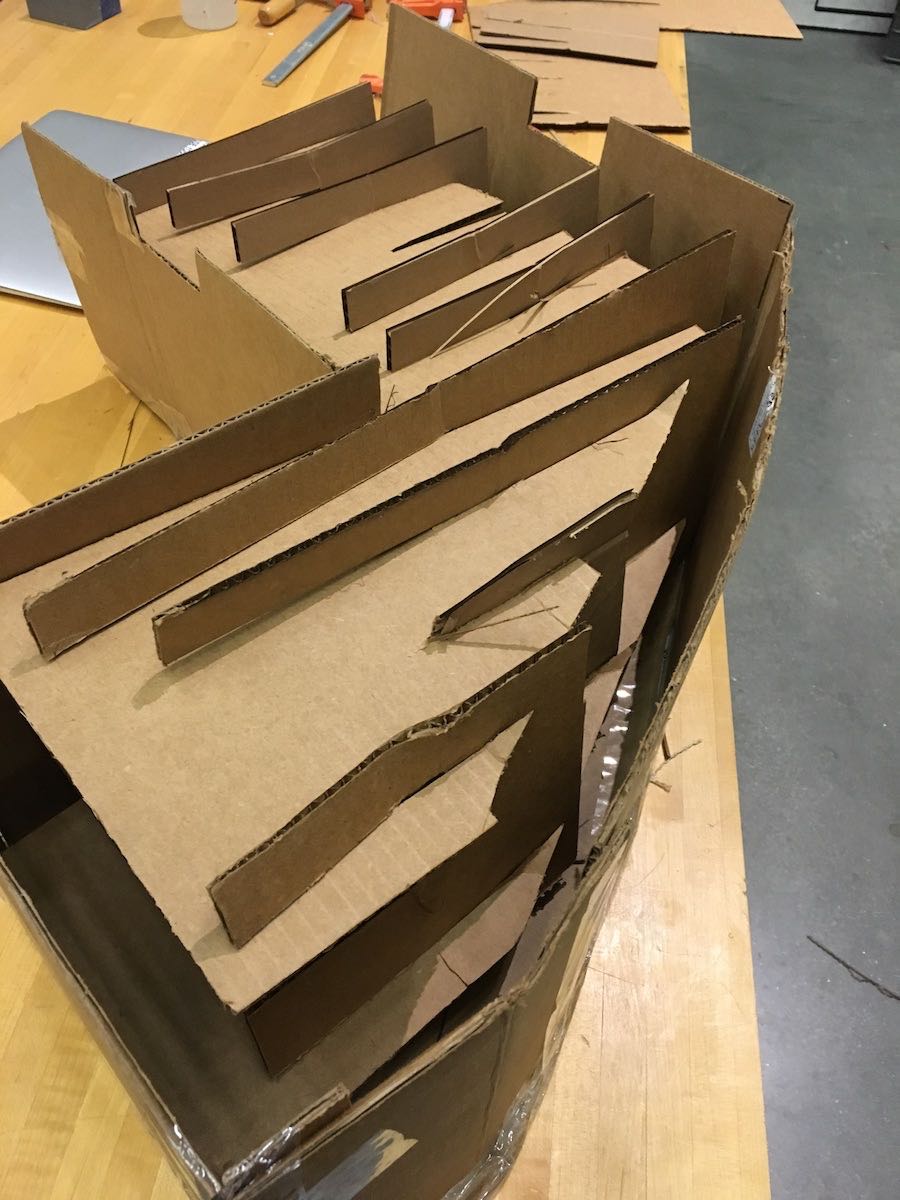
Finally I cut all the cardboard out, and then bent it and added some bonus tolerances so it will all fit once I make the splash guard out of composite material. Here's the full four-part mold, since the full splash guard will need to fit in and around a bunch of obstacles so I needed several different pieces.
Having some doubts about my precision engineering skills, I wisely decided to only do the first part, which is a little under half of the full splash guard.
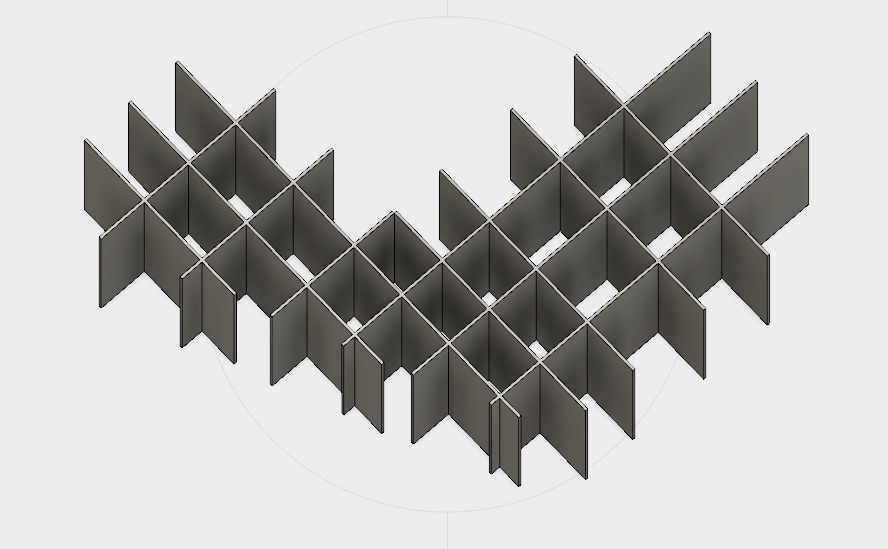
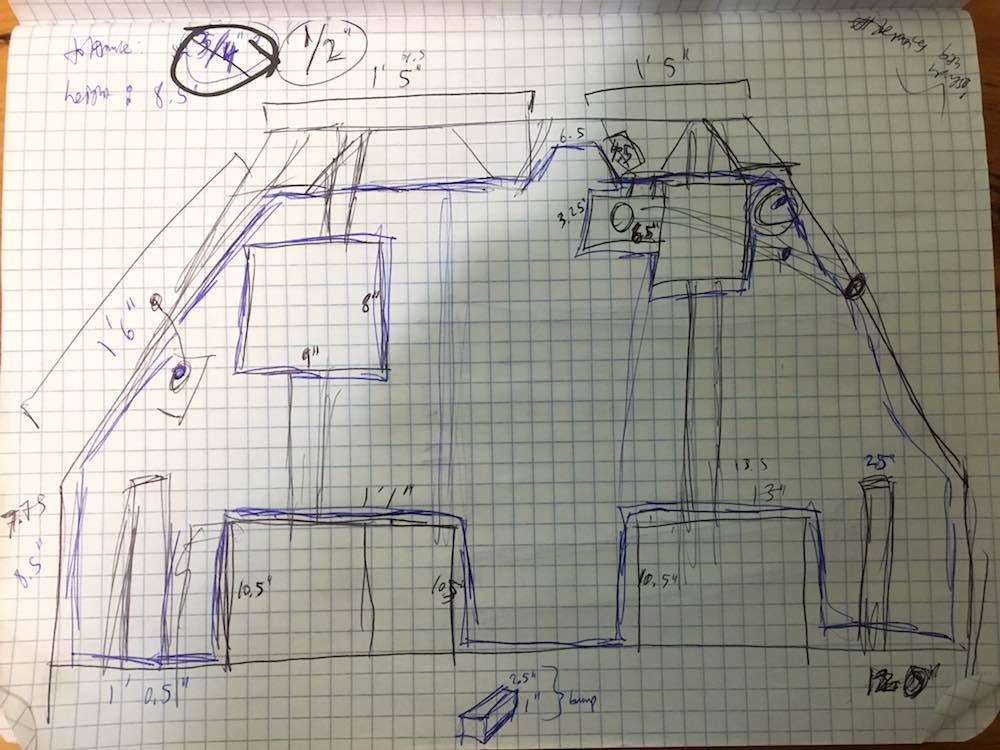
I needed something firm to keep the cardboard mold from collapsing under pressure when vacuum-sealing my composites together. Since this initially seemed like too large a thing for a foam mold, I watched this guy's boat-building video and decided to stick with cardboard for the composite mold. Instead of cutting all the cardboard for an underlying structure manually, I had the bright idea of modelling it and then getting the laser cutter to do it for me!
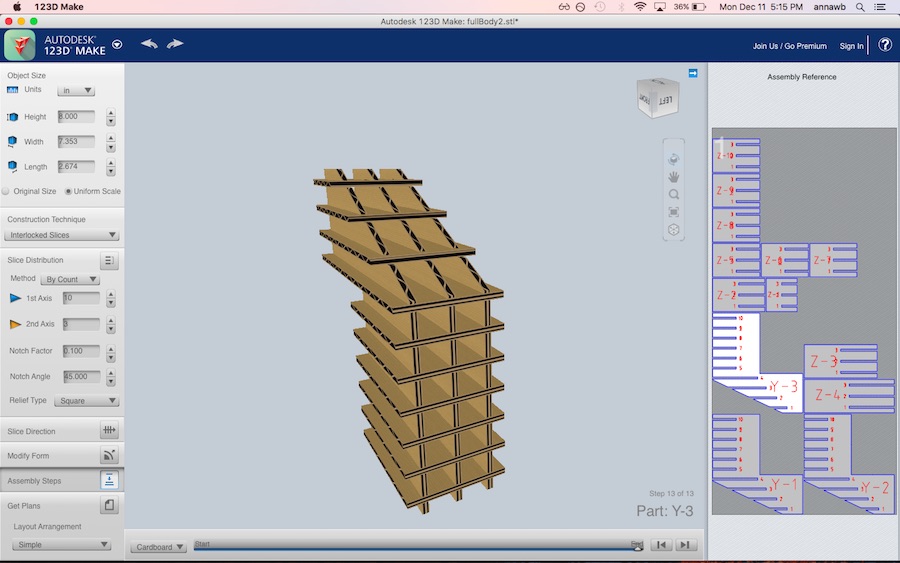
Two hours later, after failing to figure out how to flatten things appropriately in Fusion and then giving up and switching to Autodesk's (now-defunct?) 123DMake, I had a design that was ready for laser-cutting. An exacto knife and ruler would have taken me way less time, but at least this was educational.
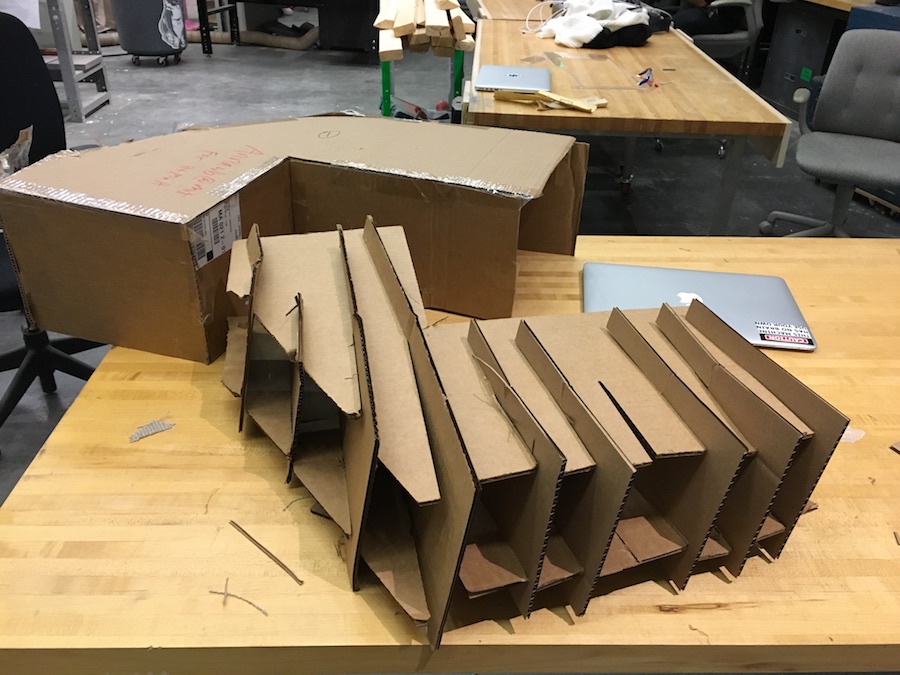
The no-longer-supported 123DMake didn't choose the most structural shapes, so things ripped a bit during assembly. I should've remembered this lesson from the cardboard construction set week...
Oops, the cardboard understructure doesn't quite fit... I must've shrunk it by too much when trying to get my pieces to fit into the laser-cutter.
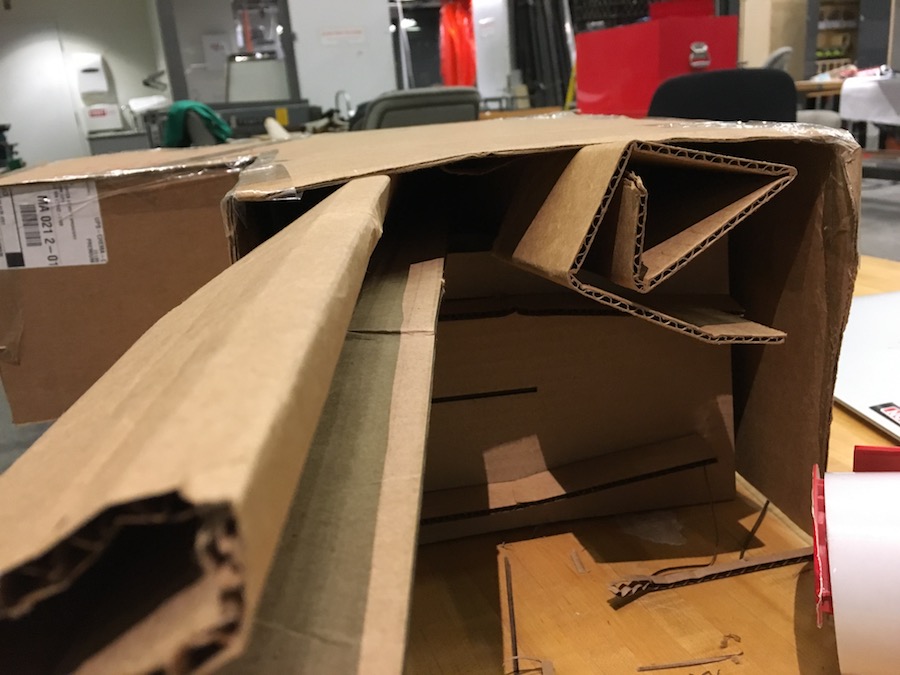
Properly fitting things into other things is a very critical component of effective design. On the other hand, why would the CBA shop have so much scrap cardboard that can be rolled up and stuffed into things if it wasn't meant to be used by lazy builders? My mold only needs to be moderately structural after all...
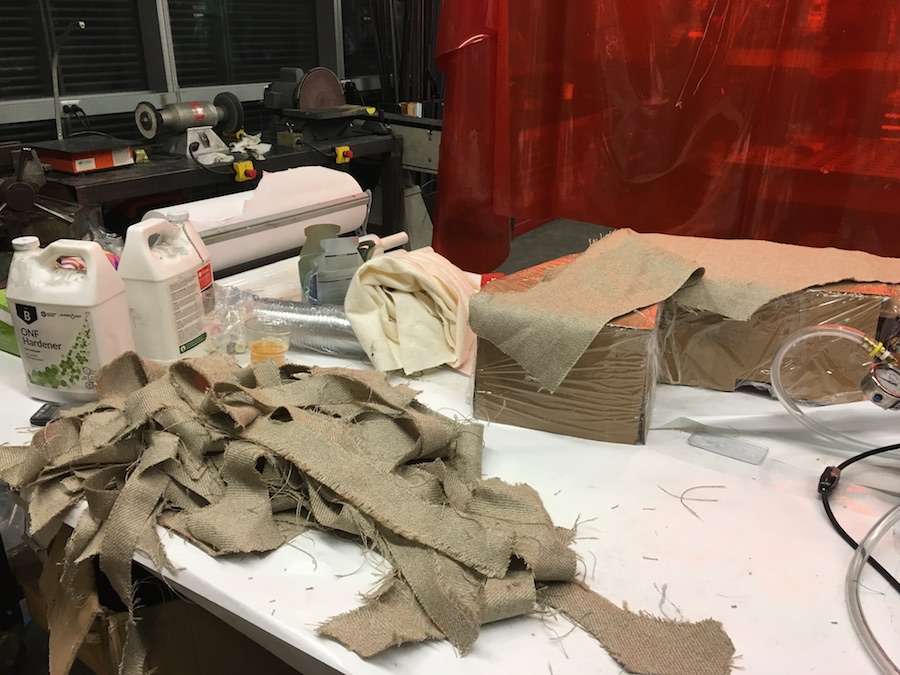
Grace challenged our class to use a cheaper material for our composite-making, since the fancy roll of burlap we're using this week is expensive. Since we were running low on fancy burlap and my model is quite large, I took Grace up on her challenge and used scrap materials. I cut the scrap into strips, boat-building-style, to put onto my saran wrap coated cardboard mold.
Turns out that it's hard to slather resin over large surface. I used over a kilogram of resin because I wanted it to be all watertight! I mixed batches of 200-250g of resin at a time, since too much would start getting very hot. One of my batches started overheating after I deliberated too long about where to add extra layers, but I quickly poured it out and stirred it around before it got too hot to handle. This would've all been a lot neater if my original plan had worked, where I wanted to lay strips vertically for the first layer and then horizontally for the second layer. Unfortunately the faces of my mold were too steep and the strips kept falling off due to gravity, so I had to get more creative and drape longer strips along the top and then down over the sides.
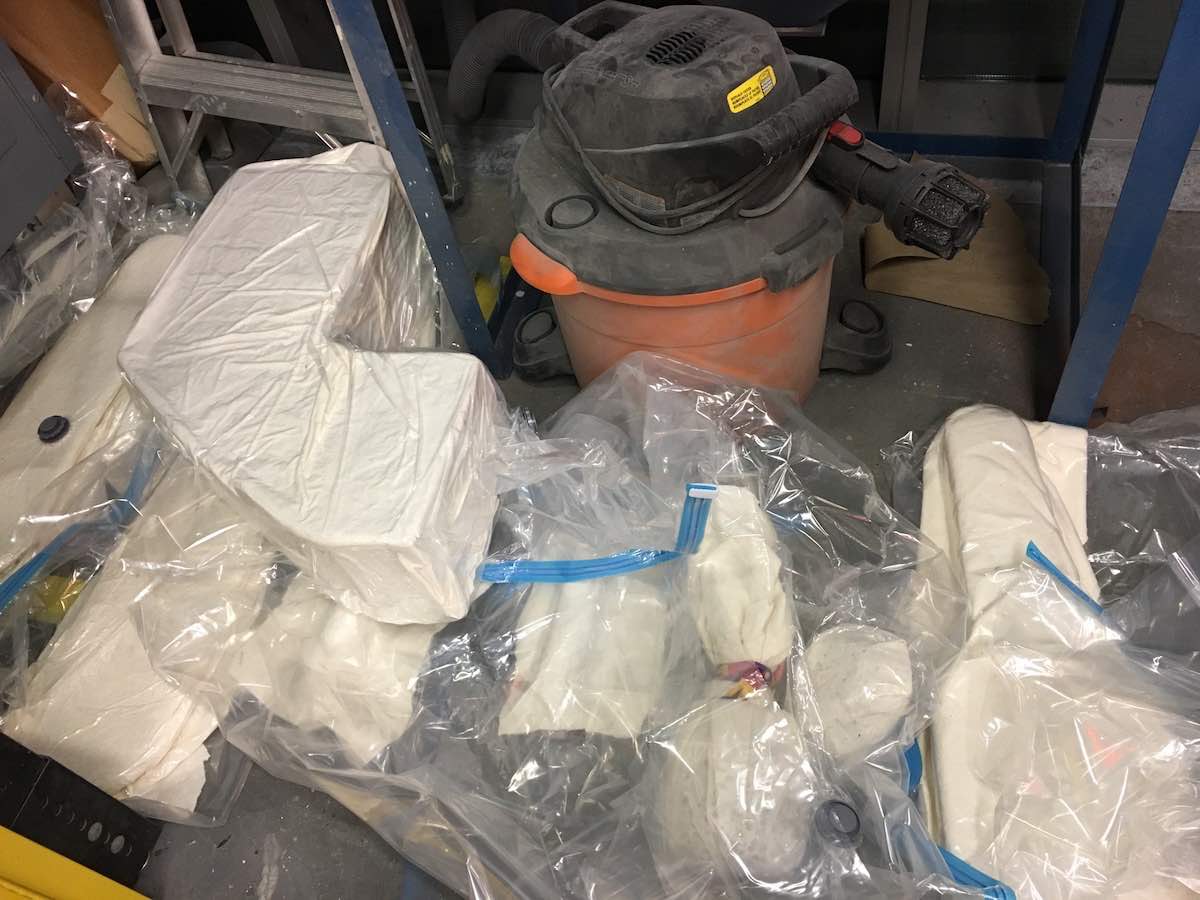
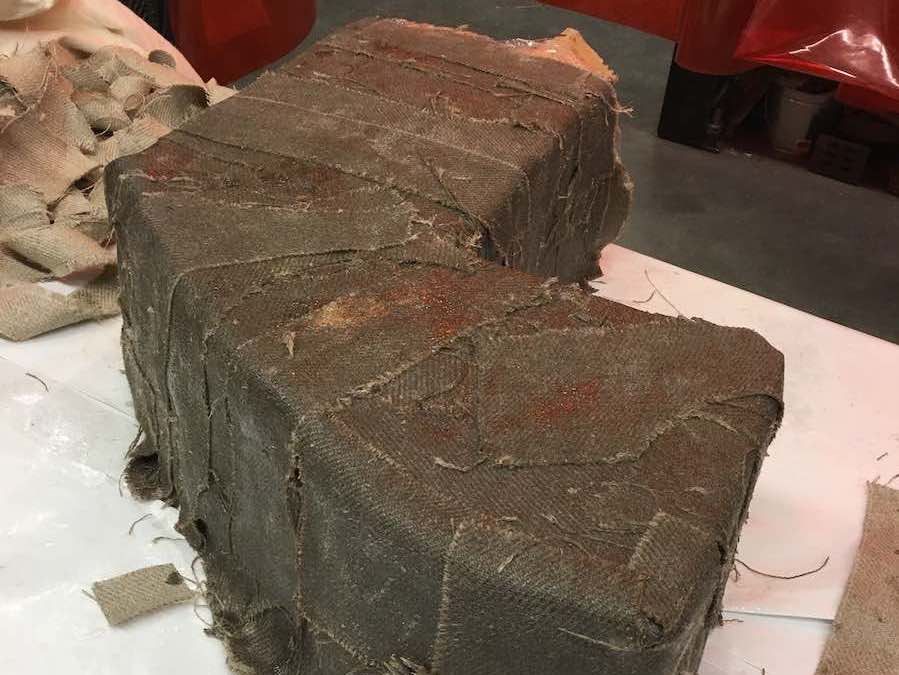
Eventually I got most of the thing covered in two layers, and some of it covered in three layers. If I really cared about making everything water-tight, I should've kept going with a full third layer-- but it was pretty late at this point and composites are finicky, so I was worried about leaving it out for two long. Layering on all the pieces had taken nearly three hours! As instructed, I wrapped the mold in a plastic sheet, poked holes in it with the horrendous spiked roller, and then covered the whole thing in cotton batting before sticking it into a vacuum bag and vacuuming it.
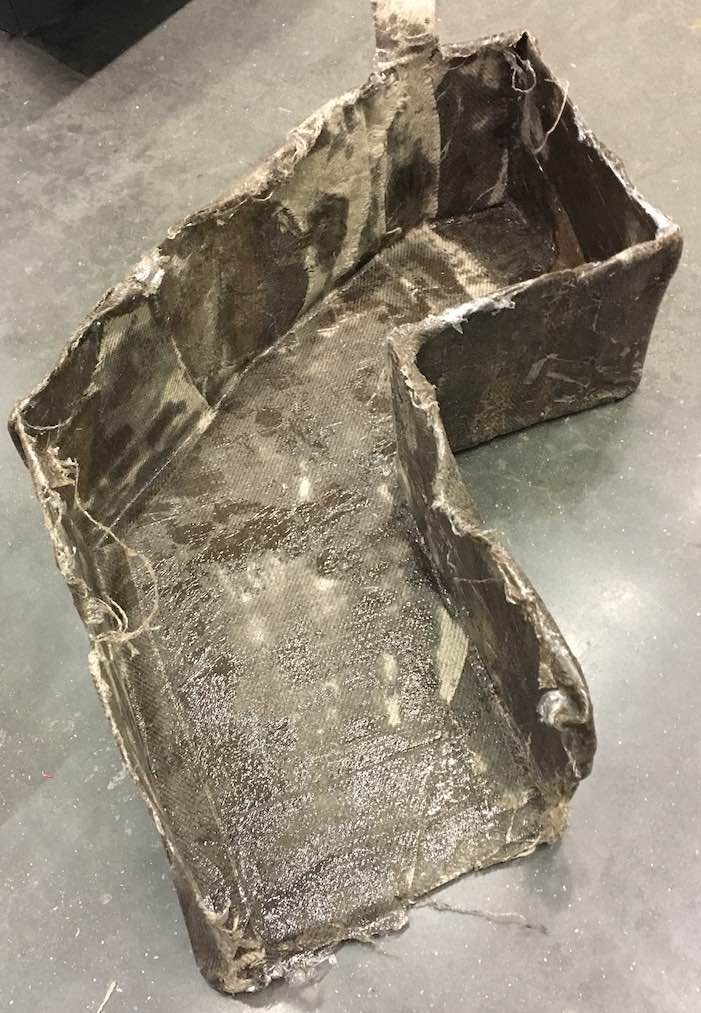
22 hours later, I destroyed the outer cardboard of the mold to unveil my splash guard. It... certainly holds together! The resin didn't soak all the way through on the bottom (I should've slathered more onto the saran wrap directly), and the edges are quite gnarled (I should've wrapped the edges around more carefully).
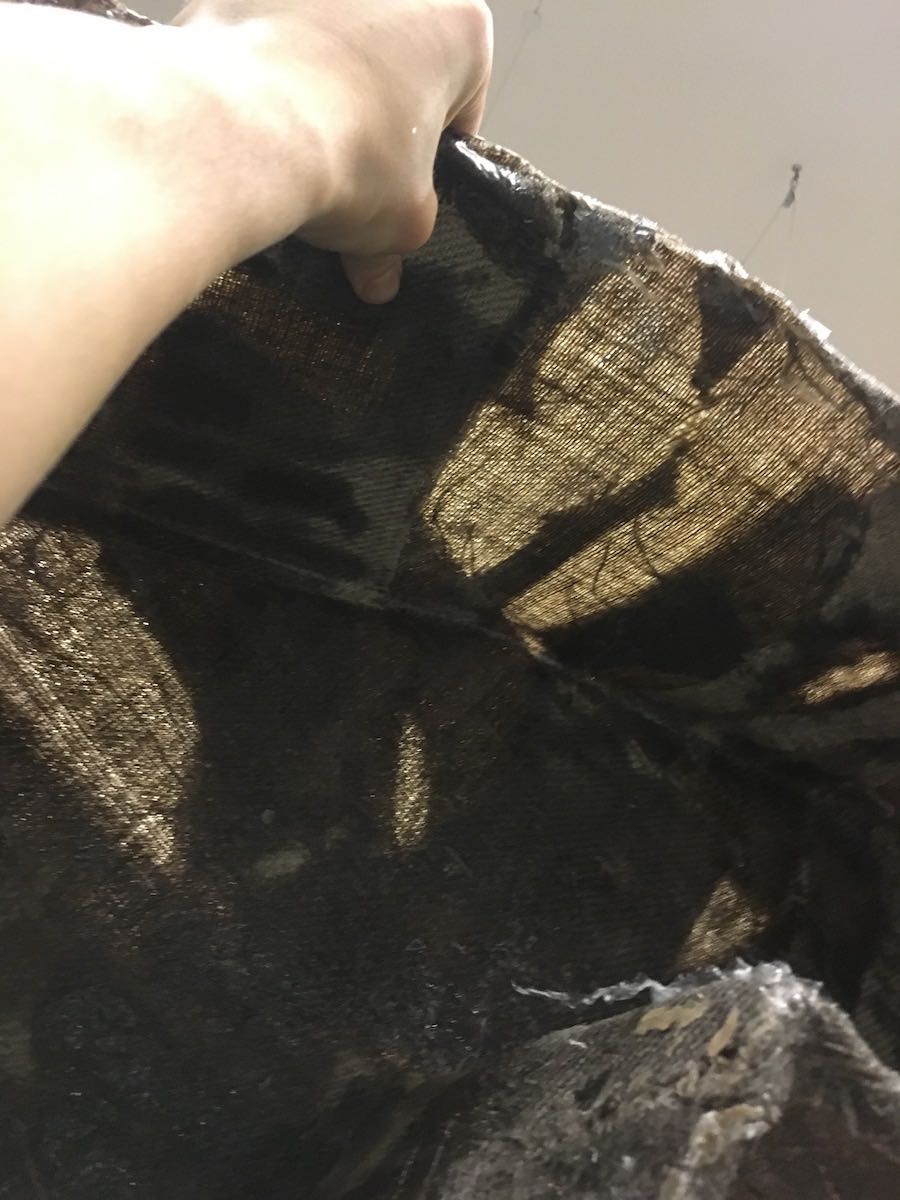
When holding it up to the light, I noticed that I didn't quite get two layers all the way around. I had a feeling this might happen, since it was hard to tell how many layers I'd put where using the scrap strips. Different colors might help, or more precision in laying down strips. (But as you may have noticed, this wasn't the week for precision.)
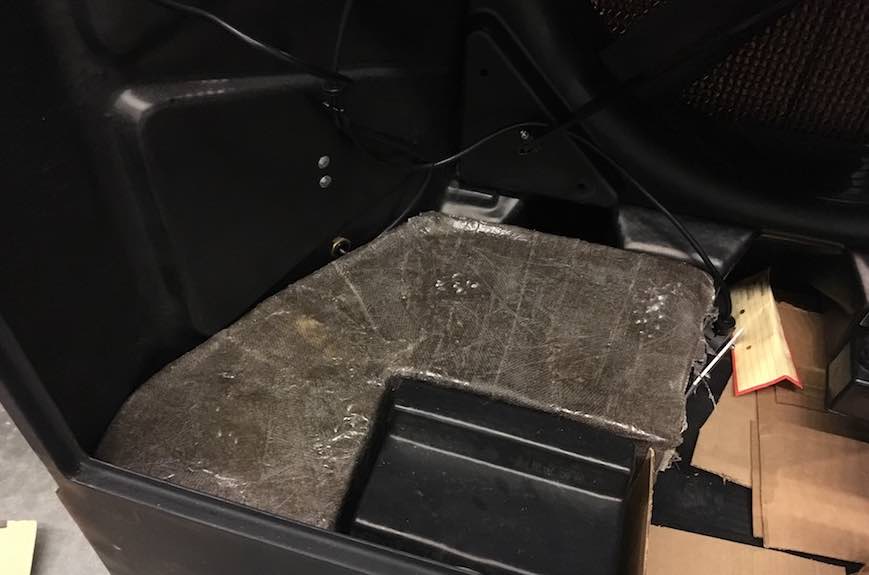
Miraculously, I incorporated enough tolerances in the right place, and the composite is slightly malleable in the right dimensions, and the whole thing just fit right into the Portacool without any modifications!!
Let's just take another moment to appreciate how wonderful this is. I have a sinking suspicion that the rest of the week won't be quite so satisfying, but you never know...