How To Make (Almost) Anything
Week 5 - Computer Controlled Machining
This week was a challenging week to "make something big." Yes, I was slightly intimidated ( confession, before this week, I hadn't used a power tool). My main concern however was that, as a graduate student living in Cambridge, Massachusetts, I did not have a place large enough to contain something "big." **sobs** Additionally, my lab space was completely off-limits for personal projects because of the Media Lab Members' Event happening at the Lab. Luckily for me, I was able to help out one of my labmates when I found out her project had some staging requirements. Emily Van Belleghem created this amazing conical Pepper's ghost display that was best viewed at eye level. Additionally, the ambient light needed to be blocked as much as possible for the effect to be clearly visible.
Design
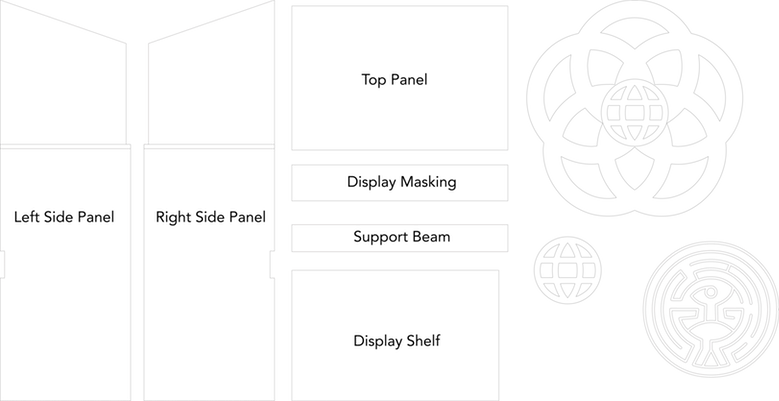
Figure 1: The maze isn't meant for you.
Emily and I met up to talk about what she was looking for to best showcase her work. We took measurements of the monitor, viewing height, and optimal light blocking angles. I took those values and created a design using Adobe Illustrator. Since it was imporant the effect be level, I added slots to the side board pieces to help align the shelf holding up the monitor.
Since I ended up with more space than I anticipated for my OSB sheet, I added on the Epcot logo (using Adobe Illustrator's image trace feature) to help me better understand the tolerances, affordances, and constraints of the ShopBot. Because I'm a pop culture connoisseur, I also created a vector of the maze from Westworld.
ShopBot Configuration
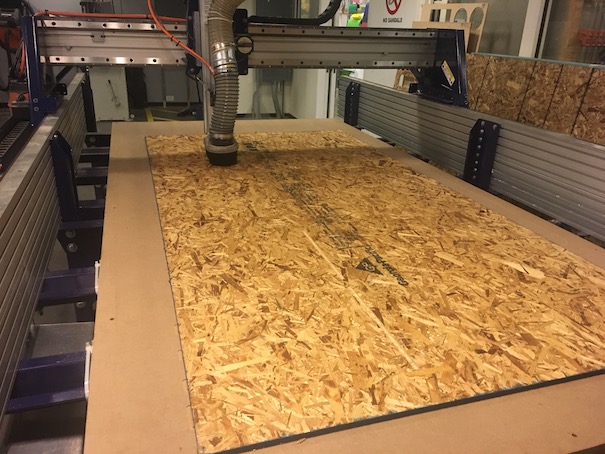
Figure 2: The ShopBot (look how gigantic this thing is!)
Tom is an angel. He spends many of his weekends at the shop so that we can complete our assignments. He provides advice and guidance and is a total pro. This weekend was no exception. I arrived at the shop after completing training earlier in the week feeling woefully unprepared to wrangle with the gigantic pieces of OSB (spoiler alert: all the splinters), nevermind the intimidating ShopBot. Tom wisely assured me that fearing a machine like that was probably best for my health and wellbeing.
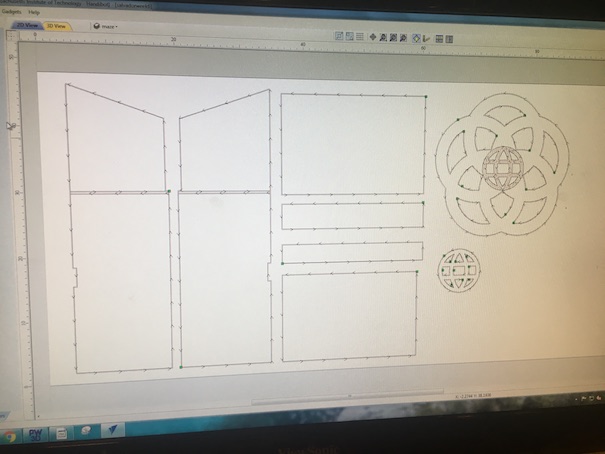
Figure 3: Vcarve Interface
I exported my Illustrator file as a .dxf and loaded it into the Vcarve software. I selected all the geometry that represented slots and created a toolpath that made sense for my needs. I decided to scrap the more intricate maze vector and focus on the cabinet and Epcot logo, since those components could be milled without changing out the .25" endmill. After that toolpath was created, I selected the geometries that would be cut and set the cutting depth to slightly more than the thickness of the board to ensure the ShopBot would completely cut my pieces out. I exported the toolpaths and opened the ShopBot software.
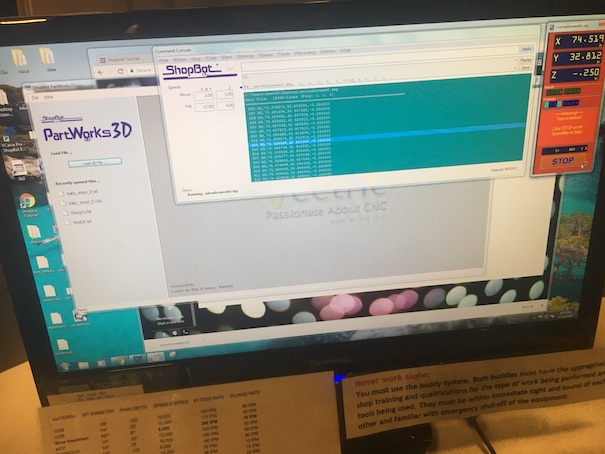
Figure 4: Partworks Interface
I exported the toolpaths and opened the ShopBot software. I positioned the endmill to the bottom right corner of the OSB sheet and made sure that the key was engaged. After turning on the vacuum, I pressed the start button, sort of afraid something would explode (how? idk). The slotting part of the process went by quickly and without incident. However, when it came to cutting through the board, I ran into an unexpected hiccup. While the components of my cabinet were quite large, there were smaller cutouts in the Epcot logo that were getting eaten by the vacuum. I was a little worried about that, however, I didn't want to stop the job incase that would waste the board. Then, a larger chunk of the Epcot logo got lodged in the opening of the vacuum and that made me feel uncomfortable. I stopped the program since Tom was not there at that particular moment, using the stop button on the ShopBot software. I'm glad I did that because I could still use the same sheet of OSB, as the software retains the origin positions from the last job. I reselected the paths that were left to cut and Tom showed me how to add tabs to my toolpath so the smaller pieces wouldn't get lodged in the vacuum.
Production

Figure 5: Unfinished OSB
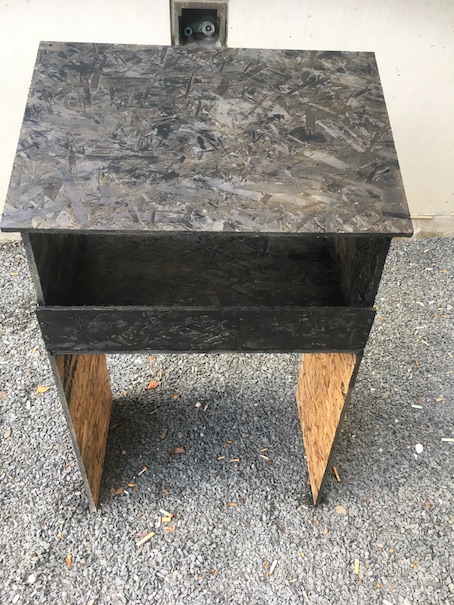
Figure 6: Spraypainted OSB
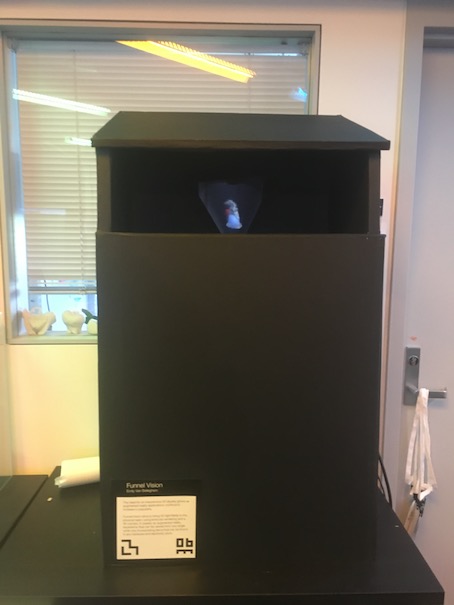
Figure 7: Foamcore covered OSB
Assembly was a process and I'm super thankful that Emily came to help me stabilize the pieces as I nailed them into a secure position. Dan Novy provided spray paint and foam core expertise that really helped upgrade the OSB aesthetic.
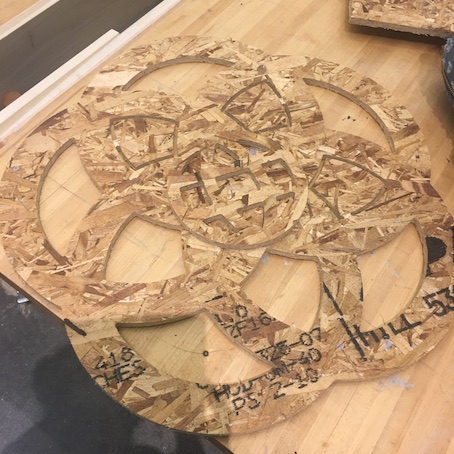
Figure 8: The smaller cutout piece of the Epcot logo was slightly too large to fit into the slot.
As for the Epcot logo, the smaller globe piece doesn't fit into the slotted globe piece. I think that if I had a better understanding of the tolerances of the software, I could have cheated to make it fit. That being said, it's a great opportunity to learn how to sand wood!