How To Make (Almost) Anything
Week 7 - Molding and Casting
Molding and Casting week! Woohoo! This week we were tasked with designing, molding, and casting a model. Since I'm a fan of Nintendo and I need to ration my halloween candy consuption, I decided to make a Nintendo Question Block piggy bank to store my halloween candy stash.
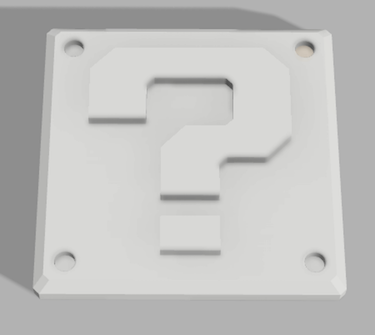
Figure 1: Nintendo Question Block Design
In an effort to learn more about useful tools in Fusion 360, this week, I imported the Question Block design into Illustrator. I created a vectorized version of the outlines and exported those vectors as a DXF file. I then imported that file into Fusion 360. That was pretty neat because instead of having to model the Question Block myself, I could use the accurate dimensions from the original image. I extruded the question mark from the block and recessed the mock screw holes, partly because that's how the model looks in game, but also because I wanted to see how the ShopBot would address extrusions and recessions.
Machining
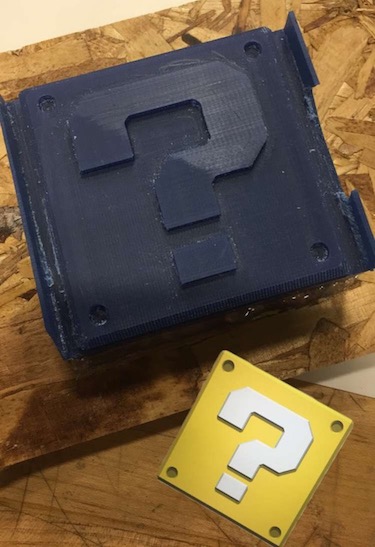
Figure 1: Nintendo Question Block in Machinable Wax
The ShopBot process was fairly similar to the computer controlled machining week. VCarve handles the calculations for the machine path. For three dimensional fabrication, we're also milling in the z direction, so it was important to make sure that the endmill would be able to traverse the z-path. Basically, I made sure none of the z-paths were too deep or too narrow for the endmill to reach otherwise that could cause the wax or the endmill to break.
I hot-glued the machinable wax to a scrap piece of OSB and screwed that into the bed of the ShopBot. I aligned the x,y,z origin and made sure all the settings were appropriate to cut the machinable wax. The Nintendo Question Block took about 10 minutes to run. The rough pass was super quick and the majority of the job time was spent on the finish pass. I had misheard the dimensions of our machinable wax block during class, so I was careful to mill the design precisely onto the block, since there wasn't any margin for error.
Molding
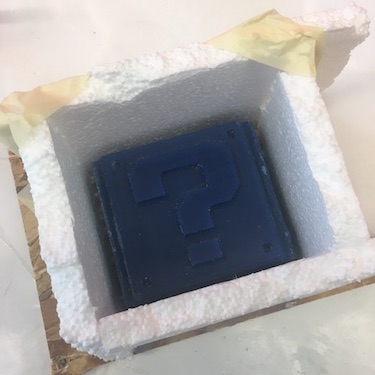
Figure 2: Styrofoam Walls for Pouring Oomoo Mold
Since there wasn't enough room on my machinable wax piece to add boundaries, I created my own using scrap pieces of styrofoam. I hot-glued the styrofoam to the OSB piece and filled any holes with hot-glue.
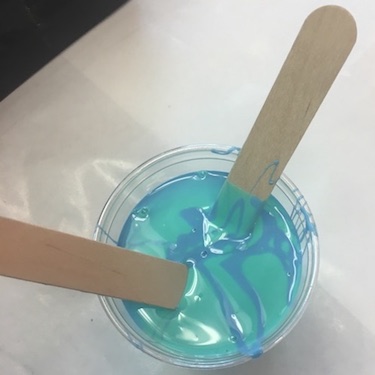
Figure 3: Combining Part A and Part B Oomoo
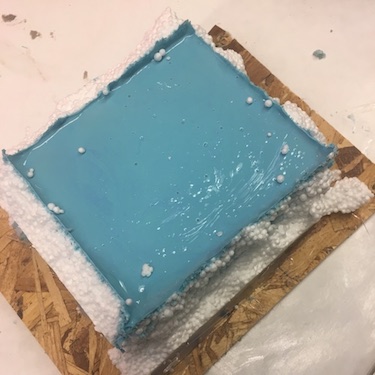
Figure 4: Cured Cast... time to remove the styrofoam
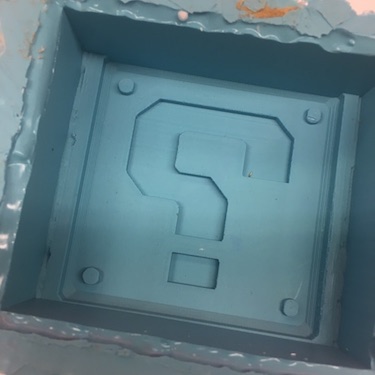
Figure 5: Finished Silicon Mold
Next, I poured and measured equal volumes of Oomoo and mixed in a shearing fashion to prevent bubbles from getting trapped in the viscous liquid. I removed as much air as I could from the silicon casting liquid using a vacuum chamber. Then, I slowly poured the liquid over my machined design, taking care to make sure the liquid was flowing smoothly over the important features. I vacuumed the liquid again (although, I was a little nervous about how the styrofoam would act in the chamber, it turned out just fine). I tapped the bottom of the model against the table for extra good luck that there would be no trapped bubbles trying to ruin my cast and kept my fingers crossed that after 6 hours of curing, my model would come out correctly.
Getting the silcion cast to seperate from the styrofoam and the OSB took a little bit of effort. It was fairly easy to rip large chunks of the styrofoam away, but that turned out to be messier than I expected, plus many of the tiny styrofoam balls became lodged in the silicon mold. However, once I had a decent amount of the bottom of the silicon mold exposed, I was able to remove it from the machinable wax easily.
I think it turned out quite well! There were no distortions from bubbles on the surface of my mold and it was able to lay completely flat, which is important for casting.
Casting
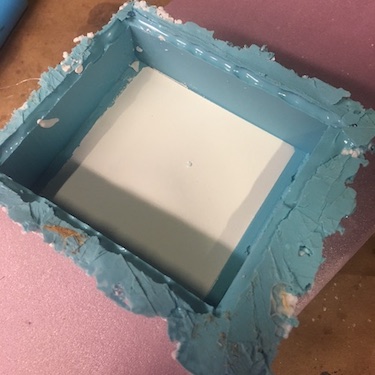
Figure 6: First Pour of DryStone
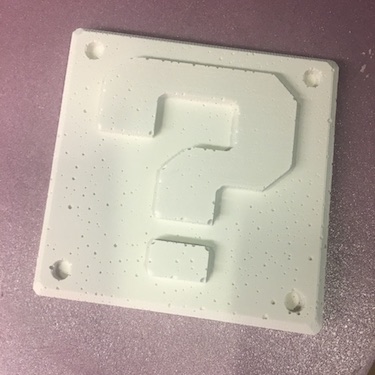
Figure 7: DryStone Cast
I chose to work with DryStone over HydroStone because I knew that I wanted to color my casts to match the Nintendo asset and DryStone dries to white, while HydroStone dries to a greyish color. I poured 80g of the DryStone powder into a cup and added 18g of water. I mixed the liquid until it combined into a pancake batter like consistency. I vacuumed the DryStone mixture to remove bubbles and poured it into the silicon mold. DryStone cures much faster than Oomoo, so a half hour later, I came back and repeated the process three more times to create the four panels for my cube.
Assembly

Figure 8: Painting the DryStone Casts with Watercolor
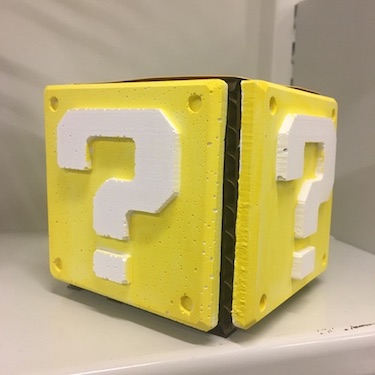
Figure 9: Assembled Cube
As a final step, I watercolored my DryStone cast (although, I probably could have added watercolor pigment directly to the mix). I also laser cut a pressfit cube and glued the casted panels to the side. On the top panel of the cube, I laser cut a hole to fit candy or coins, and on the bottom panel, I added a tape latch for opening and closing the Question Block.