We first created multiple circle patterns to measure the kerf. Two measurements types were gathered: the outer diameter of the physical circles, which we compared to the expected diameter, as well as the inner diameter of the cardboard hole.
From this, we can measure the kerf as the average of the difference between each measured diameter and the expected diameter.
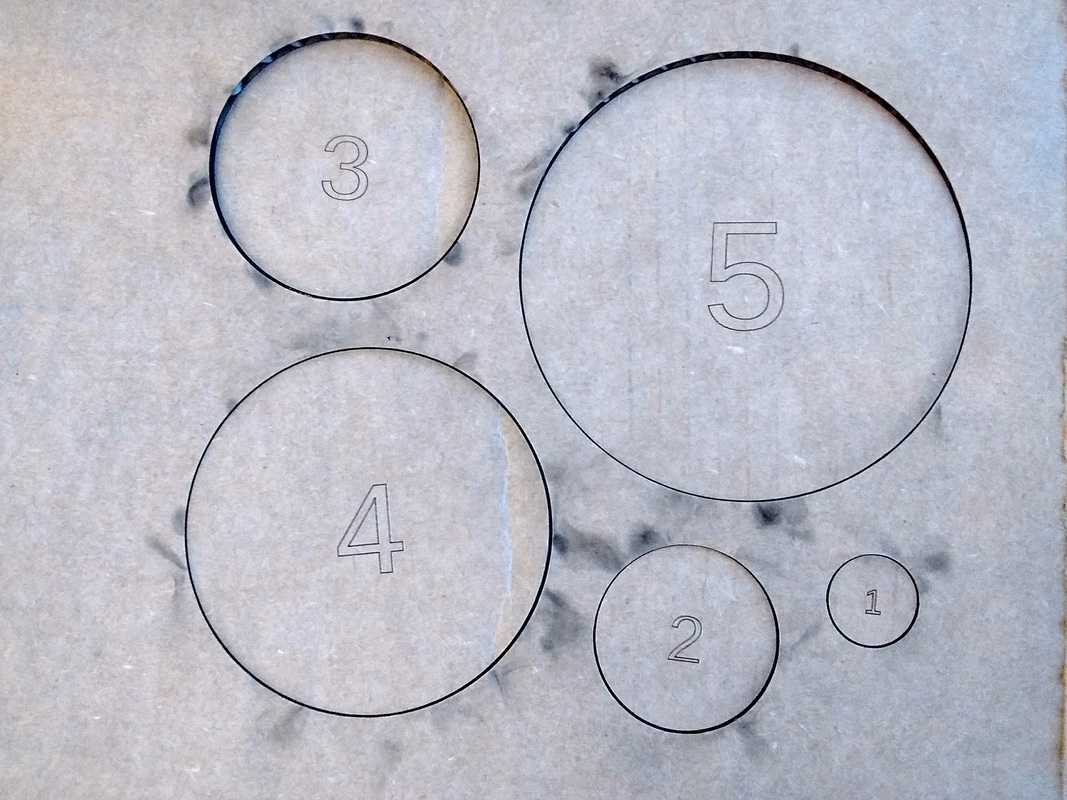
Ben decided to try multiple scales of circles from 1 to 5 inches in diameter. The power setting was using -10% relative, so 90% power.
| Expected | Measured (circle) | Measured (hole) |
| 1 in | 0.9815 | 1.0185 |
| 2 in | 1.9805 | 2.0120 |
| 3 in | 2.9815 | 3.0120 |
| 4 in | 3.9815 | 4.0045 |
| 5 in | 4.9800 | 5.0270 |
The measurements were hard to keep consistent. Getting the same measurement twice with the caliper was somewhat of a prowess. This is because we are looking as very small variations (around 0.01 inch), and that the cardboard expands and shrinks as your apply force on it.
A vision-based non-intrusive measurement would be better.
Our cardboard was 0.17 inch thick and we convened that the kerf was around 0.015 to 0.02 inch with our current setting.
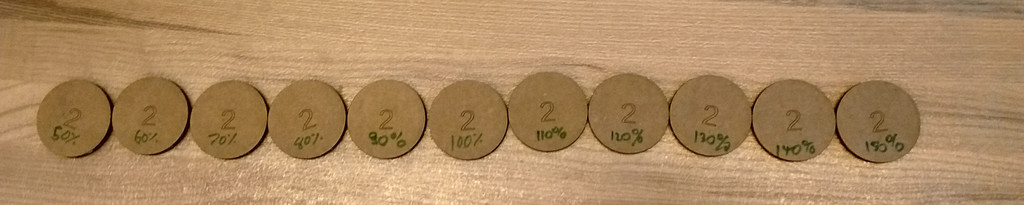
We eventually decided to try to use different power and speed settings to check whether these had any impact. The short answer is that the trend we measured were not conclusive (and somewhat contradictory), but that the variations were probably not significant. All the circles were of 2 inch diameters with power settings ranging from 50% to 150%. We also report the intensity and speed values the machine was using (we set the power percentage from the default interface and then would look at the power and speed from the advanced interface).
| Effective Power | Intensity | Speed | Measured (circle) | Measured (hole) |
| 50% | 50% | 5.8% | 1.9855 | 2.0150 |
| 60% | 60% | 5.8% | 1.9855 | 2.0120 |
| 70% | 70% | 5.8% | 1.9855 | 2.0120 |
| 80% | 80% | 5.8% | 1.9840 | 2.0120 |
| 90% | 90% | 5.8% | 1.9805 | 2.0120 |
| 100% | 100% | 5.8% | 1.9740 | 2.0110 |
| 110% | 100% | 5.3% | 1.9760 | 2.0095 |
| 120% | 100% | 4.8% | 1.9790 | 2.0145 |
| 130% | 100% | 4.5% | 1.9815 | 2.0165 |
| 140% | 100% | 4.1% | 1.9825 | 2.0175 |
| 150% | 100% | 3.9% | 1.9855 | 2.0180 |
Visually speaking, they are all similar. The power changes were not sufficient to create strong artifacts or burning any piece.
Last, we tested different chamfers to try to find the optimal fit. We created a board with six unique chamfer sizes and then checked to see which created the best joints.

We determined through subjective mechanical testing that, while the presence of chamfer makes assembly much easier, the exact amount doesn't matter very much.